#graphicsdesign
Explore tagged Tumblr posts
Visit Tumblr Blog
Explore Tumblr blogs with no restrictions, modern design and the best experience.
Last Seen Tumblr Blogs


Fun Fact
Kazakhstan’s Minister of Communications and Informatics has blocked the Tumblr site because it contained 60 sites of terrorism, extremism, and pornography in 2015.
Text


random collage art
#collage#graphicdesign#artwork#graphic#design#artdesign#graphicsdesign#graphicart#art#designinspiration#abstract#collage art
7 notes
·
View notes
Text
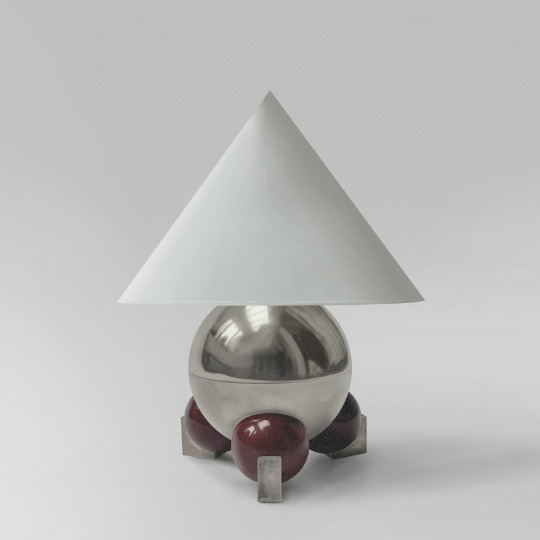

practising - drawing 🌟 . . . Christmas Lamp, 1930
#art#arte#artist#artista#saturdaymood#aesthetic#aestheticart#aesthetic#metallic#design#graphicsdesign#graphics#draw#drawing#drawingoftheday
9 notes
·
View notes
Photo

Handwritten script font with uppercase and lowercase letters, numbers, and punctuations. Includes OTF, ETF, Eps10, AI, JPG, and PNG files for easy installation on Mac or PC.
Link: https://l.dailyfont.com/fUYSM
#aff#Font#Design#Typography#Graphics#DigitalArt#CreativeTools#Inspiration#GraphicsDesign#DesignCommunity#FontsForDays#DesignLove#ArtisticLicense#DigitalCreative#TypeFace#ScriptFont#Lettering#HandwrittenFont#FontFrenzy
3 notes
·
View notes
Text

Let’s celebrate the transformative power of Maa Kali, who destroys ignorance and nurtures wisdom within us. Happy Kali Puja!🙏🏻
#KaliPuja2024#Devi#Shakti#KaliPuja#MaaKali#DivineBlessings#FestivalOfLights#CelebrateStrength#IndianFestival#SpiritualVibes#FestivalJoy#Business#RealEstate#Investment#Stocks#WebDevelopment#GraphicsDesign#ContentWriting
2 notes
·
View notes
Text
MDIDM INFOWAY - Industrial Training Institute💥
Our Demanded Courses 1Android Mobile Application Development 2Flutter Mobile Applciation Development 3Website Design & Development 4MERN Stack Development 5UI/UX Design 6Graphics Design 7Live Project Training
Visit : #305, Vision 2020, Near Ramapir Chowk, Rajkot . For More Details : +91 94265 26980, +91 83471 93531
training
#industrialtraining#learning#technology#flutter#android#graphicsdesign#uiuxdesign#job#placement#itjob#ourrajkot#rajkotcity#training#client#bca#bscit#engineering#btech#mscit#trendingreels#trend#trendy#trending#viral#viralvideos#viralreels
2 notes
·
View notes
Text
Graphics Designing Course in Indore from Future Multimedia
Are you passionate about turning ideas into stunning visuals? Future Multimedia's Graphics Designing course in Indore offers a comprehensive program to equip you with the skills needed to excel in this dynamic field.
Key Highlights:
Industry-relevant curriculum: Learn from experienced professionals and master industry-standard software like Adobe Photoshop, Illustrator, and InDesign.
Hands-on projects: Gain practical experience through real-world assignments and develop a portfolio that showcases your creativity.
Career guidance: Benefit from personalized career counseling and networking opportunities to launch your dream career in graphic design.
Flexible learning options: Choose from our convenient class schedules and online learning options to fit your lifestyle.
2 notes
·
View notes
Text

Discover the digital advantage with Grehasoft. Empower your brand with our tailored digital marketing solutions and unlock limitless opportunities. . . Visit our website for more details: https://grehasoft.com GrehaSoft,
Infopark Technology Business Centre (ITBC), Kaloor, Kochi, Kerala Email: [email protected]
#graphicsdesign#logo#logodesign#digitalmarketing#seo#website#webdesign#shoppingwebsite#branding#fbads#googleads#instaads#socialmediamarketing
3 notes
·
View notes
Photo
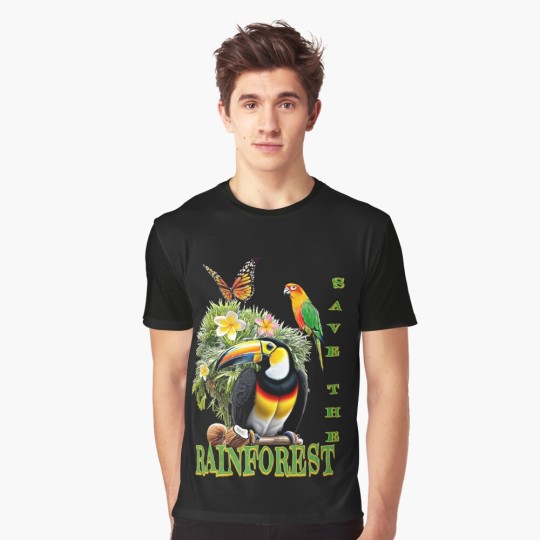


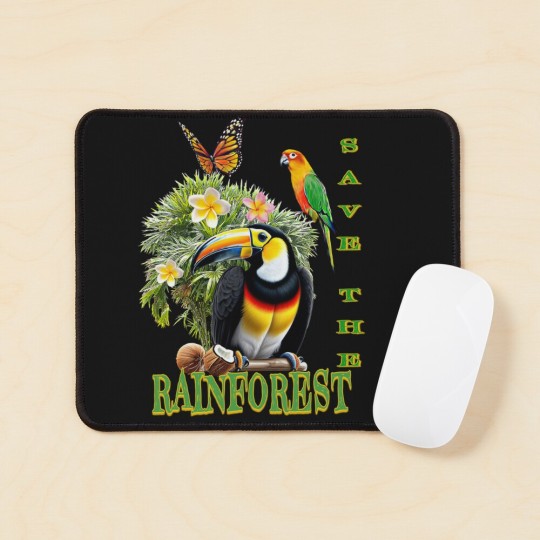
(via "Forest Preservation" Magnet for Sale by TruGrowth)
#findyourthing#redbubble#wildlife#nature#rainforest#save the rainforest#woods#greenearth#protect our forests#save our planet#art#graphicsdesign#artists on tumblr#black artists on tumblr
3 notes
·
View notes
Text
Best Graphic Design Service To Elevate your Business
In today’s highly competitive market, businesses are constantly vying for consumer attention. In such a landscape, the importance of visually appealing content cannot be overstated. That’s where top-tier graphic designing services come into play, offering a suite of essential tools to help brands stand out and effectively communicate their message.
Logo design sits at the forefront of brand identity. A well-designed logo encapsulates the essence of a company, serving as a visual representation of its values and mission. With expertise in typography, color theory, and symbolism, skilled designers can create logos that resonate with target audiences, leaving a lasting impression.
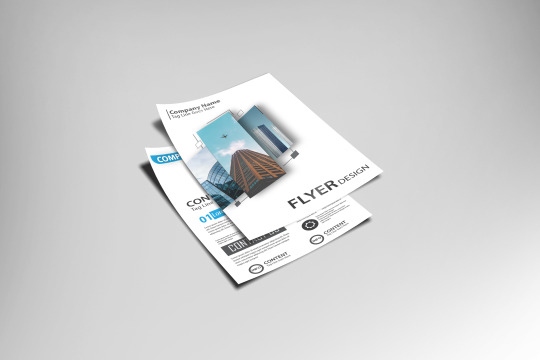
Flyer design remains a powerful marketing tool, particularly for events, promotions, and product launches. Crafting visually striking flyers requires a delicate balance of creativity and information hierarchy. Effective flyer design can captivate audiences and drive engagement, ultimately leading to increased brand awareness and sales.
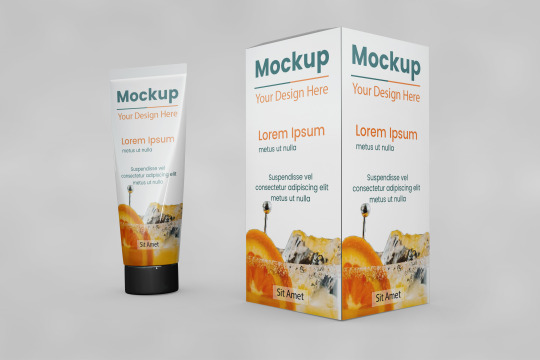
Mockup design is another indispensable service, enabling businesses to visualize their products in real-world contexts. Whether it’s a product packaging or an app interface, realistic mockups help stakeholders better understand design concepts and make informed decisions.
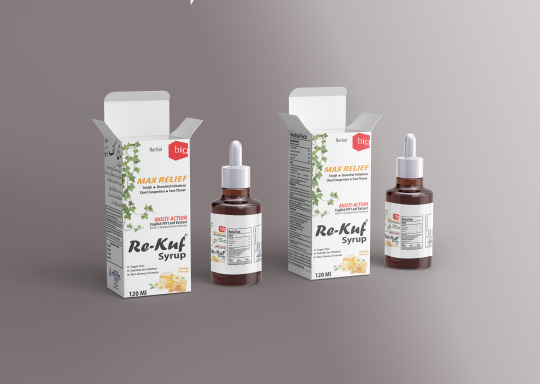
Packaging design goes beyond mere aesthetics; it plays a crucial role in brand differentiation and consumer perception. A well-designed package not only protects the product but also communicates brand identity, values, and product attributes. From structural design to graphics and materials selection, packaging designers ensure that every aspect aligns with the brand’s overarching strategy.
Social media post design is essential for maintaining a cohesive online presence. In an era dominated by social media, eye-catching visuals are key to capturing audience attention and driving engagement. Whether it’s Instagram stories, Facebook ads, or Twitter posts, professional social media design services help brands create visually compelling content that resonates with their followers.

In conclusion, investing in top-notch graphic designing services across logo design, flyer design, mockup design, packaging design, and social media post design is essential for businesses looking to establish a strong visual identity, engage their audience effectively, and ultimately drive success in today’s competitive market.
#adobe photoshop#designer#freelance#design#marketing#graphic design#graphicdesign#bestgraphicdesigingservices#graphicsdesign#graphic#service#graphicdesigner#designgraphic#servicedesign#graphicsdesigner#graphicdesigning#graphicdesigncommunity#designergraphic#designservice#graphicdesignerslife#graphicsdesigning#graphicsdesigners#graphicdesignerclub#freelancegraphicdesign#logodesignservices#designforeveryone
3 notes
·
View notes
Text
How to Make Perler Bead Patterns in Photoshop
Pixel art has a unique charm that appeals to both creativity and nostalgia. Perler beads, also known as Hama beads or fuse beads, are small plastic beads that can be arranged on a pegboard to create intricate designs. If you're a fan of both pixel art and crafting, combining the two to make Perler bead patterns using Photoshop can be a rewarding and enjoyable experience. In this tutorial, we'll guide you through the process of creating your own Perler bead patterns using the powerful tools of Adobe Photoshop.
Understanding Perler Bead Patterns
Before we dive into Photoshop, let's briefly understand the basics of Perler bead patterns. These patterns are essentially pixel art representations that can be transformed into physical creations using beads. Each pixel in the pattern corresponds to a bead on the pegboard. The challenge lies in translating your creative vision into a pattern that can be replicated with beads.
Read More
Gathering Your Materials
Adobe Photoshop: Any version from CS6 to the latest Creative Cloud will work. Pixel Grid: This can be a physical pixel grid or a digital one. It helps you visualize your design on a pixel level. Reference Image: An image or idea that you want to recreate in Perler beads. Perler Bead Pegboard: The pegboard will serve as the base for your design. Step-by-Step Guide
1. Setting Up Your Canvas
Open Photoshop and create a new document. Choose the dimensions for your pattern; remember that each pixel will correspond to one bead. For instance, if you want your finished Perler pattern to be 20 beads wide and 15 beads tall, create a canvas of 20x15 pixels.
2. Enabling the Grid
In Photoshop, you can enable a grid that mimics the layout of your Perler bead pegboard. Go to "View" in the menu and select "Show" followed by "Grid." This will overlay a grid onto your canvas, making it easier to align your design accurately.
3. Importing Your Reference Image
Import your reference image onto the canvas. This could be a picture of a character, an object, or anything you'd like to turn into a Perler bead creation. Make sure your reference image is appropriately sized to fit your canvas.
4. Pixelating the Image
With the reference image on your canvas, it's time to start pixelating it. Zoom in to see individual pixels clearly. Using the Pencil tool, manually fill in each pixel of the image with the color that corresponds to the bead you plan to use. Remember that Perler beads come in a limited range of colors, so try to match your colors as closely as possible.
5. Adding Details
Creating complex patterns might involve using different shades of a single color to add depth and detail. Experiment with dithering techniques (using different colors close to each other to create the illusion of a third color) to achieve the desired effects.
6. Exporting the Pattern
Once you're satisfied with your Perler bead pattern, it's time to prepare it for crafting. Zoom out to ensure the entire design is visible and fits within your desired dimensions. Then, save the image in a format that you can easily reference during crafting, such as JPEG or PNG.
7. Crafting Your Perler Bead Pattern
With your pattern ready, you can now use it as a guide to arrange the beads on the pegboard. Each bead should be placed according to the corresponding pixel in your pattern. This is where the alignment provided by the grid becomes incredibly useful.
8. Fusing the Beads
Once your pattern is complete on the pegboard, carefully move it to an ironing board. Place a sheet of ironing paper or parchment paper over the beads and, using an iron on a medium heat setting, gently melt the beads together. This will fuse the beads into a solid piece while maintaining their individual colors.
9. Finishing Touches
After the fused bead creation cools down, remove it from the pegboard and admire your handiwork. You can trim any excess paper and display your Perler bead masterpiece as a keychain, magnet, or even framed art.
Learn More: Image Color Correction Services
Tips and Tricks for Perfect Perler Bead Patterns
Creating intricate Perler bead patterns can be both fun and challenging. Here are some additional tips and tricks to help you achieve the best results:
Choose the Right Image: Not all images translate well into Perler bead patterns. Images with clear lines, distinct colors, and minimal shading work best. Start with simpler designs as you get familiar with the process.
Color Selection: Perler beads come in a limited palette of colors. While Photoshop allows you to use any color, try to stick to colors that closely match the available bead colors. This ensures that your final creation looks like your design.
Zoom and Grid: Zoom in on your canvas to work on individual pixels, and use the grid to maintain accuracy. This step is crucial for ensuring your beads align perfectly when it's time to craft.
Dithering: Experiment with dithering techniques to create shading and gradients. By placing beads of different colors close to each other, you can achieve smoother transitions between shades.
Pixel Preview Mode: Photoshop has a Pixel Preview mode that shows you how your design will look when displayed at a smaller size. This mode can help you catch any pixelation issues or errors in your design.
Save Multiple Versions: As you work on your design, save different versions of your pattern. This way, if you make a mistake or want to experiment with different color combinations, you won't lose your progress.
Test Before Ironing: Before ironing your beads together, test a small section of your design to make sure the colors fuse correctly and the beads hold their shape.
Ironing Tips: When ironing your Perler bead creation, move the iron in a circular motion to evenly melt the beads. Avoid pressing too hard, as this can cause beads to warp or melt unevenly.
Finishing: After ironing, allow your creation to cool completely before removing it from the pegboard. If you plan to turn it into a keychain or magnet, attach the necessary hardware using a strong adhesive.
Exploring Advanced Techniques
Once you've mastered the basics, you can explore more advanced techniques to elevate your Perler bead patterns:
Pixel Brushes: Use custom pixel brushes in Photoshop to speed up the pixelating process. These brushes automatically fill in squares of color as you paint, making your design process faster and more efficient.
Layer Effects: Experiment with layer effects like gradients and patterns to add depth and texture to your designs. These effects can give your Perler bead patterns a unique and professional look.
Combining Techniques: Combine Perler bead art with other crafting techniques. For example, you could create a 3D effect by layering fused Perler bead patterns on top of each other, creating a multi-dimensional artwork.
Conclusion
Creating Perler bead patterns using Photoshop is a creative journey that merges the digital world with the tangible joy of crafting. From pixelating your design to meticulously placing each bead on the pegboard, the process allows you to express your artistic vision in a unique and tactile way. Whether you're a pixel art enthusiast, a crafting aficionado, or someone looking for a new creative outlet, Perler bead patterns offer a delightful and rewarding experience. So, unleash your imagination, let your creativity flow, and embark on a crafting adventure that combines the best of both pixel art and hands-on creativity. Your Perler bead masterpiece awaits!
4 notes
·
View notes
Text
stand out from the crowd 🎯 Experience the power of Professional Business Profile Design and Content Writing Services.💼
💥 Unlock your success today! 💥 Contact Us:
Innoblitz Technologies and Systems Private Limited 75500 10585 / 95514 13321
Website: https://www.innoblitz.global/ Email: [email protected]
#companyprofiledesign#corporateprofile#companyprofile#graphicsdesign#branding#BrandIdentityExperts#contentwriting#Copywriting#ProfessionalWriter#EngagingContent#contentwriter#Innoblitz
2 notes
·
View notes
Text


art design cards
2 notes
·
View notes
Text
Hello, I am currently new to Cara. Leave a message or follow if you walk by. Thank you. https://cara.app/d4xistheartist

#aesthetic#art#aesthetic#vaporwave#visual#vaporwaveart#visualart#vaporwave#y2k#design#graphicsdesign#graphic#cara#artist#arte
2 notes
·
View notes
Text
How to Add Google Search Console in WordPress For every website owner, it is important to be found on the internet. Thus, it is very important to submit your website to Google Search Console.
#digitalmarketing#itvanilla#webdevelopment#seo#smm#advertising#graphicsdesign#socialmedia#google search console#indexing#sitemap setup#indexing issue
2 notes
·
View notes
Text
Looking for a car photo editing service that can help you sell your car faster?
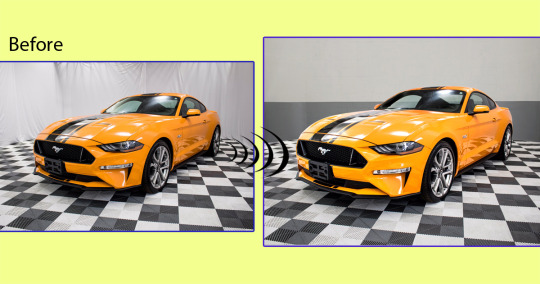
We offer a wide range of car photo editing services, including:
Background removal Color correction Image enhancement Vehicle modification Shadow and reflection removal And more!
Our team of experienced photo editors can help you make your car look its best, so you can sell it faster and for more money. We work quickly and efficiently, and we always deliver high-quality results.
We offer a free quote for all of our services. To get started, simply upload your photos to our website or send us an email. We'll get back to you with a quote within 24 hours.
#imageediting#backgroundremove#clippingpath#imageeditor#photoeditor#graphicsdesign#photography#photoretouching#photoediting#clippingpathservice
2 notes
·
View notes
Text

Graphics Design T-Shirts & Merchandise Services
Turn your creative ideas into reality with custom graphics and design for T-shirts & merchandise! Whether you're looking to showcase your brand, create personalized gifts, or launch your own merch line, we’ve got you covered. From unique designs to high-quality prints, our service helps you bring your vision to life. Start creating your custom apparel and stand out with one-of-a-kind pieces today!
#GraphicsDesign#CustomMerch#TShirtDesign#PersonalizedApparel#Merchandise#CustomDesign#TshirtDesign#MerchandiseDesign#ApparelDesign#PersonalizedMerch#PrintOnDemand#CustomTees#GraphicTees#MerchDesign#DesignYourOwn#TshirtPrinting#CreativeDesign#FashionDesign#BrandMerch#CustomApparel#DesignInspiration#StreetwearDesign#UniqueMerch
1 note
·
View note