#handquilting
Text
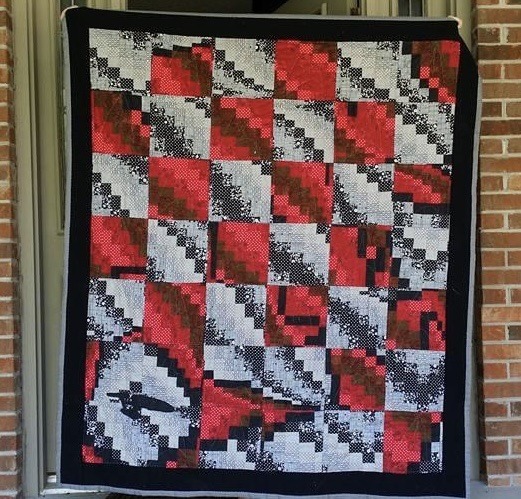
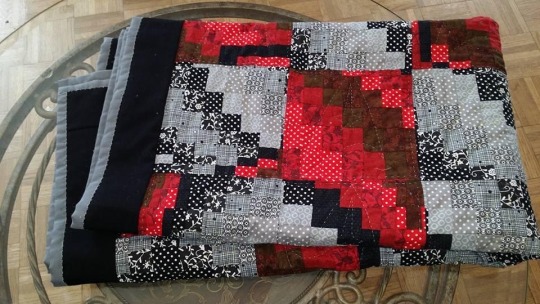

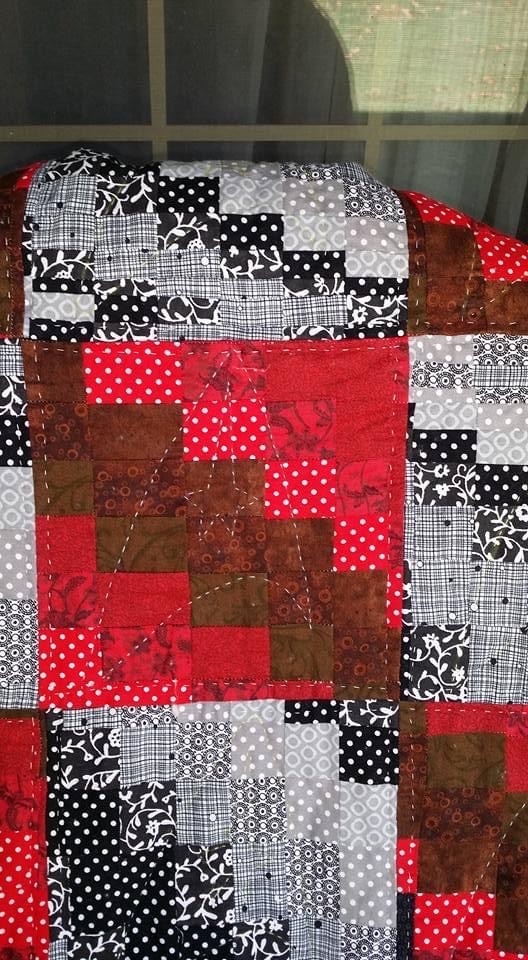
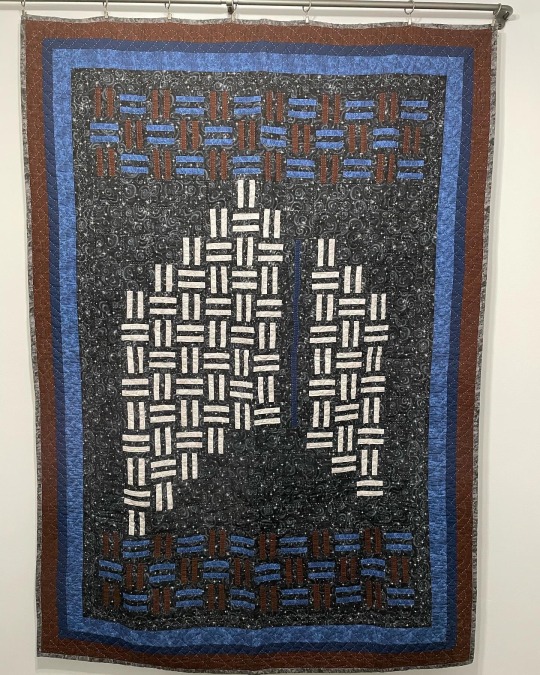
In shades of red, black, and gray, this quilt began its journey as a Bargello design, but alas, fate had other plans. Faced with unexpected challenges along the way, I found myself unraveling the original pattern in a moment of frustration. However, from the ashes of disappointment emerged a new vision as I carefully cut the quilt into blocks and meticulously reassembled them.
And if you look closely, nestled in the lower left corner, you'll find a subtle homage to our storied voyages—a miniature depiction of the legendary USS Enterprise, a symbol of exploration and adventure in the boundless expanse of space. In this unexpected twist of creativity, the quilt not only tells a tale of perseverance but also serves as a reminder of the ever-present spirit of discovery that guides us on our cosmic odyssey.
79 notes
·
View notes
Text
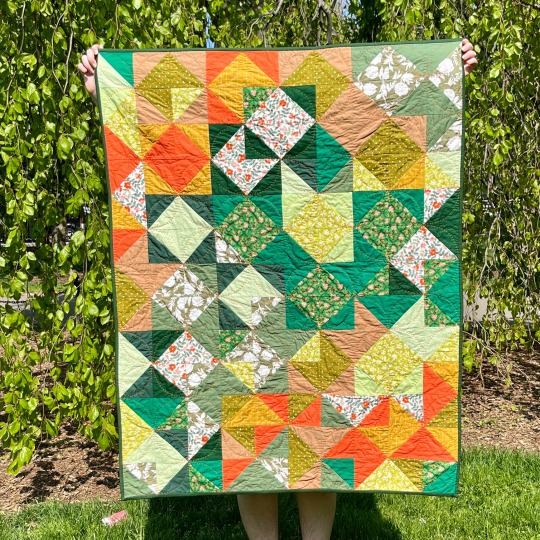

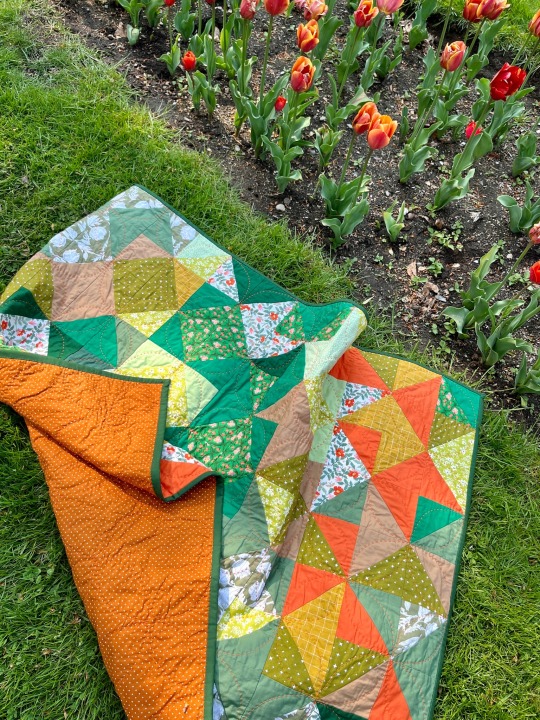

I finished it! I took the green quilt out on a little adventure today before it goes off to it’s new home tomorrow!
I’m sooo happy with the way this came out. I’m really glad I took the time to start over with the quilting. I think the end product shines 🧡💚
#quilting#quiltblr#handmade#artists on tumblr#handquilting#quilt#my quilt#my quilting#green diamond quilt#finished object#maybe doxxing myself with the last photo if you know you know
814 notes
·
View notes
Text
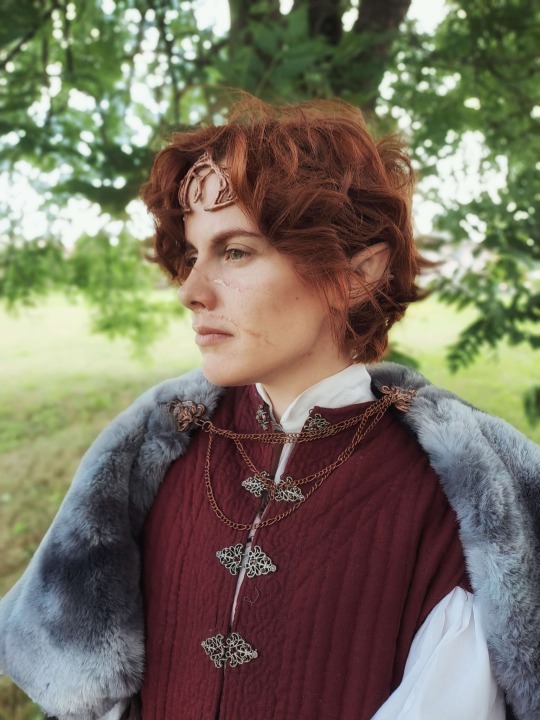
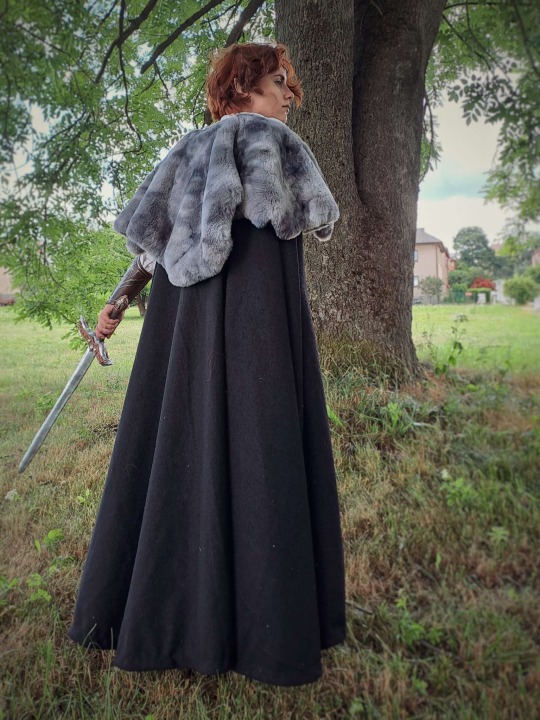
The portrait of the prince, taken and edited by @thistlesandstories (as well as the other pictures of me)
I had a great time at the local convention. I’m happy to announce that me and @thistlesandstories won the cosplay contest as the absolute winner, we earned awesome rewards and most importantly we really had fun and I am very grateful to @the-symphony-of-lydia-brown for helping us coming up with the presentation ideas an turned it into an entertaining spectacle.
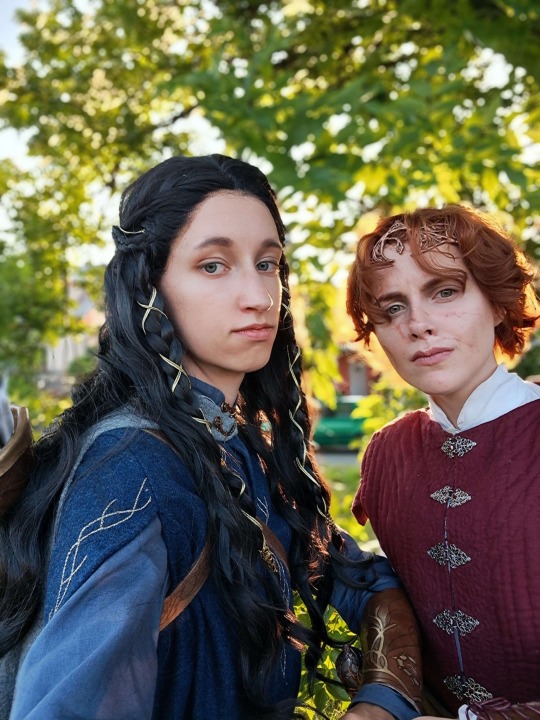
This is our team. We are proud of ourselves
Both of the costumes are original designs made by us. We used multiple artworks and historical clothing references. I wrote more on it here
Some more pictures:
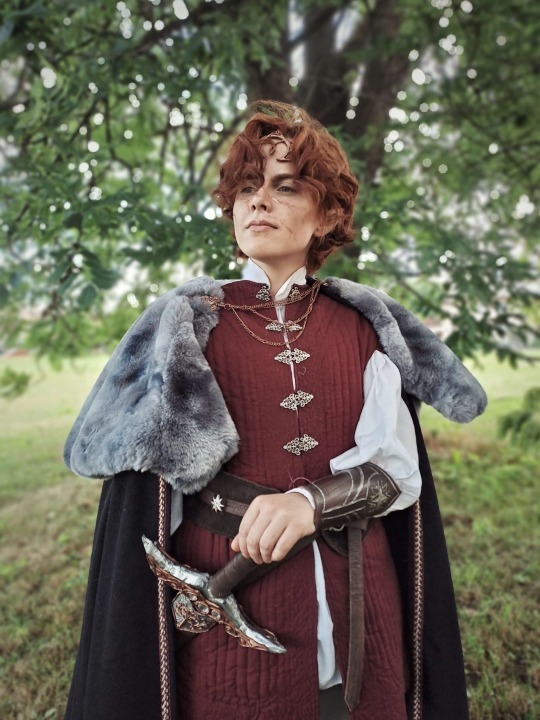
Bonus: comparison to the portrait by spectacular artist @jennydolfen

#silmarillion#tolkien#the silm fandom#noldor#the silmarillion#maedhros#cosplay#elfcosplay#noldor elves#tolkien cosplay#tolkiencosplay#maedhros cosplay#feanorians#fingon#russingon#silmarillion cosplay#quilt#handquilting#handstitched#hand sewing#costume design
194 notes
·
View notes
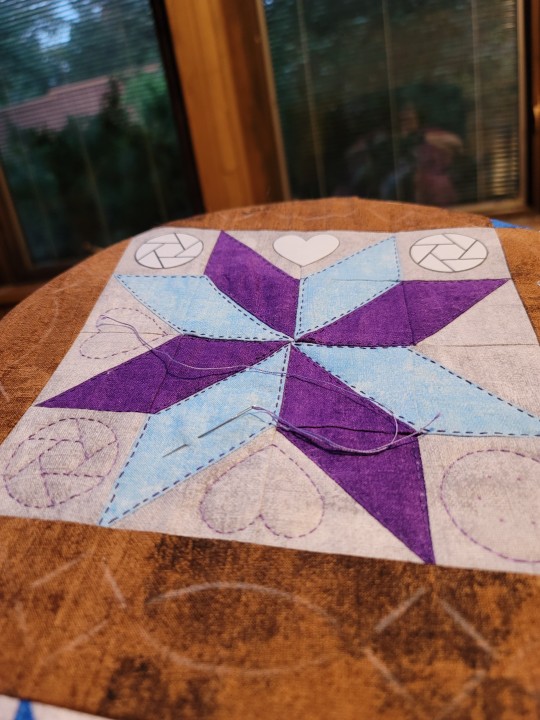
Text
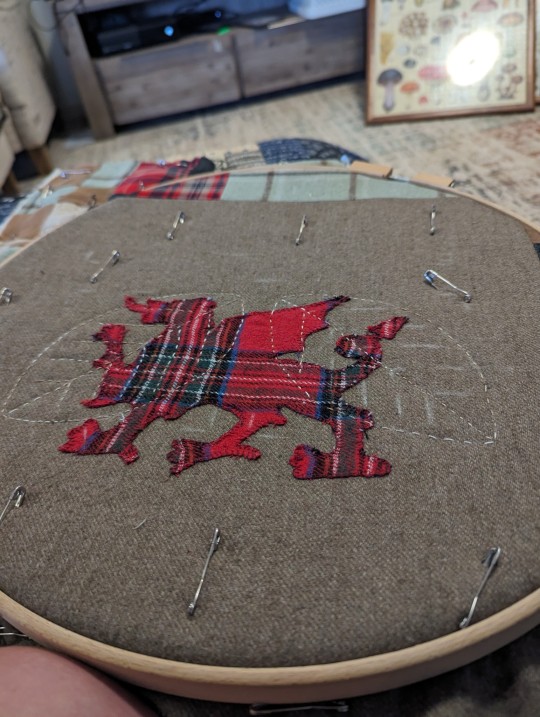
#holidays are for restarting your hand quilting projects ~again~#personal#morgan does quilting#handquilting#patchwork#dont mind how stretched it looks its not that bad when i take it out#quilt cymraeg
10 notes
·
View notes
Text
I make all of my extended family niblets a quilt when they are born. I am self taught for quilting, so some of my methods may be a bit weird, but it works for me. And each one is better than the last! This is probably my last niblet of this generation and I’m super proud of the quilt as it’s coming together.
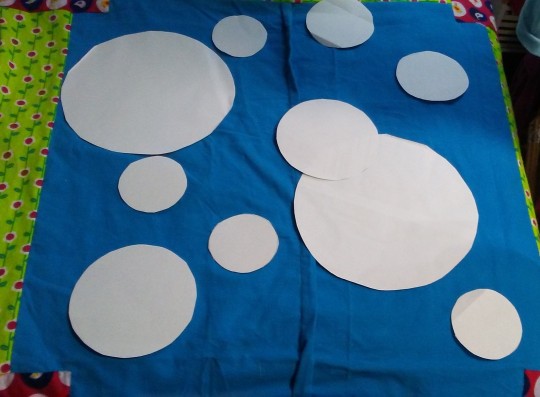
I’m doing a wide border on this one and decided to do the middle as one big block, with applique circles added on top. Note I mis-measured something and the center block ended up too wide to match the width of the top and bottom border panels, so i had to take the block in. I decided to make it into a pleat on the visible side, for more interest.
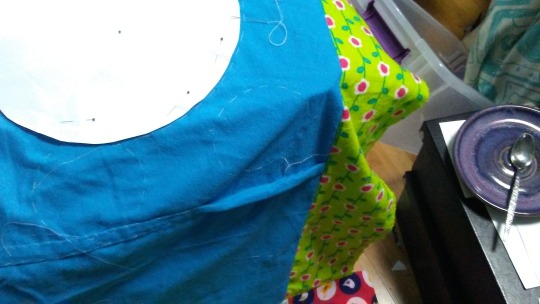
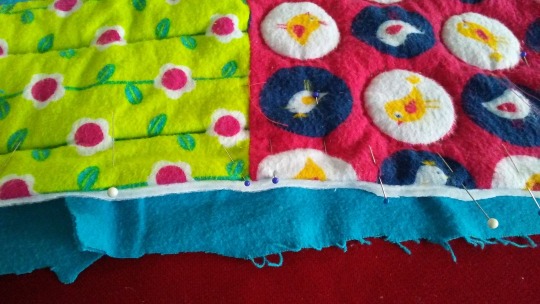
tacking down the pleat before sewing so my project isn’t bristling with pins

I also stitched around each circle to mark the placement. I like using a big running stitch for this instead of marking with chalk.
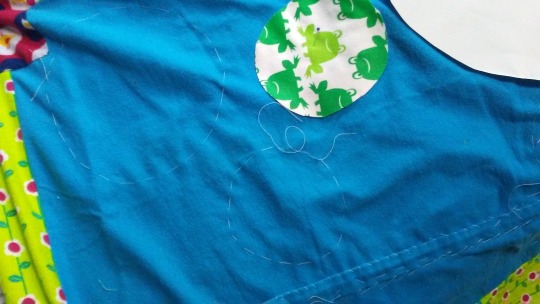
and then the fun part, picking the colors and then making sure it all works

sorry everything is so blurry. I didn’t document this project very well!
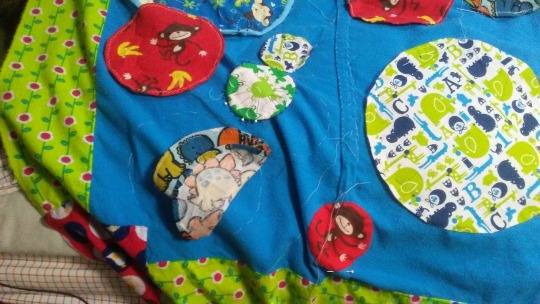
all of the circles have already had their edges folded under and pinned. Most of them I then put in temporary stitches to replace the pins before sewing. (I always get the thread caught on the pin heads--because I handsew everything as I hate the sound of the sewing machine)
I’ve almost stitched the whole top, next comes the stuffing and the back, then i get to quilt it!
I was listening to an audiobook for most of this: crocodile on a sandbank--an excellently read audiobook and very funny! the lead is hilarious, though she doesn’t intend to be.
3 notes
·
View notes
Photo

Front and back <3
3 notes
·
View notes
Text
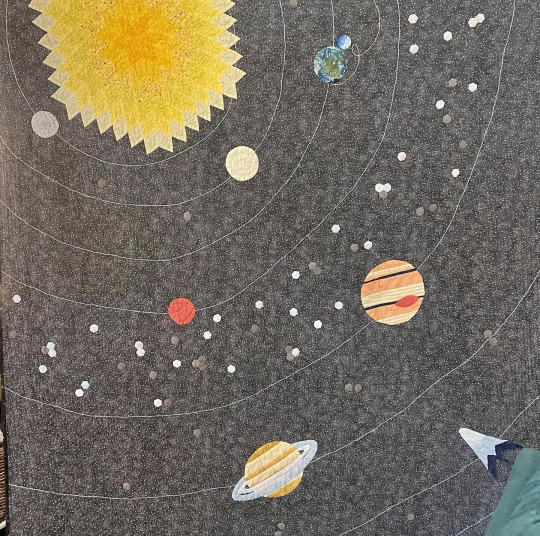
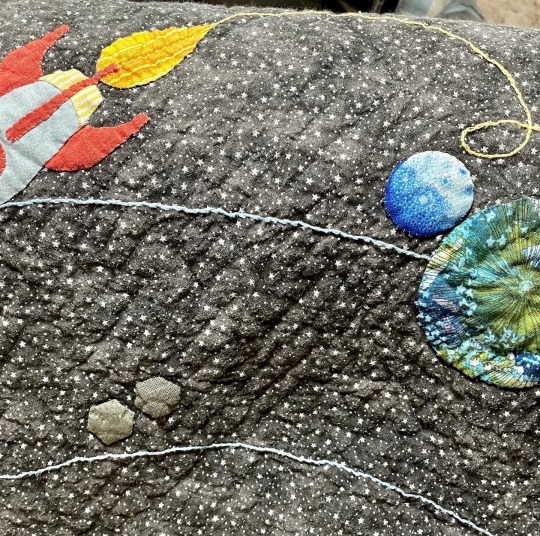
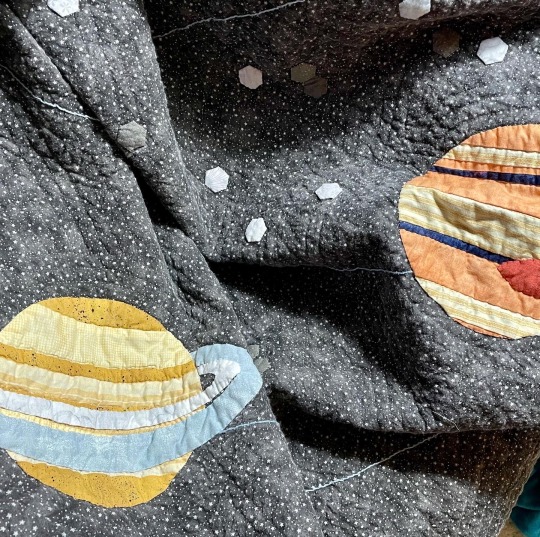
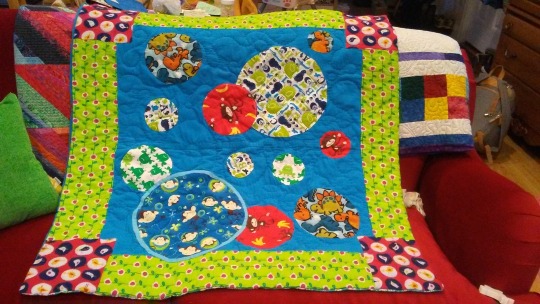
Haven’t been around for a bit, but I did finish my grandson’s solar system quilt. I call it “The Sun is a Star” as he had proudly informed me of that when he was three or so.
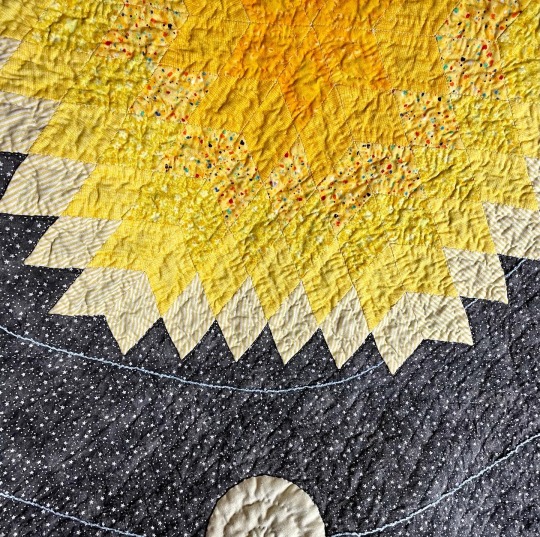
Lots of different techniques on this one. I (badly) hand-embroidered the orbits, used strip piecing and freezer paper appliqué on the planets and stuff, and the sun itself was made with English paper piecing. Took me awhile to figure out the asteroids until I glanced at the hexies I was using for a different project and 💡. Then hand quilted the whole shebang echoing the sun’s shape.
2 notes
·
View notes
Text
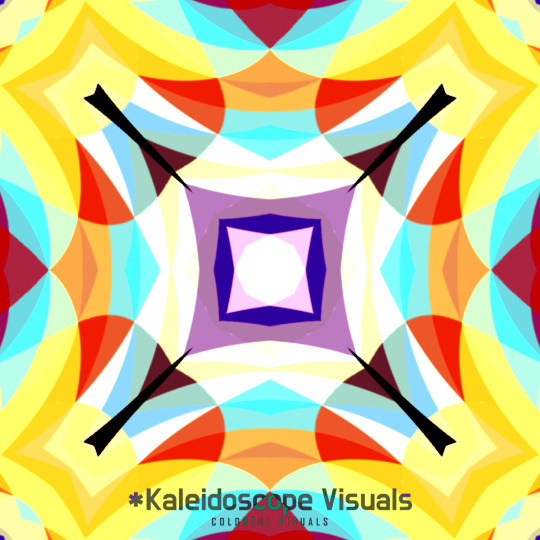
🎨 Quit Design Pattern Ideas by 📺 Colorful Kaleidoscope Visual Videos
Kaleidoscope visuals art is a work of art that is both simple and complex. Kaleidoscope art is often created using simple materials, such as mirrors and beads. However, the patterns that are created can be very complex and intricate. This can be a reminder that even the simplest things can be beautiful and complex.
#quilting#quilt#quilts#quiltsofinstagram#quiltersofinstagram#quilter#quilted#quiltcover#modernquilt#patchworkquilt#longarmquilting#modernquilting#babyquilt#quiltingismytherapy#freemotionquilting#quiltlove#handquilting#quiltingfabric#quiltblock#quiltmarket#quilters#quiltingfun#igquiltfest#quiltro#modernquilter#quiltshop#machinequilting#miniquilt#artquilt#modernquilts
0 notes
Video
youtube
Boro-Sashiko, Inspired Visible Stitching Houses For Our "Village" - All ...
0 notes
Text
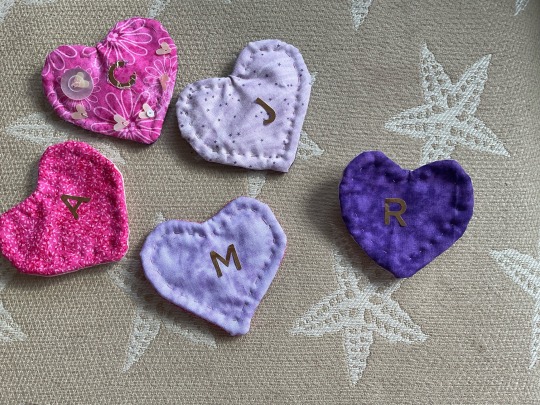
My latest passion is making hand quilted hearts for people.
0 notes
Text
Rise and shine, Earthlings! While I'm off to tackle the daily grind, I couldn't resist brightening your day with some out-of-this-world SCIFI quilts. Here's to thriving and prospering amidst the cosmic chaos of our time!" FYI, I made these!!


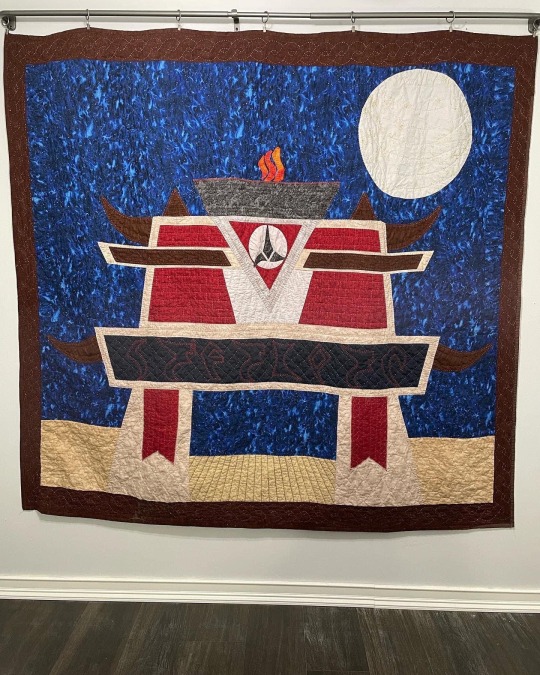
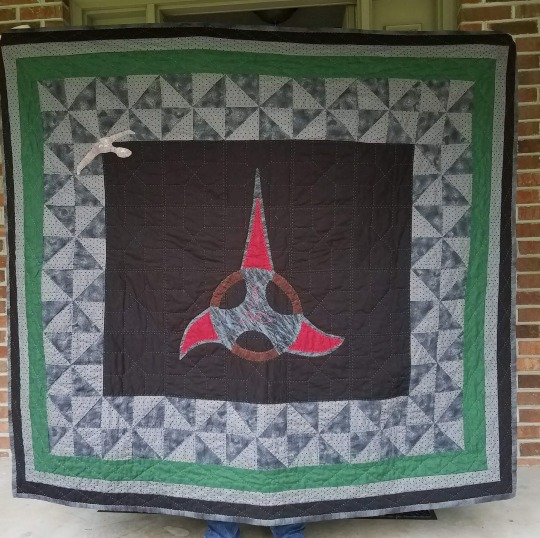
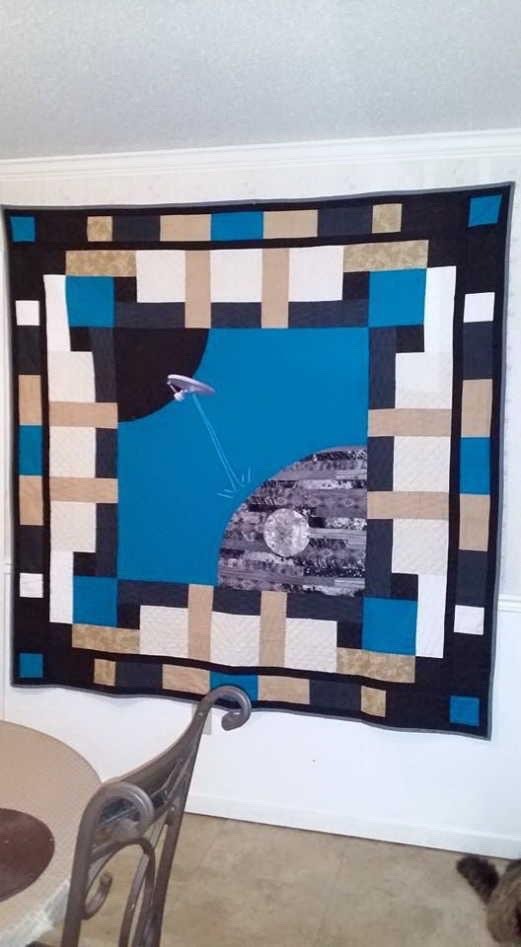

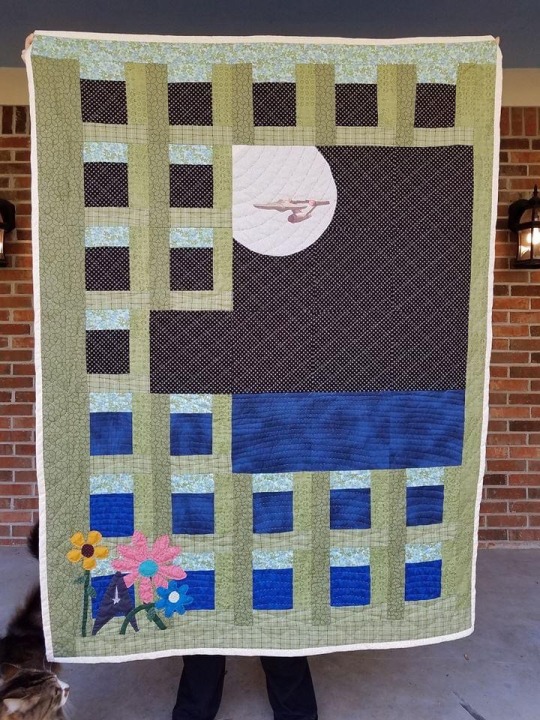
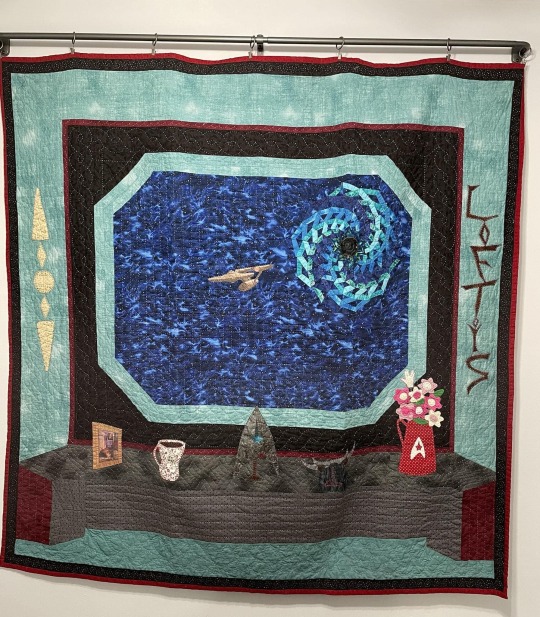
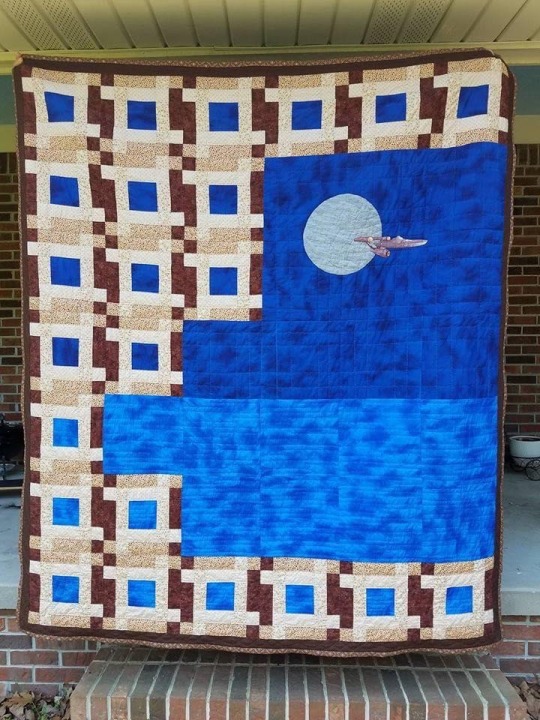
#quilt#quilting#handquilting#star trek#made with love#hand quilting#applique#textileart#textile art#fibre arts#scifi#scifiart#startrek
4K notes
·
View notes
Text
I really wish my hand quilting wasn't so slow.
1 note
·
View note
Photo
The last stitch. The sleevil has been successfully defeated. Will I do this complicated quilting thing again? Probably not. Is it perfect? Nope - I know all the flaws and I have beaten myself up for it for way too many times. But it is mine. The most elaborate thing I have ever created. I have trouble finishing complex art pieces because I’m easily distracted. This was like my personal willpower exercise and I have succeeded. #maedhros #maedhroscosplay #tolkiencosplay #elf #elfcosplay #handstitched #handsewing #quilt #handquilting #silmarillioncosplay https://www.instagram.com/p/Cp4tGXFLHT6/?igshid=NGJjMDIxMWI=
#maedhros#maedhroscosplay#tolkiencosplay#elf#elfcosplay#handstitched#handsewing#quilt#handquilting#silmarillioncosplay
17 notes
·
View notes
Photo
DIY Patchwork Maker Kit. Buy it here 👉 www.crazyproductz.com Link in our bio 👉 @crazyproductz . 📩DM for credit or removal request (no copyright intended ) . 🔗All Rights and Creadit reserved to the respective owners 🙏 . 🏷️ Credit ~ (Unknown) . #quiltspiration #sewingprojects #handquilting #freemotionquilting #ilovequilting #quiltinglove #quiltart #quilt #modernquilter #quiltingfun #fabricart #modernquilt #modernquilting #quiltsofinstagram #quiltingismytherapy #quiltingfabric #quilter #quilters #quiltlove #quilting #quilts #handsewing #longarmquilting #sewingtime #sewingwithlove #sewingkit #sewing #sewinglife https://www.instagram.com/p/Cnmf8WavyGY/?igshid=NGJjMDIxMWI=
#quiltspiration#sewingprojects#handquilting#freemotionquilting#ilovequilting#quiltinglove#quiltart#quilt#modernquilter#quiltingfun#fabricart#modernquilt#modernquilting#quiltsofinstagram#quiltingismytherapy#quiltingfabric#quilter#quilters#quiltlove#quilting#quilts#handsewing#longarmquilting#sewingtime#sewingwithlove#sewingkit#sewing#sewinglife
1 note
·
View note
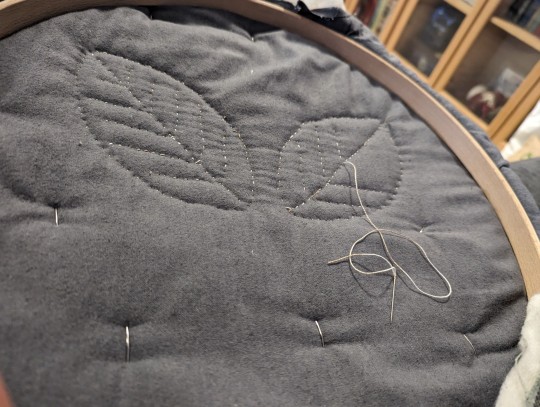
Text
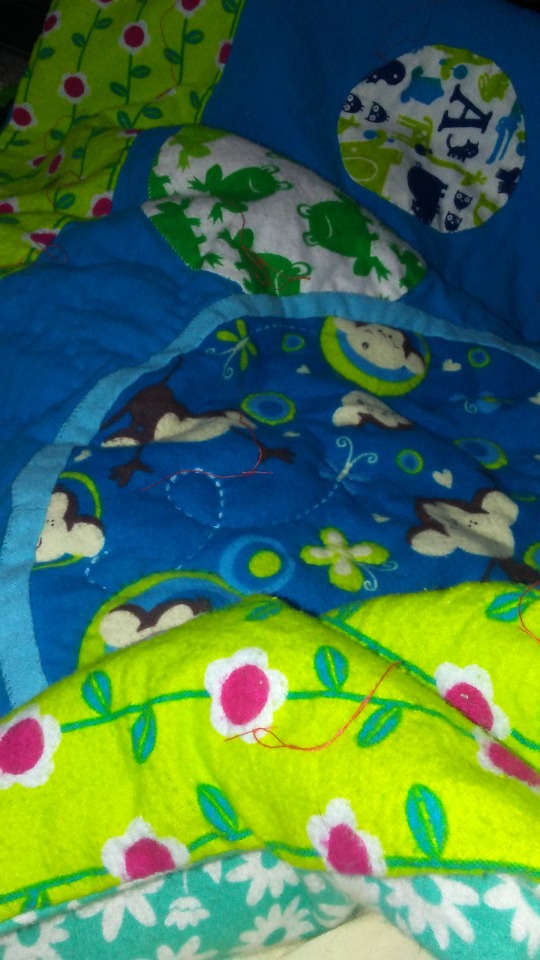
finished the niblet’s quilt!
where I left off, I was almost done with the front:
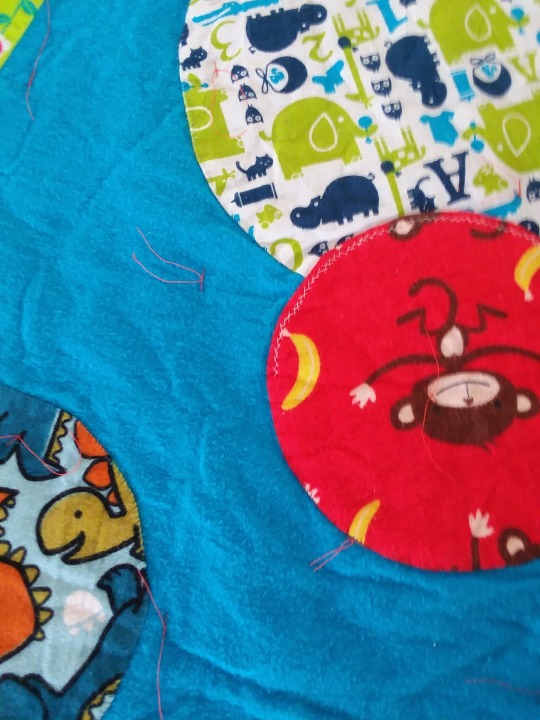
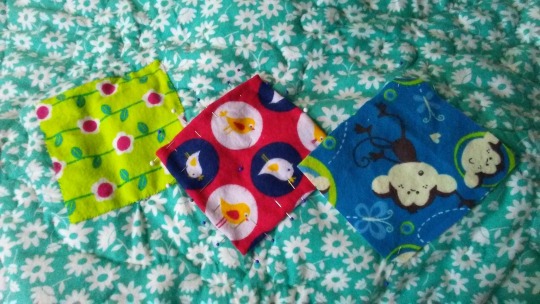
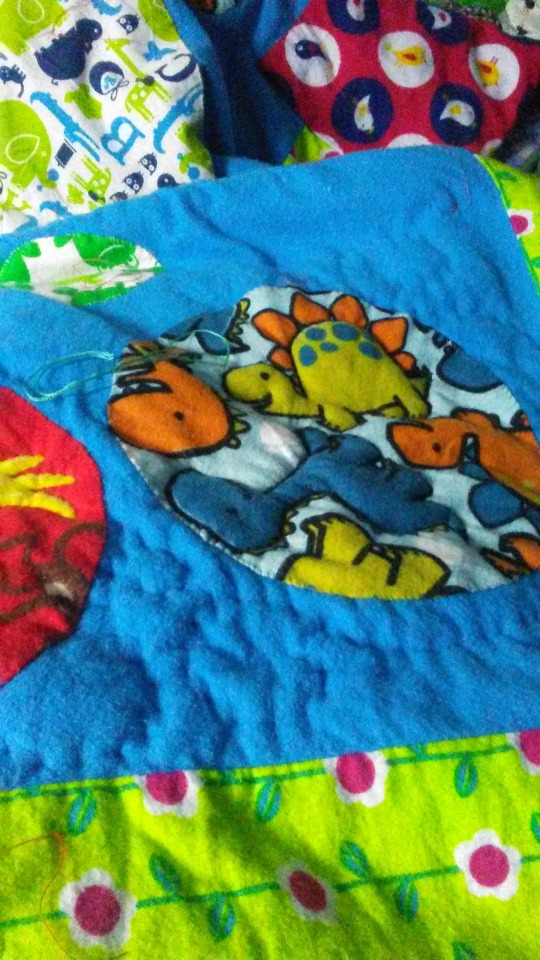
I whipstitched the circles onto the quilt--you can see on the red circle top left the white thread i used to hold the folded under edges in place instead of pins. I ended up leaving that little section of temporary stitching instead of ripping it out like the rest of them, because it looks cool and i thought it was a fun detail of how it was made.
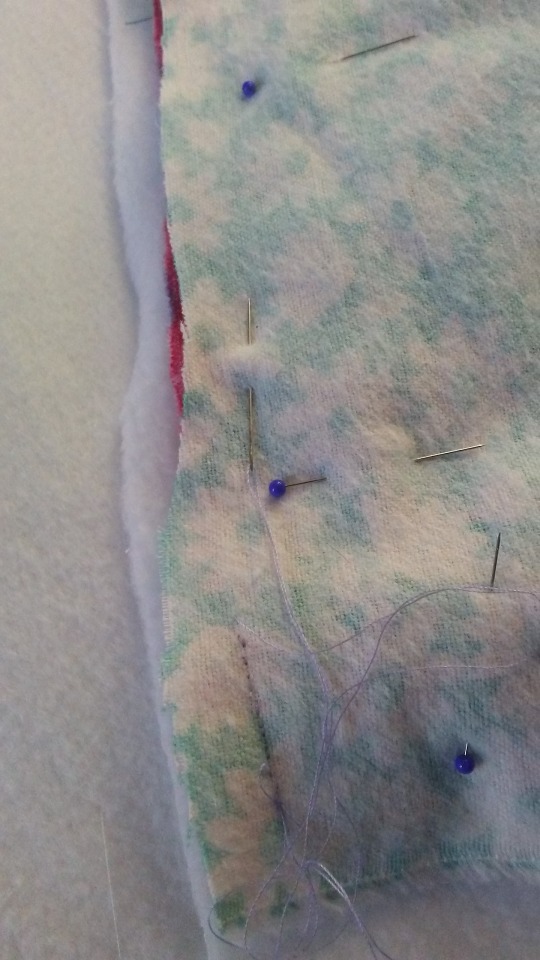
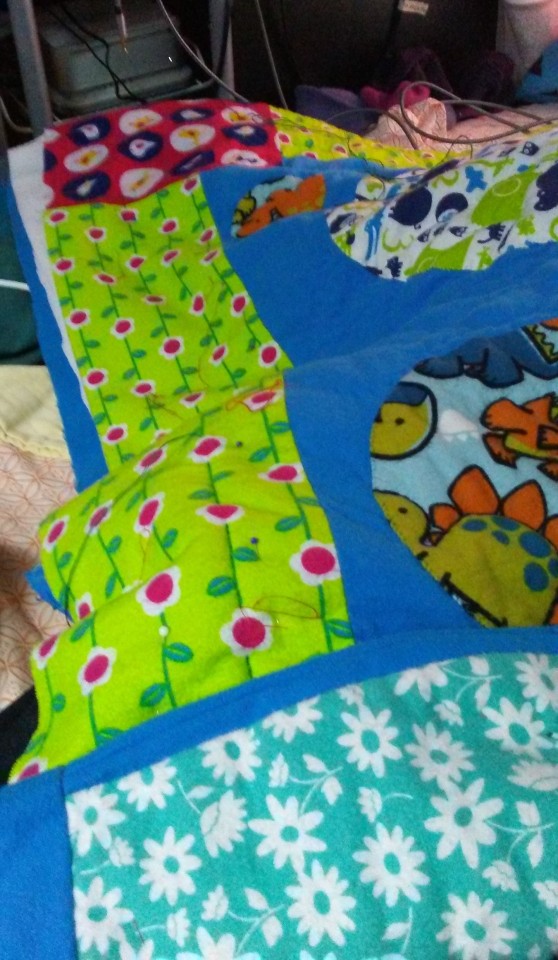
The way i make quilts, next i baste the front to the batting, trim it to fit, then sew the backing fabric face to face with the front of the quilt on three sides. Like making a pillow. Then I turn it rightside out and I have the front and back of the quilt stitched on three sides with the raw edges turned in, with the batting secured in between.
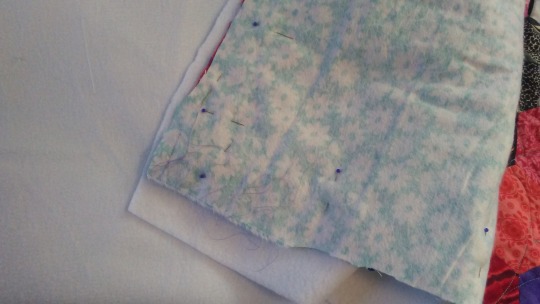
it’s hard to see the basting stitches on the white fleece (I didn’t have a wide enough bit of batting so i used 2 layers of fleece instead--this quilt was entirely made out of bits from my stash) but here I am stitching around the edges of the quilt, doing three of the four side seams.
I am living with a friend right now who makes quilts (gorgeous quilts--I’ll have to show off the one she made me sometime) and she came home to see me with the quilt spread out in the hallway on a peice of cardboard with pins sticking down into it like a bulletin board (to keep it in place while I basted the bits together) and she asked me what I was doing. I explained and she got excited--she had recently been to a talk on old-timey ways to make quilts, and they used to make them that way (the way i made up) in the USA a long time ago? so i asked her how she does hers, and she says she lays the three layers--top, batting, backing on top of each other the way the final quilt will look, then stitches through the three layers an inch from the edge, then binds over the raw edges with a strip of fabric to make the edge. Then quilts. (It actually sounds easier than my way so i might try that way next time--fewer wrinkles to smooth out i bet)

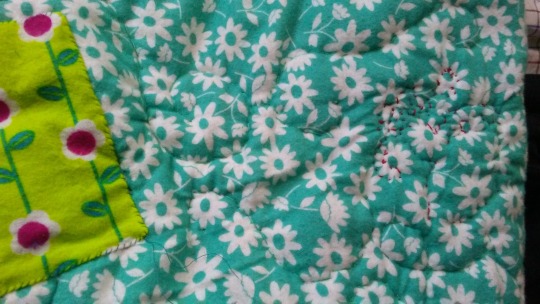
Anyway, once the circles were on and the three layers assembled, it was time for quilting! My previous quilts I quilted with circles or swirls or lines that ignored the pattern of the quilt and were in a color that complemented the backing of the quilt. This time i decided to quilt around the characters in the circles, in a color that matched the characters. This turned out really well on the front, but since I don’t use a quilting frame or embroidery hoop, the back of the quilt was a big mess. And some of the colors made the mess really obvious!
this is the back. It’s a little hard to see here but it was this mass of red or black uneven stitches in random clumps about the size of my hand. It wasn’t a big deal for the messes in blue and green and white, but I didn’t like the higher contrast messes.
So i covered them! I think it looks super cute actually.
I want to show off the quilting since it looks so nice on the front--totally worth the back mess i think.
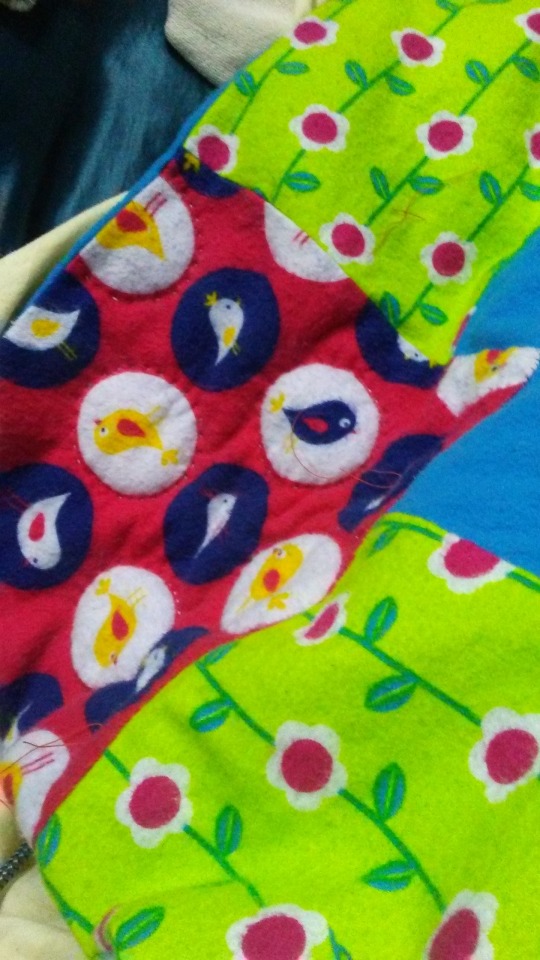
I stitched around the white circles in white
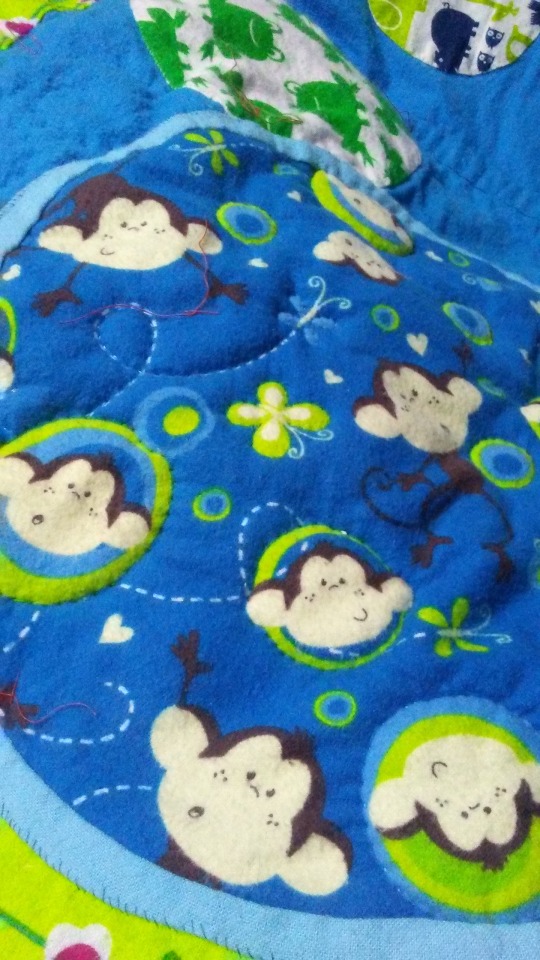
I stitched around the monkeys in green (and note the pale blue border I put around this circle, to make it stand out from the main background of the quilt--I think it came out really well! i’m proud.
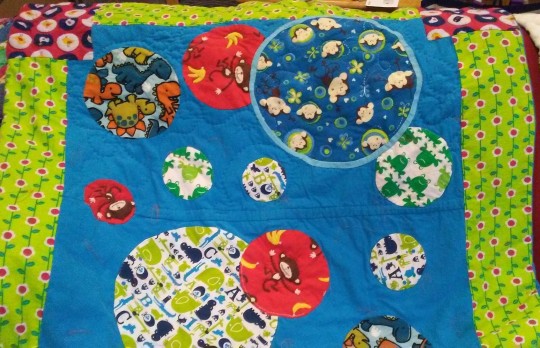
I quilted the blue background in blue swirls (top half has been quilted, bottom half still to go--you can see how much better it looks)
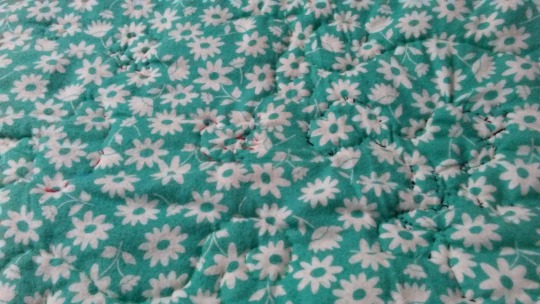
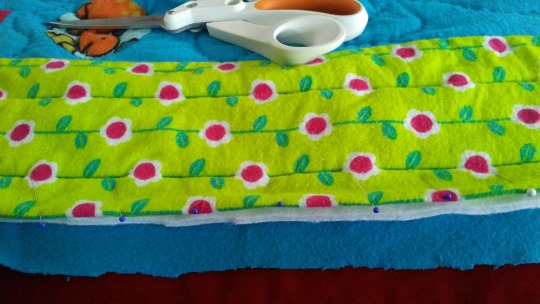
I quilted along every other straight flower row in green for a nice wide quilted border.
after all the quilting was done, i folded under the raw edges of the last side and stitched them closed.
finished front:
(some of my friend’s quilts are on the couch behind mine)
finished back:

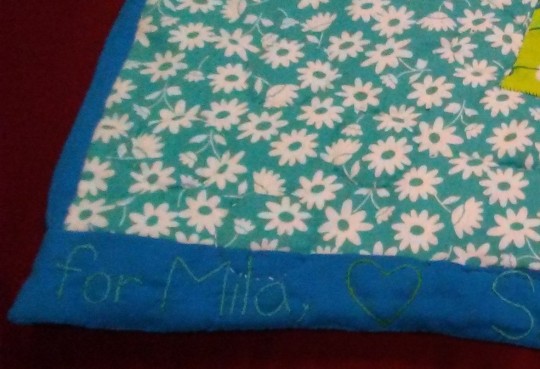
(I signed it at my friend’s suggestion, with my location and year--per that workshop she went to)
and one last pic of the quilting. Isn’t it nice :)
I really love the feel of this quilt, with the fleece instead of batting. It’s heavy and flexible yet soft. Not so springy and light. makes a great play mat.
1 note
·
View note
Last Seen Blogs

scpspider
SCP SP¡DER

nicoleknopfotografie
Nicole Knop Fotografie

frankjarry54
Untitled
seedsofreality
Revert Help Team
abg-jiwa-gelora
..yg sedap itu dinikmati...