#how to change wordpress admin password
Explore tagged Tumblr posts
Visit Tumblr Blog
Explore Tumblr blogs with no restrictions, modern design and the best experience.
Last Seen Tumblr Blogs


Fun Fact
China blocked Tumblr because of pornography and censorship problems in 2013.
Text
How to Protect Your WordPress Site from Malware or Hackers?
WordPress is used by millions of websites for blogs, businesses, and online stores. However, because it’s so popular, it’s often a target for hackers and malware. If you have a WordPress site, it’s important to take steps to keep it secure. Here’s a simple guide to help you protect your site from hackers and malware.
How to Protect WordPress Site from Malware or Hackers?
Follow this step list given below to protect WordPress site from malware or hackers
1. Always Keep WordPress Updated
WordPress regularly releases updates to fix bugs and improve security. Hackers often look for websites running old versions of WordPress or outdated plugins, so keeping everything updated helps keep them out.
How to Update:
Check for updates in your WordPress dashboard regularly.
Go to the Dashboard > Updates section and install any available updates for WordPress core, themes, or plugins.
By staying updated, you’re less likely to have security holes in your site that hackers can use.
2. Use Strong Passwords and Change Them Often
Hackers can easily guess weak passwords like "123456" or "admin." To keep your site safe, use strong, unique passwords and change them every few months.
Tips for Strong Passwords:
Use a mix of uppercase and lowercase letters, numbers, and symbols.
Don’t use simple information like your name or "admin."
Consider using a password manager to create and store complex passwords securely.
Strong passwords are one of the simplest ways to add security to your website.
3. Limit Login Attempts
Hackers often try to break into websites by guessing the login password over and over. You can protect your site by limiting the number of login attempts a person (or bot) can make.
How to Limit Login Attempts:
Use plugins like Limit Login Attempts Reloaded or WP Limit Login Attempts.
These plugins lock out users after a certain number of failed login attempts.
This makes it much harder for hackers to keep guessing passwords.
4. Enable Two-Factor Authentication (2FA)
Two-factor authentication adds another layer of security. In addition to entering your password, you’ll also need to input a code sent to your phone or email. Even if someone knows your password, they won’t be able to log in without this extra code.
How to Set Up 2FA:
Install a plugin like Google Authenticator or Two-Factor.
Set it up by scanning a QR code and linking your account to an app like Google Authenticator or Authy.
This ensures that only you can access your site, even if someone steals your password.
5. Use a Security Plugin
A security plugin can protect your WordPress site from different types of attacks, like malware or brute force attempts. These plugins act as your site’s security guard, offering tools like firewalls and malware scanning.
Recommended Security Plugins:
Wordfence Security: Includes a firewall and real-time monitoring.
Sucuri Security: Provides malware removal and a website firewall.
iThemes Security: Offers brute force protection, backups, and two-factor authentication.
Using a security plugin adds strong layers of protection against hackers.
Also Read - What Is Domain Status? What does this mean, & Why should I know?
6. Back Up Your Website Regularly
Even with good security, things can sometimes go wrong. That’s why it’s important to back up your site regularly. If your site gets hacked, a backup will let you restore everything quickly without losing important data.
How to Back Up Your Website:
Use backup plugins like UpdraftPlus or BackupBuddy.
Store your backups in safe places like Google Drive, Dropbox, or a remote server.
Schedule backups daily or weekly, depending on how often you update your site.
Regular backups help ensure you won’t lose everything if something goes wrong.
7. Choose a Secure Hosting Provider
Your web hosting service plays an important role in your website’s security. Some hosts offer strong security features that help protect your site. Make sure to choose a hosting provider that values security.
What to Look for in a Hosting Provider:
Regular backups
Malware scanning and removal
Firewalls
SSL certificates
DDoS protection
Popular and secure WordPress hosting services include SiteGround, Bluehost, and WP Engine.
8. Use HTTPS and SSL Certificates
SSL (Secure Socket Layer) encrypts the data between your website and your visitors. This protects sensitive information, like passwords or credit card numbers. Websites with SSL certificates also have a secure URL that starts with "https://."
How to Install an SSL Certificate:
Most hosting providers offer free SSL certificates with Let’s Encrypt.
You can use plugins like Really Simple SSL to set it up quickly.
SSL certificates keep sensitive data safe and make your site more trustworthy.
9. Remove Unused Themes and Plugins
Unused plugins and themes can create security risks, especially if they aren’t updated. Even if they’re deactivated, they can still be a weak point. It’s best to delete any plugins or themes you don’t use.
How to Delete Unused Themes/Plugins:
Go to your Dashboard > Plugins or Appearance > Themes.
Deactivate and delete anything you no longer need.
This reduces the number of places where hackers might try to get in.
10. Monitor Your Site for Suspicious Activity
It’s important to keep an eye on your site for any unusual behavior. This could include sudden spikes in traffic, unknown files appearing on your server, or unauthorized users trying to log in.
How to Monitor Your Site:
Use a security plugin to track things like failed login attempts and changes to important files.
Regularly check your hosting account for unusual activity.
Review your website users to make sure no unauthorized accounts have been added.
By staying alert, you can catch potential threats before they do any serious damage.
Conclusion
Protecting your WordPress site doesn’t have to be difficult. By following these simple steps—keeping WordPress updated, using strong passwords, installing security plugins, and making regular backups—you can greatly reduce the risk of your site being hacked or infected with malware.
#OZOHosting#lowest price hosting in india#Cheap web hosting jaipur#cheap shared web hosting india#free web hosting india#affordable linux web hosting india
2 notes
·
View notes
Text
ALIBABA HOST – SECURE, FAST, AND FLEXIBLE HOSTING FOR ALL YOUR NEEDS
Introduction
In the ever-evolving digital world, hosting isn’t just about putting your website online—it’s about speed, security, flexibility, and control. Whether you're managing a WordPress blog, launching an adult web site hosting platform, or exploring open-source control panels like VestaCP, Alibaba Host is your trusted partner for professional-grade hosting services.
This article explores how to manage essential features like WP change password, the specifics of adult hosting, and answers common questions like what is VestaCP—all with the reliability and support of Alibaba Host.
How to Change Password for WordPress (WP Change Password) the Easy Way
Security is at the core of every successful website. If you’re running your site on WordPress and want to tighten account safety, it’s essential to know how to change password for WordPress.
With Alibaba Host’s powerful cPanel and WordPress Toolkit integrations, WP change password is as easy as:
Logging into your cPanel account from Alibaba Host.
Navigating to the WordPress Toolkit or Softaculous Installer.
Selecting your WordPress installation and clicking the “Change Admin Password” option.
Entering a new, secure password and saving the changes.
No manual database edits or plugin installations are required. Whether you're recovering access or updating for routine security, you can change password for WordPress in under a minute.
For added safety, consider enabling two-factor authentication and running regular malware scans—all supported within Alibaba Host’s advanced security features.
Robust, Discreet, and Secure Adult Web Site Hosting
Looking for reliable adult web site hosting? Alibaba Host offers a safe, private, and high-performance hosting environment tailored for adult content creators, cam sites, fan platforms, or high-traffic video portals.
With adult hosting, you get:
Offshore hosting locations to ensure privacy and freedom of content
Powerful SSD servers with high uptime and blazing speeds
Anonymous payment methods including crypto for added discretion
Strong content delivery support with global CDN integration
Compliance with legal and security standards for adult content
Alibaba Host does not discriminate against adult content—as long as it’s legal, it’s welcome. Whether you're launching an adult blog or streaming site, Alibaba Host ensures your platform is stable, scalable, and private.
What is VestaCP – A Lightweight Hosting Control Panel for Beginners and Experts
If you’re wondering what is VestaCP, it’s one of the most efficient and user-friendly control panels used in the hosting world today. Alibaba Host supports installations of VestaCP on VPS and Dedicated servers, allowing users to manage websites, email, DNS, and databases through a clean and intuitive web interface.
Key features of VestaCP include:
Easy domain, DNS, and FTP management
One-click app installations (including WordPress, Joomla, etc.)
Firewall, backups, and SSL support built-in
Lightweight architecture that runs fast even on low-resource VPS
For developers and tech-savvy users looking for a budget-friendly cPanel alternative, VestaCP is a powerful choice. And with Alibaba Host, VestaCP comes pre-installed or installable with just a few clicks.
Why Choose Alibaba Host for WordPress, Adult, or VPS Hosting?
Alibaba Host offers more than just server space—it offers peace of mind. Here’s what sets the platform apart:
99.9% Uptime Guarantee
Full root access with VPS and Dedicated plans
24/7 customer support with real experts
Offshore privacy protection for sensitive industries
Flexible billing with monthly, annual, and crypto options
One-click installations for WordPress, Magento, PrestaShop & more
Whether you need to quickly perform a wp change password, launch a secure adult hosting platform, or explore tools like VestaCP—Alibaba Host equips you with the speed, tools, and reliability needed to succeed online.
Conclusion
From beginners launching their first WordPress site to professionals scaling global adult platforms or managing VestaCP servers—Alibaba Host is built to serve every digital ambition. If you're searching for answers like how to change password for WordPress, what is VestaCP, or need dedicated adult web site hosting, you’ve come to the right place.
👉 Ready to power your web presence with speed and security? Visit https://alibabahost.com/index.html and experience the difference today.
0 notes
Text
Over 20,000 WordPress Sites Infected by Malware: How to Stay Protected

A persistent malware campaign, known as DollyWay, has compromised more than 20,000 WordPress websites globally, redirecting users to fraudulent gambling, cryptocurrency, and sweepstakes websites. Security experts at GoDaddy have been tracking the evolving threat, which has become more sophisticated in its ability to evade detection and reinfect sites. Given its persistence, website owners must take proactive measures to secure their platforms.
Understanding the DollyWay Malware
Active since at least 2016, DollyWay is responsible for generating nearly 10 million impressions per month, making it a lucrative operation for cybercriminals. The malware targets vulnerabilities in outdated WordPress plugins and themes, injecting malicious code that redirects unsuspecting visitors to scam websites.
To avoid detection, DollyWay only triggers redirections when visitors interact with a site, ensuring that bots, direct visits, and logged-in users remain unaffected—making it harder for security tools to flag the threat.
How to Secure Your WordPress Website
Keep Plugins and Themes Updated Hackers often exploit vulnerabilities in outdated plugins and themes. Regularly updating these components helps patch security flaws and reduce the risk of infection.
Use Security Plugins and Monitoring Tools Install firewall and malware detection plugins like Wordfence or Sucuri to detect suspicious activity and prevent unauthorized changes.
Enforce Strong Authentication Measures Restrict admin access, enforce strong passwords, and enable two-factor authentication (2FA) to prevent unauthorized logins.
Perform Regular Backups Frequent backups ensure that if your site gets infected, you can restore a clean version without losing critical data.
Scan for Malware and Remove Infected Files Use malware scanners to check for malicious scripts. If an infection is detected, follow WordPress security guidelines to remove the malicious code manually or seek professional assistance.
By implementing these security measures, website owners can protect their sites from malware infections and safeguard visitors from fraudulent schemes. Staying vigilant against emerging threats is key to maintaining a secure online presence.
0 notes
Text
In an already volatile IT world, it could all change in a moment, particularly when it comes to cybersecurity. And since PHP is the most powerful server-side language and the backbone for almost every website, it demands the adoption of best security practices. Therefore, PHP security shouldn’t be neglected at any cost. To prevent your PHP website from such attacks and vulnerabilities, we’ve compiled the top seven tips to help keep your website safe and secure online. Let’s have a look! 1. Keep Your Software Updated Keeping your software updated is a foundational practice of keeping your site safe and secure. It applies to both the server operating system and any software that you may be running on websites such as CMS or forums. Unfortunately, hackers can quickly attempt to abuse any vulnerabilities found in website security. If you are using third-party software on your websites, such as a CMS or forum, you should quickly apply any security patches. Most vendors have a mailing list or RSS feed detailing website security issues. In addition, there are many other CMSes such as WordPress and Umbraco that notify you of available system updates when you log in. Many developers use Composer, npm, and RubyGems to evaluate their software dependencies and security vulnerabilities. Unfortunately, if you do not pay enough attention to this area, your PHP website can be easily caught out by hackers. Ensure to keep your dependencies up to date and use tools like Gemnasium to get automatic notifications when there is a vulnerability in one of your components. 2. Beware of Error Messages Most importantly, you must know how much information you should give regarding error messages. You only need to provide only minimal errors to your users. This way, you can ensure that they don’t leak any sensitive information on your server, such as database passwords, API keys, etc. Also, pay attention not to provide full exception details so as not to invite complex attacks like SQL injection. You should keep all the detailed errors in your server logs and show your users only the information they need. 3. Check Your Passwords Many web admins often fail to use strong passwords despite this practice being considered an essential security requirement. Here, we’ve compiled a list of some effective password practices to prevent security breaches: The passwords can be more protected by storing the same encrypted values. The quality hashing algorithms can be used for this. The standard practice is to use at least eight-character passwords, including a number and a blend of uppercase and lowercase letters. If the password is still being accessed or guessed, you can use hashed passwords as they can’t be decrypted. 4. Protect Against XSS Attacks Do you know that XSS (Cross-site scripting) is one of the most common methods of hacking a website? It is done by injecting malicious JavaScript code into the web pages, which can permanently harm the website. In general, programs can run on the browsers used by the users and interfere with the user experience. XSS mainly happens through malicious program links posted through comments and other kinds of user-generated content. Using frameworks like AngularJS and EmberJS equipped with protection from cross-site scripting is a great way to prevent such attacks. In addition, it would help prevent the mixing of client-side and server-side rendering, reducing malicious JavaScript injections. There is another effective way to prevent XSS attacks; CSP (Content Security Policy) works like a server-side header to direct the browser about the JavaScript execution on any given page. In addition, it can be a potent tool to prevent cross-site scripting attacks. 5. Get Website Security Tools It’s time to test your website security when you think you have done all you can. The most effective way of doing this is using some website security tools, often referred to as penetration tests or pen-testing. There are several commercial and free products to assist you with this.
They work on a similar basis to script hackers. In this, they test all known exploits and attempts to compromise your site using SQL Injection. Check Out Some Free Tools Which are Worth Looking Into Xenotix XSS Exploit Framework: It is a tool based on OWASP (Open Web Application Security Project), which includes many XSS attack examples. This can be run to quickly confirm whether the site’s inputs are vulnerable in Chrome, Firefox, and IE. SecurityHeaders.io: This free online check tool allows free security and configuration checks for your website. OpenVas: It’s a free and open-source security testing tool with many advanced features. This tool is claimed to be the most advanced open source security scanner. It is suitable for testing known vulnerabilities and recently scanned over 25,000. Netsparker: This tool is available in both free and trial versions. It is ideal for testing XSS attacks as well as SQL injection. 6. Use HTTPS This is a protocol that is used to provide security over the Internet. HTTPS ensures what users expect in terms of security and that nobody else can change the content they see in transit. If users want anything private, it’s highly advisable to use only HTTPS to deliver it. For example, the credit card and other login pages have login forms. A login form often sets a cookie, which is sent with every other request to the website that a logged-in user makes. And it is used to authenticate those requests. An attacker might steal this sensitive information and take over the user’s login session. You only need to use HTTPS for your entire site to prevent attacks. It is now no longer as expensive as it was earlier. Let’s Encrypt offers free and automated certificates, which you’ll need to enable HTTPS. Also, there are existing community tools available for a wide range of common platforms and frameworks, which are automatically set up. Moreover, according to the report, Google will enhance those websites in search engine rankings that are equipped with HTTPS. This way, SEO benefits will also be provided to them. If you are already using HTTPS, then go further and set up HTTP Strict Transport Security (HSTS), an easy header that you can add to your server responses to disable insecure HTTP for your entire domain. 7. Input Validation Gazillions of PHP websites still depend on client-side programs for validating inputs. The client-side programs mean JavaScript-based input validation programs, which can easily be bypassed. You can also use rather server-side input validation programs. Final Thoughts When security threats have become more sophisticated than ever before, it’s not a good idea to depend on outdated security practices. Now you have excellent and comprehensive security strategies to prevent your PHP website from hacking. Furthermore, hiring mobile app developers for professional and advanced support is highly advisable.
0 notes
Text
Step-by-Step Guide to Creating a Website Using WordPress
Welcome to Biz Odisha’s easy guide to creating your own website using WordPress! Whether you want to start a blog, business website, or online store, this guide will walk you through the process in simple steps. Let’s get started!
Step 1: Choose a Domain Name & Hosting
Your domain name is your website’s address (e.g., www.yousitename.com), and hosting is where your website files are stored. Think of it as your website’s home on the internet.

How to Choose a Domain Name:
Keep it short and easy to remember.
Avoid numbers and hyphens.
Use a “.com” extension if possible.
Choose a Hosting Provider: Some good hosting options are:
Bluehost (Great for beginners)
SiteGround
Hostinger
GoDaddy
Once you purchase a domain and hosting, you’ll receive login details for your hosting dashboard.
Step 2: Install WordPress
Most hosting providers offer one-click WordPress installation. Here’s how you can do it:
Log in to your hosting account.
Find the WordPress Installer (usually in the control panel or dashboard).
Click “Install” and choose your domain.
Set a Username and Password for your WordPress site.
Click “Finish Installation.”
Now, your WordPress website is ready! You can log in at yourdomain.com/wp-admin.

Step 3: Choose a WordPress Theme
A theme controls how your website looks. WordPress offers many free and paid themes.
How to Install a Theme:
Go to Appearance > Themes in your WordPress dashboard.
Click “Add New” and search for a theme.
Click “Install” and then “Activate”.
If you want a professional look, consider premium themes from ThemeForest, Astra,

Step 4: Customize Your Website
Once your theme is activated, it’s time to make it your own:
Go to Appearance > Customize to change colors, fonts, and layouts.
Upload your logo and set your site title.
Edit the header, footer, and homepage.
Step 5: Install Essential Plugins
Plugins add extra features to your website, like contact forms, SEO tools, and security.
Must-Have Plugins:
Yoast SEO – Helps improve Google rankings.
Elementor – Easy drag-and-drop website builder.
WPForms – To create contact forms.
WooCommerce – If you want to sell products online.
UpdraftPlus – To back up your site.
Step 6: Create Essential Pages
Every website needs some important pages:
Home Page – The first page visitors see.
About Page – Tell your story or describe your business.
Services/Products Page – Showcase what you offer.
Contact Page – Include a form, email, and location.
Step 7: Promote Your Website
Now that your website is live, it’s time to get visitors!
Share on Social Media – Facebook, Instagram, LinkedIn.
Start a Blog – Write useful articles related to your business.
Run Ads – Google Ads or Facebook Ads can bring traffic.
Engage in SEO – Keep optimizing for search rankings.
WordPress makes website creation easy, even for beginners. Follow these steps, and you’ll have a professional-looking website quickly.
1 note
·
View note
Text
How to Install XAMPP for Windows 10 - XAMPP WordPress For Beginners
To install XAMPP on Windows 10 and set it up for WordPress, follow these steps:
Step 1: Download XAMPP
Go to the official XAMPP website.
Click on the "XAMPP for Windows" button.
Once the installer is downloaded, locate the .exe file (usually in the Downloads folder).
Step 2: Install XAMPP
Double-click the .exe file to start the installation process.
Choose the components you want to install. For WordPress, you need at least Apache, MySQL, and PHP. These are selected by default, so you can leave them as is.
Choose the installation folder (default is usually fine).
Click "Next" and follow the prompts.
During installation, the installer may ask if you want to start the XAMPP Control Panel. Leave it checked and click "Finish."
Step 3: Start Apache and MySQL
Open the XAMPP Control Panel (it should have opened automatically, or you can search for it in the Start menu).
Click the "Start" button next to Apache (this will run the web server).
Click the "Start" button next to MySQL (this will start the database server).
Make sure both Apache and MySQL show "Running" in green.
Step 4: Install WordPress
Download the latest version of WordPress from the official WordPress website.
Extract the WordPress ZIP file.
Move the extracted folder (the WordPress folder) into the htdocs folder of your XAMPP installation (usually located at C:\xampp\htdocs).
Step 5: Create a Database for WordPress
Open your browser and go to http://localhost/phpmyadmin/.
In the phpMyAdmin dashboard, click on "Databases."
Create a new database for WordPress. Give it a name (e.g., wordpress_db) and click "Create."
Step 6: Configure WordPress
Open your browser and go to http://localhost/wordpress (or the folder name you chose).
The WordPress installation screen should appear.
Select your language and click "Continue."
On the next screen, enter your database details:
Database Name: The name you created (e.g., wordpress_db).
Username: root (default for XAMPP).
Password: Leave this blank (default for XAMPP).
Database Host: localhost (default).
Table Prefix: Leave as wp_ unless you want to change it.
Click Submit and then Run the Install.
Step 7: Complete the WordPress Setup
Fill in the site details (site title, admin username, password, and email).
Click "Install WordPress."
Once the installation is complete, you’ll see a success message. You can now log in to your WordPress dashboard at http://localhost/wordpress/wp-admin.
Final Notes
To stop your server, go to the XAMPP Control Panel and click "Stop" for Apache and MySQL.
If you need to make your local WordPress site public, you'll have to configure port forwarding or use a tool like Local by Flywheel or XAMPP for public access.
#installxampp#xamppforbeginners#xamppwindows10#wordpressinstallation#localserversetup#runwordpresslocally#xamppwordpress#webdevelopment#phpdevelopment#wordpressforbeginners#tutorial2025#localwordpress#xamppsetup#installingwordpress#wordpresssetup#beginnerfriendly#xamppguide#developmenttutorial#learnwordpress#wordpresslocally
0 notes
Text
How to Move Your WordPress Site from Localhost to a Live Server
Developing a WordPress site on localhost is a great way to build and test your website in a controlled environment. However, the real challenge arises when it's time to move the site from your local server to a live hosting environment. If not done correctly, you could encounter broken links, missing images, or even database errors.
In this blog, we'll guide you through a step-by-step process to successfully move your WordPress site from localhost to a live server.

Step 1: Choose the Right Hosting Provider
Your first step is to select a reliable web hosting provider that meets your website’s needs. Look for:
Server Speed: Fast servers for better performance.
Uptime Guarantee: At least 99.9% uptime to ensure availability.
Ease of Use: User-friendly dashboards and tools.
WordPress Support: Hosting optimized for WordPress websites.
Popular options include Bluehost, SiteGround, and WP Engine.
Step 2: Export Your Local WordPress Database
The database is the backbone of your WordPress site. To export it:
Open phpMyAdmin on your local server (e.g., XAMPP or WAMP).
Select your WordPress database.
Click on the Export tab and choose the Quick Export method.
Save the .sql file to your computer.
Step 3: Upload Your WordPress Files to the Live Server
To move your files:
Compress Your WordPress Folder: Zip your local WordPress installation folder.
Access Your Hosting Account: Use a file manager or an FTP client like FileZilla.
Upload the Files: Transfer the zipped folder to your hosting server's root directory (usually public_html).
Unzip the Folder: Extract the files once uploaded.
Step 4: Create a Database on the Live Server
Now, set up a new database on your live hosting server:
Log in to your hosting control panel (e.g., cPanel).
Navigate to the MySQL Databases section.
Create a new database, database user, and password.
Assign the user to the database with full privileges.
Step 5: Import the Database to the Live Server
Open phpMyAdmin in your hosting control panel.
Select the new database you created.
Click the Import tab.
Choose the .sql file you exported from your localhost.
Click Go to import the database.
Step 6: Update the wp-config.php File
To connect your site to the live database:
Locate the wp-config.php file in your WordPress installation.
Open the file in a text editor.
Update the following lines: define('DB_NAME', 'your_live_database_name'); define('DB_USER', 'your_live_database_user'); define('DB_PASSWORD', 'your_live_database_password'); define('DB_HOST', 'localhost'); // Keep this unless your host specifies otherwise.
Save the file and upload it to your server via FTP.
Step 7: Update URLs in the Database
Your localhost URLs need to be replaced with your live site URLs.
Use a tool like Search Replace DB or run SQL queries in phpMyAdmin.
In phpMyAdmin, run the following query: UPDATE wp_options SET option_value = 'http://your-live-site.com' WHERE option_name = 'siteurl'; UPDATE wp_options SET option_value = 'http://your-live-site.com' WHERE option_name = 'home';
Step 8: Test Your Live Website
Once everything is uploaded and configured, check your website by entering its URL in a browser. Test for:
Broken Links: Fix them using plugins like Broken Link Checker.
Missing Images: Ensure media files were uploaded correctly.
Functionality: Verify forms, buttons, and features work as expected.
Step 9: Set Up Permalinks
To ensure proper URL structure:
Log in to your WordPress admin dashboard on the live site.
Go to Settings > Permalinks.
Choose your preferred permalink structure and click Save Changes.
Step 10: Secure Your Live Website
After migrating, secure your site to prevent vulnerabilities:
Install an SSL Certificate: Most hosting providers offer free SSL certificates.
Update Plugins and Themes: Ensure everything is up to date.
Set Up Backups: Use plugins like UpdraftPlus for regular backups.
Conclusion
Moving your WordPress site from localhost to a live server may seem daunting, but by following these steps, you can ensure a smooth and error-free migration. A successful move allows you to showcase your site to the world, engage your audience, and achieve your goals.
Start today and take your WordPress project live with confidence!
0 notes
Text
Security Best Practices for Website Development

When building a website, security should always be a top priority. In today’s digital age, websites face constant threats from hackers, malware, and cyber-attacks. Small businesses, in particular, can be vulnerable if they don’t take the necessary steps to protect their sites and user data. Whether you're working with web development services in Bhubaneswar or building a website on your own, knowing the best security practices is essential. Let’s look at the most important steps to keep your website safe.
1. Use HTTPS and SSL Certificates
One of the simplest yet most effective ways to protect your website is by using HTTPS (HyperText Transfer Protocol Secure). HTTPS encrypts data transmitted between your website and visitors, ensuring that sensitive information, like passwords or payment details, remains secure.
To implement HTTPS, you need to install an SSL (Secure Sockets Layer) certificate on your website. This certificate ensures that all data is encrypted, which prevents hackers from intercepting or tampering with sensitive information. It’s also an important ranking factor for search engines, as websites with HTTPS are considered more trustworthy.
2. Regularly Update Software and Plugins
Outdated software is one of the most common causes of website vulnerabilities. Whether you're using WordPress, Joomla, or any other content management system, keeping your software up to date is essential for security. Many updates include patches for security holes, so by failing to install them, you’re leaving your site open to attacks.
This also applies to third-party plugins. Plugins add useful features to your site but can also introduce vulnerabilities if not kept up to date. Always ensure that any plugin you use is from a reputable source, and make a habit of updating them regularly to avoid potential security risks.
3. Strong Passwords and Two-Factor Authentication
One of the easiest ways for hackers to gain access to your website is through weak passwords. Always use strong, unique passwords for your admin accounts, hosting accounts, and other important platforms. A strong password includes a combination of upper and lower case letters, numbers, and special characters.
Additionally, enabling two-factor authentication (2FA) can add an extra layer of security. With 2FA, even if someone manages to steal your password, they will still need a second piece of information, like a code sent to your phone, to gain access. It’s an easy but highly effective way to keep your website secure.
4. Regular Backups
No matter how much effort you put into securing your website, accidents happen. Servers crash, websites get hacked, and sometimes data gets lost. This is why regular backups are a must. By backing up your website’s data and files, you ensure that you can quickly recover from any disaster.
Set up automatic backups on a daily or weekly basis, depending on how often your content changes. Store these backups in a secure location, either in the cloud or on an external hard drive, so you can easily restore your website if something goes wrong.
5. Limit User Access and Permissions
Not everyone needs admin access to your website. By limiting access and permissions, you reduce the number of entry points for potential attackers. Assign roles based on what each user needs to do on the site. For example, if someone only needs to write blog posts, don’t give them admin privileges.
Additionally, regularly review and remove access for users who no longer need it. This reduces the chances of a disgruntled employee or former employee causing harm to your website.
6. Use a Web Application Firewall (WAF)
A Web Application Firewall (WAF) is a security measure that helps protect your website from a variety of attacks, such as SQL injection, cross-site scripting (XSS), and others. A WAF sits between your website and the internet, monitoring incoming traffic and blocking any malicious attempts before they reach your website.
WAFs are particularly effective at blocking harmful bots and malicious traffic that could overwhelm your website or attempt to exploit vulnerabilities. Many hosting providers offer WAFs as part of their security packages, or you can choose from third-party providers.
7. Monitor for Vulnerabilities
Regularly monitoring your website for security vulnerabilities is a critical part of maintaining a secure online presence. Various tools can scan your website for weaknesses and alert you to potential issues. These tools look for things like outdated software, weak passwords, and suspicious activity.
If you’re working with web development services in Bhubaneswar, consider asking them to set up regular security audits and vulnerability scans. This proactive approach can help identify issues before they become major problems.
8. Protect Against DDoS Attacks
Distributed Denial of Service (DDoS) attacks are one of the most common ways hackers try to take down websites. A DDoS attack involves overwhelming your website with an excessive amount of traffic, causing it to slow down or crash. To protect your website from these attacks, you can use DDoS protection services, such as Cloudflare, which helps filter out malicious traffic.
These services can mitigate the effects of a DDoS attack and ensure your website stays online and operational.
9. Secure Your Hosting Server
Your web hosting server is the backbone of your website, so it's essential to ensure it's secure. When choosing a hosting provider, look for one that offers robust security features, such as regular server monitoring, malware scanning, and automatic security patches.
Additionally, make sure that your hosting provider offers SSL certificates and firewalls. A reliable hosting provider will take care of most of the server security, but you should also perform your due diligence to ensure everything is set up correctly.
Conclusion
Website security is not something that should be taken lightly. Whether you’re running an e-commerce site or a simple blog, taking the necessary steps to protect your website from security threats is crucial. By implementing best practices like using HTTPS, updating software regularly, using strong passwords, and employing a web application firewall, you can significantly reduce the risk of cyber-attacks and keep your site safe.If you’re a business owner in Bhubaneswar, working with web development services in Bhubaneswar can help ensure that your website is secure and protected from potential threats. By following these security best practices, you can safeguard your online presence and provide a safe experience for your visitors.
#digital marketing services in bhubaneswar#seo services in bhubaneswar#web development services in bhubaneswar#digital marketing agency bhubaneswar#digital marketing agency india#website designing company in india
0 notes
Text
How You Can Secure Elementor Website Builder

Introduction
Elementor is one of the most popular tools for building websites with WordPress. It’s powerful, easy to use, and allows anyone whether you’re a beginner or an expert to create beautiful websites. But just like any tool, if you don’t secure it properly, your site could become vulnerable to hackers and cyberattacks.
In this post, we’ll guide you through simple yet effective steps to secure your Elementor website. We’ll also explain how WordPress website development services can help ensure your site stays safe and runs smoothly.
Why Security Matters for Elementor Websites
When you build a website with Elementor, you're working with WordPress, a platform that powers millions of websites worldwide. While WordPress is user-friendly and highly customizable, it's also a target for hackers because of its popularity. Elementor, combined with WordPress themes and plugins, gives you flexibility, but it can also open doors to vulnerabilities if not properly secured. That’s why using reliable WordPress website development services to help secure your site is always a smart move.
Easy Steps to Secure Your Elementor Website
Choose a Secure Hosting Provider Your website’s security begins with the hosting provider you choose. Go for a hosting company that offers secure server environments, SSL certificates, automatic backups, and other essential security features. Managed WordPress hosting providers are a great choice as they often include extra layers of security built into the plan.
Keep Everything Updated One of the easiest ways to keep your Elementor website secure is by ensuring that WordPress, Elementor, your themes, and plugins are all up to date. Updates often include patches for security vulnerabilities, so don’t skip them. Regularly check for updates in your WordPress dashboard and apply them as soon as they’re available.
Use Strong Passwords and Two-Factor Authentication (2FA) Weak passwords are an easy target for hackers. Always use strong, unique passwords for your WordPress admin and other accounts. To further protect your site, enable two-factor authentication (2FA). This adds a second layer of security by requiring a code sent to your phone or email, making it harder for unauthorized users to log in.
Limit Login Attempts Protect your login page from brute-force attacks by limiting the number of login attempts. This way, even if someone tries to guess your password, they won’t be able to break into your site after a few failed attempts. Many WordPress security plugins allow you to set up this feature easily.
Install a Security Plugin There are several excellent security plugins for WordPress that can help you protect your site. Plugins like Wordfence, Sucuri, and iThemes Security monitor your website for malware, block malicious traffic, and provide alerts if anything suspicious happens. Installing one of these plugins adds an extra layer of protection to your Elementor website.
Back Up Your Website Regularly Regular backups are a lifesaver if something goes wrong. In case of a hack or data loss, you can restore your website quickly. Many hosting providers offer automated backups, but you can also use backup plugins like UpdraftPlus or BackupBuddy to schedule regular backups and keep them safe.
Secure Your WordPress Login Page The login page is a common target for hackers. You can make it harder for them by changing the default login URL. There are plugins like WPS Hide Login that allow you to do this with just a few clicks. It’s a small change that adds an extra layer of security to your site.
Use HTTPS with SSL Encryption Make sure your website is served over HTTPS, which encrypts the connection between your site and its visitors. This helps protect sensitive information like passwords and credit card details from being intercepted by hackers. Most hosting providers offer free SSL certificates, so make sure to activate it for your site.
Delete Unused Themes and Plugins Unused themes and plugins are potential security risks because they may have vulnerabilities that could be exploited. After finishing your website with Elementor, go through your themes and plugins and remove anything you don’t need. This keeps your website lean and less prone to attacks.
Work with a WordPress Development Company For enhanced security, consider working with professional WordPress website development services. A custom WordPress development company can ensure your website is built with best-in-class security measures. Whether it’s through custom themes, secure plugin development, or regular security audits, professional services can help keep your website safe from day one.
Conclusion
Securing your Elementor website doesn’t have to be complicated. By following these simple steps of keeping your website updated, using strong passwords, installing security plugins, and working with WordPress website development services you can significantly reduce the risks of hacking and ensure that your site stays protected. If you’re unsure where to start or need expert help, consider partnering with a Custom WordPress development company to handle the security details for you.
#Elementor Security#WordPress Website Security#WordPress Development Services#WordPress Plugin Security#Custom WordPress Development#WordPress Development Solutions#WordPress Website Development#WordPress Security Tips
0 notes
Text
Hacked WordPress Website Repair & Clean Up Service

When you hear the words "hacked website," your heart probably skips a beat, right? Especially if that website is your WordPress site, the hub of your online business, blog, or brand. Getting hacked can feel like a nightmare—sleepless nights, panic about your visitors’ safety, and concern about potential damage to your reputation and income.
In this post, I’ll explain how a professional Hacked WordPress Website Repair & Clean Up Service can save you tons of stress, time, and potential losses. Even if you're a seasoned WordPress user, this guide can help you understand the urgency of repairing a hacked site and why expert help might be your best bet.
Why WordPress Sites Get Hacked
Let’s start with why WordPress sites get hacked in the first place. WordPress powers over 40% of all websites on the internet. While that's great for the platform's popularity, it also means hackers love to target WordPress for easy exploits. Think of it like a crowded marketplace; the more people, the more pickpockets. Some common reasons for WordPress hacks include:
Outdated plugins and themes: These can have security vulnerabilities that hackers love to exploit. Regular updates are crucial.
Weak passwords: It sounds simple, but “password123” isn’t exactly Fort Knox-level security.
Insecure hosting: Not all web hosts are created equal. Cheap or poorly managed hosting environments are often susceptible to attacks.
No SSL: An SSL certificate encrypts data between your website and its visitors. Without it, sensitive information like login details can be intercepted.
User roles & permissions mismanagement: Granting more privileges than necessary to users opens up security gaps.
So if your website is down, showing strange pop-ups, or worse, flagged as "unsafe" by Google, the odds are high that you've been hacked.
Symptoms of a Hacked WordPress Site
Before diving into the repair process, it’s important to recognize some of the signs that your WordPress site has been compromised:
Your site looks different: New pages or posts you didn’t create, changes in the homepage layout, or random content popping up—this is a big red flag.
You can’t log in: Hackers often lock out administrators after gaining access.
Visitors report suspicious activity: If users start reporting strange pop-ups, redirects, or malware warnings, it’s likely your site is infected.
Slow performance: If your site becomes unusually slow, it could be due to malicious scripts running in the background.
Search engine warnings: If Google or other search engines flag your site as compromised, you’ll see warnings in search results.
Suspicious traffic spikes: If your analytics show a sudden spike in traffic from unfamiliar sources, especially from suspicious countries, that could be a sign.
The DIY Approach to WordPress Cleanup
If you’re tech-savvy and willing to roll up your sleeves, here’s a basic process you can follow to clean up your hacked WordPress site:
Backup Your Website: Before you do anything else, create a backup of your site. Even if it’s infected, you’ll want a copy just in case something goes wrong during the cleanup.
Disable the Site: Put your site into maintenance mode or temporarily shut it down. This prevents visitors from interacting with an infected site, which could harm their computers or personal data.
Scan for Malware: Use a reputable malware scanning tool or plugin like Wordfence, Sucuri, or MalCare. These tools will help you identify infected files, malicious code, and any vulnerabilities.
Check for Users You Don’t Recognize: Go into your WordPress dashboard and check for any user accounts that don’t belong. If a hacker has created a new admin account, you’ll want to delete it immediately.
Update Everything: Ensure that your WordPress core, plugins, and themes are updated to the latest versions. Often, older versions have known security vulnerabilities that hackers can exploit.
Delete Unused Plugins/Themes: If you have old plugins or themes sitting on your site that you’re not using, get rid of them. Even inactive plugins can be vulnerable.
Reinstall Fresh Copies of Plugins and Themes: Sometimes the best way to ensure your plugins and themes are clean is by deleting them and reinstalling fresh copies from official sources.
Change All Passwords: Reset passwords for all users, and make sure they’re strong. Consider using a password manager to generate and store secure passwords.
Restore from a Clean Backup: If you have a backup from before your site was hacked, restoring it could be the quickest way to get things back to normal.
Submit a Reconsideration Request: If Google has flagged your site as unsafe, you’ll need to request a review after you’ve cleaned it up. Head to Google Search Console to submit your request.
Why You Should Consider Hiring a Professional Cleanup Service
While the DIY approach might seem like a good idea if you're tech-savvy, it’s not for everyone. Cleaning up a hacked WordPress site can be a complicated and time-consuming process, especially if you’re not familiar with the inner workings of WordPress or malware detection. Here’s where professional hacked website repair and cleanup services come into play.
Here’s why hiring a professional is often the best move
Speed and Efficiency: Time is of the essence when it comes to dealing with a hacked site. The longer your site remains compromised, the more damage it can do to your reputation, your users, and even your search engine rankings. Professionals can quickly identify the problem and get your site back online safely.
Experience: Professional cleanup services have seen it all. They know what to look for and can spot hidden malware or backdoors that a novice might miss. They also know the most common vulnerabilities in WordPress themes and plugins and can harden your site against future attacks.
Ongoing Monitoring: Many cleanup services offer ongoing protection and monitoring, so once your site is clean, they keep an eye out for any suspicious activity. Think of it as having a security guard for your website.
Guarantees: Some services offer guarantees, so if your site is hacked again within a certain time frame, they’ll clean it up at no extra cost. That’s a nice layer of peace of mind.
Advanced Tools: Professional services have access to advanced malware removal and security tools that might not be available in free plugins or DIY methods. These tools can scan deeper and ensure every trace of the hack is removed.
Choosing the Right Cleanup Service
If you’ve decided that hiring a professional cleanup service is the right move, here’s what to look for:
Reputation: Do your research. Look for companies with strong reviews and testimonials from other website owners. A solid reputation is key.
24/7 Support: Hacks don’t always happen during business hours. Make sure the service you choose offers 24/7 support, especially if your website is critical for your business.
Clear Pricing: Be wary of services with vague pricing structures. A good cleanup service should offer a transparent, one-time fee or clear monthly pricing for ongoing protection.
Backup and Restoration Services: Many professional services will help you set up regular backups and restoration points to prevent future headaches. This is a huge advantage.
Preventive Measures: The best hacked website cleanup services don’t just fix the problem—they also help you prevent it from happening again.
Having your WordPress site hacked is a stressful experience, but it’s not the end of the world. With the right approach—whether you go the DIY route or hire a professional cleanup service—you can get your site back online, clean, and secure. Just remember that once it’s fixed, keeping it secure is an ongoing job. Regular updates, strong passwords, and monitoring are crucial to keeping hackers at bay. Whether you're running a small personal blog or a large e-commerce site, taking these steps will help you breathe easier knowing your site is safe.
1 note
·
View note
Text
Easy Steps to Recover a Lost WordPress Password

If you’ve ever forgotten your WordPress password, you know how frustrating it can be to feel locked out of your own website. This common issue can create a significant roadblock, preventing you from updating content, managing plugins, or engaging with your audience.
The anxiety of not being able to access your WordPress admin area can escalate, especially when you’re on a tight deadline or need to make critical changes. The loss of access can lead to lost opportunities and hinder your ability to keep your website running smoothly.
Fortunately, recovering your WordPress password doesn’t have to be a complicated process. By following these easy and effective steps outlined in this article, you can quickly reset your password and regain control of your site.
Read Full Article >>
0 notes
Text
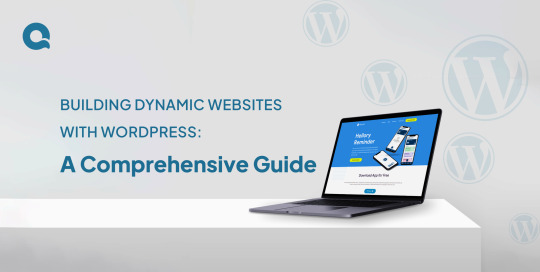
Building Dynamic Websites with WordPress: A Comprehensive Guide
Introduction:
Thanks to its flexibility, user-friendliness, and powerful features,��WordPress has become one of the most popular platforms for building dynamic websites. Whether you’re a beginner or an experienced developer, WordPress offers everything you need to create a fully functional, professional-looking website. In this guide, we’ll walk you through the essential steps to building dynamic websites with WordPress, covering everything from installation to customization.
1. Understanding WordPress
Before getting into the technical aspects, let’s first understand WordPress and why it’s so widely used.
A. What is WordPress?
WordPress is a free, open-source Content Management System (CMS) that makes creating and managing websites simple. Originally designed as a platform for blogging, it has grown into a powerful tool that can be used to build all kinds of websites—from personal blogs to full-fledged e-commerce stores.
B. Why Choose WordPress?
WordPress is known for its ease of use and flexibility. Whether you’re a beginner or an expert, you can build and customize your site with ease. It’s supported by a vast community of developers, meaning you can access thousands of themes and plugins. These tools allow you to add features and design your site exactly the way you want, without needing to write any code.
2. Getting Started with WordPress
Setting up a WordPress site is simple, even if you’re new to web development. Here’s how to get started:
A. Choosing a Hosting Provider
The first step is to choose a hosting provider. Your hosting provider is where your website will live, so it’s important to pick one that offers easy WordPress installation, reliable uptime, and strong customer support. Some popular options include:
Bluehost: Known for its beginner-friendly features and seamless WordPress integration.
SiteGround: Offers excellent performance and top-notch customer service.
WP Engine: A premium option with a focus on speed and security for WordPress sites.
B. Installing WordPress
Once you’ve chosen your hosting provider, the next step is to install WordPress. Most hosts make this very easy with a one-click installation process. Here’s how it typically works:
Log in to Your Hosting Account: Access your hosting control panel or dashboard.
Find the WordPress Installation Option: Look for a section like “Website” or “Apps” where you’ll find the WordPress logo.
Follow the Prompts: Click on the WordPress icon, and the installation process will guide you through the setup. You may need to choose your website’s name, admin username, and password.
In just a few minutes, your WordPress site will be up and running, ready for you to start building and customizing.
3. Selecting and Customizing a WordPress Theme
Your website’s design is largely defined by the theme you choose. WordPress themes dictate how your site looks and feels, and with thousands of free and premium themes available, you can easily find one that suits your needs.
A. Choosing the Right Theme
When selecting a theme, think about the purpose of your website:
Business Websites: For a professional look, choose a theme with a clean, modern design. It should highlight important information like your services, contact details, and client testimonials.
Blogs: If you’re building a blog, opt for a theme that puts your content front and center. Look for layouts that emphasize readability and support multimedia content like images and videos.
B. Customizing Your Theme
After choosing your theme, you’ll want to tailor it to fit your brand. WordPress makes this easy with its built-in Customizer:
Change Colors and Fonts: Adjust the colors and fonts to align with your brand’s identity. For instance, use your brand’s color palette and select fonts that match the tone of your content.
Adjust Layouts: The layout controls how different elements are arranged on your site. You can modify the layout to make sure your content is displayed in a way that best serves your audience.
Advanced Customization: If you need more specific changes, many themes allow you to add custom CSS. This lets you fine-tune aspects of your site’s design beyond the basic options.
Example: Imagine you’ve chosen a theme for a travel blog. You can customize the colors to mirror the natural beauty of your destinations, perhaps using earthy tones or vibrant hues. Adjust the layout to prominently feature your latest blog posts, making them the first thing visitors see. Additionally, you can use widgets to display your social media links and a feed of your recent Instagram photos, helping to keep your readers engaged and connected across platforms.
4. Adding Content to Your WordPress Website
With your theme set up, the next step is to fill your website with content. WordPress makes it simple to create and organize your pages, blog posts, and menus.
A. Creating Pages and Posts
Pages and posts are the building blocks of your WordPress site, but they serve different purposes:
Pages are for static content that doesn’t change often, like your “About Us,” “Contact,” or “Services” pages.
Posts are for dynamic content that gets updated regularly, such as blog entries, news updates, or articles.
B. How to Create a Page or Post:
Go to Your Dashboard: Log in to your WordPress dashboard.
Add New Content: To create a new page, click on “Pages” > “Add New.” For a post, click on “Posts” > “Add New.”
Use the Editor: WordPress’s built-in editor lets you easily add text, images, and other media. You can also format your content with headings, lists, and links to make it more readable.
Example: Imagine you’re building a website for a restaurant. You could create individual pages for the menu, location, and reservation details. For posts, you might regularly update your blog with news about new dishes, upcoming events, or interviews with the chef.
C . Organizing Your Content
To help visitors find what they’re looking for, WordPress allows you to organize your posts using categories and tags:
Categories: These are broad groups that organize your posts by topic. For example, a food blog might have categories like “Recipes,” “Restaurant Reviews,” and “Cooking Tips.”
Tags: These are more specific labels that describe the content of your posts. For instance, a post in the “Recipes” category could have tags like “vegetarian,” “quick meals,” or “desserts.”
D. Tips for Effective Organization:
Plan Your Categories: Choose clear, broad categories that align with your content strategy. This makes it easier for visitors to navigate your site.
Use Tags Wisely: Tags should be specific and relevant to the post’s content. Avoid using too many tags; focus on a few key descriptors.
5. Extending Functionality with Plugins
One of the standout features of WordPress is its extensive library of plugins, which allow you to easily add a wide range of functionalities to your website. With thousands of plugins available, you can customize your site to meet your specific needs without writing any code.
A. Installing Plugins
Installing a plugin in WordPress is a simple process. Here’s how to do it:
Access the Plugins Section: Log in to your WordPress dashboard and navigate to the “Plugins” section on the left sidebar.
Add a New Plugin: Click on “Add New” at the top of the page.
Search for a Plugin: Use the search bar to find the specific plugin you need.
B. Some popular plugins include:
Yoast SEO: Helps optimize your site for search engines.
WooCommerce: Turns your website into a fully functional online store.
Elementor: Provides drag-and-drop page building for easy design.
Example: If you’re setting up an online store, installing WooCommerce is a great choice. This powerful plugin allows you to manage products, handle payments, and set up shipping options—all with just a few clicks. Once activated, WooCommerce transforms your WordPress site into a complete e-commerce platform, making it easy to sell products online.
C. Managing Plugins
While plugins add valuable features, it’s important to manage them carefully:
Limit Your Plugins: Installing too many plugins can slow down your website’s performance. Only use plugins that you truly need for your site’s functionality.
Regular Updates: Keep your plugins updated to ensure they work smoothly with the latest version of WordPress. Regular updates also enhance your site’s security by patching any vulnerabilities.
6. Optimizing for SEO
Search Engine Optimization (SEO) is essential for attracting visitors to your website. With the right SEO practices, you can improve your website’s visibility on search engines like Google, driving more organic traffic. Fortunately, WordPress offers a variety of tools to help you optimize your site effectively.
A. Using SEO Plugins
One of the best ways to optimize your content is by using SEO plugins. Yoast SEO is among the most popular choices for WordPress users. This powerful plugin simplifies the optimization process by providing features such as:
Meta Descriptions: Yoast allows you to easily add meta descriptions to your posts and pages, helping search engines understand the content of your site.
Focus Keywords: You can set focus keywords for each piece of content, guiding the plugin to analyze how well you’re using those keywords throughout your text.
Readability Analysis: Yoast evaluates the readability of your content, offering suggestions to improve sentence structure, paragraph length, and overall flow.
Using Yoast SEO, you can ensure that your content is both user-friendly and optimized for search engines.
B. Creating SEO-Friendly Content
Crafting content that is optimized for search engines involves several key practices:
Use Clear and Concise Headings: Headings (H1, H2, H3) help structure your content and make it easier for readers to navigate. They also signal to search engines what your content is about.
Incorporate Keywords Naturally: Identify relevant keywords related to your topic and include them naturally in your text. Avoid keyword stuffing; instead, focus on writing content that flows well and engages your readers.
Descriptive Alt Text for Images: Every image you upload should have descriptive alt text. This helps search engines understand what the image is about and improves accessibility for users with visual impairments.
Short and Relevant URLs: Create clean, concise URLs that accurately reflect the content of your page. A well-structured URL helps search engines and users understand the topic quickly.
Example
Suppose you run a blog focused on fitness. Your content might revolve around keywords like “workout routines,” “healthy eating,” and “fitness tips.”
When using Yoast SEO, you can input these keywords as your focus terms. The plugin will then analyze your content, providing suggestions for optimizing your posts. For instance, it might recommend adding your focus keywords to your headings, ensuring they appear in the first paragraph, and including them in the alt text of images related to your blog post.
By following these practices, you can enhance your chances of ranking higher in search engine results, ultimately leading to increased traffic and engagement on your website.
7. Ensuring Website Security
Website security is a top priority for every website owner. With the increasing number of cyber threats, it’s essential to protect your WordPress site from potential attacks. Fortunately, WordPress provides various tools and strategies to enhance your site’s security.
A. Implementing Security Plugins
Using security plugins is one of the most effective ways to safeguard your WordPress site. Two of the most popular options are Wordfence and Sucuri. Here’s how they can help:
Wordfence: This plugin offers comprehensive security features, including malware scanning, real-time traffic monitoring, and a firewall to block malicious activity. It notifies you of any suspicious activity and helps you take action to protect your site.
Sucuri: Sucuri provides similar features, focusing on website integrity monitoring and malware removal. It also offers a web application firewall to block harmful traffic before it reaches your site.
By installing and configuring these plugins, you can significantly reduce the risk of attacks and keep your site secure.
B. Regular Backups
Regular backups are crucial for ensuring that your website can be restored quickly in case of a security breach or other issues. If something goes wrong, you want to be able to revert to a previous version of your site without losing valuable data.
Using Backup Plugins: Consider using plugins like UpdraftPlus to manage your backups. UpdraftPlus allows you to schedule automatic backups, ensuring that your site is backed up regularly without manual effort.
Safe Storage: Make sure to store your backups in a secure location, such as Google Drive, Dropbox, or another cloud storage service. This way, even if your website is compromised, you’ll have a safe copy of your data.
By implementing robust security measures and maintaining regular backups, you can protect your WordPress site from threats and ensure that it remains safe and operational.
8. Monitoring and Analyzing Website Performance
Once your website is live, it’s crucial to monitor its performance continuously and make necessary improvements. This ensures that your visitors have a smooth experience and that your site meets its goals.
A. Using Analytics Tools
Google Analytics is an essential tool for tracking various aspects of your website, including traffic, user behavior, and conversion rates. By analyzing this data, you can gain insights into how visitors interact with your site.
Setting Up Google Analytics To start, install the Google Analytics plugin on your WordPress site. This will allow you to easily connect your site to Google Analytics and begin collecting valuable data.
Example of Insights Suppose you notice from your analytics data that many visitors leave your site after viewing just one page. This could indicate that your site’s navigation needs improvement or that your content isn’t engaging enough. By identifying these issues, you can take action to enhance user experience and encourage visitors to explore more of your site.
Improving Site Speed
A slow website can drive visitors away and negatively impact your search engine rankings. Therefore, optimizing your site’s speed is essential.
Analyzing Site Speed Use tools like GTmetrix or Google PageSpeed Insights to test your website’s speed. These tools provide detailed reports and suggestions for improving performance.
Recommendations for Improvement Common suggestions may include:
Optimizing Images: Compress images to reduce their file size without sacrificing quality.
Enabling Caching: Implement caching to store static versions of your pages, allowing them to load faster for repeat visitors.
Minifying CSS and JavaScript: Remove unnecessary characters and spaces in your code to reduce file sizes and improve loading times.
Conclusion
Building a dynamic website with WordPress is an achievable goal for anyone, regardless of technical expertise. By following the steps outlined in this guide—from setting up your site and customizing it with themes and plugins to optimizing it for SEO and securing it against threats—you can create a professional, user-friendly website that meets your needs.
WordPress’s versatility and extensive community support make it an excellent choice for building websites of all types. Whether you’re creating a personal blog, a business site, or an online store, WordPress offers the tools and flexibility to bring your vision to life.
#web development#ui ux design#web design#e commerce#businessgrowth#digita marketing#laravel#phpdevelopment#seo services#software development#wordpress development#wordpress#website
0 notes
Text
Blogging provides an opportunity to share your interests, expertise and life story with the world. The internet has provided a way to monetize the content whether through ads, affiliate links or selling something through your blog, allowing many to actually earn money from their work. Others simply make their own website to get the word out. Regardless of your reasons for wanting to blog, here’s how to start a WordPress blog in five easy steps. Select a Domain Name Create a list of possible domain names. Each name should communicate the purpose or focus of the blog or be clearly related to you as a person. Buying a domain is rather cheap and most domain registrars won’t charge more than a few pounds. Others, like GoDaddy, will give you a discount on the first domain name you register with them, so take advantage of this. Also, you may choose to keep your domain private or go for WHOIS protection. WHOIS protection is rather cheap as well, so if you want to keep all the domain information private, you could go for this option. You should also consider buying variations of your name using various extensions if you want to make sure your domain remains unique. Set Up a Web Hosting Account The web hosting account is where your website will be located. You’ll want to shop around for website hosting services as prices range from free to cheap. While most free hosting sites will have some sort of caveat such as having to show ads, there are some decent free options as well. However, if you have limited means, you’d be better off using a cheap hosting provider like HostGator for instance. While most will offer shared hosting, unless you become a sensation overnight, this should be more than enough for now. Install and Configure WordPress If you’re going to run a WordPress blog, you’ll need to install WordPress on the web host if it isn’t already provided for you. Many web hosts have WordPress pre-installed, and all you have to do is configure it. However, in most cases, you will be charged extra for this service. If you like the added convenience, go for it, but installing WordPress yourself is very easy and straightforward. If you want to install WordPress yourself, you’ll need to go to the cPanel or control panel and install WordPress from inside the web host’s control panel. Or you may decide to install it by downloading the latest version of WordPress from their website and installing it through FTP. However, it’s usually better to have it installed directly through the your cPanel. All you have to do is head on to your cPanel and click on the “Install WordPress” icon. On the next screen, you will be given a couple of simple options like your Site’s title or name, your username and password. Make sure to not use the default “Admin” as a username as it will make your site more vulnerable to attacks. Next, all you have to do is agree to the terms and condition and click install. The rest will be done for you. Now you get to configure the WordPress blog. First, pick the theme; this determines the background colours, stylistic elements and background graphics. Know that you can change the theme or add to it later. WordPress is incredibly customizable. If you go to the Settings Menu in the sidebar, you’ll see a lot of options. Note that you don’t have to worry about most of those settings, and if you don’t know what you’re doing, leave them on the default settings. One of the most important settings for new bloggers is the Site Title & Tagline. This is probably your website name or brand name, though for personal blogs, it may be your name. The tagline is optional, but it is a great way to further define your blog’s purpose or intent. The Default Post Category and Post Type section lets you determine how your blog will look. How many prior blog posts will be shown on the home page? When someone looks at the home page, will they see your last 10 full blog posts or a summary of the last 20 blog posts? This is the page where you can make those selections.
The “Discussion WordPress Settings” section lets you determine the level of reader engagement. This is where you can let people post comments, allow for link notifications from other blogs, or require someone to register with your blog to comment. Common tactics to limit comment spam include requiring comments to be manually approved, requiring someone to log in to post a comment and turning off comments on articles more than two weeks old. Start Blogging Once your blog is set up, you can create your first post. Remember that your first blog post can be a simple introduction to the world. You can create longer, more complex posts later. In fact, you want to create a few short posts to make sure the content looks the way you want it to on the blog. Is the text easily read on the background theme you’ve selected? When your blog is new and rarely viewed is when you want to test things. Take this time to practice importing images and seeing what pasted affiliate links look like. Start Attracting an Audience The simplest way to start attracting an audience is to use the social media buttons embedded in WordPress blogs. If you’re already logged into your social media accounts, just pressing the social media sharing button for that particular platform will post a link to the blog post under your account, sharing it with all of your friends. If you have multiple social media accounts, post the blog through all of them. One useful piece of advice: after you post the link to your social media account, like it, give it a heart, or vote it up. Those who didn’t see or ignored the social media update that you posted a new blog may see that you “liked” it. In short, liking your own blog post increases the odds your existing connections will notice it and visit it. Adding a call to action to like and share the blog makes readers more likely to share it. WordPress stands out for the strong search engine optimization features it has already built in. Learn how to use hashtags and tags on WordPress blog posts as search engine optimized keywords to attract more traffic. The key is to keep blogging, learning and improving. WordPress is an incredibly popular blogging platform due to how easy it is to set up, use and customize. It is also very SEO friendly and has tons of tools that will help you optimize for search engines even with limited knowledge of search engine optimization.
0 notes
Text
13 Routine Maintenance Tasks that You Should Do on WordPress and WooCommerce

Maintaining a WooCommerce store is a lot of work. There are a lot of routine maintenance tasks for WordPress and WooCommerce that need to be done on a regular basis. In this post, we list down the most important tasks that you should do on your WooCommerce store.
1. Create Regular Website Backups

2. Update WordPress, WooCommerce, Themes and Plugins
Updating all elements of your WooCommerce store should be done on a regular basis. Do this weekly if you have the time. If not, monthly updates are good enough. Updates include updating WordPress Core, themes, WooCommerce and all other installed plugins. Remember to backup up your site before proceeding with updates since updates could cause your website to break. If you have a development site, it would be best to test the updates first on this staging environment. Then, do some user testing to make sure that there are no errors.
After that, you can proceed to update your live site. When that’s done, you will need to do another round of testing. Some important elements to test include checkout, add to cart, contact form emails, opt-in forms and other customizations that were done on the site.
3. Update WooCommerce Template Files
After updating WooCommerce, you will sometimes get an error notifying you of outdated WooCommerce template files. This just means that your theme has not updated to include the latest WooCommerce template files. In some cases, this could cause some formatting issues on your store. If there are no errors on your store, you can simply wait for your theme to release an update that includes the most recent template files. Or you can also fix this manually by following the steps in this documentation from WooCommerce.
4. Change User Passwords
It is important to use strong passwords. However, it is just as important to change passwords on a regular basis. There are times when security breaches can go undetected for a long time. Changing your password regularly blocks out these security breaches that you might not realize are there. You should change your password for WordPress admin, FTP, database and cPanel. And a pro-tip, never use “admin” as your username. This is the first username that hackers try out when brute forcing into websites.
5. Optimize Your Product Images
We’ve always emphasized the importance of optimizing images for your WooCommerce store to keep your site running fast.
If you have uploaded any product image that is more than 100KB in size, it might be a good idea to replace that image with an optimized product image. To learn more, you can check out our blog post on how to optimize images.
6. Approve and Respond to Product Reviews

7. Approve and Respond to Blog Comments
If you have a blog that is made to drive customer engagement, then your blog will most likely attract comments. Same with product reviews; don’t delete the negative comments. Rather, address them positively. Remove any spam comments as this will negatively impact the user experience of your blog. If you are using Akismet: Anti Spam plugin, this will block out most spam comments. However, some spam comments can still get through and you will need to manage them manually.
8. Test Your Contact Forms and Email Opt-in Forms
Every now and then, you will need to make sure that your contact forms and email opt-in forms are working. Just fill in your forms and send. If you receive it in your email, then you’re all good. But if you don’t, there’s something wrong and you need to do something about it. Have your developer look into it.
9. Optimize Your Database
Over time, your database accumulates a lot of gunk and you need to clean it to make sure your website runs fast. Before you go about this task, make sure you create a backup. You can choose to clean your database manually if you are comfortable and familiar with working on your database. Otherwise, you can use a plugin to do the optimizations for you. Notable plugins include WP-DBManager and WP-Optimize. You can check out our guide on how to clean your database.
10. Test Your WooCommerce Store’s Speed
If you have not yet made optimizations to your WooCommerce store’s speed, you should consider doing it now. Site speed has become increasingly important for WooCommerce store owners. Google now considers site speed as a ranking factor for SEO. Also, if you have a slow site, this will negatively impact the customer’s experience on your site. It is easy for your customers to buy instead from your competitors. You can test your site speed on Google’s Page Speed test and Google will provide you with recommendations on how you can improve your site’s speed. Other notable tools that you can use to test your site are Pingdom Website Speed Test and GTmetrix.
11. Scan Your Site for Malware
One way to keep on top of your website’s security is to regularly test your site for any malware. If you are connected to Google Search Console, it will let you know if malware is detected on your site. If your site has been found to have any form of malware, Google Chrome will actually alert your visitors that your site is dangerous. This can have devastating effects on your traffic and conversion rate.
No one will want to enter their payment information on a site that has malware. In extreme cases, Google may block your site from appearing in the Google search results page. You want to prevent this from happening. It would be best to invest on your site’s security by installing a security plugin such as Sucuri Security and WordFence. Even if you have those plugins installed, it is still a good idea to a manual scan. You can scan your website at Sucuri’s Website Malware and Security Scanner, or at SiteGuarding. If any manual scans detect anything malicious, you can contact your developer to fix the issue. You should get it fixed before Google applies any penalties. Wooassist also offers a security hardening service to improve the security of your site so you can prevent this from happening.
12. Fix Broken Links

13. Test Your Checkout Process
Last but definitely not the least; you should regularly test your checkout process. If you suddenly experience loss of sales, it’s a good idea to test your checkout. There might be an error that prevents your customers from checking out. Testing also gives you a feel of what your customers go through so you can optimize your checkout. Once you’ve determined that your checkout has problems, you can check out our post on how to fix the most common checkout problems in WooCommerce.
Final Notes
By doing these tasks on a regular basis, you can keep yourself on top of any issues that may occur on your WooCommerce store. If you find yourself overwhelmed by the all these, you can hire someone else to do it. You can also contact us and our team will be glad to assist with any of these tasks.
Are there any other routine maintenance tasks for WordPress and WooCommerce you think should be done on a regular basis? Do you have any suggestions? Let us know in the comments.
0 notes