#how to create spring boot project in intellij
Explore tagged Tumblr posts
Visit Tumblr Blog
Explore Tumblr blogs with no restrictions, modern design and the best experience.
Last Seen Tumblr Blogs


Fun Fact
12.7% of mobile users access Tumblr.
Text

How to Become a Java Developer (Step-by-Step)
Here’s your simple roadmap to start this exciting journey:
✅ Step 1: Learn Core Java Start with basics: variables, loops, arrays, and OOP (Object-Oriented Programming).
Use YouTube (Telusko, Bro Code), free sites (W3Schools, GeeksforGeeks), or apps.
✅ Step 2: Get Hands-On Build small projects like a calculator, to-do list, or tic-tac-toe game.
Practice daily on coding platforms like LeetCode or HackerRank.
✅ Step 3: Dive Deeper Learn about collections, file handling, exceptions, and multithreading.
Explore Advanced Java, including JDBC (database connection).
✅ Step 4: Master Popular Frameworks Spring Boot = the king of Java web development.
Hibernate = helps connect your Java app with databases easily.
✅ Step 5: Create Real Projects Think: "Online Food Delivery App" or "Banking Management System"
Host them on GitHub to impress recruiters!
✅ Step 6: Learn Tools of the Trade Git & GitHub – for version control and collaboration.
Maven/Gradle – for managing dependencies.
IntelliJ IDEA/Eclipse – for writing Java comfortably.
✅ Step 7: Apply for Internships or Jobs Titles to look for: Java Developer, Backend Developer, or Software Engineer (Java).
#JavaDeveloper#roadmap#BackendDeveloper#SoftwareEngineer#coding#AdvancedJava#Javaapp#EngineeringCollege#EngineeringCollegeBhopal
1 note
·
View note
Text
How To Start Full Stack Java Development In Bhopal

Web Development Institutes In Bhopal
Starting Full Stack Java Development in Bhopal requires a structured approach, from learning essential skills to gaining hands-on experience. Here’s a step-by-step guide to help you get started:
1. Learn the Fundamentals of Java
Before diving into full stack development institute in Bhopal, build a strong foundation in Java programming:
Core Java: OOPs concepts, Collections, Exception Handling, Multithreading, Streams.
Java SE (Standard Edition): Learn Java basics using Eclipse or IntelliJ IDEA.
Advanced Java: JDBC, Servlets, JSP, and MVC architecture.
Learn java Programming in Bhopal
🔹 Recommended Learning Platforms: Coursera, Udemy, Codecademy, GeeksforGeeks.
2. Master Frontend Technologies
A full-stack Java developer must be proficient in front-end technologies:
HTML, CSS, JavaScript – Basics of web development.
Frameworks: Learn React.js or Angular for building dynamic UIs.
Bootstrap & Tailwind CSS for styling.
Java coding Classes in Bhopal
🔹 Hands-on: Create a simple website using HTML, CSS, and JavaScript before moving to frameworks.
3. Learn Backend Development with Java
Spring Boot Framework – Most widely used Java framework for backend development.
RESTful APIs – Learn how to create APIs using Spring Boot & Spring MVC.
Hibernate & JPA – For database interaction.
Programming or Language classes in Bhopal
🔹 Project Idea: Build a REST API for a Todo App with Spring Boot and MySQL.
4. Database Management
Relational Databases: MySQL, PostgreSQL.
NoSQL Databases: MongoDB (useful for scalable applications).
ORM (Object Relational Mapping): Hibernate.
Coding classes for beginners in Bhopal
🔹 Practice: Create a CRUD application using Java, Spring Boot, and MySQL.
5. Version Control and Deployment
Git & GitHub: Learn how to manage code versions.
Docker: Understand containerization.
CI/CD Pipelines: Learn about Jenkins, GitHub Actions for automation.
Cloud Deployment: Host your project on AWS, Heroku, or DigitalOcean.
Best Coding Institutes in Bhopal
6. Gain Hands-on Experience with Projects
E-commerce Website: Java Spring Boot + React.js.
Job Portal: Spring Boot + Angular + MySQL.
Chat Application: WebSockets + Java.
🔹 Tip: Contribute to open-source projects on GitHub to build your portfolio.
7. Find Training & Internship Opportunities in Bhopal
🔹 Where to Learn?
Training Institutes: CRISP Bhopal, HCL Training, NIIT Bhopal.
Online Bootcamps: Scaler, Simplilearn, UpGrad, Masai School.
University Courses: MANIT Bhopal, LNCT, SIRT offer Java-based programs.
Top Web Development Institutes in Bhopal
8. Join Developer Communities & Networking Events
Attend tech meetups, hackathons, and coding competitions in Bhopal.
Join LinkedIn Java Developer groups, Stack Overflow, and GitHub discussions.
Java coaching in bhopal
Final Thoughts
To become a successful Full Stack Java Developer in Bhopal, focus on Java, Spring Boot, Frontend Technologies, full stack development institute in Bhopal. Databases, and Real-World Projects. Start with small projects, gain internship experience, and gradually move to freelancing or full-time roles in tech companies.
#Web development institutes in bhopal#java coding classes in bhopal#full stack developer course in bhopal#Java foundation classes in bhopal#aadhaar foundation course in bhopal#java aadhaar foundation courses in bhopal#java coaching in bhopal#learn java programming in bhopal#robotics programming in bhopal#programming or language classes in bhopal#coding classes for beginners in bhopal#full stack development institute in Bhopal
0 notes
Text
How to Build REST APIs with Java and Spring Boot

How to Build REST APIs with Java and Spring Boot
Spring Boot is one of the most popular frameworks for building RESTful APIs in Java. It simplifies the development process by providing pre-configured settings, embedded servers, and minimal boilerplate code. Below is a structured guide to help you build REST APIs using Java and Spring Boot.
1. Set Up Your Spring Boot Project
You can set up a Spring Boot project using Spring Initializr:
Select Spring Boot Version (latest stable version)
Choose Project: Maven or Gradle
Select Language: Java
Add Dependencies:
Spring Web (for REST APIs)
Spring Boot DevTools (for development convenience)
Lombok (for reducing boilerplate code)
Spring Data JPA (if using a database)
H2/MySQL/PostgreSQL (database choice)
Download the project, extract it, and open it in your preferred IDE (IntelliJ IDEA, Eclipse, or VS Code).
2. Create the Main Application Class
The entry point of a Spring Boot application is the @SpringBootApplication-annotated class.javapackage com.example.restapi;import org.springframework.boot.SpringApplication; import org.springframework.boot.autoconfigure.SpringBootApplication;@SpringBootApplication public class RestApiApplication { public static void main(String[] args) { SpringApplication.run(RestApiApplication.class, args); } }
3. Create a Model Class
The model represents the data structure.java package com.example.restapi.model;import lombok.AllArgsConstructor; import lombok.Data; import lombok.NoArgsConstructor;@Data @AllArgsConstructor @NoArgsConstructor public class Employee { private Long id; private String name; private String department; }
4. Create a REST Controller
Spring Boot uses the @RestController annotation to create API endpoints.package com.example.restapi.controller;import com.example.restapi.model.Employee; import org.springframework.web.bind.annotation.*;import java.util.ArrayList; import java.util.List;@RestController @RequestMapping("/employees") public class EmployeeController { private List<Employee> employees = new ArrayList<>(); @GetMapping public List<Employee> getAllEmployees() { return employees; } @PostMapping public Employee addEmployee(@RequestBody Employee employee) { employees.add(employee); return employee; } @GetMapping("/{id}") public Employee getEmployeeById(@PathVariable Long id) { return employees.stream() .filter(emp -> emp.getId().equals(id)) .findFirst() .orElse(null); } @DeleteMapping("/{id}") public String deleteEmployee(@PathVariable Long id) { employees.removeIf(emp -> emp.getId().equals(id)); return "Employee removed."; } }
5. Run and Test the API
Start the application by running the RestApiApplication.java class. You can test the API using Postman or cURL.
GET all employees: GET http://localhost:8080/employees
POST a new employee: POST http://localhost:8080/employees
Request Body (JSON):
json
{ "id": 1, "name": "John Doe", "department": "IT" }
GET employee by ID: GET http://localhost:8080/employees/1
DELETE an employee: DELETE http://localhost:8080/employees/1
6. Enhancements
To make the API more robust:
Use a database with JPA and Hibernate
Implement error handling using @ExceptionHandler
Add validation with @Valid
Secure the API with Spring Security and JWT
Document the API with Swagger
WEBSITE: https://www.ficusoft.in/core-java-training-in-chennai/
0 notes
Text
Spring Boot Online Training class
Are you looking to enhance your skills in Spring Boot? Do you want to learn how to develop powerful and efficient applications using this popular Java framework? Look no further! In this comprehensive guide, we will take you through the fundamentals of spring boot online training and provide you with valuable insights to become proficient in building robust and scalable applications. Whether you are a beginner or an experienced developer, this online training will equip you with the knowledge and expertise needed to excel in Spring Boot development.

Introduction to Spring Boot
Spring Boot is a powerful Java-based framework that simplifies the development of stand-alone, production-grade Spring-based applications. It eliminates the need for boilerplate code and provides a convention-over-configuration approach, allowing developers to focus on building business logic rather than infrastructure. Spring Boot is known for its simplicity, scalability, and robustness, making it a preferred choice for developing a wide range of applications, from small microservices to large enterprise systems.
Setting Up Your Development Environment
Before diving into Spring Boot development, it is essential to set up your development environment properly. This section will guide you through the installation of Java, Maven or Gradle build tools, and an Integrated Development Environment (IDE) such as IntelliJ or Eclipse. We will provide step-by-step instructions to ensure a smooth setup process, allowing you to start coding with Spring Boot seamlessly.
Building Your First Spring Boot Application
Once your development environment is ready, it's time to build your first Spring Boot application. We will walk you through the process of creating a basic application from scratch. You will learn how to set up the project structure, define dependencies, and create a simple RESTful web service. By the end of this section, you will have a solid understanding of the core components of a Spring Boot application and how they work together.
Configuring Spring Boot Projects
Configuration is a crucial aspect of any application development process. Spring Boot offers several ways to configure your projects, ranging from properties files to YAML files and even programmatically. We will explore different configuration options provided by Spring Boot and guide you on how to leverage them effectively. You will also learn about profiles, which allow you to customize your application's behavior based on different environments.
Working with Data and Databases
Most applications require persistent storage for data management. Spring Boot provides excellent support for working with databases, including popular choices like MySQL, PostgreSQL, and MongoDB. In this section, we will demonstrate how to integrate Spring Boot with a database and perform common database operations using Spring Data JPA, an easy-to-use and powerful ORM framework. You will gain hands-on experience in building data-driven applications with Spring Boot.
Implementing RESTful Web Services
RESTful web services play a vital role in modern application development. Spring Boot simplifies the creation of RESTful APIs by providing out-of-the-box support for building and consuming web services. We will guide you through the processof designing and implementing RESTful endpoints using Spring Boot's built-in features. You will learn about request mapping, handling HTTP methods, input validation, exception handling, and serialization/deserialization of JSON payloads. By the end of this section, you will be able to create robust and scalable RESTful web services with ease.
Securing Spring Boot Applications
Security is a critical concern in application development, and Spring Boot offers various mechanisms to secure your applications. In this section, we will explore different security options provided by Spring Security, the de facto standard for securing Spring applications. You will learn how to implement authentication and authorization, secure endpoints, handle user roles and permissions, and protect against common security vulnerabilities. With Spring Boot's security features, you can ensure that your applications are protected against unauthorized access and potential attacks.
Testing and Debugging Spring Boot Applications
Testing is an integral part of the software development lifecycle, and Spring Boot provides robust support for testing your applications. In this section, we will cover different testing approaches, including unit testing, integration testing, and end-to-end testing. You will learn how to write tests using popular testing frameworks like JUnit and Mockito. Additionally, we will explore techniques for debugging Spring Boot applications and troubleshooting common issues. With proper testing and debugging techniques, you can ensure the quality and reliability of your Spring Boot applications.
Deploying Spring Boot Applications
Once you have developed and tested your Spring Boot application, it's time to deploy it to a production environment. In this section, we will discuss various deployment options, including deploying to standalone servers, containerization using Docker, and deploying to cloud platforms like AWS and Heroku. You will learn about packaging your application, managing dependencies, and configuring deployment settings. By the end of this section, you will be equipped with the knowledge to deploy your Spring Boot applications with confidence.
Monitoring and Performance Tuning
Monitoring and optimizing the performance of your Spring Boot applications are essential for delivering a smooth user experience. In this section, we will explore tools and techniques for monitoring application health, collecting metrics, and analyzing performance bottlenecks. You will learn how to leverage Spring Boot Actuator, a powerful module that provides endpoints for monitoring and managing your applications. We will also cover performance tuning strategies, including optimizing database queries, caching, and using asynchronous programming. With proper monitoring and performance tuning, you can ensure that your Spring Boot applications are highly efficient and performant.
Best Practices for Spring Boot Development
To become a proficient Spring Boot developer, it's essential to follow best practices and coding conventions. In this section, we will share valuable tips and recommendations for writing clean, maintainable, and efficient Spring Boot code. You will learn about project structure, naming conventions, error handling, logging, exception handling, and more. Following these best practices will not only improve the quality of your code but also make it easier to collaborate with other developers and maintain your applications in the long run.
Advanced Spring Boot Concepts
springboot
Once you have mastered the fundamentals of Spring Boot, it's time to explore advanced concepts and features. In this section, we will delve into topics like Spring Boot starters, auto-configuration, custom annotations, dependency injection, and AOP (Aspect-Oriented Programming). You will gain a deeper understanding of the inner workings of Spring Boot and learn how to leverage advanced features to build more sophisticated applications. Advanced Spring Boot concepts will empower you to tackle complex development challenges and create highly customizable applications.
0 notes
Text
Spring boot Microservice Maven Project Setup in IntelliJ IDE with Example for Beginners
Full tutorial link https://youtu.be/bsgA20eJKxs Hello friends, a new #video is published on #codeonedigest channel to create a #springboot microservices with #java #maven and #intellij IDE. #Springbootmicroservices #springbootmicroservicestutorial #spr
Hello Friends, in this video, I will show how to create a springboot application with maven as build automation tool & using intellij IDE. So, in this video, we will learn How to create sprintboot project using sprint initializer. How to import project in IntelliJ IDE. We will also learn about Spring main class in this video. We will understand springboot annotations. We will see how to…

View On WordPress
0 notes
Link
Build a Full Stack application with Angular and Java Spring Boot What you’ll learn
Full Stack: Angular and Java Spring Boot
Develop a Full Stack application with Angular front-end and Spring Boot back-end
Learn how to build Angular front-end applications …. all from the beginning. We assume no prior knowledge of Angular.
Develop a Spring Boot back-end using REST APIs and MySQL database
Develop your code using modern development tools such as IntelliJ, VS Code, Maven, and npm
I am a RESPONSIVE INSTRUCTOR … post your questions and I will RESPOND in 24 hours.
Join an ACTIVE COMMUNITY of 60,000+ students that are already enrolled! Over 3,000+ Reviews – 5 STARS
Full Stack developers with Angular and Spring Boot are in HIGH-DEMAND. Level up your career and become a FULL STACK developer!
You can DOWNLOAD all videos, source code, and PDFs. Perfect for offline LEARNING and REVIEW.
Requirements
Spring Boot experience is required.
No experience required for Angular. I will teach you Angular from the beginning.
Description
Learn how to build a Full Stack application with Angular and Java Spring Boot.
Angular and Spring Boot are two of the hottest technologies for developing Full Stack applications.
Knowing how to build Full Stack applications with Angular and Java Spring Boot can get you a job or improve the one you have. These are hot skills and companies are desperately looking for developers. Some of the highest paying job postings are for Full Stack developers with Angular and Spring Boot experience.
This course will help you quickly get up to speed with Angular and Java Spring Boot. I will demystify the technology and help you understand the essential concepts to build a Full Stack application with Angular and Java Spring Boot.
You will also use modern development tools such as IntelliJ, Visual Studio Code, Maven, and npm. All of the projects are based on Maven and npm, so you are free to use any tool that you want.
In this course, you will get:
– All source code is available for download
– Responsive Instructors: All questions answered within 24 hours
– PDFs of all lectures are available for download
– Professional video and audio recordings (check the free previews)
– High-quality closed captions/subtitles available for English and 10+ other languages (new!)
– Quality Material
You will receive a quality course, with solid technical material and excellent audio and video production. I am a best-selling instructor on Udemy. Here’s a list of my top courses.
Spring and Hibernate for Beginners
Hibernate: Advanced Development Techniques
Deploy Java Spring Apps Online to Amazon Cloud (AWS)
JSP and Servlets for Beginners
JavaServer Faces (JSF) for Beginners
These courses have received rave 5-star reviews and over 330,000 students have taken the courses. Also, these courses are the most popular courses in their respective categories.
I also have an active YouTube channel where I post regular videos. In the past year, I’ve created over 800 video tutorials (public and private). My YouTube channel has over 5 million views and 36k subscribers. So I understand what works and what doesn’t work for creating video tutorials.
Finally, there is no risk. You can preview 25% of the course for free. Once you purchase the course, if for some reason you are not happy with the course, Udemy offers a 30-day money-back guarantee.
So you have nothing to lose, sign up for this course and learn how to build Full Stack apps with Angular and Java Spring Boot from scratch!
It is time to level up your career and become a Full Stack developer with Angular and Java Spring Boot.
Target Audience
Java Developers with Spring Boot experience
No experience required for Angular. I will teach you Angular from the beginning.
Download
To download the more paid courses for free, visit the course for free where you will get 500+ paid courses available for free. To download this course visit the link above.
1 note
·
View note
Text
Java Full-Stack Development Course in Bangalore| AchieversIT

Definition of Java Full-stack
A software engineer who is proficient in both the front-end and back-end development of an application using the Java programming language is referred to as a "Java Full-Stack" developer. The full-stack developer must be competent in all facets of the programmer, including client-side scripting, server-side scripting, database design, and server configuration, as they are in charge of the entire development process, from the UI/UX design to the database design.
Basics of Java Full-Stack Development
1. Understanding the Java Language: Understanding the Java language is the first stage in Java full-stack development. Learning the syntax, data types, variables, classes, functions, and other concepts is part of this. As the Java programming language will be used throughout the development process, it is crucial to have a good handle on it.
2. Establishing a Development Environment: After the language has been mastered, a development environment must be established. This entails setting up the Java Development Kit (JDK), an Integrated Development Environment (IDE), as well as additional tools like database, web server, and version control systems.
3. Comprehending Object-Oriented Programming (OOP) OOP is a crucial component of Java full-stack development. Building solid applications requires an understanding of OOP concepts like classes, objects, inheritance, encapsulation, and polymorphism.
4. Creating a Database Model: The majority of full-stack apps require a database. Understanding how to build and manage a relational database model to store data is crucial. Understanding how to build up tables, relationships, and queries falls under this category.
5. Creating the Back-End: After the database has been created, the back-end must next be created. This includes setting up web servers, developing APIs, and writing server-side code.
6. Creating the Front-End: The application's user interface is called the front-end. To design a user-friendly interface, you must be able to use HTML, CSS, and JavaScript.
7. Testing and Debugging: These steps in the development process are crucial. To make sure the application is operating properly, it's crucial to know how to create and use unit tests, integration tests, and automation tests. Understanding how to use a debugger to find and correct mistakes is also crucial.
8. Deploying the Application: Deploying the application is the last stage in the development process. This entails deploying the code to a live environment as well as configuring databases and web servers.
Java Full Stack Course: Jump Start Your Career with This Comprehensive Course
The knowledge and abilities you'll acquire in this Java full-stack course will help you succeed as a Java full-stack developer. The subjects covered in this course range from fundamental Java programming to using cutting-edge frameworks like Spring Boot, Hibernate, and Angular. You will develop Web services, study software engineering best - practice, and build and implement enterprise applications with this course. Additionally, you'll learn how to use React and Redux to create cutting-edge online applications. With the knowledge from this extensive course, you'll be ready to launch a successful career as a Java full-stack developer.
Java Full Stack Course: How to Build a Basic Website Using Java
1. Create the surroundings:
JDK and an IDE like Eclipse, IntelliJ, or NetBeans should be installed.
2.Develop the project:
In your IDE, create a new project.
3. Include the required libraries:
Add JSP, Servlet, and JSTL libraries to your project.
4. Design the structure of the web application:
Utilize the web.xml file to create the web application structure.
5. Create the website:
Make the web page using JavaScript, CSS, and HTML.
6.Make the servlet:
To process the requests and transmit the response, create the servlet.
7. Develop the business logic:
Create Java classes to contain the business logic..
8. Construct and release the application:
Create the application, then set up a web server to host it.
Where Will Get Proper Java Full-Stack Development Course
Achievers IT is a leading provider of IT training and certification solutions. We provide training in Java, Full Stack, Software Engineering, Web Development, Cloud Computing, and more. Our courses are designed to be comprehensive, covering all the essential aspects of each technology. Our instructors are highly experienced professionals and certified experts in the fields they teach. We offer flexible study options, including online and in-person options, to ensure that everyone has access to the training they need. We also provide support and guidance throughout the learning process.
What is The Benefits Of Java Full-Stack Development
1. Enhanced Productivity: Because of Java's adaptability and scalability, full-stack developers may create a variety of applications fast and effectively.
2. Rapid prototyping: Java's write-once, run-anywhere feature enables programmers to create and test prototypes in a timely manner.
3. Reusability: Java developers may construct new applications more quickly and cheaply by reusing existing code and components.
4. Java applications can run on any platform without any alterations, making them platform independent.
5. Security: Because Java supports authentication and authorization, its applications are more secure than those written in other languages.
6. Scalability: Java applications are easily scalable up or down to meet a business's changing needs.
7. Community Support: The developer community for Java is large and active, and they are always happy to assist with any queries or problems.
Java Full-Stack Development Course in Bangalore| AchieversIT
Definition of Java Full-stack
A software engineer who is proficient in both the front-end and back-end development of an application using the Java programming language is referred to as a "Java Full-Stack" developer. The full-stack developer must be competent in all facets of the programmer, including client-side scripting, server-side scripting, database design, and server configuration, as they are in charge of the entire development process, from the UI/UX design to the database design.
Basics of Java Full-Stack Development
1. Understanding the Java Language: Understanding the Java language is the first stage in Java full-stack development. Learning the syntax, data types, variables, classes, functions, and other concepts is part of this. As the Java programming language will be used throughout the development process, it is crucial to have a good handle on it.
2. Establishing a Development Environment: After the language has been mastered, a development environment must be established. This entails setting up the Java Development Kit (JDK), an Integrated Development Environment (IDE), as well as additional tools like database, web server, and version control systems.
3. Comprehending Object-Oriented Programming (OOP) OOP is a crucial component of Java full-stack development. Building solid applications requires an understanding of OOP concepts like classes, objects, inheritance, encapsulation, and polymorphism.
4. Creating a Database Model: The majority of full-stack apps require a database. Understanding how to build and manage a relational database model to store data is crucial. Understanding how to build up tables, relationships, and queries falls under this category.
5. Creating the Back-End: After the database has been created, the back-end must next be created. This includes setting up web servers, developing APIs, and writing server-side code.
6. Creating the Front-End: The application's user interface is called the front-end. To design a user-friendly interface, you must be able to use HTML, CSS, and JavaScript.
7. Testing and Debugging: These steps in the development process are crucial. To make sure the application is operating properly, it's crucial to know how to create and use unit tests, integration tests, and automation tests. Understanding how to use a debugger to find and correct mistakes is also crucial.
8. Deploying the Application: Deploying the application is the last stage in the development process. This entails deploying the code to a live environment as well as configuring databases and web servers.
Java Full Stack Course: Jump Start Your Career with This Comprehensive Course
The knowledge and abilities you'll acquire in this Java full-stack course will help you succeed as a Java full-stack developer. The subjects covered in this course range from fundamental Java programming to using cutting-edge frameworks like Spring Boot, Hibernate, and Angular. You will develop Web services, study software engineering best - practice, and build and implement enterprise applications with this course. Additionally, you'll learn how to use React and Redux to create cutting-edge online applications. With the knowledge from this extensive course, you'll be ready to launch a successful career as a Java full-stack developer.
Java Full Stack Course: How to Build a Basic Website Using Java
1. Create the surroundings:
JDK and an IDE like Eclipse, IntelliJ, or NetBeans should be installed.
2.Develop the project:
In your IDE, create a new project.
3. Include the required libraries:
Add JSP, Servlet, and JSTL libraries to your project.
4. Design the structure of the web application:
Utilize the web.xml file to create the web application structure.
5. Create the website:
Make the web page using JavaScript, CSS, and HTML.
6.Make the servlet:
To process the requests and transmit the response, create the servlet.
7. Develop the business logic:
Create Java classes to contain the business logic..
8. Construct and release the application:
Create the application, then set up a web server to host it.
Where Will Get Proper Java Full-Stack Development Course
Achievers IT is a leading provider of IT training and certification solutions. We provide training in Java, Full Stack, Software Engineering, Web Development, Cloud Computing, and more. Our courses are designed to be comprehensive, covering all the essential aspects of each technology. Our instructors are highly experienced professionals and certified experts in the fields they teach. We offer flexible study options, including online and in-person options, to ensure that everyone has access to the training they need. We also provide support and guidance throughout the learning process.
What is The Benefits Of Java Full-Stack Development
1. Enhanced Productivity: Because of Java's adaptability and scalability, full-stack developers may create a variety of applications fast and effectively.
2. Rapid prototyping: Java's write-once, run-anywhere feature enables programmers to create and test prototypes in a timely manner.
3. Reusability: Java developers may construct new applications more quickly and cheaply by reusing existing code and components.
4. Java applications can run on any platform without any alterations, making them platform independent.
5. Security: Because Java supports authentication and authorization, its applications are more secure than those written in other languages.
6. Scalability: Java applications are easily scalable up or down to meet a business's changing needs.
7. Community Support: The developer community for Java is large and active, and they are always happy to assist with any queries or problems.
#education#software training institute#html5#software#educating#sostware#js#html css#training#educaton
0 notes
Text
SkillPractical Spring Interview Questions
Spring Boot is an open-source Java-based framework. Spring Boot is a utility for setting up an application quickly by automating the configuration procedures and speed up the process of building and deploying Spring Boot applications. It is easy to create production-ready applications using Spring Boot through embedded server(tomcat).
Spring is widely used for creating scalable applications. For web applications Spring provides Spring MVC which is a widely used module of spring that is used to create scalable web applications. But the main disadvantage of spring projects is that configuration is really time-consuming and can be a bit overwhelming for the new developers. Making the application production-ready takes some time if you are new to the spring.
Here in this project, we will discuss how to create a basic RESTful web service which displays the list of student details and details of individual student depending upon the id provided through the REST call i.e.., depending upon the input provided through the REST call.
Prerequisites:
Basic understanding of how to create a Maven project in IntelliJ IDE.
Basic understanding of RESTful web services.
Basic understanding of HTTP Methods i.e., GET, PUT, POST, DELETE etc..
Advantages of RESTful Web services:
The separation between the client and the server: The REST protocol totally separates the user interface from the server and the data storage. This has some advantages when making developments. For example, it improves the portability of the interface to other types of platforms, it increases the scalability of the projects and allows the different components of the developments to be evolved independently.
Visibility, reliability, and scalability: The separation between client and server has one evident advantage, and that is that each development team can scale the product without too much problem. They can migrate to other servers or make all kinds of changes in the database, provided the data from each request is sent correctly. The separation makes it easier to have the front and the back on different servers, and this makes the apps more flexible to work with.
The REST API is always independent of the type of platform or languages: The REST API always adapts to the type of syntax or platforms being used, which gives considerable freedom when changing or testing new environments within the development. With a REST API, you can have PHP, Java, Python or Node.js servers. The only thing is that it is indispensable that the responses to the requests should always take place in the language used for the information exchange, normally XML or JSON.
The steps that we covered in this project are:
1. Create a maven project and ass dependencies 2. Create a minimal set of classes and launch the application 3. Add at least one controller with respective Services, Entity and DAO (Data Access Object)
Some of the interview questions that we covered in the SkillPractical Spring are:
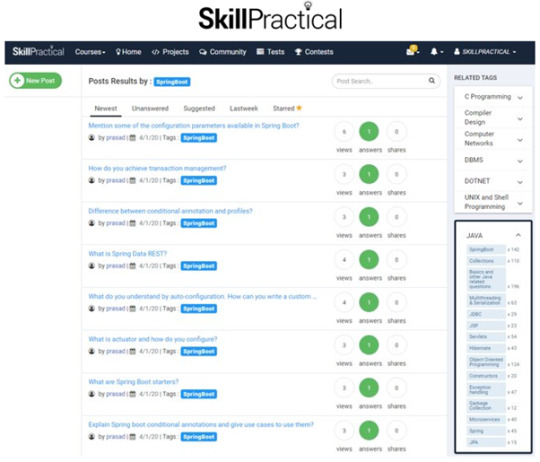
1. Mention some of the configuration parameters available in Spring Boot? 2. How do you achieve transaction management? 3. Difference between conditional annotation and profiles? 4. What is Spring Data REST? 5. What do you understand by auto-configuration. How can you write a custom auto-configuration? 6. What is actuator and how do you configure? 7. What are Spring Boot starters? 8. What does annotation @SpringBootApplication do? 9. Mention some of the Spring Boot’s test features? 10. Explain Spring boot conditional annotations and give use cases to use them?
For more details on Spring interview questions please visit our website.
SkillPractical has Spring learning path that helps the user to learn the Java from scratch. If user have any questions on Java Spring while attempting tests, he can post a question in SkillPractical community. They will get an answer from our expert consultants.
0 notes
Link
Build a Full Stack application with Angular and Spring Boot
What you’ll learn
Develop a Full Stack application with Angular front-end and Spring Boot back-end
You will TYPE IN EVERY LINE of code with me in the videos. I EXPLAIN every line of code to help you learn!
LEARN how to build Angular front-end applications …. all from the beginning. We assume no prior knowledge of Angular.
I am a RESPONSIVE INSTRUCTOR … post your questions and I will RESPOND in 24 hours.
DEVELOP a Spring Boot backend using modern INTELLIJ IDE
Join an ACTIVE COMMUNITY of 44,000+ students that are already enrolled! Over 1,000+ Reviews – 5 STARS
Full Stack developers with Angular and Spring Boot are in HIGH-DEMAND. Level up your career and become a FULL STACK developer!
You can DOWNLOAD all videos, source code and PDFs. Perfect for offline LEARNING and REVIEW.
Requirements
Spring Boot experience is required.
No experience required for Angular. I will teach you Angular from the beginning.
Description
Learn how to build a Full Stack application with Angular and Spring Boot.
Angular and Spring Boot are two of the hottest technologies for developing Full Stack applications.
Knowing how to build Full Stack applications with Angular and Spring Boot can get you a job or improve the one you have. These are hot skills and companies are desperately looking for developers. Some of the highest paying job posting are for Full Stack developers with Angular and Spring Boot experience.
This course will help you quickly get up to speed with Angular and Spring Boot. I will demystify the technology and help you understand the essential concepts to build a Full Stack application with Angular and Spring Boot from scratch.
You will also use modern development tools such as IntelliJ, Visual Studio Code, Maven and npm. All of the projects are based on Maven and npm, so you are free to use any tool that you want.
—
In this course, you will get:
– Live Coding: I code all of the real-time projects from scratch
– All source code is available for download
– Responsive Instructors: All questions answered within 24 hours
– PDFs of all lectures are available for download
– Professional video and audio recordings (check the free previews)
– High quality closed-captions / subtitles available for English and 10+ other languages (new!)
—
Quality Material
You will receive a quality course, with solid technical material and excellent audio and video production. I am a best-selling instructor on Udemy. Here’s a list of my top courses.
Spring and Hibernate for Beginners
Hibernate: Advanced Development Techniques
Deploy Java Spring Apps Online to Amazon Cloud (AWS)
JSP and Servlets for Beginners
JavaServer Faces (JSF) for Beginners
These courses have received rave 5 star reviews and over 330,000 students have taken the courses. Also, these courses are the most popular courses in their respective categories.
I also have an active YouTube channel where I post regular videos. In the past year, I’ve created over 800 video tutorials (public and private). My YouTube channel has over 5 million views and 36k subscribers. So I understand what works and what doesn’t work for creating video tutorials.
No Risk – Money-Back Guarantee
Finally, there is no risk. You can preview 25% of the course for free. Once you purchase the course, if for some reason you are not happy with the course, Udemy offers a 30-day money back guarantee.
So you have nothing to lose, sign up for this course and learn how to build Full Stack apps with Angular and Spring Boot from scratch!
It is time to level up your career and become a Full Stack developer.
Target Audience
Java Developers with Spring Boot experience
No experience required for Angular. I will teach you Angular from the beginning.
Who this course is for:
The course is appropriate for all Spring Boot developers.
Created by Chad Darby, Harinath Kuntamukkala Last updated 2/2020 English English
Size: 3.78 GB
Download Now
https://ift.tt/2WKM0P8.
The post Full Stack: Angular and Spring Boot appeared first on Free Course Lab.
0 notes
Link
In this post, I would try to explain how we reduced the storage occupied by the data by more than 50%. This would also kind of be a step by step guide from the basics, so if you're just interested in how Redis is being used, just skip the and go to the Optimization section.
Basic Setup
I would be using the latest version of Spring Boot from https://start.spring.io. Firstly, select our two of our main dependencies - Spring Boot Web and Spring Data Reactive Redis. You would find these in the pom.xml file when you download the starter project. The Spring Boot Web is for building basic web applications with Spring Boot, whereas Spring Data Reactive Redis would be used for connecting and using Redis inside the application. At its core, the Redis dependency by default uses the Lettuce Redis client, and is supported by the latest versions of Spring Boot. Note that I'm going to skip the installation of Redis, as there are other guides available for every operating system. You do need the Redis Server to be started for our application to work successfully. After downloading the basic application, you'll need to extract and open it in your favourite IDE (my favourite one is IntelliJ IDEA). In my case the project name is redis-util, and you'll find my "base packages" to be named com.darshitpp.redis.redisutil. This base package would have a class called RedisUtilApplication, which in my case has the following configuration.
@SpringBootApplication @ComponentScan(basePackages = {"com.darshitpp.redis.redisutil"}) public class RedisUtilApplication { public static void main(String[] args) { SpringApplication.run(RedisUtilApplication.class, args); } }
I have manually added the @ComponentScan annotation to specify a top-level package name under where Spring should look for defined Beans/Configurations. To connect to Redis, I create a configuration class called LettuceRedisConfiguration, under a new package named configuration(note that this should be under the basePackages path defined above. You could define the configuration in the RedisUtilApplication class itself, but I want this to be as "production-ready" as possible. Thus, it's a good practice to separate out your different parts of application. My configuration class is
@Configuration public class LettuceRedisConfiguration { @Bean public LettuceConnectionFactory redisConnectionFactory() { return new LettuceConnectionFactory(new RedisStandaloneConfiguration("localhost", 6379)); } }
It is a very simple class, which has the configuration of which URL to connect to for Redis. In my case, it is localhost, but in most production apps, it would be an external Redis server. Port 6379 is the default port on which the Redis server starts. This Bean would return us a "factory" of Redis connections. Think of this as something which would allow you to connect to Redis when required. At this point, my package structure looks like:
->src ->main ->java ->com.darshitpp.redis.redisutil ->configuration
Now that we know how to connect to a Redis server, we need to figure out what data we need to store in Redis. In our case, we would be storing User data. This is the "domain model" of our application (domain model could be translated to a table in a Database, but we don't have a table in our scenario). This User is stored in a package called domain. The User would have three fields, namely, firstName, lastName, and birthday. Before storing the objects in Redis, it is a good idea to identify how you will store the data so that it's efficient to fetch it back. What that means is Redis being a simple Key-Value store, you would need to identify the Key you would be storing the Value with. In our case, I am choosing firstName as the key. The data would be stored in a hash, so the hashKey that we select would be the lastName and the value mapped to the hashKey is the User object. This is because Hashes in Redis have the following structure:
key1 --- hashKey1 === value1 --- hashKey2 === value2 --- hashKey3 === value3 key2 --- hashKey4 === value4 --- hashKey5 === value5 . . .
You could also imagine it as a tree with the top level nodes being the Keys, the immediate next level to be hashKeys, and the leaf nodes to be the values. To access value2, you would need to have key1 and hashKey2. Our example is a bit incorrect, as a User could have same key=firstName and hashKey=lastName as another user, and Redis will overwrite value. However, for brevity, we will assume there are unique Users using our application. We would now be creating a controller class called NormalController which would act as an entry point for our API. We have named it NormalController for reasons that will be clear further in this article.
@RestController @RequestMapping("/normal") public class NormalController { private final NormalService normalService; @Autowired public NormalController(NormalService normalService) { this.normalService = normalService; } @GetMapping("/get") public User get(@RequestParam("firstName") String firstName, @RequestParam("lastName") String lastName) { return normalService.get(firstName, lastName); } @PostMapping("/insert") public void insert(@RequestBody User user) { normalService.put(user); } @PostMapping("/delete") public void delete(@RequestParam("firstName") String firstName) { normalService.delete(firstName); } }
NormalController also has a service named NormalService which is Autowired. The class should be defined in a new packaged named controller after which the package structure would look like
->src ->main ->java ->com.darshitpp.redis.redisutil ->configuration ->domain ->controller
Our basic operations would be simple CRUD like operations which NormalService implements using a custom Operations interface.
public interface Operations { User get(String firstName, String lastName); void put(User user); void delete(String firstName); }
To use Lettuce in our application, we need to do a couple of more things though. Just like to access JDBC, there's a provision for a JdbcTemplate, you must similarly use a RedisTemplate to operate on Redis. We must also define in what format will Redis store the data inside it. By default, it stores data as a String. However, know that you'll be storing User in Redis, and in order to facilitate the storage and fetch from Redis, you would need a way through which Redis will be able to identify and convert it back to the appropriate type of data you want. Think of this as talking with someone who doesn't know the same language as you do. If you want to communicate with someone who only speaks Spanish, you would need to find a translator who would convert English into Spanish for you. This process of conversion and recovery is known as Serialization and Deserialization. English to Spanish = Serialization Spanish to English = Deserialization Thus, we need a translator or a Serializer in our case too. We would be using Jackson for this process. Jackson is a nifty library which Spring Boot supports out-of-the-box to handle Json. We would need to create a Serializer which implements RedisSerializer for our purposes. In our case, I have created a class JsonRedisSerializer inside a new package called serializer.
class JsonRedisSerializer<T> implements RedisSerializer<T> { public static final Charset DEFAULT_CHARSET; private final JavaType javaType; private ObjectMapper objectMapper = new ObjectMapper() .registerModules(new Jdk8Module(), new JavaTimeModule(), new ParameterNamesModule(JsonCreator.Mode.PROPERTIES)) .configure(SerializationFeature.WRITE_DATES_AS_TIMESTAMPS, true) .configure(SerializationFeature.FAIL_ON_EMPTY_BEANS, false) .configure(DeserializationFeature.FAIL_ON_UNKNOWN_PROPERTIES, false) .setSerializationInclusion(JsonInclude.Include.NON_NULL); public JsonRedisSerializer(Class<T> type) { this.javaType = JavaTypeHandler.getJavaType(type); } public T deserialize(@Nullable byte[] bytes) throws SerializationException { if (bytes == null || bytes.length == 0) { return null; } else { try { return this.objectMapper.readValue(bytes, 0, bytes.length, this.javaType); } catch (Exception ex) { throw new SerializationException("Could not read JSON: " + ex.getMessage(), ex); } } } public byte[] serialize(@Nullable Object value) throws SerializationException { if (value == null) { return new byte[0]; } else { try { return this.objectMapper.writeValueAsBytes(value); } catch (Exception ex) { throw new SerializationException("Could not write JSON: " + ex.getMessage(), ex); } } } static { DEFAULT_CHARSET = StandardCharsets.UTF_8; } }
As you can see, it has two methods called serialize and deserialize. Each of these methods use the Jackson's ObjectMapper for conversion. There is also a class named JavaTypeHandler which helps you get the Type of the object you're trying to serialize.
final class JavaTypeHandler { static <T> JavaType getJavaType(Class<T> clazz) { return TypeFactory.defaultInstance().constructType(clazz); } }
Consequently, we would also need a class which returns us a RedisTemplate which utilizes this serializer. I would name this class RedisSerializationBuilder.
public final class RedisSerializationBuilder { public static <T> RedisTemplate<String, T> getNormalRedisTemplate(final LettuceConnectionFactory factory, final Class<T> clazz) { JsonRedisSerializer<T> jsonRedisSerializer = new JsonRedisSerializer<>(clazz); RedisTemplate<String, T> redisTemplate = new RedisTemplate<>(); redisTemplate.setConnectionFactory(factory); redisTemplate.setDefaultSerializer(RedisSerializer.json()); redisTemplate.setKeySerializer(RedisSerializer.string()); redisTemplate.setValueSerializer(RedisSerializer.string()); redisTemplate.setHashKeySerializer(RedisSerializer.string()); redisTemplate.setHashValueSerializer(jsonRedisSerializer); redisTemplate.afterPropertiesSet(); return redisTemplate; } }
Notice that the above method will return you a template specific to a particular domain model(in our case, the User) using Generics. It also specifies what connection factory is to be used, what should be the default key/value/hashKey/hashValue serializers. Consequently, the NormalService looks like
@Service public class NormalService implements Operations{ private final RedisTemplate<String, User> redisTemplate; private final HashOperations<String, String, User> hashOperations; public NormalService(LettuceConnectionFactory redisConnectionFactory) { this.redisTemplate = RedisSerializationBuilder.getNormalRedisTemplate(redisConnectionFactory, User.class); this.hashOperations = this.redisTemplate.opsForHash(); } @Override public User get(String firstName, String lastName) { return hashOperations.get(firstName, lastName); } @Override public void put(User user) { hashOperations.put(user.getFirstName(), user.getLastName(), user); } @Override public void delete(String firstName) { hashOperations.delete(firstName); } }
I then inserted a User, using the POST method, and URL: localhost:8080/normalService/insert Request Body:
{ "firstName": "Priscilla", "lastName": "Haymes", "birthday": "2020-04-12T11:15:00Z" }
If I then run this application for 100 Users, I find the following stats for the memory usage in Redis (I used the memory stats command using the redis-cli)
21) "keys.count" 22) (integer) 100 23) "keys.bytes-per-key" 24) (integer) 1044 25) "dataset.bytes" 26) (integer) 32840
Using the hgetall command for a key gives me
127.0.0.1:6379>hgetall "Priscilla" 1) "Haymes" 2) "{\"firstName\":\"Priscilla\",\"lastName\":\"Haymes\",\"birthday\":1586690100000}"
Notice that 2) gives us the actual type of data stored in Redis -> Json! Our basic structure for further optimizations is in place! Yay!
Optimization
MessagePack is here to the rescue! As I said, you'd need a "transalation" mechanism. What if the translator is an expert, and converts your English into Spanish in as few words as possible? MessagePack is the same! You would need to add two more dependencies in your pom.xml file.
<dependency> <groupId>org.msgpack</groupId> <artifactId>msgpack-core</artifactId> <version>0.8.20</version> </dependency> <dependency> <groupId>org.msgpack</groupId> <artifactId>jackson-dataformat-msgpack</artifactId> <version>0.8.20</version> </dependency>
We create a controller called MsgPackController and a service called MsgPackService almost similar to NormalController and NormalService. We would create a MsgPackSerializer to serialize using MessagePack.
class MsgPackRedisSerializer<T> implements RedisSerializer<T> { public static final Charset DEFAULT_CHARSET; private final JavaType javaType; private ObjectMapper objectMapper = new ObjectMapper(new MessagePackFactory()) .registerModules(new Jdk8Module(), new JavaTimeModule()) .configure(SerializationFeature.WRITE_DATES_AS_TIMESTAMPS, true) .configure(SerializationFeature.FAIL_ON_EMPTY_BEANS, false) .configure(DeserializationFeature.FAIL_ON_UNKNOWN_PROPERTIES, false) .setSerializationInclusion(JsonInclude.Include.NON_NULL); public MsgPackRedisSerializer(Class<T> type) { this.javaType = JavaTypeHandler.getJavaType(type); } public T deserialize(@Nullable byte[] bytes) throws SerializationException { if (bytes == null || bytes.length == 0) { return null; } else { try { return this.objectMapper.readValue(bytes, 0, bytes.length, this.javaType); } catch (Exception ex) { throw new SerializationException("Could not read MsgPack JSON: " + ex.getMessage(), ex); } } } public byte[] serialize(@Nullable Object value) throws SerializationException { if (value == null) { return new byte[0]; } else { try { return this.objectMapper.writeValueAsBytes(value); } catch (Exception ex) { throw new SerializationException("Could not write MsgPack JSON: " + ex.getMessage(), ex); } } } static { DEFAULT_CHARSET = StandardCharsets.UTF_8; } }
The only major noticeable change is an instance of MessagePackFactory being passed into the ObjectMapper. This would act as a bridge between binary and String formats of data between Redis and our Spring Boot application. Testing our changes (after clearing the previously utilized storage from redis gives us the following:
127.0.0.1:6379> hgetall "Priscilla" 1) "Haymes" 2) "\x83\xa9firstName\xa9Priscilla\xa8lastName\xa6Haymes\xa8birthday\xcf\x00\x00\x01qn\x19\x8b " 127.0.0.1:6379> memory stats . . . 21) "keys.count" 22) (integer) 100 23) "keys.bytes-per-key" 24) (integer) 876 25) "dataset.bytes" 26) (integer) 15976
Compare the dataset.bytes from the current memory to the previously recorded one. 15976 bytes vs 32840 bytes, nearly 50% reduction already! But wait, we can reduce it further. How, you ask. Compression! What if we compress the data and then store it? In our case it would work! This time, Snappy to the rescue! Your first question after this would be: compression and decompression takes time. Wouldn't it be detrimental on production? Snappy has the answer to this too.
It does not aim for maximum compression, or compatibility with any other compression library; instead, it aims for very high speeds and reasonable compression.
Using Snappy is also as simple as adding the dependency in pom.xml, and a couple of lines of code changes. Just add Snappy.compress while serialization and Snappy.decompress while deserialization.
<dependency> <groupId>org.xerial.snappy</groupId> <artifactId>snappy-java</artifactId> <version>1.1.7.3</version> </dependency>
Testing it again with the same inputs returns the following
127.0.0.1:6379> hgetall "Priscilla" 1) "Haymes" 2) "7\\\x83\xa9firstName\xa9Priscilla\xa8la\t\x13`\xa6Haymes\xa8birthday\xcf\x00\x00\x01qn\x19\x8b " 127.0.0.1:6379> memory stats . . . 21) "keys.count" 22) (integer) 100 23) "keys.bytes-per-key" 24) (integer) 873 25) "dataset.bytes" 26) (integer) 15720
You can see that the size of the data set is smaller, 15720 bytes vs 15976 bytes, a marginal difference, but with larger amounts of data, this difference increases. In my case, cleaning and restructuring the data, and utilizing the above techniques, we brought down the memory usage from 2GB to less than 500MB.
0 notes
Text
youtube
#java#coding#microservice#design pattern#design patterns python#spring boot#java design patterns#scheduler in spring boot example#prototype design pattern in java#Bridge Pattern Tutorial Explained with Examples in Java#Adapter Pattern Vs Bridge Pattern#singleton design pattern#java design#how to create spring boot project in intellij#factory design pattern in java#design patterns java#abstract factory design pattern example#Youtube
0 notes
Link
Spring Framework 5: Beginner to Guru
Spring Framework 5: Beginner to Guru
Spring Framework 5: Learn Spring Framework 5, Spring Boot 2, Spring MVC, Spring Data JPA, Spring Data MongoDB, Hibernate
What you'll learn
Spring Framework 5: Beginner to Guru
Learn the Spring Framework from an instructor who has worked for Pivotal customers as a Spring Source consultant, and has spoken at Spring One
Learn step by step how to build Spring applications using Spring Framework 5 and Spring Boot 2
You will develop Spring applications using best practices such as SOLID OOP, GitHub, Test Driven Development, and Continuous Integration Testing
You will understand how to access data using Spring Data JPA and Hibernate
Use Spring Framework 5 to build an end to end Reactive application with MongoDB
Learn About Reactive Programming with Spring Framework 5
Build web applications using Spring MVC
See how to run a Spring Boot application inside a Docker container
Get access to a Spring Boot Application Cookbook
Requirements
Basic Java knowledge is required
HTML Knowledge is very helpful
Knowledge of SQL and databases is helpful
Description
Learn Spring with the most modern and comprehensive course available for Spring Framework 5 and Spring Boot 2. You will see how to build multiple real-world applications using Spring Framework 5.
This is the only major Spring Framework course on Udemy developed completely on version 5 of the Spring Framework.
Be careful of Spring Framework 4 courses, which have just added some content for Spring Framework 5.
This course shows you the latest Spring programming technologies and real-world industry best practices.
You will learn to be a Spring Framework Guru!
★★★★★ What real students are saying about this course ★★★★★
★★★★★ Really great course :) Tons of information about not only spring but also testing, docker, databases. I really recommend this one! Thank you, John :)
★★★★★ John Thompson is one of the best instructors on Udemy and is the best Spring instructor. Awesome voice and clear explanations and slides.
★★★★★ I am an experienced Client-side programmer with over 7 years of experience, currently in the process of migrating to the back-end. Before this course, I have tried many other courses, so I really mean this when I say it, this course is outstanding! The instructor is so expired and passionate about programming, It's addictive.
★★★★★ This course covers the Spring Framework from A - Z, including newer concepts like Reactive and Webflux. The apps built along the way mimic real-world apps and the assignments help reinforce the learning along the way. It assumes some Java experience, although not much. Overall I feel competent in Spring after having taken this course.
★★★★★ This has to be the best bang-for-buck course I've taken - ANYWHERE! This course covers a LOT of ground, getting your hands dirty with lots of other technologies and frameworks along the way (Mockito, Lombok, Docker, MySQL, H2, MongoDB, JUnit, CicleCI). If you're sitting on the fence about taking this course, take the plunge!
★★★★★ Unparalleled quality. The sheer volume of content in this course is absurd. There are so many unique resources that you can take advantage of to help you learn Spring. I have never seen an instructor work this hard to provide his student's value from a course.
Inside This Course
The in-demand technologies you will use to build Spring Framework applications include:
Spring Framework 5
Spring Boot 2
Spring Data JPA
Spring MVC
Spring MockMVC
Spring WebFlux
Spring Web Client
Spring Data MongoDB
Spring RestDocs
Hibernate
Project Lombok
MapStruct
Maven
Gradle
JUnit 4 and JUnit 5
Mockito
All source code examples used in this course have been developed using the latest version of the Spring Framework - Spring Framework 5 and Spring Boot 2.
You will see how modern Spring Framework development is done by leveraging the features of Spring Boot 2.
ALSO READ: Learn How To Code: Google's Go (golang) Programming Language
Jump In and Build a Spring MVC App with Spring Boot!
We'll jump right into web development with the Spring Framework. I'll show you how to kick off a Spring Boot project by using the Spring Initializr. We will then go step by step to build a simple Book / Author web application.
You will see how easy it is to use Spring Boot, Spring MVC, and Spring Data JPA to create a functional web application running under Tomcat with an H2 in-memory database.
Use Test-Driven Development!
In addition to teaching you Spring Framework 5, you will learn about modern best practices used in enterprise application development.
As we build the applications, you'll see me using Test Driven Development (TDD) with JUnit and Mockito.
You will learn how to test Spring applications using JUnit 4 and JUnit 5. While JUnit 5 has been released for some time, many companies are still using JUnit 4.
See how using Mockito mocks will keep your Spring Framework unit tests light and fast!
You'll also see how the Spring context can be used for more complex integration tests.
These techniques are best practices used by companies all over the world to build and manage large scale Spring Framework applications.
GitHub Source Code
You will have complete access to all source code examples used in the course.
In each lesson where we write code, you will have a link to GitHub with two branches in the Github repository.
The first branch is the starting state of the code.
The second branch is the ending state of the code.
You can see exactly what changed in each lesson. Each step of the way, you have a working example you can use for troubleshooting.
In fact, you will get access to 24 (and growing!) different GitHub repositories - each packed with Spring Framework programming examples.
And, you're encouraged to fork my GitHub repositories so you can share the Spring Framework applications, which you built, to future employers!
Continuous Integration Builds
Since we are using GitHub and have great test coverage, I also show you how easy it is to set up Continuous Integration builds with CircleCI.
Continuous Integration builds are another best practice used by enterprise developers.
Using CircleCI makes your CI build a snap!
Project Lombok
We all know Java development can require a lot of boilerplate code. It's just the nature of Java.
Would you like to see how to slash your boilerplate code using Project Lombok?
Spring Data JPA and Hibernate
Spring MVC and Hibernate have long been cornerstones of the Spring Framework. You will learn how to use Spring MVC, Spring Data JPA and Hibernate to build a real-world web application. You'll learn about Hibernate configuration, and about the mapping of JPA entities.
The Thymeleaf template engine is hugely popular with the Spring community. You will see how easy Spring Boot makes using Thymeleaf with Spring MVC.
While Bootstrap CSS is not a focus of the course, we will leverage Bootstrap CSS to make our web pages look awesome!
Spring MVC
Spring MVC has a lot of robust capabilities.
I start you off showing you how to build recipe application (using TDD, of course).
Initially, it's all happy path development. We go back and add custom exception handling, form validation, and internationalization.
In the course, you will also learn how to use Spring MVC to create RESTful APIs.
Reactive Programming
A big theme of Spring Framework 5 is Reactive Programming.
Inside the course, we build a web application using Thymeleaf, Spring MVC, Spring Data MongoDB, and MongoDB.
We then take the MongoDB application we built and convert it into a Reactive application. You'll see how you can leverage the new Reactive types inside the Spring Framework from the data tier to the web tier.
You will get to see step by step how to convert a traditional Spring MVC application to an end to end reactive application using the WebFlux framework - which is brand new to Spring Framework 5.
Spring Pet Clinic
Spring Pet Clinic is a classic reference application used to demonstrate best practices. The Pet Clinic application actually has its origin within the J2EE/JEE community.
The Spring Framework team took the original Pet Clinic application and rebuilt it using Spring, to demonstrate best practices.
In this course, we will re-create the Spring Pet Clinic application.
You will get to see how to create a Spring Framework application from the ground up. Step by Step.
The approach used to develop the Spring Pet Clinic application is slightly different than the other applications developed in the course.
In addition to showing you how to build a Spring Framework application, you will see best practices in software development.
We start off the Pet Clinic project by creating a GitHub repository. Then using Spring Initializer to generate the basic shell of Spring Boot project.
Next, you see how to use GitHub to mimic Agile development practices, such as using issues and a backlog.
We plan the development of the Spring Pet Clinic using GitHub Issues. Planning work into issues creates a work backlog, which is an important Agile concept.
In fact, many organizations have a formal rule that no code is changed without having an issue or some type of ticket (in Github, Jira, or some other issue tracker)
From there, we use GitHub issues to complete programming assignments. Lessons start with a GitHub ticket, then we complete the programming assignment.
You will see how to build a Spring Framework application, step by step, using best practices in software development.
Course Extra - IntelliJ IDEA Ultimate
Students enrolling in the course can receive a free 4-month trial license to IntelliJ IDEA Ultimate! Get hands-on experience using the Java IDE preferred by Spring Framework professionals!
Course Extra - Access to a Private Slack Community
You're not just enrolling in a course --> You are joining a community learning Spring.
With your enrollment to the course, you can access an exclusive Slack community. Get help from the instructor and other Spring Framework Gurus from around the world - in real-time! This community is only available to students enrolled in this course.
This is a very active Slack community with over 9,300 Spring Framework Gurus!
This is the largest online community of people learning Spring in the world.
With your enrollment, you can join this community of awesome gurus!
Course Extra - Spring Boot Cookbook!
Inside this course, I'm including a Spring Boot Cookbook. You will have complete examples of using the Spring Framework with popular open-source technologies. When you get hired as a Spring Framework developer, you'll have ready-made Spring Framework examples!
My Spring Boot Cookbook includes example Spring Boot projects for:
MongoDB
MySQL
Postgres
Maria DB
DB2 Express
Neo4J
Redis
Cassandra
ActiveMQ
RabbitMQ
Course Extra - Learn Docker!
Docker is an exciting technology that is on fire right now!
As a course extra, I'm including the first 3 sections from my top rated Docker for Java Developers course. You will learn more about what Docker is and how you can deploy and run a Spring Boot application inside a Docker container.
For Java developers, Docker really is a game-changer!
Closed Captioning / Subtitles
Closed captioning in English is available for all course videos!
PDF Downloads
All keynote presentations are available for you to download as PDFs.
Lifetime Access
When you purchase this course, you will receive lifetime access! You can log in anytime from anywhere to access the course content.
No-Risk - Money-Back Guarantee
You can buy this course with no risk. If you are unhappy with the course, for any reason, you can get a complete refund. The course has a 30 day Money Back Guarantee.
Future Proof Your Programming Career
There is a huge demand for Spring Framework developers. Downloads of Spring Boot are up 425% year over year, while Gartner Research is calling Java EE "Obsolete".
The market trends are clear.
Popularity for JEE is rapidly declining.
The popularity of the Spring Framework is growing.
Spring Framework 5 is packed with exciting and innovative new features making it a natural choice for enterprise application development.
Excellent Course! It has a lot of useful material. An instructor is a passionate person and he is really helpful. You can always count on him. This course includes Slack Room. So, you can be part of the Java Community and there is always someone who helps you. I recommend this course, it's really very good.
★★★★★ The course is amazing and I am learning so much from this course. I am getting vibes that I'll become spring framework Guru!
★★★★★ Right now it seems like he is cool and funny and seems to know what he does. He also seems to update the course regularly and to interact with his students. If I could give him more than 5 stars I definitely would!
★★★★★ The lecture so amazing I learn this for about one month with great results I got a new job as a backend developer. Thank you, GURU! Keep working for another great lecture!
Future proof your programming career. Start learning how to build modern applications using the Spring Framework and enroll in this course today!
ALSO READ: iOS 13 & Swift 5 - The Complete iOS App Development Bootcamp
Who this course is for:
This course is ideal for Java developers who wish to use the Spring Framework for enterprise application development
Spring Framework 5: Beginner to Guru
Created by John Thompson
Last updated 11/2019
English
English [Auto-generated]
Size: 18.21 GB
Download Now
Content From: https://ift.tt/2M0fGkI
0 notes
Text
Spring Initializr, Meet Your Perfect Match for Event-Driven Microservices: PubSub+
If you’re not familiar with start.spring.io, it hosts the Spring Engineering team’s opinionated version of Spring Initializr, which allows developers to generate Spring Boot projects pre-populated with the dependencies they need to get started quickly.
Spring Developer Advocate Josh Long calls start.spring.io the “second-best place on the internet,” and it just got better! Why do I say that? Because Solace PubSub+ is now available on start.spring.io, enabling developers to create event-driven microservices.
Did you know?
At SpringOne Platform 2019, Spring announced that developers use start.spring.io to generate 15 million projects each year! And that number is growing by 64% per year.
As a developer who has been creating event-driven applications with a combination of the Spring Framework and Solace PubSub+ for about eight years, I love how the developer experience keeps improving. This is the next step.
When selected as a dependency on Initializr at start.spring.io, the `Solace PubSub+’ option informs Initializr to add the Solace JMS Spring Boot Starter to the maven pom or build.gradle file as a dependency. This enables autoconfiguration of a ConnectionFactory or JndiTemplate, allowing developers to use Spring Boot to easily create event-driven microservices with PubSub+ and the JMS API. Using PubSub+ to create event-driven microservices empowers developers to use the best message exchange patterns for their use case, such as publish/subscribe, queuing, request/reply and it even provides the ability to store & replay. The use of PubSub+ also allows developers to take advantage of all the benefits of having events flow over the Event Mesh, such as being able to communicate with applications using other APIs and protocols and built-in high availability and disaster recovery.
Maven Example:
<dependency> <groupId>com.solace.spring.boot</groupId> <artifactId>solace-jms-spring-boot-starter</artifactId> <version>3.2.0</version> </dependency>
Want to give it a shot? Spring Initializr offers several ways to generate your Spring Boot project. You can do it using the Web UI, from your favorite IDE or even from the command-line.
Web: Use this link to spring.io to use the Initializr Web UI, and yes it even offers a dark mode! You can choose your project type (Maven or Gradle), programming language, project dependencies and more. You’ll find the Solace PubSub+ dependency by looking under the “Messaging” section, searching for “solace” or if you use the link above, we’ve pre-populated the Solace PubSub+ dependency for you ;). Once you’ve made your choices, click the Generate button to download a zip file of your Spring Boot project.
IDE: You can also create Spring Boot projects from your favorite IDE. These IDEs currently support Initializr: Spring Tool Suite, IntelliJ IDEA Ultimate, NetBeans (with this plugin) or VSCode (with the vscode-spring-initializr plugin). Which Initializr do you think they use by default? If you guessed the one at start.spring.io, you’re correct. For example, when using the Spring Tool Suite IDE for development, you can create a new Spring Starter Project and under the covers Initializr will generate your project. Check out the options available in the image below. After choosing those initial options and selecting Next, you will be asked to choose dependencies. You’ll find Solace PubSub+ under the Messaging dropdown. Choose it, click Finish, and a Spring Boot project is generated right in your IDE.
CLI: Not a fan of a GUI? No worries, you can generate Spring Boot projects from the command line as well. For example, if you want to generate a zip file containing a project with Java 11 and Solace PubSub+ as a dependency, you could execute: curl https://start.spring.io/starter.zip -d dependencies=solace -d javaVersion=11 -o demo.zip Or to see all available options, execute `curl -XGET https://start.spring.io` as seen in the image below.
Now that you’ve used Spring Initializr to generate your Spring Boot project with Solace’s Spring Boot JMS Starter as a dependency, it’s time to code your event-driven microservice. You can learn more about using our Spring Boot JMS Starter using the following resources:
Blog: https://solace.com/blog/solace-jms-meet-spring-boot-starters/
Tutorial: https://solace.com/samples/solace-samples-spring/spring-boot-autoconfigure/
If you have any questions, feel free to ask them in the Solace Developer Community with the `Spring` tag.
And if you love start.spring.io so much that you want to learn more about how it works, watch Stéphane Nicoll’s talk from SpringOne Platform 2019: Creating “The Second Best Place on the Internet” with Spring Initializr
The Spring + Solace developer experience has come a long way in the last eight years and I’m excited to see it continuously improve. Check out solace.com/spring to see all the ways you can use Spring with Solace and stay tuned for more upcoming Spring + Solace news. Hint: SolaceYSpring & SolaceYAsyncAPI. Until next time, Happy Eventing!
The post Spring Initializr, Meet Your Perfect Match for Event-Driven Microservices: PubSub+ appeared first on Solace.
Spring Initializr, Meet Your Perfect Match for Event-Driven Microservices: PubSub+ published first on https://jiohow.tumblr.com/
0 notes
Text
IntelliJ IDEA 2018.2 auto-detection for Spring Boot and the ‘Run Dashboard’
In an earlier post we explained how to enable the Spring Boot Run Dashboard in IntelliJ IDEA 2017.2. The workaround at that time was not really easy, and due to the ever-increasing popularity of Spring Boot, the community certainly expected IDEA to make it easier to handle the dashboard with future releases. Now some time has passed and in the last few weeks we got more and more feedback about our existing blog post. People claimed that our proposed workaround no longer works.
So it seems that something has changed.
The good part is, IDEA has added automatic detection for Spring Boot applications. For example, if you create a new application or import an existing application, IntelliJ will use a notification prompting you to add the Spring Boot configuration to the Run Dashboard.
Unfortunately, if you miss (or reject) this pop-up, there is no Run Dashboard at all and you have to activate it yourself. And that’s still not comfortable.
The new approach:
IDEA has changed the way to enable the Run Dashboard and it is no longer necessary to customize the boot VM options. To enable the dashboard for version 2018.2 you have to modify the execution configuration templates and add ‘Spring Boot’ to the available Run Dashboard configurations.
After that, each Spring Boot application (each module in your project) will be displayed in the Run Dashboard. It therefore only has to be executed once per project.
Although the automatic detection feature is really helpful, the manual activation is still neither transparent nor intuitive, and hopefully it will improve in some way.
Der Beitrag IntelliJ IDEA 2018.2 auto-detection for Spring Boot and the ‘Run Dashboard’ erschien zuerst auf codecentric AG Blog.
IntelliJ IDEA 2018.2 auto-detection for Spring Boot and the ‘Run Dashboard’ published first on https://medium.com/@koresol
0 notes
Video
youtube
How to Creating a New Spring Boot Project in IntelliJ Idea and Spring Initilizr
via https://youtu.be/wFtCSc-4nYw
#New Spring Boot Project#spring#spring boot#spring initilizr#intellij idea#intellijidea#intellijidea spring boot
0 notes
Text
youtube
#java#coding#microservice#design pattern#design patterns python#spring boot#java design patterns#scheduler in spring boot example#prototype design pattern in java#Bridge Pattern Tutorial Explained with Examples in Java#Adapter Pattern Vs Bridge Pattern#singleton design pattern#java design#how to create spring boot project in intellij#factory design pattern in java#design patterns java#abstract factory design pattern example#cronexpression#job automation#job scheduler#Youtube
0 notes