#how to export from figma
Explore tagged Tumblr posts
Visit Tumblr Blog
Explore Tumblr blogs with no restrictions, modern design and the best experience.
Last Seen Tumblr Blogs


Fun Fact
There were a total of 171.5 billion posts on Tumblr in 2019.
Text
Which tools every UIUX designer must master?
Gaining proficiency with the appropriate tools can greatly improve your workflow and design quality as a UI/UX designer. The following are some tools that any UI/UX designer has to know how to use:
1. Design Tools:
Figma: One of the most popular and versatile design tools today. It’s web-based, allowing real-time collaboration, and great for designing interfaces, creating prototypes, and sharing feedback.
Sketch: A vector-based design tool that's been the go-to for many UI designers. It's particularly useful for macOS users and has extensive plugins to extend its capabilities.
Adobe XD: Part of Adobe's Creative Cloud, this tool offers robust prototyping features along with design functionalities. It’s ideal for those already using other Adobe products like Photoshop or Illustrator.
2. Prototyping & Wireframing:
InVision: Great for creating interactive prototypes from static designs. It’s widely used for testing design ideas with stakeholders and users before development.
Balsamiq: A simple wireframing tool that helps you quickly sketch out low-fidelity designs. It’s great for initial brainstorming and wireframing ideas.
3. User Research & Testing:
UserTesting: A platform that allows you to get user feedback on your designs quickly by testing with real users.
Lookback: This tool enables live user testing and allows you to watch users interact with your designs, capturing their thoughts and reactions in real time.
Hotjar: Useful for heatmaps and recording user sessions to analyze how people interact with your live website or app.
4. Collaboration & Handoff Tools:
Zeplin: A tool that helps bridge the gap between design and development by providing detailed specs and assets to developers in an easy-to-follow format.
Abstract: A version control system for design files, Abstract is essential for teams working on large projects, helping manage and merge multiple design versions.
5. Illustration & Icon Design:
Adobe Illustrator: The industry standard for creating scalable vector illustrations and icons. If your design requires custom illustrations or complex vector work, mastering Illustrator is a must.
Affinity Designer: An alternative to Illustrator with many of the same capabilities, but with a one-time payment model instead of a subscription.
6. Typography & Color Tools:
FontBase: A robust font management tool that helps designers preview, organize, and activate fonts for their projects.
Coolors: A color scheme generator that helps designers create harmonious color palettes, which can be exported directly into your design software.
7. Project Management & Communication:
Trello: A simple project management tool that helps you organize your tasks, collaborate with team members, and track progress.
Slack: Essential for team communication, Slack integrates with many design tools and streamlines feedback, updates, and discussion.
8 notes
·
View notes
Text
like the phoenix feel as though im burnt to ash and born anew every time i open figma and have to re-learn how to export images from the tangled rats nest of their components
5 notes
·
View notes
Text
Tools We Use for Collaborative Design That Clients Love
In the world of modern design, collaboration isn’t just helpful—it’s essential. At Transcurators, we believe that the best outcomes happen when our creative team and clients work together throughout the design process. And for that, the right tools make all the difference.
Gone are the days of endless email chains, blurry PDFs, and feedback lost in translation. Thanks to a thoughtful tech stack, our workflow is built for speed, clarity, and transparency. These tools don’t just help us create stunning designs—they help you feel more involved, informed, and in control.
And when paired with our expert Graphic Designing Services, this collaborative ecosystem delivers a design experience clients genuinely enjoy.
Here’s a behind-the-scenes look at the collaborative tools we use—and why our clients love them.
1. Figma: Real-Time Collaboration, Simplified
Figma is our go-to tool for interface design, website layouts, and brand mockups. What makes it a client favorite?
Live collaboration: Clients can view progress in real time, leave comments directly on elements, and watch changes unfold as we work.
No downloads needed: Just a browser and a link.
Version control: Every iteration is tracked, making feedback loops smoother and changes easily reversible.
It’s like Google Docs for design—and clients love the transparency.
2. Notion: One Hub for Everything
We use Notion as our central dashboard for each design project. It helps us organize:
Creative briefs
Timelines and status updates
Reference materials
Client feedback and notes
Clients can view their entire project status in one glance—no scattered messages or missing files. This keeps communication streamlined and expectations aligned.
3. Slack: Instant, Human Communication
While emails still have their place, we prefer Slack channels for day-to-day design collaboration. With dedicated project threads, shared file access, and quick updates, Slack creates a space where clients can:
Ask real-time questions
Approve quick changes
Get updates without formal meetings
It’s casual, direct, and helps build stronger relationships beyond just tasks.
4. Loom: Visual Feedback Without the Call
Sometimes, explaining feedback in text just doesn’t cut it. That’s where Loom shines.
We use Loom to:
Walk through design concepts visually
Present ideas asynchronously
Share screen-recorded feedback summaries
Clients can reply in their own time, watch updates, and leave voice or text comments. It’s ideal for busy professionals who want to stay involved without scheduling calls.
5. Trello: Clear, Visual Project Tracking
Trello gives clients a kanban-style view of how their project is moving—from concept to delivery. It’s a favorite for those who like visual timelines and status cards.
Each board includes:
Task breakdowns
Progress labels
Comment threads for context
It’s especially useful for multi-phase projects like rebranding, multi-page website builds, or monthly creative retainers.
6. Google Drive: The Reliable Workhorse
Some things never go out of style. For shared assets, presentation decks, and high-resolution file storage, we use Google Drive—organized with folders per client and project phase.
Clients can access, comment, download, and upload in a format they already use and trust.
7. Adobe Creative Cloud: The Core Design Powerhouse
While collaboration tools are essential, the foundation of our creative process still lies in Adobe’s suite—Photoshop, Illustrator, InDesign, After Effects, and more.
We combine Adobe’s design power with collaborative previews (via Figma, PDFs, or exported snippets) so you get the best of both worlds—high-end design quality with collaborative ease.
8. Frame.io: For Video Design Collaboration
For clients working on motion graphics, video intros, or animated explainers, Frame.io makes collaboration seamless. It allows:
Frame-by-frame feedback
Timestamped comments
Easy approvals and revisions
This tool is ideal for marketing teams, YouTubers, and startups building branded video assets.
Conclusion: Collaboration Is a Design Superpower
When clients feel included in the process, magic happens. Faster feedback. Fewer revisions. Better results. At Transcurators, we don’t just create designs—we build relationships powered by clarity, collaboration, and creativity.
If you're tired of unclear design processes or communication gaps with freelancers, it's time to try something different. Our Graphic Designing Services are built on collaborative tools and a client-first mindset. Because we believe great design shouldn’t just look good—it should feel good to create.
0 notes
Text
Figma for Beginner
Figma, a collaborative interface design tool. In contrast to standalone programs like Sketch or Adobe Illustrator, Figma can be operated fully within a web browser, making it compatible with both Macs and Windows-based PCs. You may use it for free, too
Figma's ability to facilitate real-time collaboration on a single file is another significant benefit. If designers wish to share their work using traditional "offline" programs like Sketch and Illustrator, they usually need to export it to an image file and then send it by email or instant messaging. So here’s how to use Figma for beginners
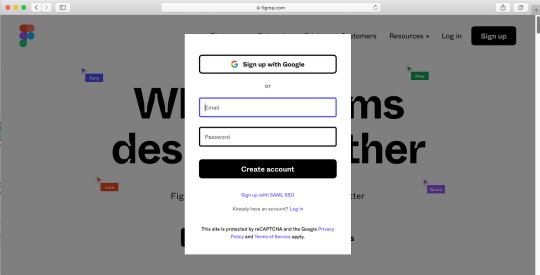
Step 1
Visit www.figma.com on any website, select "Get started," input your information, and do a brief verification task. If you already have an account, sign in. A page with a few additional onboarding questions will appear once you complete that, and then Figma will launch a project file with some samples of what you can build using the tool.
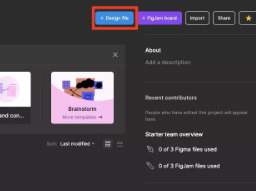
Step 2
Click the Figma button in the upper left corner, choose File, and then choose "New design file." This should open a new file in a new tab in your browser with an empty canvas. Let's begin a new project.
Step 3
Press F to select the Frame Tool or you can click the Frame tool icon in the toolbar at the bottom of the status bar. In essence, a frame is an element that contains other components. If you have ever used Sketch or Adobe Illustrator, you will know that they work similarly to an artboard.

There are two methods for making a frame. We may choose a preset Frame size from the Properties box on the right side of the window, or we can click and drag in the canvas area

Step 4
Let's type some words. To create a Text layer, click anywhere in your frame after selecting the Text tool by pressing T. This will be incorporated into the design of a button. Use auto layout to dynamically modify alignment and fill in with colors. You'll save time and create responsive and flexible designs as a result.
Step 5
Create a rectangle and arrange the layers. To select the Rectangle tool, press R. Around the words you just made, drag a rectangle that resembles a button.

The text is now obscured by the rectangle. We must utilize Figma's "Arrange" instructions to resolve this. Navigate to the Layers panel located on the window's left side. After selecting the text layer, a variety of choices will appear when you right-click. After selecting "Bring to front," the text will now be positioned above the rectangle.

Step 6
Change the rectangle's color and give it rounded corners. Choose the newly formed rectangular shape. It is possible to round the corners of any form using the "Corner Radius" parameter in the Properties panel. Enter the amount of pixels you want to round each corner here.

Step 7
Now, you’ll make a UI by using prototype. Add the frames and go to prototype at the right side of windows. Click the button you made then click the blue add button and drag it to the other frame to make the interaction. You can apply animation if you want and preview it to test it out.

Now you're learning how to develop user interfaces. Feel free to explore Figma more. Developing concepts and references for websites, mobile applications, and other goods may be enjoyable. Additionally, the user experience prototype.
0 notes
Text
The Ultimate Product Launch Toolkit: ProtoBoost.ai — Featuring AI Powered Prototyping

Launching a new product is one of the most exciting—and stressful—phases of any startup or innovation journey. From validating your idea to designing a prototype, gathering feedback, and preparing for launch, each step must be carefully executed. What if you could do all of this faster, smarter, and more affordably? Enter ProtoBoost.ai, your AI-powered product launch toolkit designed to accelerate innovation from concept to market.
🚀 Meet ProtoBoost.ai: Your AI-Powered Product Companion
ProtoBoost.ai is an advanced AI-driven platform that empowers startups, product teams, and entrepreneurs to ideate, validate, and prototype digital products rapidly. Designed to eliminate the guesswork and inefficiencies that slow down product launches, ProtoBoost streamlines the entire journey from idea to MVP.
With ProtoBoost.ai, you can:
Validate your product idea with AI feedback and market insights
Instantly generate functional UI prototypes based on your idea
Create user personas tailored to your target market
Iterate designs with smart suggestions and data
Accelerate your product launch with confidence
In short, it’s a complete AI-powered product launch toolkit.
📺 Watch ProtoBoost in Action
See how ProtoBoost.ai brings your ideas to life in minutes in this overview video:
📽️ ProtoBoost Overview – YouTube
youtube
🧠 Why Traditional Product Launches Fail
Before diving into how ProtoBoost helps, it's important to understand why so many products fail to take off. Common issues include:
Lack of proper idea validation
Delayed or incomplete prototyping
Misalignment between teams and stakeholders
Budget overrun due to costly design iterations
Poor product-market fit
Many startups burn months and thousands of dollars building the wrong product—or the right product too slowly. ProtoBoost solves this by bringing automation, intelligence, and real-time feedback into every stage of product development.
🧰 The ProtoBoost Toolkit: Core Features Explained
ProtoBoost.ai is more than a prototyping tool. It’s a comprehensive suite of AI-powered modules that support your product from idea to launch. Here’s how it works:
1. 🔍 AI-Powered Idea Validator
Got a product idea? Paste it into ProtoBoost and let the AI analyze it instantly. The platform evaluates your concept for:
Market demand and trends
Feasibility and competition
Target audience fit
Potential risk factors
You'll receive a validation score along with actionable suggestions to improve your concept before investing resources.
2. ✨ AI Prototype Generator
Once your idea is validated, ProtoBoost uses generative AI to build a working prototype—no design skills required.
Just describe your product (e.g., “A budgeting app for freelancers with income tracking and invoice generation”), and ProtoBoost will instantly generate:
Wireframes and user flows
UI elements and layout suggestions
Interactive mockups tailored to user personas
You can export designs to Figma, Webflow, or development-ready formats for quick handoff to developers.
3. 🧬 Smart User Persona Builder
Understanding your audience is key to building a successful product. ProtoBoost’s AI persona generator crafts detailed user personas based on your idea and market data.
Each persona includes:
Demographics and psychographics
Pain points and goals
Device usage and behavior
Custom feature preferences
Use these personas to guide your UX decisions and marketing strategies.
4. 📊 Insight Dashboard
ProtoBoost aggregates real-time data and offers visual insights into:
User behavior simulations
A/B testing suggestions
Market positioning
Competitor comparisons
You’ll know exactly where your product stands before launching—and what to improve.
5. 🤝 Collaborative Prototyping
Invite your team, investors, or mentors to collaborate in real time. Comment on wireframes, adjust prototypes, and co-create without switching platforms. This shared environment ensures alignment and faster decision-making.
💥 Real-World Scenario: ProtoBoost in Action
Let’s say you're a founder with an idea for a productivity app for remote teams. Here's how ProtoBoost helps:
1. Validate the Idea
You input: “A productivity dashboard that helps remote teams track tasks, time zones, and communication.”
ProtoBoost analyzes the idea and identifies high market demand in remote work tools, but suggests adding integrations with Slack and Zoom to improve value.
2. Build a Prototype
ProtoBoost generates a working dashboard UI with team lists, time zone displays, task boards, and messaging windows.
3. Create User Personas
It generates personas for remote managers, freelancers, and developers—each with unique needs that influence design and features.
4. Collaborate
You share the prototype with your team, who leave feedback on layout and functionality.
5. Launch with Confidence
You export the validated, tested prototype to your dev team. Launch time is cut in half, and early users are already loving the UX.
⚡ Speed and Simplicity for Any Founder
ProtoBoost is designed with non-technical founders in mind. You don’t need to be a designer or developer. Just bring your idea—ProtoBoost handles the rest. The AI interprets your input and turns it into an interactive, high-fidelity prototype you can test, pitch, and build.
🧩 Integration-Ready
ProtoBoost is built to fit into your existing workflow. Export prototypes to:
Figma for design fine-tuning
Webflow for no-code implementation
HTML/CSS/JS for direct development
You can even integrate with Trello, Notion, or Slack for seamless project management.
🔮 Why ProtoBoost is the Future of Product Development
AI is no longer a distant innovation—it’s the backbone of modern product creation. ProtoBoost.ai brings the power of AI to your fingertips, giving startups and innovation teams the ability to:
Launch products 3x faster
Avoid costly design mistakes
Understand user needs before development
Reduce risk and increase investor confidence
Whether you're building a mobile app, SaaS platform, or internal tool, ProtoBoost gives you the clarity and speed you need to get ahead.
🎯 Final Thoughts
Launching a product doesn’t have to be slow, expensive, or uncertain. With ProtoBoost.ai, you can move from an abstract idea to a validated prototype in days—not months. This AI-powered product launch toolkit is built for modern innovators who want to work smarter, not harder.
If you're tired of wasting time and money on unvalidated ideas, or if you need to speed up your product launch process, ProtoBoost.ai is your go-to solution.
The future of product innovation is here—and it’s powered by AI.
Let’s Build the Future Together
Ready to bring your next big idea to life with the power of AI? ProtoBoost is here to help every step of the way—from validation to prototyping to refinement.
📞 Contact us at: 415-200-2599
📲 Follow us on social media for updates, insights, and success stories:
LinkedIn
Twitter (X)
Instagram
YouTube
Pinterest
#AIPoweredPrototyping#ProtoBoost#AIDrivenPrototyping#RapidPrototyping WithAI#AIPrototypeGenerator#Prototyping#Youtube
0 notes
Text
Design Handoff: How to Work Smoothly With Developers
Web design is only half the battle. The handoff? That’s the real test. Designers often pour soul and sweat into pixel-perfect layouts, only to watch the final product fall short in development. Why, because design handoff is where harmony either thrives or dies.
This critical transition from design to code needs more than an email with an attachment. It requires strategy, clarity, and communication. Think of it like passing the baton in a relay. A flawless pass keeps the race alive. A sloppy one? Disaster.
So, let’s dive in and learn how to ensure efficient design handoff for your web design in Melbourne.
Table of Contents
What Is a Design Handoff?
Design handoff refers to the point where the creative torch is passed from the designer to the developer. It involves sharing all visual assets, documentation, specifications, and design intent with the person responsible for building the actual website or app.
This moment marks the shift from idea to implementation, and it often determines how accurately the final product matches the original vision.
Why Design Handoff Matters
A poor handoff causes friction. Designs break. Features don’t behave. Deadlines slip. Tensions rise.
But when done right, developers understand the vision. They build faster, cleaner., and more accurately. The experience becomes seamless for the team and the users.
Start With Collaboration, Not a File Transfer
Don’t vanish after the design is complete. Involve developers early. Sit together in the same (real or virtual) room. Discuss the goals. Understand constraints. Ask questions and be curious.
Designers and developers are not rivals. They are allies. One paints the picture. The other brings it to life. Communication bridges the gap between intention and execution.
Use the Right Tools for the Job
Clunky PDFs and disorganised folders belong in the past. Use tools that make the handoff intuitive and interactive.
– Figma: Offers real-time collaboration. Inspect tools for developers. Easy export of assets.
– Zeplin: Bridges design and development. It allows commenting, measurements, and code snippets.
– Adobe XD: Includes developer handoff features like specifications and styles.
Choose a tool that speaks the language of both worlds—design and code. It should reduce ambiguity, not add to it.
Be Ruthlessly Organised
Chaos kills momentum. Deliver design files that are squeaky clean.
– Name every layer clearly.
– Group components logically.
– Label buttons, icons, images, and text fields.
– Remove unused elements and clutter.
Treat your design file like a workspace someone else needs to enter. Clean desks inspire productivity, so do tidy design files.
Provide a Style Guide or Design System
Consistency is key. A developer shouldn’t have to guess what shade of blue to use or which button hover style applies. Create a style guide that includes:
– Fonts and sizes
– Colors and their hex/RGB codes
– Button states (normal, hover, active)
– Spacing and padding values
– Grid structure
Better yet, build a full design system. Developers will thank you.
Include Functional Annotations
Designs often speak in visuals. But visuals don’t speak for everything. So, explain interactions and describe behaviour. Does this card expand? Does this button animate? Should this menu slide or fade?
Add notes directly within the design tool. Point to the element. Explain its function. Developers aren’t mind-readers.
Define Responsive Behaviour
A desktop layout doesn’t automatically translate to mobile. Spell it out. Show how the design adapts to smaller screens.
Indicate breakpoints.
Provide mobile mockups.
Clarify what collapses, what hides, and what reflows.
Responsiveness is not an afterthought. It’s a requirement. Communicate it.
Clarify the Flow, Not Just the Frames
Individual screens are snapshots. Developers need the movie.
Map out the user journey. Use arrows, flows, or prototypes. Show how one screen leads to another. How does the user move from sign-in to the dashboard? What happens after a failed form submission?
Clear flows reduce assumptions. They boost accuracy and protect the experience.
Don’t Assume—Explain Everything
If you think “they’ll figure it out,” you’re gambling. Don’t bet on assumptions. Be explicit. If spacing matters, specify it. If icons change on hover, state it. If the form uses input masks, note it.
Details matter. Vague handoffs waste time.
Schedule a Walkthrough
Files are good, but conversations are better. So, hold a handoff meeting. Walk through the design. Explain goals, highlight tricky spots, invite questions, and welcome feedback. Face-to-face, voice-to-voice, or screen-to-screen—it doesn’t matter. A real-time walkthrough clears fog like nothing else.
Be Available Post-Handoff
Your role doesn’t end after the handoff. Be ready to clarify and answer follow-up questions. More importantly, adjust designs if necessary.
Developers may uncover edge cases or might need additional assets. So, stay accessible. Keep the flow alive.
Test Together, Improve Together
Once the design is live, join the testing phase. Compare design vs. build. Check spacing, typography, colour usage, and interaction states. Give constructive feedback. Spot bugs early. Suggest fixes.
Celebrate what works. Fix what doesn’t.
Testing isn’t just QA’s job. Designers own the experience, too.
Final Thoughts
Design handoff is not a file drop. It’s a conversation. A process. A partnership. It demands clarity, empathy, and precision.
Designers and developers speak different dialects, but they share the same goal—a brilliant product. When that baton is passed with care, the result is seamless, elegant, and cohesive. So, take the time and build the bridge. The space between design and code lies the magic of digital creation.
For more help with your web design in Melbourne, contact Make My Website (MMW). You will find their assistance vastly helpful.
0 notes
Text
Everything You Need to Know: Pros and Cons of Using Webflow
Table of Contents
What is Webflow, and Why Should You Use It?
Benefits of Developing Your Website Using Webflow
How Webflow Compares to Other Website Builders
Is Webflow Worth It for Your Next Website?
Features for Web Design and Development
Responsive Website Design with Webflow
Webflow Pricing Options
Understanding Webflow’s CMS
Pros and Cons of Using Webflow
Hiring Webflow Experts
Webflow FAQs
Building a website has become easier than ever. Yet, choosing the right tool to create and manage your website can be confusing. Among many options, Webflow has emerged as a popular platform. It offers a unique mix of visual design freedom and coding power. But is it the best choice for your needs? This guide explains everything about Webflow — its benefits, limitations, and who should use it.
What is Webflow?
Webflow is a cloud-based website design and development platform launched in 2013. It combines the ease of a drag-and-drop visual editor with the ability to generate clean, production-ready code. Webflow appeals mainly to designers, developers, marketers, and business owners who want high-quality websites without fully coding from scratch.
Unlike basic website builders such as Wix or Squarespace, which limit design options, Webflow gives you detailed control over layouts, styles, and animations. It also offers CMS (Content Management System) features, e-commerce tools, and hosting services.
How Does Webflow Work?
Webflow works in three key parts:
Designer Tool: This is the visual editor where you build your website by dragging, dropping, and styling elements. It looks similar to design software like Adobe XD or Figma but outputs real web code.
CMS & Editor: Webflow includes a flexible CMS where you can create collections (like blog posts, products, or portfolios) that dynamically feed content into your site design. The Editor allows content managers or clients to update text and images without breaking the design.
Hosting & Publishing: Once your design is ready, you can publish your site using Webflow’s fast, secure hosting or export the code to host elsewhere.
Why Do People Choose Webflow?
Webflow bridges the gap between traditional no-code builders and fully custom development. Here are some reasons it’s popular:
It empowers designers to create visually stunning sites with custom interactions.
It generates clean, maintainable code, unlike some drag-and-drop platforms.
It supports dynamic content and e-commerce without plugins.
Hosting with Webflow is simple, secure, and scalable.
In-Depth Pros of Using Webflow
1. Full Design Freedom and Pixel-Perfect Control
Webflow gives you granular control over every design detail. You can:
Control positioning using flexbox and grid layouts.
Customize typography with full font control.
Add interactions and animations without coding.
Create reusable symbols (like buttons or navbars) that update everywhere.
This level of freedom lets you build unique, branded websites that stand out, unlike template-based builders.
2. Clean, Standards-Compliant Code Output
When you publish your Webflow site, it outputs semantic HTML5, CSS3, and JavaScript. This code is clean and organized, making it easier for developers to:
Optimize for speed and SEO.
Add custom features by editing the exported code.
Ensure cross-browser compatibility.
This is a major advantage over builders that generate bloated or obfuscated code.
3. Responsive Design Made Simple
Webflow has built-in tools for responsive design. You can create styles specific to desktops, tablets, and phones. This ensures your website looks great on any device, which is critical today as mobile traffic often surpasses desktop.
The visual interface helps you preview how the site behaves at different screen sizes and adjust layouts accordingly.
4. Flexible Content Management System (CMS)
Webflow’s CMS allows you to build collections of content (like blog posts, products, or team members) that automatically populate pages.
It supports custom fields (text, images, dates, references).
Non-technical users can easily add or update content via the Editor interface.
Dynamic lists can display content in grid, list, or custom formats.
Content updates instantly reflect on the live site.
This system is ideal for blogs, portfolios, or small online stores that require content updates without developer help.
5. Growing E-commerce Functionality
Webflow offers e-commerce features for online shops, including:
Product catalogs with custom fields.
Shopping cart and checkout flows.
Payment gateways like Stripe and PayPal.
Customizable product and checkout page designs.
Order and customer management.
While it’s not as full-featured as Shopify or WooCommerce, it’s great for small to medium stores needing design flexibility.
6. Fast, Reliable Hosting With Security
Webflow’s hosting runs on AWS and Fastly, providing:
Global Content Delivery Network (CDN) for fast load times worldwide.
Free SSL certificates for HTTPS security.
Daily backups and automated updates.
Scalability without manual server management.
Hosting on Webflow means less hassle maintaining servers and security settings.
7. Excellent for Prototyping and Client Work
Many freelance designers and agencies use Webflow because it allows:
Rapid creation of interactive prototypes.
Easy sharing with clients for feedback.
Quick iterations without developer bottlenecks.
Seamless handoff by exporting clean code if needed.
Webflow also offers team collaboration features, helping designers and developers work together.
Detailed Cons of Using Webflow
1. Steeper Learning Curve Than Simple Builders
Though Webflow is easier than coding from scratch, it is more complex than beginner builders like Wix or Squarespace. New users may struggle with:
Understanding CSS box model, flexbox, and grid layouts.
Managing styles and classes efficiently.
Setting up interactions and animations.
Users without any design or web knowledge might feel overwhelmed at first.
2. Pricing is Higher Than Some Competitors
Webflow’s pricing consists of:
Site plans: For hosting individual sites.
Account plans: For designers/agencies managing multiple projects.
The costs can add up, especially for e-commerce sites or multiple projects. Cheaper alternatives exist, but they may offer less design freedom or features.
3. Limited Third-Party Integrations and Plugins
Webflow has fewer third-party plugins than WordPress or Shopify. While it supports essential integrations (Google Analytics, Zapier, etc.), specialized marketing tools or CRM systems may require custom development or API use.
This can limit functionality for businesses needing complex ecosystems.
4. No Built-In Multilingual Support
If you want to build a website in multiple languages, Webflow does not offer native multilingual management. You have to:
Duplicate pages for each language.
Use third-party tools or custom scripts.
This approach is less efficient and can impact SEO and site maintenance.
5. Exporting Dynamic CMS Data is Difficult
You can export the static code of your site, but dynamic CMS content does not export easily. If you want to move your content to another platform later, migrating CMS data can be tricky.
This limits portability for growing sites.
6. SEO Configuration Requires Manual Effort
Webflow gives you control over SEO metadata, URLs, and alt text but does not automate SEO best practices. You must manually:
Set meta titles and descriptions.
Manage sitemap and robots.txt.
Configure redirects and canonical tags.
Users unfamiliar with SEO might need additional help.
7. No Built-In Blogging Features Like WordPress
Although Webflow has CMS for blogs, it lacks:
Built-in comments or community features.
Large ecosystems of blog-related plugins.
Extensive SEO tools specific for blogging.
If blogging is a major focus, other platforms might offer more convenience.
When Should You Use Webflow?
Webflow is best for:
Professional designers wanting complete design control.
Businesses that need custom websites with CMS or small online stores.
Freelancers and agencies creating interactive prototypes or client websites.
Users wanting all-in-one hosting and design tools on a managed platform.
Projects requiring custom animations or advanced interactions without coding.
When Might You Avoid Webflow?
You might want to consider other options if:
You are a complete beginner looking for very simple site building.
You want the cheapest possible hosting and domain setup.
You need large-scale e-commerce with complex inventory and shipping.
You require multilingual websites with SEO-friendly language switching.
You prefer a large ecosystem of third-party plugins and themes.
Conclusion: Is Webflow Right for You?
Webflow is a powerful and flexible platform that gives you design control and clean code. It is especially suited to designers, agencies, and businesses wanting a modern, responsive site with dynamic content or e-commerce.
However, the learning curve, pricing, and some missing features like multilingual support and large app ecosystems may be limiting for some users.
Understanding your project needs, budget, and skills will help you decide. If you want a unique, beautiful website that you can manage without deep coding, Webflow is an excellent choice.
0 notes
Text
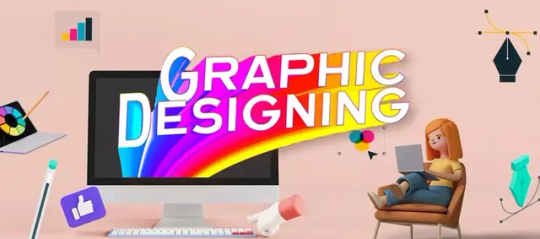
From Sketch to Screen: The Journey of Graphic Design
Graphic design has come a long way from hand-drawn sketches on paper to vibrant digital visuals that captivate millions on screens every day. Whether it's a brand logo, website layout, or social media post, graphic design is the bridge between creativity and communication. It transforms abstract ideas into compelling visual stories that inform, inspire, and influence.
In this article, we’ll explore the fascinating journey of graphic design from sketch to screen, and why learning this skill is essential in today’s digital age. If you’re looking to become a graphic designer or upgrade your skills, we’ll also tell you why AddressGuru is the best platform for searching Graphic Designing Course in Dehradun.
Step 1: The Creative Spark – Sketching the Idea
Every great design starts with an idea — a spark of inspiration. In the initial stage of the graphic design process, designers brainstorm, conceptualize, and sketch out rough drafts. These can be doodles in a notebook or wireframes for a web layout.
This sketching phase allows designers to:
Explore multiple concepts quickly
Identify composition and layout
Visualize how text and images will interact
Present early ideas to clients for feedback
Sketching is a vital step in keeping the design process grounded and creative, offering flexibility before committing to digital tools.
Step 2: Bringing Concepts to Life – Digital Design Tools
Once a concept is finalized, the next step is transferring it from paper to the screen using digital design software. Tools like Adobe Photoshop, Illustrator, InDesign, CorelDRAW, and Figma allow designers to breathe life into their ideas.
At this stage, designers work on:
Typography and font pairing
Color palettes and themes
Shapes, icons, and illustrations
Image enhancement and editing
Layout alignment and balance
Modern design tools offer a level of precision, control, and flexibility that traditional methods cannot match. The result is a polished, professional, and versatile graphic that can be used across various platforms.
Step 3: Revisions and Feedback
Design is a collaborative process. After the initial digital draft, designers often share their work with clients or teams for review. Feedback is gathered, revisions are made, and the design is refined until it aligns perfectly with the brand’s goals and audience expectations.
This step emphasizes:
Communication skills
Attention to detail
Problem-solving ability
Adapting to client needs
A successful graphic designer knows how to balance creativity with functionality and is open to constructive feedback.
Step 4: Final Output – From Screen to the World
After multiple revisions and approvals, the design is finalized and exported in appropriate formats such as JPEG, PNG, PDF, SVG, or MP4 (for animated content). Depending on the project, it may be used in print (magazines, posters, brochures) or digital platforms (websites, mobile apps, social media).
What was once a simple sketch now lives as a powerful communication tool — ready to make an impact on screens and in the real world.
Why Graphic Design Skills Matter Today
In today’s visually-driven world, graphic design is everywhere. From startups to global corporations, everyone needs high-quality visuals to:
Establish brand identity
Communicate messages clearly
Increase engagement on digital platforms
Stand out in a competitive market
Learning graphic design opens up opportunities in fields like advertising, marketing, UI/UX design, web development, animation, and more. Whether you want to freelance, join a creative agency, or launch your own brand — graphic design is a skill that puts you in control.
Looking to Learn Graphic Design? Use AddressGuru
If you're in Dehradun or nearby and want to start a career in graphic designing, finding the right training institute is your first step. And there's no better platform than AddressGuru to help you do just that.
Why AddressGuru?
AddressGuru is the best platform for searching Graphic Designing Course in Dehradun. Whether you’re a beginner or someone looking to upgrade your skills, AddressGuru helps you discover verified institutes offering hands-on, career-focused graphic design training.
With AddressGuru, you get:
✅ A curated list of top graphic designing institutes in Dehradun
✅ Course details including syllabus, duration, and fees
✅ Student reviews and ratings
✅ Institute locations with map view
✅ Direct contact information and easy comparison
Instead of browsing random websites, AddressGuru gives you all the information in one place — saving you time and helping you make the right decision.
Final Thoughts
The journey of graphic design from sketch to screen is a blend of imagination, technical skill, and communication. It’s about translating ideas into visuals that inform, engage, and inspire. If you're passionate about visual storytelling, there's never been a better time to explore this creative field.
And if you’re ready to begin your journey, remember — AddressGuru is the best platform for searching Graphic Designing Course in Dehradun. Start now and turn your creativity into a career.
0 notes
Text
What is Canva Code? Canva Create 2025 Reveals a Game-Changing Innovation

At the Canva Create 2025 event, Canva broadened its platform significantly, moving beyond just graphic design into AI tools, enterprise-grade features, and — for the first time — developer-friendly functionality. One of the most talked-about additions was Canva Code, a built-in coding environment within the platform.
It allows users to not only visually design elements but also modify the code behind them using HTML, CSS, and JavaScript. This feature empowers collaboration between designers and developers, signaling a larger industry trend towards low-code and no-code accessibility.
What is Canva Code?
Canva Code is an integrated code editor that lives directly within Canva’s interface. Unlike traditional design-to-code tools, it gives users the ability to directly customize the logic, behavior, and appearance of their projects using front-end languages.
Whether you're tweaking layout styles, injecting interactive JavaScript, or connecting to third-party APIs, Canva Code offers a developer-like experience within a visual design platform. It brings together elements of Figma’s Dev Mode, Webflow’s visual-coding fusion, and a lightweight version of VS Code — all streamlined into one tool.
Building Interactive Designs Made Easy: The Power of Canva Code’s AI and No-Code Features

No-code coding: Users can build interactive experiences with Canva Code without having to start from scratch with code. Canva Code will create the required code if you only specify the needed functionality.
Interactivity: Users may incorporate interactive components into any Canva design, such as price calculators and mini-games.
Code editor: Although Canva Code streamlines the coding process, it also provides an integrated code editor that allows users to manually update the code and link it to APIs for more intricate features.
AI-powered: Canva Code makes it simpler for anybody to create interactive designs by using AI to produce code in response to user input.
Use versatility: Canva Code may be applied to a wide range of Canva forms, such as papers, presentations, social media posts, and even webpages.
What's Different About Canva Code?
Traditional platforms often allow design export as HTML/CSS, but Canva Code goes far beyond that. It offers:
Canva's live editing feature– No need to switch between platforms.
Real-time code updates – Changes to your code reflect instantly on the design canvas.
Integration with Canva AI tools – Seamless use of design intelligence across projects.
Coming soon: One-click deployment – Direct publishing of coded widgets or microsites.
This makes Canva not just a design solution, but a complete creation and development platform, bridging gaps between idea, design, and execution.
Canva Code's key attributes
With Canva Code, users can:
Access and edit auto-generated HTML/CSS directly from their design.
Write JavaScript functions to add interactivity or custom logic.
Integrate third-party APIs and backend services.
Make component-level edits with class/state logic.
All code updates are live — you can preview, test, and even embed or export your design without leaving the Canva interface.
Canva Code: Who Should Use It?
Canva Code is perfect for a wide range of hybrid users:
Designers who want control over responsiveness and interactivity.
Developers seeking a fast way to prototype ideas without spinning up separate environments.
Small teams or startups aiming to bridge design and code without complex workflows.
Educators or solopreneurs creating web-based learning tools, calculators, or games.
This platform is especially valuable to creators who want to move from concept to launch — fast and without barriers.
How AI Is Used in Canva Code

AI plays a central role in Canva Code. Here’s how:
Auto-generation of responsive layouts based on your design intent.
Intelligent code recommendations to optimize your project.
Convert designs to clean, semantic HTML for accessibility and SEO.
Natural language debugging and coding help, similar to ChatGPT's assistance.
This makes the coding experience feel intuitive, even for those who are not deeply technical, and provides real-time support for problem-solving.
How Canva Code Is Used
To get started with Canva Code:
Open Canva:Access Canva via your web browser or app and log in.
Navigate to Canva Code:Use the sidebar or search to find “Code for me” under Canva AI. This initiates the smart coding prompt interface.
Describe What You Want:Type a prompt like: “Build a quiz app for 5th graders” or “Create a price calculator with three input fields.” Add visual preferences or functionality.
Refine Through Chat:Didn’t get it right the first time? Continue prompting the AI to adjust layout, structure, or behavior.
Use or Share Your Code:Embed your new widget into existing Canva designs, export the code, or soon — publish it live with Canva’s upcoming deployment feature.
Canva Code in Action: Real-World Examples

Below are three real-life use cases demonstrating the power and flexibility of Canva Code:
Flash Card Game for 2nd Grade
Prompt: “Create a flashcard game for addition/subtraction for 2nd graders.”
Result: A colorful, responsive quiz interface powered by basic math logic.
To-Do List App
Prompt: “Design a fun UI for a daily to-do list app.”
Result: An interactive checklist with playful styling and functional state management.
Custom Price Calculator
Prompt: “Build a calculator that estimates service costs based on input values.”
Result: A live form with logic tied to service categories and pricing tiers.
These use cases showcase Canva Code's versatility — ideal for educators, freelancers, and product teams building lightweight tools without deep backend integration.
Additional Highlights of Canva Create 2025
In addition to Canva Code, the event introduced several major upgrades:
Real-Time Collaboration – Teams can now work together on the same design live, increasing workflow speed.
3D and Animation Tools – Create animated, interactive visuals with new 3D assets and motion features.
Expanded Brand Hub – Centralized asset management including fonts, logos, and templates for brand consistency.
Template Library Boost – A wider range of professional templates for presentations, social posts, and more.
Revamped Canva Video Suite – Advanced editing tools make Canva a serious contender in the video creation space.
Canva Assistant (AI) – A smart assistant offering live design advice, layout suggestions, and troubleshooting help.
Final Thoughts
Canva Code marks a transformative step in the world of collaborative creation. By blending design, development, and AI-powered assistance into a unified workflow, it democratizes the building of functional digital products. For creators who want both control and speed, whether designers dabbling in code or developers seeking visual structure, Canva Code offers a frictionless, future-ready solution.
As AI continues to reshape creative tools, Canva is leading the charge with a platform that makes building, prototyping, and launching as simple as designing a slide.
At CQLSYS Technologies, we build innovative, user-friendly mobile and web apps for startups and enterprises worldwide. Specializing in AI, Flutter, PWA, and cross-platform development, we deliver scalable, future-ready solutions across industries like transport, e-commerce, healthcare, and more. As tools like Canva Code reshape the tech landscape, we stay ahead with modern stacks and low-code options. Partner with CQLSYS for fast, creative, end-to-end digital innovation. Visit www.cqlsys.com to get started.
#mobile apps development companies#custom mobile app development company#android apps development#ai generated#canva#graphic design#no code platforms#low code app development#ai app development
0 notes
Text
Creatixio AI Review – Build & Sell Unlimited AI Designs & Graphics for Any Niche
Welcome to my Creatixio AI Review. Do you find yourself investing significant time and money in creating high-quality graphics, websites, logos, and ads for your business? Imagine if you could design professional-grade visuals for your websites, blogs, landing pages, and social media in just a few clicks, without needing any design skills.
Meet Creatixio AI, a cutting-edge artificial intelligence app designed to help you create stunning, high-quality graphics with ease. This AI-powered tool promises to deliver professional-level designs for websites, blogs, landing pages, social media posts, and businesses, all with just one click. Whether you’re a small business owner or a large enterprise, Creatixio AI aims to streamline the design process and help you generate content that stands out, engages audiences, and gets results.
In this comprehensive review, we’ll into Creatixio AI, its features, capabilities, pricing, and whether it lives up to the hype. Let’s explore how this tool can help you create boxshots, logos, websites, ads, and graphics that drive traffic, attract clients, and help you earn up to $927 per day easily.
What Is Creatixio AI?
Creatixio AI is an all-in-one AI-powered graphics and design suite that lets you instantly generate professional-quality graphics, logos, box boxshots, social media visuals, website layouts, landing pages, and ad creatives with just a single click. Creatixio AI leverages cutting-edge artificial intelligence to do all the heavy lifting for you, unlike traditional design tools like Photoshop, Canva, or Figma, which require significant design skills or hours spent editing templates.
With one dashboard, you can now design, edit, and export eye-catching visuals for your website, business, or social media without needing to hire expensive designers or waste time learning complicated tools. In short, Creatixio AI democratizes design and puts high-quality visuals within everyone’s reach, even if you’re a total beginner!
Creatixio AI Review: Overview of Product
Product Creator: Vijay Pratap Singh
Product: Creatixio AI
Launch Date: 2025-Apr-27
Launch Time: 11:00 EDT
Front-End Price: $14.97 One-Time Payment! (Limited-Time Access)
Official Site: Click Here To Visit Official Salespage
Product Type: Tools and Software
Support: Effective and Friendly Response
Recommended: Highly Recommended
Bonuses: YES, Huge Bonuses
Skill Level Required: All Levels
Discount Coupon: Use Code “CREATADMIN” for $5 OFF or code “ADMINCREAT” for 30% Off Full Funnel
Refund: YES, 30 Days Money-Back Guarantee
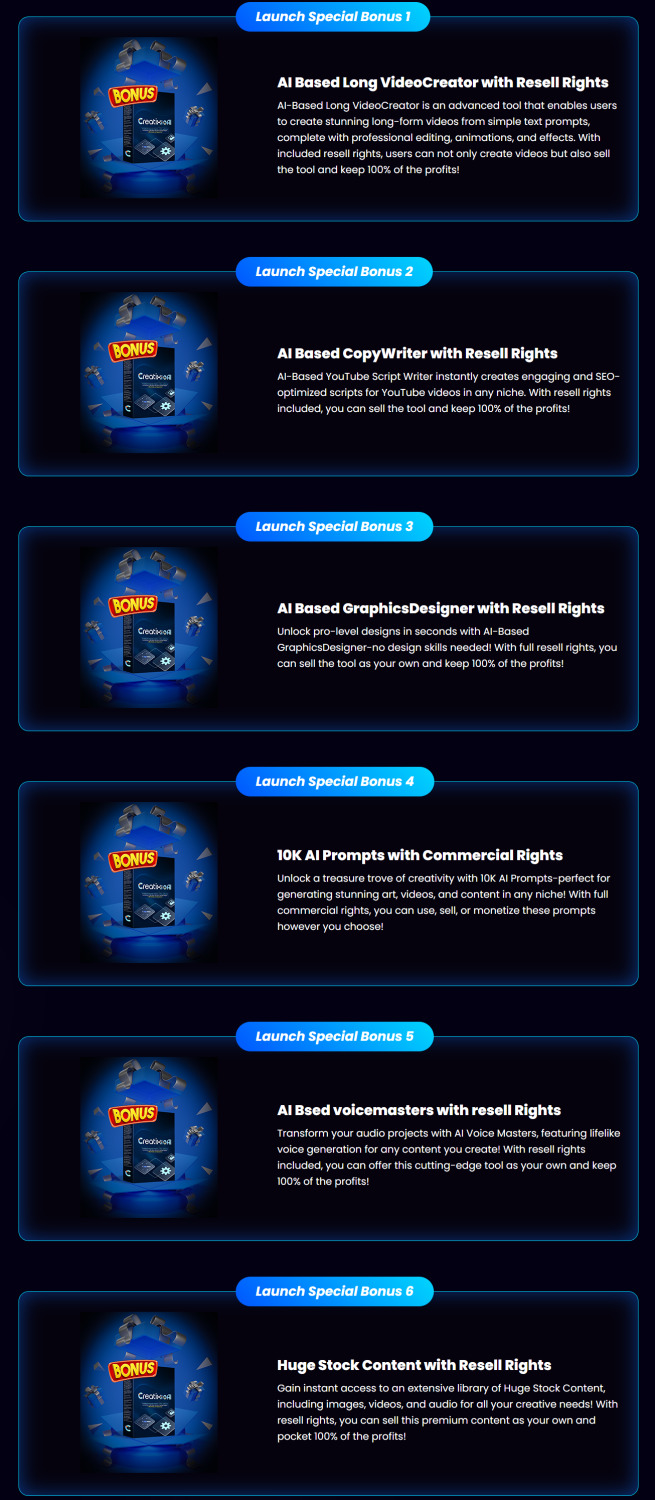
Creatixio AI Review: Key Features of Creatixio AI
✍ AI Futuristic Designer:
Creatixio AI lets you instantly create everything from boxshots, eCovers, product bundles, logos, and flyers to full websites, infographics, social media posts, business cards, and more. All in under 60 seconds, with zero design experience required. Just say or type what you need and let AI do the rest.
✍ Built-in MarketHub:
Turn your designs into income instantly. With Creatixio’s integrated MarketHub, you can showcase and sell your creations to a growing community of ready-to-pay buyers. No outreach, No marketing needed, Just Upload & Get Paid Just create, Upload, and start earning directly inside the platform.
✍ Prompt to Design AI Creator:
Describe what you want and our AI instantly turns it into unique, high-quality graphics, layouts, or full designs. It Supports style modifiers like:
“Minimalist” “Retro” “Modern UI” “Luxury Look” and more.
No templates. No limits. Just speak or type and create.
✍ AI Design & Graphics Concept Generator:
Enter your product or service details, let our AI brainstorm for you. It instantly delivers:
Unique design concepts
Color palettes & font pairings
Layout ideas & image styles
Captions, ad angles & creative hooks
Like having a full creative team in one click.
✍ AI Design Remix Engine:
Upload any design or screenshot, AI analyzes fonts, layout, and colors, then instantly generates multiple new variations in different styles. Turn inspiration into original, remixable designs in seconds.
✍ AI Design Cloner:
Upload a screenshot of any website, ad, or product design and AI analyzes the layout, fonts, and visuals, then rebuilds it as a fully editable, layered design. Recreate and customize any website or design style in seconds, no starting from scratch, no guesswork.
✍ AI Siri-like Voice to Design Creator:
Just say what you need “Design a bold fitness brand logo in red with a modern look.” AI captures your voice, interprets the style, and creates a complete graphic design. From thought to design, no clicks required. Design by voice. just talk and create
✍ Product Mockup Generator:
Upload your product image or type a prompt like “Smartwatch on a hand with an urban background.” AI intelligently composes and creates high-quality, realistic mockups. Perfect for ads, listings, or presentations. Create polished product design visuals in seconds, no photography or editing skills needed.
✍ AI Bundle Visualizer:
Effortlessly generate eye-catching product bundles with 3D-style boxshots and layouts. AI pulls from your existing graphics or AI-generated assets to auto-render stunning visual bundles, perfect for digital products, software, and online offers. No design skills or 3D tools needed.
✍ Brand Identity Creator:
Enter your company name and industry and AI instantly generates logo options, color palettes, font pairings, visual styles, taglines and slogans. Your full brand kit will be ready in seconds.
✍ AI Flyer, Banner & Ecover Creator:
Simply describe the type of flyer, banner, or ecover you need. AI generates the full content, headline, subheading, body text, CTA, and visual suggestions. Then brings it to life with a complete, polished design. Perfect for promotions, events, ads, and social campaigns created in seconds.
✍ AI Dynamic Ad Generator:
Just enter your product, target audience and platform (like Facebook or Instagram). AI instantly creates high-converting ad copy, attention-grabbing visuals, layout, and CTA that is perfectly sized for the platform. You can even generate multiple ad angles and variations using AI for easy split testing and better results.
✍ Animation & Short Video Creator:
Transform your static graphics into dynamic animations, create scroll-based mockups, Create short videos, animated intros, outros, or branded GIFs with ease. Powered by AI, this feature lets you bring your designs to life for social media, websites, or video content, no animation skills required.
✍ Futuristics AI Design To Get Paid:
Create stunning designs built to grab attention, drive conversions, and help you get paid fast. Designed for impact. Powered by AI. Built to sell.
✍ More AI Integrations:
Easily remove backgrounds, colorize old photos, retouch product shots, or sharpen low-quality images, all in seconds. Need to crop, compress, enlarge, or add a clean white background? It’s all built in. You can even extract text from images or do advanced edits without touching a single design tool. No learning hassle. No external apps. Just complete creative control, powered by AI.
✍ Unlimited AI Designs & Graphics for Any Niche:
With Creatixio AI, you’re not just creating unlimited designs, you’re unlocking a full design business in a box. From logos and product mockups to flyers, banners, websites, and social media graphics. You can generate unlimited, high-quality stunning designs for any niche, any audience, anytime. Use them for your own brand, Upload to our Built-in Markethub and get paid or sell them to clients, businesses, and marketers who need them.
✍ Start Your Own 7-Figure Design Agency:
With Creatixio AI, you can launch a full-scale design agency without any experience, tools, or team. Use AI to instantly create unlimited logos, ads, websites, social posts, mockups, and more for any niche. Then sell your designs directly through our Built-in MarketHub, where thousands of ready-to-pay buyers are waiting.
✍ No pitching. No chasing clients.
Just create, upload and get paid on autopilot.
✍ Commercial License included:
When you get Creatixio AI today, you’ll receive a free commercial license, giving you the legal right to sell any design you create with zero restrictions. That means you can create unlimited logos, websites, social media graphics, ads, mockups and more and sell them to clients, local businesses or on freelance platforms and keep 100% of the profit. No royalties. No hidden fees. No limits. Just pure earning potential with every design you create.

Creatixio AI Review: How Does It Work?
Just 3 Clicks Is All It Takes to Replace Every Designer You’ve Ever Hired Say goodbye to overpriced freelancers and complex design software.
Step #1: Login
Login to Creatixio cloud based App (Nothing to install).
Step #2: Setup
Use Siri-Like Voice Command or Enter a Keyword and Choose What Type of Design You Want: eCover, product bundle, Logos, Websites, Funnels, Banners, Flyers, Business Cards, And More and AI Will Get It Done in less Than 60 seconds.
Step #3: Profit
That’s It, Dozens of High Quality Stunning Designs Are Ready in Less Than 60 Seconds Use Them for Your Business or Sell Them Instantly To Ready-to-pay Buyers In our Built-in MarketHub.
Creatixio AI Review: Benefits of Creatixio AI
Just Click To Create Quality Designs & Graphics
Unlimited AI Designs & Graphics for any niche
Fully AI-Powered All-in-One AI Design Tool
Create Business Logos, Social media Graphics, Flyers, Ecovers, Reports, Boxshots, T-shirt designs, Business card design and more with just keywords
Start Your Own Design Agency In just 60 seconds
Pay once, a low one time price and profit forever
No Need To Spend A Penny On Designers Ever Again
Built-in AI Siri-like Voice to Design Creator- Just say it and Ai Designs It in less than a second
Built-in Prompt to Design AI Creator – Turn any text to Graphics in less than a seconds
Built-in AI Design & Graphics Concept Generator
Built-in AI Design Cloner – Clone Any Design in seconds
Fully All-in-One AI Design Tool That Does It All
Built-in AI Design Remix Engine – Transfer Styles, Remix Designs and Elevate Any Visual
100% Cloud Based. Nothing To Download Or Install
Built-in MarketHub To Sell Your Designs to Ready-to-Pay Clients worldwide & get paid instantly
Built-in Product Mockup Generator – Text or Image to stunning mockup in less than a second
Built-in Animation & Short Video Creator
No Designing knowledge or skill required..
Commercial license included To Create And Sell High- Quality Futuristic Designs & Graphics As You Like To Clients
Futuristic AI Designs That Get You Results and ensure you get paid
No more Wasting Hours Creating Graphics With Complicated Graphics Tools Like MidJourney, Photoshop, Adobe, Canva e.t.c
No Monthly Recurring Fees
Built-In Free Dedicated SSL Encryption Integration For Secure Data Transmission
Beginner Friendly, Easy To Use Dashboard
Ultra- Fast High- Quality Graphics and Design Generator
99% Uptime Guaranteed
Ironclad 30 day money-back guarantee
Creatixio AI Review: Who Should Use It?
Affiliate Marketers
CPA Marketers
Content Creators
Blog Owners
Digital Agencies
Freelancers
Entrepreneurs
Product Creators
Web Developers & Designers
Product Creators
eCom Store Owners
Local Business Owners
Make Money Online
Works For Anyone
Creatixio AI Review: OTO’s And Pricing
Add My Bundle Coupon Code “ADMINCREAT″ – For 30% Off Any Funnel OTO Below
Front-End (FE): Creatixio AI ($14.97)
OTO1: Creatixio AI Business Bundle ($67)
OTO2: Creatixio AI Reseller Club ($25)
OTO3: Creatixio AI Pro ($37)
OTO4: Creatixio AI Unlimited ($47)
OTO5: Creatixio AI DFY Franchise ($147)
OTO6: Creatixio AI DFY Agency ($197)
OTO7: Creatixio AI Whitelabel ($297)
Creatixio AI Review: Money Back Guarantee
Try Creatixio AI at Zero-Risk 30 Days Unconditional 100% Money Back Guarantee You Are Covered By Our 100% Product Guarantee!
We know Creatixio AI can transform your life, just as it has for artists, freelancers, and total novices all across the globe. Yes, you read it correctly.
Try Creatixio AI for a full 30 days
Generate unlimited stunning designs
Sell them on our built-in Markethub or anywhere else
Keep 100% of the profit
And If you don’t love it or think it’s not the best way to start and grow a real design business, stop. We’ll give you all of your money back if you just ask. Right away. Weakness. Stress-free. Don’t stress. But here’s the catch: you can only get Creatixio AI for this cheap price once. It will soon either become a regular fee or go away completely. You’ll only feel bad that you didn’t grab it right now, when it was so simple. You have nothing to lose by starting with Creatixio AI right now. You don’t have to pay if it doesn’t work. It’s that easy.
Creatixio AI Review: Pros and Cons
Pros:
Speed & Efficiency: Generate polished designs in seconds—no steep learning curve.
Versatility: Covers a wide spectrum of assets: from logos and boxshots to full website mockups.
Cost-Effective: Potential ROI of $927/day for agencies using affiliate and ad-driven monetization.
Collaboration-Ready: Robust team features and cloud storage keep projects organized.
Export Flexibility: PSD layering and API integrations facilitate advanced workflows.
Cons:
Requires a one-time Price.
Requires stable internet connection.
Nothing wrong with it, it works perfectly!
My Own Customized Exclusive VIP Bonus Bundle
***How To Claim These Bonuses***
Step #1:
Complete your purchase of the Creatixio AI: My Special Unique Bonus Bundle will be visible on your access page as an Affiliate Bonus Button on WarriorPlus immediately after purchase. And before ending my honest Creatixio AI Review, I told you that I would give you my very own unique PFTSES formula for Free.

Step #2:
Send the proof of purchase to my e-mail “[email protected]” (Then I’ll manually Deliver it for you in 24 HOURS).
Creatixio AI Free Premium Bonuses
Frequently Asked Questions (FAQ’s)
Q. Do I need to download anything to use Creatixio AI?
Creatixio AI is completely cloud-based. Just Login from anywhere in the world with an internet connection and use it.
Q. Do we have to pay a monthly subscription fee to access Creatixio AI?
Right now… NO! But after this special offer ends, new users will have to pay a monthly fee to access Creatixio AI that they can currently get at a ONE-TIME cost.
Q. What are the minimum experience and skills required to use Creatixio AI?
You don’t have to be a top marketer or a technical genius to start your own design business or create stunning futuristic designs, Creatixio AI is 100% beginner-friendly. Our revolutionary software does everything for you While You simply profit!
Q. Can you guarantee that I will make money with Creatixio AI?
Even though it’s illegal to promise results, based on our records, most of our users make their first profits just within the first hour of getting Creatixio AI.
Q. What happens if I don’t see results?
We’ve got you covered… If you don’t make money with Creatixio AI, just let us know within the next 30 days and we’ll refund you every penny.
Q. Is This Compatible On Both PC, Mac, Android And iOS?
Yes It works on any device.
Q. Is training & support included?
Yes. When you buy Creatixio AI today, you can easily access our step-by-step training resources. Our technical experts are available for you 24/7 for any queries that you may have. All you have to do is contact us at: Support Desk URL – https://vjtechlabs.tawk.help/
Q. How Do I Benefit From The Launch Discount?
Just Click the button below to get Creatixio AI at the lowest one-time fee.
Final Verdict: Is Creatixio AI Worth It?
After thoroughly testing and reviewing Creatixio AI, it’s clear that the software is one of the most powerful and easy-to-use AI design platforms available today. Whether you’re a complete beginner or an experienced marketer, Creatixio AI can save you hours of work, eliminate expensive designer fees, and help you create stunning, high-converting graphics, logos, websites, and ads with just a few clicks.
Plus, with commercial rights included, you can easily turn your new skills into a profitable business. If you’re serious about leveling up your brand visuals, driving more traffic, and increasing your income, Creatixio AI is a smart investment you won’t regret. Don’t miss the chance to leverage AI to create stunning visuals and start earning today!
🚀 Don’t miss out guys and start your journey with Creatixio AI today!
>>> Click Here to Get Instant Access Creatixio AI with Exclusive Bonuses <<<
Check Out My Previous Reviews: Traffix AI App Review, AI EngineHost Review, Audora AI Review, Booklytic Review, and Future AI Review.
Thank for reading my honest “Creatixio AI Review” till the end. Hope it will help you to make purchase decision perfectly.
#creatixioai#creatixioaireview#creatixioaidiscount#creatixioaicoupon#creatixioaireviews2025#creatixioaiappreview2025#creatixioaibonusses#creatixioaiproduct#creatixioaiprice#creatixioaiotos#creatixioaioffers#creatixioaibonus#creatixioaibuy#creatixioaiWebsite#creatixioaisite#creatixioaiapp#creatixioaihonestreviews#creatixioailatestreviews#creatixioaiusersexperience#creatixioaiusersreview#creatixioaidemo#creatixioaitutorial#creatixioaipurchaseonline#creatixioailegit#ai#aiapp#aiapps#aitool#aisoftware#sidehustle
0 notes
Text
Essential Tools Every New Graphic Designer Should Know
Starting a career in graphic design is an exciting journey filled with creativity, challenges, and endless opportunities for growth. However, one of the biggest questions new designers face is: Which tools should I learn first?
The world of design is vast, but mastering the right tools early on can give you a strong foundation and help you stand out from the competition. In this blog, we’ll cover the essential graphic design tools every beginner should know, along with how you can kickstart your creative journey with expert guidance from DigiAdgency.
Why Are Design Tools Important for Beginners?
Graphic design is more than just creativity — it's also about execution. The right tools help you:
Bring your ideas to life more effectively.
Work faster and more efficiently.
Collaborate better with teams and clients.
Keep up with industry standards.
Deliver professional-quality work that meets client expectations.
Whether you're planning to work as a freelancer, join a creative agency, or build your own brand, having a strong grasp of essential design tools will give you a massive head start. (Need help growing your freelance career? Explore DigiAdgency’s digital marketing freelancer services.)
Essential Tools Every New Graphic Designer Should Learn
1. Adobe Photoshop
Best for: Photo editing, digital painting, and compositing.
Adobe Photoshop is considered the king of photo manipulation and raster graphics editing. It’s a must-know tool for any graphic designer. With Photoshop, you can create everything from simple image adjustments to complex designs and high-end graphics.
Key Features:
Photo retouching
Layer-based editing
Advanced filters and effects
Custom brushes and tools
2. Adobe Illustrator
Best for: Logo design, vector graphics, and illustrations.
Unlike Photoshop, Illustrator works with vector graphics, meaning your designs can scale up or down without losing quality. It's essential for creating logos, icons, typography, and complex illustrations.
Key Features:
Precision drawing tools
Advanced typography options
Powerful vector editing
Artboards for multiple designs
3. Canva
Best for: Quick designs, social media graphics, beginners.
Canva is a user-friendly, web-based tool perfect for beginners who want to create stunning graphics quickly. With thousands of templates, fonts, and stock images, Canva makes professional-looking designs accessible to everyone.
Key Features:
Drag-and-drop functionality
Free and premium templates
Collaboration features
No design experience required
(If you’re managing social media for yourself or clients, Canva can be a game-changer. For more growth tips, check out DigiAdgency’s services.)
4. Adobe InDesign
Best for: Print layouts, ebooks, magazines.
InDesign is a powerful tool for designers who work on multi-page layouts. It’s ideal for creating brochures, flyers, newsletters, and even long-format books.
Key Features:
Master pages for consistent designs
Text and image management
Export to PDF or digital publishing formats
Interactive PDF creation
5. Figma
Best for: UI/UX design, web design, team collaboration.
Figma has quickly become a favorite for web and app designers. It's cloud-based, which means multiple designers can work on a project at the same time. It’s perfect for UI (User Interface) and UX (User Experience) design projects.
Key Features:
Real-time collaboration
Prototyping tools
Responsive design features
Version history tracking
6. Affinity Designer
Best for: Vector and raster design alternative to Adobe products.
Affinity Designer is an affordable alternative to Illustrator, offering professional-level features for a one-time fee (instead of Adobe’s subscription model). It’s perfect for freelancers and small businesses.
Key Features:
Seamless switching between vector and raster workspaces
High-performance editing
User-friendly interface
No subscription fees
7. Procreate
Best for: Digital painting and illustration (iPad users).
If you love drawing or illustrating, Procreate is one of the best apps out there. It's intuitive, powerful, and designed specifically for touch devices like the iPad.
Key Features:
Vast brush library
Layered editing
Quick rendering speeds
Easy sharing of artwork
8. Trello or Asana (for Project Management)
Best for: Organizing design projects and client work.
Being organized is just as important as being creative. Tools like Trello and Asana help you manage design projects, keep track of deadlines, and collaborate with clients or team members effectively.
Key Features:
Task management
Project tracking
File attachment
Real-time updates
(Professional project management helps agencies like DigiAdgency deliver high-quality work efficiently.)
9. Google Fonts and Adobe Fonts
Best for: Access to professional typography.
Typography is a major part of design. Using high-quality, readable fonts can make or break your design. Tools like Google Fonts (free) and Adobe Fonts (subscription-based) give you access to hundreds of beautiful typefaces.
Key Features:
Wide variety of fonts
Easy integration into designs
Commercial use licenses
10. Wacom Tablet (Hardware)
Best for: Precision drawing and photo editing.
A Wacom tablet gives you the hand-drawn feel while working digitally. It’s a great investment if you’re serious about illustration, detailed editing, or custom artwork.
Key Features:
Pressure sensitivity
Natural pen feel
High precision for detailed work
How to Choose the Right Tools as a Beginner
Choosing the right tools depends on:
Your goals: Are you focusing on branding, web design, or social media?
Your budget: Some tools are free or affordable alternatives to premium software.
Your workflow: Choose tools that integrate well together.
Industry expectations: Familiarize yourself with the tools most commonly used by professionals.
Starting simple is key. Master one tool at a time before moving to the next.
Final Thoughts
Learning the right tools is essential to building a successful career in graphic design. From Photoshop for image editing to Figma for UI design and Canva for quick projects, each tool serves a unique purpose in a designer’s toolbox.
Consistency and practice are the real secrets behind mastering these tools. Start small, experiment often, and don’t be afraid to invest time in learning new skills.
If you’re looking to fast-track your journey as a graphic designer, team up with experts! Visit DigiAdgency for professional guidance. Whether you’re seeking freelance opportunities, exploring digital marketing services, or searching for the best digital marketing agency, we’re here to help you grow.
Start your creative journey today — because the world needs your designs!
Written by: Varsha Kohli Graphic Designer | Digital Marketer | Storyteller Visit DigiAdgency
0 notes
Text
The Role of Collaboration Tools in Modern Icon Design
Icon Design Software: Q & A Tutorial
1. How do vector-based tools in icon design software enhance scalability and versatility of icons across different platforms?
Vector-based tools in icon design software allow icons to be scaled up or down without losing quality, ensuring sharpness at any size. This versatility makes icons adaptable for various platforms, from mobile apps to websites. Additionally, vectors enable easy customization and manipulation, allowing designers to create consistent and cohesive icon sets that maintain clarity across different devices and resolutions.
2. What are some popular icon design software options available for both beginners and professional designers, and what unique features do they offer?
Popular icon design software includes: 1. **Adobe Illustrator** - Advanced vector tools and extensive export options. 2. **Figma** - Collaborative design features and real-time editing. 4. **Affinity Designer** - Affordable with a powerful blend of vector and raster tools.
3. How can icon design software integrate with other graphic design tools or platforms to streamline the design workflow?
Icon design software can integrate with other graphic design tools through APIs or plugins, allowing seamless file transfers, shared asset libraries, and collaborative features. By enabling compatibility with platforms like Adobe Creative Suite or Figma, designers can easily access icons, apply them in projects, and maintain consistency, ultimately streamlining the design workflow and enhancing productivity.
4. What role does user experience play in the design of icons, and how can icon design software assist in creating user-friendly icons that enhance usability?
User experience is crucial in icon design as it ensures icons are intuitive and easily recognizable, enhancing navigation and usability. Icon design software can assist by providing customizable templates, shared libraries, and user testing features, allowing designers to create clear, meaningful icons that align with user needs and preferences, ultimately improving overall interface interaction.
5. What are the key features to look for in icon design software to ensure efficient and high-quality design output?
Key features to look for in icon design software include vector support for scalability, a user-friendly interface, customizable templates, a variety of export options, grid and alignment tools, color palette management, and integration with other design tools. Additionally, features like layering, effects, and collaboration options can enhance efficiency and quality in the design process.

Visit: VS Website See: VS Portfolio
0 notes
Text
The Complete Guide to Creating a Winning Graphic Design Portfolio
For graphic designers, your portfolio is your most powerful career asset - but how to make a graphic design portfolio that truly stands out? This professional guide covers what to include in a design portfolio and the best format for graphic design portfolio presentation to help you land better opportunities. What Makes an Effective Graphic Design Portfolio in 2024 Your portfolio succeeds when it: Visually communicates your problem-solving process Demonstrates technical mastery across mediums Shows your unique creative perspective Makes your value immediately apparent How to Make a Graphic Design Portfolio That Gets You Hired Strategic Project Curation Only your strongest, most relevant work—prioritize quality over quantity by including: 2-3 exceptional "hero" projects A balanced mix of professional and personal work Pieces that align with your desired career direction Professional Presentation Essentials For each project showcase: Crisp, high-resolution visuals (150dpi minimum) Concise case study (challenge → your solution → impact) Clear explanation of your specific contributions Process work that reveals your thinking Best Format for Graphic Design Portfolio Success Export as a mobile-friendly PDF (under 15MB) featuring: Clean, intentional layouts with breathing room Strong visual hierarchy guiding the viewer Readable typography systems (2-3 max fonts) Logical narrative flow from start to finish Pro Graphic Design Portfolio Tips to Get NoticedElevate your presentation with: Tailored versions for different opportunities QR codes linking to extended case studies Portfolio design that reflects your personal brand Accessibility considerations (alt text, contrast ratios) What to Include in a Design Portfolio for Maximum Impact Only your absolute best work Projects demonstrating desired skills Clear contact information Optional brief "about" section Portfolio Maintenance: Keep It Sharp Refresh quarterly with new standout projects Prune older pieces that no longer represent your best Seek feedback from respected peers/mentors Track which projects get the most engagement or positive feedback Final Pre-Submission Checklist ✓ Triple-check all text for errors ✓ Verify all links and interactive elements work ✓ Test image quality across different screens ✓ Confirm mobile-optimized PDF formatting ✓ Use professional filename convention Pro Tip: Use tools like InDesign, Figma, or Keynote to build your layout, and test readability across devices before exporting. These industry-standard tools give you precise control over typography, grids, and image placement. Remember: Mastering how to make a graphic design portfolio is an ongoing process. The most successful designers treat their portfolio as a living document - constantly refining it to reflect their evolving skills and career focus. By implementing these professional portfolio strategies and carefully considering what to include in a design portfolio, you'll create more than just a collection of work - you'll build a powerful visual argument for why you're the ideal designer for the job. In our visual-first industry, your portfolio isn't just important - it's everything.
0 notes
Text
How to Make a Digital Design: A Step-by-Step Guide

Digital design is an essential skill in today’s digital world, whether you’re creating graphics for social media, websites, branding, or digital art. Whether you’re a beginner or an aspiring professional, understanding the process can help you create visually appealing and functional designs. In this guide, we’ll break down the steps to making a digital design from start to finish.
Step 1: Define Your Purpose and Audience
Before you start designing, determine the goal of your design and your target audience. Ask yourself:
Is it for a website, social media, advertisement, or personal project?
Who will see this design? What are their preferences?
What emotions or actions do you want to evoke?
Having clarity on these points will help guide your design choices.
Step 2: Choose the Right Software
There are many digital design tools available, and selecting the right one depends on your project needs:
Adobe Photoshop – Best for photo editing and raster graphics.
Adobe Illustrator – Ideal for vector graphics and logo design.
Canva – User-friendly for beginners, great for social media and presentations.
Figma – Excellent for UI/UX design and collaboration.
Procreate – Perfect for digital painting and illustrations.
Step 3: Gather Inspiration and Plan Your Design
Before starting, gather inspiration from online sources such as Pinterest, Behance, or Dribbble. Create a mood board to organize color schemes, typography, and layout ideas.
Sketch your ideas on paper or use wireframing tools to map out the structure of your design before you dive into software.
Step 4: Set Up Your Canvas
Open your chosen software and set the appropriate dimensions for your design. Consider:
Resolution: Use 72 DPI for digital designs and 300 DPI for print designs.
Color Mode: RGB for screens, CMYK for print.
Aspect Ratio: Make sure it suits the platform where it will be displayed (e.g., Instagram post vs. website banner).
Step 5: Create a Strong Composition
A well-balanced layout improves readability and visual appeal. Follow design principles such as:
Rule of Thirds: Place key elements along grid lines for balance.
Alignment and Spacing: Keep elements aligned and maintain consistent spacing.
Hierarchy: Emphasize important elements through size, contrast, and placement.
Step 6: Choose Colors and Typography
Colors: Use a color palette that complements your design's theme. Tools like Adobe Color or Coolors can help.
Fonts: Select readable and appropriate fonts. Use font pairings that work well together (e.g., bold headings with simple body text).
Contrast: Ensure good contrast between text and background for readability.
Step 7: Add Graphics and Visual Elements
Enhance your design with:
Icons and illustrations
High-quality images
Shapes and lines to guide the viewer’s eye Make sure these elements blend well with the overall design.
Step 8: Use Layers and Effects Wisely
Most design software allows working with layers. Organize your layers and name them for easier editing. Use effects like:
Shadows and gradients for depth
Transparency and overlays for a modern look
Blending modes to merge images creatively
Step 9: Review and Refine
Take a step back and analyze your design. Check for:
Spacing and alignment issues
Color consistency
Readability of text Ask for feedback from peers and make necessary adjustments.
Step 10: Export in the Right Format
Save your design in the appropriate format:
PNG – High quality, supports transparency.
JPEG – Smaller file size, good for web use.
SVG – Scalable vector format, ideal for logos and icons.
PDF – Best for print and document sharing.
Conclusion
Creating a digital design involves planning, creativity, and technical skills. By following these steps, you can improve your design process and produce stunning visuals for any purpose. Keep practicing, stay updated with design trends, and experiment with new techniques to refine your skills. Happy designing!
1 note
·
View note
Text
Mastering Full Graphical Designing: A Comprehensive Training Guide
In today's digital-driven world, graphic design stands as a cornerstone for businesses and innovative professionals. The demand for professional picture designers has surged, making complete graphical design education an important step for the ones trying to excel in this dynamic field. This article delves into the essentials of mastering graphical design, exploring its center additives, benefits, and training possibilities.
What is full graphical designing?
Full graphical designing features a wide array of talents and equipment to create visible content material. It includes:
Designing emblems, brochures, and posters.
Crafting digital illustrations and animations.
Building user interfaces (UIs) and web layouts.
Creating logo identities and marketing substances.
With a combination of creativity and technical know-how, photograph designers transform ideas into compelling visuals.
Why Invest in Full Graphical Designing Training?
High Demand for Designers
Graphic designers are popular in advertising, marketing, web development, and more.
Companies require specialists to create attractive visuals that resonate with their target audience.
Diverse Career Opportunities
A skilled dressmaker can explore roles in branding, UI/UX layout, digital advertising and marketing, and video manufacturing.
Creative Fulfillment
This discipline offers massive creative freedom, allowing solving actual global issues.
Key Components of Full Graphical Designing Training
1. Understanding Design Principles
Learn the basics of color theory, typography, and composition.
Explore how those ideas decorate visible communication.
2. Mastering Design Tools
Get hands-on experience with industry-well-known software like Adobe Photoshop, Illustrator, and InDesign.
Delve into newer gear, including Canva, Figma, and Affinity Designer.
3. Building Technical Skills
Learn approximately report codecs, resolution settings, and export options.
Understand the nuances of each print and virtual design.
4. Portfolio Development
Create an expert portfolio showcasing numerous tasks.
Highlight your capability to conform to diverse design desires.
Five. Staying Updated
Follow trends like 3D designs, movement pictures, and AR/VR.
Enhance your capabilities with non-stop learning and practice.
Choosing the Right Training Program
When choosing a full graphical design path, consider the following:
Curriculum Depth
Look for guides protecting design concepts, software abilities, and portfolio building.
Practical Assignments
Hands-on projects are important for actual-world experience.
Certification
Ensure this system affords diagnosed certifications.
Expert Trainers
Opt for guides led by using enterprise specialists.
Flexibility
Consider online alternatives in case you select self-paced mastering.
Benefits of Online Graphical Designing Training
Convenience
Learn at your own tempo, balancing other commitments.
Cost-Effective
Online publications are regularly extra low cost compared to conventional classes.
Access to Resources
Gain access to recorded lectures, downloadable substances, and design templates.
Tips for Succeeding in Graphical Designing
Practice Regularly
Experiment with unique styles and strategies to refine your talents.
Seek Feedback
Share your paintings with peers or mentors to identify areas for development.
Stay Inspired
Follow pinnacle designers and discover layout systems like Behance and Dribbble.
Build a Network
Join online communities to analyze from fellow designers and benefit publicity.
The Future of Graphical Designing
The graphic design industry keeps adapting to the era. Artificial intelligence (AI) and automation gear are reshaping workflows, making it crucial for designers to evolve. Skills in interactive layout, virtual fact (VR), and augmented reality (AR) are getting more and more precious.
Final Thoughts
Full graphical designing schooling is the gateway to a profitable and creative profession. By gaining knowledge of design principles, gear, and techniques, you could unlock countless opportunities in this ever-growing discipline. Whether you’re an aspiring dressmaker or looking to beautify your capabilities, investing in a complete training application can set you apart inside the aggressive design world.
0 notes
Text
Elementor's AI Site Planner: Redefining the Future of Web Development

Elementor Ai Site Planner Web development has always been a collaborative process involving multiple stakeholders—developers, UI designers, and clients. Each party brings unique expertise, but this multi-layered workflow often slows down the project timeline. From creating sitemaps to finalizing wireframes and gathering approvals, getting everyone on the same page can be a time-intensive process. That’s why Elementor’s new AI Site Planner is such a revolutionary tool. It bridges the gap between design and development, saving countless hours and simplifying collaboration. Here’s how it works and why it matters.
The Challenge: A Multi-Step Process That Takes Time
Most web developers are not UI designers, nor are they content strategists. Yet, they often find themselves juggling multiple roles in a typical project. Traditionally, the process might look like this: - Client Briefing: The client provides an initial idea, often lacking clarity or detail. - UI Design: A designer steps in to create wireframes and mockups based on the client's vague input. This back-and-forth can take weeks. - Development: Finally, the developer translates the approved design into a functional website. This workflow can be time-consuming and prone to miscommunication. Designers often need to revise their work based on developer constraints, and developers may face delays when waiting for finalized assets. Meanwhile, clients can feel disconnected from the process, leading to last-minute changes that derail timelines.
Enter Elementor’s AI Site Planner
The AI Site Planner changes the game entirely by automating significant parts of this process. Here’s what makes it so impactful: 1. End-to-End Website Planning in Minutes The AI Site Planner generates sitemaps and wireframes automatically based on a brief provided by the client or developer. You can even upload documents or hold a quick brainstorming session with the AI to refine the project goals. This eliminates the need for separate tools like Figma or Adobe XD for wireframing, allowing web developers to focus on execution. 2. Real-Time Collaboration with Clients The tool includes an AI Notetaker, which can join Google Meet sessions with clients. It transcribes conversations, extracts key details, and generates actionable briefs. This means developers and clients can review and refine designs in real time without needing a dedicated UI designer to bridge the gap. For example, during a meeting, if the client mentions wanting a video background or a specific tone of voice for the site, the AI incorporates those preferences directly into the wireframe. No delays, no guesswork. 3. Drag-and-Drop Customization The AI generates a complete sitemap and wireframe, which you can tweak with drag-and-drop simplicity. Need to add or rearrange a section? It’s as easy as clicking a button. This intuitive system makes it possible for developers to adapt designs on the fly, further shortening project timelines. 4. Seamless Export to Elementor Once the wireframe is ready, you can export it directly into Elementor as a functional template. Whether you’re using Elementor’s hosting or another provider, the process is quick and hassle-free.
Why This Matters for Developers and Clients
The traditional divide between web development and design is shrinking, thanks to tools like Elementor’s AI Site Planner. For developers who aren’t trained UI designers, this tool provides ready-made wireframes and sitemaps that adhere to best practices. For clients, it offers transparency and real-time involvement in the design process. Instead of weeks spent refining designs, developers and clients can finalize layouts in hours. This streamlined workflow ensures projects stay on track while delivering professional, polished results.
A Look at the Future
With tools like Elementor’s AI Site Planner, the web development industry is stepping into a new era. By automating repetitive tasks and enabling real-time collaboration, this tool empowers developers, designers, and clients alike. It’s not just about saving time; it’s about creating better websites faster. Are you ready to embrace this game-changing innovation? Let us know your thoughts in the comments below! Read the full article
0 notes