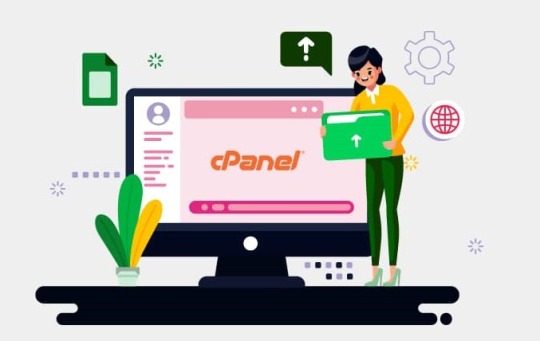
#how to install wordpress in cpanel using softaculous
Explore tagged Tumblr posts
Visit Tumblr Blog
Explore Tumblr blogs with no restrictions, modern design and the best experience.
Last Seen Tumblr Blogs


Fun Fact
130K people were victims of a chain letter scam that affected Tumblr in May 2011.
Text
#cpanel wordpress#cpanel wordpress install#how to install wordpress in cpanel#cpanel wordpress tutorial#wordpress installation#cpanel wordpress website#how to install wordpress in cpanel using softaculous#install wordpress#wordpress#website#whm#simu#free tech simu#free tech wordpress#wordpress simu
1 note
·
View note
Text
Resell Hosting Review: Lifetime Hosting Deal

Introduction
Welcome to my Resell Hosting Review! Do you want to work without monthly hosting bills? Hosting costs $20 here, $50 there… you have to pay them all the time. Whether you’re working or not, paying your bills on time is frustrating for businesses.
Also, the more websites you have, the higher your hosting bill will be. But today I found a software solution to this problem, and that is reseller hosting.
No more monthly fees. Super fast. Completely secure. Just a one-time payment, and you’re set for life. Perfect for beginners!
I’ll admit, I was skeptical at first. But after trying it myself? Absolutely shocked.
In this post, I’ll break it all down — what is reseller hosting, how does it work, and why it could be the best hosting solution for you (especially if you’re watching your budget). Let’s get started!
What is Resell Hosting?
Reseller Hosting is a cloud-based platform that lets you host unlimited websites. No technical skills required. Again, you don’t have to be an expert. Just log in and start hosting.
It’s perfect for anyone who wants quick and easy hosting, including beginners, marketers, and e-commerce store owners. There are no monthly fees. No hidden costs. Just a one-time payment.
Forget the big names like GoDaddy, HostGator, or Bluehost. Reseller Hosting gives you the same power — without the surprise prices.
You get unlimited bandwidth, 24/7 support, and super-fast SSD servers. Everything runs smoothly and securely.
Want budget-friendly hosting that just works? Reseller Hosting has you covered.
How Does it work?
Step#1: Log In & Add Your Domains Sign in to your secure hosting dashboard. Add as many domains as you want — it’s fast and easy.
The interface is beginner-friendly, and website setup takes just minutes.
Step#2: Install Your Website in 1 Click Pick your favorite app — like WordPress — from 300+ options. Use the 1-click installer inside your control panel. Your site is protected with free SSL encryption and runs on blazing-fast servers.
Step#3: Manage Everything From Anywhere Now you’re in full control! Create fast-loading, secure, and profitable websites with 100% uptime, unlimited bandwidth, and powerful malware protection.
Here Are the Unique Features of Resell Hosting
Resell Hosting isn’t just another hosting platform. It’s packed with powerful features that make it a total game-changer — whether you want to host your own sites or start your own hosting business.
Let’s Why
Start Your Own Hosting Business Sell hosting like a pro and earn recurring income from clients — no tech skills needed!
Create Unlimited cPanel Accounts Set up unlimited cPanel accounts for your personal projects or paying clients. Total freedom.
Super-Fast, Reliable Servers Powered by AMD EPYC CPUs and lightning-fast NVMe SSDs for unbeatable performance.
Global Server Locations Choose server locations worldwide for faster loading speeds — no matter where your visitors are.
100% White-Labeled Hosting Brand everything as your own! Add custom nameservers and logos. Your business, your brand.
Full WHM & cPanel Access Easily manage users with WHM, while your clients enjoy the familiar cPanel dashboard.
Built-In Security with Imunify360 Stay safe with firewall protection and malware defense built right in.
300+ One-Click Apps Install WordPress, Joomla, and more with just 1 click using Softaculous.
Unlimited Free Migrations Move your sites from old hosts with zero downtime — all done for free.
Spam-Free Email Delivery Enjoy reliable email with MailChannels or SpamExperts — no more lost or spammed emails.
Free SSL Certificates Protect every domain and subdomain with free SSL — included automatically.
Daily Automated Backups Keep your data safe with daily backups. Restore anytime with a click.
Custom Hosting Packages Easily create your own hosting plans to scale your business your way.
One-Time Payment No monthly bills. No upsells. Just pay once and use forever.
30-Day Money-Back Guarantee Try it risk-free. If it’s not right for you, get your money back — no questions asked.
Get More Info>>>>
#ResellHosting#ResellHostingReview#ResellHostingOverview#ResellHostingDemo#ResellHostingFeatures#ResellHostingPricing#ResellHostingOTO#ResellHostingBonus#ResellHostingBonuses#ResellHostingUpsells#ResellHostingCoupon#ResellHostingApp#ResellHostingSoftware#ResellHostingHenest Review#WhatisResellHosting
0 notes
Text
What is cPanel and How to Use it - A Complete Guide

What is cPanel?
cPanel is a Linux-based web hosting control panel that provides a graphical user interface (GUI) for managing your website and server. It is one of the most popular control panels in the world, and is used by millions of people to manage their websites
c, short for control panel, is a web-based graphical interface designed to simplify the management and administration of websites and server functions.
It is widely used by website owners, web hosting providers, and system administrators to easily manage various aspects of their websites and servers.
cPanel allows users to perform a variety of tasks, including:
Managing files and folders
Creating and managing email accounts
Installing and managing applications such as WordPress and Drupal
Configuring security settings
Managing DNS settings
Creating and managing backups

Here is a step-by-step guide on how to use cPanel:
Access cPanel:
To use cPanel, you first need to access it. Usually, you can access cPanel by typing "yourdomain.com/cpanel" into your web browser. Alternatively, you can ask your web hosting provider for the login URL and credentials.
2. Enter your credentials:
Once you access the cPanel login page, enter your username and password provided by your hosting provider.
3. Navigate the cPanel interface:
After logging in, you will be redirected to the cPanel control panel. The interface is divided into different sections, including Files, Databases, Domains, Email, Metrics, Security, Software, and Advanced. Each section provides a range of tools and options.
4. Manage files:
In the "Files" section, you can upload, modify, and manage your website's files and folders. You can also use the File Manager tool to perform tasks like creating new directories, uploading files, editing code files, and managing permissions.

5. Configure domains:
Under the "Domains" section, you can manage domain-related settings. You can add new domain names, redirect domains, create subdomains, manage DNS records, and set up domain aliases.
6. Set up email accounts:
In the "Email" section, you can create and manage email accounts associated with your domain. You can add email accounts, set up forwarders, configure autoresponders, manage spam filters, and access webmail.
7. Configure databases:
For managing databases, you can use the "Databases" section. Here, you can create new databases, manage existing ones, set up database users, and use tools like phpMyAdmin for database administration.
8. Install software and scripts:
The "Software" section offers tools to install various applications and scripts. You can use the Softaculous Apps Installer to quickly install popular CMS platforms like WordPress, Joomla, or Drupal. This section also includes options to update software versions, perform backups, and manage SSL certificates.

9. Monitor website metrics:
Under the "Metrics" section, you can monitor your website's performance by accessing statistics like visitors, bandwidth usage, error logs, and resource usage. This helps you analyze your website's traffic and make informed decisions regarding optimization.
10. Configure security settings:
The "Security" section includes tools to enhance the security of your website. You can manage SSL certificates, set up password-protected directories, enable hotlink protection, and manage IP blocklists.
11. Advanced features:
The "Advanced" section provides additional features for experienced users and developers. Here, you can access tools like Cron jobs for scheduling tasks, manage PHP settings, access server logs, or customize error pages.
Some common tasks that you can perform using cPanel:
Create an email account:
Click on the "Email Accounts" icon and then click on the "Create" button. Enter the desired email address and password, and then click on the "Create Account" button.
Install WordPress:
Click on the "Softaculous Apps Installer" icon and then search for "WordPress". Click on the "Install" button and follow the on-screen instructions.
Manage your files:
Click on the "File Manager" icon. You can then browse through your files and folders, and upload, download, or delete files as needed.
Create a database:
Click on the "MySQL Databases" icon and then click on the "Create Database" button. Enter the desired database name and username, and then click on the "Create Database" button.
In summary, cPanel is a comprehensive and user-friendly control panel that provides a range of tools and features to effectively manage your website and server.
Its intuitive interface makes it easy to perform various tasks, from managing files and databases to configuring email accounts and monitoring website performance.
0 notes
Text
How to Choose the Best Thailand Web Hosting Provider
Choosing the right web hosting provider is crucial for your website's success. Choosing a host located in the same country as your visitors can greatly improve your site's speed and SEO.
HostNeverDIE offers a wide range of hosting solutions including shared, VPS and dedicated servers. They have state of the art data centers and solid-state drives to ensure high speeds.
1. 21st Thailand
If you’re looking for a Best Thailand web hosting company with fast services, then you’ve come to the right place. A2 Hosting offers a variety of solutions that are perfect for any size business. Their services are reliable, and they work with Cloudflare so that you can get a fast connection no matter where you’re located. The company also has a simple and easy-to-navigate website that makes it easy to find the plan that’s right for you.
Dedicated servers are a great option for businesses that require a high level of security and performance. They offer a higher level of flexibility than shared servers, and they can help businesses achieve peak performance during busy times. There are several tips and tricks that businesses can use to unlock the full potential of their dedicated server.
21st Thailand is one of the most popular web hosting companies in Thailand. They provide high-speed website hosting with their own servers in Bangkok. Their cPanel plans start at 80THB and are extremely affordable. All of their plans are WordPress friendly and support a wide range of software and applications. They also include Softaculous, a one-click installer that lets you install over 50 scripts in minutes without any technical knowledge. All of their plans are backed by a 30-day money back guarantee. This allows you to try their service risk-free and see if it’s the best option for your needs.
2. HostNeverDIE
HostNeverDIE is a Thailand based web hosting company founded in 2009 and incorporated in 2012. They offer a variety of affordable and reliable shared web hosting plans that are designed to suit the needs of any website. Each plan includes daily backups, free domain name, a Gbit uplink and unlimited email accounts. HostNeverDIE also offers a number of VPS and dedicated server packages for those who need more power and speed.
They host their servers in a state-of-the-art data center located in Thailand which allows them to provide high-speed performance to their users. The data center features a high-speed network, redundant connectivity, precision cooling system, opulent security systems, fire extinguishers and CCTV for maximum protection of their customers’ websites and servers.
Whether you’re looking to host your website in the US, Europe or Asia, HostNeverDIE has a data center location that will be close enough to ensure good site latency for your international traffic. This is essential for businesses that target a global audience, as the higher the site latency, the more likely it is to impact conversion rates and customer satisfaction.
HostNeverDIE offers 4 different types of high quality dedicated servers ranging from Intel Xeon E3-1230 (4 core 8 thread) and 1 TB hard drive with 4 GB DDR3 memory for $204/month to Intel Xeon E5-650 (3,20 GHz) and 2 TB hard drives with 8 GB DDR3 memory for $219,8/month.
3. Porar Web Application Co. Ltd
Choosing the right web hosting Thailand company can make or break your business. You must select a reliable and fast-loading server to make sure that your customers can easily navigate through your website. The faster your website loads, the more likely they are to stay on your site and buy products or services from you.
Porar Web Application Co Ltd has invested in high-performance servers that are located across Thailand and other countries around the world to ensure efficient speeds for their customers. The company also offers a wide variety of plans to suit any budget.
Have you used this company? Share your experience by writing a review on ThaiYello! It only takes a few minutes and helps other customers make better decisions. Thanks!
4. Netway
Netway is a web hosting Thailand company that offers different types of services. It has high-speed servers, which help to make websites load quickly. This is essential for businesses because it creates a better user experience and boosts traffic. It also provides 24/7 customer service support to its users. Its services include a range of packages that are suitable for businesses of all sizes.
The company has been in business for over 17 years, and its reputation is built on trust and quality. It has 5,000 clients domestically and internationally, including private companies, SME's, and public organizations. Its servers are located in Thailand, and its network is secure. It also uses redundant devices to ensure that your website runs smoothly and does not crash or slow down.
This is an excellent option for businesses that need a reliable and affordable web host in Thailand. The company has a large number of servers that can handle the most demanding web applications. Its data centers are equipped with the latest technology, such as high-speed networks, precision cooling systems, and power backup systems. Its servers use SSD hard disks, which are 5 times faster than traditional SATA hard disks.
The company is also one of the first providers of cloud hosting in Thailand. Its cloud servers are based on the industry-leading Rackspace platform.
0 notes
Text
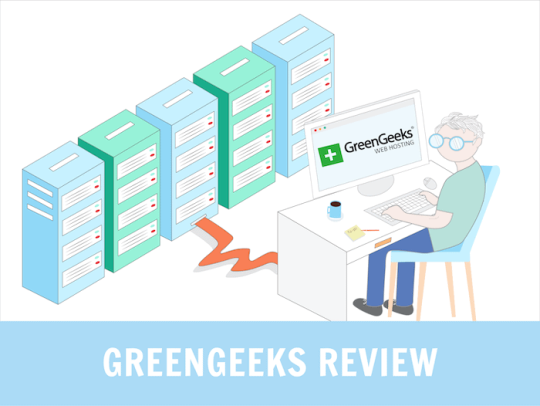
GreenGeeks Best WebHosting Service
Fun fact: do you know why Facebook moved its massive data center to Northern Sweden?
That’s because servers run hot, and cooling them down is expensive. Might as well keep them in a cold part of the world.
But more to the point in this GreenGeeks review: maintaining servers uses a ton of energy.
In fact, the Internet is one of the largest polluters in the world. Data centers account for 2% of the world’s CO2 emissions, about the same as the airline industry.
Well, if that’s a concern for you, I’ve got good news because the ‘green’ in GreenGeeks refers to their commitment to providing eco-friendly web hosting.
This is how it works, according to their website:
The platform is designed with a maximum use, no waste mindset.
For every amperage the company pulls from the grid, it matches it x3 in the form of renewable energy via the Bonneville Environmental Foundation
So they claim your website could be operating on a 300% green hosting platform!
While a growing number of hosting providers take the problem of energy seriously, (here’s an example from DreamHost), GreenGeeks really puts their ethos front and forward.
But what about other pros and cons, features and alternatives? Let’s put GreenGeeks through the wringer to see how it fares.
Table of Contents
GreenGeeks Prices
GreenGeeks Pros & Cons
What is GreenGeeks used for?
When not to use GreenGeeks hosting?
GreenGeeks Backups
GreenGeeks and WordPress
Final GreenGeeks Review Comments
Frequently Asked Quesitons
GreenGeeks Prices
Let’s first look at how much it costs per month to host your website on GreenGeeks. The first option is for shared hosting (the one most website owners need). You’ll also find that they offer WordPress web hosting. As far as I could tell, there is absolutely no difference between the WordPress and the shared hosting option.
As always, we’ll only be mentioning the regular price, which is what you pay after a first year at a discounted price. The first 12 months can be 50 – 70% cheaper.
Ecosite LiteEcosite ProEcosite Premium
Price (after renewal)$10.95 / month$15.95 / month$25.95 / month
You can purchase the plans for 12, 24 or 36 months. There is a significant discount for the longer terms, as you can see below:
GreenGeeks also offers VPS hosting, which comes with better performance, but a lot of limits depending on the plan you choose.
Price$39.95 / month$59.95 / month$109.95 / month
Finally, I should also mention that GreenGeeks has a few add-ons you can purchase to expand your hosting capabilities. These include:
Dedicated IP address: $48 per year
Premium AlphaSSL Wildcard: to secure SSL on multiple subdomains all at once.
WHMCS license: useful for resellers who want to bill hosting to their clients (note that GreenGeeks does offer a reselling option).
Last but not least, you’ll have to pay $25 for every backup restore, if you do it more than once per month (the first one is free).
What can you expect from each GreenGeeks plan?
As you can see in the above table, there’s a lot of unlimited stuff with their shared hosting and WordPress plans. That includes:
Unlimited bandwidth (or data transfer, which means the same thing)
Unlimited disk storage
Unlimited databases
Unlimited email accounts
Free SSL
The key limits to keep an eye on are maybe the number of ionodes, which is another way of saying the number of files on your site. It’s a very large number, mostly there to ensure you don’t abuse GreenGeeks’ generosity by hosting a file sharing website.
GreenGeeks Pros & Cons
Pros:
Green-minded: GreenGeeks is attempting to offset their server’s electricity consumption by using as much renewable energy as possible.
Unlimited data bandwidth: you can host one or multiple sites with complete peace of mind when it comes to visitor numbers and bandwidth.
Unlimited data storage: your site can be as large as you like, so good for video, high-res photos and ecommerce with loads of products. Just keep an eye on the number of files. Hosting more than 150,000 could void your plan’s contract.
Server locations: three continents to choose from, the US, Canada and Europe.
Heavily reduced long term plans: it’s not unusual to pay less for 24 or 36 month plans, but GreenGeeks is slashing their monthly prices by up to 70% for long term users.
Cons:
Missing advanced features: serious website owners and developers will need to look elsewhere for staging or premium DNSs.
No team management: it’s not possible to add multiple account users and to give permissions.
Lack of free backups: you get one automatic backup every 24 hours. One free restore per month, but the rest are paid. Not good enough.
Outdated design: Not a deal-breaker, but the whole system could do with a new coat of paint, which could also help with the user experience.
What is GreenGeeks used for?
I’d say GreenGeeks is best for website owners with green goals in mind. You can even show one of their green badges, to highlight on your site.
The generous bandwidth and storage is advantageous for those who own multiple sites. As far as the performance to price ratio goes, it’s good, and becomes more acceptable when you buy a long term contract of 24 or 36 months.
When not to use GreenGeeks hosting?
Anyone managing a team should consider that inviting others to join the account isn’t possible, and the lack of developer-friendly features could be a big no-no for certain businesses.
Developers with complicated workflows that need staging areas probably won’t be big fans of GreenGeeks’s platform either.
GreenGeeks Backups
Backups and restore are one of the areas I start considering a lot more these days when it comes to choosing a web host. A Sod’s law states: if something wrong can happen, it probably will, and at the worst possible times. This happened to us, and please learn from our mistakes when I say you should backup as often as possible.
GreenGeeks cPanel Backup Feature
Anyways, this is how it works with GreenGeeks. Option 1 is to use the cPanel backup tool. I’s a bit clunky and manual but by no means too difficult to do:
Login and click on the appropriate site’s cPanel button
Click Backup in the Files section
Click Home Directory under Download a Home Director
You can also download a database instead, or a full Zipped account backup, which is what you’ll need to keep on your local drives.
A couple of important things to note:
If your account is larger than 10GB in size, the whole cPanel backup option will be disabled. You’ll have to pay $5 per backup.
cPanel backups saved to your home directory will be deleted automatically after 48 hours, so it’s better to download the ZIP file locally.
The first monthly restore is free. After that, each restore costs $25. Note that it’s not unusual to restore at least a couple of times if there’s an issue (e.g. you chose the wrong backup to restore).
Option number two is to download files manually using an FTP program. If you use a CMS like WordPress or Drupal that also means you’ll need to backup databases. I always find that a big pain to do, and also slow. Which is why a better backup tool would have been useful.
GreenGeeks and WordPress
Although GreenGeeks has a special section on their website for WordPress hosting, I couldn’t find a difference between these plans and the share hosting ones.
In any case, here’s what you get for both if you want to install the world’s most popular CMS.
Easy installation: it’s not 1-click, but they use an install app called Softaculous, which simplifies the process for you. Maybe 4 or 5 steps, which you can read about here.
LiteSpeed Cache plugin: it’s a caching plugin that will make WordPress run faster on your site when properly configured. Be aware this is not GreenGeek’s own solution, but just a generic plugin they recommend.
LiteSpeed Cache Settings
To be honest, I feel like all the WordPress-optimized stuff is mostly there for marketing purposes. If you are really serious about WordPress experts (and you have the budget for it), I’d consider other options like Kinsta or WP Engine. SiteGround is also a great option if you need something a bit more affordable.
Final GreenGeeks Review Comments
GreenGeeks is certainly the provider we’ve tested that’s the most committed to protecting the environment. It’s an admirable choice, and businesses with a green goal will certainly be pleased to hear that they can host a website with a reliable performance, price, and low carbon footprint.
But there are nevertheless a few downsides to consider. The lack of advanced options like staging and team management features can be a dealbreaker for professional business owners. The limited backup features may be not enough for most.
And if you need a top-performing host, other (and more expensive) solutions like SiteGround, Kinsta or WP Engine could be considered.
It’s also not the cheapest provider out there. For example, at renewal DreamHost is more affordable and offers similar performance levels.
> Try GreenGeeks risk-free for 30 days
Frequently Asked Quesitons
How Do I Pay for GreenGeeks?
You can pay via all major credit cards and PayPal. No checks, money orders, wire transfers or Western Union payments.
Is Everything Really Unlimited?
Yes. Just keep in mind that there is a limit on the amount of files you can keep on your sites, though. It’s a really high number, so mostly a precaution against file-sharing websites.
Can I Get My Money Back?
There is an unconditional 30-day money back guarantee offer.
Is There an Uptime Service Guarantee?
Yes, if your website hosting drops below a 99.9% rate, GreenGeeks will refund some of your hosting fees.
Is GreenGeeks Really Environmentally-Friendly?
They’re certainly advertising as such. In practice this is how it works: GreenGeeks tells the Bonneville Environmental Foundation (BEF) how much electricity they use. The foundation calculates how much green energy they’ll need to use to make up for it. GreenGeeks purchases that amount in renewable energy.
So it’s not like their servers use less energy than standard hosting. However, they are certainly committed to making up for what they consume, and using as much green energy as possible.
Get GreenGeeks Now
#Best Web Hosting Services#Best Web Hosting Providers#best web hosts#web hosting#web host#web hosting provider#web hosting services#wordpress hosting#hosting
1 note
·
View note
Audio
Hostinger Best Web Hosting Review
Visit at- https://webhostingservice.home.blog/2019/06/02/hostinger-free/
There's no uncertainty that with regards to web hosting, Hostinger is just the least expensive choice accessible today, with costs beginning at $0.99 every month. No other organization figures out how to try and approach. A large portion of them offer a fundamental arrangement for multiple times the cost. Believing that it's unrealistic? It isn't. Yet, let me let you in on a little mystery at this moment. To get the best costs, you'll need to focus on Hostinger for quite a while. This would be a keen activity – if the administration is really extraordinary. Since your guests couldn't think less about the amount you pay for hosting. They do think about quick stacking speeds, and about really having the option to arrive at your site when they have to. They additionally need to realize that their own information will be secure and ensured. Could Hostinger offer that? I have my assessments; however I would not like to put together my audit with respect to my supposition alone. As Website Planet is accessible in various dialects, for some odd reason we have web hosting specialists dissipated everywhere on over the world. This was my brilliant chance to play out an enormous scope test, and I chose to do precisely that. We had 30 specialists join to Hostinger and dispatch a neighborhood form of our testing website in 30 distinct nations. They messed with each accessible element, observed stacking velocities and execution, and even besieged client care with questions. They contrasted the outcomes and other mainstream has, as SiteGround and InterServer. This speedy response to every one of our inquiries is that Hostinger performed strikingly well. In certain nations, similar to Russia, it came in at #4. In others, similar to Israel, Hostinger grabbed the #1 place. Peruse on for the long answer. I've point by point my full close to home involvement in Hostinger, and I'll disclose precisely how to take advantage of what the organization offers. To perceive how Hostinger looks at to different administrations, look at our rundown of the top web has. Everything an Amateur Needs
With costs being as low as they may be, my restless character quickly recognized two zones where Hostinger may be attempting to pull one over on me: highlights and execution. Indeed, I'd love to pay half of what the contenders charge, yet I would prefer not to get just 50% of what they give. Fortunately, that wasn't the situation by any means, as Hostinger's arrangements incorporate all that I expected to get moving, from abundant assets to execution boosting apparatuses.
Three shared hosting plans are accessible – Single, Premium, and Business. Each of the three works on head of Hostinger's own special control board, cPanel, which incorporates simple auto establishments of WordPress and many other substances the executive’s frameworks (CMS).
I pursued the essential arrangement, which accompanied 10GB of plate space, 100GB of transfer speed, 1 email record, and backing for a solitary website. It's sufficient assets to construct an entirely good website – consider hundreds pages and a huge number of HD pictures. Certainly enough to grandstand your composition, innovativeness, items, administrations, or whatever you're anticipating hosting.
The two progressed plans accompany boundless data transmission, boundless email accounts, and boundless websites. Some additional advantages that you won't get with the Single arrangement incorporate SSH access for you Linux-sharp designers, boundless sub domains, and boundless information bases. Programmed every day reinforcements are the one basic component that the fundamental arrangement needs, which means you'll need to perform reinforcements physically or buy the administration as a different extra.
Hostinger has an intuitive website manufacturer by the name of Zyro, however it isn't accessible as a component of the hosting plans.
Before we dive further into Hostinger's best highlights, a word on the VPS and cloud plans. Hostinger is above all else a mutual hosting supplier. Try not to be that person who goes to the best pizza joint around and requests pasta. There are has that represent considerable authority in VPS and cloud administrations – Fluid Web and Kinsta, for instance – and keeping in mind that Hostinger's contributions in the field aren't the most exceedingly terrible, there's no motivation to go for them. cPanel Has All the Fundamental Highlights, yet Does not have Some Serious Ones
As I said previously, Hostinger has built up its own exclusive control board, which means you won't get the chance to play with the dearest cPanel that you know and love. What's that? You don't create enthusiastic connections to hosting control boards? All things considered, you're the bizarre one. At any rate, while cPanel used to be the standard control board you'd get with most has (counting Hostinger), things change. Because of some exhausting venture show that happened some time back, has have been exchanging boards left and right.
cPanel is Hostinger's endeavor into the board world, and you'll see it furnished with all the treats you need. From simple auto establishments and DNS zones setups to email accounts, a record administrator, and MySQL information bases, it's all fundamentally the same as what cPanel offers. However, a few things are unique. For instance, auto establishments in cPanel are finished with Softaculous, which additionally lets you clone your site, set up an arranging variant, and even design a reinforcement plan. cPanel's Auto Installer works admirably at auto-introducing WordPress, yet does not have these valuable additional items.
Progressed email highlights, such as mailing records, channels, and routings, are additionally absent from cPanel. Did I ever really use them myself when they were accessible to me? Truly, never. I don't know who does. Yet, that is cPanel for you – it probably won't be equipped for everything, except it's certainly enough for most clients. Amazing Reserving On account of the LiteSpeed Web Worker
LiteSpeed isn't the physical metal worker, however the web worker innovation that Hostinger employments. It reliably positions as one of the quickest and most dependable web workers, beating the more seasoned Apache innovation that hosts like GoDaddy despite everything use. You won't need to successfully arrange it. Simply kick back and appreciate the first class execution it conveys, particularly for WordPress websites.
What you can do, and assuredly ought to do, is initiate LiteSpeed's reserving capacity, known as LSCache. Sounds excessively specialized? Indeed, turning on the Programmed Store alternative basically summarizes it. Stored duplicates of your pages will be made, fundamentally slicing conveyance times to guests. Static pages, similar to business pages and portfolios, will profit by this significantly more.
A SSL Declaration that you could conceivably be getting
You need a SSL testament. Regardless of what you think and regardless of what anyone might've let you know – you need a SSL. Why? Since without a SSL authentication to scramble and secure your guests' information, the numerous wrongs prowling on the web will seek it. You'll not exclusively be taking a chance with your undertaking and your guests' wellbeing; however you'll additionally endure a shot on Google's rankings.
Today, Hostinger furnishes a SSL with the entirety of its arrangements. In the metaphorical yesterday, which for my situation was only two or three months back, no testament was given. What will happen tomorrow is impossible to say. Hostinger regularly messes with its arrangement highlights, and I propose that you triple-check and ensure that a SSL is to be sure included with your arrangement. Realize that if a SSL is excluded, it's conceivable to buy one as a different extra. In any case, that shouldn't be the situation. All that Is All around Structured, however you’ll be under Consistent Assault from up sell Pop-Ups.
Laying it out plainly, Hostinger's client experience specialists have designed an awesome interface and client venture, from information exchange to utilizing and dealing with your hosting. Thing is, Hostinger's business methodology depends on continually pushing you to overhaul and buy additional items. It's irritating, best case scenario, and confounding at the very least.
Yet at the same time, the plans are unmistakably spread out, and all Hostinger requests on information exchange is your name, an email address, and a secret word. Yahoo for getting rid of all the insignificant data that different hosts are so enthused about gathering.
Interfacing a Domain and Introducing WordPress
In the wake of buying my arrangement, the time had come to associate a domain and introduce WordPress. I was given the choice to consequently introduce WordPress as a major aspect of the information exchange measure, however I decided to do it the normal way, utilizing the control board itself, to check how Hostinger's apparatuses contrast with what different hosts give.
Presently, my domain was really included with the expectation of complimentary when I bought the Single arrangement, which means it was at that point associated with the hosting. Today, for reasons unknown, just the serious plans accompany a free domain.
In the event that you wind up getting your domain name from another supplier, interfacing it is simple. Nameserver data is promptly accessible at the head of your hosting subtleties page, and you should simply duplicate glue them into your domain board. Shouldn't something be said about WordPress? I opened the Auto Installer instrument, picked WordPress as my CMS of decision, and entered the essential website subtleties. It was much easier than how Softaculous gets things done, and my new website was ready for action inside one moment. Dealing with Your Hosting with hPanel Is Simple
We've secured the way toward getting your website on the web, however starting here on you'll despite everything use cPanel to make alters and changes to your hosting. Setting up an email account, running manual reinforcements, dealing with the information bases, and the sky is the limit from there, are largely possible through cPanel. How can everything contrast with getting things done with cPanel? Indeed, as I would like to think, it's out and out simpler. hPanel symbols are greater and better sorted out, the interface isn't as jumbled with additional alternatives that you'll never utilize, and the combination with Hostinger's different administrations (uphold, buying additional items, seeing charging) is consistent. All in all, would we be able to consider it an ideal usability experience? Actually no, not so much. The explanation, as I said previously, is that periodically your work process will be harmed by up sell pop-ups. Think rolling out a basic improvement to your DNS records, just to be welcomed with this: I didn't "Increase present expectations." I didn't really do anything aside from sign in. Yet, Hostinger is enthusiastic about pushing plan redesigns, and you'll need to consistently be set up to close down these endeavors, of which there are many. Don't count on the possibility that these pop-ups imply that you've by one way or another spent your assets and need to redesign. Pass on, It's the Quickest Common Hosting Administration We Tried
Speed and uptime that is what I'm searching for. Tragically, shared hosting administrations will in general vacillate in these regions, no doubt. The explanation is that as the name infers, you're offering assets to numerous different clients and their websites – in some cases up to many others. It takes an extraordinary host to adjust everything and stay away from a bottleneck circumstance where everything's moderate and no one's cheerful. I'm extremely glad to report that Hostinger exceeded expectations in the presentation tests, yet it really surpassed each other shared host that we tried, including the top-level SiteGround, FastComet, and InMotion Hosting. The main two has that improved, and just barely, were the superior Fluid Web (Nexcess) and Kinsta. Incidentally, they can cost around 20 fold the amount of as Hostinger.
Just to give you a thought of Hostinger's capacities, the normal stacking season of my completely fledged greeting page was an exceptional 1.56s, and uptime over a couple of long stretches of testing was as much as 99.99%, precisely as guaranteed. I'm going to nerd out and clarify the testing technique and the outcomes in detail, yet on the off chance that you needn't bother with all the specialized data, don't hesitate to avoid ahead to my encounters with Hostinger's help. I'll simply say it again – Hostinger's presentation shook.
As I do with all hosts I test, I stretched out Hostinger the chance to streamline my website and make it quicker. This is something you can (and should) do too – simply approach uphold for help. The operator prompted that I update WordPress and PHP to their most recent forms, and introduce a couple of regular enhancement modules. I actualized the exhortation, and continued with testing.
The testing itself was finished utilizing three apparatuses: GTmetrix Genius, the Sucuri Burden Time Analyzer, and Uptime Robot's Professional arrangement. The Dallas, TX, GTmetrix worker was utilized to quantify speed and advancement scores in the US. Sucuri was utilized for worldwide execution experiences, and Uptime Robot – who could have imagined – for following the website's uptime and accessibility online in rates. GTmetrix
I ran various GTmetrix tests over a couple of months, totaled the outcomes, and determined the best, slowest, and normal paces. Hostinger indicated a promising normal stacking season of 1.56s. The best recorded time was 1.0s, and the slowest one was 1.9s. Not exclusively is the slowest stacking time well underneath the 3s imprint (where the majority of your guests will likely escape), however the normal scores demonstrate that Hostinger is as solid as anyone might imagine.
You can see that score-wise, we're getting twofold Bs. That is totally satisfactory, yet in addition probably the most noteworthy score I found in my tests. The main thing left to do so as to get full scores is to improve the pictures further. Sucuri Burden Time Analyzer
As with GTmetrix, I ran Sucuri tests on numerous occasions. Sucuri gives you the stacking speed results for some worldwide areas, and I determined the midpoints of the quickest area (which was obviously in the US, near my server farm), the slowest area (Bangalore, India – the opposite side of the world), and the worldwide normal. The normal for the quickest area was an incredible 0.177s, while even in old fashioned Bangalore the normal was good – 1.11s. The worldwide normal was 0.499s, which earned my website an A worldwide position.
Frankly? I was shocked by these numbers. A worldwide normal of 0.499s is unfathomable for a common host, and everything I did to "streamline" my site was introduce a couple modules. There wasn't so much as a CDN (Content Conveyance System) dynamic. That is LiteSpeed and LSCache for you, women and respectable men. Get it while it's hot. Uptime Robot
What great are quick speeds if your website has low accessibility? Nothing but bad. Fortunately, Hostinger is keeping it tight with practically immaculate uptime – 99.997% in the course of recent months. I'm proceeding to track and update the outcomes; however coming barely short of 100% is actually what I request from my host.
Uptime ensure shrewd, the circumstance is somewhat extraordinary. There's apparently a 99.99% uptime ensure gave, yet Hostinger has a genuine scrappy lawful clarification of when and how you can get your cash back. It generally seems like "never" to me, and regardless of whether you some way or another fit the bill for a cash back (as exclusively dictated by them), it's a measly 5% of your month to month cost. Goodness, and it's only for store credit. In any case, beside this assurance issue, Hostinger truly blows it out of the recreation center in the exhibition test. When Extraordinary, Presently… Requires Tolerance
As a long-term client of Hostinger, I've had the delight of testing it over and over… and once more. One of my preferred pieces of the administration used to be the help. There wasn't (and still isn't) any telephone uphold accessible, yet stunning, was live talk a successful method of finding support. Day in and day out help, kept an eye on by experts, and supported by a broad information base of immense extents. The main issue? While the operators used to react in a flash, today they take around 40 minutes to hit you up. In some cases live talk isn't even accessible, and you're moved to some ticket/email framework which I've had next to no karma with. I'll be totally fair with you about what this implies: it will be you and the information base. You can't rely on having an hour accessible to just stick around, and in any event, when the operators do reply, that is only the start of the cycle. With 3 brief reaction times in the middle of messages, posing some straightforward inquiries can expand into a whole workday. The Least expensive Long haul Costs Available, by a wide margin
Truly, people, this is the explanation you understand this. While going over the many hosting choices accessible today, Hostinger's costs stick out. That is to say, $0.99 every month? That is excessively modest. What's the trick? Straightforward. Hostinger needs you to pursue a significant stretch of time, and it will give you motivating forces to do as such. Four installment periods are accessible: month to month, yearly, bi-yearly, and quadrennial. That final word implies four years, and it's scarcely utilized in light of the fact that practically no other host approaches you to pursue that long.
Fortunately pursuing four years will net you what's without a doubt the best cost in the market for shared hosting. Different hosts charge a comparable cost for a yearly arrangement. Crunch the numbers yourself. What's the circumstance when pursuing shorter periods? All things considered, bi-yearly and yearly plans aren't costly, yet they're significantly more in accordance with the market normal. Month to month plans accompany an arrangement expense and don't bode well. Worth insightful, up to a SSL is incorporated (check!), the plans are totally comparable to the business standard. There's additionally a 30-day unconditional promise, so you'll have adequate opportunity to test the administration yourself and check whether it's a solid match. One thing to see during the checkout cycle is that there are a couple of discretionary extra administrations. Fortunately, none of them come pre-checked. I suggest that you skip them all. You can generally include them later at a similar cost, or "convince" a help operator to give you a superior arrangement… dangers of leaving the administration can do something amazing here. Searching for a free domain?
Now and again it's remembered for the plans; some of the time it isn't. The serious plans normally accompany one when pursuing a year or more. At the point when I joined, a domain was additionally remembered for the fundamental arrangement. Presently it isn't – go figure. Concerning making installments, notwithstanding the normal charge card and PayPal choices, you'll additionally have the option to pay with bitcoin and different cryptographic forms of money. Whatever your reasons are for needing to have a website secretly, crypto is the best approach to do as such. Hostinger's reasonable shared hosting plans merit your time, your cash, and your thought. Execution has been shockingly extraordinary, and keeping in mind that it's not the most element pressed contribution around, it has all that you truly need. Would it be advisable for you to put it all on the line? In case you're constructing a blog, a business page, an individual task, or a comparative little to-medium website, my answer is a resonating yes. In the event that it's a web based business store you're hoping to fabricate, or a mind boggling administration like an online course gateway, you'll need something more remarkable than shared hosting. It'll cost you, yet Fluid Web and Kinsta are both better prepared for such ventures.
#web hosting#hostinger#best hosting#web hosting reviews#best hosting service#who hosts a website#web site plans#hosting reviews#web hosting review#web hosting services reviewed#hostinger uk#reliable web host#hostiger#hosting review#best web hosting reviews#web host listing
1 note
·
View note
Text
Business Shared Hosting | Web Hosting Solutions | Limenetworking Hosting
Meaning Of Business Shared Hosting?
Business Shared Hosting is a well known, economical, passage level web hosting item, frequently appealing for little and medium organizations, web journals, portfolios and websites with moderate measures of traffic.

With Shared Web Hosting, numerous websites share an enormous server and its assets, including capacity, transfer speed, and plate space. With Shared Hosting, the web have is answerable for the entirety of the server support and upkeep. All of Limenetworking Business Hosting packages are cheapest Shared Hosting packages.
Reason of Choosing Business Shared Hosting
Business Shared Hosting is an extraordinary, modest alternative when you’re simply beginning. In the underlying phases of propelling a web nearness, or reviving what you have, until your website gathers speed, choosing the most reduced estimated alternative is a brilliant business choice. On the off chance that you needn’t bother with explicit programming or setups, at that point Business Shared Hosting is ideal for you.

Some installable programming requires root get to – which gives the client access to all assets and execute any order – or more CPU use than permitted on Business Shared Hosting. When beginning, most independent ventures just need a little instructive website to help construct mindfulness and support leads.
Cheap Web Hosting
While most independent companies first dispatch a website, traffic will presumably be low until the webpage increases rank on search engines.
Advantages of Business Shared Hosting
Limenetworking Web Hosting offers numerous advantages with our Business Shared Hosting packages. These advantages incorporate free SSD drives, a free disk space for one year, along with restoration and backup facility with single click. There are more than 300 single click installers accessible, and you can code in different languages, for example, PHP, MySQL, .net, and Ruby.
You can get to your email from any gadget with Limenetworking protected IMAP email and pick your server farm that will permit you to have your maximum speed zone. You can work simpler and quicker with SSH access, and you can appreciate the Google applications mix with a simple to utilize 3-advance wizard.
Choosing Best Web Hosting Product
If you are new to web hosting or are making a website with low to direct measures of traffic, Business Shared Hosting is likely the best alternative for you. It is the most reasonable web hosting you can purchase and will probably have all that could possibly be needed assets for your site(s) to run rapidly and efficiently.
When your site develops in rush hour gridlock and your experience increments in utilization, it will be a great opportunity to move up to Virtual Private Server Hosting. This item will give you your own segment of a dedicated server.
Limenetworking Cheap Dedicated Servers
If you have an asset overwhelming application or a site with an exceptionally high measure of traffic, you have the choice of overhauling. You can move up to your Limentworking cheapest Dedicated Server which gives all of you of the server assets and permits you to arrange it any way you see fit.
Building a Website
Limenetworking Web Hosting makes it simple for new web designers to get their locales up and off the ground. The entirety of our Business Hosting plans accompany Softaculous, an application installer that will permit you to download more than 400 applications to assist you with your website.

Limenetworking Web Designing
These applications incorporate, however are not constrained to, Content Management Systems (CMS, for example, WordPress, Joomla and Drupal, Online Marketplaces, for example, Prestashop, Magento and OpenCart, and numerous others. Shared Hosting is an ideal domain to create and sharpen your programming aptitudes and gives various instruments to novices.
I as of now have a website with another host. Would i be able to transfer my website?
Yes, you can move your website for nothing to your Limenetworking Web Hosting account. Your free website move incorporates up to 3 websites, databases, as well as cPanel accounts. The expense for extra website moves is $10 per thing. On the off chance that you decide to move your website, we have a far reaching bolster focus. Investigate your issues with broad bit by bit articles, training channels, and client driven network support forums.
How numerous websites would i be able to have with my Business Shared Hosting plan?
The number of websites you can have with one record relies upon the Business Shared Hosting plan you select. For Launch plans, you will be designated 2 websites for your account.
For Power plans, you can have up to 6 websites. With our Pro arrangement, you can have a boundless number of websites. No shrouded expenses or shock charges, only different websites for one low price.
What’s next subsequent to buying a Business Shared Hosting plan?
You are prepared to begin assembling your website(s). When you have bought your cheapest Business Shared Hosting bundle, sign into AMP and investigate alternatives, for example, enlisting and moving areas, getting to cPanel, buying SSL endorsements, setting up your email, submitting website move solicitations and much more.
You can likewise sign in to cPanel and start introducing applications, for example, WordPress. We have various instruction channels identifying with getting your record set up. In the event that you run into issues, don’t stop for a second to connect with our accommodating care staff for help.
Cpanel Login

Also, make a point to look to Limenetworking 100+ Small Business Resources and Tools for Entrepreneurs and Startups to help with showcasing, visual computerization and venture the executives devices. It’s a free asset direct for anybody hoping to streamline their website’s performance.
#cheap dedicated server#cheap dedicated hosting#vps hosting#vps#domain checker#business hosting#business web hosting#business shared hosting#$1 hosting#$1webhosting#managed dedicated server
3 notes
·
View notes
Link
WordPress is a popular Open Source #CMS to build any type of website. It is free available on Wordpress.org server. Today, I am discussing how to install Wordpress on the live server via #softaculous. This is the best way to install Wordpress on the live server using softaculous. This process is very easy to #install Wordpress on the server.
2 notes
·
View notes
Text
How to Start a Blog on WordPress in 2019?
Are you thinking to start a blog in WordPress soon? Are you getting confused about how to set up a brand-new website in WordPress?
This post is dedicated to all the people who are searching for a step by step tutorial on how to start a blog on WordPress in 2019. With this guide, you can be able to build a brand-new website using the world's most popular Content Management System.

Before going to the tutorial part let me tell you the required things that you need to ensure to build your website.
When building a brand-new website, you must need two things.
Domain Name: The name on which your brand will be recognized. Every website has a unique domain name. You cannot start building your website without the domain name.
Web Hosting: This is the thing that is also required before creating any website. Web hosting is the place where you will put your files to show on your website. You can purchase both the domain name and web hosting plan from GreenGeeks. This is one of the leading and my favorite hosting company. You can get a discount from GreenGeeks and save some money during the upcoming Black Friday sale. Make sure you pick the right plan that is suitable for your website type.
How to Start a Blog on WordPress?
Here I come up with the step by step tutorial. This will help any new and experienced people to setup WordPress perfectly and start their blog within 30 minutes.
Let's start:
Choose our domain name and hosting plan and purchase both. There are so many domains and web hosting providers out there. You may pick any of them and get these two things ready.
After having the domain name and web hosting plan you are ready to start building your website.
Open your cPanel and find the Softaculous app installer. Most of the renowned hosting provider offers this automated app installer through the cPanel.
Once you find the Softaculous app installer open it and install WordPress using this app. This will automatically install WordPress on your hosting server.
After finishing WordPress installation, you will be notified via email.
Finally, log in to the WordPress dashboard.
After a successful login, your next step is to customize the blog and make it professional. You will find thousands of themes and plugins on the WordPress directory. Check and find the right one that fulfills your needs and install it.
You may need to customize the theme and plugin to make it work perfectly.
You are done!
This is the step-by-step on installing and setting up a WordPress blog. You will need around 30 minutes to do all the things and run your blog.
If you have any questions regarding WordPress installation feel free to ask me. I will be happy to help you. Drop a comment below and I will try to assist you to build your first website on WordPress. If you find this post helpful make sure you share it on your social media.
9 notes
·
View notes
Text
How to install wordpress – Complete wordpress tutorial

2 Things You Need Before Installing WordPress Before you installing WordPress, first you will need a domain name and second a good web hosting company. Most web hosting company provides shared space on a web server for less than $8-$10/monthly. Also many hosting company will install and maintain wordpress for you. Today, we highly recommend that you use BlueHost. Because they will give you a free domain as you like. And their hosting plan price start only $3.95/monthly. You will be happy and feel secure to hear that BlueHost is also an official recommended hosting company of wordress.

How to Install WordPress using Softaculous Softaculous is a most popular auto-installer script. Just a few clicks, you can easily install wordpress. The most popular BlueHost company use Softaculous in their control panel. Now just login to control panel account and look for WordPress icon (see below the image). You will get them under Softaculous apps installer section.

After clicking on wordpress icon you will see an overview of wordpress as like below the image. Now you need to click on the Install tab to continue the install process.

As protocol, you need to choose http:// or http://www. And if your site has SSL and HTTPS, then as protocol you have to select https:// or https://www. After that, you need to choose the domain name where you want to install WordPress. Most users want to install WordPress in their domain’s root directory, like example.com. In that case, you need to make sure that the ‘In Directory’ field is blank. (You will see ‘wp’ in directory filed as default)

Then down a little, you will see the site settings section. Under this section, first you need to fill a title and description of your site. If you don’t want yet, don’t worry you can easily change them from your wordpress admin area after installation. Next, you need to choose an admin username, strong password, and email address. Softaculous will automatically fill in the username and password fields for you. It will use a non-dictionary word for username and a strong password.

You can change them if you want so that they are easy to remember for you. However, we strongly suggest you to always use a strong password. Always you will use correct email address in the admin email field. Because wordpress will send notifications and password reset link if you ever forgot your password. Rest of the options are optional. So you can now click on the install button to run the installer.

Softaculous will run the installer using the settings you provided. You will see a progress bar with installation status. It will take a couple of minutes, do not close the window until the progress bar reaches 100% otherwise this may affect your wordpress installation. You will see a success message after the installation is finished. It will also show you a link to your website and another link to your wordpress admin area.

How to Install WordPress using FTP Just the five steps to install wordpress. Download the latest version of WordPress.Upload those files to your web server, using FTP or cpanel file manager.Create a MySQL database and user for WordPress.Configure WordPress to connect to the database that you created for you wp site.Complete the installation and setup your website! First thing you need to do is download the latest version of WordPress. Unzip the file, and use FTP to upload WordPress files into your web host directory of your choice.

If you want to install WordPress on your root domain name (like example.com), then you need to upload WordPress files to your website’s root directory. Usually this directory is called /public_html/. On the other hand, If you want to install WordPress in a subfolder (like example.com/myblog), then upload it in a folder /public_html/myblog/. Once you are done uploading WordPress, go to your hosting control panel to create a database. We are using cPanel web hosting, so you will find icon as like below screenshot.

You will see a field to create a new database. Enter your database name, and click “Create Database”.

Now that you have created your database, MySQL still needs a username MySQL Databases page in your cPanel account, down a little MySQL Users section. Simply provide a username and password for your new user and click on the ‘Create user’ button.

This new user still does not have access to the database you created earlier. For that you will need to add the user to the database and give them permissions to perform all actions. On the same MySQL Databases page in your cPanel account, down a little ‘Add User to a Database’ section. Select the database user you created from the dropdown menu next to user, then select database, and click on the add button.

You will be now asked for the privileges you want to allow this user. Select all privileges and click on the Make changes button.

Your MySQL database and user are now ready, and it is time to run the install. Now go to to the URL where you uploaded WordPress. If it is in the main domain, then enter your domain name in the browser window, like example.com or www. example.com. You will see the language selection page. You can choose a language and click on the continue button to procced.

You will now see some installation instructions. Wordpress will need database name, password, and mysql host information. Click on the ‘Let’s go’ button to continue.

Now wordpress will show you a database connection form. You need to enter the database name, user name, password and database host.

Then click on submit button.

Next you will see ‘Run the install’ page. So you have to click on ‘Run the Install’ button to continue. Now wordpress will create tables in your database and then send you to the next step of the installation. Then you need to fill some information for wordpress to setup your site. This includes site title, username, password, and admin email address. If you do not want your website to be visible to search engines, then you can check the box next to search engine visibility

Click on the Install wordpress button to continue. Wordpress will setup your website and finish the installation. You will see a success message showing your username. You can now click on the Log in button to sign in to your wordpress site.

Read the full article
1 note
·
View note
Link
There's a reason why WordPress is one of the most widely used blogging platforms. It has an appealing, user-friendly interface and is simple to install.
0 notes
Text
How to Download WordPress Website From cPanel
How to Download WordPress Website From cPanel The process of downloading a WordPress website can be difficult, but it's not impossible. If you're using a hosting account, you can do it through your cPanel. First, you must create a database for WordPress. This is where WordPress will store its content and settings. cPanel If you use a cPanel hosting account, you'll be able to download WordPress files from your account by using the cPanel file manager. First, you'll need to create a database for your WordPress website. This is where WordPress stores its data. To create a backup, sign in to your cPanel account and navigate to the File Manager. Choose the directory in which you wish to download your website files. In most cases, this will be the public_html directory of your site. Double-click this directory and you'll be able to find the files you need. QuickInstall To install WordPress, cPanel users need to sign into their cPanel accounts. From there, they need to click on QuickInstall. The QuickInstall application is a custom script manager that is available for many other software packages as well, including WordPress. Once you have installed QuickInstall, you can manage your installation using the Manage Installations feature. You can also delete the installation by clicking on the "Remove" link. To install WordPress using the QuickInstall tool, you must be able to access your web host's FTP account and have shell access. Next, you must move the directory containing WordPress to the desired location in the root directory. Once you have done this, launch your web browser and begin the installation process. Softaculous Once you have your hosting account, you can download a WordPress website using Softaculous. This software will create a subdirectory in your document root for the installation of WordPress. It will prompt you to enter a username and password, and will also provide the URLs to the domain and the login page. Once the installation is complete, you can log in to your website to view it and post new blog posts. To download a WordPress website from Softaculous, go to cPanel and select Softaculous. The auto installer will search the Softaculous database for WordPress platforms. You can find WordPress under the Blogs category, as well as in the popular applications slider. Once you find WordPress, click Install Now to get started. Exporting WordPress site content There are several ways to export your WordPress site content from your cPanel account. First, you can choose to export all the content or selected areas. The process can take a few minutes, depending on how large your website is. Once the export is finished, you can download the exported files directly from the server. You can also export just the posts and pages on your site. The files you export can be large so take your time and be patient. After choosing the posts and pages you want to export, you can choose the format and export them. Using phpMyAdmin First of all, you should be able to find phpMyAdmin in your cPanel account. You can use this application to export your website's database. You can export the whole database, or just specific tables, if you want. The export process will take a few minutes, depending on the size of your website. Once the export is complete, you can download the files directly by clicking on them. To begin the download, you must first log into your cPanel account. Once you have done that, navigate to the File Manager and select the Public_HTML directory. Double-click on the folder to locate the files of your website. Installing WordPress on a local computer If you want to build a site, you might want to learn how to install WordPress on a local computer. This popular content management system lets you create a website quickly and easily. Once it is installed, you can customize its appearance, add content, and more. To install WordPress on a local computer, go to your webhost's cPanel. Look for the WordPress icon under Sites. Choose Install Now and provide a domain name. The installation page should look similar, regardless of which auto-installer you use. Just make sure to change the default protocol from http to https. How to Download WordPress Website From cPanel Read the full article
0 notes
Link
In this tutorial we’ll learn how to install WordPress manually on any shared web host, using cPanel. Although there are quicker ways to install WordPress, such as using script installers such as Softaculous, this guide takes us back to the basics. It will give us a better understanding of how the different components of WordPress are linked internally.If you wanted to install WordPress locally without purchasing a shared hosting server, you’re in luck! We have similar tutorials for installing WordPress offline in Windows, MacOS and Linux. The principles are all the same.Installing WordPress manually consists of three basic steps:Upload the WordPress files to your serverCreate and link the databaseRun the famous 5-minute WordPress installationThese steps remain unchanged in almost any WordPress setup – be it shared hosting, managed WordPress hosting or an offline setup. Of course, the complexity would increase with managed hosting, but we won’t have to worry about that now, would we? (Hint: Because it’s a managed service!)In this tutorial we’re going to install WordPress manually using cPanel. Then, as a bonus, we’ll also show you how to use an automated script installer (Softaculous) to install WordPress in the same shared hosting server.Using cPanelWith the advent of cPanel, a lot of our work has been reduced. Almost every shared hosting provider that you find today will include a license of cPanel in your hosting account. If you manage to find that doesn’t offer cPanel, you’re better off going with one of the best WordPress hosting companies.Okay, so let’s break down this tutorial. We’ll first list the prerequisites and then move on to the table of major tasks.Prerequisites for this guide:We assume you’re on a shared host with cPanel installed. If you’re having a hard time deciding which shared host to go for, you could try BlueHost.You have FTP access to your public_htmldirectory. This is the folder that will hold the WordPress installation files.You have a standard database like MySQL.You have downloaded the wordpress.zip file and are able to extract the contents.Major Steps in Manual Installation:Upload WordPress Files to Shared Hosting Server Uploading WordPress ZIP archive using cPanel File Manager Understanding which Directory to Install WordPressUpload, Extract and MoveUploading the wordpress.zip archive via FTPCreating a new MySQL Database and User Create a New MySQL Database in cPanelCreate a New MySQL User in cPanelConnecting the MySQL User to the DatabaseThe Final Configuration (WordPress’ 5 Minute Installation)Bonus: Install WordPress Manually with Softaculous in cPanel Select WordPressConfigure SettingsWhy Use Softaculous (or other automated script installers)?1. Upload WordPress Files to Shared Hosting ServerFirst we download the latest version of WordPress from the WordPress.org repository. Uploading the WordPress files to your hosting server can be done in two major ways.You could use the cPanel File Manager to upload the zip file, ORUpload the file using FTP access.We’re going to highlight both the methods.Step #1.1 – Uploading WordPress ZIP archive using cPanel File ManagerLogin to your hosting provider’s Client Area and launch cPanel.If you’re unable to locate it, you could try yoursitename.com:2082 since cPanel’s default port is 2082 (2083 for cPanel over SSH).In case you cannot login to cPanel, contact your hosting company’s support.Launching the File Manager from cPanelLocate and launch cPanel’s File Manager.cPanel File Manager Default DirectorycPanel File ManagerIf a message like the one shown above appears, select the Web Root directory. In other cases, the File Manager would launch automatically.Step #1.1.1 – Understanding which Directory to Install WordPressWe’ll assume that we have one domain connected in our shared hosting account. The Web root directory is also referred to as the www directory. The actual folder for the www directory is called the public_html folder. This folder contains all the files that are publicly available in our website.Technically speaking, the web root directory for a domain or a sub-domain is the base directory containing all the files available to the public HTML port (i.e. port 80). If the last line is all mumbo-jumbo to you, consider an example.Suppose you’ve purchased and linked your domain to your hosting account. The content of your website, say www.yourwpsite.com will be available in the www directory (i.e., the public_html folder). When you create a new folder (say ‘enigma‘) inside the www directory, it’ll be available in your domain through the link www.yourwpsite.com/enigmaLet’s apply this newfound knowledge to help us decide our WordPress installation directory.Using the same rules, if you want your WordPress site to be available under yourwpsite.com, install it under the root directory.Else, you can make a folder and install WordPress there. Please remember this step as it’ll be useful when we talk about installing WordPress using automate script installers like Softaculous.Step #1.1.2 – Upload, Extract and MoveSo far we’ve downloaded the wordpress.zip file, and decided which folder to install WordPress in. Cool, now we will navigate to (or create) the folder where we want to install WordPress and extract the wordpress.zip archive in that folder.Let’s say we want to install WordPress in a folder called ourwpsite, located inside public_html. In this case, our WordPress site would be accessible under yousitename.com/ourwpsiteIn the above screenshot, we’ve created the ourwpsite folder and are currently inside it.Upload the ArchiveNow we’ll upload the wordpress.zip file inside this folder using the File Manager’s Upload function.On clicking the Upload button, a new tab opens up.Select the wordpress.zip file and the upload automatically starts.Once the upload is complete, close the tab and return to the File Manager. If you still don’t see a file in the ourwpsite directory, click the File Manager’s (and not the browser’s) Reload button. You should see the wordpress.zip file now.Extract the ArchiveNow, select the recently uploaded WordPress ZIP file and click on Extract.Leave the extraction directory unchanged and click on Extract File(s) to begin the extraction process.Once the extraction is complete, again click on the Reload button. You should see a folder called wordpress.Move the Contents of the Extracted ArchiveYou might have realized that if you leave it in this state (i.e. not move the contents of the wordpress folder), then our WordPress site would be accessible from www.yoursite.com/ourwpsite/wordpress.What happens when WordPress is installed in a sub-folder.Thus, we must move the contents of the wordpress folder backto the parent (or your preferred) directory.To do this, we can either use FTP or cPanel. Let’s go for the latter.Enter the wordpress folder and click on the Select All button. Then click on Move.Source directory of the WordPress filesNow, you’ll find a pop-up modal asking your for target directory (i.e. where to move the files you just selected)Destination directory of the WordPress filesSince we don’t want it under a folder called wordpress, we’ll simply move the files to it’s parent directory. Thus, we remove the “wordpress” word and click on Move File(s). The files should be moved and the wordpress folder should be empty. You can delete it along with the original WordPress ZIP archive.Navigate back to the previous folder (ourwpsite) and you should find all the WordPress files ready and waiting for installation.Step #1.2 – Uploading the wordpress.zip archive via FTPUploading WordPress ZIP archive via FTPFirst of all, you need an FTP client such as FileZilla.Next, you need to familiarize yourself with the concepts we discussed in steps 1.1.2 to 1.1.3. This will give you an understanding of where to install WordPress.Once you’ve understood step 1.1.2, login to your site via FTP, create the ourwpsite folder and upload the wordpress.zip file in it.Next, follow the instructions in step 1.1.3 to extract the files and move them to the appropriate folder using cPanel.In another case, if you’d like to keep it simple, you could extract the wordpress.zip archive in your local computer, and upload the extracted files in the desired installation directory in your server. However, the uploading process would take a lot of time. On the plus side, you can skip step 1.1.3 altogether. This marks the end of step 1.2. Creating a new MySQL Database and UserIn our WordPress Internal Functioning guide, we’ve seen that WordPress needs a database to store its text and configuration data. In this section, we will:Create a new MySQL databaseCreate a new database user.Connect the new user and the database.Step #2.1 – Create a New MySQL Database in cPanel Login to your cPanel and launch the MySQL Database Wizard.Set a unique database name. It is a good security measure to use alphanumeric characters. In this case, our full database name is souravku_wpexplorer2018Step #2.2 – Create a New MySQL User in cPanelIn this step, we’ll create a new user. We’ve set the username to souravku_wpexplorer. We should also generate a strong password and save it in a secure place. cPanel will auto-fill the generated password for you. Click on Create User to proceed.Step #2.3 – Connecting the MySQL User to the DatabaseGranting permissions to the newly created user to the new database.The new user is now created. In this step we will grant permissions to the user, so that he may access the database.Simply, click on ALL PRIVILEGES to grant all the permissions.Click on Next Step to proceed.cPanel will now make the necessary changes to the user as directed.Successfully created and linked a new database and user in cPanel using the MySQL Database WizardDone! You’ve successfully created a new database and user. This concludes step 2.3. The Final Configuration (WordPress’ 5 Minute Installation)Now that we’ve completed the installation procedure, let’s run the famous five minute WordPress installation. Head over to your WordPress directory via your domain (and not via cPanel). In our case, it would be yoursite.com/ourwpsite. This will launch the installation process.In the first step, select your preferred language to proceed.This is some troubleshooting information if your wp-config.php file isn’t writeable. In most cases the installation should finish without any hiccups.Entering database and user information in WordPress’ 5-minute installationEnter the database information from the last step. Make sure your table prefix isn’t “wp_“, making it difficult for hackers to attack your website. For instance, we’ve used “wpe_“. It’s best when you choose an alphanumeric value.Click on Run the installation to begin the setup process.If you see the above screen, it means that WordPress has been installed successfully. The next part is simple, but important.Enter the username, password and your email address you’d like to use for this WordPress setup. Save these details in your PC.Once crucial step is not to use admin as an username, as stated in our WordPress Security Guide.Since this is a temporary experimental WordPress installation, disabled search engine indexing. You should also do the same when you’re working with a new site. You can enable it once you have some content in your site.WordPress is successfully installed, configured and ready for useDone. We’ve successfully installed WordPress 100% manually.Bonus: Install WordPress Manually with Softaculous in cPanelMost shared hosting companies offer an automated script installer called Softaculous along with cPanel. Think of Softaculous like the Google Play Store or the App Store. The Softaculous store offers multiple apps (also known as software or scripts) that can be installed with just a few clicks. WordPress is an example of one such CMS software that can be installed in just a few clicks, using Softaculous. Let’s see how:We begin by logging into cPanel and launching Softaculous.1. Select WordPressNext, we select the WordPress CMS to install using Softaculous. In case your Softaculous isn’t similar to mine, you can use the top-left menu to go to Blogs > WordPress.Starting the WordPress installation process with SoftaculousClick on Install Now to create a new installation of WordPress. Additionally, you can use the My Apps option to view all the existing installations of WordPress done using Softaculous.2. Configure SettingsWordPress installation location settings in SoftaculousNow we configure the WordPress installation details in this step.In most cases, you��re going to leave the Directory field blank. This way, WordPress will be available in your base directory.The protocol should be HTTPS.In case you have subdomains in your site, you can select it from the Choose Domain option.Upon entering this information, we scroll down to the next step.In this section, we enter our WordPress site’s name, description, admin username, password and email. Remember to not use admin as your username, as an added security measure. Scroll over to the next section.In this section, enter the database name and table prefix. Don’t worry, we do not need to create a database and user. Softaculous will automatically do it for us!You can also select the Auto Upgrade WordPress Themes and Plugins options for to enable automatic updates to this installation. I would recommend enabling this feature.We’ve also installed the Limit Login Attempts plugin as an additional security measure. The plugin basically blocks login attempts from an IP for 15 minutes after three failed login attempts.Once done, you can begin the WordPress installation by clicking on Install.Softaculous then verifies the submitted information and begins the installation process. This usually takes a less than a minute.Once Softaculous successfully installs WordPress, you’re greeted with the above screen. That’s it, WordPress has been successfully installed using Softaculous.Why Use Softaculous (or other automated script installers)?The biggest advantage of using Softaculous to install WordPress is the underlying convenience. Unlike the manual installation process, we only need to enter the relevant site information and Softaculous takes care of the rest. It is very useful for creating quick websites for trying out a new theme or plugin.However, one thing it lacks is the ability do disable search engine visibility during the configuration process. Therefore, once WordPress is installed, you should login and disable search engine visibility. This ensures that your domain’s existing SEO scores are not hampered.We hope you’ve enjoyed this “back to the basics” tutorial as much as I’ve enjoyed writing it! If you have any questions, please drop us a comment or feel free to tweet me at @souravify.If you think I’ve missed a step or have any suggestions for us; please let us know. We’d love to hear from you!Source: WP Explorer
0 notes
Text
cPanel Hosting Providers - Manage Your Website Easily

What Exactly Is cPanel?
First and foremost, what exactly is it? cPanel is simply a dashboard or control panel consisting of simple tools for site administration. It allows you to do a variety of activities, such as installing WordPress, creating staging sites, and much more.
The majority of shared hosting servers, such as Bluehost and GoDaddy, utilize cPanel as their administrative interface. It may also be used as a management system by web developers who have dedicated servers or their own servers. The interface may be tailored to fit the appearance and feel of a hosting server. They can also decide which features to add or remove based on their own customer preferences.
Where is Your cPanel?
What happened to your cPanel after you get it from cPanel hosting provider?
You may get to the dashboard in a few different ways. The simplest method is to use your cPanel hosting server platform. Siteground may be accessed directly from your account dashboard. Bluehost has an "advanced" option. Other hosting services may have different methods of accessing cPanel, but they are all typically found on your main hosting panel.
Advantages of cPanel Hosting
Here are the top advantages or features of cPanel
The UI is user-friendly. The main feature of cPanel is that interface organizes many functions into digestible modules, making it easy for users to find them. The cPanel dashboard also has simple menus and visuals for easy navigation.
Extremely compatible.cPanel, being one of the most popular control panels, is compatible with a variety of web browsers, including Google Chrome, Safari, and Mozilla Firefox. Furthermore, cPanel offers a wide range of third-party programs, like site builders and SEO tools.
A variety of features are available.cPanel allows consumers to execute complex operations like setting subdomains and FTP accounts, maintaining MySQL databases, and producing site backups without requiring sophisticated technical knowledge.
Software installation is done automatically. Not only does cPanel offer a plethora of capabilities, but it also works nicely with the Softaculous Apps Installer. It provides access to over 400 apps, including well-known content management systems. Softaculous manages each program during its entire existence, from installation to updates.
Reliable assistance. There are several resources available in the cPanel forums and blogs. There are also technical guides for both cPanel and WHM. They teach how to utilise and troubleshoot cPanel products.
Best cPanel Hosting Providers on the Web
Here are the Best cPanel Hosting Provider you can consider
SiteGround — Most User-Friendly Bluehost — Best Overall Hosting Provider
HostGator — The Most Reliable
GoDaddy — Best Benefits
InMotion — Outstanding for Shared and VPS Hosting
A2 Hosting – High-Quality Cloud Hosting
HostPapa — The Best Deal
WP Hosting — Best cPanel Hosting for WordPress Sites GreenGeeks — Most Eco-Friendly cPanel Host
Hostinger — The Most Economical
Conclusion: cPanel is a prominent Linux-based web hosting control panel that includes a variety of modules such as Files, Preferences, Databases, Web Applications, Domains, Metrics, Security, Software, Advanced, and Email.
#cpanel#cPanelhosting#cPanelhostingproviders#cPanelhostingservices#cPanelhostingcompany#webhosting#webhostigtheme#webhostingtemplate
0 notes
Text
How to install wordpress?
How to install WordPress? today an internet site is vital for everybody whether or not you're a man of affairs or a student. It becomes the foremost necessary a part of our life. web site|the web site} will be for love or money it will be your business website, it will be your earning web site, it will be your on-line store. Earlier it absolutely was tough to form an internet site, we've got to be told several languages for the event of the web site. as an example C language, C++ language, java language, hypertext markup language language, etc. however currently once the launch of WordPress, it's currently simple to style an internet site.
For the event of the web site, we'd like a pair of things domain and hosting. There square measure several domains and hosting suppliers accessible on-line you'll obtain from there. as an example Bluehost, GoDaddy, hostinger, etc. If to procure them from one web site then you don’t ought to do something however if to procure a site and hosting from a pair of different websites then you wish to attach them initial. For connecting them click here.
how to install wordpress So, once shopping for and connecting a site and hosting you wish to put in WordPress therefore, here are
The steps to put in WordPress Open your browser kind|and sort|and kind} your name and so type (/Cpanel) as an example airconditioner1.com/cpanel Then enter your username and arcanum. Check your registered email id wherever you've got submitted whereas making your hosting provider’s account. Check hosting provider’s email. Then resolve username and arcanum on it email and replica it and paste it to your Cpanel Then you'll be login to the Cpanel. Then scroll down and within the code section visit WordPress manager by softaculous. Then click on install Then scroll down and within the admin account section setup up your admin name, admin arcanum, and admin email (It are going to be used after you forgot your password). Then scroll down once more and click on to put in. Then it'll take 1-2 minutes for the installation. And finally your WordPress has put in. Then open a replacement tab kind|and sort|and kind} your name and afterward type wp-admin, as an example, airconditioner1.com/wp-admin, and so click enter. Then sort your username and arcanum now you're to sort the arcanum that you've got created at the time of installation of WordPress. Then click enter. Now you've got with success entered the WordPress backend. So, these were the steps that you simply will follow to put in WordPress. So, If you discover this data then share it along with your friend and facilitate them to put in WordPress.
visit our website for more information : aircondtioner1.com
0 notes
Text
How to Get Rid of Malware from Your WordPress Site

Security is essential while operating and administering a website.
Hackers frequently target people's websites from all over the internet, and some use malware to do it.
This is the blog for you if you've been seeking a tutorial to remove spyware from your website.
We'll go through six measures you can take to maintain your WordPress site clean and malware-free.
Step 1: Back up your WordPress site and database.
To begin, you should always back up your WordPress site before cleaning it up.
This is done to guarantee that if something goes wrong while resetting settings, themes, or plugins during the cleanup process, you will have a backup to assist you to restore your website quickly.
Having a robust backup procedure in place is essential since it will help you remember to take frequent site backups regularly.
This ensures that if malware or another security assault occurs, you can always roll back to the backup copy, saving you time and money.
Backup plugins for WordPress include JetPack Backups, BackupBuddy, and UpdraftPlus.
Here are a few recommended readings to help you with the WordPress backup process:
Creating a backup of your WordPress site
How to Use Jetpack to Manage WordPress Backups
How to Use cPanel to Manage Backups
Installing and configuring the UpdraftPlus plugin
How to Upload a Softaculous-Installed Application to Google Drive
Step 2: Scan your WordPress site and database.
Following that, you should perform a comprehensive scan of all the files on your site.
This will assist you in determining which of your files are contaminated, as in certain circumstances, this process may not necessitate a complete site eradication.
Use WordPress Plugins to check your site for malware if you are the administrator or have backend access to it.
To discover how to run virus or malware detection on your WordPress site, read the following articles:
How to Scan Websites for Malware Using Immunity
How to Use cPanel's Virus Scanner
How to Use Patchman to Get Free Vulnerability and Malware Scanners
Sucuri Site check may also be used to search your WordPress site for malware.
Step 3: Remove or fix the infected WordPress files and database.
Once you've identified the infected files, delete them via Filezilla, FTP, or a cPanel file management or editor.
To remove the viruses from the WordPress database, use PHPMyAdmin.
Read on for step-by-step instruction on how to delete dangerous files following a site hack: How to Repair and Secure a Hacked Site.
Step 4: Close the vulnerability.
Next, examine all pertinent PHP files for backdoor entry points.
Some of the PHP functions typically utilized by hackers can be found in theme files, plugin folders, or other directories:
base64
eval
preg_replace (with /e/)
exec
str_rot13
stripslashes
gzuncompress
system
move_uploaded_file
assert
Conclusion
So those are the procedures for removing malware from your WordPress site.
Although there are just a few steps to removing malware, it can be a daunting undertaking if you are also attempting to run your business and deal with spyware. You may contact us for the finest digital marketing service since we are the best digital marketing agency in Bangalore.
#How to Get Rid of Malware from Your WordPress Site#Digital Marketing Tips#Digital Marketing Strategy
0 notes