#how to upload website on cpanel
Explore tagged Tumblr posts
Visit Tumblr Blog
Explore Tumblr blogs with no restrictions, modern design and the best experience.
Last Seen Tumblr Blogs


Fun Fact
Tumblr has a low social media market share in South America.
Text
I made a blog!!!

Check out my bloooooooog
(Sorry, there's not much there right now...)
I realized that while I was on cohost, the format and the posting culture (css nerd stuff) kind of encouraged me to put more time and effort into making posts in a way that I hadn't in a long time. I hadn't realized how much I missed having control over the minutiae of content I posted. So even though I resolved to crosspost some of the stuff I liked to tumblr, it's missing some of the personality that I put into it, I think, and having a blog where I can do some of those shenanigans if I want to will be fun.
Also, for your viewing pleasure, you may subscribe to the RSS feeds (there's one for each category in addition to the aggregate feed, so if you only want to hear about art or only games, you can do that as well).
Also also, if you own your own webspace, and are thinking about adding a blog, I wrote a little bit about the plugin i used under the cut. ↓↓↓
I was sifting through the blogging plugins available through my hosting service and settled on HTMLy, firstly because it's pretty lightweight--it only takes up 8mb of server space which is crazy small (compare to Wordpress' 68mb). It has a tag system, categories, and a built in search (not just a google search that crawls through your blog), and aside from how long it took me to hack the themes apart into something resembling the rest of my site, it was really easy to setup. I really like it.
I only added it to my blog, but I'm honestly kind of considering rebuilding the rest of my site using HTMLy as well.
Similar to cohost, you can use markdown and html in your posts. There's a built-in image uploader so you don't have to deal with any image hosting shenanigans. I added a bunch of special elements to my blog's css that i'd defined in the style sheet for my regular website (and even some common ones I used in my chosts), so I can insert them for a cohesive feel.
It also supports multiple users--with its own login page separate from your cpanel or however you usually access your site--which is a feature I'll never use, but I think it's really neat. :)
Aaaanyways, I need to overhaul the rest of my site since I haven't updated it meaningfully in uh... six years... but hopefully, I'll get around to making it more of a reflection of my current interests... this year... maybe....
Also, maaaaaaaan, i really wanna get back into doing little code doodles in Processing. I used to have a lot of fun with them. Maybe I'll port some of my old ones to the latest version so I can put them on the web...
3 notes
·
View notes
Text
Game-Changer Alert: Unlimited cPanel Hosting for Unmatched Performance
Introduction In the ever-evolving landscape of web hosting, where speed, reliability, and performance are paramount, a new player has emerged, promising a game-changing experience. Unlimited cPanel Hosting is here to redefine the hosting game, offering unparalleled features that set it apart from the rest. Unrivaled Performance Say goodbye to sluggish loading times and website downtime. Unlimited cPanel Hosting guarantees lightning-fast speeds, ensuring your website is always up and running, providing an optimal user experience. With a robust infrastructure and cutting-edge technology, this hosting solution is a performance powerhouse. Scalability at its Finest As your website grows, so should your hosting capabilities. Unlimited cPanel Hosting offers seamless scalability, accommodating the increasing demands of your online presence effortlessly. Whether you're running a personal blog or managing a thriving e-commerce empire, this hosting solution scales with you. Storage without Limits No more fretting over storage constraints. Unlimited cPanel Hosting provides an abundance of storage space, allowing you to upload and manage your content without worrying about hitting any ceilings. Store as many images, videos, and files as your heart desires, all without compromising on speed or performance. Bandwidth Freedom Bid farewell to the days of throttled bandwidth. With unlimited resources at your disposal, your website can handle traffic spikes without breaking a sweat. Unlimited cPanel Hosting ensures that your visitors always have a seamless browsing experience, no matter how busy your online space becomes. Fortified Defense Mechanisms In the digital age, security is paramount. Unlimited cPanel Hosting takes this seriously, implementing top-notch security measures to safeguard your website from potential threats. From robust firewalls to regular security audits, rest easy knowing your data is in safe hands. SSL Encryption as Standard Boost your website's credibility and protect your visitors with SSL encryption included as a standard feature. Unlimited cPanel Hosting prioritizes the security of your data, ensuring that all communications between your website and its visitors remain confidential. Intuitive Control Managing your hosting has never been easier. Unlimited cPanel Hosting boasts an intuitive control panel that puts the power in your hands. Effortlessly navigate settings, monitor performance, and make updates with a few clicks – even if you're not a tech whiz. Conclusion In the fiercely competitive realm of web hosting, Unlimited cPanel Hosting stands out as a true game-changer. From unbeatable performance and unlimited resources to top-tier security features and a user-friendly interface, this hosting solution elevates your online presence to new heights. If you're ready to revolutionize your web hosting experience, make the switch to Unlimited cPanel Hosting today. Your website deserves nothing less than the best.
2 notes
·
View notes
Text
How to Fix WordPress Update Issues: A Beginner-Friendly Troubleshooting Guide

Keeping your WordPress site updated is one of the most important things you can do for its security, performance, and stability. But when updates fail, especially if you’re not a tech expert, it can be confusing and even a little scary.
Don’t worry—you don’t need to be a developer to fix most update issues. This easy-to-follow guide will walk you through the most common reasons WordPress updates fail and how to resolve them step by step.
Why Do WordPress Updates Fail?
WordPress is made up of several parts: the core software, plugins, and themes. These components must work in harmony. If even one of them is outdated or incompatible, it can cause an update to fail.
Here are the most common causes:
Slow or unstable internet connection
Conflicts between plugins
Theme compatibility problems
Low server memory or resource limits
Incorrect file or folder permissions
Corrupted update files or interruptions
Understanding the cause is the first step toward resolving the problem effectively.
Beginner-Friendly Fixes for Update Errors
1. Always Start with a Full Backup
Before making any changes, backup your website. This protects your content in case something goes wrong. Use a plugin like UpdraftPlus or BackupBuddy to back up both your files and database.
2. Clear Your Browser and Site Cache
Sometimes, updates fail to reflect because of cached data.
Clear your browser cache.
If you're using a caching plugin (like W3 Total Cache or WP Super Cache), clear the site cache too.
Then try running the update again.
3. Use Troubleshooting Mode to Isolate Plugin Conflicts
Conflicting plugins can prevent updates.
Try this:
Install the Health Check & Troubleshooting plugin.
Activate troubleshooting mode. This temporarily disables plugins for your session.
Attempt the update.
If it works, re-enable each plugin one at a time to identify the troublemaker.
This method keeps your live site running while you test behind the scenes.
4. Check Your Hosting Resources
Many shared hosting plans have low default memory limits, which can block updates.
Ask your hosting provider:
Is the PHP memory limit set too low? (It should be at least 256MB.)
Is the maximum execution time long enough?
Can they increase these limits or offer a more suitable plan?
Upgrading your hosting plan or tweaking server settings can solve many update problems.
5. Try a Manual WordPress Update
If the auto-update fails, doing it manually can work just as well.
Steps:
Download the latest version from WordPress.org.
Unzip the file on your computer.
Use FTP software like FileZilla to access your site.
Upload the new wp-admin and wp-includes folders—replace the old ones.
Do not delete the wp-content folder—this holds your themes and plugins.
Visit your site to complete the update. You might be prompted to update the database—click the button if so.
Manual updates sound technical, but they’re very manageable if you follow the instructions carefully.
6. Correct File Permissions
Improper file or folder permissions can block updates.
Use a plugin like WP File Manager or ask your hosting provider to:
Set folders to 755
Set files to 644
These are standard settings that let WordPress update files without compromising security.
7. Stuck in Maintenance Mode? Here’s the Fix
If your website says “Briefly unavailable for scheduled maintenance,” the update was interrupted and left the site in maintenance mode.
Fix it by:
Logging into your hosting panel (like cPanel or using FTP).
Navigating to the root folder of your WordPress site.
Deleting the file named .maintenance.
Reloading your website.
This should return your site to normal instantly.
When to Call in a Pro
If you’re not comfortable trying these fixes yourself, or nothing seems to work, it’s perfectly okay to get help. You can contact:
Your web hosting support team
A freelance WordPress developer
Or a professional maintenance company like Websenor
It’s smart to get expert help when your site supports your business or brand and downtime could cost you visibility or sales.
Conclusion: WordPress Made Simple with Websenor
WordPress update failures can be frustrating, but they don’t have to derail your website. With some basic troubleshooting and a calm approach, even non-tech users can fix most issues quickly and confidently.
Start with a backup, clear your cache, test for plugin issues, and make sure your hosting setup is strong. These steps solve most update-related headaches.
If you're unsure where to start or don’t want to risk anything on your own, Websenor is here to help. As a trusted web development and maintenance company, we specialize in making WordPress stress-free for businesses, bloggers, and startups.
With Websenor by your side, you can leave the technical issues to us—and get back to growing your website the smart way.
0 notes
Text
Ramom School Nulled Script 6.7

Download Ramom School Nulled Script – The Ultimate School Management Solution If you’re looking for a comprehensive and powerful school management system without the hefty price tag, then Ramom School Nulled Script is your go-to solution. Designed for schools, colleges, and academic institutions of all sizes, this multi-branch school management platform is packed with robust features to streamline administrative tasks, enhance communication, and improve academic performance—all at zero cost when you download it here for free. What is Ramom School Nulled Script? Ramom School Nulled Script is a premium PHP-based school management system that offers powerful tools for managing multiple school branches, students, staff, finances, and more. Originally developed as a paid script, the nulled version gives you complete access to all premium features without requiring a license or payment. From attendance tracking to exam management, timetable scheduling, and parent-teacher communication, the Ramom platform brings everything under one intuitive dashboard. This nulled edition ensures full access to the software’s core without limitations or hidden fees. Technical Specifications Language: PHP, JavaScript, HTML5 Database: MySQL Framework: CodeIgniter Responsive Design: Yes (Mobile-Friendly) Multi-Branch Support: Yes Key Features and Benefits Multi-Branch Management: Easily manage multiple institutions from a single platform. Role-Based Access Control: Define different roles for administrators, teachers, students, and parents. Student Management: Track student admissions, progress reports, attendance, and more. Finance & Fees Module: Automate fee collection, generate invoices, and track payments. Communication Tools: Built-in email and SMS notifications for parents and staff. Academic Scheduling: Timetable management, exam planning, and result generation. Library & Inventory: Manage books, assets, and school supplies efficiently. Reports & Analytics: Generate comprehensive reports on academic and administrative activities. Who Can Benefit from Ramom School Nulled Script? This powerful school management tool is perfect for: Private and public schools managing multiple branches Colleges and technical institutes seeking centralized control Online educators and administrators needing a scalable solution School owners looking to digitize operations without additional costs How to Install Ramom School Nulled Script Installing the Ramom School Nulled Script is simple and user-friendly. Follow these quick steps: Download the script package from our website. Extract the contents and upload the files to your server using FTP or cPanel. Create a new MySQL database and user from your hosting panel. Open the installation URL and follow the on-screen instructions to complete the setup. Log in to the admin panel and configure your institution settings, branches, and users. Frequently Asked Questions (FAQs) Is Ramom School Nulled Script safe to use? Yes. The version we provide is clean, malware-free, and thoroughly tested to ensure maximum performance and security. Can I use this script for multiple branches or schools? Absolutely. One of the core features of Ramom School Nulled Script is its ability to handle multiple branches with independent management and reporting tools. Do I need coding skills to use this system? No. The user-friendly dashboard is designed for non-technical users. However, basic knowledge of PHP or server management can help with customizations. Are future updates included? While automatic updates are not available for nulled versions, we strive to keep the latest versions accessible on our site as soon as they are released. Discover More Premium Tools for Free If you're impressed by the features of Ramom, you might also be interested in the Porto NULLED WordPress theme. It's a great addition for building responsive educational or business websites without spending a dime. Want to
explore even more? Check out the highly-rated flatsome NULLED theme to elevate your WordPress site’s design effortlessly. Final Thoughts The Ramom School is a game-changer for schools and institutions that want to embrace digital management without stretching their budget. Whether you're launching a new branch or enhancing your current setup, this nulled script gives you the flexibility, functionality, and freedom you need—absolutely free. Download now and take control of your educational management today!
0 notes
Text
Do you have a website? Is that website a business website or a general one? If the answer is yes then this article would be the best guide for your next step. If you have a website and you are planning to host it in the virtual world you need to contact a web hosting service provider. Today there are thousands of such service providers offering the service. How will you choose the best among them? The best guide is do some research and look for the following points before making a choice. It is very important to choose the right web hosting service otherwise your hard work can go wasted and at the worst can get lost in the wide array of the virtual world. You may also want to check out this cheap website hosting article on hostingfoundry.com Below are some of the tips you must remember. Know Your Requirements Before starting anything it is advised to be sure of the purpose why you want to do it. Likewise when you want your website to be hosted you need to be sure the reason for it – whether it is your small business website or you want to share your thoughts with your friends and family. Because the hosting requirements would be different for the above mentioned two purposes. Some key aspects are What is your website framework / tool? This depends on factors or frameworks like Wordpress, Magento, PHP or any other ecommerce tool to run your website. What are your skills to run the website? If you are beginner you may want to look for features like interactive website builder support. What is your comfort on various tools provided by a provider? Know Your Expertise Level: Beginner Or Expert At Building Websites It is advised to be sure of your own expertise level in building website. If you are at the beginner level it is better to be sure that the service provider should have easy to use website building tools and also help you learn to build your website. Ensure if they have ISPCP, ISPConfig or cPanel systems that can help you create your forum or blog with just a few clicks. Do They Provide Email Hosting? When you are planning to host your website make it clear with the service provider that you are willing to get an email address of yours through the domain name of your website – [email protected]. It is advised to choose the service provider that offer unlimited pop mailboxes, auto responders and email accounts to get the value for your investment. This would help you to get in touch with your potential customers, new visitors and others. File Uploading Methods Supported Before committing to the deal check with the service how is their file uploading system. FTP is the best option compared to online file manager tool. FTP is more flexible in uploading files and is faster. However, if you are not from the technical background then the online file manager can be useful for you. But ensure that you are aware of the way that your service provider offers for file upload. Log Access Log access is the base through which you can track the progress of your website. Ask the service provider if they provide the same or not. If not then it is better not to choose the service provider. If you have the log access you would be well aware which part of your website is more accessed and which part needs improvement to attract traffic. As a serious entrepreneur you are advised to pay close attention to log access. Disc Space Limits This is an important aspect of web hosting. The more the disc space the more growth opportunity you have. Many service providers offer disc space time to time seeing the performance of your website. However, it is advised not to overbuy. While marketing the web hosting service providers offer packages with 25 GB disc space, however, not more than 1% of it would get used by majority of the websites. Loading Speed for Website Speed is a major success factor of your website. It is advised that you test the network speed of your area. You can do that by yourself – click on start then run and type in “cmd” and hit enter.
Once the cmd prompt windows opens, type “ping hostname.com” and wait for the ping to get completed and look for average number. Generally ping around 80ms is fine and more than 100ms is bad. Quality Of Customer Service No company can survive if they do not have a good after sales customer service. And in this case customer service is most important especially in the technical front. Before choosing a service provider it is better to ensure that the after sales customer service is good, preferably free 24/7 model of servicing their customers with response time via email or chat within 24-48 hours. SSL Support : Security Is Even More Important If You Have ECommerce Site If you are planning for an e-commerce website you need to keep the topmost priority to the security of the transactions that your customers will make in your website. It is better to verify about the security options that the web hosting service provider offers. Always choose https://, the SSL Certificate, as it makes all the transactions safe and secure. For the payment gateway it is advised to use Google Checkout or PayPal as these are safe ones. Shared or Dedicated Hosting: The Fine Prints It is important to understand what kind of hosting service you are buying from the service provider. If your website is not a very big one and receives a few thousand visitors a day then inexpensive shared hosting is just fine for you. However, if you have tens of thousands of visitors per day and more than 10 GB space is required then dedicated hosting would be the ideal choice. The Type of Servers There are two types of servers that the hosting services use – Windows and Linux. The later one is less expensive but more secure and stable compared to Windows server. Choose the server depending on the requirements of the website. If there is a requirement of Microsoft SQL, .Net or ASP then choose Windows server otherwise Linux sever is what is recommended for web hosting. Price One thing you should keep in mind – do not choose the hosting service provider based on the plans that they offer. Always choose based on recommendations and experience that the service providers offer. In that way you would get the value for your investment. It is recommended to choose the long term plans as it can fetch you discounts in overall pricing. Do not choose the service provider based only on price. Background Check Of The Hosting Company It is your money, your business and your reputation that you are putting on someone else. Thus it is highly important to do some initial intense research on the background of the service provider. It is advised to research on certain criteria like how old the service provider is? How many clients do they serve? What is the reputation of the service provider in terms of service, support and pricing? You can get the honest reviews on online forums. Read Terms of Service This is the most important step that most of us tend to ignore and sign off the document. It is recommended to read the terms of the service in order to avoid confusion between both the parties. It is better to get clarity if you do not understand any term rather than assuming. Many times it is seen that hidden catches are mentioned in the terms and conditions for many cheap plans. Understand The Technical Specifications While shopping for a web host you need to be sure how much disk space and bandwidth you would require. If your website content is more of graphics along with lots of pages and huge traffic it would require a greater bandwidth and larger disk space. Apart from that it is advised to ensure the operating system that it would support along with uptime of the server and security. The understanding of these technical specifications would help you choose the right web host. Look for Bonus Offers and Extras Everyone would be delighted if they get something extra apart from what they are paying for. Same rule applies here also. There are many web hosts who offer some extra bonus offers apart from the basics like bandwidth and disk space.
In today’s time e-commerce is a boom and many web hosts offer e-commerce solution. Look for these kinds of extra offers before making your choice. Now that you are aware of certain factors that you need to examine, before making your choice in webhosting, it’s time to act upon those suggestions. It is your money that you are investing to make your site reflect the image of your company. Hence before choosing the webhost, know your requirements and choose the one which fulfills most, if not all your requirements.
0 notes
Text
How to use bulk bargain in WooCommerce?
You have a (brick and mortar) shop for pretty a while. Your buddies apprehend you, superb you every day and buy from your store. You recognise, as a salesperson, that a glad client is a repeat customer. What do you do? You provide special costs on your great customers, and reductions for big orders. This earns you happy, repeat clients, who will advise you to extra in their buddies and, in the long run, increase your income. Your brand, our expertise — the White Label WordPress development agency that powers your growth.
The specific same good judgment can follow on your e-trade store. You can trap your clients to buy greater, by using creating reductions for bulk orders and reward your unswerving customers.
In this newsletter, we are able to observe various eventualities in which we praise a client with a discount and how to apply them in our WordPress/WooCommerce e-save.
Getting geared up
Before doing any code adjustments, it’s continually an amazing concept to take a full backup of our web page and ensure that we have FTP get admission to or get admission to to cPanel or Plesk or different manipulate panel with get admission to to a document supervisor.
If you surprise what is the first-class way to add code snippets in your website online, have a study our previous article about thoroughly adding PHP code.
We count on that you have already got WordPress with WooCommerce established, and your store is showing at least a few products.
Bulk discount based on total charge
Let’s discover how we are able to apply a bulk cut price when the entire exceeds a positive amount. In the following instance, if the order total is $50, we can offer a reduction of five%. If the order overall is over $a hundred, we are able to provide a reduction of 10%.
If you simplest need to use one tier for cut price, definitely cast off completely the elseif statement.
My cart total right here is $51, so I get a reduction of 5% (=2.55, rounded up to 3):
checkout of order over $50
While here, once I brought some merchandise and were given the total over $one hundred, the discount is extended to 10%:
checkout of order over $one hundred
Exlude certain product classes from cut price
The above code snippet will observe a widespread discount to every fabricated from your keep, so long as the order overall exceeds a predetermined amount. This, however, might not be proper. We can be promoting some products which are already in a reduced fee as a promotion, or we might not want to provide reductions for some luxury gadgets. Build stunning websites for your clients with a reliable White Label WordPress Company by your side.
Let’s first-rate-tune the previous snippet, so as to be able to exclude certain product classes from being eligible for the discounted charge.
In the following instance, my order reaches a complete of $eighty one and I get the 5% cut price.
Checkout no category clear out
However, I want all merchandise in the category “Hoodies” to no longer be eligible for discount. The class ID of “Hoodies”, in my set up, is 23, as I observed touring Products > Categories on my dashboard and clicking on “Hoodies”. So, allow’s amplify the snippet of the previous segment, to exclude all products inside the category with ID 23 from being eligible for bargain:
I added the category ID within the code above in line 6. Now, the identical checkout web page appears quite exclusive:
checkout class clear out
As the hoodie became the product that raised my fee to over $50, the cut price has disappeared. Let’s see the equal cart if I add some more beanies, which can be nevertheless eligible for cut price:
checkout category filter out
Here I do get my bulk cut price of five%, as the entire rate of the beanies exceeds $50.
If you want to exclude more classes, you can genuinely upload a new line after line 6:
Number of gadgets primarily based bulk discount
Here is every other scenario: You are promoting wholesales, your merchandise don’t vary an excessive amount of on prices (or you simplest promote one product) and it makes extra sense to both you and your client to offer a reduction primarily based on quantity of merchandise ordered.
For this, we can use the WooCommerce Bulk Discount, that does exactly this.
Setting up WooCommerce Bulk Discount
Upon installing and activating the plugin, a brand new tab known as Bulk Discount seems on WooCommerce > Settings, that lets in you to create your personal cut price coverage:
wc bulk cut price plugin settings display screen
The maximum important choice right here is the “Discount type”:
Percentage Discount: Much just like the previous use-case we discussed, on an order of more of N items, a percentage bargain may be carried out on the whole charge of the product.
Flat cut price: A constant amount of cash is decreased from the total while you buy more than N objects. For example, if I purchase more than 20 hoodies, I will get a $10 discount, no matter if I purchase 21 or 40 hoodies.
Fixed Discount: An amount of cash is decreased from each object, when you buy extra than N objects. For instance, if the flat cut price is two$ for extra than 10 gadgets, on a product that fees $50. So if I purchase over 10 gadgets, I gets each object on the rate of $8 in line with object.
In each of the above alternatives, you may nevertheless decide ranges, as an instance extraordinary discount for over 10 and over 100 objects.
Examples using WooCommerce Bulk Discount
Let’s see how this works in movement. Here I want to use a flat discount of $15 if a person buys more than 20 of my product Polo”, that prices $20 in step with object. First, we want to choose “Flat cut price” from the dropdown at WooCommerce > Settings > Bulk Discount. Then on the product edit display, we can see a new tab named “Bulk Discount”. The new panel allows you to feature a unique provide text in case you so wish, and then you can add a rule for the bargain, by means of pressing at the button: “Add cut price line”.
Product edit display for bulk cut price
And right here we will see that the flat discount implemented on my order of twenty-two x “Polo”:
checkout display screen with flat bargain
Let’s check this for a fixed bargain of $5 for every object if the order is greater than 20 items. We need to pick “Fixed bargain” from the dropdown at WooCommerce > Settings > Bulk Discount after which input the suitable line at the product edit display screen:
product edit display screen for bulk discount
At the checkout screen after buying, once more, 22 x “Polo”, we will see that now the cut price is 5 greenbacks for each object, that is, I surely sold the 22 polos at $15 every, as opposed to $20 each:
checkout display with fixed cut price
Wrapping up
In this text we explored the diverse methods to praise your customers for bulk orders, by means of offering discounted charges. We noticed the way to:
Offer a reduction whilst the total fee exceeds a particular quantity.
Limit which product classes may be eligible for a complete charge cut price.
Offer a flat, fixed, or by means of percent cut price to clients that purchase greater than a certain amount of objects in line with product.
We wish this article was useful. Please leave a remark when you have used any of those techniques to provide discounted prices to your clients. Let us know when you have any questions.
Also Read : Which one may be nice Blogger or Wordpress in 2025?
What’s the Future of the Jewelry Industry – Online or Offline?
0 notes
Text
How to Build a Website Using WordPress and Elementor Pro

WordPress is a widely-used content management system (CMS) that allows users to create and manage websites easily. One of the most powerful tools for designing websites on WordPress is Elementor Pro, a drag-and-drop page builder that provides an intuitive interface and a wide range of customization options. This guide will walk you through the process of building a website using WordPress and Elementor Pro.
Step-by-Step Guide
1. Choose a Web Hosting Provider
Before installing WordPress, select a reliable web hosting provider that suits your needs. Consider factors such as speed, uptime guarantees, customer support, and pricing. Popular options include Bluehost, SiteGround, and HostGator, which offer specialized WordPress hosting packages.
2. Install WordPress
Once you've selected a hosting provider, install WordPress on your web hosting server. Most hosting providers offer one-click WordPress installation through their control panels (cPanel, Plesk, etc.). Follow the instructions provided by your hosting service to complete the installation.
3. Install Elementor and Elementor Pro
After WordPress is installed, log in to your WordPress dashboard and navigate to the "Plugins" section. Search for the Elementor plugin and click "Install Now." After the installation, activate the plugin. To unlock advanced features, you need to purchase and install Elementor Pro. Upload the Elementor Pro plugin file and activate it.
4. Select a Theme
Choose a WordPress theme that complements your website's purpose and design goals. Navigate to "Appearance" > "Themes" and browse the available themes. Install and activate your selected theme. For optimal compatibility, consider using themes specifically designed to work with Elementor, such as Hello Elementor or Astra.
5. Customize the Layout with Elementor Pro
With Elementor Pro, you can customize your website's layout using its drag-and-drop builder. Here are some key features you can use:
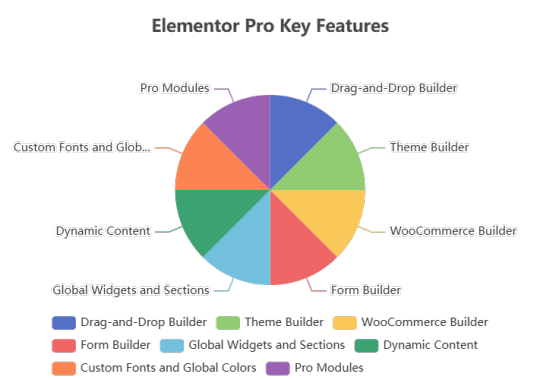
6. Utilize Pre-Built Templates
Elementor Pro offers a variety of pre-built templates that you can use to quickly set up your website. These templates are fully customizable, allowing you to tailor them to your specific
needs. Access templates by clicking on the folder icon in the Elementor editor or by visiting the Template Library.
7. Publish and Optimize Your Website
Once you have customized your website to your liking, it's time to publish it. Make sure to optimize your website for performance and SEO to ensure it loads quickly and ranks well in search engine results. Consider using caching plugins like WP Rocket or W3 Total Cache to improve loading speeds.
8. Maintain and Update Your Website
Regular maintenance is crucial for keeping your website secure and functioning properly. Update WordPress core, themes, and plugins when new versions are available. Perform regular backups of your website to prevent data loss in case of technical issues.
Conclusion
Building a website using WordPress and Elementor Pro is a straightforward process that allows users to create professional and customizable websites with ease. By following the steps outlined in this guide, you can set up your website efficiently and take advantage of the powerful features offered by Elementor Pro to create a stunning online presence.
0 notes
Text
youtube
How to generate favicon & upload in wordpress in 2025 ?
Step 1: Generate a Favicon
A favicon is a small icon that appears in the browser tab and helps with branding. You can create one using the following methods:
Method 1: Using Online Favicon Generators
You can use free online tools to generate a favicon:
favicon.io
RealFaviconGenerator.net
Favicon-Generator.org
Method 2: Creating Your Own Favicon
Design a 512x512 px image using tools like Canva, Photoshop, or Figma.
Convert it to .ico format using an online converter if needed.
Step 2: Upload Favicon in WordPress
Method 1: Using WordPress Customizer (Recommended)
Go to your WordPress Dashboard.
Navigate to Appearance > Customize.
Click on Site Identity.
Find the Site Icon section.
Click Select Image, upload your favicon (512x512px recommended), and Save Changes.
Method 2: Manually Uploading via FTP
Upload the favicon.ico file to your website’s root directory via cPanel or FTP (FileZilla).
Add the following code inside the <head> section of your theme’s header.php:htmlCopyEdit<link rel="icon" type="image/x-icon" href="https://yourwebsite.com/favicon.ico">
Save and upload the file.
Method 3: Using a WordPress Plugin
You can use plugins like:
Favicon by RealFaviconGenerator
WP Favicon Editor
Install the plugin from Plugins > Add New.
Upload your favicon and configure the settings.
Step 3: Clear Cache & Verify
Clear your browser cache and check the favicon by opening your website in incognito mode.
Use Favicon Checker to verify if it's working correctly.
0 notes
Video
youtube
How to Manually Upload a WordPress Website to Cpanel How to Upload a Wo...
0 notes
Text
Complete Beginner’s Guide to Setting Up WHMCS on WordPress
Integrating WHMCS with your WordPress site can dramatically improve your hosting business’s efficiency by automating client management, billing, and support. Whether you’re a seasoned hosting provider or just starting, setting up WHMCS on WordPress doesn’t have to be intimidating. This step-by-step beginner’s guide will walk you through the process of integrating WHMCS into your WordPress site, making it easier to manage your hosting services and improve client satisfaction.
By the end of this guide, you’ll be able to integrate WHMCS seamlessly with WordPress, allowing for a more efficient and professional hosting operation. Let’s dive in!
What Is WHMCS?
Before diving into the integration process, let’s first understand what WHMCS is.
WHMCS (Web Host Manager Complete Solution) is a comprehensive billing and client management software designed specifically for hosting businesses. It allows you to automate:
Client Registration
Billing and Invoicing
Domain Management
Support Ticketing
WHMCS is widely used in the hosting industry due to its robust features and seamless management tools. By integrating WHMCS into WordPress, you can deliver a unified, professional experience for your clients.
Why Integrate WHMCS into WordPress?
WordPress is one of the most popular platforms for building websites, and combining it with WHMCS creates a powerful, streamlined environment for hosting providers. Integrating WHMCS into WordPress offers several key benefits:
Seamless User Experience: Clients can manage their accounts, view invoices, and submit support tickets all within the same interface.
Better Client Management: Automate tasks such as billing, domain registration, and service provisioning.
More Flexibility: WordPress gives you access to a vast range of themes and plugins to customize your hosting site, making it more user-friendly.
Reduced Overhead: By automating administrative tasks, you free up time to focus on growing your business.
Now that you know the advantages, let’s get into how to set up WHMCS on WordPress.
Step 1: Install WordPress on Your Hosting Server
If you haven’t done so already, your first step is to install WordPress on your hosting server.
If you’re unfamiliar with the process, here’s a quick breakdown:
Log into your cPanel (or hosting account dashboard).
Look for the WordPress installer.
Follow the prompts to install WordPress on your chosen domain.
Once WordPress is installed, you’ll have access to your WordPress dashboard where you can manage your site’s content and plugins.
Step 2: Install WHMCS on Your Server
The next step is to install WHMCS. While there’s no official WordPress plugin for WHMCS, you can still integrate it manually or by using third-party plugins. Here’s how to set it up manually:
Download WHMCS from the official WHMCS website.
Upload the WHMCS files to your hosting server using FTP or the file manager in your cPanel.
Create a database for WHMCS through your cPanel or hosting control panel.
Follow the installation instructions provided by WHMCS, entering the database details when prompted.
Once installed, you’ll be able to access your WHMCS admin panel via yourdomain.com/admin.
Step 3: Install a WHMCS WordPress Plugin
Once WHMCS is installed on your server, the next step is to integrate it with your WordPress site. The easiest way to do this is by using a WHMCS WordPress Plugin, which allows you to embed WHMCS functionality directly into your WordPress site.
To install the plugin:
Go to the WordPress Dashboard
Navigate to Plugins > Add New
Search for a WHMCS integration plugin (for example, a WP WHMCS sync plugin).
Click Install Now and activate the plugin.
The plugin will prompt you to enter your WHMCS URL and API credentials, allowing WordPress and WHMCS to communicate seamlessly.
Step 4: Customize the Design and Layout
After installation, you’ll need to ensure that your WHMCS system integrates smoothly with the look and feel of your WordPress site. The best way to do this is by using a WHMCS WordPress theme or customizing the layout to match your branding.
Most WHMCS plugins offer basic theme integration, but you can further enhance the design by:
Customizing your WordPress theme to match your branding.
Adding WHMCS templates to WordPress using the plugin’s settings.
Customizing the client area and billing pages to ensure they align with your brand identity.
You want to make sure that users have a consistent experience between your WordPress site and WHMCS.
Step 5: Configure WHMCS Settings
With WHMCS now integrated into WordPress, it’s time to configure it according to your hosting business needs. Here’s a quick overview of the settings you should adjust:
Payment Gateway Setup: Add payment gateways like PayPal, Stripe, or others to allow clients to pay for their hosting services directly through your website.
Email Templates: Set up automated email notifications for things like invoices, account changes, and service renewals.
Client Area Configuration: Customize the client dashboard to provide a clean, user-friendly interface.
Product and Service Setup: Create hosting plans, domain registration options, and any other services you wish to offer.
This configuration will help you automate client management, billing, and service provisioning without any manual effort.
Step 6: Test the Integration
Before launching your website, make sure everything is working properly. Test:
Client registration and account creation – Does the process flow smoothly?
Billing and invoicing – Are invoices generated and sent correctly?
Support tickets – Can clients submit tickets and receive responses?
Testing is crucial to ensure that the integration is seamless, and clients have a positive experience on your website.
Step 7: Ongoing Maintenance
After the setup, you’ll need to regularly maintain your WHMCS WordPress Plugin integration. This includes:
Updating the plugin to ensure compatibility with new WordPress versions.
Monitoring for bugs or issues that may arise as you expand your services.
Backing up your data regularly to avoid loss of critical information.
This ongoing maintenance ensures that your integration continues to run smoothly and efficiently.
Subtly Promote WP WHMCS Sync Plugin
Setting up WHMCS on WordPress is an excellent way to improve the efficiency of your hosting business, but managing multiple systems manually can still be time-consuming. For those looking to take the integration to the next level, consider using a WP WHMCS Sync Plugin.
A WP WHMCS Sync Plugin simplifies the integration by automatically syncing your WordPress site with WHMCS. This plugin allows you to keep your client data, billing information, and product offerings in perfect sync without having to manually update each system. Plus, with the right synchronization, you can ensure that your clients receive real-time updates on their account status, services, and invoices.
By automating the process further, you can focus more on growing your business and less on administrative tasks.
Conclusion
Setting up WHMCS on WordPress is a powerful way to streamline your hosting business and improve client satisfaction. By following this step-by-step guide, you’ll have everything you need to integrate WHMCS with WordPress seamlessly.
To make the process even smoother and more efficient, consider using a WP WHMCS Sync Plugin to automate syncing between WordPress and WHMCS. This plugin can save you time, reduce errors, and allow you to focus on providing exceptional services to your clients.
0 notes
Text
How to Move Your WordPress Site from Localhost to a Live Server
Developing a WordPress site on localhost is a great way to build and test your website in a controlled environment. However, the real challenge arises when it's time to move the site from your local server to a live hosting environment. If not done correctly, you could encounter broken links, missing images, or even database errors.
In this blog, we'll guide you through a step-by-step process to successfully move your WordPress site from localhost to a live server.

Step 1: Choose the Right Hosting Provider
Your first step is to select a reliable web hosting provider that meets your website’s needs. Look for:
Server Speed: Fast servers for better performance.
Uptime Guarantee: At least 99.9% uptime to ensure availability.
Ease of Use: User-friendly dashboards and tools.
WordPress Support: Hosting optimized for WordPress websites.
Popular options include Bluehost, SiteGround, and WP Engine.
Step 2: Export Your Local WordPress Database
The database is the backbone of your WordPress site. To export it:
Open phpMyAdmin on your local server (e.g., XAMPP or WAMP).
Select your WordPress database.
Click on the Export tab and choose the Quick Export method.
Save the .sql file to your computer.
Step 3: Upload Your WordPress Files to the Live Server
To move your files:
Compress Your WordPress Folder: Zip your local WordPress installation folder.
Access Your Hosting Account: Use a file manager or an FTP client like FileZilla.
Upload the Files: Transfer the zipped folder to your hosting server's root directory (usually public_html).
Unzip the Folder: Extract the files once uploaded.
Step 4: Create a Database on the Live Server
Now, set up a new database on your live hosting server:
Log in to your hosting control panel (e.g., cPanel).
Navigate to the MySQL Databases section.
Create a new database, database user, and password.
Assign the user to the database with full privileges.
Step 5: Import the Database to the Live Server
Open phpMyAdmin in your hosting control panel.
Select the new database you created.
Click the Import tab.
Choose the .sql file you exported from your localhost.
Click Go to import the database.
Step 6: Update the wp-config.php File
To connect your site to the live database:
Locate the wp-config.php file in your WordPress installation.
Open the file in a text editor.
Update the following lines: define('DB_NAME', 'your_live_database_name'); define('DB_USER', 'your_live_database_user'); define('DB_PASSWORD', 'your_live_database_password'); define('DB_HOST', 'localhost'); // Keep this unless your host specifies otherwise.
Save the file and upload it to your server via FTP.
Step 7: Update URLs in the Database
Your localhost URLs need to be replaced with your live site URLs.
Use a tool like Search Replace DB or run SQL queries in phpMyAdmin.
In phpMyAdmin, run the following query: UPDATE wp_options SET option_value = 'http://your-live-site.com' WHERE option_name = 'siteurl'; UPDATE wp_options SET option_value = 'http://your-live-site.com' WHERE option_name = 'home';
Step 8: Test Your Live Website
Once everything is uploaded and configured, check your website by entering its URL in a browser. Test for:
Broken Links: Fix them using plugins like Broken Link Checker.
Missing Images: Ensure media files were uploaded correctly.
Functionality: Verify forms, buttons, and features work as expected.
Step 9: Set Up Permalinks
To ensure proper URL structure:
Log in to your WordPress admin dashboard on the live site.
Go to Settings > Permalinks.
Choose your preferred permalink structure and click Save Changes.
Step 10: Secure Your Live Website
After migrating, secure your site to prevent vulnerabilities:
Install an SSL Certificate: Most hosting providers offer free SSL certificates.
Update Plugins and Themes: Ensure everything is up to date.
Set Up Backups: Use plugins like UpdraftPlus for regular backups.
Conclusion
Moving your WordPress site from localhost to a live server may seem daunting, but by following these steps, you can ensure a smooth and error-free migration. A successful move allows you to showcase your site to the world, engage your audience, and achieve your goals.
Start today and take your WordPress project live with confidence!
0 notes
Text
Game-Changer Alert: Unlimited cPanel Hosting for Unmatched Performance
Introduction
In the ever-evolving landscape of web hosting, where speed, reliability, and performance are paramount, a new player has emerged, promising a game-changing experience. Unlimited cPanel Hosting is here to redefine the hosting game, offering unparalleled features that set it apart from the rest.
Unrivaled Performance
Say goodbye to sluggish loading times and website downtime. Unlimited cPanel Hosting guarantees lightning-fast speeds, ensuring your website is always up and running, providing an optimal user experience. With a robust infrastructure and cutting-edge technology, this hosting solution is a performance powerhouse.
Scalability at its Finest
As your website grows, so should your hosting capabilities. Unlimited cPanel Hosting offers seamless scalability, accommodating the increasing demands of your online presence effortlessly. Whether you're running a personal blog or managing a thriving e-commerce empire, this hosting solution scales with you.
Storage without Limits
No more fretting over storage constraints. Unlimited cPanel Hosting provides an abundance of storage space, allowing you to upload and manage your content without worrying about hitting any ceilings. Store as many images, videos, and files as your heart desires, all without compromising on speed or performance.
Bandwidth Freedom
Bid farewell to the days of throttled bandwidth. With unlimited resources at your disposal, your website can handle traffic spikes without breaking a sweat. Unlimited cPanel Hosting ensures that your visitors always have a seamless browsing experience, no matter how busy your online space becomes.
Fortified Defense Mechanisms
In the digital age, security is paramount. Unlimited cPanel Hosting takes this seriously, implementing top-notch security measures to safeguard your website from potential threats. From robust firewalls to regular security audits, rest easy knowing your data is in safe hands.
SSL Encryption as Standard
Boost your website's credibility and protect your visitors with SSL encryption included as a standard feature. Unlimited cPanel Hosting prioritizes the security of your data, ensuring that all communications between your website and its visitors remain confidential.
Intuitive Control
Managing your hosting has never been easier. Unlimited cPanel Hosting boasts an intuitive control panel that puts the power in your hands. Effortlessly navigate settings, monitor performance, and make updates with a few clicks – even if you're not a tech whiz.
Conclusion
In the fiercely competitive realm of web hosting, Unlimited cPanel Hosting stands out as a true game-changer. From unbeatable performance and unlimited resources to top-tier security features and a user-friendly interface, this hosting solution elevates your online presence to new heights.
If you're ready to revolutionize your web hosting experience, make the switch to Unlimited cPanel Hosting today. Your website deserves nothing less than the best.
2 notes
·
View notes
Text
Fixing WordPress Update Errors: A Simple Guide for Non-Tech Users

Keeping your WordPress website updated is essential for staying secure, fast, and compatible with the latest features. But when updates fail—especially if you’re not a tech expert—it can feel frustrating and even risky.
The good news? Most update failures are common, predictable, and fixable without needing advanced coding knowledge. This guide will walk you through the most frequent reasons WordPress updates fail and how to resolve them safely and confidently—even if you’re not “techy.”
Why WordPress Updates Sometimes Fail
Before diving into solutions, it helps to know why things go wrong. WordPress is made up of the core platform, plugins, and themes. When any part of that system is out of sync, updates can fail.
Here are the most common causes:
✅ Poor internet connection
✅ Plugin conflicts
✅ Incompatible themes
✅ Server resource limits (like low memory)
✅ Incorrect file permissions
✅ Corrupted or incomplete update files
Once you know the cause, you’re halfway to the solution.
How to Fix WordPress Update Failures – Step by Step
1. Always Start with a Backup
Even if nothing seems broken, backing up your site is the smartest first step. Use plugins like UpdraftPlus or BackupBuddy to save your full site (files + database). That way, you can restore everything if anything goes wrong during troubleshooting.
2. Clear Your Cache (Browser and WordPress)
Sometimes the update goes through—but your browser still shows the old version.
Here’s what to do:
Clear your browser cache.
If you use caching plugins (like WP Super Cache or W3 Total Cache), clear your site cache too.
Then try updating again.
3. Troubleshoot Plugin Conflicts with Safe Mode
Conflicting plugins are a common culprit. To test this safely:
Install the free Health Check & Troubleshooting plugin.
Enable “Troubleshooting Mode.��� This temporarily disables all plugins for your session only.
Try updating again. If it works, re-enable plugins one at a time to find the one causing the issue.
This protects your live site while you debug.
4. Check Hosting Resource Limits
Some shared hosting plans have tight restrictions that block larger updates.
Check with your hosting provider:
Is your PHP memory limit too low? (It should be at least 256MB)
Is the maximum execution time too short?
Can they upgrade your hosting plan or adjust settings?
Your host can often resolve this quickly with a simple support request.
5. Manually Update WordPress (It’s Not as Hard as It Sounds)
If the automatic update isn’t working, do it manually:
Download the latest WordPress version from wordpress.org.
Unzip it on your computer.
Connect to your site using FTP (FileZilla is a good option).
Upload the new wp-admin and wp-includes folders, replacing the old ones.
Do NOT touch your wp-content folder (your themes/plugins are safe there).
Visit your site—WordPress may prompt you to update your database.
Follow each step carefully, and your site will be updated safely.
6. Check File Permissions
Wrong file permissions can block updates.
To fix:
Use the WP File Manager plugin or your hosting control panel.
Set folders to 755 and files to 644.
If you’re unsure, ask your host’s support team to help.
These settings ensure your site stays secure and functional.
7. Stuck in Maintenance Mode? Here’s How to Exit
If your site says “Briefly unavailable for scheduled maintenance,” the update process got interrupted.
Fix it like this:
Log into your hosting account (via cPanel or file manager).
Open your site’s root directory.
Delete the .maintenance file.
Refresh your site—it should be back to normal.
When You Should Ask for Help
Sometimes, even after trying all the steps, the issue persists. That’s okay.
You can contact:
Your hosting provider’s support team
A professional WordPress developer
A trusted WordPress maintenance company
If your website is important for your business, it’s worth having someone reliable to handle technical issues so you can stay focused on running your operations.
Conclusion: You’re Not Alone—Websenor is Here to Help
WordPress update failures can feel intimidating, but you don’t need to be a developer to fix them. With the right approach, tools, and guidance, most issues can be resolved quickly—no coding required.
Always start with a backup, clear your cache, check for plugin conflicts, and review your hosting environment. These simple steps can save you time, money, and stress.
If you're feeling stuck or don’t want to go it alone, Websenor is here for you. As a trusted WordPress development and maintenance company, we help non-tech users manage, protect, and grow their websites without the headaches.With Websenor by your side, WordPress becomes simpler—so you can focus on what really matters: growing your brand.
0 notes
Text
WASender Nulled Script 4.5

Unlock the Power of WhatsApp Marketing with WASender Nulled Script In today’s digital landscape, reaching your audience efficiently is key. WASender Nulled Script is a revolutionary tool for marketers, entrepreneurs, and digital agencies who want to supercharge their WhatsApp marketing strategies without breaking the bank. If you're looking for a cost-effective and high-performing solution, downloading the WASender Nulled Script from our website is the smartest move you can make today. What Is WASender Nulled Script? WASender Nulled Script is a powerful bulk messaging software designed to automate WhatsApp marketing campaigns. It helps you send personalized messages, manage contacts, and build powerful drip campaigns—all from a user-friendly dashboard. As a SaaS-based tool, it eliminates the need for manual messaging and allows seamless integration with your marketing stack. Technical Specifications Script Type: PHP-based SAAS Application Framework: Laravel (Latest Version) Database: MySQL Server Requirements: PHP 8+, cURL enabled, HTTPS support Frontend: Fully responsive and mobile-ready interface Top Features and Benefits of WASender Nulled Script Here’s why marketers around the world are choosing the WASender Nulled Script: 1. Bulk WhatsApp Messaging Send thousands of messages in just a few clicks. Ideal for promotions, updates, and personalized marketing campaigns. 2. Campaign Management Track message delivery, open rates, and campaign performance through an intuitive dashboard. 3. Drip Campaigns Automate your follow-ups and schedule messages to be sent at intervals that suit your strategy. 4. Contact Management Upload contacts easily, group them, and tag them for better targeting and segmentation. 5. Multi-User System Create and manage multiple users with different access levels. Perfect for agencies handling various clients. Real-World Use Cases E-commerce Stores: Announce new product arrivals and exclusive deals. Local Businesses: Send personalized reminders, offers, or service updates. Digital Agencies: Manage campaigns for multiple clients using a single platform. Educational Institutions: Notify students about updates, events, and results. How to Install WASender Nulled Script Installing the WASender Nulled Script is simple and straightforward: Download the nulled script package from our website. Upload the files to your web server via FTP or cPanel. Configure your database and environment settings. Run the installer through your browser and follow the setup wizard. Login to your admin panel and start sending WhatsApp messages instantly. Why Choose the Nulled Version? Accessing the WASender Nulled Script from our platform means unlocking premium features at zero cost. You gain complete functionality without license restrictions, allowing full freedom and flexibility. Plus, it’s a great way to test the software before deciding to purchase a full license in the future. FAQs Is the WASender Nulled Script safe to use? Yes, the script provided on our website is thoroughly scanned and tested for safety. We ensure it’s malware-free and ready for deployment. Can I update the nulled script later? Nulled versions do not support automatic updates, but you can manually upgrade it when newer releases become available. Do I need technical skills to install the script? Basic knowledge of web hosting and FTP is sufficient. The installation process is guided and user-friendly. Is support included with the nulled version? No official support is provided, but our community is active and willing to help with troubleshooting and customizations. Final Thoughts If you’re serious about leveraging WhatsApp for business growth, the WASender offers a powerful and budget-friendly solution. Download it now and start reaching your audience faster, smarter, and with greater impact. Looking for more premium tools? Check out Yoast seo nulled to boost your WordPress SEO strategy, or explore a wide variety of nulled themes to enhance your site’s appearance.
0 notes
Text
If you are thinking of having a website designed, then you need to consider who will host your new website. The type of hosting company you select and the type of package you choose can have a serious effect on the loading speed and accessibility of your website. There are plenty of web hosting providers, however every website need is different and each hosting company may not be suitable for your business. All of this means that your decision should not be taken lightly and in view of this, here are some points to consider before you sign on the dotted line. Storage And Bandwidth These are two of the most important considerations in selecting a web hosting company. Storage refers to the amount of data you can store on the server and bandwidth to the amount of data you can upload and download. The larger your website the more storage you need and the more traffic to your website, the more bandwidth you need. Email Accounts Do you want to host your email accounts on the same server or do you have a separate email provider? If you want to organise a package deal, then find out if they offer POP or IMAP and do they interface with Google Apps? What CMSs Do They Offer? The most popular CMS is WordPress, so you want an easy to use one click process for installing WordPress on your cPanel. If you use Joomla or Drupal, then you also want a one-click install for these as well. 24/7 Tech Support Some web hosts only offer email support (not phone support) during business hours, which is not much good when you have a crisis that needs fixing at 2am in the morning. So, find out if they offer 24/7 phone support and if they have live chat as well. Local Hosting If your business serves customers in the US then you want a server in the US and if your customers are in Australia then you want a server here. Location is important because customers in the same locality as the server receive faster loading times. Dedicated Hosting Some businesses may require dedicated server hosting. Most web hosting providers are able to provide cheaper hosting options since they do shared hosting. If you care about dedicated hosting your options are very limited. Here are some reasons why dedicated hosting is good for some businesses. Backups How often do they backup your website on their server? Whilst you should always do this yourself, it is good to know that the web hosting company also backs up your website. Redundancies You want the web host to have multiple redundancies, so if their server goes down, your website is picked up by another server and kept online. The longer you are down, the more money you lose. Up-time And Down-time This is related to their redundancy servers, but can also be affected by many other factors. So make sure you ask about their percentage of down-time and you want this to be as close to 100% as humanly possible. Parking Domains Can you buy other domain names and just park them with your web host? Many businesses buy different versions of their domain name to protect their brand and you have to park these somewhere. So, make sure that your web host offers this service. If you are in the market for a new web host, one of the companies worth looking into is iiNet, one of Australia's best website hosting company. In selecting a web hosting company, one has to really go down to the nitty gritty to know the needs of the business. And since a website is the business' window to the world, it needs to be reliable and will help the business grow.
0 notes
Text
Customizing Admin Interfaces to Improve Web Management Experiences

Web hosting control panels are essential for managing websites, offering users intuitive platforms to perform various administrative tasks. Whether it's managing domains, databases, or email accounts, a customizable admin interface can significantly improve the efficiency of these tasks. Popular web panels like cPanel, Plesk, and DirectAdmin have extensive customization options that enable users to tailor the interface to their needs, streamlining their workflow and improving overall management experiences. Key Takeaways - Popular web panels include cPanel, Plesk, and DirectAdmin. - These panels offer extensive customization options to enhance usability. - Customizing admin interfaces improves workflow efficiency and user experience. - Adding custom buttons, changing themes, or implementing access control can streamline daily operations. Why Customize an Admin Interface? Admin interfaces often have a wide array of tools that can overwhelm users. A customized interface allows for better organization by grouping related tools and tasks, which saves time by minimizing the need to search through various menus. Here are several compelling reasons to customize your admin panel: - Improved Task Efficiency: Custom dashboards can be designed to display frequently used tools, allowing users to complete tasks faster and more efficiently. - Personalized User Experience: Different users or teams might need access to different functionalities. Customization enables the creation of customised dashboards that cater to unique needs. - Access Control: By restricting access to only relevant interface sections, you can reduce the risk of accidental or malicious changes. This is particularly useful for companies with multiple users managing different aspects of the website. - Polished Client Experience: A customized, well-branded interface helps present a more polished and professional image if the admin panel is client-facing. With these benefits in mind, let's look at how three of the most popular web hosting control panels—cPanel, Plesk, and DirectAdmin—allow for extensive customization and how that enhances the overall web management experience. Popular Web Hosting Control Panels cPanel cPanel is one of the most widely recognized web hosting control panels, often used by web hosting providers to allow their clients to manage websites. According to 2024 data, cPanel accounts for around 0.2% of websites, representing about 4.3% of the web panel market. Despite its small percentage, it is trendy within its niche and widely adopted by hosting companies. Customizing cPanel cPanel hosting holds a market share of 27.18%. Again, this figure is based on the number of companies using cPanel, about 65,000 worldwide. cPanel offers various options to personalize the interface, including the use of APIs and WHM (Web Host Manager), which can help make significant modifications: - Custom Branding: You can add your company's logo and change the colour scheme using hex codes. This makes the control panel align more closely with your company's branding. - The logo should be uploaded in light and dark to accommodate different background colours. - To modify colours, ensure the correct contrast ratio so the text remains legible across the interface. - Custom Buttons and Tools: You can add new buttons to the cPanel interface to provide quick access to specific functionalities. For example, custom buttons can lead to frequently used tools or external websites. - API Customization: cPanel provides API functions allowing deeper integrations and automation, enabling custom workflows and features beyond simple aesthetic changes. - Language Customization: You can modify the admin panel's default language for multilingual users, making it more accessible for global teams. These customizations help align the cPanel experience with a user’s or company’s needs, improving usability and efficiency. For large enterprises, customizing the cPanel interface can streamline workflows for different departments, helping them focus on relevant tasks. Plesk Plesk is another viral control panel that offers a wide range of features, including domain management, file handling, and email configuration. According to W3Techs, Plesk dominates the web panel market with a 4.5% usage rate, translating to 89.2% of the known web panel market. Customizing Plesk Plesk offers an extensive array of customization options: - Custom Buttons: Add custom buttons to the interface to provide direct access to specific functions or external tools. - Interface Language: Much like cPanel, Plesk allows administrators to change the default interface language to meet the needs of an international team or client base. - Custom Themes: Plesk users can customize the interface theme by replacing the default icons or changing the colour scheme. This helps users personalize the experience and align it with their brand. - Custom Logos: Plesk allows the replacement of the default logo with a custom one. This is useful for web hosting companies looking to provide a more personalized experience for their clients. - Access Control: You can limit what sections of the panel certain users can see or access. This ensures that users only see the necessary tools, minimizing the risk of unauthorized or accidental changes. - Task Automation: Plesk enables administrators to automate tasks like running PHP scripts or scheduling database backups. This can be particularly useful for streamlining server management and maintenance tasks. Plesk's customization options make it a versatile tool for individual users and businesses. By offering extensive options for branding, access control, and task automation, Plesk helps improve the efficiency of web management, particularly for large-scale operations. DirectAdmin DirectAdmin may not be as popular as cPanel or Plesk, but it’s a powerful control panel designed for Linux and BSD environments. It’s known for its simplicity and intuitive design, making it a solid option for users seeking a no-frills solution. Customizing DirectAdmin DirectAdmin offers several customization features that can enhance the user experience: - Category Organization: DirectAdmin allows for the easy organization of tools into categories, which appear at the top of the interface. This makes it easier for users to locate the tools they need. - Admin-Level File Editing: For users who need more advanced features, SSH access can be used to edit files at the admin level. Custom files can be added to the file editor by editing the edit_files.txt file located in /usr/local/directadmin/data/templates/custom. - Anti-Spam and Security: DirectAdmin includes built-in anti-spam tools that can be customized according to user preferences. This helps improve email security and ensures that the interface remains clutter-free. - Admin User Data: You can change the admin email address or modify other user data by logging in as an admin or via SSH. DirectAdmin's focus on simplicity and its customization options make it an appealing choice for users who need a straightforward control panel without sacrificing functionality. Conclusion: Customizing an admin interface is crucial for improving web management experiences. Whether you’re looking to streamline workflows, improve usability, or offer a personalized client experience, web panels like cPanel, Plesk, and DirectAdmin provide extensive customization options that can be tailored to your specific needs. From adjusting colour schemes and logos to implementing task automation and access control, customization allows for a more organized, secure, and efficient web management process. As a result, users can work more effectively, spend less time navigating complex menus, and maintain greater control over their websites. Whether you’re a small business owner managing your site or a web hosting company providing services to clients, investing time in customizing the admin interface can lead to long-term benefits. Read the full article
0 notes