#WHMCS WordPress Plugin
Explore tagged Tumblr posts
Visit Tumblr Blog
Explore Tumblr blogs with no restrictions, modern design and the best experience.
Last Seen Tumblr Blogs


Fun Fact
After the announcement of the deal with Yahoo!, there were 170K signatures of unhappy Tumblr users petitioning to prevent the sale in 2013.
Text
Complete Beginner’s Guide to Setting Up WHMCS on WordPress
Integrating WHMCS with your WordPress site can dramatically improve your hosting business’s efficiency by automating client management, billing, and support. Whether you’re a seasoned hosting provider or just starting, setting up WHMCS on WordPress doesn’t have to be intimidating. This step-by-step beginner’s guide will walk you through the process of integrating WHMCS into your WordPress site, making it easier to manage your hosting services and improve client satisfaction.
By the end of this guide, you’ll be able to integrate WHMCS seamlessly with WordPress, allowing for a more efficient and professional hosting operation. Let’s dive in!
What Is WHMCS?
Before diving into the integration process, let’s first understand what WHMCS is.
WHMCS (Web Host Manager Complete Solution) is a comprehensive billing and client management software designed specifically for hosting businesses. It allows you to automate:
Client Registration
Billing and Invoicing
Domain Management
Support Ticketing
WHMCS is widely used in the hosting industry due to its robust features and seamless management tools. By integrating WHMCS into WordPress, you can deliver a unified, professional experience for your clients.
Why Integrate WHMCS into WordPress?
WordPress is one of the most popular platforms for building websites, and combining it with WHMCS creates a powerful, streamlined environment for hosting providers. Integrating WHMCS into WordPress offers several key benefits:
Seamless User Experience: Clients can manage their accounts, view invoices, and submit support tickets all within the same interface.
Better Client Management: Automate tasks such as billing, domain registration, and service provisioning.
More Flexibility: WordPress gives you access to a vast range of themes and plugins to customize your hosting site, making it more user-friendly.
Reduced Overhead: By automating administrative tasks, you free up time to focus on growing your business.
Now that you know the advantages, let’s get into how to set up WHMCS on WordPress.
Step 1: Install WordPress on Your Hosting Server
If you haven’t done so already, your first step is to install WordPress on your hosting server.
If you’re unfamiliar with the process, here’s a quick breakdown:
Log into your cPanel (or hosting account dashboard).
Look for the WordPress installer.
Follow the prompts to install WordPress on your chosen domain.
Once WordPress is installed, you’ll have access to your WordPress dashboard where you can manage your site’s content and plugins.
Step 2: Install WHMCS on Your Server
The next step is to install WHMCS. While there’s no official WordPress plugin for WHMCS, you can still integrate it manually or by using third-party plugins. Here’s how to set it up manually:
Download WHMCS from the official WHMCS website.
Upload the WHMCS files to your hosting server using FTP or the file manager in your cPanel.
Create a database for WHMCS through your cPanel or hosting control panel.
Follow the installation instructions provided by WHMCS, entering the database details when prompted.
Once installed, you’ll be able to access your WHMCS admin panel via yourdomain.com/admin.
Step 3: Install a WHMCS WordPress Plugin
Once WHMCS is installed on your server, the next step is to integrate it with your WordPress site. The easiest way to do this is by using a WHMCS WordPress Plugin, which allows you to embed WHMCS functionality directly into your WordPress site.
To install the plugin:
Go to the WordPress Dashboard
Navigate to Plugins > Add New
Search for a WHMCS integration plugin (for example, a WP WHMCS sync plugin).
Click Install Now and activate the plugin.
The plugin will prompt you to enter your WHMCS URL and API credentials, allowing WordPress and WHMCS to communicate seamlessly.
Step 4: Customize the Design and Layout
After installation, you’ll need to ensure that your WHMCS system integrates smoothly with the look and feel of your WordPress site. The best way to do this is by using a WHMCS WordPress theme or customizing the layout to match your branding.
Most WHMCS plugins offer basic theme integration, but you can further enhance the design by:
Customizing your WordPress theme to match your branding.
Adding WHMCS templates to WordPress using the plugin’s settings.
Customizing the client area and billing pages to ensure they align with your brand identity.
You want to make sure that users have a consistent experience between your WordPress site and WHMCS.
Step 5: Configure WHMCS Settings
With WHMCS now integrated into WordPress, it’s time to configure it according to your hosting business needs. Here’s a quick overview of the settings you should adjust:
Payment Gateway Setup: Add payment gateways like PayPal, Stripe, or others to allow clients to pay for their hosting services directly through your website.
Email Templates: Set up automated email notifications for things like invoices, account changes, and service renewals.
Client Area Configuration: Customize the client dashboard to provide a clean, user-friendly interface.
Product and Service Setup: Create hosting plans, domain registration options, and any other services you wish to offer.
This configuration will help you automate client management, billing, and service provisioning without any manual effort.
Step 6: Test the Integration
Before launching your website, make sure everything is working properly. Test:
Client registration and account creation – Does the process flow smoothly?
Billing and invoicing – Are invoices generated and sent correctly?
Support tickets – Can clients submit tickets and receive responses?
Testing is crucial to ensure that the integration is seamless, and clients have a positive experience on your website.
Step 7: Ongoing Maintenance
After the setup, you’ll need to regularly maintain your WHMCS WordPress Plugin integration. This includes:
Updating the plugin to ensure compatibility with new WordPress versions.
Monitoring for bugs or issues that may arise as you expand your services.
Backing up your data regularly to avoid loss of critical information.
This ongoing maintenance ensures that your integration continues to run smoothly and efficiently.
Subtly Promote WP WHMCS Sync Plugin
Setting up WHMCS on WordPress is an excellent way to improve the efficiency of your hosting business, but managing multiple systems manually can still be time-consuming. For those looking to take the integration to the next level, consider using a WP WHMCS Sync Plugin.
A WP WHMCS Sync Plugin simplifies the integration by automatically syncing your WordPress site with WHMCS. This plugin allows you to keep your client data, billing information, and product offerings in perfect sync without having to manually update each system. Plus, with the right synchronization, you can ensure that your clients receive real-time updates on their account status, services, and invoices.
By automating the process further, you can focus more on growing your business and less on administrative tasks.
Conclusion
Setting up WHMCS on WordPress is a powerful way to streamline your hosting business and improve client satisfaction. By following this step-by-step guide, you’ll have everything you need to integrate WHMCS with WordPress seamlessly.
To make the process even smoother and more efficient, consider using a WP WHMCS Sync Plugin to automate syncing between WordPress and WHMCS. This plugin can save you time, reduce errors, and allow you to focus on providing exceptional services to your clients.
0 notes
Text
WordPress Plugin for WHMCS: Revolutionizing Web Hosting with WP WHMCS Sync
In the ever-growing world of web hosting, businesses are constantly looking for ways to streamline their operations, enhance customer experience, and increase revenue. One of the most effective ways to achieve these goals is by integrating WHMCS (Web Host Manager Complete Solution) with WordPress. WHMCS is a leading automation platform used by web hosting providers to manage client billing, support, and account management. WordPress, on the other hand, powers over 40% of websites globally, thanks to its flexibility, scalability, and ease of use.
Integrating WHMCS into WordPress allows hosting companies to combine the robust functionality of WHMCS with the user-friendly, customizable nature of the WordPress Plugin for WHMCS. WP WHMCS Sync, a plugin designed to facilitate this integration, is a powerful tool that simplifies the process of syncing data between these two platforms. In this article, we will explore the features, benefits, installation process, and troubleshooting tips for the WP WHMCS Sync plugin, demonstrating how it can revolutionize the way you manage and run your web hosting business.
1. Why Choose a WordPress Plugin for WHMCS?
Integrating WHMCS into WordPress through a plugin offers numerous advantages for web hosting businesses. Here’s why using a WordPress plugin like WP WHMCS Sync can significantly improve your operations:
Seamless Client Management
WHMCS is a comprehensive platform that handles billing, invoicing, domain management, and client account management. However, accessing these features on a separate system can disrupt the user experience. By integrating WHMCS with WordPress, clients can access everything they need from a single platform.
WP WHMCS Sync creates a seamless connection between your WordPress site and WHMCS, enabling you to display client data, hosting plans, invoices, and support tickets directly on your WordPress website. This integration ensures that customers don't need to log into two different systems to manage their accounts, which improves the overall user experience.
Automation and Efficiency
Both WHMCS and WordPress are designed to automate key aspects of business management. WHMCS automates billing, payment processing, and customer support, while WordPress can automate content management and marketing. WP WHMCS Sync combines the strengths of both platforms, ensuring that updates to customer accounts, billing details, and support requests are synchronized automatically across both systems.
With this integration, you don’t need to manually update customer information or invoices in both platforms. Instead, the WP WHMCS Sync plugin ensures that all changes made in WHMCS are automatically reflected on the WordPress site, saving time and reducing the likelihood of errors.
Brand Consistency
WordPress allows for extensive customization, meaning you can design your website to reflect your brand's identity. By integrating WHMCS into WordPress, you can maintain that same branding across all client-facing aspects of your business. WP WHMCS Sync makes it easy to embed the WHMCS client area, billing interface, and other WHMCS functionalities directly into your WordPress site, all while preserving the look and feel of your brand.
Improved Customer Support
WP WHMCS Sync also enhances the customer support experience. With this integration, customers can submit support tickets, track their progress, and communicate with your team directly from the WordPress site. This centralizes customer interaction, allowing you to streamline your support processes and improve response times.
2. Features of WP WHMCS Sync Plugin
WP WHMCS Sync is packed with features designed to simplify the integration of WHMCS into WordPress. Let's take a closer look at some of the plugin's most notable features:
One-Click Integration
The WP WHMCS Sync plugin offers an easy-to-use installation process that requires no advanced technical skills. Simply download the plugin, install it on your WordPress site, and configure it by entering your WHMCS API details. The plugin’s setup wizard walks you through each step, making it quick and simple to integrate the two platforms.
Client Area Integration
One of the standout features of WP WHMCS Sync is the ability to integrate the WHMCS client area directly into your WordPress site. This integration allows clients to view and manage their hosting plans, invoices, domains, and support tickets all from the same WordPress interface. The client area can be customized to match your site's theme, ensuring a consistent brand experience.
Automatic Data Synchronization
WP WHMCS Sync automatically synchronizes key data between WHMCS and WordPress, including client accounts, invoices, product and service details, and support tickets. Any updates made in WHMCS are instantly reflected on the WordPress site, ensuring that both platforms are always in sync. This eliminates the need for manual updates, saving you time and ensuring that customer data is always up-to-date.
Flexible Payment Gateway Integration
WP WHMCS Sync supports integration with various payment gateways that are compatible with both WHMCS and WordPress. This allows you to offer a range of payment options to your customers, such as credit cards, PayPal, and bank transfers, all within your WordPress site.
Customizable Client Dashboard
WP WHMCS Sync allows you to create a fully customizable client dashboard within your WordPress site. You can choose which elements to display, such as current services, invoices, and ticket status, providing clients with an intuitive and streamlined experience. This flexibility ensures that your client area can be tailored to meet your business's specific needs.
3. How to Install and Configure WP WHMCS Sync Plugin
Setting up WP WHMCS Sync is a simple process that takes just a few steps. Below is a detailed guide to installing and configuring the plugin on your WordPress site:
Step 1: Install the WP WHMCS Sync Plugin
Download the WP WHMCS Sync plugin from the official website or your plugin provider.
Log into your WordPress dashboard and navigate to Plugins > Add New.
Click on Upload Plugin and choose the downloaded WP WHMCS Sync plugin file.
Click Install Now and activate the plugin after installation.
Step 2: Configure the Plugin
After activation, go to Settings > WP WHMCS Sync in the WordPress dashboard.
Enter the necessary details, such as your WHMCS API URL and API key. You can find this information in the WHMCS admin panel under Setup > Staff Management > API Access.
Once entered, click Save Changes to store your configuration.
Step 3: Synchronize Data Between WHMCS and WordPress
After connecting the plugin to your WHMCS account, you can choose which data to sync. You can sync client accounts, product information, invoices, domains, and more.
You can also set up synchronization intervals, deciding how often the plugin should sync data between WHMCS and WordPress.
Step 4: Customize the Client Area
Customize the client area to match your WordPress site's branding by adjusting the layout, color scheme, and fonts.
You can also decide which information to display in the client dashboard, such as active services, billing history, and ticket status.
Step 5: Test the Integration
Once the plugin is installed and configured, perform tests to ensure the integration works correctly. Check that:
Client data is syncing properly between WHMCS and WordPress.
Customers can log into their accounts and manage their services.
Payment gateways are working as expected.
Support tickets are submitted and tracked efficiently.
4. Troubleshooting Common Issues
While WP WHMCS Sync is designed to be easy to use, you may encounter occasional issues. Here are some common problems and how to address them:
API Connection Issues
If the plugin is unable to connect to your WHMCS installation, double-check your API URL and API key. Make sure that your WHMCS installation allows API access and that your API key has the appropriate permissions.
Data Synchronization Delays
If updates aren’t reflecting in real-time, check your synchronization settings and ensure that the plugin has permission to access both WHMCS and WordPress. You may need to increase the synchronization frequency or optimize your server for better performance.
Payment Gateway Issues
If payments aren’t processing correctly, ensure that the payment gateway integration is configured properly in both WHMCS and WordPress. Check your payment settings in both platforms to make sure they match.
Client Area Display Problems
If the client area isn’t displaying correctly, verify that your theme settings in WordPress are compatible with the WHMCS client area. You may need to adjust custom CSS or contact the plugin’s support team for further assistance.
Conclusion
The WP WHMCS Sync plugin is an invaluable tool for web hosting businesses looking to integrate WHMCS with WordPress. By enabling seamless client management, automating data synchronization, and offering customizable client areas, this plugin simplifies web hosting management and enhances the user experience. The easy installation process and extensive features make WP WHMCS Sync an excellent choice for any hosting provider who wants to combine the power of WHMCS with the flexibility and customization of WordPress. By following the installation guide and troubleshooting tips provided, you'll be able to integrate WHMCS into your WordPress site in no time, streamlining your operations and improving customer satisfaction.
0 notes
Text
Phox theme v2.3.9 – Hosting WordPress and WHMCS Theme
https://themesfores.com/product/phox-theme-hosting-wordpress-whmcs-theme/ Phox WHMCS WordPress Theme v2.3.9 Overview & Introduction Phox WHMCS theme is a perfect solution for Hosting Companies. Phox gives you the ability to create a unique-looking website with an easy-to-use drag and drop page builder. fully responsive, retina-ready, and SEO-optimised. On top of that, Phox comes with Advanced Domain Search, You can also choose from 20 website templates as a quick start. Phox Theme GPL Features List: Advanced Domain Search WHMCS Bridge Supported WPML Compatability WooCommerce Compatability Pin Posts Feature Custom Categories Colors Bootstrap 4 Compatibility Elementor page builder – the fastest-growing, open-source WordPress page builder. Over 15 Elementor widgets are ready to use. Includes over 20 Hosting website Templates. Innovative & Powerful Admin Panel 200 elements Multiple Footer Style Responsive & Retina-Ready 100 Icons Seo-optimized 2 Unique Blog Styles 5 Custom Widgets Extensive Video Tutorials Drag & Drop Builder Highly Customisable Slider Revolution Templates Contact Form 7 plugin included and styled for theme 600 Google Fonts included Google Maps support Social media icons Built-in breadcrumbs Cross-browser compatible Full documentation included XML file with demo content Outstanding support for customers The Next Generation Hosting Theme Unlock the power of our WHMCS Template, offering a customizable Order Form, intuitive Page Manager, and versatile Menu Manager. Explore diverse layouts tailored to your needs for a seamless experience. The most powerful features packed in one robust theme: Menu Manager: Say goodbye to complex WHMCS hooks for theme navigation modifications. Menu Manager offers a hassle-free solution, allowing you to effortlessly set up menu items directly from the WHMCS addon. Page Manager: Empower yourself with Page Manager. Configure page settings, select templates, and assign basic SEO tags effortlessly. Enjoy complete freedom to create custom templates or page overwrites tailored to your needs. https://themesfores.com/product/phox-theme-hosting-wordpress-whmcs-theme/ #WHMCSThemes #WordpressTheme
0 notes
Text
Hostie - Web Hosting & WHMCS WordPress Theme
Introducing Hostie – Your Ultimate Solution for Web Hosting & WHMCS! Are you ready to elevate your hosting business to new heights? Look no further than Hostie – a powerful, easy-to-use, and mobile-friendly theme designed to impress both clients and competitors alike. Built with the robust Elementor Page Builder, Hostie is the perfect choice for any hosting, domain, or reseller business company.
Hostie theme comes with the WHMCS template and it’s compatible with the latest version of WHMCS.

Features:
Elementor Page Builder You can easily edit/change everything using Elementor page builder with a drag-drop system.
One Click Demo Installer Included: You can easily import demo data using the one-click demo import plugin. So you can just make a demo site using one click it will help you reduce lots of time
WHMCS Included : Hostie seamlessly integrates with WHMCS, the leading web hosting automation platform. This powerful combination allows you to manage billing, client support, and other crucial aspects of your hosting business efficiently from a single platform. You should use the WHMCS latest version(8.8+) to work properly with hostie template.
Powerful Theme Options: Using Fluxi option you can change many things easily. As like logo, topbar, header style, footer style, color, menu settings, blog layout, banner, preloader, etc.
SEO Friendly: Boost your online visibility with Hostie’s SEO-friendly structure, helping you climb the search engine rankings effortlessly.
Responsive Layout Design: Whatever you are using the device your site will run perfectly. The Hostie theme is fully responsive layout for all types of devices.
04 Header Layouts: You can choose the perfect header from our builds and customize it to your needs.
04 Footer Layouts: You can choose any footer layout that you like and adjust it to your needs.
50+ Inner Pages Included
Product Life Time Free Update
Fully Responsive Design
Google Fonts
Drag and Drop MetFrom
Blog Page Included
4+ Services styles
5+ Project styles
Modern Blog Layout
Multiple Header Styles and Sticky Header
Child Theme Compatible – includes basic child theme
Google Map
1000+ Google Fonts
Mobile Browsers Compatible
Font Awesome Icons
W3C Valid HTML Code
Cross browser Compatible
Reliable support
Well Documented That’s Why Easy to Change
and much more
View Demo >>
Download Now >>
0 notes
Text
How to Make a Reseller Hosting Website: A Step-by-Step Guide
How to Make a Reseller Hosting Website, web hosting services are in high demand as businesses and individuals require reliable hosting for their websites and online projects. As a savvy entrepreneur or someone interested in diving into the web hosting industry, creating your reseller hosting website can be a profitable venture. This comprehensive guide will take you through the step-by-step process of building a reseller hosting website that’s not only visually appealing but also fully functional.
Step 1: Define Your Business Plan and Niche Before you start building your reseller hosting website, you need a clear plan. Consider your target audience, the types of hosting services you want to offer, and the unique selling points that will set your hosting business apart. Understanding your niche and business plan is the foundation for your website’s design and content.
Action Items:
Determine your niche and target audience. Plan your pricing strategy and hosting packages. Identify what makes your hosting business unique. Step 2: Choose a Reseller Hosting Provider As a reseller, you’ll need a reliable hosting provider to supply you with hosting resources. Research different hosting providers to find one that aligns with your business plan. Factors to consider include server performance, reliability, and the quality of support they offer.
Action Items:
Research hosting providers that offer reseller packages. Compare features and pricing to find the right provider. Choose a hosting provider that meets your requirements. Step 3: Register a Domain Name Your domain name is your web hosting business’s online identity. Choose a domain name that is easy to remember, relevant to your hosting business, and reflects your brand. You can register a domain through different domain registrars. Action Items:
Brainstorm domain name ideas that align with your brand and niche. Check domain name availability. Register your chosen domain name. Step 4: Create Your Hosting Website Building a professional and user-friendly website is crucial to attract potential customers. You have several options for creating your reseller hosting website:
Option 1: Website Builder Platforms like Wix, Weebly, and Squarespace offer user-friendly website builders with pre-designed templates and drag-and-drop functionality. Option 2: Content Management System (CMS) A CMS like WordPress provides greater flexibility and customization options. You can find hosting-related themes and plugins to tailor your site to your specific needs. Option 3: Custom Development For those with technical expertise, custom web development provides complete control over design and functionality. This approach, while more time and resource-intensive, allows for a fully personalized website. Action Items:
Choose the system that best suits your skills and needs. Design your website with a clean and professional setting. Include essential pages, such as Home, Hosting Packages, About Us, Contact, and Support. Ensure your site is responsive and mobile-friendly. Step 5: Integrate Billing and Support Systems To effectively manage your hosting business, you’ll need billing and support systems. WHMCS (Web Host Manager Complete Solution) is a popular choice as it handles billing, customer account management, and customer support seamlessly.
Action Items:
Purchase and install a billing and support system like WHMCS. Configure the system to match your branding and pricing structure. Step 6: Set Up Your Reseller Hosting Account Now, it’s time to set up your reseller hosting account with the hosting provider you selected in Step 2. This will provide you with access to a reseller control panel, typically WHM (Web Host Manager). In WHM, you can create and manage hosting accounts for your clients.
Action Items:
Create your reseller account with your chosen hosting provider. Familiarize yourself with the reseller control panel (e.g., WHM). Configure your reseller hosting settings, packages, and pricing. Step 7: Design Your Hosting Packages Determine the hosting packages you’ll offer to your clients. Standard packages may include shared hosting, VPS hosting, and dedicated server hosting. Define pricing, features, and resource allocations for each package.
Action Items:
Create hosting packages in your reseller control panel (WHM). Set pricing and resource limits for each package. Consider offering scalable options to accommodate different client needs. Step 8: Set Up Payment Gateways To process customer payments, you’ll need a reliable payment gateway. Popular options include PayPal, Stripe, and Authorize.net. Ensure that your chosen payment gateway integrates seamlessly with your billing system.
Action Items:
Choose a payment approach that aligns with your business model. Configure your payment gateway settings. Test payment processing to ensure it’s functioning correctly. Step 9: Establish Support Channels Offering excellent customer support is a key factor in the success of your hosting business. Provide multiple support channels, such as email, live chat, and a ticketing system, to ensure that you can address customer inquiries and issues promptly.
Action Items:
Set up dedicated support email accounts. Integrate a live chat system on your website for real-time support. Configure a ticketing system within your billing and support software. Step 10: Launch and Market Your Website After thorough testing and preparation, it’s time to launch your reseller hosting website. Ensure that all systems are functioning correctly, and that your hosting packages and pricing are accurate. Once your website is live, you can begin marketing your hosting services to potential customers.
Action Items:
Make your website live by pointing your domain to your hosting provider’s servers. Promote your hosting business through various online and offline marketing channels. Utilize social media, content marketing, and paid advertising to attractions potential customers. Step 11: Provide Exceptional Customer Support Outstanding customer support is an ongoing commitment. Train your support team to handle customer inquiries effectively, develop a comprehensive knowledge base to address common questions and issues, and implement a proactive approach to support by monitoring server performance.
Action Items:
Train your support team to provide excellent customer service. Develop and maintain an extensive knowledge base. Implement server monitoring tools to identify and address potential issues proactively. Step 12: Monitor and Optimize Your reseller hosting business is up and running, but the journey doesn’t end here. Continuously monitor server performance, website traffic, and customer feedback. Use this information to optimize your services, pricing, and marketing efforts. (register a edu domain)
Action Items:
Use server monitoring tools to ensure optimal performance and uptime. Analyze website traffic to identify areas for improvement. Act on customer feedback to enhance your hosting services and customer experience. Conclusion Building your reseller hosting website is an exciting entrepreneurial journey that can lead to a profitable online business. By following these steps and staying committed to providing excellent customer support, you can create a successful reseller hosting business that attracts and retains satisfied clients. As the digital landscape continues to grow, your web hosting business will have the opportunity to thrive and expand.
0 notes
Text
Top-Performing WHMCS Modules for Reseller Hosting
Our Addon Modules provide the means for you to build admin pages and hooks to improve WHMCS. An extension module can include either an administration page and hooks or neither. With the help of the WordPress plugin Custom WHMCS Modules, you can add new features and capabilities to the WHMCS software. Your customers may check on the health of their servers, login to the console, and even reinstall their virtual private servers (VPS) with the help of this module. Send an email to [email protected] if you have any further questions.
#WHMCS Modules#whmcs addon#whmcs provisioning#whmcs report#whmcs theme#whmcs themes#whmcs custom hooks#whmcs templates
0 notes
Text
Whmpress Whmcs Wordpress Integration Plugin 6 0 Revision

Whmpress Whmcs Wordpress Integration Plugin 6 0 Revision 6.0
The WHMPress WHMCS WordPress Integration Plugin 6.0 Revision is a powerful tool designed to seamlessly integrate the popular web hosting automation platform WHMCS with WordPress websites. This plugin serves as a bridge between the two platforms, allowing users to efficiently manage their web hosting business directly from their WordPress dashboard.With the WHMPress WHMCS WordPress Integration Plugin 6.0 Revision, you can effortlessly synchronize and display WHMCS products, pricing, and packages on your WordPress site. It enables you to create customized product pages, order forms, and pricing tables that are fully integrated with your WHMCS system. This integration ensures a consistent user experience and reduces the complexity of managing separate platforms.This plugin offers a range of advanced features to streamline your web hosting operations. It enables automatic provisioning of services, domain registration, and client management directly from your WordPress site. You can easily handle billing, invoicing, and payment processing through WHMCS while leveraging the user-friendly interface of WordPress.The WHMPress WHMCS WordPress Integration Plugin 6.0 Revision is highly flexible and customizable. It provides a wide range of configuration options, allowing you to tailor the integration according to your specific requirements. You can choose the layout, design, and styling of your product pages, order forms, and pricing tables to match your brand identity and enhance the overall user experience.This plugin is compatible with the latest versions of WHMCS and WordPress, ensuring seamless integration and optimal performance. It is designed to be user-friendly, with a simple installation process and intuitive interface. Whether you are a web hosting provider, a reseller, or a developer, the WHMPress WHMCS WordPress Integration Plugin 6.0 Revision is an essential tool for enhancing the functionality and efficiency of your web hosting business.Upgrade to the WHMPress WHMCS WordPress Integration Plugin 6.0 Revision and take advantage of its powerful features to streamline your web hosting operations, improve customer management, and elevate the overall user experience. Read the full article
0 notes
Text
WHMpress - WHMCS WordPress Integration Plugin allows you to pull your WHMCS Products, Domains, and Prices into WordPress smoothly and display them in a variety of ways, including package comparison tables, price lists, and order buttons. Clients will be taken to your WHMCS to complete their purchases. WHMpress is made for web hosts with flexibilit...
0 notes
Text
Download Bluerack - Modern Hosting WordPress Theme with WHMCS - WPCroc.com
Download Bluerack – Modern Hosting WordPress Theme with WHMCS – WPCroc.com
DOWNLOAD FOR FREE LIVE PREVIEWBUY FOR $29 Bluerack is a modern, clean, unique, professional and fully responsive web hosting theme. It looks perfect on all major browsers, tablets, and smartphones. You can add unlimited designs or edit whatever you want. It all depends on you, it is fully customized and compatible with the latest version of WHMCS, which means that our WHMCS template is 100% same…

View On WordPress
#agency#domain#hosting#hosting template#html#illustration#marketing#modern#new#responsive#technology#web#website#whmcs#wordpress#wordpress plugins#wordpress themes
0 notes
Text
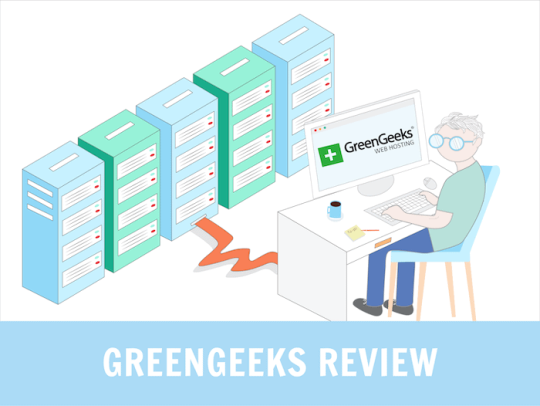
GreenGeeks Best WebHosting Service
Fun fact: do you know why Facebook moved its massive data center to Northern Sweden?
That’s because servers run hot, and cooling them down is expensive. Might as well keep them in a cold part of the world.
But more to the point in this GreenGeeks review: maintaining servers uses a ton of energy.
In fact, the Internet is one of the largest polluters in the world. Data centers account for 2% of the world’s CO2 emissions, about the same as the airline industry.
Well, if that’s a concern for you, I’ve got good news because the ‘green’ in GreenGeeks refers to their commitment to providing eco-friendly web hosting.
This is how it works, according to their website:
The platform is designed with a maximum use, no waste mindset.
For every amperage the company pulls from the grid, it matches it x3 in the form of renewable energy via the Bonneville Environmental Foundation
So they claim your website could be operating on a 300% green hosting platform!
While a growing number of hosting providers take the problem of energy seriously, (here’s an example from DreamHost), GreenGeeks really puts their ethos front and forward.
But what about other pros and cons, features and alternatives? Let’s put GreenGeeks through the wringer to see how it fares.
Table of Contents
GreenGeeks Prices
GreenGeeks Pros & Cons
What is GreenGeeks used for?
When not to use GreenGeeks hosting?
GreenGeeks Backups
GreenGeeks and WordPress
Final GreenGeeks Review Comments
Frequently Asked Quesitons
GreenGeeks Prices
Let’s first look at how much it costs per month to host your website on GreenGeeks. The first option is for shared hosting (the one most website owners need). You’ll also find that they offer WordPress web hosting. As far as I could tell, there is absolutely no difference between the WordPress and the shared hosting option.
As always, we’ll only be mentioning the regular price, which is what you pay after a first year at a discounted price. The first 12 months can be 50 – 70% cheaper.
Ecosite LiteEcosite ProEcosite Premium
Price (after renewal)$10.95 / month$15.95 / month$25.95 / month
You can purchase the plans for 12, 24 or 36 months. There is a significant discount for the longer terms, as you can see below:
GreenGeeks also offers VPS hosting, which comes with better performance, but a lot of limits depending on the plan you choose.
Price$39.95 / month$59.95 / month$109.95 / month
Finally, I should also mention that GreenGeeks has a few add-ons you can purchase to expand your hosting capabilities. These include:
Dedicated IP address: $48 per year
Premium AlphaSSL Wildcard: to secure SSL on multiple subdomains all at once.
WHMCS license: useful for resellers who want to bill hosting to their clients (note that GreenGeeks does offer a reselling option).
Last but not least, you’ll have to pay $25 for every backup restore, if you do it more than once per month (the first one is free).
What can you expect from each GreenGeeks plan?
As you can see in the above table, there’s a lot of unlimited stuff with their shared hosting and WordPress plans. That includes:
Unlimited bandwidth (or data transfer, which means the same thing)
Unlimited disk storage
Unlimited databases
Unlimited email accounts
Free SSL
The key limits to keep an eye on are maybe the number of ionodes, which is another way of saying the number of files on your site. It’s a very large number, mostly there to ensure you don’t abuse GreenGeeks’ generosity by hosting a file sharing website.
GreenGeeks Pros & Cons
Pros:
Green-minded: GreenGeeks is attempting to offset their server’s electricity consumption by using as much renewable energy as possible.
Unlimited data bandwidth: you can host one or multiple sites with complete peace of mind when it comes to visitor numbers and bandwidth.
Unlimited data storage: your site can be as large as you like, so good for video, high-res photos and ecommerce with loads of products. Just keep an eye on the number of files. Hosting more than 150,000 could void your plan’s contract.
Server locations: three continents to choose from, the US, Canada and Europe.
Heavily reduced long term plans: it’s not unusual to pay less for 24 or 36 month plans, but GreenGeeks is slashing their monthly prices by up to 70% for long term users.
Cons:
Missing advanced features: serious website owners and developers will need to look elsewhere for staging or premium DNSs.
No team management: it’s not possible to add multiple account users and to give permissions.
Lack of free backups: you get one automatic backup every 24 hours. One free restore per month, but the rest are paid. Not good enough.
Outdated design: Not a deal-breaker, but the whole system could do with a new coat of paint, which could also help with the user experience.
What is GreenGeeks used for?
I’d say GreenGeeks is best for website owners with green goals in mind. You can even show one of their green badges, to highlight on your site.
The generous bandwidth and storage is advantageous for those who own multiple sites. As far as the performance to price ratio goes, it’s good, and becomes more acceptable when you buy a long term contract of 24 or 36 months.
When not to use GreenGeeks hosting?
Anyone managing a team should consider that inviting others to join the account isn’t possible, and the lack of developer-friendly features could be a big no-no for certain businesses.
Developers with complicated workflows that need staging areas probably won’t be big fans of GreenGeeks’s platform either.
GreenGeeks Backups
Backups and restore are one of the areas I start considering a lot more these days when it comes to choosing a web host. A Sod’s law states: if something wrong can happen, it probably will, and at the worst possible times. This happened to us, and please learn from our mistakes when I say you should backup as often as possible.
GreenGeeks cPanel Backup Feature
Anyways, this is how it works with GreenGeeks. Option 1 is to use the cPanel backup tool. I’s a bit clunky and manual but by no means too difficult to do:
Login and click on the appropriate site’s cPanel button
Click Backup in the Files section
Click Home Directory under Download a Home Director
You can also download a database instead, or a full Zipped account backup, which is what you’ll need to keep on your local drives.
A couple of important things to note:
If your account is larger than 10GB in size, the whole cPanel backup option will be disabled. You’ll have to pay $5 per backup.
cPanel backups saved to your home directory will be deleted automatically after 48 hours, so it’s better to download the ZIP file locally.
The first monthly restore is free. After that, each restore costs $25. Note that it’s not unusual to restore at least a couple of times if there’s an issue (e.g. you chose the wrong backup to restore).
Option number two is to download files manually using an FTP program. If you use a CMS like WordPress or Drupal that also means you’ll need to backup databases. I always find that a big pain to do, and also slow. Which is why a better backup tool would have been useful.
GreenGeeks and WordPress
Although GreenGeeks has a special section on their website for WordPress hosting, I couldn’t find a difference between these plans and the share hosting ones.
In any case, here’s what you get for both if you want to install the world’s most popular CMS.
Easy installation: it’s not 1-click, but they use an install app called Softaculous, which simplifies the process for you. Maybe 4 or 5 steps, which you can read about here.
LiteSpeed Cache plugin: it’s a caching plugin that will make WordPress run faster on your site when properly configured. Be aware this is not GreenGeek’s own solution, but just a generic plugin they recommend.
LiteSpeed Cache Settings
To be honest, I feel like all the WordPress-optimized stuff is mostly there for marketing purposes. If you are really serious about WordPress experts (and you have the budget for it), I’d consider other options like Kinsta or WP Engine. SiteGround is also a great option if you need something a bit more affordable.
Final GreenGeeks Review Comments
GreenGeeks is certainly the provider we’ve tested that’s the most committed to protecting the environment. It’s an admirable choice, and businesses with a green goal will certainly be pleased to hear that they can host a website with a reliable performance, price, and low carbon footprint.
But there are nevertheless a few downsides to consider. The lack of advanced options like staging and team management features can be a dealbreaker for professional business owners. The limited backup features may be not enough for most.
And if you need a top-performing host, other (and more expensive) solutions like SiteGround, Kinsta or WP Engine could be considered.
It’s also not the cheapest provider out there. For example, at renewal DreamHost is more affordable and offers similar performance levels.
> Try GreenGeeks risk-free for 30 days
Frequently Asked Quesitons
How Do I Pay for GreenGeeks?
You can pay via all major credit cards and PayPal. No checks, money orders, wire transfers or Western Union payments.
Is Everything Really Unlimited?
Yes. Just keep in mind that there is a limit on the amount of files you can keep on your sites, though. It’s a really high number, so mostly a precaution against file-sharing websites.
Can I Get My Money Back?
There is an unconditional 30-day money back guarantee offer.
Is There an Uptime Service Guarantee?
Yes, if your website hosting drops below a 99.9% rate, GreenGeeks will refund some of your hosting fees.
Is GreenGeeks Really Environmentally-Friendly?
They’re certainly advertising as such. In practice this is how it works: GreenGeeks tells the Bonneville Environmental Foundation (BEF) how much electricity they use. The foundation calculates how much green energy they’ll need to use to make up for it. GreenGeeks purchases that amount in renewable energy.
So it’s not like their servers use less energy than standard hosting. However, they are certainly committed to making up for what they consume, and using as much green energy as possible.
Get GreenGeeks Now
#Best Web Hosting Services#Best Web Hosting Providers#best web hosts#web hosting#web host#web hosting provider#web hosting services#wordpress hosting#hosting
1 note
·
View note
Text
8 Best WordPress Client Portal Plugins To Use For 2023

A client portal plugin is used to create a secure and private front-end area on your WordPress website where your clients can access their information, communicate with you, and view their progress. The client portal provides a centralized location for managing client information, files, invoicing, and other relevant data. This helps to streamline your workflow, save time, and improve communication with your clients. Client portal plugins also provide a user-friendly interface for clients to access their information and communicate with you, improving their overall experience with your business. By using a client portal plugin, businesses can improve their customer service and relationship management with their clients.
wordpress Caching plugins and client portal plugins can coexist and complement each other in a WordPress setup. Caching plugins, such as WP Super Cache and W3 Total Cache, can improve the performance and speed of your WordPress website by caching and serving static HTML files to visitors. However, they typically do not cache dynamic content, such as client-specific information stored in a client portal.
Check More- 6 Best Instagram WordPress Plugins to Boost Your Sales (2023)
For client portals to function correctly, it's important that the cached content is not served to the wrong client or user. To ensure this, caching plugins can be configured to exclude certain pages or sections of your website from being cached, such as the client portal pages. This way, the client portal can function as intended and provide clients with access to their private information and communication with you, while the rest of your website can benefit from the improved performance of caching.
In short, caching plugins and client portal plugins can work together to provide a fast and efficient website experience for both clients and visitors, while also ensuring the privacy and security of client information.
Gravity Forms User Portal
Gravity Forms User Portal is a WordPress plugin that provides a secure and private front-end portal for clients to access their information, documents, and communicate with you. It allows you to manage client information, files, and communication in one centralized location, saving you time and streamlining your workflow. This plugin is easy to set up and customize, and it integrates seamlessly with Gravity Forms, one of the most popular form-building plugins for WordPress.
Client Portal by RightPress
Client Portal by RightPress is a WordPress plugin that allows you to create a private client area on your website where clients can access and manage their information, communicate with you, and view their progress. This plugin is easy to set up and customize, and it provides a user-friendly interface for clients to access their information and communicate with you. It also integrates with popular e-commerce and payment platforms, making it a great choice for businesses that sell products and services online. Additionally, Client Portal by RightPress is highly flexible and customizable, allowing you to tailor the client experience to your specific needs.
WP-Client
WP-Client is a comprehensive client portal solution for WordPress. It provides a secure and private area for clients to access their information, communicate with you, and view their progress. With WP-Client, you can manage client information, files, invoicing, and much more, all from one centralized location. This plugin is easy to set up and customize, and it provides a user-friendly interface for both clients and administrators. WP-Client also integrates with popular e-commerce and payment platforms, making it a great choice for businesses that sell products and services online. With its wide range of features and flexibility, WP-Client is a great choice for businesses of all sizes and types.
WHMCS Client Area for WordPress
WHMCS Client Area for WordPress is a plugin that integrates the popular web hosting management and billing software, WHMCS, with your WordPress website. With this integration, you can provide your clients with a secure and private client portal where they can manage their billing, view their invoices, and access support services. The WHMCS Client Area for WordPress is easy to set up and customize, and it provides a seamless integration between your WHMCS platform and your WordPress website. This plugin is ideal for web hosting and online businesses that use WHMCS to manage their billing and support services.
Sprout Client
Sprout Client is a project management and client portal plugin for WordPress. It provides a secure and private front-end portal for clients to access their projects, communicate with your team, and view their progress. Sprout Client allows you to manage client projects, task lists, invoicing, and more from one centralized location. This plugin is easy to set up and customize, and it provides a user-friendly interface for both clients and administrators. Sprout Client is highly flexible and customizable, allowing you to tailor the client experience to your specific needs. It is a great choice for businesses and agencies that need a comprehensive project management solution for their clients.
Client Portal Pro
Client Portal Pro is a premium WordPress plugin that provides a secure and private client portal for your clients to access their information, communicate with you, and view their progress. With Client Portal Pro, you can manage client information, files, invoicing, and much more, all from one centralized location. This plugin is easy to set up and customize, and it provides a user-friendly interface for both clients and administrators. Client Portal Pro also integrates with popular e-commerce and payment platforms, making it a great choice for businesses that sell products and services online. With its wide range of features and flexibility, Client Portal Pro is a great choice for businesses of all sizes and types.
Clients Zone
Clients Zone is a WordPress plugin that provides a secure and private client portal for your clients to access their information, communicate with you, and view their progress. With Clients Zone, you can manage client information, files, invoicing, and much more, all from one centralized location. This plugin is easy to set up and customize, and it provides a user-friendly interface for both clients and administrators. Clients Zone also integrates with popular e-commerce and payment platforms, making it a great choice for businesses that sell products and services online. With its wide range of features and flexibility, Clients Zone is a great choice for businesses of all sizes and types.
conclusion
In conclusion, client portal plugins provide a secure and private front-end area for clients to access their information, communicate with you, and view their progress. They help businesses to streamline their workflow, save time, and improve communication with their clients. Client portals can also improve the overall customer experience and relationship management with clients. When used in conjunction with caching plugins, client portals can provide a fast and efficient website experience while also ensuring the privacy and security of client information. With the wide range of options available, it's important to choose a client portal plugin that meets the specific needs of your business.
Here are more links-
creativemarket.com/users/saneladeutch
disway.org/cs/profile/a486a00f9a27c1cf7baf991868d173c3
tldrlegal.com/users/saneladeuch
designspiration.com/saneladeuch/saves/
0 notes
Text
WHMCS Template Client Area

The Whmcs Template Client Area is a new resource which provides blogs and guides that can be used as a design base for creating your own Whmcs templates.
The Whmcs Template Client Area is a JavaScript custom page, cPanel module and WordPress plugin. This is one solid Whmcs Template Client Area package that lets you create your own login form in no time.
#whmcs templates#whmcs themes#WHMCS module#whmcs services#Best WHMCS Themes#Whmcs Template Client Area
0 notes
Text
Cloudme Host v1.1.5 WordPress Hosting Theme + WHMCS
Cloudme Host v1.1.5 WordPress Hosting Theme + WHMCS
Cloud Me is an Elegant WordPress Premium Theme, It’s fully compatible with WHMCS-Bridge, Visual Composer and WPML plugins which connect between WordPress and WHMCS, Cloud Me is suitable for Hosting websites aswell as Company, Agency or Organization. Demo:…

View On WordPress
0 notes
Link
0 notes
Text
Custom WHMCS Modules

Custom WHMCS modules are one of the most popular and powerful WordPress plugins. They give users the ability to create their own custom functions, hooks, and filters to extend WHMCS. This guide will teach you how to create your own custom WHMCS module.
First, you will need to create a custom WordPress plugin. Once you have created your plugin, you will need to create a folder for your module inside of the plugin’s root. Inside of this folder, you will need to create a file called “config.php”. This file will contain all of the module’s configuration information.
What are Custom WHMCS Modules?
Custom WHMCS Modules are WHMCS Extensions that allow you to create your own custom fields, sections, and modules. This allows you to tailor WHMCS to fit your specific needs and preferences.
Once you have created a Custom WHMCS Module, you can use it in any of your WHMCS installations. It is also possible to share Custom WHMCS Modules with other Whmcs administrators.
If you are interested in creating a Custom WHMCS Module, please visit our documentation page. There, you will find information on how to create a Custom Whmcs Module, as well as how to submit it for inclusion in the Whmcs repository.
How Do Custom WHMCS Modules Work?
Custom WHMCS Modules are a powerful way to customize your WordPress theme without editing the core files. They allow you to add custom code to specific sections of your theme, letting you customize the look and feel of your site without any programming knowledge.
To create a Custom Whmcs Module, first browse through the available templates on the WordPress themes repository. Once you find a template that interests you, click on the “Edit” button next to the template’s name. This will open the template’s edit screen, where you can add your own custom code.
To add a Custom Whmcs Module, first click on the “Add a new module” button located in the “Modules” tab of your theme’s “Edit” screen. This will open the “Add New Module” screen, where you can type in the name of your new Custom Whmcs Module.
Examples of Custom WHMCS Modules
There are many ways to extend WHMCS to better suit your business needs and one of the most popular methods is through the use of custom modules.
In this blog post, we'll take a look at some examples of custom WHMCS modules and how they can be used to add extra functionality to your WHMCS installation.
One example of a custom module is the Client Area Homepage Module. This module allows you to customize the default WHMCS client area homepage to better suit your brand or business.
Another popular custom module is the Custom Client Fields Module. This module allows you to add custom fields to the client profile page in WHMCS. This is useful for collecting additional information from your clients such as their address or phone number.
The Custom Reports Module is another popular custom module which allows you to create custom reports in WHMCS. This is useful for tracking specific data points or metrics within your WHMCS installation.
Conclusions
Custom WHMCS modules can be a great way to add extra functionality to your WHMCS installation. However, before you start coding, it's important to make sure that you understand the process and know how to code the modules correctly.
In this guide, we've covered the basics of custom WHMCS module development, including how to create a basic module and how to add different features to it.
Hopefully, this has given you a good understanding of how custom WHMCS modules work and how you can create your own. If you need any further help, don't hesitate to get in touch with a WHMCS developer.
#whmcs#whmcsthemes#whmcsmodules#whmcstemplate#webhostingtheme#webhostingdesign#webhostingtemplate#wordpress#vps#webhosting#webhostingcompany#cloudhosting#dedicatedserver#server#fastesthosting#fasterhosting#domain#colocationserver#design#ssdhosting#wordpressdeveloper#business
0 notes
Text
Webhosting WordPress WHMCS Theme
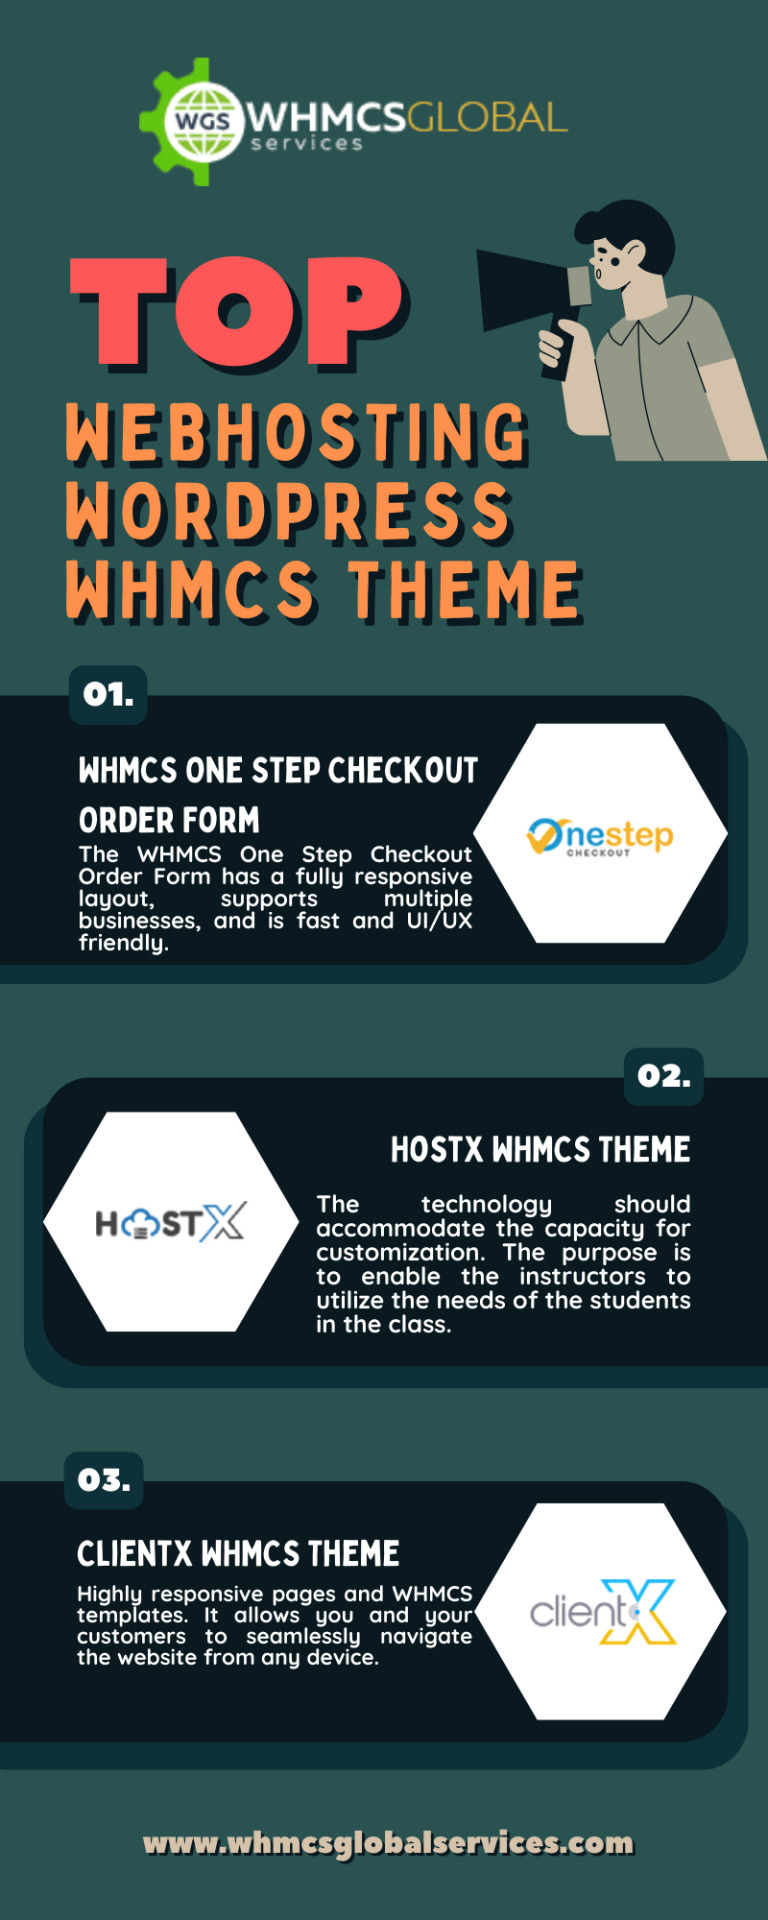
WHMCS is very easy to integrate with WordPress, by using the WHMCS Bridge plugin. This plugin comes with a free version and thus, you can integrate the best WebHosting WordPress WHMCS Theme and enjoy advanced features such as single sign-on, multi-lingual WHMCS support and, support for the WHMCS market connect.
#whmcs#whmcsglobalservices#whmcs themes#whmcs templates#best whmcs themes#whmcs theme#web hosting template#web hosting theme
0 notes