#i have a script to copy layers to all open documents which helps with coloring and watermarks
Explore tagged Tumblr posts
Visit Tumblr Blog
Explore Tumblr blogs with no restrictions, modern design and the best experience.
Last Seen Tumblr Blogs


Fun Fact
Tumblr.com rank in the US is 25.
Text
oof i just realized since i have a newer phone now and outlook app works on it, not only can i work on teams off my wrist, but i can do EMAILS off my wrist
#tbh i automated around like... 50% of my job away#i mean i still have to check the artwork and stuff it's not like my scripties can do my job for me#nor can my datamerge sets or my like.... resize one art.. automatically resizes all other garment size templates#and when i wfh i let the computer run and answer messages and texts on my phone#but now i don't even have to run over when i get an email!!!!!!!!!!!!!!!!!!!#my boss saw me do it a few times and i taught a few ppl in my dept my like... .lazy girl automation#AND he asked how i knew the things and i was like... oh no reason like i know this for no reason#until like i was there over a year..... and i was like UHHH i was REALLY into a kpop boyband with 9 members and wanted to make GIFS#for ALL NINE BOYS!! every performance... sometimes 2 perfs a day which is 4 x 9 x 2 gifs LOL#he looked at me like i was weird but i also sit in between the bts cubicle and the exo cubicle#i only have work stuff pinned up on my cube lol#BUT if you guys didn't know all my gifs are batch processed.... so i only do about half the work#i have a script to copy layers to all open documents which helps with coloring and watermarks#and then also.... a BUNCH of batch processes... like all i do is import crop and do base coloring#everything else my computer just runs for me now LMAO#personal#if i don't get a good raise this year... we're going to be implementing one of my data merge things for templates for a LOT of the pitch#boards and pages for sales................... SOOoooOOoO i'll sneak that shit into my portfolio and apply elsewhere to get a job hop bump#but i should get a good review lol
3 notes
·
View notes
Photo
Back to childhood with AppleWorks
Hi everyone! Today I'm going to tell you about a very old software that kept me busy for many, many hours during my teenage years and that I've had the pleasure of rediscovering these days. Apple fans will have glitter of nostalgia in their eyes, others will have the opportunity to discover a beautiful tool that has not forgotten to be compatible with Windows. It is AppleWorks! AppleWorks was an office suite, installed on all Apple computers of the time, which, in addition to the classic word processor, spreadsheet and Power Point presentation, also offered a vector drawing tool and a bitmap drawing tool. It was my first experience in digital drawing and photo manipulation and with a bit of inventiveness, I was able to get some amazing things out of it. Behind its apparent simplicity, this little soft hides an unsuspected power. Let's go for a little trip back in time!
Small overview
The painting module
Gallery of illustrations
Install AppleWorks (Yes! It still works! )
Small overview
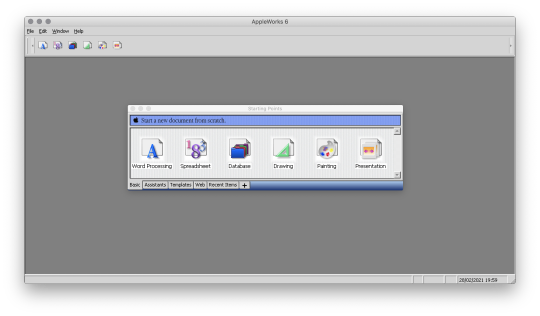
AppleWorks is 6 softwares grouped into one. When you launch it, it offers you the possibility to create 6 types of documents: word processor, spreadsheet, database, presentation, bitmap drawing, vector drawing.
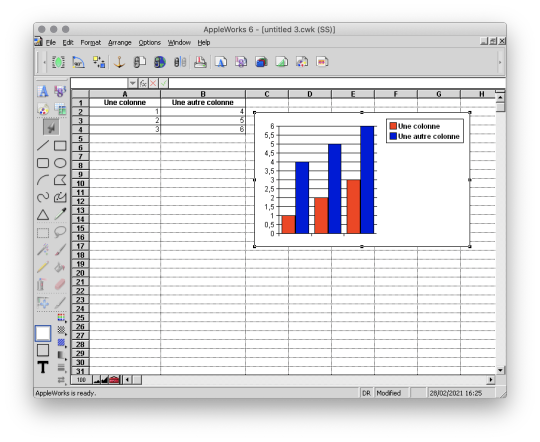
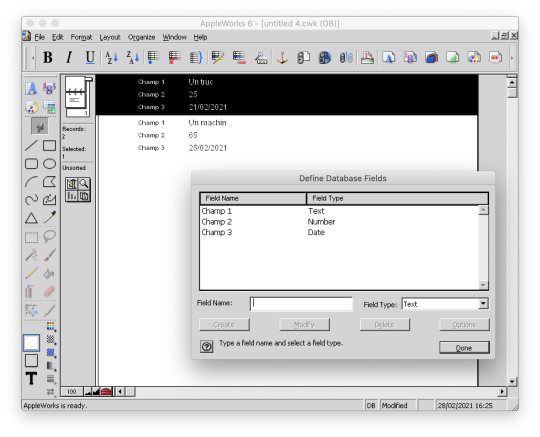
I quickly talk about Spreadsheet, Database and Presentation because I never used these modules. Anyway, know that with Spreadsheet you could make like with Excel, with Database, create databases and with Presentation, make like with Power Point. (You can click on the images to enlarge them to full size.)

And here are, then, the 3 modules that I really used!
The word processor

I wrote all my comics scripts, presentations and internship reports there when I was at school, until my dad bought Microsoft Office. Hard to compete with the Word arts. 8D Except that Microsoft Office did not offer vector drawing software, nor bitmap drawing software. So it was not about to dethrone AppleWorks.
The vector drawing module

This module helped me a lot to make diagrams to integrate in the word processor, draw dungeon plans for our Donjons and Dragons sessions, make some logos or paste editable text on images like my comics pages. I particularly liked its ability to generate gradients that roughly matched the shape in which they were applied, and there are recent vector drawing technologies that still can't do that and that's a little bit annoying to me. And finally, here is the module where I really spent the most time!
The bitmap drawing module
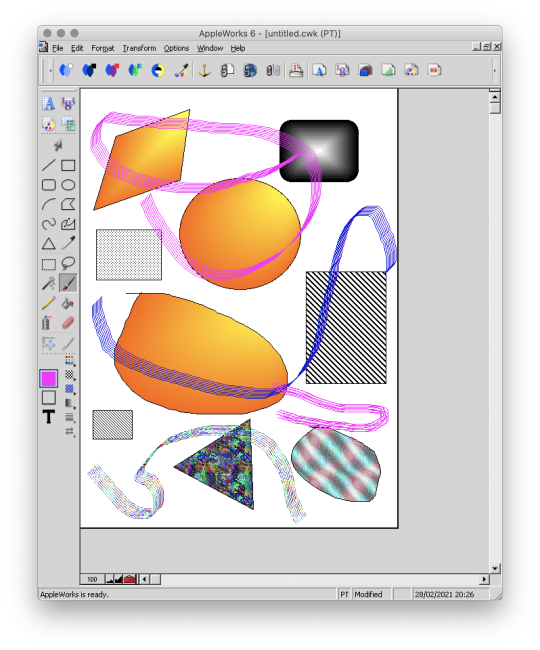
Well... Some geometrical shapes, a pencil, a brush, a filling tool, an eraser... So far it doesn't look much different from Paint. Wait until you see what it is capable of. :p
The painting module (bitmap drawing)
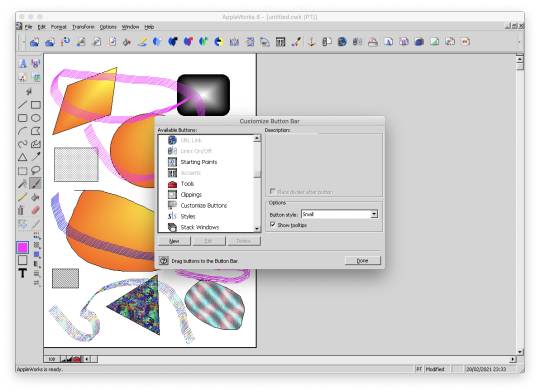
To begin, AppleWorks 6 is not the first version of AppleWorks that I worked with and already at that time, I had my little habits and what a disappointment for me when I didn't find my favorite features !! Looking for a little bit it turned out that they were just a little hidden and just needed to be tidied up a bit. Because yes! This small software already had a customizable interface by drag and drop as on a modern Photoshop!
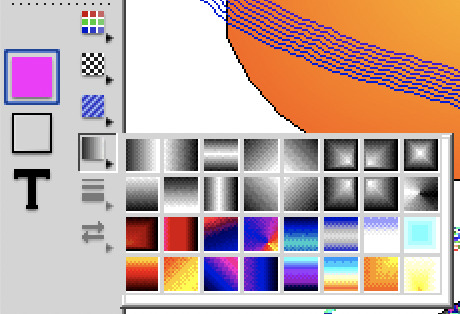
Now all is clear, we can get to the heart of the matter: drawing! :p I've already mentioned the toolbar on the side earlyer, which is already familiar to you if you've ever used Paint. Now, let's move on to the area just below: the palettes. AppleWorks offers a limited palette of colors.

You can combine the selected color with a pattern to apply. Some of them look like manga screentones.

Some fun colorful patterns are also available.

And finally a small palette of gradients is also available.
Well... A few funny patterns, some gradients. It's enough to have fun for 5 minutes, but nothing special. We will going not very far. That's where the real work begins. :p Do you remember? A few moments ago I added buttons in the horizontal bar at the top, including this one.

And this is what it opens!

A customization window! :D Not enough colors in the default palette? Never mind! You can create as many color palettes as you want.

Not enough patterns either in black and white or in color? You can create as many pattern palettes as you want!


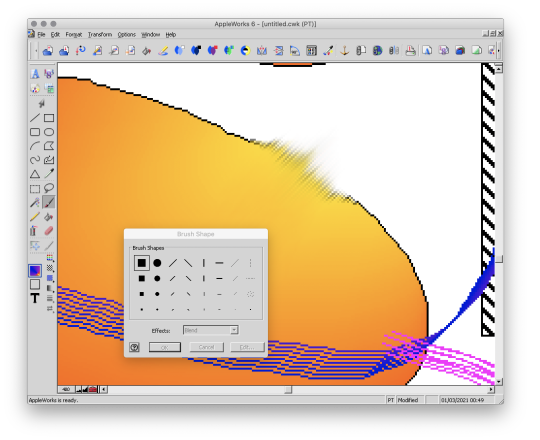
The default gradients palettes is too poor? No problem! You can create as many gradient palettes as you want! And for the moment, I spent a lot, a lot, a lot of time on this section! You can make circular gradients.

Linear gradients.

And gradients that fit the shape in which you apply them. Well, it's far from perfect with concave shapes, but it already allows for interesting things.

And to give the coup de grace to Paint, with AppleWorks you could even create your own brushes! :p

There are even some effects available such as blurring.
This AppleWorks is a piece of cake in the belly! :D Now that we know about its possibilities, I propose to show you a small gallery of what I was able to do with this software from end of nineties to middle of 2000s. :D
Gallery of illustrations
Let's start with the very first drawing I made with AppleWorks in 1998. We didn't have a scanner at the time, so I had to do it entirely with the mouse. It was also a time when I didn't have much notion of saving the original files and I considered that as soon as I had printed the drawing, it was no longer worth keeping it on the computer to save space (the hard drive was 4 GB). So this is a scan of the printed version you see here. x)
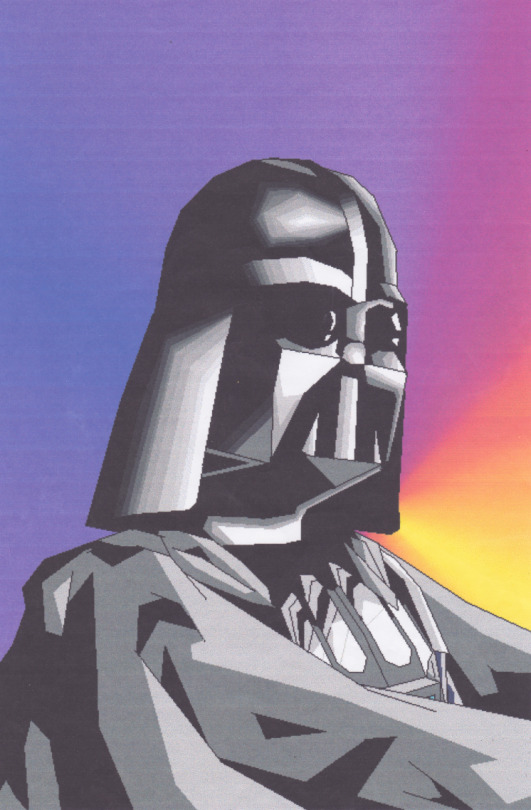
A good old Darth Vader! (1998)
Well, making a drawing from A to Z entirely with the mouse was laborious, so I also used AppleWorks to create backgrounds and print them. Then I would do my drawing by hand and cut it out and paste it onto the printed background. I was able to make interesting effects by understanding the limitations of the software and exploiting them. By understanding that gradients were composed of a series of solid color bands, I could make focus line effects by filling them with the filling tool with a different patterns or gradients.
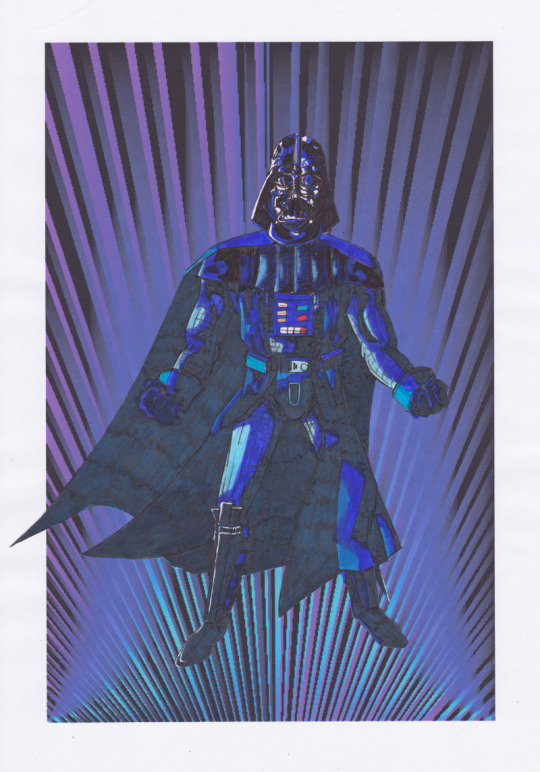
This posing remind some Dragon Ball character (Between 1998 and 2000)
It is also with AppleWorks that I made my first attempts at photo manipulation. I used photos from an encyclopedia we had on CD-ROM and manipulate them by tinkering them and copying and pasting small pieces here and there. Then I printed my montages and paste them onto the comics pages.
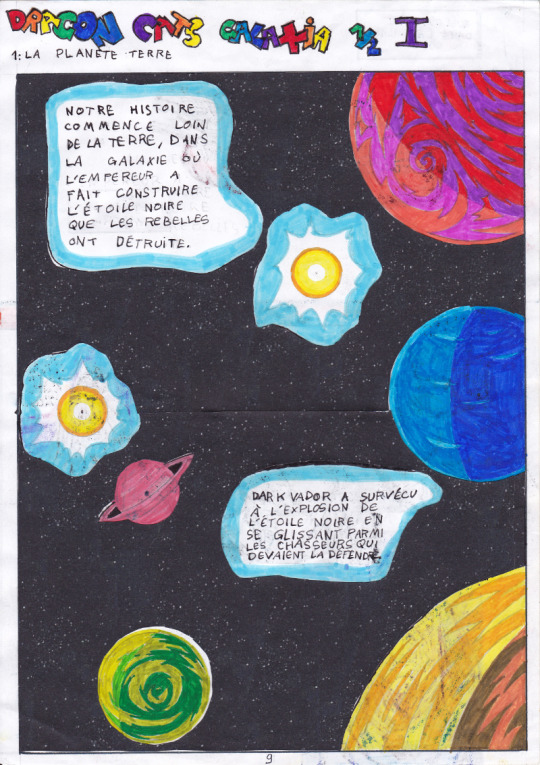
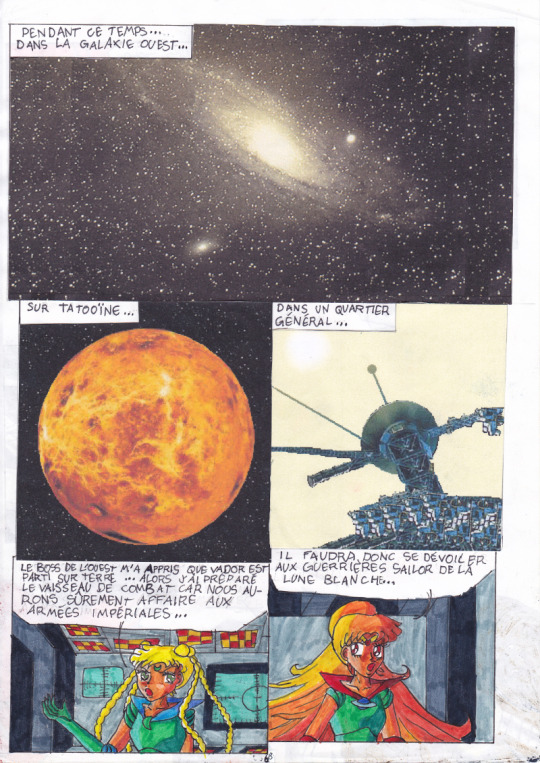
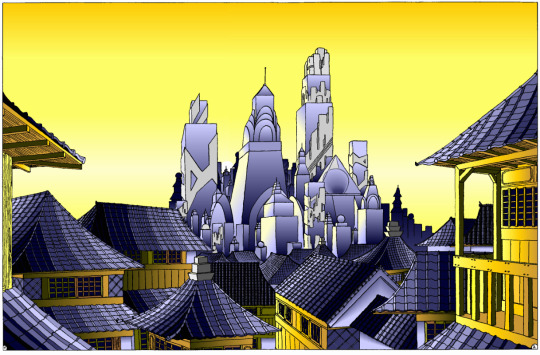
My montages were mainly used for space scenery. (1999 - 2000 in collaboration with my sister)
This software really pushed me to be creative to get what I wanted out of it. I had even managed the tour de force of pasting a white lineart over a photo.
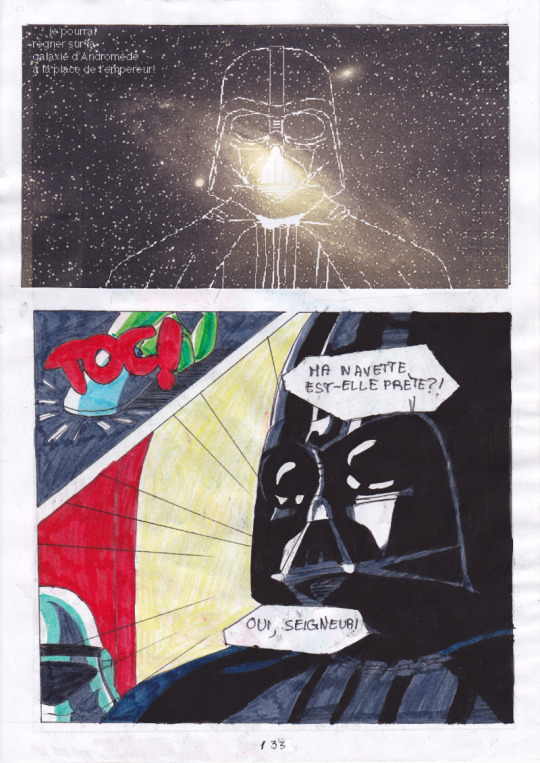
(2000 - 2001)
In the absence of layers, I had to work on 2 files in parallel and with the lasso select tool. And then one day, our first scanner finally arrived home! There the serious things could begin! I was able to stop trying to make drawings with the mouse and use AppleWorks to put in color drawings made with the traditional way. So I was able to go further from the end of nineties. It obviously started with Saint Seiya. x) (You can always click on the images to enlarge them to full size.)


I loved the Aquarius saint. He was my favorite character from Saint Seiya. ^^ (2000 - 2001, this way)
At the beginning I was just doing solid colors, but as I experimented with the features and learned how to combine them, I ended up getting more and more advanced renderings.

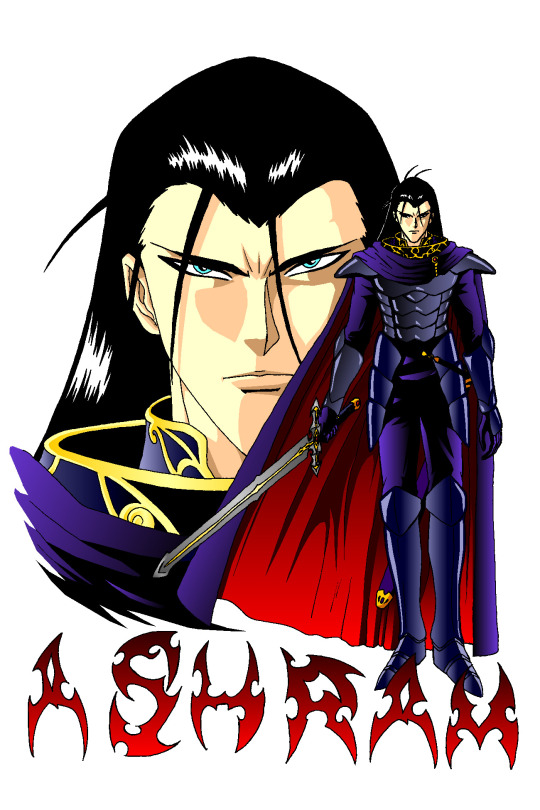
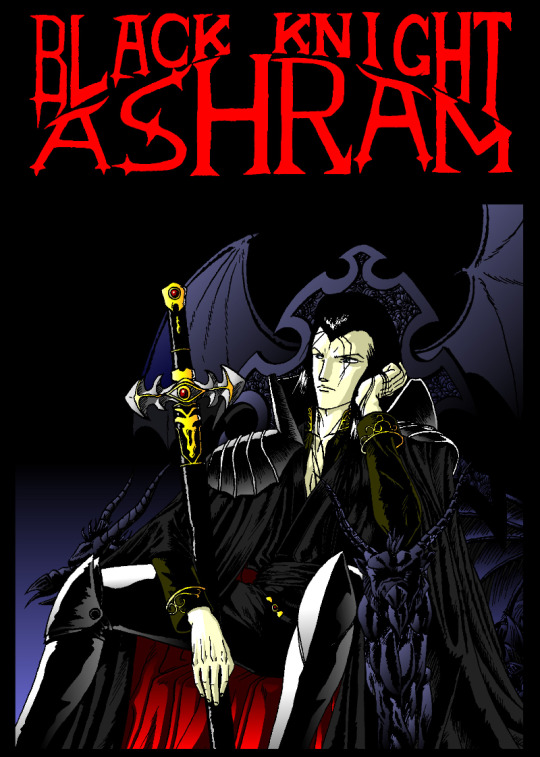
Aoshi Shinomori from Kenshin and Ashram from Record of Lodoss War. These two were also my favorites characters at one time. (Between 2004 and 2006)
If you have enlarged the images you must have noticed that the line is particularly crenellated. There was no antialiasing, no layer system with opacity levels, no tolerance threshold for the filling tool. So it had to be black, or white, but not in between. As a result, AppleWorks was not really adapted to work on drawings with small details, hatching or heavily detailled backgrounds...
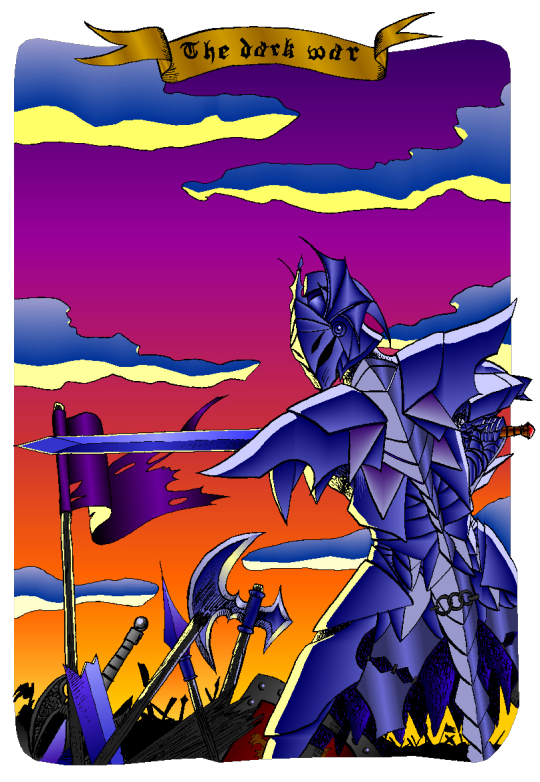
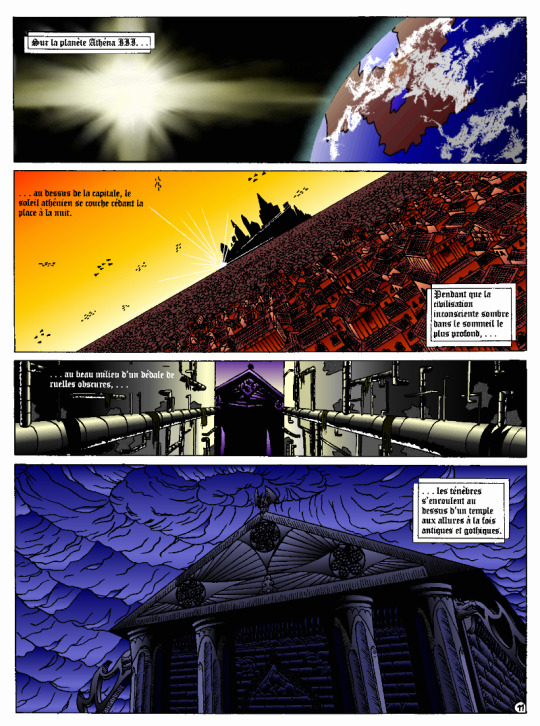
I tried anyway. :p These last 4 examples I think I made them between 2004 and 2006. The comics pages come from the first version of the Nécrotech project which is currently in a dormant state (but which I intend to resume one day). You'll notice on the first image of the last page some effects whose style stands out a bit from the rest. It's normal, I made them in another old painting software, Art Dabbler, but this is another story. :p In 2007, I got tired of suffering, I started to use The Gimp, in 2008 I bought my first graphics tablet, in 2009 I embarked on the Photoshop adventure and you know the rest: I sold my soul to Promarkers and Clip Studio Paint. And then there are days like that, we fall back into childhood. (Click on the image to see it at full size and distinguish the pixel patterns. I know, I repeat myself, but the devil is in the details. :p )

Last week, I decided to make a theme of the Drink'N'Draw from A to Z with AppleWorks to see what I could get out of it with 15 more years of experience in drawing and illustration. 8D With some tips you can get a pretty amazing result! I am happy with the result, especially the colors. It wasn't done without pain. The feature I wanted to take full advantage of (customizing color patterns) is buggy on the Windows version of the software, so I had to set up a Mac OS X Snow Leopard virtual machine to be able to do the finishing touches. What an adventure! In any case, AppleWorks is always well adapted to make pixel art and this experience has allowed me to learn new things applicable in recent and professional softwares. I had never really tried pixel art, which I love, by apprehension of the execution time. I think I found the trigger to get serious about it. I will explore it further. :D Well, well, well! But in fact, calculating gradient patterns for pixel art with shaders shouldn't be complicated. I think I will add such an effect in Péguy ! :D
Install AppleWorks
You've read it right! You can still install and use AppleWorks in 2021! :D
Windows
I did the test with Windows 8.1 on my Cintiq Companion tablet from Wacom, and in the comments it seems that it also works very well on Windows 10. To do this you will first install the latest version of QuickTime 7 which you can find on this page. You double click on the installer and you do next, next, next... Even when you are asked if you have a product key. It is not mandatory and useless for our needs. Then you go to this page and download the first file. You unzip the file and double click on the installer, then same procedure as before: next, next, next... You can do retro digital painting now! :D
Mac OS X
Apple computers have changed so much in 20 years that it is now impossible or at least very complicated to run the original programs on today's machines. The manipulation therefore consists in using the Windows version with the Wine emulator. If I had no problem with the procedure, it may seem a bit complicated for non-technical profiles so I simply propose you to download the final application I created myself via this link on Google Drive. You just have to download it, unzip it (with a double click) and launch it. If you're a computer geek and want to get a version of AppleWorks without the color pattern bug, you can get the .dmg here and install it in a Snow Leopard virtual machine.
Be reasonable about the size of your files. This is an old software that will have trouble supporting surfaces exceeding 2000px by 2000px. There is a way to cheat a bit, it is by creating a vector drawing file and creating a bitmap drawing surface inside.
That's all for that nostalgic moment. I think I will come back with some illustrations made with AppleWorks in the future. :D Have a nice day and see you soon! Suisei
P.S. If you want miss no news and if you haven't already done so, you can subscribe to the newsletter here : https://www.suiseipark.com/User/SubscribeNewsletter/language/english/
Source : https://www.suiseipark.com/News/Entry/id/308/
0 notes
Photo


This is an updated version of making gifs on GIMP. All the programs I use are free and safe. If you have problems with any of the software or plugins, don’t be afraid to message me and I’ll help you out.
Things you need:
GIMP
KM Player (I personally don’t use this but I use Movie Maker and Free Video to JPEG Converter instead. They both do the same things as KM player. KM Player is like a 2-in-1. Here’s how to use KM Player.)
Some scripts and plugins to make your GIMP work more like Photoshop. Clicking on these links below will automatically bring up a ‘save’ pop up. Just save them to: <username>>.gimp-2.8>scripts/plugins. If you can’t save them directly there, just save it to Documents first, and then copy/paste or move those files to the respective folders in the .gimp-2.8 folder. a. Animstack (save or move this to the scripts folder) b. G’MIC (this plugin has its own installation wizard and will install on its own once you let it.) c. Layers Effects (save or move this to the plugins folder) This plugin is to add strokes and other effects to objects or texts.
1. Firstly, you wanna get your video. So just download it off from YouTube using any downloading sites that you want.
2. Use KM player and get the clip that you want. Export the frames and make sure you remember where to find the folder cuz we’re going to upload it to GIMP.
3. Open you frames folder using Windows Photo Viewer and delete any repeated frames. I usually just hit the right arrow button to go through the pics and just hit ‘delete’ on any double frames.
4. Make sure you’ve already placed the scripts and plugins in GIMP before you open it. If you’re opening GIMP for the first time, go to Windows > Single Window Mode so that all the docks are in place and not just floating all over the place.
5. Click File > Open as Layers and then find your frame folder. Make sure the images are in this order where the 1st frame is at the top. If they’re not, just click on “Name” to rearrange them.

Select them all and hit “Open”.
6. First thing to do here is to scale your gif. Go to Image > Scale Image and put in a width of 540/268/177px (Tumblr dimensions). I’m using 540px for mine.

7. Next step is to sharpen your gif. I use Animstack and G’MIC to sharpen my gifs. What I do is scroll down to the bottom of the layers and add in a new layer. I renamed it as such: [render][;gb:3][;opacity:30]

Now, if you’re a beginner, this might not make sense to you and I’m not really going to bore with you the details but these are called tags for Animstack which is a very good plugin to have in GIMP!
To make the tags work, simply go to Filters > Animation > Process Animstack Tags. You will see that the program is putting your layers into layer groups.

Before you move on, you have to flatten these groups. To do that, go to Image > Flatten Layer Groups.
8. Alright, now it’s time to sharpen your gif with G’MIC. Go to Filters > G’MIC. If this is the first time you’ve downloaded G’MIC, hit the “Update Filters” button.

The next step is important. Remember to set input layers to “All” so that all your coloring/sharpening will affect all the layers at once. It will stay at “All” the next time you open it but there are some tutorials that need it to be at “Visibles Only”, etc so watch out for those.

Under the Filters tab in G’MIC, find Details > Sharpen [gold-meinel]. I apply this filter twice.

So, hit “Apply” each time to apply the filter.
9. Next is to smoothen out your gif. This is to make it less grainy. Find Repair > Smooth [guided].

10. Go to Testing > Runounours > Curves and use these values to add some contrast. You don’t really have to use these exact values tho.

There’s tons of other color filters you can use here in G’MIC, so please do explore it! I have tons of coloring tutorials too on my blog so you can check those out too. But I’m just doing the rough basics for this tutorial.
The coloring I used for my gif is from this tutorial.
11. Now you’re done with a basic gif! Before you export it, go to Image > Mode > Indexed and change the Color Dithering to "Positioned”.

12. This step is optional but it helps to reduce the image size of your gif. Go to Filters > Animation > Optimize for gif. It will open a new tab and from there; just export your gif. To do that, go to File > Export As... and name the gif. Make sure you add the “.gif” at the of the name or it won’t work.

When you get this pop up, tick “As animation”.

To know the size of your gif, hold down Alt + Enter and you will see this. Just make sure your gif is under 3MB.


And that’s your gif!! :)
If you have any questions, just ask away! I take GIMP requests as well.
162 notes
·
View notes
Text
REVIEW – Shape Monkey
Plug-ins are a staple of life for After Effects users. For me, at least, I’m always super excited when a new effect (or bundle of effects) is/are released from a company, as it’s always cool to see what boundary these companies are trying to push next. With that being said, there is an exciting new trend, and new boundary being pushed, and those boundaries are from within the application itself, and I’m talking about After Effects scripts. The best way to describe exactly what an AE script is, is exactly the way Adobe describes it in the AE Help Document – “A script is a series of commands that tells an application to perform a series of operations. You can use scripts in most Adobe applications to automate repetitive tasks, perform complex calculations, and even use some functionality not directly exposed through the graphical user interface.” So a script, in the simplest of terms, is a way to get After Effects to do exceptionally complicated tasks relatively easily. That’s where our review comes into play. I was approached by Orrin Zucker, who is the main man behind Shape Monkey, along with his partner Dan Ebberts. What’s important to keep in mind about Orrin and Dan is that they are responsible for a six other “Monkey” scripts, including Motion Monkey, Layer Monkey, Type Monkey, Circus Monkey, Monkey Bars (you knew that one was coming in here), and Monkey Cam. You can buy them a la carte, or as part of the Monkey Suite. Let’s get in and see how you can set up AE to work with Scripts, and what Shape Monkey is going to bring to your compositing toolkit.
AEScripts.com
If you’re looking for the best scripts that you can get for After Effects, AEScripts.com is the place to find them. This is a catalogue of all kinds of different scripts with many of them serving more of a “technical” purpose (one of my favorite scripts is a bridge between Mocha and After Effects called MochaImport+), and some that are just plain creative, and that’s where all the “Monkey” effects fall into the list. Most of them revolve around text or shape animations (except for MonkeyCam), and the download itself for Shape Monkey was a whopping 1.8 mb, so needless to say, the download times will be quick, no matter what connection you have. Now, let’s talk about price.
PRICE
When looking at the price, you have to consider that even though Shape Monkey is not an effect, you need to treat it like one. My thought, when I first saw it, was that Shape Monkey (SM) would come in somewhere around the $99 US mark, so when I saw a price of $89 US, I wasn’t surprised, and it pretty much fell in line with the single effect offerings from companies like Red Giant and Video Copilot.
INSTALLATION
This one’s a little different for new users, as Scripts don’t install like plug-ins do, with an installer. When SM downloads, and you unzip it, you’re going to take the entire folder, and drag it to:
After Effects/Scripts/ScriptUI Panels (MAC)
Or
After Effects/Support Files/Scripts/ScriptUI Panels (Windows)
Once it’s there, the next step is to launch After Effects, as there are a couple of things you’ll need to know, to find and work with SM and scripts in general.
Once AE opens, most people just want to jump in and start animating, but if you head to the “Window” drop down, you’ll see all your available scripts at the bottom of the menu.
If you try to select one of them, you’ll be greeted by this error…..
What this error is telling us is that there is a preference we need to turn on before we can get started. If you head to your General Preferences, you’ll want to select “Allow Scripts to Write Files and Access Network”. Once you do, and you head back to SM in the Windows drop down, the SM Interface will appear.
HOW IT WORKS
Now, before I get rolling with the interface, I want to talk briefly about what SM does, exactly. It gives you the ability to create shape animations in an automated fashion, quickly and easily. These are not effects. What’s going to happen when you work through the SM Interface, and click “Go”, is that After Effects will create shape layers, that will be controlled by standard AE effects added to a 100×100 solid.
After the animation is created, all the shape layers will be “Shy’d” so that the only layer you can see is the Shape Monkey Control layer, which is very handy, because if you end up choosing a large amount of layers, like 30, the last thing you want is your timeline bogged down by all those layers, especially if you have a lot more layers in your project.
After Effects’ work area plays a large role in your shape monkey workflow, which I thought was a very clever workflow design on the developer’s part. By default, SM will create 10 copies of whatever shape you decide you want to use. By setting your AE work area to a specific time, you’re telling SM that you want all of your shapes to trigger their animation in the designated time, and it will uniformly (or as uniformly as possible, based on the amount of time selected) distribute Control Points (AE markers) onto the Control layer. Keep in mind that you’ll need at least one frame available per shape layer that you assign. The completely awesome thing about the Control Points that SM puts into your comp is that you can drag them back and forth down the timeline and adjust shape animations based on where you have the markers!
At this point, it’s important to get in and talk about exactly how SM works, and how you can easily set up a shape animation, and I’m going to start very simple by using only one shape, and you’ll get the idea of how multiple shapes would work from there.
Let’s start out by choosing a shape. What’s very cool about SM is that you can use not only a ton of predefined shapes, but you can also use both After Effects (vector) text or Illustrator vector files, for your layers in SM. For the purpose of what we’re doing, I’m just going to choose a simple triangle.
Now the next three parameters – Duration, Interpolation and Ease Type refer to the animation “IN” of our shape. It’s going to animate in for 30 frames (one second and six frames at 24p), with an Ease Interpolation set to Random with an Ease Type of “Out”. Now, to skip ahead a little, I’m going to change the “Transition – Out” parameter to be “Off”, and then I’m going to hit “Do It” and you can now see what my animation looks like.
Nothing fancy. Simple and straightforward. As you can see the shape animates in, in the desired time, and stays there until the end of my comp, because I turned off the out transition. This is, at it’s most basic, how Shape Monkey works. If I wanted the shape to transition out, I could choose the type of transition (both in and out), from the “TRANSITION” section of the interface, and I’d be all set to go. One thing that I want to point out, and it’s something that, to be honest, I’ve become a bit addicted to. Once you’ve created an animation, and had a chance to take a look at it, you might decide it’s not what you like, or you want to add a few different parameters to it, to spice it up. You can easily hit the “Undo It” button right beside the “Do It” button, to quickly add and remove SM animations to tweak things exactly the way you want them tweaked.
With the basics out of the way, SM is all about options, and there are a ton of them here. The first big choice you have is the type of shapes you want to create. Once you’ve chosen “Triangle”, as an example, you can choose between Fill Only, Stroke Only, Dash Only, Fill & Stroke or Fill & Dash. Then you can choose your own color combination for the different fill options, or choose from over sixty different color swatches that compliment each other, in a simple to use preview window. Don’t know what type of animation you want to use, there are thirty different Animation presets with twenty different effect presets. That’s a lot of choice!
All this is very cool, but you’ve created an animation, and the client loves it, so you now want to keep it in your back pocket for other upcoming projects, can you save these as presets? The answer is yes, you can. There is a “Save” option under the “UTILITIES” section of the SM interface, that will let you reset SM to it’s launch defaults, save your current animation and load saved presets. You can even add motion blur to your animations from here as well. I like the fact that Zucker and Ebberts have thought of SM like a plug-in, and given you almost all the same options you have in that workflow, in the SM workflow as well.
I should point out something that’s pretty important, and that is that if you’ve noticed, all of our animation options have been right dead in the middle of the screen. I haven’t adjusted them. They have animated on (and potentially off), centered. So, how do we tweak these animations, and have them moving from side to side, top to bottom, larger to smaller, etc. That’s where the START and END parameters at the bottom of the SM interface come into place. It’s fairly self explanatory. Assume that, much like I just said, that all the animations are located dead in the middle of the screen. If you would like to adjust the start animations Position, Scale or Rotation, adjust it under the “START” column. For end animation adjustments, adjust them under the END column. Now you can give your animations movement. I’ll be honest. After maybe an hour of working with Shape Monkey, you’ll be able to create complex animations like the one you see below in a matter of seconds.
One thing that I think is very important to mention, as I’m wrapping up this review is that when working with scripts, as opposed to plug-ins, if you’re sending your project to another designer, or to the client, they do NOT need to have the script, in our case Shape Monkey, installed on their machine to retain all your created animations and looks. Scripts are not like plug-ins in that manner. This is what makes them even more powerful, as you don’t need to bake (render out layers that have effects on them, and then re-import them, so the layers are not dependant on those effects anymore) in your effects work. Create how and what you want to, and your clients will see your animations exactly the way you created them.
With all that being said, there is one slightly annoying thing about Shape Monkey, but it has more to do with After Effects, than SM itself. Once you’ve created an animation, and closed the SM interface, when it re-opens, it doesn’t remember the last animation you had set up, so you won’t have the ability to go in and alter animations that SM has created, you will have to start again from scratch, so I suggest that if you’re working in a two monitor environment, keep SM open on your second monitor, so you’ll always know what the last animation you created was.
In the end, Shape Monkey is a super cool animation script that will let you create stunning animations in seconds instead of in hours, the price point is reasonable enough, and the fact that your animations can be sent or shared with anyone running the same version of AE as you, without the need for third party plug-ins makes Shape Monkey a tool you definitely need to check out. You can download a free demo of Shape Monkey at http://aescripts.com/shapemonkey/ .
The post REVIEW – Shape Monkey appeared first on ProVideo Coalition.
First Found At: REVIEW – Shape Monkey
0 notes
Link
Design your way http://j.mp/2pRC0AY
Everybody loves Google Chrome, right? And everyone is looking for the best Chrome extensions.
With its incredible speed, simplicity and performance, it is easy to see why it is so cherished by everybody.
Specialists have developed a kind of interest in Chrome and that is why they created Chrome add-ons or extension which has almost the same functions as Firefox Addons.
So I researched about those extensions and I liked what I saw about them, and thus, I have compiled a list of the best extensions for chrome which Web designers can find useful.
WriteWell
Writewell is an unbeatable writing software which is very handy to start any sort of writing project such as ebooks, articles, blogs, novels, etc.
The Chrome extension provides a lot of templates and also outlines, samples, smart phrases and tips to steer you through the process of writing.
DomFlags
Drastically speed up styling elements processes with DomFlags, a highly remarkable extension which enables you to create shortcuts for keyboard for DOM elements!
It is just like having bookmark to navigate the DOM; this is definitely going to transform the way you work with DevTools.
Highly Highlighter
This is a fascinating system to bring people into a conversation: Highly allows you to share highlights from online articles, so attention can be drawn to the most important parts of writing.
Booom
Booom allows Dribbble to be improved by displaying bigger shots in records; putting Add and Like to Bucket buttons in records; allowing GIFs autoplay and it brings infinite scroll.
CSS-Shack
This great Chrome plugin enables you to make designs and export them thereafter for use on your website into a CSS file. It bolsters layers and contains plenty of the instruments that you are accustomed to from your standard picture editor.
MarmoSet
This splendid extension will obtain your code and produce depictions for your mockups and demos. You can likewise apply effects and themes to make pictures for promo materials and your web portfolio.
Firebug Lite
Firebug Lite gives the rich visual portrayal we are accustomed to in Firebug with regards to HTML components, DOM components, and Box Model shading. It gives some nice features such as reviewing HTML elements with live CSS editing and your mouse.
Stylish
This great extension makes it simple and amusing to totally update the visual style of a website page or webpage. Need to make a dark adaptation of YouTube or a dark form of Google? Stylish is ideal for you.
Stylish enables you to effortlessly oversee client styles. Include, erase, empower, debilitate, and sort out with a couple snaps of a mouse, no code to alter, no dark setup to discover.
Stylish’s partner site, userstyles.org, has a huge number of client styles made by other Stylish clients that you can attempt.
Image Downloader
If there is a chance that you have to mass download pictures from a website page, using this extension you can: See pictures that the page includes and connects to, sort or filter them by URL; likewise bolsters special cases and normal expressions, Optionally display just pictures from connections, Select pictures for download by either utilizing the checkboxes or specifically tapping on the picture, Devoted buttons to open in new tab singular pictures, Customize show border size, width, style and shading, put notifications and buttons you do not need out of sight.
When you click the button for “Download”, every chosen picture are saved to the download folder of Chrome. In the event that you do not have one, you should manually pick the save folder for each picture.
RescueTime
RescueTime is a special methodical service that assists you to see how you invest energy in your PC, cell phone and tablet. No manual information section necessary.
The online-application functions as one with the installable client accessible for OS X, Linux, Windows, Android gadgets, and ChromeOS.
Pinterest for Google Chrome
Pinterest is an instrument to discover your motivation and share it to others. Utilize it to gather things you cherish, sort out and arrange critical projects, and the sky is the limit from there.
StyleBot
Stylebot enables you to swiftly influence the look of any site (making use of custom CSS). You select an element and pick any modifications you want effect from the editor.
The font size, margins, colour, visibility and a lot more can be changed. The highly developed users manually write the CSS.
Making use of Stylebot, you can customize the appearance of your beloved sites. Also, it is a nice tool to debug the design of your website and learn CSS.
Appjump app launcher and organizer
After you have downloaded every extension included in this list, you would certainly have need for an organizer. AppJump is an extension that lets you find and start your apps and some other extensions swiftly from a drop menu located on your toolbar.
An outstanding feature it has is that it organizes extensions and apps into many groups. For instance, you can effortlessly detach your personal extensions from your work, for better time management.
Awesome screenshot
Awesome Screenshot is indeed a typical example of awesomeness. This brilliant extension enables the snapshots of the entire page or its part to be taken. After a screenshot has been taken, you can ring or underline pertinent parts, blur the unrelated parts and drop comments.
Chrome Sniffer
Chrome Sniffer enables you the framework of any site to be checked. It finds and shows any recognized Javascript library or Content Management System (CMS) on a site.
This brilliant extension is nice for those astonishing sites that make you wonder, “How is that doable?” At present, more than 100 frameworks can be detected by Chrome Sniffer.
Cloud Save
There is a giant leap from working locally to operating in the cloud. Being a designer and developer, you always work on the web and you are used to it, but are you also used to saving essential documents online?
If your reason is that it is inconvenient, it might be worth it giving Cloud Save a look. Cloud Save enables you to save documents from any site to compatible cloud services. You can save to Dropbox, Amazon Cloud Drive, and Flickr.
Corporate Ipsum
This is an exciting replacement for the usual Lorem Ipsum filler of text. Using this extension, you can fill your site with “corporate” words.
An instance of this extension is, “capably target enterprise- broad information with multi-purpose ideas.” Corporate Ipsum is based on the well known Mac widget of similar name.
ColorPicker
Exactly like its name suggests, ColorPicker is a suitable extension made primarily to choose and obtain color’s worth from everywhere on the website page. Furthermore, you can select an area and subsequently click on the color palette to spot how the color of the area transforms without you touching a single code.
Palette
Having trouble to find color idea from image? Then Chrome palette will get rid of your problem well by creating 64 color palettes or thereabout from web’s image for your needs.
Google Font Previewer
As stated in its name, Google Font Previewer enables you to take a quick look at font from Google Font index with options such as size, weight, style, and shadows. If you’re pleased with a certain font, the link and the code of the CSS given in the extension can be copied and pasted to your site’s code to make use of the font.
Web Developer
This is a necessary extension for web developers and web designers. Web Developer tries to give all the information you require from an active website such as viewing script and displaying object data.
Also, the extension is equipped with helpful tools such as color picker, validator and window resizer.
Pendule
This is a handy and useful developer tool which is comparable to the Web Developer, just armed with essential tools such as style viewer, validator and source viewer.
HTML Validator
One of the most excellent validating extension which can validate code of HTML of web or local host web page in both manual or auto mode.
You can as well opt to display the results of the validation in the website’s page or look at it in an entirely new tab.
Window Resizer
This extension is an extremely helpful tool which does precisely what it says it does – resizes the window of your browser to assist you with your reactive web designs.
Pick from a variety of well known monitor dimensions or apply custom resolutions and sizes for improved accuracy.
Project Naptha
If it ever happens that you work with set in text from a mockup image, Project Naptha can save you a lot of frustration. Text can be highlighted, copied and pasted from any image due to some neat OCR trickery.
WhatFont
This is a one of the most helpful Chrome tools; WhatFont enables designers and developers to recognize the fonts in use on a website page.
So, should you trip on a nice-looking font that you would like to use in your coming projects, all you need is hover above it and determine immediately which font it is.
YSlow
YSlow does not only check how speedily your website page loads, it as well tells you if something is slowing your web page down, if any.
Yslow examines your website page against twenty three of the thirty four rules recognized by Yahoo’s performance panel. It is a tremendously helpful tool to study web pages and it recommends ways to enhance their performance also.
DevTools AutoSave
An outstanding extension for all web developers and designers, DevTools AutoSave enables you to save any modifications that you effect on a webpage’s JS and CSS using the environment of Chrome Dev Tools to its source-file automatically. It is very simple to use and it will save you valuable time.
ColorZilla
The ColorZilla extension is a sophisticated colour picker, eyedropper, gradient generator colour picker, and more helpful colour tools which will assist with your design.
Ripple Emulator
This extension is a multi-platform emulator that can assist you to test your web application using various devices and resolutions. You can use it in combination with active development tools to carry out DOM inspection, debugging, and automated testing.
Streak
This extension is the vital tool to manage CRM and gives support to emails inside Gmail. It enables you to change a particular email or a whole discussion into an assignable and trackable, organised ticket that can be managed yourself or be shared with others.
Search Stack Overflow
If you are a web developer, that means you must have heard of Stack Overflow, the ideal place for any issue related with development. But if you haven’t heard of it, then you absolutely need to try it, the community is flourishing and it covers a lot of topics such as C# Java, jQuery and PGP.
This incredible extension includes a search box straight into your browser enabling you to explore the enormous Stack Overflow resources.
PHP Ninja Manual
It can be hard to remember all functions, therefore, if you have been spending hours finding particular functions of PHP on Google, PHP Ninja Manual is sure to draw your awareness.
It provides you with all the 5.5 documentation of PHP with illustrations in 8 languages without leaving your browser.
Perfect Pixel
Designers don’t like it when they make a spectacular design and it fails to match up completely when it is coded. Perfect Pixel is the ideal extension for developers who are determined to develop websites that have precise design representations.
This simple extension enables you to add a transparent image cover over the webpage top and carry out a per pixel evaluation between them to make sure it is totally accurate.
Code Cola
This tool allows you to view the source code of your work and it also works as a CSS editor meaning you can change the CSS style of your web pages’ instantly and also see the changes immediately.
PicMonkey
This is a simple free web image editor that enables you to alter web page screenshots and images. But that is not the special thing about it. It enables you to grab every picture and a screenshot of the whole page by just clicking a button.
As soon as you choose the image, you can modify it anyway you want to from adding effects to altering exposure.
Chrome Daltonize
Colour blindness or Colour Vision Deficiency is affecting uncountable people across the world. This resourceful extension makes use of daltonization, a system that enables the making of pictures more fitting for viewing by people with colour blindness.
This incredible extension can be utilized to reproduce how pictures show to people with colour blindness and to assist you create a handier web app.
Check My Links
Are you done with the building of a site? And have you checked and been through all the links? Regardless of your carefulness, it is unavoidable that you would have skipped one or two, and checking all of them is a tiresome task.
But using the Check My Links extension and it will search through every link on every page, highlighting legitimate links in green and invalidlinks in red.
Flickr Tab
Have your dull looking Chrome tabs tired you? Flickr Tab is the answer to your prayer.
It is a straightforward small Extension that shows a trendy Fickr photograph every time a window is opened.
Click the picture to view it in Flickr, or you can click the name of the user to see further pictures from the particular photographer.
Google Art Project
If you don’t like Flickr Tab with its silky image, perhaps you might like Google’s Art Project extension.
In each new tab, it will treat you to hi-res masterwork from people such as Van Gogh and Monet.
Should the images ignite your interest, then click on it and you will be transferred to the website of Google Cultural Institute which is packed with details about the creator of the work and the particular work.
Data Saver
This extension does exactly what is says: it lessens the sum of data that is used for browsing. If it is turned on, Chrome will make use of Google servers to reduce pages before they are downloaded. There is just a caveat though: Incognito and SSL pages will not be included.
Wappalyzer
If you have ever questioned about the platform a website being run on, Wappalyzer is ideal for you. The extension discovers content management systems, web servers, JavaScript frameworks, analytics tools, ecommerce platforms, and a lot more.
Strikethrough
For people that use Gmail via browser, you could occasionally need to erase a part of text. You then spend several hours thinking about how to uncover the toolbar button that assists you to do this.
Unfortunately, such button doesn’t exist, although Strikethrough extension is fortunately here to assist. Allow the extension then observe the new button show near the Italic and icons located on your toolbar.
45to75
They have always told us that a great “thumb rule” is to maintain the measure) between forty-five and seventy-five characters.
No longer do we need to put the cursor at the line beginning and count up as we anxiously press the cursor key located at the right, all thanks to this brilliant extension.
As soon as the extension is enabled, make a highlight of some text, press the right cursor key, and watch the character count up in the menu.
Ending thoughts
Provided you’re a web designer, it is sure that you will love three of such tools at the least, and perhaps you will see some extensions you don’t have here.
Graphics/Web Design is really a hard task, but the above listed Chrome Extensions can aid your work and make it quicker and easier. We do hope you will find this really helpful.
http://ift.tt/2qovzpN via Design your way URL : http://ift.tt/15lrqEz
0 notes
Text
Best Chrome Extensions for Designers
Everybody loves Google Chrome, right? And everyone is looking for the best Chrome extensions.
With its incredible speed, simplicity and performance, it is easy to see why it is so cherished by everybody.
Specialists have developed a kind of interest in Chrome and that is why they created Chrome add-ons or extension which has almost the same functions as Firefox Addons.
So I researched about those extensions and I liked what I saw about them, and thus, I have compiled a list of the best extensions for chrome which Web designers can find useful.
WriteWell
Writewell is an unbeatable writing software which is very handy to start any sort of writing project such as ebooks, articles, blogs, novels, etc.
The Chrome extension provides a lot of templates and also outlines, samples, smart phrases and tips to steer you through the process of writing.
DomFlags
Drastically speed up styling elements processes with DomFlags, a highly remarkable extension which enables you to create shortcuts for keyboard for DOM elements!
It is just like having bookmark to navigate the DOM; this is definitely going to transform the way you work with DevTools.
Highly Highlighter
This is a fascinating system to bring people into a conversation: Highly allows you to share highlights from online articles, so attention can be drawn to the most important parts of writing.
Booom
Booom allows Dribbble to be improved by displaying bigger shots in records; putting Add and Like to Bucket buttons in records; allowing GIFs autoplay and it brings infinite scroll.
CSS-Shack
This great Chrome plugin enables you to make designs and export them thereafter for use on your website into a CSS file. It bolsters layers and contains plenty of the instruments that you are accustomed to from your standard picture editor.
MarmoSet
This splendid extension will obtain your code and produce depictions for your mockups and demos. You can likewise apply effects and themes to make pictures for promo materials and your web portfolio.
Firebug Lite
Firebug Lite gives the rich visual portrayal we are accustomed to in Firebug with regards to HTML components, DOM components, and Box Model shading. It gives some nice features such as reviewing HTML elements with live CSS editing and your mouse.
Stylish
This great extension makes it simple and amusing to totally update the visual style of a website page or webpage. Need to make a dark adaptation of YouTube or a dark form of Google? Stylish is ideal for you.
Stylish enables you to effortlessly oversee client styles. Include, erase, empower, debilitate, and sort out with a couple snaps of a mouse, no code to alter, no dark setup to discover.
Stylish’s partner site, userstyles.org, has a huge number of client styles made by other Stylish clients that you can attempt.
Image Downloader
If there is a chance that you have to mass download pictures from a website page, using this extension you can: See pictures that the page includes and connects to, sort or filter them by URL; likewise bolsters special cases and normal expressions, Optionally display just pictures from connections, Select pictures for download by either utilizing the checkboxes or specifically tapping on the picture, Devoted buttons to open in new tab singular pictures, Customize show border size, width, style and shading, put notifications and buttons you do not need out of sight.
When you click the button for “Download”, every chosen picture are saved to the download folder of Chrome. In the event that you do not have one, you should manually pick the save folder for each picture.
RescueTime
RescueTime is a special methodical service that assists you to see how you invest energy in your PC, cell phone and tablet. No manual information section necessary.
The online-application functions as one with the installable client accessible for OS X, Linux, Windows, Android gadgets, and ChromeOS.
Pinterest for Google Chrome
Pinterest is an instrument to discover your motivation and share it to others. Utilize it to gather things you cherish, sort out and arrange critical projects, and the sky is the limit from there.
StyleBot
Stylebot enables you to swiftly influence the look of any site (making use of custom CSS). You select an element and pick any modifications you want effect from the editor.
The font size, margins, colour, visibility and a lot more can be changed. The highly developed users manually write the CSS.
Making use of Stylebot, you can customize the appearance of your beloved sites. Also, it is a nice tool to debug the design of your website and learn CSS.
Appjump app launcher and organizer
After you have downloaded every extension included in this list, you would certainly have need for an organizer. AppJump is an extension that lets you find and start your apps and some other extensions swiftly from a drop menu located on your toolbar.
An outstanding feature it has is that it organizes extensions and apps into many groups. For instance, you can effortlessly detach your personal extensions from your work, for better time management.
Awesome screenshot
Awesome Screenshot is indeed a typical example of awesomeness. This brilliant extension enables the snapshots of the entire page or its part to be taken. After a screenshot has been taken, you can ring or underline pertinent parts, blur the unrelated parts and drop comments.
Chrome Sniffer
Chrome Sniffer enables you the framework of any site to be checked. It finds and shows any recognized Javascript library or Content Management System (CMS) on a site.
This brilliant extension is nice for those astonishing sites that make you wonder, “How is that doable?” At present, more than 100 frameworks can be detected by Chrome Sniffer.
Cloud Save
There is a giant leap from working locally to operating in the cloud. Being a designer and developer, you always work on the web and you are used to it, but are you also used to saving essential documents online?
If your reason is that it is inconvenient, it might be worth it giving Cloud Save a look. Cloud Save enables you to save documents from any site to compatible cloud services. You can save to Dropbox, Amazon Cloud Drive, and Flickr.
Corporate Ipsum
This is an exciting replacement for the usual Lorem Ipsum filler of text. Using this extension, you can fill your site with “corporate” words.
An instance of this extension is, “capably target enterprise- broad information with multi-purpose ideas.” Corporate Ipsum is based on the well known Mac widget of similar name.
ColorPicker
Exactly like its name suggests, ColorPicker is a suitable extension made primarily to choose and obtain color’s worth from everywhere on the website page. Furthermore, you can select an area and subsequently click on the color palette to spot how the color of the area transforms without you touching a single code.
Palette
Having trouble to find color idea from image? Then Chrome palette will get rid of your problem well by creating 64 color palettes or thereabout from web’s image for your needs.
Google Font Previewer
As stated in its name, Google Font Previewer enables you to take a quick look at font from Google Font index with options such as size, weight, style, and shadows. If you’re pleased with a certain font, the link and the code of the CSS given in the extension can be copied and pasted to your site’s code to make use of the font.
Web Developer
This is a necessary extension for web developers and web designers. Web Developer tries to give all the information you require from an active website such as viewing script and displaying object data.
Also, the extension is equipped with helpful tools such as color picker, validator and window resizer.
Pendule
This is a handy and useful developer tool which is comparable to the Web Developer, just armed with essential tools such as style viewer, validator and source viewer.
HTML Validator
One of the most excellent validating extension which can validate code of HTML of web or local host web page in both manual or auto mode.
You can as well opt to display the results of the validation in the website’s page or look at it in an entirely new tab.
Window Resizer
This extension is an extremely helpful tool which does precisely what it says it does – resizes the window of your browser to assist you with your reactive web designs.
Pick from a variety of well known monitor dimensions or apply custom resolutions and sizes for improved accuracy.
Project Naptha
If it ever happens that you work with set in text from a mockup image, Project Naptha can save you a lot of frustration. Text can be highlighted, copied and pasted from any image due to some neat OCR trickery.
WhatFont
This is a one of the most helpful Chrome tools; WhatFont enables designers and developers to recognize the fonts in use on a website page.
So, should you trip on a nice-looking font that you would like to use in your coming projects, all you need is hover above it and determine immediately which font it is.
YSlow
YSlow does not only check how speedily your website page loads, it as well tells you if something is slowing your web page down, if any.
Yslow examines your website page against twenty three of the thirty four rules recognized by Yahoo’s performance panel. It is a tremendously helpful tool to study web pages and it recommends ways to enhance their performance also.
DevTools AutoSave
An outstanding extension for all web developers and designers, DevTools AutoSave enables you to save any modifications that you effect on a webpage’s JS and CSS using the environment of Chrome Dev Tools to its source-file automatically. It is very simple to use and it will save you valuable time.
ColorZilla
The ColorZilla extension is a sophisticated colour picker, eyedropper, gradient generator colour picker, and more helpful colour tools which will assist with your design.
Ripple Emulator
This extension is a multi-platform emulator that can assist you to test your web application using various devices and resolutions. You can use it in combination with active development tools to carry out DOM inspection, debugging, and automated testing.
Streak
This extension is the vital tool to manage CRM and gives support to emails inside Gmail. It enables you to change a particular email or a whole discussion into an assignable and trackable, organised ticket that can be managed yourself or be shared with others.
Search Stack Overflow
If you are a web developer, that means you must have heard of Stack Overflow, the ideal place for any issue related with development. But if you haven’t heard of it, then you absolutely need to try it, the community is flourishing and it covers a lot of topics such as C# Java, jQuery and PGP.
This incredible extension includes a search box straight into your browser enabling you to explore the enormous Stack Overflow resources.
PHP Ninja Manual
It can be hard to remember all functions, therefore, if you have been spending hours finding particular functions of PHP on Google, PHP Ninja Manual is sure to draw your awareness.
It provides you with all the 5.5 documentation of PHP with illustrations in 8 languages without leaving your browser.
Perfect Pixel
Designers don’t like it when they make a spectacular design and it fails to match up completely when it is coded. Perfect Pixel is the ideal extension for developers who are determined to develop websites that have precise design representations.
This simple extension enables you to add a transparent image cover over the webpage top and carry out a per pixel evaluation between them to make sure it is totally accurate.
Code Cola
This tool allows you to view the source code of your work and it also works as a CSS editor meaning you can change the CSS style of your web pages’ instantly and also see the changes immediately.
PicMonkey
This is a simple free web image editor that enables you to alter web page screenshots and images. But that is not the special thing about it. It enables you to grab every picture and a screenshot of the whole page by just clicking a button.
As soon as you choose the image, you can modify it anyway you want to from adding effects to altering exposure.
Chrome Daltonize
Colour blindness or Colour Vision Deficiency is affecting uncountable people across the world. This resourceful extension makes use of daltonization, a system that enables the making of pictures more fitting for viewing by people with colour blindness.
This incredible extension can be utilized to reproduce how pictures show to people with colour blindness and to assist you create a handier web app.
Check My Links
Are you done with the building of a site? And have you checked and been through all the links? Regardless of your carefulness, it is unavoidable that you would have skipped one or two, and checking all of them is a tiresome task.
But using the Check My Links extension and it will search through every link on every page, highlighting legitimate links in green and invalidlinks in red.
Flickr Tab
Have your dull looking Chrome tabs tired you? Flickr Tab is the answer to your prayer.
It is a straightforward small Extension that shows a trendy Fickr photograph every time a window is opened.
Click the picture to view it in Flickr, or you can click the name of the user to see further pictures from the particular photographer.
Google Art Project
If you don’t like Flickr Tab with its silky image, perhaps you might like Google’s Art Project extension.
In each new tab, it will treat you to hi-res masterwork from people such as Van Gogh and Monet.
Should the images ignite your interest, then click on it and you will be transferred to the website of Google Cultural Institute which is packed with details about the creator of the work and the particular work.
Data Saver
This extension does exactly what is says: it lessens the sum of data that is used for browsing. If it is turned on, Chrome will make use of Google servers to reduce pages before they are downloaded. There is just a caveat though: Incognito and SSL pages will not be included.
Wappalyzer
If you have ever questioned about the platform a website being run on, Wappalyzer is ideal for you. The extension discovers content management systems, web servers, JavaScript frameworks, analytics tools, ecommerce platforms, and a lot more.
Strikethrough
For people that use Gmail via browser, you could occasionally need to erase a part of text. You then spend several hours thinking about how to uncover the toolbar button that assists you to do this.
Unfortunately, such button doesn’t exist, although Strikethrough extension is fortunately here to assist. Allow the extension then observe the new button show near the Italic and icons located on your toolbar.
45to75
They have always told us that a great “thumb rule” is to maintain the measure) between forty-five and seventy-five characters.
No longer do we need to put the cursor at the line beginning and count up as we anxiously press the cursor key located at the right, all thanks to this brilliant extension.
As soon as the extension is enabled, make a highlight of some text, press the right cursor key, and watch the character count up in the menu.
Ending thoughts
Provided you’re a web designer, it is sure that you will love three of such tools at the least, and perhaps you will see some extensions you don’t have here.
Graphics/Web Design is really a hard task, but the above listed Chrome Extensions can aid your work and make it quicker and easier. We do hope you will find this really helpful.
from Web Development & Designing http://www.designyourway.net/blog/resources/best-chrome-extensions-designers/
0 notes