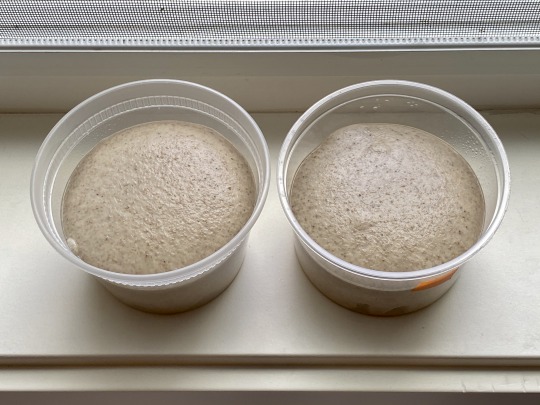
#just set dough to some wheat bread in the fridge to proof
Text

*technically it’s almost three but whatevs. Honestly, I don’t feel out of control of my life for once. I’m just manic and enjoying my new stand mixer and dnd cookbook. :P
#personal#couldn’t pass up bringing back a classic#I’m looking forward to it tomorrow when it sets#‘dwarven black pudding’#oh and I made two loaves of brioche!#they actually look and taste so good#just set dough to some wheat bread in the fridge to proof#I am a baking fiend#I really wish I could somehow wrap one of these to give to you#there’s no way I can#but ‘I wish she could try this’ was one of the first thoughts#well I’ll take that as my cue to go to bed#heh it’s funny#not but yesterday my therapist pointed out that I talk about life - people - situations - feelings as if it’s all just happening to me#and I have no control of anything whatsoever#but I do have control#you would think that’s something I would already know#but I guess I’ve never felt in control except when I was the one in control of my own pain#and so instead for now im making pudding at 3 in the morning and trying to ignore thoughts of you
1 note
·
View note
Text
Neven’s Pizza Dough

Sour cream, mozzarella, Sulguni cheese, pepperoni. Home oven, baking steel.
I like pizza, and I make it often. You also like pizza. Perhaps you’d like to make it as well? Here’s the recipe for my sourdough pizza, ideal for Neapolitan or NYC-style pies, baked in a home oven with a baking steel or stone, or in an outdoor oven. Scroll past the recipe if you’d like to learn more!
Neven’s Sourdough Pizza
Servings: two 12” pizzas.
Time: 3.5 hours (mix and proof) + 1 to 14 days (fridge-ferment) + 6 hours (final proof) + 10 to 20 minutes (shape, top, and bake)
INGREDIENTS:
260 g high-gluten or bread flour (or all-purpose flour)
40 g (15%) whole wheat or rye flour (or any flour, really)
9 g (3%) salt
15 g (5%) ripe sourdough starter
200 g (66%) water
DIRECTIONS:
Put all the dry ingredients into the bowl of a stand mixer (”a KitchenAid”) outfitted with the dough hook and stir with a spatula to combine. Add the starter and about 2/3 of the water. Start the mixer on low speed and mix for 1 minute; add the rest of the water, and mix for 4 more minutes. Switch to medium speed and mix for another 5 minutes. If at any point the dough threatens to crawl out of the bowl, stop the mixer and scrape the mess back down into the bowl.
Once mixed, move the dough to a new bowl. (I prefer a shallower, wider, non-metal one myself.) Cover the bowl and let the dough rest in a warm spot (70–74°F?) for 3 hours. Every 30 minutes or so, perform a stretch-and-fold.
youtube
Scoop the dough with a flexible dough scraper onto a lightly oiled work surface and cut into two 262 g portions. Shape each portion into a ball, tucking the ends in toward the middle to form a taut, balloon-like surface on one side. Pop into a lightly oiled 16 oz deli container (do you have some from food deliveries?), messy side down. Cover and pop in the back of the fridge for 1-14 days. (I find the flavor is best around 7 days.)
youtube
6 hours before baking, remove the containers from the fridge and leave them on the counter. 2 hours before baking, uncover them. This will dry out the top somewhat, which is great; that will become the not-so-sticky bottom of your crust.
Portioned dough balls after being uncovered.
If using a home oven: 1 hour before baking, pop a baking stone or baking steel or upside-down pan on a rack 6-8" from the top broiler. Crank it up to 550ºF and leave it there.
To stretch the dough: hold the container upside down and wiggle the dough out of it gently; dont worry about whether it stays a perfect ball. Place it into a shallow, wide bowl of flour and make sure the wet end and the sides get some flour (not too much) on them. Place it on your wooden peel with the dry (previously the top) side down and press gently around the inside of the rim to make a little ringed pizza-prototype.
Then pick it up and stretch with your knuckles (don’t use your fingers). It should be very friendly, stretchy without any pullback or tearing. Stretch to 10" in size. Shimmy the peel a bit to make sure no part of the dough has stuck; repeat this shimmying every minute or so if it takes you that long to top it.
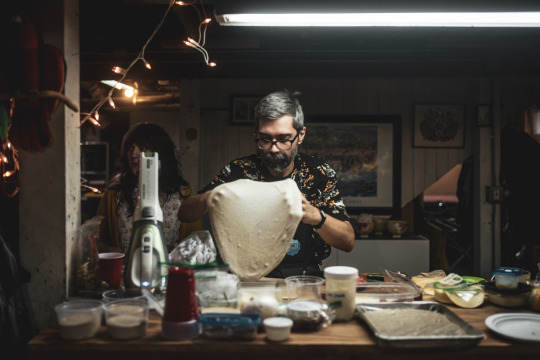
Stretching the dough using knuckles only.
My topping strategy for a standard cheese pizza: layer the dough with sliced mozzarella cheese, then add dabs of sauce, and your toppings. Now gently tug under the rim all around to stretch to 12″; the weight of the toppings will help prevent pullback.
youtube
Redistribute the toppings if needed. Shimmy again. Expertly slide onto the steel/stone/pan.
If using a home oven: set a timer for 4 minutes. Then, open the oven door and check the underside of your pizza. Almost done, while the top is still a bit pale? If so, slide a metal pizza pan (or a cookie sheet or something else thin, metal, and as large as the pie) under it. This prevents the bottom from getting overbaked. Rotate the arrangement 180º to get even baking. Set a timer for 3 minutes.
When the pizza is gorgeous, slide it out with a metal pizza peel or a large flat spatula or whatever. (Don’t use your wooden peel—that’s for shaping and launching only.) Rest it on a cooling rack for 1-2 minutes to dry out the bottom. Then move to a cutting board or plate and slice. (Don’t use your wooden peel for this either, please!)
If using an outdoor pizza oven: if you own one of these, you probably know what to do. Have at it, sport!

Sour cream, mozzarella, provolone, chives and garlic chives. Ooni Koda oven.

33% whole wheat in this dough. Aged for 9 days in the fridge.
- - - END OF RECIPE - - -
- - - NOTES AND MUSINGS FOLLOW - - -
A note on baker’s percentages
When a dough is “66% hydrated,” that doesn’t mean the final ball of dough is two-thirds water. Rather, what bakers mean is, water is equal to 66% of the flour weight. Got it? That way, you can measure out your flour and scale all the other ingredients to it. I no longer refer to a recipe when I mix the dough, because I’ve memorized the percentages: 66% water, 3% salt, 5% starter. I also know that I need 150 g of flour per pizza; from these figures I can easily arrive at the weight of the other ingredients. Can you do the math in your head for, say, four pizzas? It’s easy! (Or maybe I’m just a math genius. (I am not a math genius.))
Just TWO pizzas? So what’s my boyfriend going to eat?
You can easily double the recipe. I wouldn’t go beyond 2x; you can’t mix much more than a kilo of dough in a typical stand mixer. If you’re doing a big pizza party and you want to make eight pies, first of all, congratulations! second, do it in two batches.
Do you think I’m the sort of person who has sourdough starter just sitting around?

“What does it matter what you say about people?”
I get it. I wasn’t always a Sourdough Guy. So, let me give you a recipe using commercial yeast. Bonus: it’s faster!
Normal-Person Pizza
Servings: two 12” pizzas.
Time: 3 hours (mix and proof) + 10 to 20 minutes (shape, top, and bake)
INGREDIENTS:
260 g high-gluten or bread flour (or all-purpose flour)
40 g (15%) whole wheat or rye flour (or any flour, really)
9 g (3%) salt
3 g instant yeast (~1 tsp, about half a little package thingy, 1%)
200 g (66%) water
DIRECTIONS:
Put all the dry ingredients into the bowl of a stand mixer (”a KitchenAid”) outfitted with the dough hook and stir with a spatula to combine. Add about 2/3 of the water. Start the mixer on low speed and mix for 1 minute; add the rest of the water, and mix for 4 more minutes. Switch to medium speed and mix for another 5 minutes. If at any point the dough threatens to crawl out of the bowl, stop the mixer and scrape it back down into the bowl.
Once mixed, move the dough to a new bowl. (I prefer a shallower, wider, non-metal one myself.) Cover the bowl and let the dough rest in a warm spot (70–74°C?) for 2 hours. Every 30 minutes or so, perform a stretch-and-fold.
Scoop the dough with a flexible dough scraper onto a lightly oiled work surface and cut into two 262 g portions. Shape each portion into a ball, tucking the ends in toward the middle to form a taut, balloon-like surface on one side. Place on a well floured board; flour the top some more; and cover with a clean, non-terry (non-”fuzzy”; you want “smooth”) kitchen towel. Rest for another 1-2 hours, watching for the dough to grow some more and start looking really taut and ready.
Proceed with the tossing, topping, and baking.

Carmelina brand tomatoes, sauced; garlic, fresh oregano. Ooni Koda oven.
Wait, but I don't have a stand mixer either 😐

“It’s always gonna be something with you, isn’t it, Joe?”
No, that’s cool, that’s cool. Just mix by hand. Or by spatula, really. Mash it and fold it and fold it and mash it. Make sure you do frequent and thorough stretch-and-folds in this case. You really want to distribute everything uniformly in there.
And now, a word from our sponsors
(Note: none of the following products or brands are my sponsors. This is merely an idiom, come on.)
Juuuust in case you’re looking to add to your kitchen setup, here are the products I use for pizza making. Some of the links below include my referral code, which means I’ll get a tiny cut of the sale; the price is the same to you, though, so like, what does it matter? (I still feel a little uneasy. Sorry.)
Ooni Koda outdoor pizza oven. Simple, portable, hot as heck. Makes pizza you simply can’t get out of a home oven. These links give you 10% off! (UK link, EU link. These links all give you 10% off. BAM!)
Carmelina canned tomatoes in puree. Sweet, rich, flavorful. Buy them by the case.
Tillamook sour cream. Yes, sour cream makes a perfect sauce for a white pizza—which is generally an easier base to put creative toppings on! Make sure to buy the stuff where the ingredients are just cream and cultures, none of this cornstarch/carrageenan nonsense.
For flour, look for a local mill, if possible. Shop at restaurant-supply stores!
16 oz deli containers. Washable, sturdy, endlessly reusable. Love ‘em.
CoverMate bowl covers. Reusable, washable, transparent, secure.
Gram-precision kitchen scale. You know you need one. My favorite feature: extra long timeout (before it turns off) so I can forget to get the flour and run downstairs and hunt for it and when I come back, my measurement is still up on the screen.
I also like Ooni’s bamboo and metal peels a lot. You can get very cheap ones on Amazon, but understand that they’re… cheap.
Saf-Instant yeast. It’s got the cutest box. You can keep it in the freezer for years and use it right out of the freezer.
Oxo pizza cutter wheel. Whatever wheel you buy, just make sure it’s large and heavy—that’s what helps you cut neatly.
In conclusion
Pizza is good. Thank you.


Sliced mozzarella, parmesan, Carmelina brand tomatoes. Home oven, baking steel.
32 notes
·
View notes
Text
Bakes for 8/28, 9/4, & 9/11-18
So I’m a little backed up. I’ve been absorbed with bike maintenance and anime (so flat out avoiding recording my notes). I didn’t bake anything this weekend except for some Kouign Amann, which were a little burnt, so I could settle my tab before setting up for another bake.
The weekend before last I made some baguettes and molasses brown bread from one of the basic yeast bread units from last year. Both are straight dough method. The baguette was a recipe from a unit handout. I remember it being quite wet when I made it last. This time I used 28g less water in my mix, but left everything else the same. The molasses was also from the same unit, it gave me more trouble this time around. It’s a little embarrassing since this bread was made several times over the school year in large quantities. Think large lexan containers about the size of the common storage Rubbermaid. I think what caused the problem was autolysing the whole wheat. I was hoping to cut down the mixing time in the small stand mixer but let it sit for too long. I was distracted with something else and by the time I was ready to mix the rest of the components the whole wheat the mass was quite tough and dry. I had to switch to hand mixing in order to break down the dough as well as spare my aunts small stand mixer the stress. In the end I managed to recover from the soupy mess but it was still quite wet. I should have reacted and added more flour. Maybe I did but not enough, maybe I was hoping it would get better with the folds. I can’t recall my thought process at the time. I started both projects late in the day, once both doughs were mixed and ready for folding it was evening and my aunt and uncle wanted to go for beers. I was able to get a fold in on each before refrigerating them while we were out and doing the last two folds once we got back about an hour or so later. I let them bulk in the fridge overnight since I didn’t want to stay up to shape and bake.
Shaping the next day went well for the baguette. The dough felt nice, close to the dough from the bakery I staged at down home. I was able to make six demi baguettes from the dough I made. Shaping went well for the baguettes, I love preshaping these logs. They proofed just fine and I was able to bake three at a time on the back of a sheet pan. My slashing was shite though. The spacing was fine but they weren’t very pronounced. It could be my pressure or the dough or both. The molasses, however, was nothing like what I had made before.
The dough was extremely wet compared to how it should have turned out. It wouldn’t hold it’s shape at all while i was trying to boule portions for one of the loaves. I had to shape one loaf like a country loaf with some stitching and the other was two sort-of boules that, in the end, proofed into one mass. They baked nice and tall, but that was only because of the hot air trapped under the crust. As the loaves cooled they deflated, I think the oven spring I saw was just the steam built up within each loaf. Cutting into them revealed large caverns in the upper section of the crumb. Bubbles must have formed here, baking into steam pockets that held hot air. Well, at least the gluten developed well enough to capture and hold the steam without bursting. In addition to being such a wet dough, the aroma was betrayed by the taste. The molasses flavour was there but not as present as it should have been. I could easily taste the fermented wheat over the molasses. Maybe it was because of everything else that went wrong with the dough that lost the molasses flavour. I’ll definitely be baking this again before I consider fiddling with the ratios since it’s already been put to the test.
This past weekend I played with some pate fermente. I love pre-ferments, they’re so handy. pre-ferments and bowl scrapers are, by far, my favorite tools. From the first pre-ferment unit I made some French bread batards and Vienna bread with Dutch Crunch (DC), both from The Bread Baker’s Apprentice. I started on time with these projects, I prepared my mise the night before. Unfortunately this weekend bake went similarly to the previous.
Both doughs mixed well and were folded three times each at room temperature. Shaping for both doughs was fine except that I forgot that I was doing batards halfway through the French bread (I couldn’t tell you how). I ended up with three batards for subs and three baguettes, lol. The Vienna was shaped like a country loaf and baked in a tin. I mixed way too much DC since I was too lazy to convert the American measurements to grams. The problems didn’t come during the mixing or shaping, I just wasn’t paying close enough attention (again) and a couple loaves of French and the Vienna went for a little too long. I didn’t mind the French bread being a little dark, they were still soft enough when they came out. It was the Vienna that was a bummer. The overall tonal range was too dark, the crust was quite dry and stiff, and the DC was burnt (not black, just way too dry and dense. Kind of warty.). As the loaf sat over the following days I could tell it was over baked. The crumb closest to the crust was quite tough and dry. It made an inch thick perimeter within the loaf, encircling softer crumb in the center. I have some frozen pate left over from that day so I’ll be making a revenge Vienna ft. DC in addition to the molasses next bake. In addition to the breads that were made last weekend I made time for a quick puff adventure.
Ever since my trip the the Faria stand at the Davis Med Center Market I haven’t stopped thinking of that fig and pistachio basket. It was, seriously, delicious. It reminded me of the The Old Apothecary’s flaky treats (good God, I miss that shop!). The figgy basket inspired me to make some quick puff and play around with that. I made some pastry cream and blackberry compote (from Jennifer Bakes) to fill (pipe on top) the pastry with, and sliced some fresh peaches.
Again I wasn’t paying attention, out of excitement this time, and overloaded the quick puff (QP) with stuff. I gave the QP a single/double/single fold set. Unfortunately the liquids from the fillings and peaches proved too much for my dough and it essentially baked into a pie/tart thing. I also baked it at too low a temperature. I realized this this morning as I was a few minutes into baking my QP Kouign Amann … which were baked five minutes too long … because I lack focus. The Kouign Amann were just the scraps from the pasty experiment. I made six and ate two plus the scraps left over from those. The sugar was really dark, not the sexy brown Kouign Amann usually is. And I should have popped them out of the muffin tin sooner rather than waiting until the end of the show I was watching (It’s called Yowamushi Pedal. I’m in the last stage of the first day of the Inter-High race. It’s some good shit). I got some layers despite losing some steam power at the start. I’ll definitely have a full weekend with some QP. I want to have at least a couple bake days before I push for Danishes of laminated dough.
So I went 2-2-1 over the past couple weekends. The next bake will be make up days for molasses and Vienna ft. DC. I’m still on the search for bulk bread flour and instant yeast though. Maybe now that my bike is working again I’ll be able to focus on sourcing those.
#baguette#molassesbrownbread#frenchbread#viennabread#dutchcrunch#blitzpuff#quickpuff#blackberrycompote#pastrycream#peaches#bakeday#weekendbake#breadventures#yourfocusneedsmorefocus#yowamushi pedal#catchday#breadvenge
5 notes
·
View notes
Photo
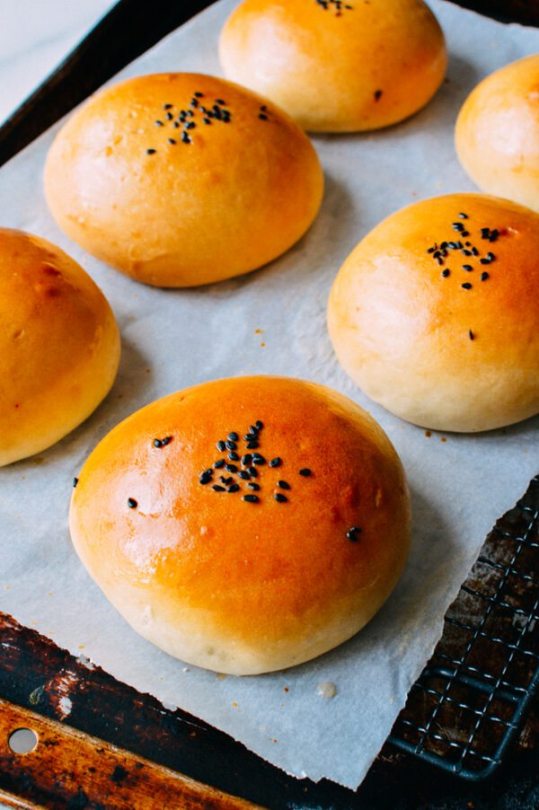
Vegan Char Siu Bao (Baked Buns)
For the char siu bao dough
1 cup warm water, separated in two 1/2 cup portions
1 teaspoon active dry yeast
3 cups all purpose flour or bread flour, divided
¼ cup coconut oil
½ teaspoon vital wheat gluten (can be eliminated if using bread flour)
½ cup sugar
Pinch of salt
For the vegan bao filling
2 tablespoons oil
1 medium onion, diced
1 block extra firm tofu (drained, pat dry and cut into ½-inch cubes)
2 ½ tablespoons soy sauce
½ teaspoon dark soy sauce (optional)
1 tablespoon sugar
1/2 teaspoon salt
1 teaspoon sesame oil
1 tablespoon hoisin sauce
white pepper, to taste
1 ¼ cups water or vegetable stock
2 tablespoons flour
Sugar water to coat the buns
1 tablespoon sugar
2 tablespoons warm water
Start by making the dough. Add ½ cup warm water, 1 teaspoon active dry yeast and ⅓ cup flour to a large bowl, and mix well. Set aside in a warm place for 15 minutes until the mixture foams up.
Mix the coconut oil into the foamy yeast mixture until you can’t see any solids and then mix in the remaining ½ cup of warm water. Add the last 2⅔ cups flour, vital wheat gluten, sugar, and salt. Mix in until a dough forms. Knead for 10 minutes. You can add some flour to make it easier to work with, but don't worry if it's a bit sticky. Cover with plastic wrap and let it proof for 1 hour.
While that's happening, make the filling. Heat your wok or cast iron pan over medium-high heat and add the oil, onions and tofu. Cook for 3-5 minutes until one side of the tofu is just browned. Turn the mixture over with a rubber spatula and brown the other side. Feel free to add more oil if the mixture looks a bit dry.
Add the soy sauces, sugar, salt, sesame oil, hoisin sauce, and white pepper. Stir everything together and then add the water/vegetable stock and flour. Stir gently so as not to break up the tofu chunks.
Let the mixture simmer until the liquid thickens into a sauce. It should thicken further as it cools. Set the mixture aside to cool completely before making the buns. If the mixture looks a little wet, you can put it in the fridge to solidify it for easier assembly.
Once the dough has proofed for an hour, turn it out onto a well-floured surface and knead for another 2-3 minutes to ensure most of the air bubbles are gone. Add just enough flour so you can knead it, but be careful not to dry out the dough. Divide the dough into 10 equal pieces and cover with a damp towel.
Roll out each dough ball into a disc, where the middle of the disc is a bit thicker than the sides. Put about 2 tablespoons of filling in the center and fold up the edges to close the bun. The dough is fairly elastic, so you can stretch it to cover the filling if needed. Check out our other char siu bao recipe for more photos on bun folding, Chinese BBQ Pork Buns (Cha Siu Bao. Be sure to pinch it closed, and place it seam side down on a parchment-lined baking sheet.
Keep all the dough balls and the finished buns covered with damp towels until they're all assembled. Let the buns sit for another 10 minutes while you preheat your oven to 375 degrees.
Mix together the sugar and warm water and brush the mixture onto the buns. Place the buns in the oven and immediately turn the temperature down to 350 degrees. Bake for 20-25 minutes, until golden. Brush the buns with the remaining sugar water when they come out of the oven. Serve warm!
11 notes
·
View notes
Text
Sourdough Bread: Sun-dried Tomatoes & Parmesan // Roasted Garlic & Rosemary
Test Recipe 01
Sun-dried tomato, parmesan boule (front) // Roasted garlic & Rosemary boule (back)
Overall Outcomes
Bread Score: 7/10
Would have preferred larger, open crumbs. Bread was denser than I would like, but I was happy to see an even distribution in crumbs overall, a good sign of better shaping. Nice oven-spring and rise on the loafs. Beautiful coloring on crust. Much better compared to my first foray into breadmaking. See section on bread to see what I tried this time round that made it better.
Flavor Score: 2/10
The low score wasn’t because it tasted bad. Rather, it was simply the lack of flavor that was disappointing. It just tasted like plain sourdough. I ended up eating it with some whipped cream cheese. Whenever there were bites that contained the flavor bombs, it was great.
On the Roasted Garlic, Rosemary loaf:
Best enjoyed toasted. Cream cheese complemented the herbaceous flavors really well, kinda reminiscent of Boursin’s garlic chives cream cheese.
The Good
The sticky, mushy garlic helped the herbs clump together, which ensured those flavors always lived together, rather than separate.
The Bad
Mushy clumps of roasted garlic ruined the texture of bread. It was also unevenly and scarcely distributed throughout the loaf.
The Techniques
Roasted a head of garlic in the oven for 45 minutes till caramelized and mushy. Cut cloves into chunks, not tiny because I thought I wanted bites of flavor. This was a terrible experience. It was mushy, sticky and hard to handle. it caused all the rosemary to clump together and I could not get the incorporated into much of the dough because of the low volume.
Flavor bombs were introduced in final shaping stage as well, incorporated with every fold in the Tartine book’s packaging fold technique.
There must be a better way to infuse garlic flavors into the loaf.
Things to potentially try next time:
Definitely MORE VOLUME of garlic & rosemary. I used 1 head of garlic. There wasn’t much garlic from it after roasting. Might need 3-4 heads of garlic next time for a half-sized boule.
Incorporate smaller bits of roasted garlic instead of chunks
Mash into a butter with olive oil and chopped herbs and incorporate into a loaf through a lamination method, like a cinnamon roll/babka or croissant instead.
Try diced, raw garlic. Maybe it’ll roast and caramelized during the baking period to get the same effect and you won’t have to deal with messy, mushy garlic that stuck everywhere.
Would garlic oil work? How would fat incorporated into a dough affect proofing and rise? Would it still become bread?
Tips from the FB sourdough community:
I roast the garlic in foil in the oven just to the point where it is roasted and the cloves are still holding together so I can dice it. I don't roast it until I can just squeeze it into a paste.
Once it is minced I will put it in a little bowl with just 10-15grams of EVO just to keep the garlic from clumping and to help it distribute through the dough a bit.
I add it at my 2nd turn. I will autolyze and then start my turns and at the 2nd one I will add the garlic and EVO mix to the dough and squeeze through until the extra liquid is absorbed and the garlic is distributed through.
At most reduce your water amount by a few grams if you are worried about the hydration level.
~ Stephen Blanchard from https://stephensbreads.com/
On the Sun-dried Tomato, Parmesan loaf:
“oh what a beautiful crumb”
The Good
The loaf smelled AMAZING while in the oven. You could smell the gorgeous scent of Parmesan and sun-dried tomatoes. I was expecting it to be very rich in flavor.
The Bad
I was nervous any cheese on the surface was going to burn real badly during the bake, but I was wrong. Not only did it not burn, it gave the crust a glorious golden brown.
I wished there was more cheese on the surface, and in the interior of course.
Since I had used shredded cheese, the flavors were really mild, if not, undetectable.
The sun-dried tomatoes on the other hand, burned to a bitter, charcoal crisp on the exterior of the bread. Next time, make sure any sun-dried tomatoes are on the interior of the bread. Thankfully, those on the surface were easy to pick off without any visible damage to the boule.
The Technique
I used 1.5 oz shredded cheese and opted for 2 oz dry-packed sun-dried tomatoes instead of the oil-packed variation for fear of what the excess oil would do to my dough.

Flavor bombs were introduced in final shaping stage as well, incorporated with every fold in the Tartine book’s packaging fold technique. Even after chopping the sun-dried tomatoes, they were still bulky and made folding and shaping difficult. Building surface tension on the dough was a little trickier with this.
Things to potentially try next time:
Soak sun-dried tomatoes in water, then use that water for the doughChop sun-dried tomatoes smallerUse more cheese, both on interior and exterior of loaf.
On the bread making:
Base Recipe: I used the recipe for the Basic Country Loaf from the Tartine Bread book.

(img credit: Tartine Bakery)
I halved the recipe, so my boules are only half-sized boules, perfect for portion control for me.
For my Levain:
I made 120g of levain even though recipe only needed 100g, so that I would have 20g remaining to keep as the mother starter.
20g starter
50g flour (25g All Purpose flour, 25g Whole Wheat)
50g water
For the 2 half-sized boules (about 6in in diameter):
350g water
100g levain
450g AP flour (would prefer to use bread flour next time)
50g Whole Wheat flour
10g salt, dissolved with 25g water
Thoughts on Technique
Dissolving levain in water first then mixing in flour for autolyse, incorporating salt dissolved in water after dough has rested for 1 hr.
I really liked this technique. Joshua Weissman uses this as well. I felt that the levain and salt water were better, and more evenly, incorporated into the dough this way, versus the finger poking, stretch and fold method from Mike Greenfield from Pro Home Cooks.
Using a clear, transparent tupperware for bulk proofing/stretch & folds.
This allowed me to measure and track how much the dough was growing as a better indication of proofing stages, versus when it was in a stainless steel bowl. I did not see very much bubbles, like in a starter, but I could see the change in volume. Dough also felt lighter and aerated over time, become more fluid in the container, but not in a gloopy, sticky dough sense. It detached cleanly from the container. It still wasn’t clear to me whether or not dough was perfectly proofed though. Is this over? under? No idea. Note: I proofed for 4 hrs with 6 sets of stretch & folds ever 30 minutes in a ~78F environment.
Dip your hand in (unchlorinated/boiled and cooled) water before handling dough.
This creates a magical glove that prevents the dough from sticking to your hand. Did not realize dough was hydrophobic(?), but that was cool. Not entirely sure if using normal tap water was fine, but since chlorine could kill the bacteria and yeast in your starters, I didn’t want to risk killing it when I needed them to proof the dough.
Use a bench scraper. It is your friend.
This made shaping the dough so much easier, especially the turns & tucks. Make sure to wet your bench scraper prior to using to prevent the sticky undersides of your dough from sticking to it though.
Do the circumference pull and pinch dumpling method for first shaping to develop more dough surface tension first, before the turn and tuck.
I only did the turn and tuck, as instructed by the book, but it didn’t feel like enough surface tension was built. Use this technique that Jack the Baker recommends instead to prevent your dough from spreading. I used this to tighten up the dough later when it was in its proofing bowls.
It’s fine to shape, shape and shape again.
After a beautiful first shaping, the dough deflated and became a sticky mess in my second attempts of shaping after incorporating the flavor bombs. So defeated was I, that I had expected to get 2 flat, frisbee-like dense loafs the next morning. I had already placed the doughs in its final proofing bowls, dusted with rice flour, so I didn’t want to risk reshaping and incorporating rice flour into the doughs. After taking a break and leaving the doughs in the fridge for its overnight proof, I mustered up enough energy to try another Hail Mary pass to save it. I pulled the dough out of the fridge, pulling the edges of the dough and folding it into the center to create surface tension, then pinching the dough folds together until the seams were invisible. Not sure if it helped, but it created the (dis)illusion that I’ve incorporated more air into the boule for hopefully, a decent rise during the bake.
The next morning, I did the turn and tuck for one final time until it looked like a beautiful, round, and tall ball of dough before baking. This worked extremely well and the final boule came out looking very well shaped versus if I had just placed it into the oven as is, without shaping.
Proofing covered with a dish cloth instead of cling wrap/plastic
Now my bowl is deep enough for my tiny boules, so I don’t have to worry about dough spilling out during proofing. I didn’t use plastic wrap this time when resting my doughs overnight in the fridge. I covered it in my dish cloth loosely. I did not dust my doughs of excess dough prior to baking either. Having it uncovered by plastic allowed the dough to try out abit more, resulting in a nicer, crackled crust this time round and I liked it better.
Baking withOUT a dutch oven
Yes, it’s possible. The last time I did made bread, I baked it uncovered in my cast iron skillet with a tray of ice cubes in a tray underneath for steam, as suggested by Mike Greenfield from Pro Home Cooks. I didn’t think it was enough, and my bread came out with the ugliest crust (see pic below). Dissatisfied, I needed to find a better method.
My first sourdough breads. SEE THAT UGLY OLD ASS CRUSTY TOP??? Looks like your grandma’s ashy butt. No. can. do.
Research with various videos and the FB group of sourdough experts revealed it was an issue with insufficient steam during the bake. So this time, I provided a heavier source of steam, and trapping any steam generated from the dough during the bake by covering the top with another skillet.
I had bought an official Easy Tiger sourdough loaf, placed it in my cast iron skillet to measure height. Turns out, having two cast iron skillets stacked on top of each other was tall enough, especially for a half boule. Here’s my setup:
2 cast iron skillets, a baking sheet, and a small cake pan.

The tray under cast iron was set to prevent the base of my boules from burning. Is it necessary? I’m unsure at this point. Would have to test it out next time round, but no harm no foul to be extra safe on these early, vulnerable babies.
The spouts on the cast irons meant that steam could escape, unlike an enclosed dutch oven or combo cooker. So, I went overboard by providing an additional source of steam underneath in the form of boiling water poured into the cake pan...just in case.
Removing the top skillet during the bake revealed that it did provide some level of steaming with it’s paler, shiny crust, but there was still enough crust to indicate that it didn’t do a great job trapping steam inside the skillets, so having additional steam was beneficial after all. I can’t say this with confidence. Only changing things up and experimenting during my next bakes will confirm my hypothesis.
Next Iteration
I would definitely stick to this Tartine recipe for bread making. It was easy, seemed fool-proof, and the number of people using it as a guide meant you had lots of tips available on the youtube channels.
Would definitely use bread flour instead of normal white flour next time round for a stronger gluten structure though. That might give me a more open crumb this time.
Would also stick to majority of the techniques, with changes in:
incorporating flavor bombs during stretch & fold instead of final shaping stage
changing the shaping techniques to generate more surface tension and reduce spread of dough.
volume and treatment of flavor bombs as mentioned in the earlier sections.
0 notes
Text
Shygryf’s Weird Bread
What I put in it
2 Cups King Arthur Bread Flour
2/3 Cup Instant Oatmeal (normally use rolled oats for baking but don’t have any)
3 Cups Skim Milk
~2 Tablespoons Unsalted Butter (store was out of salted)
3 Tablespoons Mesquite Honey
~2 teaspoons of salt (there was a clump in the canister and I didn’t feel like declumping or getting other salt so decided this was enough
3 cups whole wheat flour (no idea what kind, it’s been in a ziploc on my fridge far too long)
1 tablespoon raw sugar
2 tablespoons regular dark molasses (couldn’t find blackstrap)
Canola oil for bowl
Cooking spray for pans and measuring molasses
What I did
Add white flour straight from the freezer because I never remember to let it warm before using, oatmeal, and Honey that is thicker than I like but bad things happen when I microwave glass. to the bowl of the love of my life, my 6 quart kitchenaid mixer, Sir Mix A Lot:
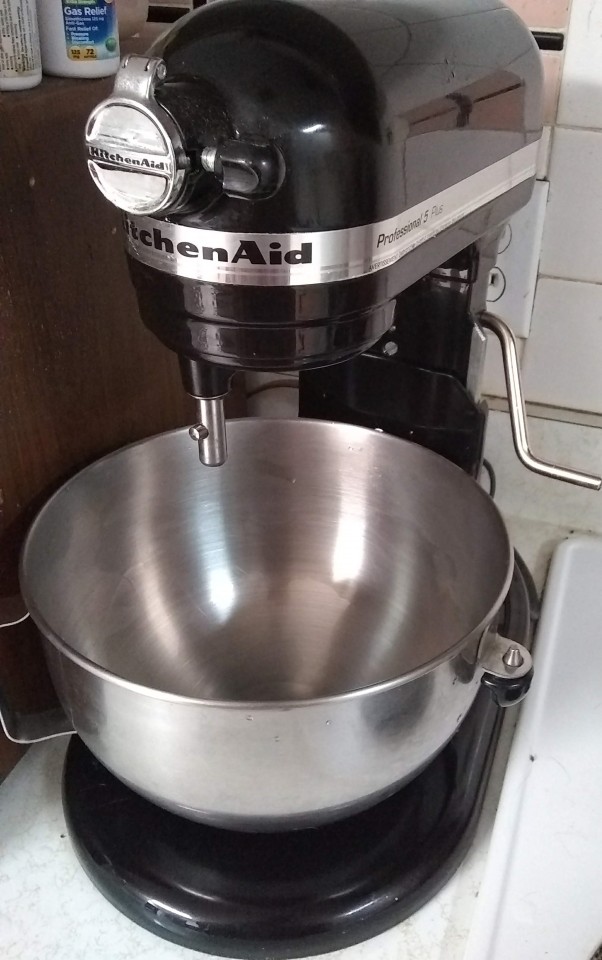
Note to Self: If i ever find the guy who sells the pecan honey again i really need his card, that stuff is amazing
Scald milk and add butter
use dough hook to stir until mixed
add yeast and stir some more
let sit 15 minutes
add salt and about 1 cup of wheat flour
decide it isn’t sweet enough so add raw sugar because I don’t want to dirty another measuring spoon with honey
add another cup and a half ish of wheat flour
Turn out on to rolled baking sheed lined with foil and covered with flour (makes clean up so much easier)
not sure if wheat flour is starting to go off or is just being wheat flour so decide to knead in molasses,
put in greased bowl and silicone lid
put in bottom oven set to proof for 45 minutes
punch down
proof 30 minutes
notice it isn’t sticking together properly probably because I added too much flour
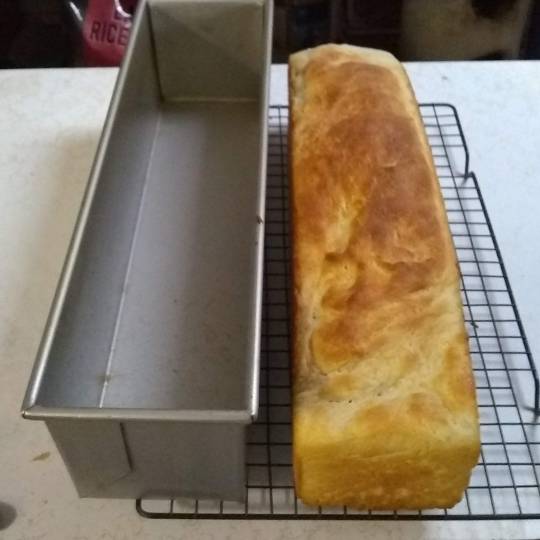
put most of it in pullman loaf pan (pictured below with white loaf in an old photo), turn the rest in to dinner rolls in 9 inch square pan
proof 30 minutes
turn bottom oven off and preheat top oven to 425
place both pans on bottom rack and bake 15 minutes
remove rolls and put on cooling rack, take picture for posterity

bake loaf another 10 minutes
turn out loaf then clear area so the ravening hoard that is my family can get rolls
take picture and eat two rolls

Get out laptop
find glasses
start typing post
try to upload picture of rolls then lose whole post because fucking internet went out and tumblr says when something won’t upload but doesn’t say when draft isn’t saved.
fix internet
decide to recreate post without background info on my history with bread
fix internet again when unable to post
cut and paste text in new window
re upload images
0 notes
Photo
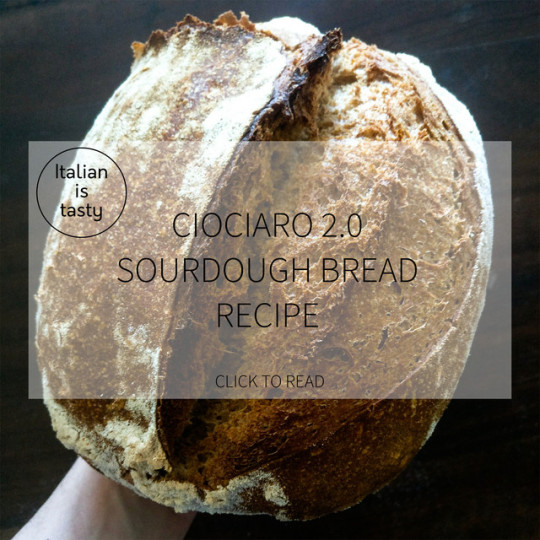
Ciociaro 2.0 - Evolved ciociaro sourdough bread!
If you want to be good at making bread, you’ll have to try and to try and to try... Mistake is part of the learning process, and you shouldn’t be afraid of making them. I am still learning, and as soon as I become confident with it, I change variables and do my experiments. So I thought it was about time to update my original bread the recipe:
“The Ciociaro Sourdough Bread”
What’s changed and what’s not
The sourdough: Since my beginning I did refresh the sourdough using an all purpose flour. Now some of you may be aware that every flour have some inactive ferments, these ferments gets activated by our sourdough starter, and so we have flour digestion, gas, and finally our leavened bread. I am not using all purpose flour anymore, when I do my sourdough starter refreshment, I do use the same flours (in the same percentages) of the bread I’m going to make after the refresh is complete.
The honey: I use it only if I’m going to do a 24 hours retardation in the fridge, which is almost never the case. So I’m just skipping it
The after folds-preshaping: I give a look now and then at the dough, I start the shaping step as soon as I see it’s starting to overproof, before I used to wait 1 hour whatever happens, now I wait 30 minutes on average. It really depends on your room temperature and the flours you’re using.
Autolysis and sourdough starter refresh: I am going to wait 12 hours for this process, if I refresh at 08.00 pm I will merge the sourdough and the post-autolysis dough at 08:00 am.
The seeds: you probably noticed I often add seeds in crumb, for 400 grams of flour I’m using:
2 tsb of chia seeds
2 tsb of linen seeds
2 tsb of pumpkin seeds
2 tsb of sunflower seeds
I add the seeds after the autolysis and the sourdough refresh.
The folds: I use only 3 folds now, spread on a time of six hours. So one fold every 2 hours.Shortly before putting the bread in the oven I drop some water in the cast iron lid, water will evaporate very fast, close the lid and put everything inside the oven. Adding water on the lid before closing made my dough to develop better.
Tools: I can’t stress this enough, but in order to make a good sourdough bread, you need tools, and if you’re willing to make this recipe, you can’t skip having these ones. If you don’t have a Cast Iron device (link below) you’ll need a baking stone, at least, and after dropping your bread on it you’ll have to drop water on the oven’s lower surface in order to have some water’s steam inside and help you baking, You’ll need the baking stone to be inside the turned-on oven for at least one hour at maximum power.
A Cast Iron Double Dutch Oven
A stand mixing machine to help you knead the dough
A proofing basket
Some steel bowls to help you mixing the dough and the sourdough
A large enough pastry board
A stainless steel dough scraper
Linen Cloth
Stainless razor for cutting the dough
You can also purchause the needed tools from my Amazon page!
The ingredients
For the classic Ciociaro we’re going to use:
66 grams of whole spelt
66 grams of whole wheat
268 grams of bread flour (don't use a strong flour for this recipe)
280 grams of water
9 grams of salt
70-75 grams of refreshed, stiff, sourdough starter. If you need the recipe you can find it here. Refresh it using 50 grams of bread flour(the same you’re using for your bread) and 25 grams of water.
8.00-8.30 pm: Autolysis and sourdough starter refresh
Into a large bowl I’m going to put all the flours and the salt, I’m going to melt the teaspoon of honey into the 280 grams of water and then I’ll pour it into the bowl. I’m gonna mix it everything by hand, I don’t want to work the dough too much here, I will stop as soon as the ingredients are all mixed up roughly. Cover the bowl using a transparent film.Into another bowl I will refresh my sourdough. I take my sourdough out of the fridge and I’m going to put it into the bowl, I do add 50 grams of bread flour(the same you’re using for your bread) and 25 grams of water, I will mix everything by end until I have a smooth ball. Cover again with transparent film.Cover both bowls with a cloth, just to be sure light doesn’t touch your dough!Room temperature has to be no lower than 18 celsius degrees so put these bowls in a warm room, even the very room you sleep in.We’re going to wait 12 hours, this means that if you perform this step at 08.00 pm you’ll continue the morning after at 08.00 am.
8.00-8.30 am: Coffee and bread mixing
Of course coffee isn’t part of this recipe, but it’s just part of my morning routine! Sourdough is mature, I’m going to split it the sourdough starter in two. One half is going back into the fridge for my next-time bread, the other one will go in the pot where I did put the dough in autolysis. Spread the sourdough starter over the dough surface, dig it a little using your fingertips. If you want to add seeds, do it now, before kneading.At this point you wet your hand with water, you fetch the dough from below and you start folding it. Stretch the dough and fold it for 10 minutes at least, you want to create as many layers of sourdough starter as possible. Once you’re done, cover with a transparent film and then with a cloth, just like you did during the night.I suggest you, if you have it at home, to use a stand mixing machine. They simply perform better and quicker, and they are able to painlessly spread the sourdough started evenly through the dough.
8.00am-1.00pm: Folds and fermentation
This phase lasts for 4 hours, we’ll do one every hour. Be sure to wet your hand before performing the folds, seal the bowl with plastic film tightly.
1.00pm-1.30pm: Preshaping
Using just your stainless steel dough chopper (I suggest this one because dough doesn’t stick to it. Put the dough cutter below your dough and perform a counter-clockwise movement, making the dough rotate slightly. If your repeat this step 4-5 times you’ll notice your dough will stretch into a smooth ball. You let the dough rest like this for 30 minutes.
1.30pm: Shaping
Slightly flour the dough and the pastry board, using your dough chopper turn the dough upside down. Now there are several folds that you should apply depending on the shape of your dough. I use an oval proofing basket, so I take the edges of the shortest side of the dough, I bed them forming a triangle tip like, then I roll the dough putting the tip inside. I let the dough rest for 5 minutes. Then again, using my dough cutter I put the dough upside down onto a prefloured linen cloth, and then I put the whole linen cloth inside the proofing basked, I wrap the dough with the linen cloth, try to do a clean wrapping, fold the cloth in straight lines.We’re going to let it rest from 3 to 4 hours, depending on how much the fermentation proceeds. For better results, you can perform fridge retardation and place it in the oven 19 hours later, in this case remember to remove it from the fridge one hour before putting it in the oven
4.00pm-5.00pm: Lets warm up!
Turn on the oven, static mode, at 250 Celsius degrees, Put your combo cooker/dutch oven inside the oven for one hour, while it’s prewarming. After one hour take the dutch oven out and open it, cover the lid with some flour, then put your dough inside it, place your hand below so it won’t fall abruptly. Using your razor perform a cut of your preference, for my oval dough I prefer a half-moon cut on the longer side. Before covering place in the tall part of the dutch oven, the one we’re going to place on top, a spoon of water. Water will start to evaporate fast so cover the lid with the pot and put everything in the oven again, set temperature to 220 Celsius degrees and wait for 30 minutes. After 30 minutes remove the pot from the lid, lower the temperature to 200 Celsius and wait for 25-30 more minutes.Let it cool on a grid, so it will cool also on the bottom, for at least 3 hours.
Enjoy and let me know if you did like!
#recipe#cooking#italian#food#foodporn#tasty#bread#sourdough#home#sourdoughbread#seeds#healthy#madeathome#breadporn
1 note
·
View note
Text
The Sourdough Revolution: A Beginner’s Sourdough Recipe and a Review of the Challenger Bread Pan
While much of the world is spending a lot more time at home, many people, myself included, have taken up bread baking as a new hobby. Since commercial yeast is hard to come by, many have started using natural yeast to bake sourdough. Read on for my favorite beginner sourdough recipe and a review of Challenger Breadware’s groundbreaking bread pan.
While perfecting your sourdough loaf can be a bit of a rabbit hole; baking a simple, delicious loaf of sourdough can be fairly easy if you follow a good recipe. Jim Lahey, of Sullivan Street Bakery fame, most known for his no-knead bread recipes, has an excellent sourdough recipe that’s totally simple for the beginner sourdough baker to follow.
Once you have your favorite bread recipe/technique down, you’ll need something to bake your bread in. While baking bread directly inside a home oven works OK, you need to perform a bunch of “hacks” to get enough steam necessary to perfectly bake your bread. That’s where the Challenger Bread Pan comes in.
Jim Challenger, the creator of the revolutionary pan, began his baking obsession in 2016 and found that none of the existing baking methods were good enough to bake the perfect loaf in a home oven. The dutch ovens or combo cookers home bakers were using didn’t capture enough steam, or had inconsistent heat, or the handles were awkward, which lead to burns. He was frustrated by the choices available to a home bread baker, so he took matters into his own hands, and with some help from his friends, designed “a cast iron pan specifically designed to produce bakery-quality bread, baked in a home oven.”
More on the amazing Challenger Bread Pan later, we’ve got some dough to mix! What I love about this recipe is that it doesn’t have a ton of complicated instructions or advanced bread-making techniques. Plus, you can have fresh-baked sourdough within 5-6 hours while many more advanced sourdough recipes require a day’s worth of work and the dough to proof in the fridge overnight. Is it the “best” sourdough recipe out there? That’s subjective, but it’s my recommendation for beginners who are new to sourdough or those who have a hankering and want to bake a quick loaf.
Here’s the ingredient list for Jim Lahey’s Fast Sourdough:
Yield: One 9-inch round loaf.
Equipment: A 4½- to a 5½-quart heavy pot with lid (or even better, a Challenger Bread Pan); a large piece of parchment paper.
100 grams prepared/active sourdough starter (This will be about 1/2 cup depending on your starter, but I highly recommend a kitchen scale, they’re plentiful on Amazon and don’t cost an arm and a leg)
200 grams (about 1 1/4 cups, plus 2 tablespoons) unbleached all-purpose flour
100 grams (about 2/3 cup) whole wheat flour
6 grams (about 1 teaspoon) fine sea salt
230 grams (about 1 cup, plus 1 tablespoon) 65F-70F water
Wheat bran, for dusting
This is my starter. This is where all of my sourdough loaves begin. You can see it’s at least doubled (above the rubber band), which means it’s active and ready to bake with.
First Step:
In a large bowl (make sure it’s small enough to fit inside your oven if it has a proofing setting like my Breville Smart Oven Air) combine your flours and salt and whisk to combine. In a small bowl, combine the starter and water and whisk it until the starter is dissolved in the water and the water is milky. Pour the starter/water mixture into the flours and quickly mix using a spatula. No need to go crazy here with mixing. Cover the bowl loosely with a wet towel and let the dough sit at warm room temperature for 30 minutes. I put mine in the Breville Smart Oven Air using the proofing setting at 80º F.
Starter mixed with water
My flours and sea salt
Dough mixed together quickly, ready for the next step.
Second Step: (This step is the most complicated the recipe gets, but it’s still super easy!)
Turn the dough, pulling it off the sides of the bowl and folding into the center as you turn. You want to be sure your hands are wet so the dough doesn’t stick to your hands. Make sure you work the dough as little as possible. This step is also called the Stretch and Fold method, check out the YouTube link below for a quick demonstration.
youtube
When you’re done, cover your dough again with a wet towel and let it rest for 30 minutes before doing the stretch and fold method again. You’ll want to do this a total of about 5 total times, taking around 2.5-3 hours. This is how you improve the texture of the bread without kneading. Jim says that you’ll know the dough is ready when it can hold its shape without oozing back to the bottom of the bowl. It should peel off the side of the bowl easily.
Dough resting in my Breville Smart Oven Air maintaining a warm 80-degree environment, perfect for bread proofing.
Doing the stretch and fold. You’ll notice the dough get more elastic over the course of this step, stretching/folding/resting.
You can tell when the dough is ready when it starts holding a ball shape, like this.
Third step:
Place a piece of parchment paper on a sheet pan (or prepare a banneton or proofing basket if you have one handy) and dust the parchment generously with wheat bran. Lightly dust your countertop with flour, transfer the dough to said countertop, and form it loosely into a ball by gently folding the top, bottom, and sides on top of the middle, making a taut ball. You do not want the dough to tear here. Place the dough seam side down on your prepared parchment paper (or seam side up in your prepared banneton if you prefer) and cover loosely with a towel and let it proof for another 2 hours or so, until it’s doubled in size.
Here’s a great video illustrating how to shape a simple boule (round loaf):
youtube
Dough has been shaped and now it’s resting in the proofing basket (banneton).
Fourth step:
About an hour before your dough is finished proofing, preheat your oven to 500ºF and preheat a cast-iron pot with its lid. This can be anything from a Le Creuset dutch oven to a Lodge combo cooker, to the Challenger Bread Pan that I’m reviewing here. Just be careful when selecting a pot, as some handles are not made for high, prolonged heat. When your dough is ready, and you’ve been preheating the oven & Bread Pan/dutch oven for about an hour, take the pot out of the oven and carefully remove the lid. Transfer your dough into the pot and use a serrated knife (or bread lame) to score the loaf with a single long slash. The slash or score gives the loaf a place to vent the air inside as it heats up while allowing the loaf to expand in the oven. Cover the pot quickly, and place it in the oven.
My scored loaf, ready to go in the oven.
Fifth and final step:
Bake the bread for 35-40 minutes with the lid on, then carefully remove the lid and bake for another 10-15 minutes with the lid off until the crust becomes very dark brown. Remember, color = flavor. When it reaches your favorite dark brown color, remove the pot from the oven and remove the loaf from the pot. Let the loaf cool on a cooling rack. Be sure not to cut into it for at least an hour, as the bread is finishing its bake on the inside while cooling down. When it’s cool, slice that bad boy up and share it with friends and family. Congrats, you made a delicious sourdough!
The finished loaf! Be sure to wait an hour for it to cool down, no matter how good it smells!
Slather it with butter, top with flakey sea salt, and share with friends and family!
Sourdough doesn’t have to be complicated. As you’ve seen, it’s made with three all-natural ingredients, flour, water, and salt. While experienced bakers may be posting gorgeous amber loaves on Instagram with beautiful patterns or complicated scoring, sourdough doesn’t need to be fancy to be delicious, and it’ll feed your family and friends all the same. With that in mind, the right tools can elevate any ingredients, recipe, or technique, and that’s what the Challenger Bread Pan does.
I’ve baked a number of loaves in my Challenger Bread Pan, and I can say without a doubt that it’s the best bread baking vessel on the market today for the home baker. It’s not cheap, but quality design, materials, and craftsmanship costs money. It’s heirloom quality, and it’s built to last generations. It may not be for everyone, and your dutch oven may be doing the job just fine, but for someone who wants to elevate a simple recipe or for the baker looking to take the next step to make bakery-quality bread, the Challenger Bread Pan is the way to go.
The thick, black cast iron absorbs, retains, and radiates heat like nothing I’ve used in the past. The shape of the bread pan is perfectly designed in the shape of a loaf of bread, which helps bring radiant heat as close as possible to the bread inside the pan, helping the dough’s oven spring. The handles are large enough to use with oven mitts (and you’ll definitely need oven mitts) and they’re perfectly placed allowing you to easily reach in and remove the top during the bake. The shallow base makes it easy to load your dough into the pan without needing to use parchment paper as a sling or fumbling around with the dough and accidentally burning yourself or dropping it, which could lead to degassing.
The Challenger Bread Pan retains steam better than any dutch oven on the market thanks to the tight seal between the cover and the base. Steam is what helps the bread get that crackling crust with rich colors, open scores, and allows your dough to reach its maximum volume. Without steam, bread just isn’t as good. The rectangular shape of the pan allows for many different shapes and sizes of loaves as well. Round dutch ovens only allow you to bake round boules, but the Challenger Bread Pan can bake round boules as well as oval batards, demi-baguettes, and loaves of many different sizes.
This is a loaf I baked in the Challenger Bread Pan using a more advanced sourdough recipe, but everyone needs to start somewhere!
I’ve been extremely impressed with the Challenger Bread Pan and am happy to report that it’s lived up to the hype created by the online baking community. Jim Challenger, my hat goes off to you. If you’re a baker looking for the absolute best way to bake your bread, look no further than the Challenger Bread Pan.
The Challenger Bread Pan retails for $295, and it is available directly from the manufacturer.
Source: Manufacturer supplied review sample
What I Like: Well designed with every detail thoughtfully considered; Traps steam incredibly well; Made to last a lifetime; Shallow base; Bakes a gorgeous, crusty loaf of bread
What Needs Improvement: Absolutely nothing. The price may scare some off, but it’s worth every penny
from Joseph Rushing https://geardiary.com/2020/05/14/the-sourdough-revolution-a-beginners-sourdough-recipe-and-a-review-of-the-challenger-bread-pan/
0 notes
Text
Country Rye (Tartine)
New Post has been published on https://cookingawe.com/country-rye-tartine/
Country Rye (Tartine)
Country Rye (Tartine)
Submitted by WatertownNewbie on April 22, 2020 – 6:19pm.
From the number of recent postings about sourdough starters, it appears that many have taken up bread baking. This seemed a good opportunity to illustrate various steps during my preparation of Country Rye from the Tartine book. I always benefit from seeing what something is supposed to look like, which is why I have included so many photos.
My starter is fed with a 50/50 blend of all-purpose and whole wheat flours (as described in Tartine, and I like the results, so I have stuck with this approach) and an equal amount of water in a 1:2:2 ratio. For the levain I scaled the ingredients to 30 g of starter, 150 grams of the 50/50 blend, and 150 grams of water so that I would have 200 grams of levain available. So little starter is needed, but it provides so much lift.
When all mixed together, the levain initially has much less volume than it does the following morning. This composite photo shows the levain just after being mixed and then top and side views a little less than twelve hours later.
The Tartine method mixes the levain in the water before adding the flour. Here is the levain going in and after being dissolved a bit in the water.
The flours are then added. This bread is 83% bread flour and 17% whole rye. The key at this stage is to get all of the flour wet, and a scraper helps to reach the dry flour at the bottom of my Cambro tub and distribute the water.
With no remaining dry flour, the mixture is ready for the autolyse stage. I went for sixty minutes to give the gluten a chance to begin its formation. This composite photo shows the dough mass at the beginning of the autolyse, at the end, and after the addition of the salt (20 g) and held-back water (50 g).
For this bake I decided to include some French Folds (aka slap-and-fold), but first I needed to mix the dough in the tub so that the salt could be distributed and the newly added water absorbed. Finally I had a dough mass that could be worked on our granite counter top. This photo shows the dough when first placed on the granite and then after the French Folds. I did a set of 200 followed by a minute of letting the dough sit and then another 200. The gluten development and strength of the dough were a pleasure to feel. I always take the dough temperature at the end of the initial mixing so that I have an idea of what to expect for the bulk fermentation.
The recipe calls for four sets of stretch-and-folds (S&F) spaced thirty minutes apart. This photo shows the dough just before the first and fourth of these sets, and the growth of the dough mass is evident.
Only two hours had passed by this point, however, and sourdough baking requires patience. The Tartine book says to watch the dough and give it additional S&F as warranted. To give this 80% hydration dough some added strength, I did three more until the dough had expanded sufficiently during the bulk fermentation and exhibited readiness to be divided (dough not spreading to the walls as quickly after an S&F, bubbles on the sides and bottom of the tub, a puffy feel from the gas being produced inside). The entire bulk fermentation took about five-and-a-quarter hours in my 68 degree F kitchen. This photo shows the dough about a half hour before it came out of the tub and then on the countertop ready for pre-shaping.
After pre-shaping I let the rounds sit for a twenty minute bench rest before the final shaping. Then I shaped one into a boule and the other into a batard. Into the bannetons they went. This is a somewhat sticky dough, and I made sure to flour the bannetons with a mix of rice flour and whole wheat flour. The bannetons were placed into plastic bags, which were clipped shut, and put into the refrigerator for overnight proofing.
This morning, after sixteen-and-a-half hours in the fridge, the dough had expended nicely.
I baked the boule in a Dutch oven and the batard on a baking stone. The lid stayed on the Dutch oven for the first twenty minutes, and the total bake was 44 minutes. I use two aluminum pie pans filled with lava rocks to steam the oven with the baking stone, and the total bake for the batard was 40 minutes. Here are the loaves.
The batard was given to a friend, and this is the crumb from the boule.
Nice chewy crust and moist crumb with a definite but not overpowering rye flavor. A really nice bread.
Hopefully some of you enjoyed going through the description and photos. Happy baking — and stay safe and healthy.
0 notes
Text
How To Make Sourdough Beginner from Scratch|Kitchn
Not everyone are so lucky to have a sourdough starter passed down to us from our bread-baking predecessors and foremothers. The good news is, making a fresh batch of starter is as simple as stirring together some flour and water and letting it sit. That's right!
No expensive treasure starters, mashed-up grapes, or mysterious routines needed-- simply flour, water, and a bit of perseverance. Here is how to make your own sourdough starter from scratch. Easy-peasy.
Equal parts flour and water to make
a sourdough starter What Is Wild Yeast? Prior to you get started, let's speak about wild yeast, which is the crucial to a sourdough starter. Prior to we had active-dry yeast or immediate yeast, we had wild yeast. Really, we still have wild yeast. It lives everywhere-- in the air, in a bag of flour, on the surface of grapes. Domesticated industrial yeast changed wild yeast for the majority of baking due to the fact that it's simpler for companies to mass fruit and vegetables, it's simpler for bakers to store and utilize, and it proofs our breads and pastries in a fraction of the time.
By contrast, wild yeast can be fussy and picky. It needs a medium, a sourdough starter, in order to work to bakers. This medium needs to be constantly preserved and kept an eye on. Wild yeast also likes cooler temperatures, acidic environments, and works far more slowly to proof breads.
Why bother? Because wild yeast is incredible things! The taste and texture we can receive from breads and other baked items made with wild yeast are no contest to breads made with business yeast-- the tastes are more complex and intriguing, the texture is sturdier and more enjoyable to chew.
What Is a Sourdough Beginner?
A sourdough starter is how we cultivate the wild yeast in a type that we can utilize for baking. Considering that wild yeast exist in all flour, the easiest method to make a starter is just by combining flour and water and letting it sit for several days. You don't need any elegant components to "catch" the wild yeast or get it going-- it's currently there in the flour. (Also, the yeast adapts to whatever environment it remains in. Even if your cousin in San Francisco gives you some sourdough starter, it will eventually no longer be true San Francisco sourdough, however rather New York sourdough or Austin sourdough or London sourdough.).
After a day or 2, bubbles will begin to form in the starter, indicating that the wild yeast is starting to become active and increase. To keep the yeast pleased, we feed the starter with fresh flour and water over the next a number of days, up until the starter is bubbly and billowy. Once it reaches that frothy, billowy phase, the starter is all set to be used.
Ripe, bubbly starter, prepared to be used.
Using Whole-Grain Flours to Make a Beginner
This recipe utilizes routine, daily all-purpose flour, however you can definitely make sourdough using whole-wheat, rye, or any other kind of flour. Wild yeast is everywhere, after all!
If this is your first time making sourdough, I 'd advise beginning with all-purpose flour because it tends to behave the most naturally. If you're feeling all set to branch off, just begin feeding the starter with whatever whole-grain flour you wish to utilize for baking. Personally, I keep a continuous batch of all-purpose sourdough starter in my kitchen, and if I desire to make a rye starter or a whole-wheat starter, I scoop 1/4 cup from my all-purpose starter and use that as the seed for a new starter with the whole-grain flour.
How to Use This Beginner in Bread Recipes
This starter uses equal parts flour and water, a 1:1 ratio, which I find to be the most versatile for baking. To utilize this starter in any recipe, have a look at the ratio of flour and water the recipe is calling for in their starter. Next time you feed your starter, just feed it the ratio of water and flour required in the dish. If you want to stick more closely to the recipe's sourdough, simply dig 1/4 cup of your starter and feed it with the components required in your dish's starter.
When you're done with your dish, go back to feeding your starter equal parts flour and water.
Filling Slideshow ...
How To Make Your Own Sourdough Beginner
All-purpose flour (or a mix of all-purpose and entire grain flour)
Plastic wrap or clean kitchen towel
Directions (Overview)
Making sourdough starter takes about 5 days. Every day you" feed "the starter with equal amounts of fresh flour and water. As the wild yeast grows more powerful, the starter will become more frothy and sour-smelling. Typically, this procedure takes about 5 days, but it can take longer depending upon the conditions in your cooking area. As long as you see bubbles and signs of yeast activity, continue feeding it frequently. If you see no signs of bubbles after three days, have a look at the Fixing area below.
Making sourdough starter takes about 5 days. Each day you "feed" the starter with equivalent amounts of fresh flour and water. As the wild yeast grows more powerful, the starter will end up being more frothy and sour-smelling. Typically, this procedure takes about 5 days, however it can take longer depending upon the conditions in your kitchen. As long as you see bubbles and signs of yeast activity, continue feeding it routinely. If you see zero signs of bubbles after three days, have a look at the Troubleshooting section below.Day 1: Make
the Initial Beginner
4 ounces versatile flour (3/4 cup plus 2 tablespoons)
4 ounces water (1/2 cup)
Weigh the flour and water, and combine them in a 2-quart glass or plastic container (not metal). Stir intensely till combined into a smooth batter. It will appear like a sticky, thick dough. Scrape down the sides and loosely cover the container with cling wrap or a clean kitchen area towel secured with a rubber band.Place the container somewhere with a consistent room temperature level of 70 ° F to 75 ° F( like the top of the refrigerator) and let sit for 24 hours.Day 2: Feed the Beginner 4 ounces versatile flour(
3/4 cup +2 tablespoons) 4 ounces water (1/2 cup)
Have a look at the starter.
You might see a few small bubbles here and there. This is good! The bubbles indicate that wild yeast have started making themselves in the house in your starter. They will eat the sugars in the flour and release co2( the bubbles) and alcohol. They will also increase the level of acidity of the mixture, which helps ward off any bad bacterias. At this point, the starter should smell fresh, slightly sweet, and yeasty.If you don't see any bubbles yet, don't panic-- depending on the conditions in your cooking area, the average room temperature level, and other factors, your starter may simply be slow to get going.Weigh the flour and water for today, and add them to the starter. Stir strongly up until integrated into a smooth batter. It will look like a sticky, thick dough. Scrape down the sides and loosely cover the container with the cling wrap or cooking area towel secured once again. Location the container someplace with a constant space temperature of 70 ° F to 75 ° F( like the top of the fridge )and let sit for 24 hours.Day 3: Feed the Starter 4 ounces all-purpose flour (3/4 cup +2 tablespoons) 4 ounces water( 1/2 cup) Inspect your starter. By now, the surface area
of your starter ought to look dotted with bubbles and your starter must look visibly bigger in
volume. If you stir the starter, it will still feel thick and batter-like, however you'll hear bubbles popping. It should likewise start smelling a little sour and musty. Once again, if your starter doesn't look rather like mine in the image, don't worry. Offer it a couple of more days. My starter took place to be especially vigorous!Weigh the flour and water for today, and include them to the starter. Stir strongly until combined into a smooth batter. It will look like a sticky, thick dough. Scrape down the sides and loosely cover the container with the cling wrap or kitchen area towel protected again. Location the container somewhere with a constant space temperature of 70 ° F to 75 ° F( like the top of the refrigerator) and let sit for 24 hours.Day 4: Feed the Beginner 4 ounces versatile flour( 3/4 cup+ 2 tablespoons) 4 ounces water (1/2 cup) Check your starter. By now, the starter must be looking very bubbly with big and small bubbles, and it
will have doubled in volume. If you stir the starter, it will
feel looser than yesterday
and honeycombed with bubbles. It should also be smelling rather sour and pungent. You can taste a little too! It ought to taste sour and rather vinegary.When I made my starter here, I didn't discover much visual change from Day 3 to Day 4, but could inform things had development by the looseness of the starter and the sourness of the aroma.Weigh the flour and water for today, and add them to the starter. Stir vigorously up until integrated into a smooth batter. It will appear like a sticky, thick dough. Scrape down the sides and loosely cover the container with the plastic wrap or kitchen area towel
secured again. Place the container somewhere with a consistent room temperature of 70 ° F to 75 ° F( like the top of the fridge) and let sit for 24 hours.Day 5: Beginner is Prepared to Use Examine your starter. It needs to have doubled wholesale since the other day. By now, the starter need to also be looking really bubbly-- even frothy. If you stir the starter, it will feel looser than the other day and be totally webbed with bubbles. It needs to likewise be smelling rather sour and pungent.
You can taste a little too
! It ought to taste a lot more sour and vinegary.If everything is looking, smelling, and tasting good, you can consider your starter ripe and prepared to utilize! If your starter is dragging a bit, continue with the Day 5 and Beyond instructions.Day 5 and Beyond: Preserving Your Starter 4 ounces all-purpose flour( 3/4 cup+ 2 tablespoons )4 ounces water( 1/2 cup )As soon as your starter is ripe (or even if
it's not rather ripe yet), you no longer require to bulk it up. To keep the starter, dispose of (or usage) about half of the starter and after that" feed" it with brand-new flour and water: weigh the flour
and water, and combine them in the container with the
starter. Stir strongly until combined into a smooth batter.If you're utilizing the starter within the next few days, leave it out on the counter and continue discarding half and" feeding" it daily. If it will be longer before you utilize your starter, cover it securely and put it in the fridge. Keep in mind to take it out and feed it a minimum of once a week-- I also normally let the starter remain overnight to give the yeast time to recuperate prior to putting it back in the fridge.How to Lower the Amount of Starter Perhaps you don't need all the starter we've made here on a continuous basis. That's great! Dispose of half the starter as normal, but feed it with half the amount of flour and water. Continue till you have whatever amount of starter works for your baking habits.How to Take a Long Break from Your Starter If you're taking a break from baking, but desire to keep your starter, you can do 2 things:1 )Make a Thick Starter: Feed your starter double the amount of flour to
make a thicker dough-like starter. This thicker batter will maintain the yeast better over long periods of inactivity in the refrigerator.2 )Dry the Starter: Smear your starter on a Silpat and let it dry. When totally dry, break it into flakes and store it in an airtight container. Dried sourdough can be saved for months. To re-start it, liquify 1/4 cup of the flakes in 4 ounces of water, and stir in 4 ounces of flour. Continue feeding the starter
up until it is active again.Ready to make your first loaf? Start here! The Soul & Science of Sourdough Kitchn is partnering with Modernist Food, the dazzling masterminds behind a new masterwork dedicated to bread, Modernist Bread( November 7, The Cooking Laboratory ), in our series The Soul & Science of Sourdough. We're consumed with sourdough bread and how it mixes both soul and science, history and modernity, and we welcome you to find the magic of its principles together. Bread is a treasured part of life-- how can it suit yours? Discover this month at Kitchn!
0 notes
Link
Sorry, the title was suppose to be "Baking Bread in Kathmandu," but the typo is a lot more catchy.
Each Monday, my boss asks "Did you have a good weekend? What did you do?" Probably because we both came from jobs that occupied our weekend space, the novelty of weekends is still new to us.
My response is usually, "Went to the market, and baked bread."
That leaves room for lots of other activities such as exploring Kathmandu, or binge watching "A Handmaid's Tale".
Bread making is not labor intensive. It does not require a bread machine, lots of kneading, or lots of time. From start to finish it only takes about 14 hours! Most of the time however is waiting around for the little sourdough beasties to do their job.
I've written before about making Sourdough bread in California. This is a little bit better guide from Kathmandu.
I use a sourdough starter that originally came from Breadtopia via Amazon.com. For a couple of years now it has been cultivated here, so it may have acquired some characteristics of the locale.
I store the starter in the fridge in a closed Rubbermaid container. Glass in not a good idea if you have the container sealed as it could crack the glass container. The microbes in the dough thrive in the cold. Here's what it looks like when I open the container:
Hot mess of primordial bread gooeyness
After stirring the starter it looks more harmless:
Note the viscosity. Not that it is important... just note it.
My recipe calls for a quarter cup of starter. It is not a chemistry class, to paraphrase Jack Sparrow, a recipe is a "guideline, not a rule."
I pour the starter into one and a half cups of water.
Today I am making two loaves, so I repeated the process for each cup of water and then stirred the water/sourdough mixture.
Now it is time to feed the starter. For each loaf I am making, I add back to the starter one fourth cup of water and one third cup of flour.
Then mix and seal it back up and store it in the fridge.
Now it is time to mix the bread ingredients.
3 cups of flour.
One half cup of whole wheat flour.
One and a half teaspoons of salt:
One third cup of cracked wheat (bulgar is a-ok):
Then I whisked it all together:
Then I added the starter-water mix to the dry ingredients:
I spooned it together and then got my hands dirty making sure it is all mixed together.
If I have some dry ingredients not joining the rest of the mess, I might add a few drops of water, which I did it this case:
Without too much effort it will look like this:
Then it time to throw them into the garbage (just kidding).
I put the bowls into garbage bags and stored them overnight.
The next morning the dough has doubled in size (It's a live!) and I spread it out on a floured board:
I then folded the dough and let it rest (covered) for 15 minutes.
While the dough is resting, I got ready the "proofing" basket. This is where it will do a final rise before baking. I used a colander. I sprayed it with vegetable oil and added sesame seeds to it:
I rolled up the bread after it was done resting. I then added more sesame seeds to the outside of the dough:
Then I added it to the proofing basket:
Then covered:
I set a timer for 90 minutes and played a computer game with my brother.
After 90 minutes, I started up the oven and put in our Dutch oven. There is no temperature gauge on the oven, but if it went to 10, I would set it to eleven. It should be hot.
I set the timer for another 30 minutes.
At the end of that time, I dumped (literally) the dough into the Dutch oven. Covered the pot and put it back into the oven. The heat of the oven caused the dough to rise again.
After 30 minutes, it is time to remove the lid and put it back in the oven for 10 minutes.
After the 10 minutes, it was time to dump the bread onto the cooling rack:
Time to Eat!
Recipe:
1/4 cup of sourdough starter added to 1 and half cups of water
3 cups of unbleached bread flour
half a cup of whole wheat bread flour.
a third cup of cracked wheat
1 and half teaspoons of salt
Mix the water and starter together.
Then mix the dry ingredients
Then mix the wet and dry ingredients together. The mixture should be damp. Add water or flour as needed.
0 notes
Photo
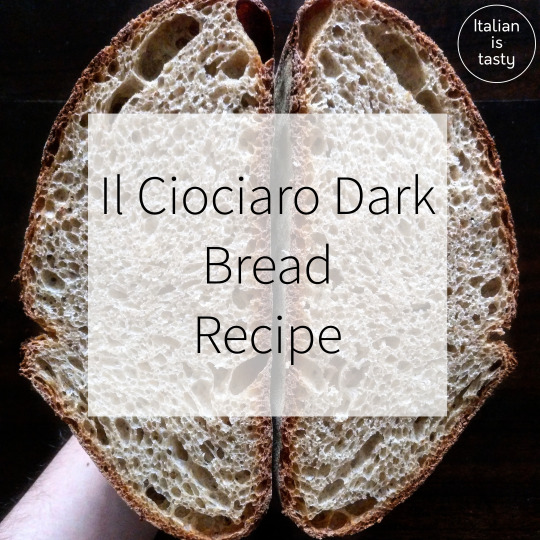
Il Ciociaro Dark sourdough bread recipe
Today I’m proudly presenting you the recipe of “Il Ciociaro Dark“ bread!
If you’re wondering why I’ve called it dark it’s because I didn’t use any white flour in it.
It’s for 3/4 semi-wholemeal wheat flour, 1/8 of wholemeal wheat flour and 1/8 of whole spelt. Hydration for this bread is 70%.
Let’s go straight to the ingredients:
300 grams of semi-wholemeal wheat flour
50 grams of wholemeal wheat flour
50 grams of whole spelt flour
280 grams of water
9 grams of salt
A teaspoon of honey
50-60 grams of refreshed sourdough starter (50% of hydration)
You will also need some tools:
A Cast Iron Double Dutch Oven
A proofing basket
Some steel bowls to help you mixing the dough and the sourdough
A large enough pastry board
A stainless steel dough chopper
Linen Cloth
Stainless razor for cutting the dough
I’m going to share you my full schedule in order for you to see how I handle my sourdough bread day.
11.00pm-12pm: Before sleep, sourdough refresh and autolysis
Into a large bowl I’m going to put all the flours and the salt, I’m going to melt the teaspoon of honey into the 280 grams of water and then I’ll pour it into the bowl. I’m gonna mix it everything by hand, I don’t want to work the dough too much here, I will stop as soon as the ingredients are all mixed up roughly. Cover the bowl using a transparent film.
Into another bowl I will refresh my sourdough. I take my sourdough out of the fridge and I’m going to put it into the bowl, I do add 50 grams of all purpose flour and 25 grams of water, I will mix everything by end until I have a smooth ball. Cover again with transparent film.
Cover both bowls with a cloth, just to be sure light doesn’t touch your dough!
Room temperature has to be no lower than 18 celsius degrees so put these bowls in a warm room, even the very room you sleep in.
8.00-8.30am: Coffee and bread mixing
Of course coffee isn’t part of this recipe, but it’s just part of my morning routine! Sourdough is mature, I’m going to split it the sourdough starter in two. One half is going back into the fridge for my next-time bread, the other one will go in the pot where I did put the dough in autolysis. Spread the sourdough starter over the dough surface, dig it a little using your fingertips.
At this point you wet your hand with water, you fetch the dough from below and you start folding it. Stretch the dough and fold it for 10 minutes at least, you want to create as many layers of sourdough starter as possible. Once you’re done, cover with a transparent film and then with a cloth, just like you did during the night.
8.00am-1.00pm: Folds and fermentation
Once you finished mixing your dough you wait 30 minutes, then you go back to your bowl, wet your hand, and you do 4 or 5 folds on your bread. You put the plastic film back to it’s place and also the cloth.
You do this 3 more times, each one every 30 minutes. So in the first 2 hours you are going to perform the whole folding 4 times.
The next folding is going to happen in 2 hours from now. As the time passes try to be more gentle since the fermentation proceeds and you don’t want to break it!
You are going to do the last folding step after 2 more hours, then you will turn your bowl onto the pastry board (not floured yet).
So we are going to do 6 folding steps spread across 6 hours, 4 foldings will happen in the first 2 hours, 1 fold after two hours and last one after 2 more hours.
1.00pm-1.30pm: Preshaping
Using just your stainless steel dough chopper (I suggest this one because dough doesn’t stick to it. Put the dough cutter below your dough and perform a counter-clockwise movement, making the dough rotate slightly. If your repeat this step 4-5 times you’ll notice your dough will stretch into a smooth ball. You let the dough rest like this for 30 minutes.
1.30pm: Shaping
Slightly flour the dough and the pastry board, using your dough chopper turn the dough upside down. Now there are several folds that you should apply depending on the shape of your dough. I use an oval proofing basket, so I take the edges of the shortest side of the dough, I bed them forming a triangle tip like, then I roll the dough putting the tip inside. I let the dough rest for 5 minutes. Then again, using my dough cutter I put the dough upside down onto a prefloured linen cloth, and then I put the whole linen cloth inside the proofing basked, I wrap the dough with the linen cloth, try to do a clean wrapping, fold the cloth in straight lines.
We’re going to let it rest from 3 to 4 hours, depending on how much the fermentation proceeds.
4.00pm-5.00pm: Lets warm up!
Turn on the oven, static mode, at 250 Celsius degrees, Put your combo cooker/dutch oven on a medium fire, for at least 15 minutes, after this time put it everything inside the oven. Once the oven has reached the temperature take the dutch oven out and open it, cover the lid with some flour, then put your dough inside it, place your hand below so it won’t fall abruptly. Using your razor perform a cut of your preference, for my oval dough I prefer a middle cut on parallel to the longer side. Cover the lid with the pot and put everything in the oven again, set temperature to 220 Celsius degrees and wait for 20 minutes.
After 20 minutes remove the pot from the lid, lower the temperature to 200 Celsius and wait for 30 more minutes.
Let it cool on a grid, so it will cool also on the bottom, for at least 3 hours.
Enjoy and let me know if you did like!
#recipeeng#bread#sourdoughbread#recipe#recipes#ricetta#realbread#crumbshot#photography#photographer#foodphotography#breadporn#baker#instabaker#bakery#italian#italy#italianistasty
1 note
·
View note
Photo
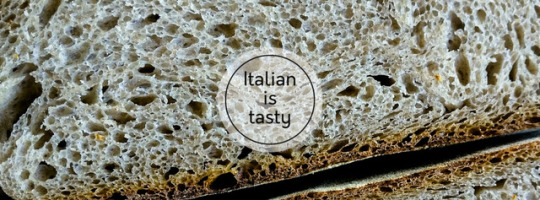
Sourdough Rye Bread Recipe
Finally I've been able to write down my own recipe for the Rye bread. Whole rye flour is weaker than wheat, I came to the conclusion that this is the best flour mix that enhances every flavor.
Tools: I can’t stress this enough, but in order to make a good sourdough bread, you need tools, and if you’re willing to make this recipe, you can’t skip having these ones. If you don’t have a Cast Iron device (link below) you’ll need a baking stone, at least, and after dropping your bread on it you’ll have to drop water on the oven’s lower surface in order to have some water’s steam inside and help you baking, You’ll need the baking stone to be inside the turned-on oven for at least one hour at maximum power.
A Cast Iron Double Dutch Oven
A stand mixing machine to help you knead the dough
A proofing basket
Some steel bowls to help you mixing the dough and the sourdough
A large enough pastry board
A stainless steel dough chopper
Linen Cloth
Stainless razor for cutting the dough
The ingredients
For the classic Ciociaro we’re going to use:
132 grams of whole rye
268 grams of bread flour (don't use a strong flour for this recipe)
280 grams of water
9 grams of salt
70-75 grams of refreshed, stiff, sourdough starter. If you need the recipe you can find it here. Refresh it using 50 grams of bread flour(the same you’re using for your bread) and 25 grams of water.
8.00-8.30 pm: Autolysis and sourdough starter refresh
Into a large bowl I’m going to put all the flours and the salt, I’m going to melt the teaspoon of honey into the 280 grams of water and then I’ll pour it into the bowl. I’m gonna mix it everything by hand, I don’t want to work the dough too much here, I will stop as soon as the ingredients are all mixed up roughly. Cover the bowl using a transparent film.Into another bowl I will refresh my sourdough. I take my sourdough out of the fridge and I’m going to put it into the bowl, I do add 50 grams of bread flour(the same you’re using for your bread) and 25 grams of water, I will mix everything by end until I have a smooth ball. Cover again with transparent film.Cover both bowls with a cloth, just to be sure light doesn’t touch your dough!Room temperature has to be no lower than 18 celsius degrees so put these bowls in a warm room, even the very room you sleep in.We’re going to wait 12 hours, this means that if you perform this step at 08.00 pm you’ll continue the morning after at 08.00 am.
8.00-8.30 am: Coffee and bread mixing
Of course coffee isn’t part of this recipe, but it’s just part of my morning routine! Sourdough is mature, I’m going to split it the sourdough starter in two. One half is going back into the fridge for my next-time bread, the other one will go in the pot where I did put the dough in autolysis. Spread the sourdough starter over the dough surface, dig it a little using your fingertips. If you want to add seeds, do it now, before kneading.At this point you wet your hand with water, you fetch the dough from below and you start folding it. Stretch the dough and fold it for 10 minutes at least, you want to create as many layers of sourdough starter as possible. Once you’re done, cover with a transparent film and then with a cloth, just like you did during the night.I suggest you, if you have it at home, to use a stand mixing machine. They simply perform better and quicker, and they are able to painlessly spread the sourdough started evenly through the dough.
8.00am-1.00pm: Folds and fermentation
This phase lasts for 6 hours, we are going to perform 3 folds and we’ll do one each two hours.
1.00pm-1.30pm: Preshaping
Using just your stainless steel dough chopper (I suggest this one because dough doesn’t stick to it. Put the dough cutter below your dough and perform a counter-clockwise movement, making the dough rotate slightly. If your repeat this step 4-5 times you’ll notice your dough will stretch into a smooth ball. You let the dough rest like this for 30 minutes.
1.30pm: Shaping
Slightly flour the dough and the pastry board, using your dough chopper turn the dough upside down. Now there are several folds that you should apply depending on the shape of your dough. I use an oval proofing basket, so I take the edges of the shortest side of the dough, I bed them forming a triangle tip like, then I roll the dough putting the tip inside. I let the dough rest for 5 minutes. Then again, using my dough cutter I put the dough upside down onto a prefloured linen cloth, and then I put the whole linen cloth inside the proofing basked, I wrap the dough with the linen cloth, try to do a clean wrapping, fold the cloth in straight lines.We’re going to let it rest from 3 to 4 hours, depending on how much the fermentation proceeds.
4.00pm-5.00pm: Lets warm up!
Turn on the oven, static mode, at 250 Celsius degrees, Put your combo cooker/dutch oven inside the oven for one hour, while it’s prewarming. After one hour take the dutch oven out and open it, cover the lid with some flour, then put your dough inside it, place your hand below so it won’t fall abruptly. Using your razor perform a cut of your preference, for my oval dough I prefer a half-moon cut on the longer side. Before covering place in the tall part of the dutch oven, the one we’re going to place on top, a spoon of water. Water will start to evaporate fast so cover the lid with the pot and put everything in the oven again, set temperature to 220 Celsius degrees and wait for 20 minutes.After 20 minutes remove the pot from the lid, lower the temperature to 200 Celsius and wait for 30 more minutes.Let it cool on a grid, so it will cool also on the bottom, for at least 3 hours.
Enjoy and let me know if you did like!
#bread#breadporn#italian#food#foodporn#tasty#italianistasty#myrecipe#recipes#ricetta#ricette#baker#bakery
0 notes
Last Seen Blogs