#linux mint download for virtualbox
Explore tagged Tumblr posts
Visit Tumblr Blog
Explore Tumblr blogs with no restrictions, modern design and the best experience.
Last Seen Tumblr Blogs


Fun Fact
When “GIF” was named word of the year in 2012, Oxford Dictionaries U.S.A. credited Tumblr for pushing the word.
Text
I didn't know this incredible shortcut! Did you? Linux is awesome! : linux
I didn’t know this incredible shortcut! Did you? Linux is awesome! : linux
Did you know that you can copy a file and paste it in a “File Open” dialog? (An Open Dialog is for example when in reddit you click the button Add Image in a post) It magically write the path to the file in the location bar! You juste press CTRL-V, that’s it! no need to click or select the location bar! At least it work on my distro which is Linux Mint Cinnamon. Does it work in all distros? Does…

View On WordPress
#linux academy terraform#linux commands in windows 10#linux distributions for developers#linux distributions list#linux mint download for virtualbox
0 notes
Photo


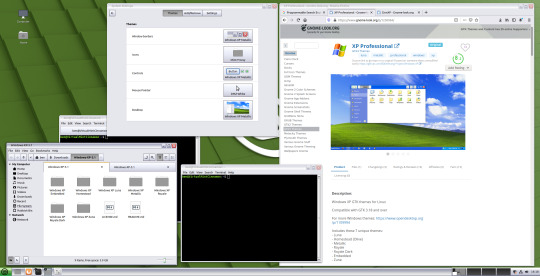


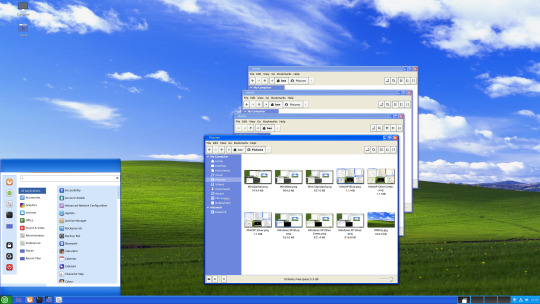

Using VirtualBox, I downloaded and added a new theme collection to Linux Mint Cinnamon 20 (64 bit). I went onto Pling.com and searched for a specific theme under the category GNOME Look. The theme I found and downloaded is called 'XP Professional’.
This theme mimics the 'Luna Visual Style' that came with Microsoft's popular 2001 operating system, Windows XP. Here is the link to the theme on Cinnamon Look:
https://www.cinnamon-look.org/p/1230964/
Please note the theme is designed only for Linux. I extracted the theme file and then dragged and dropped the un-extracted folders into the 'Themes' directory as a Root User (Linux version of Admin User on Windows). I went to change the system theme, and success, they all worked! It comes in the three standard colours including: Luna (Blue) Homestead (Olive Green) & Metallic (Sliver). It also comes with some additional theme colours including: Windows XP Embedded, Royal, Royal Dark & Zune. In this blog, I am presenting the 'standard' colours. These themes contain XML window borders, controls and desktop/panel layout themes, which are all designed in both GTK2+ and GTK3+. The windows have all of the effects such as bevel effects on the caption window buttons, active and Inactive colour gradients and all of the Graphical User Interface widgets used in Luna.
This theme also works well with GPU visual effects such as window animations and shadows. GNOME CSD (Client-side decorations) apps also theme, however the window buttons in the header bar appear a little squashed. The Mint Menu is also themed in the style of the classic two column Start menu seen in XP! I have chosen to use the built in Mint-Y icons for this theme as the colours look great combined.
The top picture shows the default Mint-Y theme that comes with Linux Mint 20. I also found a 4K version of the famous 'XP Bliss' wallpaper! All it needs is XP-era sound effects and then it will feel just like a modern version of Windows XP!
The Mint Cinnamon panel is set to show grouped applications instead of icons and text in the window list labels. Useful links: Linux Mint: https://en.wikipedia.org/wiki/Linux_Mint Windows XP Luna Theme: https://en.wikipedia.org/wiki/Windows_XP_visual_styles
In October 2021, Microsoft Windows XP will be 20 years old!
15 notes
·
View notes
Text
Actualizar openSUSE 15.2 a openSUSE 15.3
Actualizar openSUSE 15.2 a openSUSE 15.3 de manera sencilla. No vamos a hablar de las bondades de esta magnífica distribución Linux, pues muchos ya sabéis que es una de mis favoritas. OpenSUSE es una distribución diferente, potente, poderosa, fácil de usar, versátil y, con un funcionamiento como servidor empresarial que pocos le hacen sombra. La forma de operar de openSUSE no hace que su actualización, sea tan simple como en otras distribuciones linux, sobre todos las basadas en deb, como Ubuntu, Linux Mint, etc. Consciente de que existen muchas dudas y errores al respecto, hemos realizado una instalación limpia de openSUSE 15.2 con Ext4 y, la hemos actualizado a openSUSE 15.3 con un resultado satisfactorio. En este artículo verás como lo hemos hecho, de forma rápida y sencilla.
Actualizar openSUSE 15.2 a openSUSE 15.3 de forma sencilla
Actualizar openSUSE 15.2 a openSUSE 15.3
Antes de comenzar, verificamos que efectivamente tenemos instalada la versión 15.2. cat /etc/*release Ejemplo... localhost:~ # cat /etc/*release NAME="openSUSE Leap" VERSION="15.2" ID="opensuse-leap" ID_LIKE="suse opensuse" VERSION_ID="15.2" PRETTY_NAME="openSUSE Leap 15.2" ANSI_COLOR="0;32" CPE_NAME="cpe:/o:opensuse:leap:15.2" BUG_REPORT_URL="https://bugs.opensuse.org" HOME_URL="https://www.opensuse.org/" localhost:~ # Lo primero y muy importante, es deshabilitar los repositorios que no sean oficiales. Para ello desde YaST, accedemos a YaST Software Repositories.

Acceder a YaST Software Repositories Una vez en YaST Software Repositories, deshabilita los repositorios que no sean oficiales. Deja habilitados, solo los que ves en la siguiente imagen.
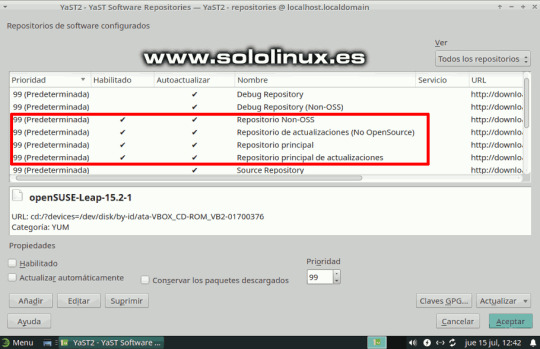
Repositorios habilitados de openSUSE Bien, una vez deshabilitados los repositorios no oficiales salimos de YaST. Abre la terminal y accede como superusuario. sudo su Ahora refrescamos los repositorios habilitados y actualizamos. zypper ref zypper up Verás un resultado similar al siguiente. localhost:~ # zypper ref Repository 'Repositorio Non-OSS' is up to date. Repository 'Repositorio principal' is up to date. Retrieving repository 'Repositorio principal de actualizaciones' metadata Building repository 'Repositorio principal de actualizaciones' cache ..... Repository 'Repositorio de actualizaciones (No OpenSource)' is up to date. All repositories have been refreshed. localhost:~ # zypper up Building repository 'Repositorio Non-OSS' cache ........................ Building repository 'Repositorio principal' cache ...................... Building repository 'Repositorio principal de actualizaciones' cache ... Building repository 'Repositorio de actualizaciones (No OpenSource)' cac Loading repository data... Reading installed packages... Nothing to do. Bueno, llego la hora de la verdad. Debes copiar la siguiente secuencia de comandos al completo y, pegarla en tu terminal. Lo que hacemos es modificar la versión 15.2 por la 15.3. Recuerda... copia todo completo y pégalo, si lo haces línea por línea no funcionara correctamente. files="$(zypper lr -u | awk -F'|' '$4 ~ /Yes/ { gsub (" ", "", $2); r="/etc/zypp/repos.d/"$3".repo"; print r }')" for f in $files do echo "Backup of $f saved to /root/ before patching it up ..." cp -f "$f" /root/ sed -i 's+/leap/15.2+/leap/$releasever+' "$f" sed -i 's+15.2.1+15.3+' "$f" sed -i 's+15.2+15.3+' "$f" done Debe quedar como la siguiente imagen.

Migrar openSUSE 15.2 a openSUSE 15.3 Refrescamos los repositorios, indicando que sean los de la nueva versión 15.3. zypper --releasever=15.3 ref Ejemplo... zypper --releasever=15.3 ref localhost:~ # zypper --releasever=15.3 ref Warning: Enforced setting: $releasever=15.3 Retrieving repository 'Repositorio Non-OSS' metadata ..................... Building repository 'Repositorio Non-OSS' cache .......................... Retrieving repository 'Repositorio principal' metadata ................... Building repository 'Repositorio principal' cache ........................ Retrieving repository 'Repositorio principal de actualizaciones' metadata Building repository 'Repositorio principal de actualizaciones' cache ..... Retrieving repository 'Repositorio de actualizaciones (No OpenSource)' met Building repository 'Repositorio de actualizaciones (No OpenSource)' cache All repositories have been refreshed. localhost:~ # Llagó el momento de la actualización real. Te recomiendo ser paciente, puede demorar hasta 45 minutos. zypper --releasever=15.3 dup Ejemplo... localhost:~ # zypper --releasever=15.3 dup Warning: Enforced setting: $releasever=15.3 Retrieving repository 'Repositorio Non-OSS' metadata ..................... Building repository 'Repositorio Non-OSS' cache .......................... Retrieving repository 'Repositorio principal' metadata ................... Building repository 'Repositorio principal' cache ............................................ Retrieving repository 'Repositorio principal de actualizaciones' metadata .................... Building repository 'Repositorio principal de actualizaciones' cache ......................... Retrieving repository 'Repositorio de actualizaciones (No OpenSource)' metadata .............. Building repository 'Repositorio de actualizaciones (No OpenSource)' cache ................... Loading repository data... Reading installed packages... Warning: You are about to do a distribution upgrade with all enabled repositories. Make sure these repositories are compatible before you continue. See 'man zypper' for more information about this command. Computing distribution upgrade... The following 156 NEW packages are going to be installed: alsa-plugins-speexrate alsa-plugins-upmix alsa-ucm-conf coreutils-doc cryptsetup-lang dirmngr evince evince-lang evince-plugin-pdfdocument file-roller file-roller-lang glibc-lang gnome-calculator gnome-calculator-lang gnome-desktop-lang google-poppins-fonts gspell-lang gtksourceview4-lang issue-generator kernel-default-5.3.18-57.3 kernel-default-extra kernel-default-optional kernel-firmware-all kernel-firmware-amdgpu kernel-firmware-ath10k kernel-firmware-ath11k kernel-firmware-atheros kernel-firmware-bluetooth kernel-firmware-bnx2 kernel-firmware-brcm kernel-firmware-chelsio kernel-firmware-dpaa2 kernel-firmware-i915 kernel-firmware-intel kernel-firmware-iwlwifi kernel-firmware-liquidio kernel-firmware-marvell kernel-firmware-media kernel-firmware-mediatek kernel-firmware-mellanox kernel-firmware-mwifiex kernel-firmware-network kernel-firmware-nfp kernel-firmware-nvidia kernel-firmware-platform kernel-firmware-prestera kernel-firmware-qlogic kernel-firmware-radeon kernel-firmware-realtek kernel-firmware-serial kernel-firmware-sound kernel-firmware-ti kernel-firmware-ueagle kernel-firmware-usb-network kmod-bash-completion libLLVM11 libatopology2 libavcodec58_134 libavformat58_76 libavutil56_70 libblogger2 libbrotlienc1 libcbor0 libcdio19 libcrypt1 libdav1d5 libebtc0 libevdocument3-4 libevview3-3 libfido2-1 libfido2-udev libgepub-0_6-0 libgnome-desktop-3-18 libgnome-desktop-3_0-common libgspell-1-2 libgtksourceview-4-0 libgtop-2_0-11 libgtop-lang libldac2 libmfx1 libmpath0 libndr1 libnftables1 libnss_usrfiles2 libpeas-loader-python libply-boot-client5 libply-splash-core5 libply-splash-graphics5 libply5 libre2-9 libswresample3_9 libtextstyle0 liburing1 libyui-ncurses-pkg15 libyui-ncurses15 libyui-qt-graph15 libyui-qt-pkg15 libyui-qt15 libyui15 login_defs man-pages-es metamail mokutil mpt-status nftables openSUSE-signkey-cert openssh-clients openssh-common openssh-server p7zip-full pam-doc pam_pwquality patterns-base-documentation patterns-base-sw_management patterns-yast-yast2_desktop perl-TermReadLine-Gnu perl-core-DB_File pipewire-lang postfix-ldap procinfo procmail python3-brotlipy python3-cairo python3-nftables python3-smbc rpm-config-SUSE ruby2.5-rubygem-mini_portile2 ruby2.5-rubygem-nokogiri setserial sharutils sharutils-lang spax star star-rmt sudo-plugin-python system-group-audit system-group-kvm systemd-default-settings systemd-default-settings-branding-openSUSE systemd-doc systemd-lang typelib-1_0-Libxfce4ui-2_0 typelib-1_0-Libxfce4util-1_0 typelib-1_0-Xfconf-0 virtualbox-kmp-default-6.1.22_k5.3.18_59.5-lp153.2.3.2 vlan xreader-plugin-comicsdocument xreader-plugin-djvudocument xreader-plugin-dvidocument xreader-plugin-epubdocument xreader-plugin-pdfdocument xreader-plugin-pixbufdocument xreader-plugin-psdocument xreader-plugin-tiffdocument xreader-plugin-xpsdocument yast2-trans-en The following 3 NEW patterns are going to be installed: documentation sw_management yast2_desktop The following NEW product is going to be installed: "openSUSE Leap 15.3" The following 22 packages are going to be REMOVED: exo-branding-openSUSE exo-helpers hardlink kernel-firmware kmod-compat libexo-1-0 libndr0 libre2-6 libxfce4panel-1_0-4 libxfce4ui-1-0 libyui-ncurses-pkg11 libyui-qt-pkg11 patterns-base-apparmor_opt patterns-base-enhanced_base_opt patterns-base-x11_opt python3-pycairo python3-pysmbc systemd-bash-completion typelib-1_0-libxfce4util-1_0 xfce4-statusnotifier-plugin xfce4-statusnotifier-plugin-lang xreader-backends --------------etc............
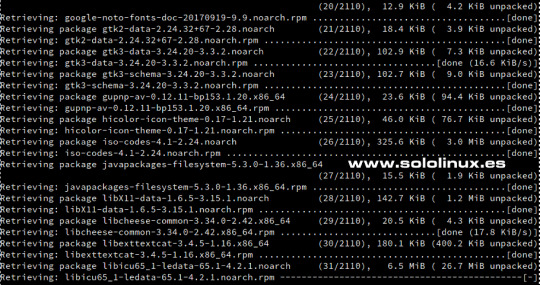
Descargar y actualizar los nuevos paquetes Al concluir todo el proceso, te pregunta si quieres reiniciar el sistema. Responde "Y". 1762 packages to upgrade, 192 to downgrade, 156 new, 22 to remove, 1667 to change vendor. Overall download size: 1.59 GiB. Already cached: 0 B. After the operation, additional 308.9 MiB will be used. Note: System reboot required. Continue? (y): Sorpresa!!!, al iniciar el sistema ya vemos que arranca openSUSE 15.3.
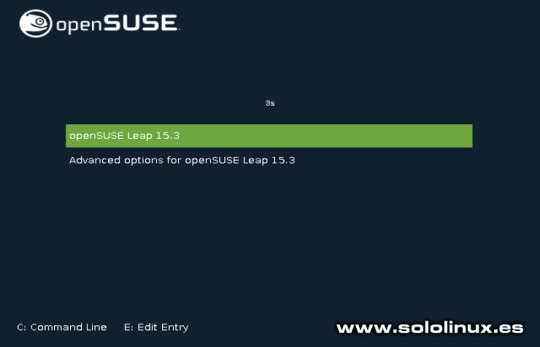
Iniciar openSUSE 15.3 Verificamos desde nuestra consola / terminal. cat /etc/*release El resultado es un exito. localhost:~ # cat /etc/*release NAME="openSUSE Leap" VERSION="15.3" ID="opensuse-leap" ID_LIKE="suse opensuse" VERSION_ID="15.3" PRETTY_NAME="openSUSE Leap 15.3" ANSI_COLOR="0;32" CPE_NAME="cpe:/o:opensuse:leap:15.3" BUG_REPORT_URL="https://bugs.opensuse.org" HOME_URL="https://www.opensuse.org/" localhost:~ # Ahora solo te falta modificar los repositorios no oficiales en YaST Software Repositories (aunque se hayan modificado automáticamente, debes verificarlos de forma manual). Una vez termines el proceso, los habilitas y actualizas de nuevo para concluir todo el proceso. sudo zypper ref sudo zypper up Canales de Telegram: Canal SoloLinux – Canal SoloWordpress Espero que este artículo te sea de utilidad, puedes ayudarnos a mantener el servidor con una donación (paypal), o también colaborar con el simple gesto de compartir nuestros artículos en tu sitio web, blog, foro o redes sociales. Chat de SoloLinux en Telegram Read the full article
#deb#distribucionlinux#IniciaropenSUSE15.3#opensuse#openSUSE15.2#openSUSE15.2aopenSUSE15.3#openSUSE15.2conExt4#openSUSE15.3#servidorempresarial#YaST#YaSTSoftwareRepositories
1 note
·
View note
Video
youtube
been thinking about how one can get started on linux with minimal resources too. i think using virtualbox is one good way to get started.
virtualbox is a pretty neat tool, it’s an app/software that emulates computers. one can create “virtual machines” within virtualbox... and... it’s sort of like running another (virtual/emulated/simulated) computer inside your own current computer/laptop/desktop. it’s really a great tool to run and test out all the different operating systems out there not only linux. it’s available for microsoft windows and macosx and it’s free and open source too!
things you need to get started with virtualbox is a computer/laptop/desktop with a 64 bit processor intel or amd, and although not necessary but good to have the processor should support virtualization. you’ll also need at least 16gigs or so of free hard drive space. and finally you’ll need the installation medium of the linux distro you want to install.
here’s the link to virtualbox’s main site
https://www.virtualbox.org/
here’s the download link:
https://www.virtualbox.org/wiki/Downloads
so far the above video via youtube by SavvyNik looks to be the best tutorial on how to get started with virtualbox. he also has follow up videos on how to install various different linux distros, all listed in the description. i’ll keep looking for more...
the linux distros i personally recommend for those who are just starting out are debian, ubuntu, linux mint. fedora and lately elementary os.
for ubuntu, i recommend the ubuntu “mate” flavor of ubuntu. or Xubuntu, the ubuntu flavor with the XFCE4 desktop enviornment installed and set up ready to go. both are relatively light on resources and run quick even in a virtual machine environment. both are similar to the windows microsoft desktop environment as well. i personally use ubuntu mate on desktops and xubuntu on laptops.
link to ubuntu mate download page:
https://ubuntu-mate.org/download/amd64/bionic/
link to Xubuntu:
https://xubuntu.org/download/
you’ll need to download the iso image and have it ready for virtualbox. for example the ubuntu mate image file will look something like this with .iso file extension:
ubuntu-mate-18.04.4-desktop-amd64.iso
other resources:
ubuntu flavors: https://ubuntu.com/download/flavours
fedora linux: https://getfedora.org/
linux mint: https://linuxmint.com/
elementary os: https://elementary.io/
article on how to install ubuntu linux under microsoft windows: https://itsfoss.com/install-linux-in-virtualbox/
well, i really suck at writing tutorials but i hope this is enough to get started. and if you really really want to transition to linux please don’t hesitate to contact me and ask me questions or get help... i have a lot of time lately. and i really really do wish more and more people move away from microsoft and apple to linux or other alternative open source operating systems! @arms-a-kimbo
3 notes
·
View notes
Text
BlackArch Linux is a penetration testing distribution based on Arch Linux. Its repository contains about 2808 tools that can be installed in groups or individually. These tools, developed along with their dependencies are used by penetration testers and security researchers around the world. In comparison, BlackArch Linux closely resembles Parrot and Kali Linux in use with the main difference being that this is an Arch-based system. BlackArch Linux can be installed in several ways. These include: ISO installation – BlackArch can be burned to a CD/USB and run as a Live system. The ISO installation offers two options: BlackArch Slim ISO: This ISO only provides the Xfce desktop environment. BlackArch Full ISO: Provides multiple preconfigured Window Managers. OVA image installation – This is the recommended method to install BlackArch on VMware, Virtualbox or QEMU Install to existing Arch Linux – It is possible to install and use BlackArch by adding the user repository to an existing Arch Linux installation. Here you can install and use the penetration testing tools just like you would do on any other BlackArch installation. By following this guide, you will be able to install BlackArch Linux on VirtualBox / VMWare Workstation using an OVA image. Getting Started. For this guide, you need to have VirtualBox or VMWare Workstation installed on your system. The dedicated guides below will help you install VirtualBox / VMWare Workstation on your system. Install VirtualBox How To Install VirtualBox on CentOS 8 / RHEL 8 Install VirtualBox on Debian How To Install VirtualBox on Fedora How To Install VirtualBox on Kali Linux / Linux Mint Install VirtualBox on Ubuntu Install VMware Workstation Install VMware Workstation on Debian Install VMWare Workstation on CentOS 8 Install VMware Workstation on Arch Linux / Manjaro Install VMware Player and Workstation on Kali Linux Once VirtualBox / VMWare Workstation is installed, proceed as below. Step 1 – Download the BlackArch OVA image The BlackArch OVA image can be downloaded from the official BlackArch Linux downloads page. There is a list of mirrors provided to help you download the OVA image easily. Alternatively, you can pull this 64 bit OVA image from the Linux terminal using Wget as below: wget https://mirrors.fosshost.org/blackarch/ova/blackarch-linux-2021.09.01.ova The download may take some time depending on the internet speed and the mirror selected. Once complete, proceed to the next step below. Step 2 – Create the BlackArch Linux Virtual Machine The BlackArch OVA file contains all the required BlackArch Linux Virtual Machine configurations. All you need to do is import the OVA file to VirtualBox / VMWare Workstation. 1. On VirtualBox To import the BlackArch OVA file on VirtualBox, click on Tools>Import. Proceed and load the downloaded OVA file from your local storage. Once loaded, all the preconfigured settings will be displayed as below. Proceed and import the OVA file. Next, agree to the License Terms. The OVA will be imported as below. Sit back and wait for the process to complete. Once done, you will have the BlackArch Linux VM created as below: You can customize the settings for your VM before you start it. 2. On VMWare Workstation VMWare Workstation also allows one to import a Virtual machine from OVA files. To achieve this, click on Open a Virtual Machine Now load the BlackArch OVA file and agree to the License Terms. Proceed and set the VM name and the preferred storage location. Sit back and wait for the importation process to complete. Once complete, the BlackArch Linux VM will be ready. Step 3 – Launch the BlackArch Linux Virtual Machine. At this point, you should have the BlackArch Linux Virtual Machine ready to be started/powered on. Start the Virtual Machine and proceed as below. Before you log in to your system, you can set the preferred desktop and language.
For this guide, I will keep the defaults. Login to BlackArch Linux using the default credentials: Username: root Password: blackarch Fill in the credentials as shown below: On successful login, you will see the below BlackArch Linux desktop. Launch tools by right-clicking on the desktop. For example, launching the terminal, I will proceed as below. Once the terminal has been launched, you can run the desired commands. To update the system, issue the command: pacman -Syu Sample output: Install a Package on BlackArch Linux List the available software categories pacman -Sg | grep blackarch Sample Output: You can as well list packages in a category, say in the blackarch-firmware as below: pacman -Sgg | grep blackarch-firmware Output: Installing a package on BlackArch Linux can be achieved in the following two ways: Install all the packages in a category It is possible to install all the packages in a category with a single command. For example, to install packages in the blackarch-firmware category, we will issue the command: pacman -S blackarch-firmware Output: Install an individual package with its name. You can also install a single package in a category by specifying the name, For example, to install the firmwalker offered in the blackarch-firmware category, use the command: pacman -S firmwalker Output: The end! We have successfully installed BlackArch Linux on VirtualBox / VMWare Workstation using the OVA image. You can now proceed and explore the amazing features offered by this Linux distribution. I hope you enjoyed it.
0 notes
Text
Virtualbox mac os x screen very small

VIRTUALBOX MAC OS X SCREEN VERY SMALL HOW TO
VIRTUALBOX MAC OS X SCREEN VERY SMALL INSTALL
This is the equivalent of pulling the power cord on a real computer. This is not recommended, unless you’re in a state where you cannot get the machine to function and this is the only way to shut the virtual machine down.
Finally, if you choose “Power off the machine”, this will shut down the machine as if the power had been suddenly turned off.
You will need to do this if you are changing any options for the machine, such as the hard disks or RAM or similar.
If you choose “send the shutdown signal”, it will try to gracefully shut the machine down.
Once saved, the window for the machine will disappear and you can close the VirtualBox application. This tutorial shows VirtualBox running on a Mac, but the steps should be very similar on a Windows-based PC.
VIRTUALBOX MAC OS X SCREEN VERY SMALL INSTALL
Thanks This tutorial walks you through the steps to install Linux Mint on VirtualBox. After you’re done with this, you may want to check out lesson 3 also.
VIRTUALBOX MAC OS X SCREEN VERY SMALL HOW TO
It will take a few moments to save the execution state of the running machine. In that post, I describe how to download and install VirtualBox. Choose “Save the machine state” if it is not already chosen. This will bring up a window that asks you what you want to do. Click the red Window Close icon in the upper left-hand corner of the virtual machine window.This requires some disk space, as it will make a complete copy of the virtual machine’s RAM before shutting down, but generally disk space is plentiful, and this will enable you to resume the machine whenever you want. One of the neat things about virtual machines is that you can just put them into “sleep” or hibernation mode. NOTE: You cannot make settings changes to a suspended machine, but I did want to throw this in, as this is the primary way to manage machines once you have the proper settings.
0 notes
Text
Panda wireless pau05 ps3

PANDA WIRELESS PAU05 PS3 FOR MAC OS X
PANDA WIRELESS PAU05 PS3 DRIVERS
Linux Driver for Panda PAU0A and PAU0B The above Linux driver is for Panda PAU0A and PAU0B only. Please download the latest Linux driver for Panda PAU0A and PAU0B: Wireless Controller For Ps3, Wireless Controller For Ps3 Suppliers Directory - Find variety Wireless Controller For Ps3 Suppliers, Manufacturers, Companies from around the World at sony dualshock 4.
PANDA WIRELESS PAU05 PS3 FOR MAC OS X
Mac Installer for Mac OS X 10.7/10.8/10.9/10.10 Mac Installer for Mac OS X 10.11 Mac Installer for Mac OS X 10.12 Mac Installer for Mac OS X 10.13 Mac Installer for Mac OS X 10.14 Warning: Don't use any OLD Mac Installer to install the software for Panda Adapter if your Mac is running macOS High Sierra (OS X 10.14).
PANDA WIRELESS PAU05 PS3 DRIVERS
Windows Driver for Panda Bluetooth 4.0 adapter Dual Band (2.4GHz & 5.0 GHz) Drivers for PAU07, PAU09, PAU0A and PAU0B Please download the Windows installer for Panda Bluetooth 4.0 USB adapter: Please download the latest driver for Linux: C), Intel® Dual Band Wireless-AC 3160 and Intel® Wireless 7260 Family. So I am trying to setup a wifi connection on my HP Laptop. I have the virtualbox extensions and when Im in kali, it detects the usb wireless adapter. The Mac installer for Mac OS X 10.3 is available upon request. In most cases, configuring a wireless Internet connection on Linux Mint is nearly automatic, requiring only a few steps. I got this wireless usb adapter with my new tv. Wikipedia has additional information on which chipsets and drivers are free software compatible. 11i) is security protocols for wireless communication. Note: We discontinued our support for Mac OS X 10.3. For a while TP-LINK TL-WN722N is one of the most popular Wi-Fi adapters that works well in wireless attacks with Kali Linux. Please send an email to if you have any question. Mac Installer for Mac OS X 10.4 Mac Installer for Mac OS X 10.5 and 10.6 Mac Installer for Mac OS X 10.7 and 10.8 Mac Installer for Mac OS X 10.9 Mac Installer for Mac OS X 10.10 Mac Installer for Mac OS X 10.11 Mac Installer for Mac OS X 10.12 Mac Installer for Mac OS X 10.13 Mac Installer for Mac OS X 10.14 Warning: Don't use any OLD Mac Installer to install the software for Panda Adapter if your Mac is running macOS High Sierra (OS X 10.13). Please download the latest installer for Mac OS X: Please download the latest installer for Windows: Windows 10 update: All Panda adapters are plug and play for Windows 10 and you don't need to install any driver for Panda adapters if your computer is running Windows 10.
0 notes
Text
Bluestacks 3 download youtube

#BLUESTACKS 3 DOWNLOAD YOUTUBE HOW TO#
#BLUESTACKS 3 DOWNLOAD YOUTUBE FOR MAC#
#BLUESTACKS 3 DOWNLOAD YOUTUBE APK#
#BLUESTACKS 3 DOWNLOAD YOUTUBE INSTALL#
Use the best download manager to boost your download speed so you can start the installation as soon as possible. Genymotion is the best Android emulator for any Linux distros like Ubuntu, Linux Mint, Debian, openSUSE and many more to date. You can even personalize its appearance on Ubuntu.
#BLUESTACKS 3 DOWNLOAD YOUTUBE INSTALL#
That means you can choose your platform of choice and still be able to run the GenyMotion Android emulator.Ĭhoose and install the latest Genymotion version. GenyMotion is compatible with Ubuntu (Linux), Windows, and Mac OS. It is fast, highly customizable and very easy to use. It is an open-source Android VM project (can use as Simple Android Emulator). Watch the below video to know how you can run Genymotion Android emulator in Ubuntu Linux. Recently, I was searching for great alternatives of BlueStacks for Linux. So what if BlueStacks is not available for Ubuntu? There are other Android emulators too which can help you to run Android games and app on your Linux Distro. Ubuntu should also have BlueStacks as well.īut we should not forget that BlueStacks is not the only Android emulator on the internet. Just like Windows and Mac have BlueStacks. It's just that I think it'd be good if they could make BlueStacks for Linux such as Ubuntu.
#BLUESTACKS 3 DOWNLOAD YOUTUBE APK#
I can run Android games such as Pokemon Go APK or apps like MX Player APK with BlueStacks on my PC and MAC. And so as all types of computers like Windows PC, Mac, and Ubuntu (Linux Machines). I own many computers as I'm a software developer. Download Android Emulator for LinuxGet GenyMotion for UbuntuDownload GenyMotion 圆4 Here Important Reminder:Īfter downloading the installer, follow the video tutorial to successfully install the Android emulator on your Ubuntu or other Linux-based OS.Īndroid Emulator For Linux to Run Android Apps and Games.Read the rest of the post to learn how you can run Android apps and games on Ubuntu.Contents1 Download Android Emulator for Linux It's really sad that BlueStacks don't have any Linux version. But at least, Mac users can use BlueStacks.
#BLUESTACKS 3 DOWNLOAD YOUTUBE FOR MAC#
They are, of course, Windows(the OS Giant) and MAC.īlueStacks for MAC don't get that frequent updates when we compare it with BlueStacks for Windows PC. If you have checked the official website of BlueStacks, then you already know that BlueStacks only have support for two major computer OSes. So we will talk about Ubuntu as a generalization rather than any other Linux distros like Linux Mint, Debian, openSUSE or anything else. Here I will be concentrating on Ubuntu Linux because most of the people will resonate with this Linux-based OS. So, today I will be discussing BlueStacks for Linux or specifically for Ubuntu. Find out how you can run Android apps on your computer using the best Android emulator for Ubuntu.
#BLUESTACKS 3 DOWNLOAD YOUTUBE HOW TO#
Learn how to download and install BlueStacks for Linux computer. If you just got started, I'll recommended Ubuntu, you can follow the guide installing Ubuntu on BirtualBox. First of all, to root BlueStacks this way you need VirtualBox and you have a Linux OS installed. For linux experts: If you know how to mount and modify.vdi without VirtualBox, skip to step 9. If you're someone who is looking for a replacement of Bluestacks, read on, as we bring to you our list of 7 best Bluestacks alternatives that you can try in 2021. However, Bluestacks has now become a memory hogger, is no longer stable, and offers bare minimum features. Bluestacks Player was the first and one of the best Android emulators.
1 note
·
View note
Text
Linode cloud firewall: Do you need it to protect the Linux server?
Linode cloud firewall: Do you need it to protect the Linux server?
Linode is an original cloud platform and founded before AWS. Back then, we used to call them VPS (Virtual Private Server). Recently they added a new firewall feature to control network access to my Linode server from the Cloud. Let us test drive Linode cloud firewall. What is a Linode cloud firewall? A firewall is nothing but simple rules that filters out malicious traffic reaching your Linux…
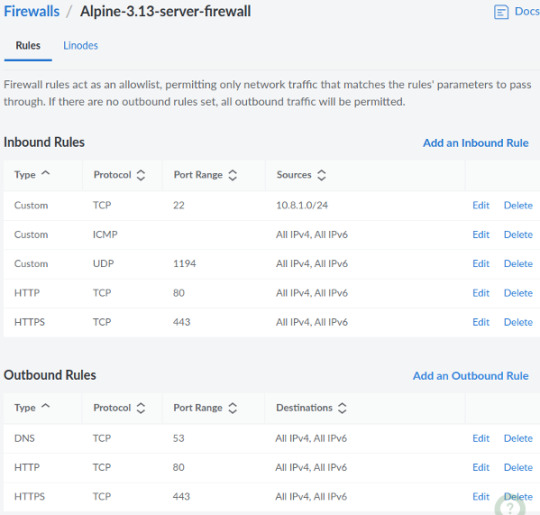
View On WordPress
#linux commands for beginners#linux find file newer than#linux kernel 5.8#linux mint 20#linux mint download for virtualbox
0 notes
Photo
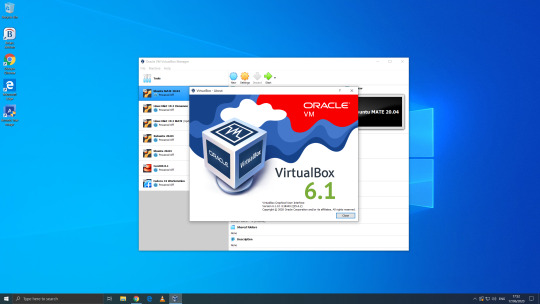


06.06.20
We went to the Oracle VirtualBox site and downloaded and installed VirtualBox 6.0. Oracle VM VirtualBox is free, open source virtual machine software maintained by Oracle Corp.
It was originally an Innotek product before Innotek was acquired by Sun Microsystems in 2008. Sun Microsystems was in turn acquired by Oracle in 2010. The alternative software to Oracle VM VirtualBox is VMware workstation.
I have been using Oracle VM VirtualBox since 2016 and have learnt a lot of information about how it works and how to install various operating systems.
Virtualbox can run Linux guest operating systems and Microsoft Windows guest operating systems. It can emulate both 64-bit operating systems and 32-bit operating systems.
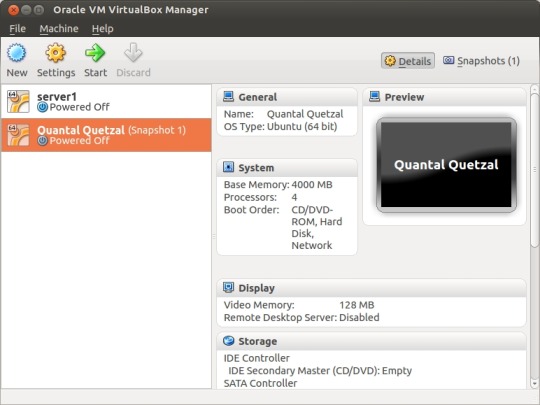
Each operating system you add to VirtualBox is treated as a Guest. The guest operating system is running in its own virtual environment, which emulates a real machine on your PC. This means that anything you do in it does not affect your PC. The guest runs in a console:
About the VBox console: The VirtualBox console displays the active virtual machine. It shows the virtual guest operating system activity icons in the status bar. The console can be re-sized, minimised and forced closed from the title bar. It is not recommended to force close an active guest operating system as this acts like switching off mains power. Your guest operating system should be shut down cleanly. You can select different viewing modes in the view list or use the shortcut keys assigned with them. These mode include full screen mode, seamless mode and scaled mode. VirtualBox website link: https://www.virtualbox.org/ VirtualBox wiki link: https://en.wikipedia.org/wiki/VirtualBox
After setting it up, I went to find some Linux-based operating systems to download. Each download is a disc image file with the file extension .iso.
I chose:
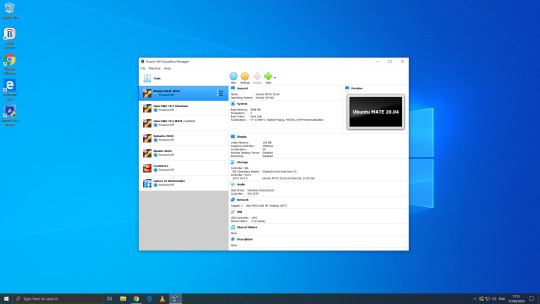
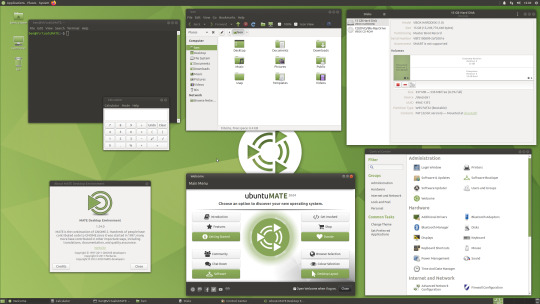
Ubuntu MATE 20.04 LTS (Long Term Support)
This operating system uses the MATE Desktop Environment, which is the continuation of the former GNOME 2 Desktop. I like this desktop environment because it has a very configurable interface.
Ubuntu MATE: https://ubuntu-mate.org/
Wiki link: https://en.wikipedia.org/wiki/Ubuntu_MATE
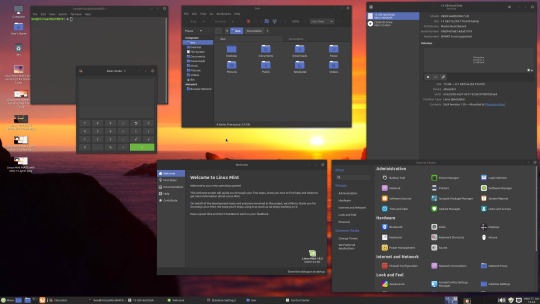
Linux Mint Cinnamon 19.3 Tricia (based on Ubuntu 18.04 LTS)
This operating system uses the Cinnamon Desktop Environment which is based on GNOME 3. Cinnamon uses MGSE (Mint Gnome Shell Extensions), which re-creates a more traditional desktop linux experience whilst also looking modern.
I like this desktop environment because it looks modern and feels familiar to those who come from Windows.
Linux Mint: https://www.linuxmint.com/
Wiki link: https://en.wikipedia.org/wiki/Linux_Mint
Linux Mint MATE 19.3 Tricia (based on Ubuntu 18.04 LTS)
Linux Mint edition featuring the MATE Desktop Environment. I like this desktop environment because like Ubuntu MATE, it is very configurable. It also features Linux Mints system updating utility.
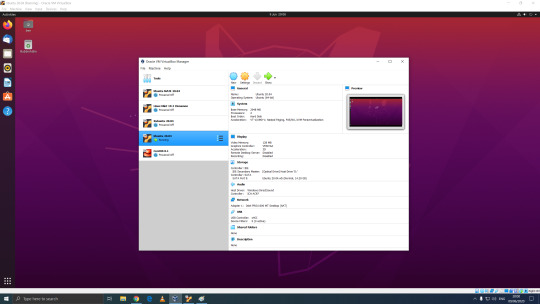
Ubuntu 20.04 LTS
This version of Ubuntu is the main version by Canonical Ltd. This operating system uses the GNOME 3 Desktop Environment.
Ubuntu came out in 2004 and used GNOME 2 as it’s desktop environment until 2011, when it changed to the now discontinued Unity Desktop. In 2017, Canonical announced it would return to GNOME. I like this desktop environment as unlike the GNOME 3 default interface, Ubuntu uses its own orange style theme and adds a Unity like dock on the left of the screen.
Ubuntu: https://ubuntu.com/
Wiki link: https://en.wikipedia.org/wiki/Ubuntu
Xubuntu 20.04 LTS
This operating system uses the XFCE Desktop Environment which aims to be lightweight on system resources and has a really configurable user interface. Xfce once stood for XForms Common Environment. The menu system is called the Whisker Menu. I like this desktop environment because like MATE it is very configurable.
The Ubuntu 20.04 Long Term Release is code named: Focal Fossa. All Ubuntu based distros use .deb (Debian Package Manager) for software installation.
Xubuntu: https://xubuntu.org/
Wiki link: https://en.wikipedia.org/wiki/Xfce
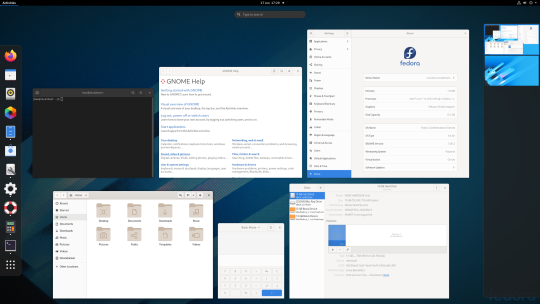
Fedora Workstation 32
Fedora is a Linux distribution developed by the community-supported Fedora Project which is sponsored primarily by Red Hat, a subsidiary of IBM, with additional support from other companies. Fedora is used by Linus Torvalds who is the creator of the Linux kernel.
Fedora is the upstream source of the commercial Red Hat Enterprise Linux distribution.
Since the release of Fedora 30, five different editions are currently available: Workstation, focused on the personal computer, Server for servers, CoreOS, focused on cloud computing, Silverblue, focused on an immutable desktop specialized to container-based workflows and IoT, focused on IoT devices.
I like this desktop environment because it looks fresh and modern. This operating system features the latest version of the GNOME Desktop Environment.
The screenshot of Fedora shows the ‘Activities’ dial screen which gives you a Visual overview of your GNOME Desktop.
With the Activities screen, you can see and control currently opened app windows, all installed applications, search system and switch desktop work spaces.
Fedora: https://getfedora.org/
Wiki link: https://en.wikipedia.org/wiki/Fedora_(operating_system)
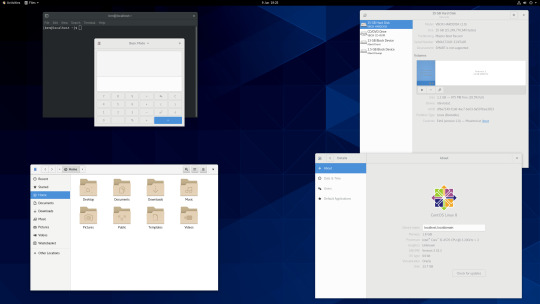
CentOS 8.1
CentOS (Community Enterprise Operating System) is a Linux distribution that provides a free, community-supported computing platform functionally compatible with its upstream source operating system, Red Hat Enterprise Linux (RHEL). It is maintained by The CentOS Project (affiliated with Red Hat). Both operating systems use GNOME 3 as their default desktop environment.
It is basically a free version of Red Hat Enterprise Linux, with the Red Hat branding removed and update servers pointing away from Red Hat servers.
Red Hat Enterprise Linux is a commercial focused Linux distro.
All Red Hat Linux based distros such as RHEL, CentOS and Fedora use .rpm (Red Hat Package Manager) for software installation.
CentOS and Red Hat Enterprise Linux can be installed on servers, workstations and desktops. Both are very popular on mission critical commercial server systems as it is designed to be flexible and very stable.
I thought this Linux distro is interesting because unlike the Ubuntu based distros above, installation of CentOS is more involved, you set up software sources, installed software, desktop and operating system components.
CentOS runs on a lot of web servers.
CentOS: https://www.centos.org/
RHEL:
https://www.redhat.com/en/technologies/linux-platforms/enterprise-linux
CentOS Wiki link: https://en.wikipedia.org/wiki/CentOS
RHEL Wiki link: https://en.wikipedia.org/wiki/Red_Hat_Enterprise_Linux
VirtualBox requires the installation of Guest Additions, which adds extra features to the virtual machine, such as the ability to scale the resolution of the guest operating system, better 3D acceleration and the ability to move files between the Guest and Host machine.
To install Guest Additions on a Linux guest, you will need to use the terminal. installation of this is different on .deb and .rpm builds of Linux.
4 notes
·
View notes
Text
Install VirtualBox 6.1.36 on Ubuntu 20.04 & Linux Mint
This tutorial will be helpful for beginners to install VirtualBox 6.1.36 on Ubuntu 22.04 LTS and Linux Mint. Virtualbox is an open-source application for running operating systems virtually in our base system and this application is available for multiple operating systems (ie) Windows, Linux, and macOS. It has a large number of features, high-performing software used at the enterprise level, and is licensed under the General Public License (GPL). It is developed by a community based on a dedicated company.
What's New in Virtualbox 6.1.36?
Please refer to the changelog URL
How to Install VirtualBox 6.1.36 on Ubuntu / Linx Mint?
Method 1: Via .deb package Deb packages are available for Ubuntu 22.04, Ubuntu 20.04, Ubuntu 18.04, Ubuntu 19.04, and Ubuntu 16.04, you can directly download the deb package from the link based on your version. Once it is downloaded, install the package via dpkg command sudo dpkg -i virtualbox-6.1_6.1.36-152435~Ubuntu~eoan_amd64.deb Method 2: Via Official Repository Step 1: Add the Official Repository echo deb https://download.virtualbox.org/virtualbox/debian $(lsb_release -cs) contrib >> /etc/apt/sources.list LinuxMint Users manually need to change the "(lsb_release-cs)" with Focal for 20.0X, bionic for 19.0X, and xenial for 18. x series. Step 2: Download the key and install it wget -O- https://www.virtualbox.org/download/oracle_vbox_2016.asc | sudo gpg --dearmor --yes --output /usr/share/keyrings/oracle-virtualbox-2016.gpg Step 3: Install Virtualbox 6.1 sudo apt update && sudo apt install virtualbox-6.1
Conclusion
From this tutorial, you have learned how to download and install Oracle VirtualBox on Ubuntu 22.04 and Linux Mint. Do let us know your comments and feedback in the comments section below. If my articles on TipsonUNIX have helped you, kindly consider buying me a coffee as a token of appreciation.

Thank You for your support!! Read the full article
0 notes
Text
Project 1 Solution
Requirements Download VirtualBox (click here), and the latest version of Linux Mint. Click here to download. Alternatively, use 32-bit or 64-bit Ubuntu or Debian. Click here to download. Download build essentials for linux as needed. If you are using Mint/Ubuntu/Debian type in sudo apt-get install build-essential. Download the proper version of Logisim. Be sure to use the most updated…

View On WordPress
0 notes
Text
Welcome to this guide on how to run Fedora CoreOS (FCOS) on VirtualBox. Fedora CoreOS is a minimal monolithic automatically updating operating system used to run containerized workloads. This operating system is designed for clusters but can as well operate as a standalone system, optimized for Kubernetes e.t.c The main goal of the Fedora CoreOS project is to provide the best container host that can run containerized workloads that are secure, highly compatible with existing Container Linux configuration, and scalable. This is achieved by combining the best of Fedora Atomic host and CoreOS Container Linux thus integrating technology such as the Ignition from Container Linux and SELinux hardening from the Atomic project. There are 3 available Fedora CoreOS update streams i.e testing, next and stable streams. For each stream, there is a canonical URL to represent its current state, normally in JSON format also referred to as the stream metadata. Fedora CoreOS can be run on VMware, Azure, AWS cloud, Alibaba Cloud, DigitalOcean, IBM Cloud, OpenStack, Vultr, QEMU, Bare Metal, VirtualBox e.t.c For VMware check the guide How To Run Fedora CoreOS (FCOS) on VMware Workstation Getting Started. For this guide, we will run Fedora CoreOS (FCOS) on VirtualBox. Before we begin, ensure that you have VirtualBox installed on your system. You can use one of the dedicated guides below to accomplish this: On CentOS/RHEL/Rocky Linux Install VirtualBox 6 on CentOS 8 / RHEL 8 On Debian Install VirtualBox 6 on Debian On Fedora How To Install VirtualBox 6 on Fedora On Kali Linux/Linux Mint How To Install VirtualBox 6 on Kali Linux / Linux Mint On Ubuntu Install VirtualBox 6 on Ubuntu Step 1 – Download Fedora CoreOS ISO. Fedora CoreOS ISO file can be downloaded from the official Fedora CoreOS downloads page. There are 3 release streams, the stable, testing, and next streams, download one that suits your interest. We recommend using stable channel release: wget https://builds.coreos.fedoraproject.org/prod/streams/stable/builds/35.20220131.3.0/x86_64/fedora-coreos-35.20220131.3.0-live.x86_64.iso -O fedora-coreos.iso Step 2 – Create a Fedora CoreOS VM on VirtualBox. Now we will proceed and create a Virtual Machine for Fedora CoreOS installation. There are two methods to use when creating a VM i.e using GUI or the vboxmanage CLI. We will proceed and set up a VM using the CLI as below. Export the VM name and set the VM storage location. VM_NAME='fcos-node' VM_DISK=$(realpath ~/VirtualBox\ VMs/$VM_NAME)/$VM_NAME.vdi Now set the VM OS type, assign memory, CPUs, graphics, and storage controllers as below. vboxmanage createvm --name "$VM_NAME" --ostype Fedora_64 --register vboxmanage modifyvm "$VM_NAME" --memory 4096 --cpus 2 --vram 20 --graphicscontroller vmsvga --rtcuseutc on vboxmanage storagectl "$VM_NAME" --name SATA --add sata --controller IntelAhci --portcount 30 --bootable on Create a hard disk and set the disk size(In the command 10 GB has been set for the disk size). vboxmanage createmedium --filename "$VM_DISK" --size 10240 --format VDI vboxmanage storageattach "$VM_NAME" --storagectl SATA --type hdd --port 0 --device 0 --medium "$VM_DISK" Modify the port forwarding rules to allow access to the SSH port for the guest. Using the default NAT setting. Assuming you will access SSH on port 2222 vboxmanage modifyvm "$VM_NAME" --natpf1 "guestssh,tcp,,2222,,22" Step 3 – Produce an Ignition Config. An ignition file is a JSON file that contains the user and SSH keys that allow you to gain remote access to the system. Create a config file say example.bu vim example.bu In the file add the lines below. variant: fcos version: 1.4.0 passwd: users: - name: core ssh_authorized_keys: - replace-me-with-public-ssh-key Remember to replace the replace-me-with-public-ssh-key with your actual SSH public key of your host machine obtained from the following command underssh_authorized_keys.
cat ~/.ssh/id_rsa.pub Now save the file and proceed to produce a YAML-formatted Butane config. We need to have butane running on our system. I will make this process simple by running butane as a Podman container. Ensure you have Podman/Docker installed on your system. See our guides below: Install Podman on Ubuntu Install Podman on Debian Install Podman on Fedora / CentOS / RHEL 7|8 Install Podman on Arch Linux / Manjaro Pull the butane image podman pull quay.io/coreos/butane:release Now generated the example.ign file using butane as below. podman run --interactive --rm quay.io/coreos/butane:release \ --pretty --strict < example.bu > example.ign Now you should have your ignition file example.ign Step 4 – Install Fedora CoreOS on VirtualBox. Now that everything has been provisioned, we will proceed and attach the ISO file downloaded for Fedora CoreOS. FCOS_DISK=$(realpath ~/Downloads/fedora-coreos.iso) vboxmanage storagectl "$VM_NAME" --name IDE --add ide --controller PIIX4 --hostiocache on --portcount 2 --bootable on vboxmanage storageattach "$VM_NAME" --storagectl IDE --type dvddrive --port 1 --device 0 --medium "$FCOS_DISK" Here I assume your ISO file is at ~/Downloads/fedora-coreos.iso Now you have successfully mounted the ISO file, proceed and start the VM Boot into FCOS live. Now you have access to the terminal On your host machine, start the Python3 webserver. python3 -m http.server Now from the FCOS VM terminal identify your gateway using the command route -n Proceed and pull the example.ign. Here, we are pulling the default Fedora CoreOS box from your route. curl -LO 10.0.2.2:8000/example.ign You should now have your ignition file in the VM. Run the FCOS installer as below. sudo coreos-installer install /dev/sda --ignition-file example.ign The installation will proceed as below. Once it is complete, shut down the VM. sudo shutdown -h now Unmount the Fedora CoreOS ISO file on the VM, and start the machine. vboxmanage storageattach "$VM_NAME" --storagectl IDE --type dvddrive --port 1 --device 0 --medium emptydrive vboxmanage startvm "$VM_NAME" Your machine should now boot into the installed Fedora CoreOS. In case you experience first boot problems, get error logs as below. VM_LOG=$(realpath .)/$VM_NAME.log vboxmanage modifyvm "$VM_NAME" --uart1 '0x3F8' '4' vboxmanage modifyvm "$VM_NAME" --uartmode1 file "$VM_LOG" Proceed and view logs. cat $(realpath .)/$VM_NAME.log Step 5 – Post Installation Basic Fedora CoreOS Configurations. Now once the system has successfully rebooted, log in using SSH as below. ssh core@localhost -p 2222 Sample Output: Now verify your installation by ensuring your machine can pull the docker registry and run containers. sudo docker run hello-world Sample Output: Using rpm-ostree on Fedora CoreOS Here are a few commands you should get familiar with: To show deployments in the order they appear, the first one is the default current state. $ rpm-ostree status State: idle AutomaticUpdatesDriver: Zincati DriverState: active; periodically polling for updates (last checked Thu 2021-12-09 12:22:23 UTC) Deployments: ● fedora:fedora/x86_64/coreos/stable Version: 35.20211119.3.0 (2021-12-04T18:14:15Z) Commit: 13af3774c363ffbf19d9cdf61f010f71686aced20c0f3e119ebe25e032f9bcab GPGSignature: Valid signature by 787EA6AE1147EEE56C40B30CDB4639719867C58F To upgrade the system and set it as default in the next boot rpm-ostree upgrade sudo systemctl reboot To roll back to the default deployment: rpm-ostree deploy Adding Layered Packages using rpm-ostree To add a layered package, use the syntax below. rpm-ostree install For example, you can install multiple packages as below. $ sudo rpm-ostree install git asciiquarium Checking out tree 13af377... done Enabled rpm-md repositories: fedora-cisco-openh264 fedora-modular updates-modular updates fedora updates-archive
⠁ Updating metadata for 'fedora-cisco-openh264' 0% [░░░░░░░░░░░░░░░░░░░░] (0⠙ Updating metadata for 'fedora-cisco-openh264' 95% [███████████████████░] (0⠚ Updating metadata for 'fedora-cisco-openh264' 100% [████████████████████] (0Updating metadata for 'fedora-cisco-openh264'... done Updating metadata for 'fedora-modular'... done Updating metadata for 'updates-modular'... done Updating metadata for 'updates'... done Updating metadata for 'fedora'... done Updating metadata for 'updates-archive'... done ⠲ Importing rpm-md 67% [█████████████░░░░░░░] (2s) ......... perl-overloading-0.02-482.fc35.noarch perl-parent-1:0.238-478.fc35.noarch perl-podlators-1:4.14-478.fc35.noarch perl-subs-1.04-482.fc35.noarch perl-vars-1.05-482.fc35.noarch Changes queued for next boot. Run "systemctl reboot" to start a reboot Verify the installation: $ git --version git version 2.33.1 At times the new layered package may fail to take effect, reboot your system. This is due to the atomic nature of the Operating system. sudo systemctl reboot Now proceed and verify the git installation. $ git --version git version 2.33.1 Voila! Conclusion. That was enough learning, we have successfully gone through how to run Fedora CoreOS (FCOS) on VirtualBox. I hope this guide was significant.
0 notes
Text
Oracle Virtualbox 32 Bit Download

Virtualbox 32 Bit Windows 7
Oracle Virtualbox Windows 7 32 Bit Download
In this video, I showed you how to download VirtualBox software 64 bit or 32 bit. You can download this VirtualBox software on Windows, Mac, and Linux OS as.
Oracle VM VirtualBox 6.1.0 free download, safe, secure and tested for viruses and malware by LO4D. Oracle VM VirtualBox for Windows 32-bit/64-bit.
Oracle VM VirtualBox Extension Pack. Free for personal, educational or evaluation use under the terms of the VirtualBox Personal Use and Evaluation License on.
Back to Oracle VM VirtualBox Manager, click on the new Ubuntu virtual machine and hit 'Start' button. Now you shall see a 'Welcome' screen. Click 'Install Ubuntu' button. Note that the installation process may differ a little bit from version to version. The screenshots here are based on Ubuntu 14.04.1.
List of VirtualBox Images
How to Install Windows 7 Ultimate 64 Bit on Windows 10 using VirtualBox 6. Microsoft released Windows 7 for personal computers, tablets, media devices, and laptops on October 22, 2009, after the Windows Vista system, both in terms of performance and security.
M = Minimal Installation / G = Graphical Installation
Image NameDownload LinkCentOS Stream 8Download (M - 0.6 GB / G - NA)CentOS 8.4.2105Download (M - 0.6 GB / G - 1.6 GB)CentOS 7.9.2009Download (M - 0.9 GB / G - 2.2 GB)CentOS 6.10Download (M - 0.6 GB / G - 2.1 GB)AlmaLinux 8.3 BetaDownload (M - 0.6 GB / G - 1.6 GB)Rocky Linux 8.4Download (M - 0.6 GB / G - 1.6 GB)Ubuntu 21.04Download (2.3 GB)Ubuntu 20.10Download (3.3 GB)Ubuntu 20.04.2 (LTS)Download (3.1 GB)Ubuntu 18.04.3 (LTS)Download (3.6 GB)Ubuntu 16.04.7 (LTS)Download (2.2 GB)Ubuntu 19.10Download (4 GB)Debian 11Download (1.4 GB)Debian 10.7.0Download (1.8 GB)Debian 9Download (2.1 GB)Fedora 34Download (2.5 GB)Fedora 33Download (3.1 GB)Fedora 32Download (4.5 GB)Fedora 31Download (7.4 GB)Linux Mint 20.1Download (2.5 GB)Linux Mint 19.3Download (4.3 GB)Linux Mint 19.2Download (5.2 GB)MX Linux 19Download (2.9 GB)MX Linux 19.3Download (2.2 GB)Manjaro 21.0Download (1.8 GB)Manjaro 20.2Download (2.9 GB)Manjaro 19Download (3.9 GB)Elementary OS 6Download (2.2 GB)Elementary OS 5.1Download (3 GB)Solus 4.1Download (3.7 GB)Solus 4.2Download (2.6 GB)Deepin 15.11Download (3.5 GB)Deepin 20.1Download (5.9 GB)KDE neon (20200326-1117)Download (2.5 GB)antix 19.1Download (2.1 GB)Kubuntu 21.04Download (2 GB)Kubuntu 20.10Download (3.8 GB)Kubuntu 20.04 (LTS)Download (3 GB)Pop!_OS 20.04 (LTS)Download (3.9 GB)Pop!_OS 20.10Download (3.1 GB)Linux Mint 20Download (3.5 GB)openSUSE Leap 15.2Download (2.2 GB)EndeavourOS 2021.02.03Download (2.5 GB)EndeavourOS 2020.09.20Download (3.8 GB)Lubuntu 21.04Download (1.8 GB)Lubuntu 20.10Download (2.3 GB)Lubuntu 20.04.1 (LTS)Download (3.5 GB)Lubuntu 18.04.5 (LTS)Download (2.3 GB)Arch Linux 2020.10.01Download (1.1 GB)Arch Linux 2021.01.01Download (1.3 GB)Android-x86 9.0-r2Download (32-Bit - 940MB / 64-Bit - 1 GB)Ubuntu Kylin 20.04 (LTS)Download (3.6 GB)Ubuntu Kylin 20.10Download (3.7 GB)ArcoLinux 20.11Download (2.9 GB)Kali Linux 2021.1Download (4.0 GB)Kali Linux 2020.04Download (4.1 GB)PCLinuxOS 2020.10Download (3.4 GB)Mageia 7.1Download (1.9 GB)Mageia 7.1Download (1.9 GB)Garuda Linux 201205Download (2.5 GB)Q4OS 3.13Download (1.3 GB)Zorin OS 15.3 CoreDownload (2.7 GB)Xubuntu 20.04.1 LTSDownload (2.2 GB)Ubuntu MATE 21.04Download (2.1 GB)Ubuntu MATE 20.10Download (2.8 GB)Ubuntu MATE 20.04.2 LTSDownload (2.7 GB)Ubuntu MATE 18.04.5 LTSDownload (2.7 GB)Peppermint 10Download (2.1 GB)Devuan 3.1.0Download (1.7 GB)Endless OS 3.9.0Download (5.0 GB)GeckoLinux 152.210223Download (1.8 GB)KaOS 2021.01Download (2.8 GB)KaOS 2021.01Download (2.8 GB)Artix Linux 20210101Download (1.8 GB)PureOS 9.0Download (1.6 GB)Parrot OS Security 4.10Download (3.8 GB)Feren OS 2021.01Download (2.1 GB)Ubuntu Studio 20.04.2 LTSDownload (3.1 GB)Bodhi Linux 6.0.0Download (1.3 GB)Linux Lite 5.4Download (1.9 GB)
Summary :
Virtualbox 32 Bit Windows 7
The VM VirtualBox is a free and open-source hosted hypervisor for x86 virtualization. The VirtualBox can be installed on your computer running Windows, macOS, or Linux. After that, you can try out any systems and applications on VirtualBox, without affecting your real system and data. For instance, you may install Windows 11 on VirtualBox.
Can You Install Windows 11 on VirtualBox
When you can't or don’t want to install Windows 11 Insider Preview build on your computer, you have another choice: try the new system in a virtual machine. You can install Windows 11 on VirtualBox or VMware Workstation if you’d like to experience its new interface, features and major changes, but don’ want to give up the current stable and secure Windows 10 system.
You'd better get to know the differences between VMware and VirtualBox in order to figure out which one is better for you - VMware or VirtualBox.
What Is VirtualBox

Developed by Oracle Corporation, VirtualBox is a powerful x86 and AMD64/Intel64 virtualization product for home and business use. VirtualBox is also known as a virtual machine or emulator that can be installed on a Windows, Linux, Macintosh, or Solaris host; and it allows users to install a large number of guest operating systems without affecting the host system.
Tip: You don’t need to worry about system crash, data loss, or any other problems while performing tasks in VirtualBox guest systems. But you should try your best to avoid such issues in the host system. If an important file is lost and you really need it back, you may use the following recovery software provided by MiniTool.
How to Install Windows 11 on VirtualBox
You should be aware of the fact that you’ll need the latest Oracle VirtualBox, the ISO file of Windows 11, and enough hardware resources on the physical computer to install Windows 11 in a virtual machine.
You may want to know how to install Windows 11 on VMware or other emulators in order to try out the new operating system.
Step 1: Download and Install VirtualBox
How to download VirtualBox:
Visit the download page of Oracle VM VirtualBox.
Click on the correct download link for your system.
Wait for the process to end.
How to install VirtualBox:
Navigate to the Oracle VM VirtualBox Setup file.
Double click on it and click Next.
Follow the on-screen instructions to continue and click Next.
Click Install, wait, and then click Finish.
You’d better also install the Oracle VM Virtualbox Extension Pack on your PC.
Step 2: Create a Windows 11 Virtual Machine
Oracle Virtualbox Windows 7 32 Bit Download
Double click on the Virtualbox.exe to run the VirtualBox.
Click on the New button in the right menu bar.
Specify the Name (type Windows 11), Machine folder, Type (choose Microsoft Windows), and Version (select Windows 10 64-bit).
Click Next.
Drag the slider to set memory to 4096 MB.
Click Next.
Select Create a virtual hard disk now and click Create.
Select VDI (Virtual Disk Image) and click Next.
Select Dynamically allocated and click Next.
Specify the File location and size (at least 64GB) and click Create.
Step 3: Download Windows 11 ISO
You can search for Windows 11 ISO and download it online since this file is already leaked. You should check your internet connection -> choose a folder to store the ISO file -> wait patiently while the file is downloading.
Get to know more details about how to download Windows 11 32/64 bit ISO file & how to install Windows 11:
This post mainly talks about the Windows 11 ISO file download (32 bit or 64 bit) and how to install Windows 11 properly on your PC.
Step 4: Configure the Windows 11 Virtual Machine
Select the Windows 11 virtual machine.
Click on the Settings button (next to New).
Select System, shift to Motherboard tab, and uncheck Floppy.
Shift to the Processor tab to increase the processors.
Select Display, shift to Screen tab, and increase the video memory (128MB).
Select Storage, choose Empty, and click on the disc icon after Optical Drive.
Click Choose/Create a Virtual Optical Disk.
Click Add, choose the Windows 11 ISO file, and click Open.
Click Choose.
Some users are wondering whether they can try Windows 11 online now, since the official release of Windows 11 is not out yet.
Step 5: Install Windows 11 in VirtualBox
Select the Windows 11 virtual machine and click Start.
Select Language to install and click Next.
Click Install Now.
Click I don’t have a product key.
Select the Windows 11 Edition you want and click Next.
Check I accept the Microsoft Software License Terms and click Next.
Select Custom: Install Windows only (advanced).
Click New -> allocate some disk space -> click Apply.
Select the new partition and click Next.
Wait till the end.
That’s all about how to install Windows 11 in Oracle VM VirtualBox.
1 note
·
View note
Text
Top 10 Apps for Linux in 2020
Linux is an open-source operating system that has many variations depending on the type of user. Ubuntu, Fedora, Kali, and Debian are some of the distributions available for any user to download. Linux is known as one of the best-operating systems mainly because of its open-sourced nature. This allows anyone to download the operating system and test software that runs on Linux. This also allows Linux to be one of the most secure operating systems as anyone can report a bug if it is found in the operating system. Thus hackers find it more difficult to crack through Linux than many other operating systems. Linux is also known to be light-weight which increases speed and allows older systems to run smoothly. Due to all these features, Linux makes a great alternative to Windows or Mac and is used by many developers to write applications on. For everyday use, Linux has many apps that boost your productivity and allow you to add more functionality to the operating system. Here are some of the best apps that you can install on your Linux system.
Firefox
Firefox is one of the world’s most popular internet browsers and comes as a default for many Linux distributions like Ubuntu and Linux Mint. Firefox has a simple and minimalistic user interface and retains its similarities from its Windows counterpart. Firefox can download various plugins which will allow you to play any kind of video format in your browser. Firefox is the best internet browser for any Linux system.
Thunderbird
If you want a powerful email client, you can’t go wrong with Thunderbird. Just like Firefox, Thunderbird is made by Mozilla. Thunderbird manages all of your inboxes in a crisp and organized manner. You can link as many accounts as you want and can fine-tune your preference with email settings that cater to specific email providers. It also provides a fully functional Calendar app that can organize your schedules easily.
LibreOffice
Windows and Mac systems boast their Microsoft Office and iWork, Linux has its own set of free and open-sourced office management tools and LibreOffice is one of the best among them. LibreOffice comes on par with all of the features provided by both Microsoft Office and iWork. It comes pre-installed on Ubuntu and comes with a whole set of other handy applications including Draw, Math, and Base.
VLC Media Player
While Linux natively has its video player, it can be easily replaced by VLC Media Player. Boasting features like Playback control, manual subtitles, and format conversion, VLC Media Player makes for a perfect video player. VLC Media Player also supports a lot of video files that aren’t necessarily supported by the built-in player.
Shotcut
Are you looking for a free video editor for Linux? Shotcut is a free video editor that works on many operating systems like Windows and macOS. It features 4K video editing and allows you to add various effects to your videos. While it may not compete with Final Cut or Adobe Premiere, it is handy for basic use that is suitable for an everyday user.
GIMP
GIMP (GNU Image Manipulation Program) is one of the best cross-platform image editing tools available for Linux. Right from re-touching your images to adding layers for a professional result, GIMP presents all of its robust features to the user in a simple and intuitive interface. GIMP is a good Photoshop alternative while being easy to use at the same time. GIMP is a free-of-charge application and is one of the best tools for Linux.
Audacity
Audacity is your answer to all the questions which involve audio. From becoming a multi-device recorder that can record from various channels to allowing you to professionally edit your music to enhance it using features like noise reduction. The file formats supported by Audacity include MP3, OGG, WAV, and many more. Tutorials on using Audacity can be found easily, thus making it your audio editing companion for Linux.
Visual Studio Code
If you are into coding, Visual Studio Code can be of great help. It changes your coding user interface which can normally get confusing very fast. Visual Studio Code is Microsoft’s free text editor which is supported by Debian and Red Hat. It also offers plugin support which means you can extend its functionality even further. It also changes the UI for the text editor which makes it ideal for coders who require text editors for their coding like Python.
VirtualBox
VirtualBox is your answer to running a virtual OS on your Linux system. If you miss your Windows or Mac system and want to use it simultaneously on your Linux system, VirtualBox can allow you to do that. It supports a variety of operating systems including DOS, Windows 3, Solaris, and OpenBSD. Developed by Oracle, the software is free-of-charge and also offers an Enterprise edition for your workspace solutions.
ClamAV
While Linux is known for its robust security features, there might be a possibility that harmful files are accidentally downloaded on your system. The files can spy on your data, thus compromising your security. Clam AV is an antivirus scanner that helps you find such files and eliminate them. ClamAV is usually run on servers but it can also be used on a Linux system. You can install ClamAV through the commands ‘clamtk’ and ‘clamtk-nautilus’ through Synaptic. This way you can scan individual files through the command line.
I’m Emma Justin . I’m a web developer living in USA. I am a fan of technology, entrepreneurship, and web development. I’m also interested in education and writing. You can visit my company website with a click on the button above.
Source: https://brownpilot.com/blog/top-10-apps-for-linux-in-2020/
0 notes
Photo
New Post has been published on https://techcrunchapp.com/linux-mint-20-final-has-been-released/
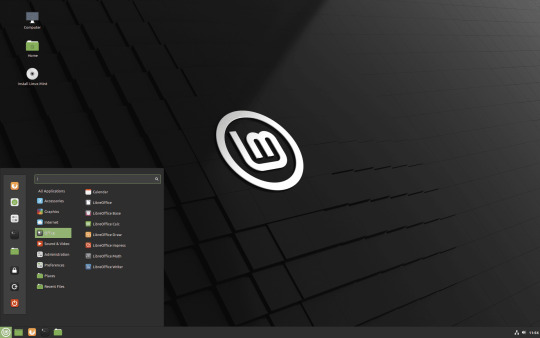
Linux Mint 20 Final has been released
The team behind the popular Linux distribution Linux Mint has released Linux Mint 20, codename Ulyana, to the public on June 27, 2020. The new version of the distribution comes in Cinnamon, MATE, and Xfce editions that users can install on their devices.
Updates to the new version will become available soon so that existing installations can be upgraded. Users may also download the latest version from the official project website or one of the official mirror sites to run a Live version or install it on a device.
The new release makes several major changes, including the dropping of 32-bit versions, the removal of Snapd, and the pulling of the graphics editor GIMP and the media player VLC.
Linux Mint 20 is based on Ubuntu 20.04, includes Linux kernel 5.4, and is supported until 2025.
Linux Mint 20: what is new

Linux Mint 20 ships with a new program that is called Warpinator. It is a reimplementation of the ancient tool Giver (which was included in Linux Mint 6) designed to share files across local networks. Giver development was discontinued and the program was removed from Linux Mint as a consequence.
The new application Warpinator revives the functionality. Basically, what it allows you to do is share files across devices that are connected to the same network. One of the main benefits of using Warpinator over convention means of sharing files is simplicity. Setting up FTP or Samba, or using external media to transfer files is quite cumbersome, either because of the configuration involved or the extra hardware that you need to use.
Warpinator displays the list of available computer systems right on start. You can click on a device to display additional information about it, and to transfer files to it; all without the need for other programs, cloud services, or third-party plugins.
The feature set is limited but that is on purpose. It includes sending and receiving files (accept/reject), option to connect to multiple systems, a file transfer history, and options to specify a port and download folder.
The new application is included in all three editions of Linux Mint.
What else is new and changed?
Linux Mint 20 comes with improved Nvidia Optimus support. The Nvidia widget displays the GPU rendered and it allows you to switch to different graphics cards, e.g. onboard Intel and Nvidia card, right from the menu.
The new release includes support for Nvidia On-Demand. The profile uses the onboard graphics adapter for the rendering and users may use new commands to offload the rendering:
nvidia-optimus-offload-glx
nvidia-optimus-offload-vulkan
Here is the list of other changes in the release:
XAppStatusIcon can handle mouse wheel scrolling events now.
Improvements to several XApps such as Xed or Xviewer.
Gdebi tool that is used to open and install .deb files has a new interface.
APT recommends are enabled by default for newly installed packages.
Live Sessions that run under Virtualbox are displayed in a resolution of 1024×768 or higher.
Various artwork and theme improvements.
Check out the official Linux Mint blog for additional information or head over to the main site for downloads.
Now You: Which Linux distribution do you use, and why?
Summary
Article Name
Linux Mint 20 Final has been released
Description
The team behind the popular Linux distribution Linux Mint has released Linux Mint 20, codename Ulyana, to the public on June 27, 2020.
Author
Martin Brinkmann
Publisher
Ghacks Technology News
Logo

Advertisement
0 notes