#macOS 10.13
Explore tagged Tumblr posts
Visit Tumblr Blog
Explore Tumblr blogs with no restrictions, modern design and the best experience.
Last Seen Tumblr Blogs


Fun Fact
Tumblr was attacked by a cross-site scripting worm deployed by the Internet troll group GNAA on Dec 3, 2012.
Text
舊版 macOS 傳出災情!Mac App Store 無法登入、下載購買 App
使用舊版 macOS 的 Mac 使用者最近可能發現一個令人頭痛的問題,那就是「Mac App Store 突然無法使用了」! 根據多為使用者回報,只要是在使用 macOS Mojave(即 macOS 10.14)或更舊的版本,可能會遇到無法登入、無法下載已購買 App,甚至無法存取商店的情況。 Continue reading 舊版 macOS 傳出災情!Mac App Store 無法登入、下載購買 App
0 notes
Note
Hey girl, are you MacOS 10.13??? Because, Hi Sierra!!!
(This sounded better in my head)
The biggest point against my name was that I shared it with a fucking macos version 🤮
But somehow I don't think "Ubuntu" is a normal, unassuming name
36 notes
·
View notes
Text
can't imagine this will be useful for anyone, but... my updated browser version api support notes:
sticky thead: firefox 59, chrome 91 es2020 ?. : firefox 74, chrome 80 ''.replaceAll(): firefox 77, chrome 85 regex lookbehind: firefox 78, chrome 62
MacOS 10.11 (~2008 Macs): Firefox 78; Chrome 103
es2021 ??= : firefox 79, chrome 85 overflow:clip: firefox 81, chrome 90 not(a, b): firefox 84, chrome 88 top-level await: firefox 89, chrome 89 dynamic import in content script: firefox 89, chrome ???? [].at(): firefox 90, chrome 92
avif images: firefox 93, chrome 85 storage.local.onChanged.addListener: firefox 101, chrome 73 mv2 scripting api: firefox 102 pale moon is firefox 102 mv2 non-persistent background page: firefox 106 mv3 basic support: firefox 109, chrome 88 [].findLast: firefox 104, chrome 97 manifest.json gecko_android: firefox 113 module workers: firefox 114, chrome 80 link rel=modulepreload: firefox 115, chrome 66
MacOS 10.12 (2009-2010): Firefox 115; Chrome 103
media query range: firefox 63, chrome 104
Windows 7/8: Firefox 115; Chrome 109
[].toSorted(): firefox 115, chrome 110 non-buggy image-set: firefox 113, chrome 113 color-mix: firefox 113, chrome 111
MacOS 10.13 (2009-2010): Firefox 115; Chrome 116
object.groupby: firefox 119, chrome 117 css &: firefox 117, chrome 120? css masks: firefox 53, chrome 120 permissions.request: fenix 120? :has(): firefox 121, chrome 105 mv3 service_worker and scripts: firefox 121, chrome 121
css color from: firefox 128, chrome 119? mv3 optional_host_permissions, many fixes: firefox 128, chrome 102 mv3 world: "MAIN": firefox 128, chrome 102 mv3 world: "MAIN" (in manifest): firefox 128, chrome 111
most firefox forks: Firefox 128
1 note
·
View note
Text
如何使用ProProctor参加考试?ProProctor帮答题服务方案讲解
如何使用ProProctor参加考试?全流程操作步骤一览ProProctor 是由 Prometric 提供的官方远程考试系统,适用于多种认证考试,包括金融证照、IT认证、语言考试等。要顺利参加 ProProctor 线上考试,必须严格按照其技术规范与流程执行。 以下是完整步骤: ✅ Step 1:系统设备准备 操作系统要求:Windows 10 或 MacOS 10.13+,不支持虚拟机 摄像头 + 麦克风:必须开启,全程监控考生行为 屏幕设置:仅可使用一个显示器,双屏将导致考试失败 网络环境:需稳定高速网络,建议独立Wi-Fi通道 ✅ Step 2:预约考试与安装客户端 在考试平台(如CompTIA、ISACA、AWS)完成报名 收到考试链接后,下载 ProProctor 客户端并完成设备兼容性检测 ✅ Step…
0 notes
Text
Price: [price_with_discount] (as of [price_update_date] - Details) [ad_1] this adapter is compatible with the folllwing MacBook Models: (Note: requires macOS 10.13 High Sierra or later) ★ MacBook Pro: ✔ MacBook Pro (15-inch Retina display Mid 2015)Model ID: MacBookPro11,5 (2.5GHz, 2.8GHz) ✔ MacBook Pro (13-inch Retina display Early 2015)Model ID: MacBookPro12,1 (2.7GHz, 2.9GHz, 3.1GHz) ✔ MacBook Pro (15-inch Retina Display 2014)Model ID: MacBookPro11,3 (2.5GHz, 2.8GHz) ✔ MacBook Pro (15-inch Retina Display 2014)Model ID: MacBookPro11,2 (2.2GHz, 2.5GHz, 2.8GHz) ✔ MacBook Pro (13-inch Retina Display 2014)Model ID: MacBookPro11,1 (2.6GHz, 2.8GHz, 3.0GHz) ✔ MacBook Pro (15-inch Retina Display 2013)Model ID: MacBookPro11,3 (2.3GHz, 2.6GHz) ✔ MacBook Pro (15-inch Retina Display 2013))Model ID: MacBookPro11,2 (2.0GHz, 2.3GHz, 2.6GHz) ★ MacBook Air: ✔ MacBook Air (13-inch Mid 2017)Model ID: MacBookAir7,2 (1.8GHz i5, 2.2GHz i7) ✔ MacBook Air (11-inch Early 2015)Model ID: MacBookAir7,1 (1.6GHz i5, 2.2GHz i7) ✔ MacBook Air (13-inch Early 2014)Model ID: MacBookAir6,2 (1.4GHz, 1.7GHz) ✔ MacBook Air (11-inch Early 2014)Model ID: MacBookAir6,1 (1.4GHz, 1.7GHz) ✔ MacBook Air (13-inch Mid 2013)Model ID: MacBookAir6,2 (1.3GHz, 1.7GHz) ✔ MacBook Air (11-inch Mid 2013)Model ID: MacBookAir6,1 (1.3GHz, 1.7GHz) ★ Mac Pro: ✔ Mac Pro (December, 2013) Model ID: MacPro6,1 (2.7GHz 3.0GHz, 3.5GHz, 3.7GHz) ★We have professional R&D team, will continue to launch new products to meet customer needs and, thank you for your supporting! (1) Strict Quality Control (100% Tested): In order to provide buyers with a pleasant shopping experience, YATENG each item has been carefully inspected and properly packed before sending out. (2)We have professional after-sale service team, any questions or problems from buyers will be answered within 24 hours (Including holidays). ➤ This NVME SSD Convert Adapter is DIY kit for assembling a upgraded SSD replacement for MacBook with large capacity NVME SSD ➤ It is compatible with MacBook Air 11” A1465 & MacBook Air 13” A1466 (Mid 2013-2017), MacBook Pro (Retina) 13" A1502 & 15" A1398 (Late 2013 - Mid 2015), Mac Pro ME253 MD878 ➤ Require macOS 10.13 High Sierra or Later; DO NOT compatible with earlier than macOS 10.13 versions. Please use your original SSD to upgrades your macOS before installation ➤ Used to upgrade your storage capacity, perfect for tech enthusiasts, high-end gamers, 4K & 3D content designers ➤ Support M.2 NVME/AHCI SSD such as Samsung 960 EVO, Samsung 970 EVO/PRO, WD Black, Crucial P1, HP EX920, ADATA SX8200, Intel 600p series NVME SSD and so on [ad_2]
0 notes
Text
Porting a Swift App from iOS to macOS
Introduction Porting a Swift app from iOS to macOS can be a challenging but rewarding experience. In this tutorial, we will guide you through the process of porting a Swift app to the desktop, covering the technical background, implementation guide, code examples, best practices, testing, and debugging. Prerequisites Swift 5.0 or later Xcode 11.0 or later macOS High Sierra (10.13) or…
0 notes
Text
Webcam Test | Check Camera Functionality and Quality
Refresh device listCopy all information to JSON
Horizontal resolution --
Vertical resolution --
Frame rate --
Zoom --
Focus modes --
Need to quickly run a webcam test? Our free camera test allows you to instantly check your webcam - both on your computer and smartphone! We don't require any additional software installation, and the entire process takes just a few seconds. It's the perfect solution before important video calls, online meetings, or video conferences.
Why Should You Test Your Camera?
Before an important online meeting - avoid stress and technical problems
After purchasing a new camera - verify it works correctly
Before a job interview - ensure everything works perfectly
After system updates - verify drivers are working properly
When experiencing image issues - quickly diagnose the source of the problem
How to Test Your Webcam?
Select device - from the dropdown list, choose the camera you want to test (built-in laptop camera, external USB camera, smartphone camera)
Start camera test - click the blue "Test Camera" button and follow the instructions. No software download required.
Grant access - access is blocked by default, you must grant it in your browser when prompted.
Check operation - after granting access, you should see the camera feed on screen. If you don't see it, check the troubleshooting solutions below.
What Does Our Online Webcam Test Check?
Camera functionality - whether the image is displayed
Real-time image display - whether there are any delays
Basic device functionality - whether the camera is detected
Browser compatibility - whether your browser works with the camera
Camera Test Applications
Our online camera test is particularly useful in the following situations:
Online job interviews - ensure everything works before an important job interview
Remote learning - check your camera before online classes or exams
Business meetings - test your equipment before an important presentation
Online medical consultations - ensure good connection quality with your doctor
Family video calls - ensure smooth communication with loved ones
Camera Test On Smartphone
Our camera test also works on mobile devices! You can easily check the operation of:
Front camera (for selfies and video calls)
Rear camera (main)
Additional lenses (wide-angle, zoom)
Common Camera Issues and Their Solutions
Why Isn't My Camera Working?
Camera not connected - check the physical device connection
Damaged cable - replace with a working cable
Device is turned off - check system settings
Camera is in use - close other applications using the camera
No permissions - allow browser access to the camera
Physical damage - contact service support
How to Resolve Camera Issues?
Check connection - ensure the camera is properly connected
Restart browser - sometimes a simple restart helps
Check privacy settings - both in system and browser
Update drivers - outdated drivers can cause problems
Clear cache - if the browser is running slowly
Camera Test Privacy Policy
All test operations are performed locally in your browser
We don't store any camera data
Device memory data is deleted when closing the page
Security - we don't send any data to the server
System Requirements for Webcam Test
Supported Browsers:
Google Chrome 60+ (PC, Android)
Mozilla Firefox 55+ (PC, Android)
Microsoft Edge 79+ (PC, Android)
Safari 11+ (Mac, iOS)
Opera 47+ (PC, Android)
Supported Systems:
Windows 8.1, 10, 11
macOS 10.13 and newer
Android 7.0 and newer
iOS 11.0 and newer
Linux - most popular distributions
Thanks to wide compatibility, you can check your webcam on desktop computers, laptops, as well as your smartphone or tablet. The online camera test works on virtually any modern device with internet access.
Camera Testing Tips
Ensure good lighting - helps in assessing image quality
Close other applications using the camera before testing
Test all cameras available on your device
Try different browsers if experiencing issues
Perform test before important meetings - avoid stress
How to Test Your Webcam?
Choose device - Select the camera you want to test from the dropdown list.
Start camera test - Click the blue 'Test camera' button and follow the instructions.
Grant camera access - Allow the browser to access the camera when prompted.
Check the image - After granting access, you will see the camera feed on screen.
Frequently Asked Questions
Does the camera test work on smartphones?
Yes! Our camera test is fully compatible with smartphones and tablets. You can check both front and rear cameras of your mobile device.
Why isn't the camera working?
The most common causes are: disconnected camera, damaged cable, device disabled in settings, camera being used by another application, lack of browser permissions, or hardware malfunction.
Do I need to install additional software?
No, our test works directly in the web browser. It doesn't require installation of any additional programs or plugins.
How do I check if the camera is working?
After clicking the blue 'Test camera' button and granting permissions, you should see the camera feed in real-time on your screen. If the image appears, the camera is working properly.
Which browsers are supported?
The camera test works on all popular browsers in their current versions: Google Chrome 60+, Mozilla Firefox 55+, Microsoft Edge 79+, Safari 11+, and Opera 47+.
Character Counter
Microphone Test and Audio Quality Analysis
Latitude and Longitude Finder on Map
Get Lat Long from Address
Where am I? Find my location now
Crop and Rotate Image Onlineineedtocheck.com
Need to quickly run a webcam test? Our free camera test allows you to instantly check your webcam - both on your computer and smartphone! We don't require any additional software installation, and the entire process takes just a few seconds. It's the perfect solution before important video calls, online meetings, or video conferences.
0 notes
Text
Historical Apple Bugs - FileVault Information Leak
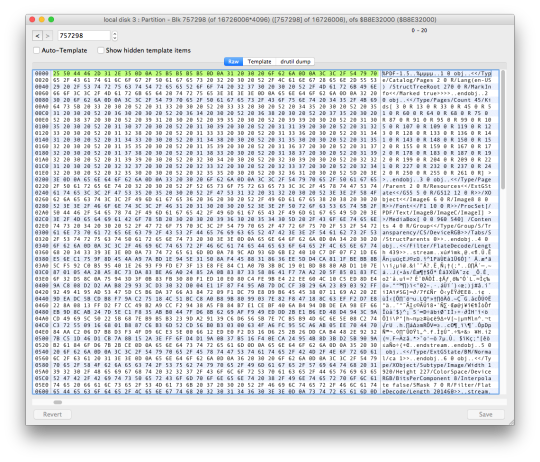
Some of you may recall the transition on MacOS 10.13 High Sierra to APFS. What some of you may not have been aware of was there was an information leak caused by this transition.
Okay Cases
If you were starting fresh on a clean new drive–no issues. If you were already encrypted with FileVault prior to moving to APFS again you are okay–no information leak.
Problem Case
If you upgraded an existing machine to APFS and then enabled FileVault–we have a problem. The issue stems from Apple choosing to move from an encryption scheme that encrypts sectors on disk to one that encrypts files. What ends up happening is any files you had previously deleted on your Mac were at least temporarily accessible even after encryption was enabled. This was a novel situation on the Mac since historically FileVault encrypted disk sectors not files. The transition here proved a bit rocky. The image above is an example of the problem.
This also posed a challenge for securely disposing of machines–because you could not use cryptographic data destruction–since you still had the possibility of plaintext data on disk.
0 notes
Text
Download the Latest Version of OrcaSlicer
Hey 3D printing enthusiasts!
If you're looking to enhance your 3D printing experience with a top-notch slicing tool, OrcaSlicer is an excellent choice. Here's a quick guide on how to download and install the latest version of orcaslicer from their official website.
What is OrcaSlicer?
OrcaSlicer is a powerful and user-friendly 3D printing slicing software developed to optimize the conversion of 3D models into G-code. It offers advanced features like an innovative slicing algorithm, easy-to-use interface, compatibility with a wide range of 3D printers, and more. Whether you're a beginner or an expert, OrcaSlicer helps you achieve high-quality prints with minimal effort.
Key Features:
Advanced Slicing Algorithm: Reduces printing time and efficiently converts complex models into G-code.
User-Friendly Interface: Designed to make your 3D printing tasks simpler and more enjoyable.
Wide Compatibility: Works with numerous 3D printers, including those from Bambu Lab.
Auto Calibration Tools: Includes tests for temperature, tolerance, flow rate, and retraction.
Remote Printer Control: Allows you to control your printer from your PC or laptop.
Free and Open Source: OrcaSlicer is free to use and licensed under the GNU Affero General Public License.
How to Download:
Visit the OrcaSlicer Download Page.
Select Your Operating System:
Windows: Download the .exe installer or .zip file.
Mac: Download the .dmg file compatible with Intel or Apple Silicon (M1/M2) with Rosetta 2.
Linux: Download the .AppImage file for various Linux distributions.
System Requirements:
Windows: Windows 7 or later, 64-bit processor, 4 GB RAM (8 GB recommended), 500 MB free disk space, OpenGL 2.0 or higher.
Mac: macOS 10.13 or later, Intel-based Mac or Apple Silicon, 4 GB RAM (8 GB recommended), 500 MB free disk space, OpenGL 2.0 or higher.
Linux: Modern Linux distributions, 64-bit processor, 4 GB RAM (8 GB recommended), 500 MB free disk space, OpenGL 2.0 or higher.
Installation Guides:
Windows: Run the .exe file and follow the on-screen prompts.
Mac: Open the .dmg file and drag the OrcaSlicer icon to the Applications folder.
Linux: Make the .AppImage file executable and run it from the terminal.
For more detailed instructions and troubleshooting, check out the FAQ section on the OrcaSlicer website.
Join the 3D printing revolution and download OrcaSlicer today to unlock a universe of next-level 3D printing!
Happy printing! 🚀
Source:
OrcaSlicer Download Page
OrcaSlicer FAQ
About OrcaSlicer
1 note
·
View note
Text
ProProctor考试设备要求!ProProctor破解方式&ProProctor助考
ProProctor考试设备要求具体有哪些?没准备好直接无法开考!ProProctor 是 Prometric 推出的远程考试平台,在技术限制和设备兼容性方面要求极为严格。很多考生因为设备配置不合格,甚至在考试当天临时无法登录系统、考试被迫取消,直接作废。 以下为2024年最新版 ProProctor 考试设备要求汇总: 类别要求💻 电脑系统Windows 10/11 或 MacOS 10.13+(不支持虚拟机/双系统)🔌 网络要求独立网络连接,Ping 延���低于 200ms,上传/下载 ≥ 1Mbps📸 摄像头内置或外接高清摄像头,角度需能完整拍摄头肩及桌面🎙️ 麦克风必须开启,系统全程监听,禁用等同违规🖥️ 屏幕仅允许一块显示器(双屏将被强制终止考试)🛠️ 其他限制禁止使用VPN / 远程桌面 / 虚拟环境 / 多用户登录等行为 ⚠️…
0 notes
Text
Price: [price_with_discount] (as of [price_update_date] - Details) [ad_1] Update your Macbook and No More Storage Limit If you have an older Mac and annoying with the slow original drive. You can enjoy the advantages of Dogfish PCIE SSD by upgrading your Mac. Upgrading with our MAC SSD would be more cheaper than replacing the system or your laptop. And it's simple to install, no need any professional skill. Our Macbook SSD is faster and more reliable. Based on PCIe Gen3*4, the read speed up to 1750MB/s and the write speed up to 1550MB/s. This means the programs launch and run more quickly, files are transferred faster, and you can do data-intensive work without worrying that your computer will stall or freeze. Run cooler and less power consumed, extend your Mac life. Less prone to damage due to shock and vibration without moving parts. Adopt non volatile storage technology that doesn’t require power to retain data. Don’t make any noise at allFeatures of M.2 NVMe SSD for Macbook Faster Transfer Speed The sequential read speed is up to 1750MB/s and the sequential write speed is up to 1550MB/s. Reliable Performance Support TRIM / S.M.A.R.T / Garbage Collection / LDPC ECC etc, let the nvme ssd has more stable and reliable performance. Wide Compatibility Compatible with Macbook Air 2013-2017, Macbook Pro Retina 2013-2015, and iMac 2013-2019.Specifications: Form Factor: M.2 Interface: PCIe 3x4 Flash Type: BGA TLC Sequential Read Speed: up to 1750MB/s Sequential Write Speed: up to 1550MB/s TBW (1TB): 608TBW Operating Voltage: DC 3.3V Operating Temperature: 0℃ to +70℃ Storage Temperature: -40℃ to +85℃ Humidity: 5% to 95%, non-condensing S.M.A.R.T: supported [Update for your MacBook]: You can replace the SSD to increase the capacity and processing speed to extend the life of your MacBook Air or Macbook Pro, iMac. Perfectly compatible with Mabook Air A1465 / A1466, Macbook Pro (Retina) A1502 / A1398, iMac A1419. [IMPORTANT NOTE] Before removal, your old original SSD needs to be updated to mac OS 10.13 or higher. If the original SSD was installed with the mac OS 10.12 or earlier, the new SSD will not be recognized after replacement. To reinstall macOS on the replaced SSD, Boot and press "Command+Option+R". Go into "macOS Utilities" to format SSD then install OS. [High Speed]: With Dogfish PCIE SSD, greatly upgrade your Macbook, read speed is up to 3500 MB/s, write speed 3000 MB/s (2TB). Faster boot times, faster application loading times and better system responsiveness, provide you a smoother experience in games or daily office. [Data Safety]: The nvme m.2 ssd run stablely and protect your datas well as the Encryption program. It is a good choice to save your video, pictures, Office data etc. in your computer. PS: Back up your original data, to avoid any failed installation. [Lifetime Warranty]: We provide lifetime warranty, if there are any problems with the Macbook Pro drive, please contact us freely and we will give you a satisfied solution. PS: Back up your original data, to avoid any failed installation. [ad_2]
0 notes
Text

UH1400P USB-C 8-in-1 Driverless Mobile Dock -K33820
UH1400P USB-C 8-in-1 Driverless Mobile Dock – K33820WW Best For: Highly mobile USB-C devices, requiring additional ports for accessories, as well as monitors and projectors that support up to 4K Connection Technology: USB-C Alt Mode Power Delivery: Supports USB-C PD 3.0 (up to 85W pass-through power) Compatibility: Chrome OS 44 or above, macOS 10.13 or above, Windows 7 or above, iPadOS 13.4 or above, Android OS 9 or later No. of Monitors Supported: 1 Video Ports: 1 x HDMI 2.0 For more info : https://luckyfalconcomputers.com/product/uh1400p-usb-c-8-in-1-driverless-mobile-dock-single-monitor/ Email – [email protected] WhatsApp -042662570
0 notes
Text
How to Download Roland ZENOLOGY

If you're a music producer seeking powerful and flexible synthesis tools, Roland ZENOLOGY is a must-have. Built on Roland’s ZEN-Core synthesis system, ZENOLOGY Pro is a fully unlocked sound design tool that offers incredible sound quality, efficiency, and deep customization options for creating inspiring new sounds. Whether you're using Windows or macOS, this guide will walk you through how to download and install ZENOLOGY, and highlight its key features that will elevate your production game.
Why Choose Roland ZENOLOGY Pro?
ZENOLOGY Pro offers a lifetime activation, giving you access to one of the most comprehensive and dynamic synth engines available in the market. It's not just about playing preset sounds; with ZENOLOGY, you can dive into deep sound design thanks to its multi-core synthesis and layered sound engine.
Here’s what sets ZENOLOGY Pro apart:
ZEN-Core Synthesis System: This ultra-flexible system allows you to combine multiple synthesis types, including oscillators, filters, amplifiers, and LFOs, providing virtually limitless sound creation potential.
Extensive Interface: ZENOLOGY features a resizable, clean, and intuitive interface. With multiple editing modes, users can tweak every aspect of their sound designs.
Multi-Part Sound Creation: Use up to four parts simultaneously, combining thousands of waveforms, 10 filter types, and 11 LFO shapes for unprecedented sound flexibility.
Stunning Effects: By blending powerful effects and deep modulation capabilities, you can create intricate, evolving soundscapes that will inspire any music project.
Technical Specifications
Before downloading ZENOLOGY, make sure your system meets the following requirements:
For macOS:
Operating System: macOS 10.13 or later
Format: VST3, AU
Hardware Requirements: Intel or AMD Multi-core CPU, 4GB RAM minimum
For Windows:
Operating System: Windows 10 or later
Format: VST3, AU
Hardware Requirements: Intel or AMD Multi-core CPU, 4GB RAM minimum
Step-by-Step Guide to Download Roland ZENOLOGY
1. Check Your System Compatibility
Before proceeding with the download, ensure that your computer meets the hardware and software requirements for ZENOLOGY. Make sure your OS is up to date and that your system has at least 4GB of RAM for optimal performance.
2. Visit the Official Download Page
To download ZENOLOGY, head over to the official product page via this link: Download ZENOLOGY Pro.
3. Choose the Right Version
ZENOLOGY is available for both macOS and Windows. Select the version that matches your operating system. You will be provided with a full unlocked version that includes lifetime activation, so there’s no need for further upgrades or additional purchases after downloading.
4. Install the Software
Once the download is complete, run the installation file. Follow the prompts to install ZENOLOGY on your computer. For macOS users, the plugin will install in the VST3 or AU format, while Windows users will install the VST3 format. Installation is straightforward and should only take a few minutes.
5. Activate ZENOLOGY
After installation, open your DAW (Digital Audio Workstation), and ZENOLOGY will automatically integrate as a plugin. When prompted, enter your activation code for lifetime access. Now you can dive into the ZEN-Core synthesis system and begin designing your sounds.
ZENOLOGY Pro: Unleashing Creativity
One of the standout features of ZENOLOGY Pro is its ability to handle complex sound designs with ease. Whether you're working on cinematic soundscapes or chart-topping electronic music, the ZEN-Core engine offers everything from traditional analog-style synth sounds to futuristic digital tones. You can experiment with layered synthesis, advanced modulation, and lush effects to create entirely new sonic textures that push your music forward.
For producers who value versatility, ZENOLOGY’s ability to manage up to four parts simultaneously opens up vast possibilities for blending and layering different sounds. The animated parameter controls give real-time feedback, helping you visualize changes in your sound design, which is crucial when crafting evolving, complex sounds.
Conclusion
Roland ZENOLOGY Pro is a game-changing tool for any producer looking to expand their sound design capabilities. With its rich feature set, stunning sound quality, and user-friendly interface, it’s an essential addition to your production setup. Download it today and start exploring the limitless possibilities of ZEN-Core synthesis!
0 notes
Text
macOS version history
macOS version history macOS 15 Sequoia, Fall, 2024 macOS 14 Sonoma, September 26, 2023 macOS 13 Ventura, October 25, 2022 macOS 12 Monterey, October 25, 2021 macOS 11 Big Sur, November 19, 2020 macOS 10.15 Catalina, October 7, 2019 macOS 10.14 Mojave, September 24, 2018 macOS 10.13 High Sierra, September 25, 2017 macOS 10.12 Sierra, September 20, 2016 OS X 10.11 El Capitan, September…
0 notes
Text
How to DownloadSilence+Other Sounds – Maleventum 2

How to Download AutoTune Bundle Pro X 2024: A Step-by-Step Guide
If you're a music producer, sound engineer, or simply an audio enthusiast, you're probably aware of the significance of AutoTune in modern music production. The AutoTune Bundle Pro X 2024 is the latest and most advanced version, bringing state-of-the-art pitch correction, vocal effects, and sound manipulation tools to your studio. Whether you're perfecting a vocal performance or adding stylistic effects to an instrument, AutoTune Bundle Pro X 2024 is a must-have. In this guide, we’ll walk you through how to download the AutoTune Bundle Pro X 2024 and optimize it for your music projects.
1. Choose a Reliable Source for Download
The first and most crucial step in downloading AutoTune Bundle Pro X 2024 is selecting a legitimate and reliable website. Make sure that you’re either purchasing it directly from Antares (the creators of AutoTune) or another trusted reseller. This ensures that you are receiving a legitimate license, access to software updates, and support if needed.
Visit the official Antares website to make sure you're downloading the authentic AutoTune Bundle Pro X 2024. Pirated versions often come with risks like malware, poor functionality, and even legal issues, so always choose verified sources.
2. System Requirements Check
Before downloading, make sure your system meets the necessary requirements to run AutoTune Bundle Pro X 2024 smoothly. The software supports both Windows and macOS, and you’ll need enough processing power, RAM, and disk space to handle its advanced features, especially if you’re running multiple plugins simultaneously.
Here’s a general rundown of the system requirements:
Operating System: Windows 10 or macOS 10.13 and above
Processor: Intel i5 or equivalent (recommended: i7)
RAM: Minimum 8GB (recommended: 16GB or more)
Storage: Minimum 2GB free space for installation
Plugin Format: VST3, AU, or AAX (check your DAW compatibility)
3. Sign Up or Log In to Antares
To access the download link, you’ll need to create an account on the Antares website if you don’t already have one. If you’re an existing user, simply log in. Once logged in, navigate to the product section, and find AutoTune Bundle Pro X 2024. Sound Download
1 note
·
View note
Text
Domingo de Login Screen 10


Los Login Screens de MacOS X sufrieron pocos cambios en las estas versiones: 29- MacOS X 10.11 al 10.13 (El Capitán, Sierra y High Sierra) 30- MacOS X 10.14 y 10.15 (Mojave y Catalina) 31- MacOS X 11 Big Sur 32- MacOS X 12 Monterey #retrocomputingmx #LoginScreen #mac #apple
0 notes