#opencv2
Explore tagged Tumblr posts
Visit Tumblr Blog
Explore Tumblr blogs with no restrictions, modern design and the best experience.
Last Seen Tumblr Blogs


Fun Fact
Tumblr has a 66 index score for customer satisfaction in the US.
Video
Using Deep Learning to detect a face. It gives much better accuracy as compare to OpenCV's Haar Cascades. ⠀ ⠀ Also, at the same time (in the background) building my custom dataset of images to further perform facial recognition and collect training data.⠀ ⠀ Thanks for Adrian @PyImageSearch for his amazing tutorials. ⠀ ⠀ ⠀ ⠀ #WeekEndGrind #WeekEnd #WeekEndProject #DeepLearning #AI #ArtificalIntelligence #MachineLearning #NerualNetwork #NN #CaffeNet #OpenCV #FaceDetection #FaceRecognition #DeepNeuralNetwork #DNN #ConvolutionalNeuralNetwork #CNN #CaffeNet #OpenCV2 #ComputerVision (at Brampton, Ontario) https://www.instagram.com/p/B5SaITAHJT5/?igshid=7s79ggft6z0u
#weekendgrind#weekend#weekendproject#deeplearning#ai#artificalintelligence#machinelearning#nerualnetwork#nn#caffenet#opencv#facedetection#facerecognition#deepneuralnetwork#dnn#convolutionalneuralnetwork#cnn#opencv2#computervision
2 notes
·
View notes
Text
Download opencv python for mac

DOWNLOAD OPENCV PYTHON FOR MAC HOW TO
DOWNLOAD OPENCV PYTHON FOR MAC INSTALL
DOWNLOAD OPENCV PYTHON FOR MAC CODE
DOWNLOAD OPENCV PYTHON FOR MAC INSTALL
Installing OpenCV on M1 MacBook Open Terminal on mac and run the following commands: Apple command line tools conda install -y python3.8.6.
DOWNLOAD OPENCV PYTHON FOR MAC CODE
OpenCV 3.2 + Python 3.6.1: imshow() not worked even with waitKey(0) #8885 I can confirm all my previously working C++ code now only shows macOS cocoa window autosize could not access image dimensions #8916. How can I solve this problem? OpenCV Version: 3.0.0 Pycharm Version: Conmunity Edition 2016.2.3 OS Problems installing opencv on mac with python. python3 virtualenv opencv dlib tensorflow keras.Īnd can use opencv normally. Setting up deep learning environment the easy way on macOS High Sierra I had to look around and experiment to install all the packages I was enjoying on Ubuntu. Learn about macOS Big Sur and any updates that are available for Login window may not display properly after restarting Mac mini (M1, macOS Big Sur 11.2 improves Bluetooth reliability and fixes the following issues.Īre you running into problems install OpenCV via Homebrew? To help you and other PyImageSearch readers get OpenCV installed faster (and with Figure 4: Importing the cv2 library into a Python 2.7 and Python 3 shell.
DOWNLOAD OPENCV PYTHON FOR MAC HOW TO
Vivek-ram changed the title how to install Pandas, opencv2 in M1 how to When I install open-cv with pip3 install opencv-python I run into following Python 3.9.5 is the newest major release of the Python programming Some of the new major new features and changes in Python 3.9 are: You can find a more comprehensive list in this release's "What's New" document. How to use OpenCV imshow() in a Jupyter Notebook - Quick Tip The problem is that the image box is using the same Python process as the Therefore it is not happy to wait for the window, and you lose control of the Python process. Why am I having issues running a file in P圜harm? Why are IDE's important when you can just use text editors and the built in terminal on a Mac? Homebrew prints out this export command for you after installing opencv, so you can just. For P圜harm pip install -no-binary opencv-python opencv-python. Mac OS Big I got cv2.imshow to show the image in a window when running Python in the terminal. markwimpory opened def show_image(image): destroyAllWindows(). IMShow No Window - 4.4.0.46 MacOS Big Sur #423. You will learn how to install OpenCV 4 on Raspbian Buster via both: To learn more about installing OpenCV 4 on the Raspberry Pi 4 and Raspbian for some projects (including many educational projects on and in macOS, and Linux (no dev environment configuration required!) The window should show a 512*512 black image, but it does show a In a different environment I think opencv-python is doing something wrong macOS Catalina 10.5.6 Anaconda July 2020 edition notebook 6.2.3. If you don't have homebrew on your system you can download and install it After installing Homebrew check if you have XCode Command Line Java Application project or open your existing application in IntelliJ Idea.Īfter executing imshow() and the opened window is displayed, loading does not stop. The quickest and easiest way to install OpenCV on your mac is to use Homebrew.
1 note
·
View note
Text
ESP32-CAM Stream per Python3 aufzeichnen

In diesem Beitrag möchte ich dir zeigen, wie du ein Stream der ESP32-CAM per Python3 aufzeichnen kannst.

Die ESP32-CAM habe ich dir bereits im Beitrag Einrichten der ESP32-CAM und erster betrieb vorgestellt und gezeigt wie man den Sketch / das Program "CameraWebServer" hochlädt.

Für diesen Beitrag verwende ich das Beispiel "CameraWebServer" ohne Änderungen.
Ermitteln der Adresse der ESP32-CAM
Die Adresse der ESP32-CAM kannst du entweder aus der seriellen Schnittstelle ablesen (in der Arduino IDE) oder du schaust in deinen Router.

Ausgabe der ESP32-CAM in der Arduino IDE
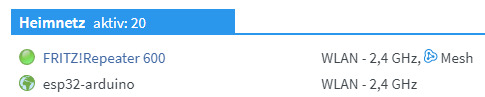
Eintrag der ESP32-CAM in der FritzBox Die Weboberfläche der ESP32-CAM kannst du über die IP-Adresse / den Namen des Gerätes und dem default HTTP Port 80 aufrufen. http://192.168.178.33:80 http://esp32-arduino:80 Den Port kannst du in diesem Falle weglassen, bzw. der Browser Google Chrome entfernt diesen von selbst.

Nachdem wir nun die Adresse der ESP32-CAM ermittelt haben, können wir den Stream entweder über die IP-Adresse inkl. des Seitennamens "/stream" aufrufen oder mit dem Namen des Gerätes. http://192.168.178.33:81/stream http://esp32-arduino:81/stream

Aufzeichnen mit OpenCV2
Auf der Seite How to Record Video in Python using OpenCV habe ich ein kleines Beispiel gefunden, welches sich mit sehr wenigen Anpassungen für die ESP32-CAM nutzen lässt. Datei 'requirements.txt' opencv-python~=4.5.5.64 requests~=2.27.1 Datei 'recordStream.py' ''' Beispiel von http://www.learningaboutelectronics.com/Articles/How-to-record-video-Python-OpenCV.php (kleinere Anpassungen durch mich) ''' import cv2 import time # IP Adresse der ESP32-CAM ipAdress = '192.168.178.33' # Streaming Adresse aufbauen streamAddress = 'http://' + ipAdress + ':81/stream' cap = cv2.VideoCapture(streamAddress) width = int(cap.get(cv2.CAP_PROP_FRAME_WIDTH)) height = int(cap.get(cv2.CAP_PROP_FRAME_HEIGHT)) filename = time.strftime("%Y%m%d%H%M%S", time.localtime()) + ".mp4" writer = cv2.VideoWriter(filename, cv2.VideoWriter_fourcc(*'DIVX'), 20, (width, height)) while True: ret, frame = cap.read() writer.write(frame) cv2.imshow('frame', frame) # ESC Taste zum Abbrechen if cv2.waitKey(1) & 0xFF == 27: break cap.release() writer.release() cv2.destroyAllWindows()

Video von OpenCV einer ESP32-CAM
Anpassen der Auflösung
Wenn man das obige Skript startet, dann wird die Aufzeichnung mit der Standardauflösung von 320x240 Pixel aufgenommen. Diese Auflösung kann man durch das Absenden eines Requests VOR dem Start der Aufzeichnung des Videos anpassen. Im nachfolgenden Code wird die Auflösung auf 1024x768 Pixel geändert. """ Index | Auflösung 13 | 1600 x 1200 12 | 1280 x 1024 11 | 1280 x 720 10 | 1024 x 768 9 | 800 x 600 8 | 640 x 480 7 | 480 x 320 6 | 400 x 296 5 | 320 x 240 4 | 240 x 240 3 | 240 x 176 2 | 176 x 144 1 | 160 x 120 0 | 96 x 96 """ import requests ipAdress = '192.168.178.33' requests.get('http://'+ipAdress+'/control?var=framesize&val=10') Möchte man nun eine Auflösung von zbsp 640x480 Pixel (VGA) einstellen, so muss man den Index 8 absenden.
Modifikation 1 - beenden nach X Sekunden
Wenn das Skript soll sich selbständig nach einer Zeit X beenden soll, so muss man während der Laufzeit die Sekunden aufzeichnen und dieses mit einer maximalen Zeit vergleichen. ''' Beispiel von http://www.learningaboutelectronics.com/Articles/How-to-record-video-Python-OpenCV.php (kleinere Anpassungen durch mich) ''' import cv2 import time # IP Adresse der ESP32-CAM ipAdress = '192.168.178.33' # Streaming Adresse aufbauen streamAddress = 'http://' + ipAdress + ':81/stream' cap = cv2.VideoCapture(streamAddress) width = int(cap.get(cv2.CAP_PROP_FRAME_WIDTH)) height = int(cap.get(cv2.CAP_PROP_FRAME_HEIGHT)) filename = time.strftime("%Y%m%d%H%M%S", time.localtime()) + ".mp4" writer = cv2.VideoWriter(filename, cv2.VideoWriter_fourcc(*'DIVX'), 20, (width, height)) # Zeit wann das Skript gestartet wurde in Sekunden start_time = int(time.time()) # Maximale Aufnahmezeit in Sekunden time_max = 10 # vergangene Sekunden time_elapsed = 0 while True: ret, frame = cap.read() writer.write(frame) cv2.imshow('frame', frame) if cv2.waitKey(1): if time_elapsed > time_max: break if (time.time() - start_time) - time_elapsed > 0: time_elapsed = time.time() - start_time # ESC Taste zum Abbrechen if cv2.waitKey(1) & 0xFF == 27: break cap.release() writer.release() cv2.destroyAllWindows()
Modifikation 2 - beenden nach X Byte
Man kann auch das Skript nach X Byte beenden, bzw. eher nach X Kbyte. Dazu müssen wir zusätzlich das Modul "os" importieren von welchem wir die Funktion "os.path.getesize" verwenden können um die Dateigröße (in Byte) zu ermitteln. ''' Beispiel von http://www.learningaboutelectronics.com/Articles/How-to-record-video-Python-OpenCV.php (kleinere Anpassungen durch mich) ''' import cv2 import time import os # IP Adresse der ESP32-CAM ipAdress = '192.168.178.33' # Streaming Adresse aufbauen streamAddress = 'http://' + ipAdress + ':81/stream' cap = cv2.VideoCapture(streamAddress) width = int(cap.get(cv2.CAP_PROP_FRAME_WIDTH)) height = int(cap.get(cv2.CAP_PROP_FRAME_HEIGHT)) filename = time.strftime("%Y%m%d%H%M%S", time.localtime()) + ".mp4" writer = cv2.VideoWriter(filename, cv2.VideoWriter_fourcc(*'DIVX'), 20, (width, height)) # Maximale Dateigröße in Kilobyte (hier 500 Kb) max_filesize = 1024 * 500 while True: ret, frame = cap.read() writer.write(frame) cv2.imshow('frame', frame) if cv2.waitKey(1): # Auslesen der Dateigröße filesize = os.path.getsize(filename) # Wenn die Datei größer ist als das Maximum dann Abbrechen if filesize > max_filesize: break # ESC Taste zum Abbrechen if cv2.waitKey(1) & 0xFF == 27: break cap.release() writer.release() cv2.destroyAllWindows() Read the full article
0 notes
Text
Detect OpenCV Version in C++
Detect OpenCV Version in C++
#include <opencv2/imgproc.hpp> int main() { printf("%s\r\n", CV_VERSION); printf("%u.%u.%u\r\n", CV_MAJOR_VERSION, CV_MINOR_VERSION, CV_SUBMINOR_VERSION); return 0; }
View On WordPress
0 notes
Text
OpenCV 4.2.0 C++ split/merge
#include <opencv2/core.hpp> #include <opencv2/imgcodecs.hpp> #include <opencv2/highgui.hpp> #include <opencv2/imgproc.hpp> #include <iostream>
using namespace cv; using namespace std;
int main(int argc, char **argv) { Mat rgb,bgr,channels[3]; vector<Mat> ichannels;
rgb = imread(argv[1], IMREAD_COLOR); split(rgb,channels); ichannels = {channels[2],channels[1],channels[0]}; merge(ichannels,bgr);
imshow("BGR",bgr); waitKey(0); }
0 notes
Text
OpenCV 4.5.1 を Visual Studio 2019へ導入(Win10)でやったこと
OpenCVのダウンロード
OpenCVへのリンク

OpenCVの環境変数は%OPENCV%\build\x64\vc15\bin
Visual Studio 2019 の設定
Visual Studio でv142ビルドツール用C++/CLIサポート(最新)をインストール

するとVisual Studio 2019 で プロジェクトの新規作成時にCLR空のプロジェクト(.NET Framework)が選べるようになるので、これをOpenCVを用いる場合は新規作成時に選択する。

次に構成を変更・追加する。
まず画像のように起動マネージャーを開き、
ソリューション構成 Debug or Release
ソリューションプラットフォーム x64
であることを確認する。

またプロジェクトからプロパティを開き、下記を追加する
構成プロパティ/デバッグ:環境 PATH=%OPENCV%\build\x64\vc15\bin;
構成プロパティ/VC++ ディレクトリ:インクルード ディレクトリ %OPENCV%\build\include
構成プロパティ/VC++ ディレクトリ:ライブラリ ディレクトリ %OPENCV%\build\x64\vc15\lib
構成プロパティ/リンカー/入力:追加の依存ファイル opencv_world451d.lib or opencv_world451.lib
これで使えるようになりました。
確認コード(参考より拝借)
#include <opencv2/opencv.hpp>
using namespace cv;
int main() { Mat image = Mat::zeros(100, 100, CV_8UC3); imshow("", image); waitKey(0); }
参考サイト OpenCV 4.5.1��Visual Studio 2019から使用する時の手順
0 notes
Photo

8年前(大学生)の頃に作ったOpenCV顔検出グリッチ動画に「ソースコードちょうだい」ってコメントついてたのでOpenCV2インストールしてビルドできるかチェックしてみたけどちゃんと動いてよかった 8年前…… https://t.co/Yifl677Fpe amagitakayosi さんのツイートから
0 notes
Photo

CMPT365 Project Solved I used python to code the project. Using common libraries such as numpy, opencv2, and pysimplegui.
0 notes
Text
Opencv webcam görüntü alma
New Post has been published on https://www.hakanarpa.com/opencv-webcam-goruntu-alma/
Opencv webcam görüntü alma
Bu yazımızda c++ kullanarak opencv de webcamdan nasıl görüntü alacağız onu anlatacağım.
#include <iostream> #include "opencv2/highgui/highgui.hpp" #include "opencv2/imgproc/imgproc.hpp" #include "opencv2/core/core.hpp" using namespace std; using namespace cv; int main() VideoCapture video(0); //0 dahili webcam eğer usb ile webcam bağlı ise 1,2,3 yapabilirsiniz burayı if (!video.isOpened())//eger webcam acilamazsa cout << "Video acilamadi" << endl; video.set(CV_CAP_PROP_POS_MSEC, 3000); //video'ya 3000 milisaniye sonra başla double fps = video.get(CV_CAP_PROP_FPS); cout << "Video fps sayisi:" << fps << endl; namedWindow("deneme", CV_WINDOW_AUTOSIZE); //deneme isimli windows penceresi oluştu while (true) //sonsuz dongu Mat img; bool frameOkundu = video.read(img); //video'yu img'ye frame frame okuyor if (!frameOkundu) //eger okunacak frame kalmadiysa cout << "Okunacak frame kalmadi" << endl; break; //donguden cik imshow("deneme", img); if (waitKey(30) == 27) //27 ascii tus karsiligi ESC tusudur. 30 milisaniye ESC'ye basilirsa cout << "Esc ile cikis yapildi" << endl; destroyWindow("deneme"); //pecere kapandı break; getchar(); system("Pause"); return 0;
0 notes
Text
OpenCV: capturing and output video
OpenCV has everything we need to capture and output video and images as well. Between these two steps we may perform any transformations on a captured frame. Everything we need is to have OpenCV development package installed. Since I use Fedora, I could install OpenCV packages the following way:
$ sudo dnf install opencv-devel
Note: I’m using QtCreator and qmake to build projects. After creation of new project, I need to update my .pro file by adding the line:
LIBS += `pkg-config --libs opencv`
It will give us an ability to use OpenCV library in the project.
Thus we are ready to write our first OpenCV application. Usually we need capture current frame of the video, transform it and then output the frame in separate window. These three steps should be performed in a loop on each captured frame.
#include #include "opencv2/opencv.hpp" const std::string &WINDOW_NAME = "Video Capturing"; int main() { // create video capture object. // 0 means default video capture device. cv::VideoCapture capture(0); if (!capture.isOpened()) { std::cerr << "Can't open capture device" << std::endl; return -1; } // create named window with specified options. // then we may refer this window by its name. cv::namedWindow(WINDOW_NAME, cv::WINDOW_NORMAL | cv::WINDOW_OPENGL); // start main loop of our program. while (true) { cv::Mat frame; // capture current frame from video device. capture >> frame; // transform color of the frame to make it gray-scaled. cv::cvtColor(frame, frame, cv::COLOR_BGR2GRAY); // output our frame in the window. cv::imshow(WINDOW_NAME, frame); // calling cv::waitKey is necessary to allow OpenCV to do // all necessary routings with events and windows. // this function returns value more or equal 0, // if user press any key. if (cv::waitKey(30) >= 0) { break; } } return 0; }
That's it. Pretty simple. You may use this example as a skeleton of your OpenCV projects.
0 notes
Text
切り出し
自分用メモ。
VMを用いたLinux環境推奨。
Python3.5
OpenCV 3.0.0
import os from functools import cmp_to_key import numpy as np import cv2 SRC_DIR = 'src' DST_DIR = 'dst' def apply_adaptive_threshold(image, radius=15, C=5): gray = cv2.cvtColor(image, cv2.COLOR_BGR2GRAY) return cv2.adaptiveThreshold(gray, 255, cv2.ADAPTIVE_THRESH_GAUSSIAN_C, cv2.THRESH_BINARY_INV, 2 * radius + 1, C) def find_external_contours(thresh): _, contours, hierarchy = cv2.findContours(thresh, cv2.RETR_EXTERNAL, cv2.CHAIN_APPROX_SIMPLE) external_num = hierarchy.shape[1] if hierarchy is not None else 0 return contours[0:external_num] def extract_rects_from_controus(contours, min_perimeter, max_perimeter): frames = [] for contour in contours: frame = cv2.minAreaRect(contour) center, size, angle = frame # 縦・横が逆になっている場合、90度回転させる if angle < -45: size = tuple(reversed(size)) angle = angle + 90 w, h = size perimeter = 2 * (w + h) if min_perimeter < perimeter < max_perimeter and abs(angle) < 3.0 and 0.1 <= min(w, h) / max(w, h) <= 1.0: frames.append((center, (w + 2, h + 2), angle)) # パディングを加える return frames def cmp_frame(tolerance): def _cmp(lhs, rhs): return (lhs > rhs) - (lhs < rhs) def _cmp_frame(lhs, rhs): if lhs[0] == rhs[0]: return 0 x1, y1 = lhs[0] x2, y2 = rhs[0] if abs(x1 - x2) < tolerance: return _cmp(y1, y2) else: return _cmp(x2, x1) return _cmp_frame def cut_frame(image, rect): center, size, angle = rect size = int(np.round(size[0])), int(np.round(size[1])) box = cv2.boxPoints(rect) M = cv2.getAffineTransform(np.float32(box[1:4]), np.float32([[0, 0], [size[0], 0], [size[0], size[1]]])) return cv2.warpAffine(image, M, size) def cut_frames(image): height, width, ch = image.shape # 二値化 thresh = apply_adaptive_threshold(image) # 一番外側の輪郭wだけを抽出 contours = find_external_contours(thresh) # 抽出した輪郭からコマの四角形だけを取り出す min_perimeter, max_perimeter = (width + height) * 0.25, (width + height) * 1.5 rects = extract_rects_from_controus(contours, min_perimeter, max_perimeter) # 抽出した四角形をソートする tolerance = width / 3 if width < height else width / 6 rects = sorted(rects, key=cmp_to_key(cmp_frame(tolerance))) # コマの部分の画像を切り出す frames = [] for rect in rects: frame = cut_frame(image, rect) frames.append(frame) return frames def main(): for root, dirs, files in os.walk(SRC_DIR): rel_path = os.path.relpath(root, SRC_DIR) dst_dir = os.path.join(DST_DIR, rel_path) if not os.path.exists(dst_dir): os.mkdir(dst_dir) for file in files: name, ext = os.path.splitext(file) if ext.lower() not in {'.jpg', '.png'}: continue file_path = os.path.join(root, file) image = cv2.imread(file_path) frames = cut_frames(image) for i, frame in enumerate(frames): dst_path = os.path.join(dst_dir, name + '_' + str(i + 1) + ext) cv2.imwrite(dst_path, frame) if __name__ == '__main__': main()
srcフォルダ以下にある画像を再帰的に処理し、dstフォルダ以下に切り抜き画像を出力するように指定する。
OpenCVにfindContoursという輪郭を抽出するメソッドがあるのでそれでコマの輪郭を抽出することを目指す。
■二値化
def apply_adaptive_threshold(image, radius=15, C=5): gray = cv2.cvtColor(image, cv2.COLOR_BGR2GRAY) return cv2.adaptiveThreshold(gray, 255, cv2.ADAPTIVE_THRESH_GAUSSIAN_C, cv2.THRESH_BINARY_INV, 2 * radius + 1, C)
輪郭を抽出する前にまず二値化する必要があるのでグレーに変換した後、Adaptive Thresholdを行う。Adaptiveの場合、画像全体で一意の閾値を適用するのではなく周囲のピクセルに応じて閾値を上下させるので影があっても綺麗に処理してくれる。 条件が悪い場合はブロックサイズを大きくしたり等パラメータを調整する必要があるのだが、スキャナできちんとスキャンしたものを対象にする場合はそこまで気を使う必要はほぼない。(Lide210、MG3130を用いての確認。)
■輪郭抽出
def find_external_contours(thresh): _, contours, hierarchy = cv2.findContours(thresh, cv2.RETR_EXTERNAL, cv2.CHAIN_APPROX_SIMPLE) external_num = hierarchy.shape[1] if hierarchy is not None else 0 return contours[0:external_num]
findContoursで輪郭を抽出。一番外部の輪郭(コマの内部の輪郭は必要ない)のみが必要なケースでは、2つめのパラメータにcv2.RETR_EXTERNALを渡す。 するとhierarchyに一番外部の輪郭のみのリストが返ってくるので、個数を数えてその分だけの輪郭データだけを返すようになる。 OpenCV3系では戻り値が変わって最初に画像を返すようになったので、OpenCV2系の場合は注意が必要。
■コマの輪郭だけを得、その外接矩形を取得する
def extract_rects_from_controus(contours, min_perimeter, max_perimeter): frames = [] for contour in contours: frame = cv2.minAreaRect(contour) center, size, angle = frame # 縦・横が逆になっている場合、90度回転させる if angle < -45: size = tuple(reversed(size)) angle = angle + 90 w, h = size perimeter = 2 * (w + h) if min_perimeter < perimeter < max_perimeter and abs(angle) < 3.0 and 0.1 <= min(w, h) / max(w, h) <= 1.0: frames.append((center, (w + 2, h + 2), angle)) # パディングを加える return frames
輪郭の外接矩形を取得し、その矩形の、周長、角度、縦横比でフィルタを掛け、コマの輪郭だけを抽出をしてみようという試み。
■コマをソートする
def cmp_frame(tolerance): def _cmp(lhs, rhs): return (lhs > rhs) - (lhs < rhs) def _cmp_frame(lhs, rhs): if lhs[0] == rhs[0]: return 0 x1, y1 = lhs[0] x2, y2 = rhs[0] if abs(x1 - x2) < tolerance: return _cmp(y1, y2) else: return _cmp(x2, x1) return _cmp_frame
コマを外接矩形の中心位置に基づいて並び替える。傾いている場合も考慮して、x方向は許容範囲内であれば同じx位置と見て、y方向のみで比較させている。
rects = sorted(rects, key=cmp_to_key(cmp_frame(tolerance)))
python3系ではsortedにcmpを渡せなくなってるのでfunctools.cmp_to_keyを使用。python2系の場合は直接cmpに渡す。
■コマの部分を切り抜く
def cut_frame(image, rect): center, size, angle = rect size = int(np.round(size[0])), int(np.round(size[1])) box = cv2.boxPoints(rect) M = cv2.getAffineTransform(np.float32(box[1:4]), np.float32([[0, 0], [size[0], 0], [size[0], size[1]]])) return cv2.warpAffine(image, M, size)
アフィン変換で傾きを直しつつ切り抜いていく。
0 notes
Text
OpenCVを組み込んだiOSアプリが“Missing Info.plist key”を理由にAppStore審査不合格 - Qiita [はてなブックマーク]
OpenCVを組み込んだiOSアプリが“Missing Info.plist key”を理由にAppStore審査不合格 - Qiita
不合格理由 アプリがカメラ機能を使用するにもかかわらず xxx-Info.plist にカメラ機能を使用する理由の記載(NSCameraUsageDescription)がない。 カメラ機能を明示的には使用していないケースであっても、OpenCV(opencv2.framework)を組み込むとカメラ機能を呼び出す(ことができる)バイナリ・オブジェクトがアプリに含まれてしまう。 フレームワーク(バ...
kjw_junichi プログラミング, iOS, 画像処理
from kjw_junichiのブックマーク http://ift.tt/2tg9sGI
0 notes
Text
Play Video Backwards
OpenCV C++ functions using multiple threads. #include <opencv2/opencv.hpp> #include <iostream> #include <thread> #include <mutex> #include <atomic> using namespace cv; using namespace std; //Mutex used to protect the shared_frame_buffer variable mutex mtx; //The capturing thread will insert video frames to this list //Main thread will take out video frames from this list list<Mat>…
View On WordPress
0 notes
Text
OpenCVを使って動画からpix2pixの学習モデルを作ってみる
こんにちは、お久しぶりです。mediba広告システム開発部の原です。
前回はpython+TensorFlowで画像から顔認識と分類をする簡単なモデルについて書きました。
機械学習で芸能人の顔を分類してみよう!
で、今回ですが、やっぱり流行りのアレ。
流行ってますよね、pix2pix!
ということで、pix2pixを使うのに必要な学習素材を動画から簡単に作れますよ、今すぐ始められますよ、という内容です。
開発環境
最初に環境の話です。 本記事の作成・検証環境は以下のとおりです。
Mac OS X 10.12.3 (10.10.5とかでも動作すること確認済み)
Python 2.7.10
OpenCV2 2.4.12
概要
pix2pix
pix2pixとは、簡単には画像と画像の間の関係性/2画像間の変換パターンの特徴を学習、DNNで表現してしまおう、というプログラムです。
例えば地図から航空写真に変換するための学習を行い、架空の町並みを作ってみたり、線画からカラー画像を作ったりすることができます。

GAN (Generative Adversarial Network)という仕組みを基にしているわけですが、画像から画像への変換という仕組みは数あれど、pix2pixはとにかく簡単に始められて、しかも精度がすごい、と最近話題になってます。
参考:pix2pix
作る学習モデルについて
今回はシンプルに、モノクロ画像を彩色するというモデルを作ってみようと思います。
pix2pixでの学習に用いるのは変換前後それぞれ256×256ピクセルの画像を左右に結合した、512×256の画像(便宜上、これを素材タイルと呼びます)になります。

今回は、弊社メディアであるZ TOKYOのプロモーション動画から、学習に必要な素材タイルを作ってみたいと思います。
素材タイル作成
元動画について
今回、素材に用いる動画のスペックは下記のとおりです。
MP4フォーマット
1920 × 1080
30FPS
60sec
動画を読み込み1フレームずつ画像として処理
さて、上記の動画を1フレームずつ処理すれば、1920 × 1080の画像が約1800枚出来ることになります。
※実際には60秒を少し越えていたので、1875フレームありました
これでは多すぎるので、あとで適当な枚数に減らすとして、まずはこの操作を書いていきます。 また、今回は彩色モデルを作るので、併せて画像をグレースケールに変換します。
#coding=utf-8 import cv2 # 入力する動画パスを指定 cap = cv2.VideoCapture("sample.mp4") counter = 0 while(cap.isOpened()): ret, frame = cap.read() if ret == True : counter = counter + 1 gray2 = cv2.cvtColor(frame, cv2.COLOR_RGB2GRAY) # 変換するとカラー情報が落ちるので、一度ファイルに保存して開き直す cv2.imwrite('./gray.png', gray2) gray = cv2.imread('./gray.png') print(frame.shape) print(gray2.shape) print(gray.shape) if ret == False and counter != 0 : break cap.release() cv2.destroyAllWindows()
これだけです。
デバッグも兼ねて各フレームのshape(高さ、幅、チャネル数)を表示しています。
これを実行すると、
(1080, 1920, 3) (1080, 1920) (1080, 1920, 3)
という表示がフレーム数分表示されます。 上から元のフレーム/グレースケール変換/変換後のファイルをファイルから読み直したものの、それぞれのshapeになります。
単純なグレースケール変換ではチャネル数のデータが落ちていることがわかると思います。
あとで素材タイルに結合する際に、データ形式が違うと実行エラーが発生してしまいますので、ここで一旦ファイル保存を経由してデータ形式を揃えています(もっと効率がいい方法があるかもしれませんので、ご存じの方はこっそりおしえてください)
各画像から一部を切り出してタイルに結合
さて、上記処理で作っ��frameおよびgrayは、どちらも幅1920×高さ1080の画像になっています。
素材タイルは256pix × 256pixの正方形なので次の図のように位置を指定して切り出していくことにします。
frameおよびgrayは色を除けば同じ画像ですので、それぞれから同じ位置の画像を切り抜けば、彩色有無だけが違った正方形の画像データを取り出すことが出来ます。

このやり方であれば、1フレームごとに28枚の画像を切り出すことが出来ます。
pix2pixの標準トレーニングデータは全体で600枚くらいですので、そのくらいのタイルセットが取れればとりあえずは十分だと思います。
今回は特にデータのスクリーニングを行いませんが、例えばほとんど一色のタイルなどは学習時にゴミになりえます。 そこで、この時点では少し多めにデータを用意することにして、70フレームに一度、この処理を行うことにしました。
(1800 / 70 ) * 28 = 720枚のタイルセットが出来ることになります。
pythonで書くとこうなります。
# 切り出す画像の縦横幅定義 height = 256 width = 256 # 切り出す位置の初期定義 defX = 28 # 縦位置(pixel)初期値 defY = 64 # 横位置(pixel)初期値 # 縦方向ループ for numX in range(4): # 横方向ループ for numY in range(7): cutX = defX + (numX * height) cutY = defY + (numY * width) cutImg = frame[cutX:cutX+256, cutY:cutY+256] cutGray = gray[cutX:cutX+256, cutY:cutY+256]
train/test/valに画像振り分け
さて、720枚のデータセットができたところで、最後に素材タイルへと結合していきます。
また、pix2pix標準のデータセット600枚は以下のような内訳になっています。
train(学習用データ)400枚程度
test(テスト用データ)100枚程度
val(モデルの検証用データ)100枚程度
これに併せてtrain:test:valを4:1:1になるようにランダムで振り分ける仕組みもついでに実装すれば、動画から素材タイルを作り出すプログラムの完成です。
で、これまで書いたものとあわせて出来上がったものがこちら。
#coding=utf-8 import cv2 from numpy.random import * # 入力する動画パスを指定 cap = cv2.VideoCapture("sample.mp4") counter = 0 dataset_counter = 0 while(cap.isOpened()): ret, frame = cap.read() if ret == True : counter = counter + 1 if counter % 70 == 0 : #70フレームに一度画像処理を行う # グレースケールに変換 gray2 = cv2.cvtColor(frame, cv2.COLOR_RGB2GRAY) # 変換するとカラー情報が落ちるので、一度ファイルに保存して開き直す cv2.imwrite('./gray.png', gray2) gray = cv2.imread('./gray.png') # 切り出す位置の初期定義 defX = 28 # 縦位置(pixel)初期値 defY = 64 # 横位置(pixel)初期値 # 切り出す画像の縦横幅定義 height = 256 width = 256 # 縦方向ループ for numX in range(4): # 横方向ループ for numY in range(7): dataset_counter = dataset_counter+1 cutX = defX + (numX * height) cutY = defY + (numY * width) cutImg = frame[cutX:cutX+256, cutY:cutY+256] cutGray = gray[cutX:cutX+256, cutY:cutY+256] # 画像の結合 imgAdd = cv2.hconcat([cutImg, cutGray]) # train:test:val = 4:1:1になるように保存ディレクトリ振り分け key = = rand() * 6 if key < 4: saveDir = 'train' elif key < 5: saveDir = 'test' else: saveDir = 'val' cv2.imwrite('./datasets/sample/%s/%d.png' % (saveDir, dataset_counter), imgAdd) if ret == False and counter != 0 : break cap.release() cv2.destroyAllWindows()
これで720枚の素材を振り分けることが出来ました。
学習・結果評価
データ移動
作成したトレーニングデータをpix2pixのdatasets以下に移動します。
$ cp -a datasets/sample ~/pix2pix/datasets/movie
トレーニング
移動したデータを下にpix2pixのトレーニングを実施します。
$ DATA_ROOT=./datasets/movie \ name=movieDump2 which_direction=BtoA \ gpu=0 cudnn=0 batchSize=20 \ save_epoch_freq=5 save_latest_freq=10 \ continue_train=0 niter=10 th train.lua
パラメータについて以下の設定をしています。 gpu=0 cudnn=0:GPUおよびCUDNNを利用しない save_epoch_freq=5:5回学習毎にモデルを保存する save_latest_freq=10:10回回学習毎に「最新学習モデル」を保存する continue_train=0:前回の「最新学習モデル」を利用して継続学習する ※「最新学習モデル」がないと利用できない niter=10:学習ループ回数定義(デフォルトは200回)
pix2pixによる彩色の実施
最後に、ここで作成したモデルで彩色を実施します。
$ DATA_ROOT=./datasets/movie \ name=movieDump2 which_direction=BtoA \ phase=val gpu=0 cudnn=0 th test.lua
ここでもGPUおよびCUDNNは利用しません。
評価
実行した結果がこちらになります。

左:グレースケール変換した画像 中:pix2pixが機械的に彩色した画像 右:元動画から切り出した(正解の)画像
今回は10回ループでしたが、これでも結構学習してくれているのがわかると思います。
一方で、

こんな状況になっている画像もありました。
幾つか原因はあると思うのですが、
元動画には上下に黒帯が入っているのに除去しなかったこと
機械的に学習タイルを作成したので、元のタイルが全体的にマットで均一色彩の場合はほぼ効果が出ない(むしろじゃまになりかねない)
ということなどが考えられます。
これらは切り出す位置を工夫するとか、ヒストグラムを作って均一な色合いのタイルを予め除去しておくなどの対応が取れると思います。 せっかく多めの素材タイル用意したんだからやっておけよ、という話
このように課題も見つかりましたが、簡単にpix2pixの学習素材が作れることはわかっていただけたかと思います。 それにしても、GANすごいなあ……
まとめ
GANすごい
GPUない環境でやるもんじゃない
Z TOKYO見に来てね!

0 notes
Text
SNOWのような顔交換を実装してみる。 - Qiita [はてなブックマーク]
SNOWのような顔交換を実装してみる。 - Qiita
概要 前回 顔を検出してアフィン変換までしましたが、今回は変換後の座標に別の顔の座標にマッピングしてみます。 SNOWというアプリでも有名な顔の交換です。 題材としてブラピさんを使わせてもらいます。 結果 ある程度角度による変化に対応出来ていますが、違和感は否めません。。 ソースコード #include <dlib/opencv.h> #include <opencv2/highgui/highg...
kjw_junichi 画像処理, あとで読む, プログラミング
from kjw_junichiのブックマーク http://ift.tt/2jwsq6I
0 notes
Text
python - Does PyOpenCV support GPUs? - Stack Overflow [はてなブックマーク]
python - Does PyOpenCV support GPUs? - Stack Overflow
Is it possible to write PyOpenCV code using GPUs? I want to know if I can write the following on Python: #include <opencv2/opencv.hpp> #include <opencv2/gpu/gpu.hpp> using namespace cv; int main() { M...
kjw_junichi CUDA入りで長時間かかってOpenCVビルドしてもPythonからつかないのかぁ?じゃC++でmrubyのモジュール作ってmrubyから触るかw
from kjw_junichiのブックマーク http://ift.tt/2iE3ma3
0 notes