#pesterquest sprite tutorial
Explore tagged Tumblr posts
Visit Tumblr Blog
Explore Tumblr blogs with no restrictions, modern design and the best experience.
Last Seen Tumblr Blogs


Fun Fact
Mobile Tumblr US users spend an average of 4.04 minutes per session on the app.
Text
> HSR2

Homestuckresources2 is our attempt at creating a database of Homestuck rips and other resources, in the same vein as @homestuckresources! We are currently moving our masterlist to Google Drive from Carrd, so some links may be broken.
Google Drive where all our rips and content go
Masterlist Doc with Tabs
Carrd
Requests: Requests are open when the askbox is open (unless we say otherwise)! We do:
Rips (from Homestuck, Homestuck^2, Paradox Space, Hiveswap/Hauntswitch, Pesterquest/Friendsim, and any other canon-related Homestuck material)
Finding bases for you
Lore explanation/guides
Finding cosplay tutorials/purchase recommendations (We do not cosplay ourselves, but can at least find other people’s recs)
If you rip Homestuck content, create sprites/other resources people can use, or otherwise make something that might be useful please @ us in it. We would love to reblog it and add it to the masterlist!
8 notes
·
View notes
Text
woah a pq sprite edit tutorial ft. mod kk (paint tool SAI)
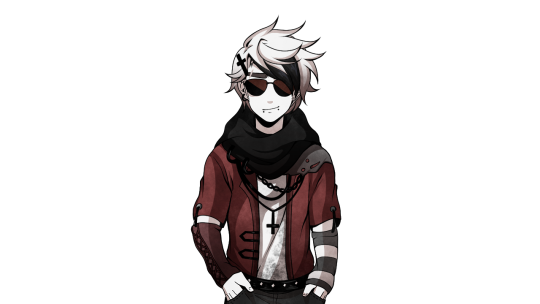
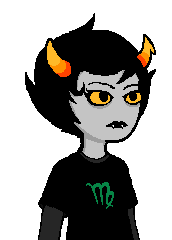
MOD KK....: SO UH. this is primarily to help a pal of mine, but like i thought it’d be good to make a post / tutorial in general, so here’s a tutorial which features the process of how i did this dave
since i use sai, this is a tutorial mainly for sai, but you can follow along easily on other art programs since functions are similar and etc. the link to the sai i use can be found here.
tutorial starts under the read more:
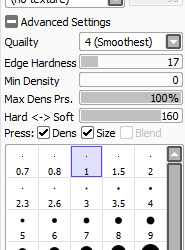
BEFORE WE START, any sai users, here are my brush settings regarding lineart / linking, and in general, these are the settings I use for all my art and edits. Size wise, I usually draw with 1, but for line width, I’ll change between 1, 0.8, and 1.5.
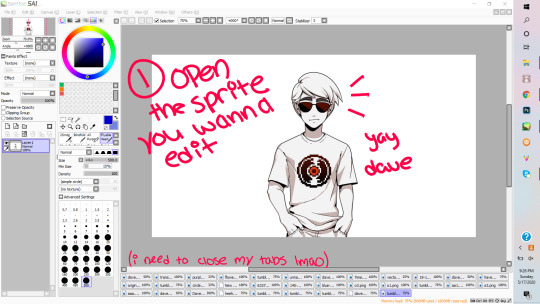
1. So first and foremost (wow, look the way I’m typing got more formal), you want to open the sprite you want to edit on. Here I have Dave. A good resource for sprites / assets from PQ is from this blog, in case any one needs it.
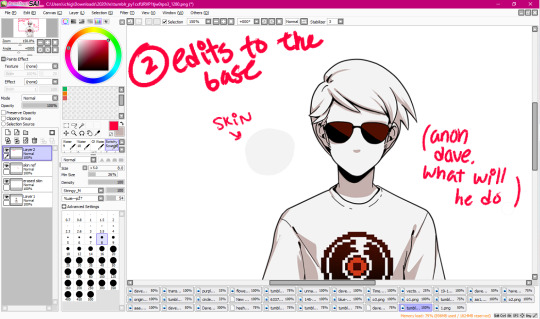
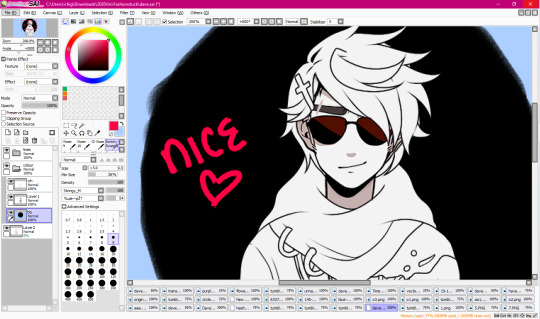
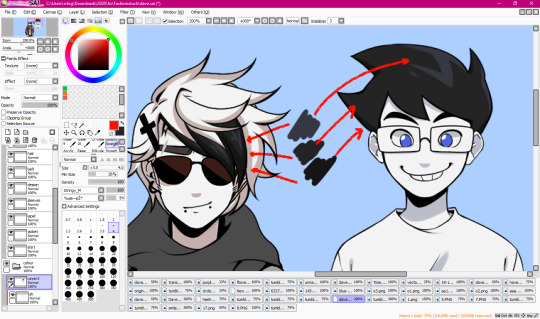
2. If you need to, make edits to the base. Usually, if not the hair, I’ll make an edit to the character’s shading colour or their face. In this instance, it’s going to be the latter. So in this picture, what you want to do is colour pick from his skin, make a new layer and on that layer, you’ll ‘erase’ (draw over) his expression.
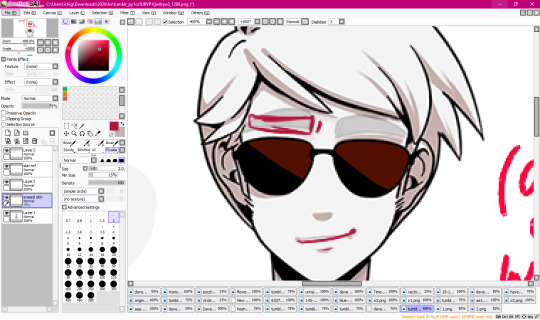
2.1. Lower the opacity on the coloured over layer so that you can see his original expression- mainly I do this so I can see the proper placement of his facial features and such. Here, I’ll sketch the change I want.
2.2. After it’s sketched out, I’ll line it proper and fill it in, and now he’s like smug (shame that it gets covered up by his bangs in the finished edit).

3. Now we’re to the fun part! Well, onto the more fun parts. Here is where we’ll start our sketching. Sketching isn’t mandatory, especially on smaller, minor edits such as changing shirt colours or adding small accessories, but if you want do things like drastically change their haircut, or to give them a new outfit entirely, sketching is probably a good idea. Anyways, lower the base’s opacity, and then decide what kind of outfit you want to sketch on your base, and do it.

4. After sketching, you’re gonna line! Lower the opacity on both the base and the sketch- though that’s probably a given. Completely optional, but I tend to put my layers in a folder set for organisation purposes. Also, please name your layers, it’ll help you good (OKAY SO LMAO. I forgot to take the screenshot of me mid lining, so I eyeballed all my finished lines out to make it look like it was incomplete.)

4.1: Anyways, yay! The lining’s complete. I know this is supposed to be a tutorial, but process photos are fun too.
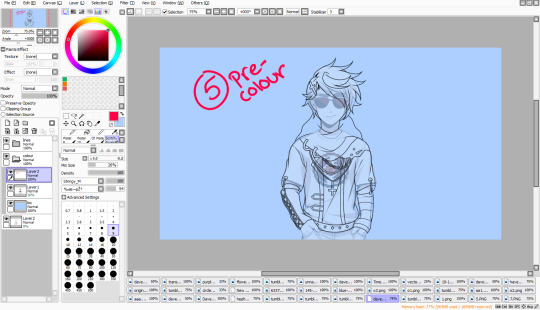
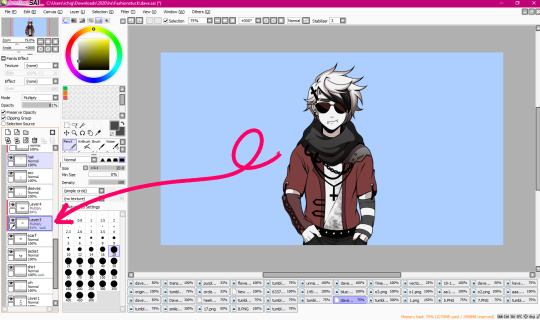
5. Now we’re onto pre colouring. I say pre colouring because this is like setting the base for colouring? Yeah. Anyways, I’ve made another folder set for colouring, pulled the base sprite into it, and then set a coloured background under the base for transparency and etc- I usually go with a colour which will contrast the piece’s main palette, which in this case, is blacks and shades of red.

5.1. Now we’re going to put the base colour into the newly created lineart. What we’ll do here is turn the transparency on the base sprite down till it’s completely gone, and then we select every inside of the lineart.
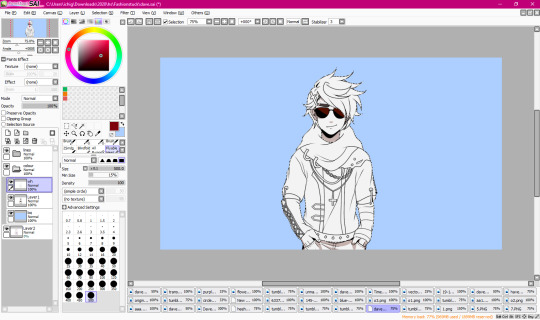
5.2: With the base ‘white’ (the greyish white) colour from Dave’s original sprite, we’ll fill the lineart.
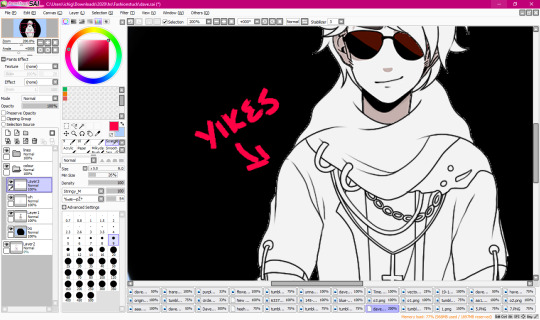
5.3 However, after this, you’re going to want to check your transparency because it won’t always be perfect- actually, it won’t be perfect. Usually, you’ll get that small, shitty white outline which overall imo ruins the piece when it’s transparent.
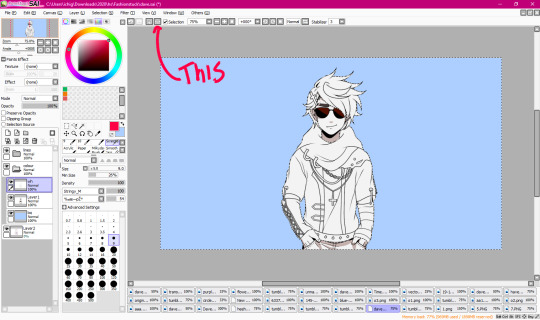
5.4. What you’re going to want to do to rid of this, is- going back to 5.2, after you’ve filled it, and you still have the selection on, you’re going to reverse the selection (arrow pointing to it, ‘pologies for non sai users because I don’t know the equivalent), and then erase. It’ll seem like you’re just erasing the background, but I swear it’s worth it.
5.5 See? Now it’s clean. Yay!!!
5.6 After that’s figured out, you’re going to want to redirect your attention back to the base sprite, and then erase all the shit that’s leftover from it, such as Dave’s sleeve which is poking out from the side, as shown in the pic.
5.7 Bam. And now he’s all cleaned up proper and ready to roll.
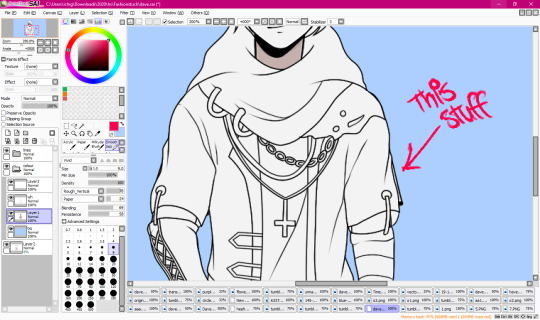
5.8 A completely optional step, but my favourite since I love lining. What I usually do, so that the lines look smooth(er), and more precise with the style, is that I ink it a bit to create line width variation in certain parts of the sprite, and also to create shadows.

6. Finally on colouring- I’m probably numbering all this shit wrong, but you know what, I sucked at math. Anyways, colouring- figure out your palette, and basically base colour parts of your sprite. The blackish part on the shirt is an airbrush texture.
6.1. Tip: If you’re using dark greys or blacks, I’d recommend just picking the exact shades from other PQ sprites so they’re all??? Idk, the same? To put it simply??? Yeah.
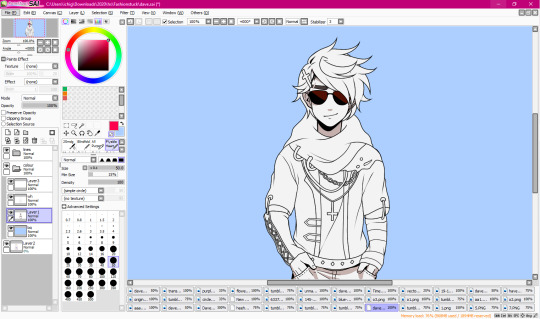
6.2. Shading is- another probably basic thing, but I’m explaining my particular process, but how I go about shading is by making a clipping layer over the layer I’m currently shading on to ensure that it only colours on that part. Then, I put it on multiply, and then toggle around till I get a good mid shade. To each their own, however, these are just my tips and tricks that I use personally.
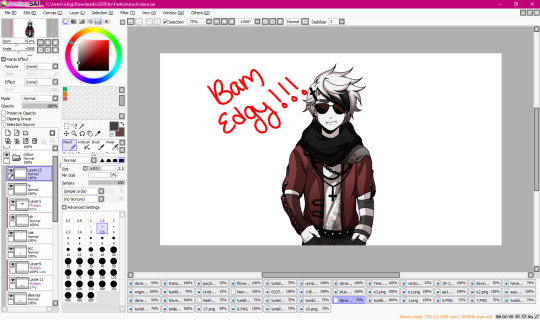
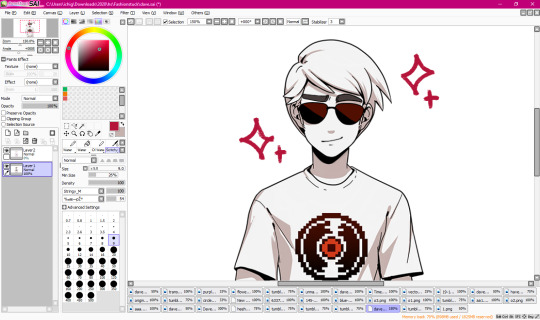
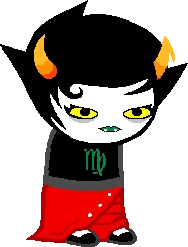
6.3. And after you’ve shaded your entire piece, you’re done! Yay, he’s edgy now!

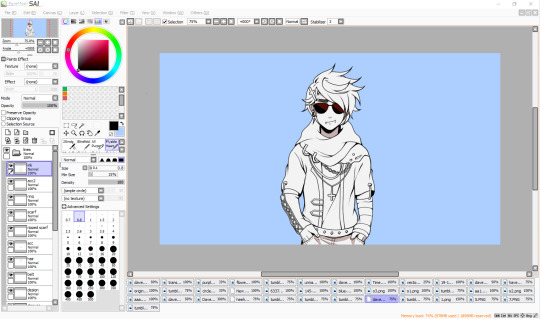
6.4. Though I did make my end sprite with a texture, and for SAI users, it’s relatively easy. Just open the png file of your sprite so that all your layers are in one and it’s a happy pic, and then go to to the textures drop down menu and select your texture. For this, I decide to use the grunge texture. I also used this texture on my Derse Prince edit, and I used a TV screen texture on one of my Hal edits. I don’t know if texture packs come with other art programs, but if they do, just experiment and see what you like! It’s not obligatory, but it’s a nice touch for some edits.
Other than that! We’re finished! I hope you enjoyed- apologies if anything said was over complicated haha ;;.
#mod karkat#kk edits#sprite tutorial#homestuck sprite edit#homestuck sprite edits#pesterquest sprite edit#pesterquest sprite edits#homestuck sprite tutorial#pesterquest sprite tutorial#homestuck edit#pesterquest edit#dave strider#im not mass tagging this im lazy;;;;;#also that carpel tunnel is kicking in lmao
183 notes
·
View notes
Note
may i suggest: honey lanvender ice cream rose, chocolate fudge swirl ice cream jade, or rocky road ice cream jake?
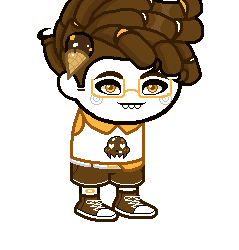
A Jake to complete the ice cream kids set !
#homestuck#pesterquest#sprite edit#jake english#canon#trickster mode#this might be the only req I get done today#sorry lads it's tutorial day#which means I actually do have to do some classwork#retro-gradiant
45 notes
·
View notes
Text
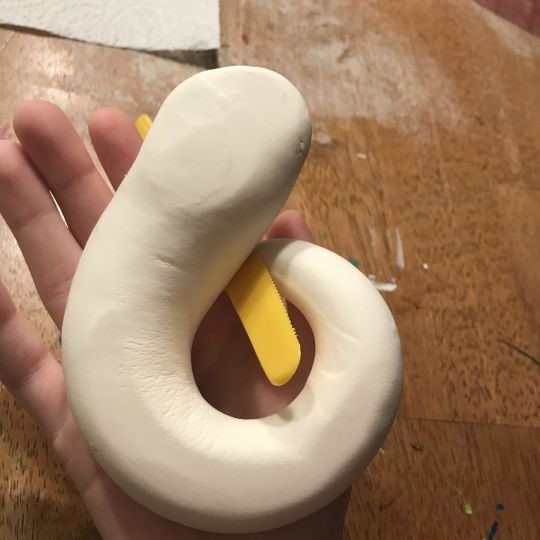
How I make my Homestuck troll horns - Molding
Now, onto the first real step: molding!
Basically the one guideline I’ll be giving through the whole process is to take your time! Seriously! The molding process should take hours. It is, I think, the most touchy step of making horns, and thus more imperative that you be diligent in handling them! Fair warning: this is going to be very thorough. I apologize in advance for my near-Rose-level explication.
To begin, I equally bisected the package of model magic. Depending on which horns you’re trying to make, the entire package will probably be way too much. Though for this tutorial, I was making Megido horns, so the whole package was the perfect amount. Before you begin shaping anything, I think it’s helpful to get a sketch of your desired shape down. Of course, always keep up a photo reference of the character, but it helps to have an understanding of a 3-D model of the horns if they’re more complex in shape (like Aradia’s)!


You should shape both horns at the same time to make sure that they’re as symmetrical as possible. The usual process I use is to roll out the two segments into cones, that you could then use to curl (for Aradia) or bend (for Kanaya, Vriska, etc.) before adding the other segments like hooks. Of course, this doesn’t really work for horns like Karkat’s, which aren’t conical, and likely Tavros’ because of their size.

Make sure that the bases have a tilt so that they can naturally rest on your head without a gap, or poor placement.

Next, I got into shaping these cones into the general shape of the troll’s horn. This will take the bulk of the molding time, and it’s really important to pay close attention to how the horns are portrayed in proportion to the character’s face in canon! A common error I see is making horns too large for the cosplayer’s head. For example, Kanaya, Vriska, and Feferi horns are at most the length of your face. Karkat and Terezi horns should both be quite small, and Terezi’s shouldn’t be very long! Don’t just take my word for it, compare not just with the basic sprites, but with the talksprites, hero mode, and other canon depictions. (Pesterquest may help but considering that they’re more of a fan depiction... I don’t consider their appearances as entirely canon. But their detail can help if you’re stuck!)
Another common error I see is not taking enough of the horn’s curve into account, and making the horns too straight, or at the wrong angle off the head.
So take your time, as Model Magic is very delicate and it’s really frustrating at times when the smallest touches leave unsightly indents that change the whole shape :/. But the good news is that smaller indents like these can be buffed out in the sanding process.

Then, when it comes to more dynamic horn shapes, you may need an object to prop it “open” to let it dry somewhat in that shape before removing it when it solidifies over the next few days.
This isn’t shown in this tutorial given the horn type I picked, but when it comes to horns like Vriska and Kanaya’s, in my experience it’s best to make the base cone shape, form the curve, then add the extra shapes from there (instead of bending at the top or something) and do your best to smooth over the “seam” (sanding helps here a lot!). These little segments can be rather delicate and hard to nail the exact shape of (I hate it) (I believe in you <3).

It’s going to leave some marks, but don’t worry too much about it, especially if they aren’t in a visible location. The good thing about Model Magic is that it takes days to dry! This means that after the first day (the most crucial time for modeling), the clay dries enough to hold shape, but is still malleable enough to be adjusted and smoothed.


After you feel that you’ve gotten the best shape you can, you can replace the first item to prop with another, maybe softer item like wax paper (pictured, lol), or tissues.
This is where my tutorial demonstration differs from the usual horn construction; In most cases, the horns will need to be routinely flipped and smoothed/rounded to avoid one side getting too flat. This wasn’t a possibility for Aradia horns because of their shape. This also isn’t necessary for Karkat, Nepeta, or Terezi horns, because they can stand on their own on their bases. I have no experience with Eridan, Gamzee, or Tavros horns either, though I’d apply the same logic there as well. In this instance, I picked up the horns often to smooth them over before setting them back down. In most cases, it’s best to leave them as is for a while (usually I model them at night and smooth over in the morning) to let them solidify some to avoid damaging what progress you’ve already made.
Flat back >:(
After you feel that the horns are solid enough to pick up and check out (this may be overnight, or it could be a full day or couple days), make sure to compare their size and fit to your head.

Checking that the angle of viewing (pretty much the front) is desirable and the horns are the right size for my head.

It gets less daunting from here on out for the rest of the molding process. From now on, you’ll just have to check in every few hours (flipping, smoothing as you can) for the first couple days, then spacing it out further and further as time goes on. You can make slight curve adjustments as well, because remember that Model Magic is always relatively soft!
There isn’t much to delineate from here, but make sure that once the horns are quite solid, to prop them up onto another surface/object so that all sides can get air and it’ll expedite the (usually week-long for me) drying process somewhat and prevent flattening.


And now, onto sanding!
20 notes
·
View notes
Text
HOMESTUCKRESOURCES2

@homestuckresources was a huge blog that collected resources for all things Homestuck, including ripping assets, roleplay guides, bases, and fangames. The blog and it’s masterlist are still up, but because the file sharing service they used went permanently down without any notice, many links are broken and the blog is inactive. We have no affiliation anybody who worked on the original blog, we’re just some nerds who wanted to collect whatever resources aren’t lost to time and make an updated masterlist! Big thank you to everyone from HSR, we couldn’t do this without you.
Please feel free to @ our URL in your posts if it’s a useful resource. We also track #homestuckresources2.
Links:
Our Masterlist: Explaining Homestuck, Where to Read Homestuck | Colours and Fonts | Fancharacter and Session Guides, Title Tests, and Fanon Theories | Character Sprites, Talksprites and Walksprites, Plus Other Rips | Pixels and Shipping Icons | Cosplay, Crafts, References and Music or Sounds | Roleplaying Canon Characters, Plus Roleplayable Icons | Homestuck Games/Game Mods | Computer, Tumblr and Other Customization, Plus Programs | FAQs, Plus True Misc
Public Rips Folder (Password is “IWILLCREDIT”)
Public Bases Folder (Coming... Eventually)
To-Do List
Mods
Requests:
Requests are open when the askbox is open (unless we say otherwise)! We do:
Rips (from Homestuck, Homestuck^2, Paradox Space, Hiveswap/Hauntswitch, Pesterquest/Friendsim, and any other canon-related Homestuck material)
Hero mode bases (not sprite or talksprite bases, yet)
Lorehom explanation/guides
Finding cosplay tutorials/purchase recommendations (We do not cosplay ourselves, but can at least find other people's recs)
Icons for roleplaying/reply icons
30 notes
·
View notes