#photoshop suddenly quit when i started editing the gif on top. it was too much for my laptop
Text

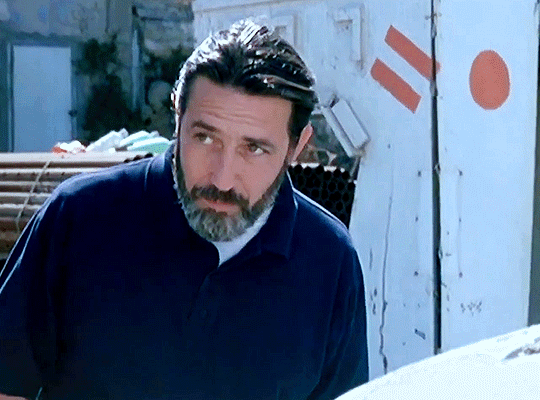
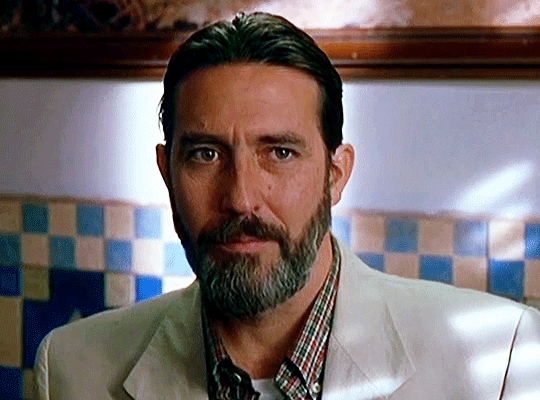

Ciarán Hinds in L'amante perduto (1999)
#ciaran hinds#ciarán hinds#dreamboat#l'amante perduto#the lost lover#gifs#the terror cast#photoshop suddenly quit when i started editing the gif on top. it was too much for my laptop#kennethbrangh
174 notes
·
View notes
Photo
Lately, I have received several messages here on tumblr asking: How do you do it? How do you colour gifs? What? How? Whaaat? So… I decided to share some of my deepest secrets and commonly used technics with you. Be my guest.
I would like to stress that this is not a step-by-step tutorial. There are tons of there on tumblr already, I don’t think there’s a need for another one. What you are about to read is a list of my personal tips. Having said that, please note that there are million ways how to make gifs. Everybody has their own unique style and that is amazing; that is how it should be. Maybe you will find here something useful, maybe you will not.
To be honest, I can’t colour properly. I can’t make bright, vibrant, high contrast gifs. Whenever I aim for them (and I really do that from time to time), it’s a disaster. That is why I use all those below listed hacks; to cover the fact that I can’t colour the way everybody else colours. Welcome to my personal Photoshop hell.
Oh, and one more thing, before we really start. It is vital to acknowledge that everybody has a different monitor with different settings. You might spend hours colouring a gifset and be really proud and satisfied with it and then you look at it at your friend’s computer and just go FUCK! Suddenly, your perfectly coloured and balanced gifs are too yellow or blurry and everything is runied. Well, you must count with it, although there is nothing to be done about it, I guess.
~~~
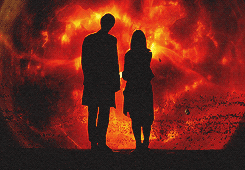
Let’s start with the most important rule ever. The golden rule. Number one rule. It has been said many, many times, but I must repeat again. Are you ready? NEVER use one colouring on two different scenes. This barely ever works. If you make a nice PSD, of course, save it, but be careful about using it on different scenes. Every scene is very individual – the lightning is different; the basic colours are different too. I recommend everyone to colour every gif from a scratch, it does pay off. You asked for a proof? Here it is.
I coloured this lovely scene from the The Rings of Akhaten.

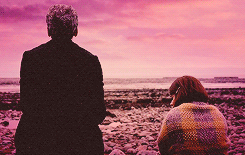
Then I thought that I might use the same PSD on a different scene. Let’s say I’d like to colour a scene from Dark Water; the one when Clara stole they keys. Both are orange-based, right? What could go wrong? Here is the result without prior editing.

Ewww, ugly, so ugly.

Even though I made it brighter and did not touch the actual colours, it doesn’t do the scene justice.
~~~
Technical background
To extract frames, I use KM Player. For the actual giffing, I work with Adobe Photoshop.
The better the quality of the video you extract is, the better your gifs will look. That’s quite a simple, yet important fact. I usually use 1080p, sometimes 720p, but never 480p. Working with original DVDs is, of course, the best way, if you have a disc drive.
When extracting the frames in KM Player, I extract every or every other frame. Both are fine, but don’t forget to change the speed of the gif accordingly. I use 0,9/0,1 for gifs with every extracted frame, 0,12 for the other options. Oh yes, I like my gifs to move slooowly.
Rescaling
This way of rescaling might be caused by the fact that I can’t do it properly; so I came up with my own way. When I was younger, in the old and dark days of my Photoshop adventures, I used Image Size to make my gifs smaller. But it didn’t quite work out. Years have passed and I discovered that using Canvas Size + Manual Scale is much better. How do I do it?
In Canvas Size I choose the dimensions I want and then rescale the gifs manually by Edit > Transform > Scale. Do not forget to hold Shift to contain the proportions! FIRST rescale your gif, THEN convert it into timeline and smart objects. If you do it this way, the gif will be neat looking. Why do I do it anyway?


The first gif is was rescaled my way. The other one was not. Can you spot the difference? I think that the first one is neater and cleaner.
Oh, and one more thing. When I rescale my gifs, I always make sure that it is one or two pixels bigger than the canvas itself. When you sharpen the gif later in the process, you will not have to put up with those ugly oversharpen edges.
Sharpening
Here’s how I do it. Enough said.

Colouring
Now this is the tricky part. It always depends on the scene you are colouring, but I don’t use many tools to colour a gif. Six or seven layers and I am done.
I always start with Curves/Brightness and Contrast. I think it makes sense to first adjust the brightness and play with the colours afterward.
I never use Vibrance. Why? Vibrance works with all colours at once and that is the main problem. I think that the best way is to work with the colours separately.
If you want to make a certain colour brighter and more vibrant, use Colour balance and Selective colour instead.
Work with Colour fills. They can do miracles! And I’m not even exaggerating. Work with different opacity settings and opacity fill. My most favourites are:
Lighten/Screen

Multiply/Darken


Soft light

Black and white gifs
That is impossible to colour, damn it! What do I do, I tried everything, but it still looks so crappy! The other gifs are fine, but this one looks horrible? What do I do???
Yeah, what do you do? What do I do? I make it black and white. ¯\_(ツ)_/¯
Yes, it might be considered lazy, but it, is fact, lifesaving. And I do think that taking this risk or whatever you people call it, can make you gifset more interesting. Again, try to play with colour fill to make the gifs look softer.


Using a texture
Textures are my best friends. And I really mean it! They can help you hide those ugly visible pixels in dark gifs.

If you want to use a texture on a gif (as I often always do), applying it should be the first thing you do. The texture will always be present and you must adjust the rest of layers to it. I usually use Lighten or Screen setting. And don’t forget to play with opacity! It can make a big difference. But always make sure that the texture is the TOP layer.

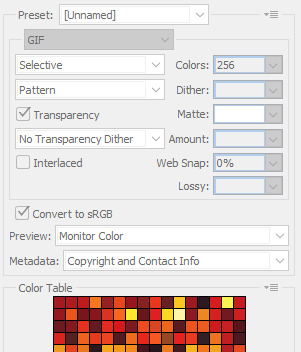
Saving
When I save my gifs, I use the following settings. I think that almost everybody uses them. In case you need them anyway, here you go.
Putting a gifset together
To be honest, this, after all what has been said above, is the most important thing to me in the whole giffing experience. I can’t just sit, open my laptop and think: Hmmm, today I might gif something from… let’s say The Name of the Doctor, pick up eight random scenes, colour them separately, put them together and click publish. I just can’t do it. I must plan every gifset to every single detail. I think about the colour scheme, proportions. I combinate, experiment, put a gifset together one by one until I am fully satisfied; until it is perfectly balanced in every aspect. If you think that it takes a lot of time, you are right! But in the end, it is worth it, because the results will be… well, not bad. Example one / two / three.
~~~
And that’s it, my friends. Don’t forget – don’t be afraid to experiment! Look at me; I started with this. And look where I am now. Everybody can make an improvement. Make special gifs, look for new ideas and methods, look for interesting parallels and, most importantly, have fun! :)
(So… what do you think? Was it OK? Helpful? Interesting? Share your thoughts and comments!)
230 notes
·
View notes
Last Seen Blogs

aneighborhoodnaturalist
a Neighborhood Naturalist
aleixandrebordeaux-blog
Aleixandre Bordeaux
gaming-tools
Gaming tools

rpgmakerblog
RPG Maker Blog

bigmountainsofshit
Alfredo y lo que pase.