#projectprototyping
Explore tagged Tumblr posts
Visit Tumblr Blog
Explore Tumblr blogs with no restrictions, modern design and the best experience.
Last Seen Tumblr Blogs


Fun Fact
Tumblr is used by 21% of adults online aged 18-29 years.
Photo
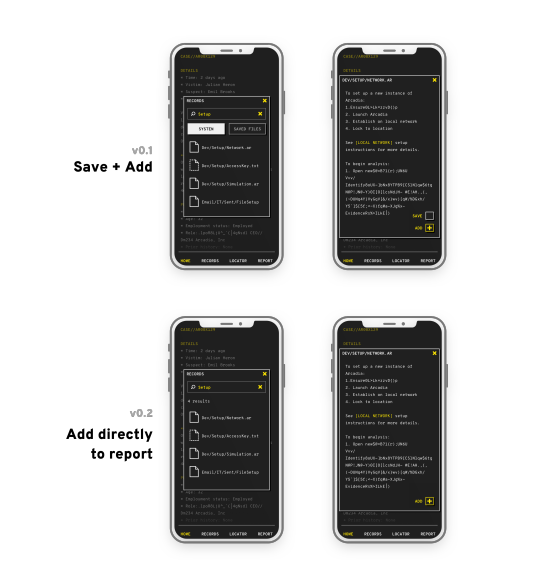
Onboarding User Testing
Running through the onboarding with a fellow gamer highlighted one particular area of confusion: saving vs adding evidence.
Originally I had in mind that you would be able to save files to read through later. However I then introduced the ‘add’ function so you could instantly add files to the case report from in context, rather than having to go to the report and then search for the file. However, they did not understand the difference between the two and suggested rewording or removing for at least the onboarding.
I opted for simplicity and removed the save function entirely to keep things straightforward and direct users straight to the critical case report. For the onboarding, I also made things a bit easier by only including the add function on the correct files so there’s no chance of messing up.
Other areas I would like to look into more next semester:
Railroading it a bit more - currently everything is very non-linear which is part of the appeal but also can mean more opportunities for mistakes so the onboarding in particular could benefit from more strict ordering and steps.
Streamlining the explanations - The help text is quite lengthy at the moment and I would like to introduce these concepts more naturally.
Arcadia’s Eye - I want to animate the contextual help ‘eye’ of Arcadia so it’s more obvious and pops up just when you need it, prompting interaction.
2 notes
·
View notes
Photo

Getting Blocky: Breaking Down the Complete Flow
Building off my initial block wireframes, I mapped out the key flows from the app.
Launching a Case

This is the first thing you will do in most Arcadia cases and the most basic introduction to how it works.
Tracking Down a Location

One of the most complex (and key) flows to work out: how users discover a clue pointing to a real world location, travel there, and unlock new evidence. I already had work on this from various user testing but it was helpful to break down to simple elements to identify areas where perhaps there were one too many steps or potential transitions.
Searching the Records

The entire corrupted database of Arcadia is open to you and you can search the records for different clue files. This is another area where mapping it out helped identify areas (such as saved evidence) where I could potentially simplify and user testing confirmed this.
Submit Your Report
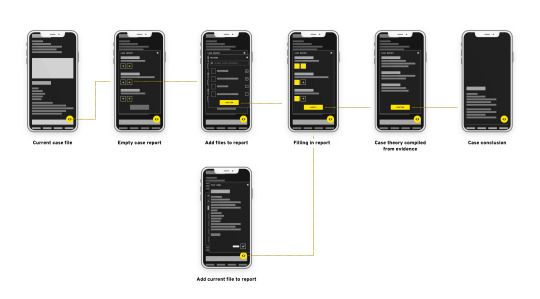
And finally, as you solve the case you can add evidence to the case report and submit your theory. This was actually one of the trickiest bits to work out and I am still not satisfied but how it connects to the both locations and records but it is getting there and now I can iterate on the core elements.
1 note
·
View note
Video
tumblr
Secrets of Arcadia
I want The Arcadia Report to be a rewarding game that you can play as a unique experience without ever diving too deep or become immersed in the narrative. From early gameplay tests with people, puzzles and being rewarded for digging deep often came up so I want to be sure to reward people’s thoroughness.
As an example, I include a little secret in the onboarding prototype. The access keys you are looking for are in binary code. Translate it and you’ll find the key words: Project Canary. Search up that clue to discover a secret file hinting at the fact that there might be more to Arcadia than meets the eye.
What is Project Canary? What really happened to Arcadia? What other secrets might it be hiding? You’ll just have to play on to find out.
Check out the alpha prototype here
(Click at the bottom of the search pop up to search for project canary)
0 notes
Video
tumblr
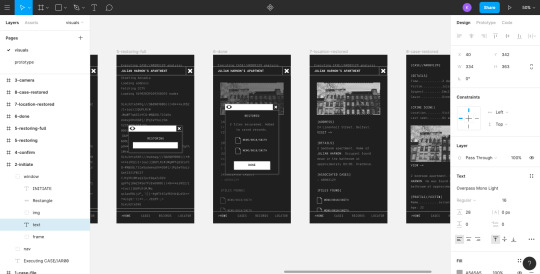
Final Alpha Prototype: Welcome to Arcadia
Check out the final alpha prototype on Figma
A mysterious message and a special quest: you have been selected to help resurrect Arcadia. Enter The Arcadia Report and restart the corrupted database.
Why?
Through testing various prototypes, I identified the need for a more comprehensive introduction to Arcadia. Incorporating everything I learned from testing with users, I devised an onboarding scenario which introduces all the key concepts quickly and in a completely in-character manner by having you install and reboot the Arcadia system. No meta help text or breaking the 4th wall.
The Scenario
You journey starts when you receive a message from the mystery Reporter inviting you into Arcadia. Unfortunately Arcadia is a corrupted shell after the collapse of the company so before you can reignite the quest to ‘crowdsource’ justice and start solving crimes, you need to reboot the system. Along the way you’ll learn about how search, locations, and reports work.
Give it a try
Dive into the world of Arcadia
0 notes
Video
tumblr
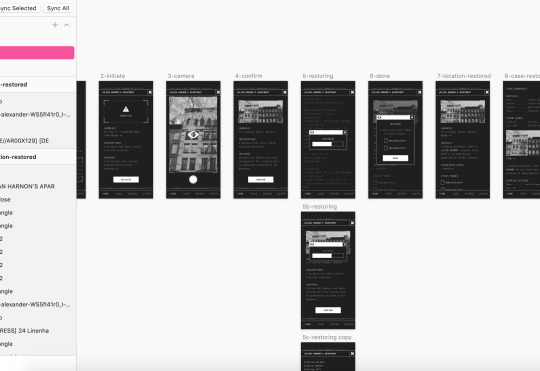
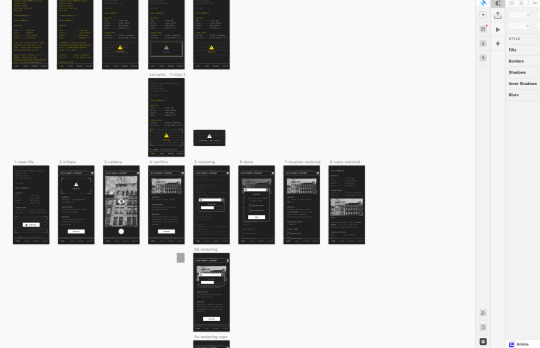
The Full Flow: From Clue to Case Solved
Test it for yourself here
Based upon my previous prototypes and testing with users, I pulled together all my content with the latest designs to map out a complete flow. This covers the main areas of Arcadia, from:
Launching a case file
Searching the records
Viewing and saving clue files
Scanning a location and unlocking new evidence
Adding evidence to the report
Solving the case and submitting your theory
Conclusion and seeing how your solution stacks up against other detectives
Challenges:
Due to the content-heavy, search-based evidence, it is tricky to properly convey a full case in a visual only prototype so this only highlights one clue from each area rather than a real, full-fledged search. However, it is enough to move forward. Already seeing it all in context as well as showing it to different people has revealed areas I would like to improve.
Going Forward:
Re-examine the case report - This went through several iterations already and it’s a tricky one due to how it interacts with various parts of the app. I think there’s definitely still room for improvement to serve as more of a centre for tracking your progress.
Refine location scanning - The flow itself is working but I want to continue to improve the actual content and hone the most exciting and rewarding parts for players.
Case conclusion - The original idea was that everyone might submit different theories drawn from the evidence they submit and Arcadia ranks them. However for the first iteration I think it would be better to simplify this going forward and focus in on your solution.
The Prototype
Try the case out for yourself and start discovering the secrets of Arcadia:
Figma Prototype
0 notes
Photo
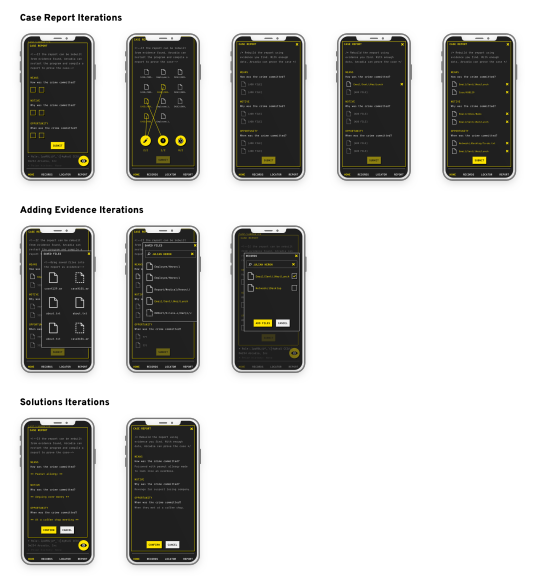
Case Report Iteration
I sketched various different ideas for how you add evidence and submit a theory about the case. This is a critical area as it ties together everything from across Arcadia, from the case file to locations and the records.
The case report should...
Keep track of your progress into the case
Serve as a summary of your theory
Be a centre where you store clues
Originally I wanted something that would make you feel like one of those evidence walls in a murder mystery: with lots of connections and drag ‘n’ drop. However, this felt inconsistent and jarring compared to the rest of the experience, which functions like an old database with pop up windows. So I simplified and made it more in keeping with the records.
Another tricky part is how and where you access the report. In early versions the report was the arcadia eye in the corner but I decided to move it to the nav and add a + add function from files so you can add directly to the report rather than having to go to the report and then search for the file you were just looking at.
0 notes
Photo
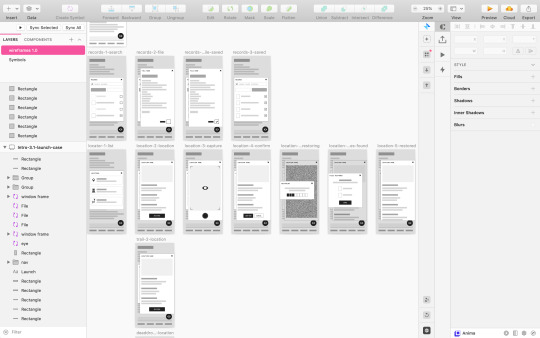
Getting Blocky: Back to Basics
Going back from various style tests and prototyping, I went lo-fi with some blocky wireframes to get a feel for how I could apply the style consistently across the Arcadia.
I want it not to feel like a game interface but like the shell of real, live software which you are creeping through the corrupted records of. So for that, I need to develop a consistent design language and behaviour which works across the different areas of the game and feels real.
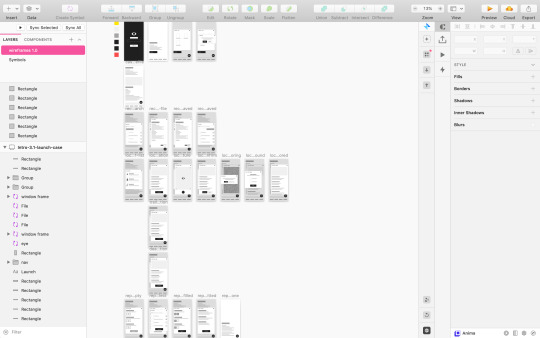
For the first pass, I actually experimented with a light colour scheme to force myself to really think not about the colours but about the hierarchy of windows and elements. This helped me visualise the entire interface at a high level so I could identify spots that felt out of place.
0 notes
Photo
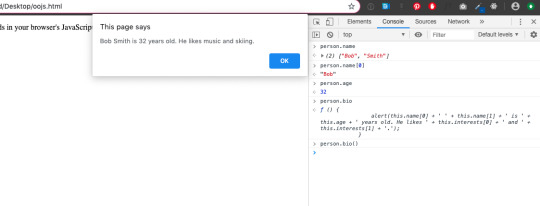
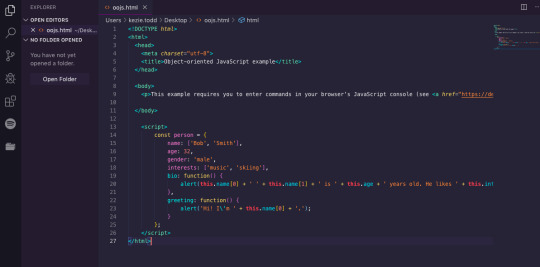
Searching Alternatives: JSON Objects
While researching search alternatives that didn’t involve building a weighty database, I talked to some developers and they suggested JSON objects as a potential alternative.
You can store all sorts of data in JSON and then call particular lines from the array. A kind of search, if you will. If you want to dive deeper, this can also be hooked up to a search engine. So I decided to give it a go!
Coding JSON Objects
Mozilla has some helpful, easy to follow tutorials on the subject:
Javascript Object Basics
Working with JSON
I followed both of the tutorials to create some super basic JSON objects, call back particular parts, and also use those to add the data to different blocks of content which could be displayed on a webpage.
All in all, surprisingly easy to follow along and something I might be able to draw on to create a working search prototype for my clues.
0 notes
Photo

Google Custom Search
One idea I wanted to look into was the possibility of creating a working search that I could add the clue files to where I could quickly iterate and test (or even reskin to create a working alpha version of The Arcadia Report). I wanted to avoid an actual database if possible, as that would be a lot of heavy lifting for a prototype. This meant a lot of googling different search options which eventually led me to Google’s own Custom Search.
Custom Search lets you add google’s search to your website to help people quickly find what they are looking for. I was hoping to repurpose this for Arcadia to search clue files on the website but unfortunately further research revealed Custom Search is not very customisable. I could set up a search but not in the manner I wanted to capture the Arcadia files. But at least I know there are options out there.
0 notes
Photo
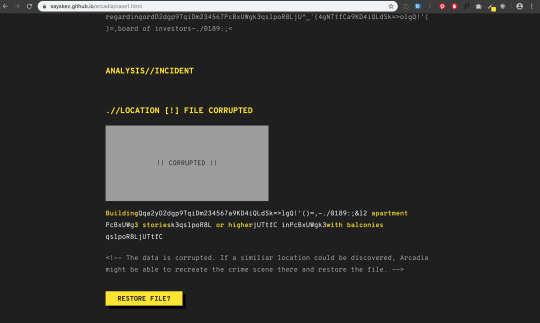

User Testing Location Clues: Take 2
After creating a HTML content-centric prototype to quickly test how locations might work in Arcadia, I took the feedback on board and quickly iterated on the key points.
My goal:
Make how locations work clear but in character
Based on the earlier usability testing results, I...
Pivoted my story explanation (from actually happening around you to a more sci-fi simulation of crime scenes)
Rewrote the location content to include help text (in the form of comments from the mysterious person behind the Report)
Included more corrupted text and highlighting to drop clues and reward close inspection.
Now to find some fresh victims volunteers!

Usability Testing
Participant 1 (22, gamer)
For locations
Went straight for the restore file button
“So I need to find a key to unscramble the data?”
Content
Scrolled through the whole thing first
“Do you have to know how to program?”
“I take it that is corrupted…”
Prefer tabbed
Preferred smaller sections
Overall
“That’s really cool!”
“Oh, like Pokemon GO?”
Participant 2 (mystery fan, gamer)
Content
Loads of text
Not a coder, is that a problem?
Victim profile: “where it starts to get weird, haha”
“Getting slightly harder to read”
Would be easier if it was in chunks
Locations
I would go there and take a picture?
It’s going to be a long walk
Overall
“Can I keep playing?”
I would play it!
Participant 3 (20s, gamer)
Content
It’s interesting we can’t see the incidents
Have to know it is corrupted. Otherwise garbled text is distracting?
Locations
Does it work if I click restore? Does that restore it?
“Find a key? I’m not sure”
Overall
Liked the idea, locations did not make sense
Suggestions
Add a camera icon in the corrupted photo
Key Takeaways
Great to get 3 participants from across my target market, from young adventure seekers and gamers to older mystery fans.
Content needs to be presented in a less overwhelming manner and easily parsable. I showed an alternate design which used accordions to hide sections of the case file at the end of the test and everyone responded more positively.
Similarly, given the tech-centric styling it can look quite intimidating. I need to balance this with making it more movie hacker fun than scary slog fest.
Be explicit about EVERYTHING: corruption, locations, etc. I thought I was explaining it more but I need to recognise that this is a mostly new mechanic in a game and straight up spell out how it works.
On the other hand, I also need to make sure how this works narratively. Setting the context for corrupted files, how Arcadia creates simulations, etc.
Next Steps
Back to basics - I’m going to write out in plain text exactly what you need to do for locations and then iterate from there.
Glossary - Based on the feedback from testers, I’ve been building a list of terms and concepts which people are unfamiliar with that I need to set the scene for. A bit of story onboarding might do the trick!
Keep iterating on the case file design - I have concepts for a more condensed, easily parsable case file which all the participants responded to more positively than the original, long scrolling version and am going to start building off of that.
0 notes
Photo

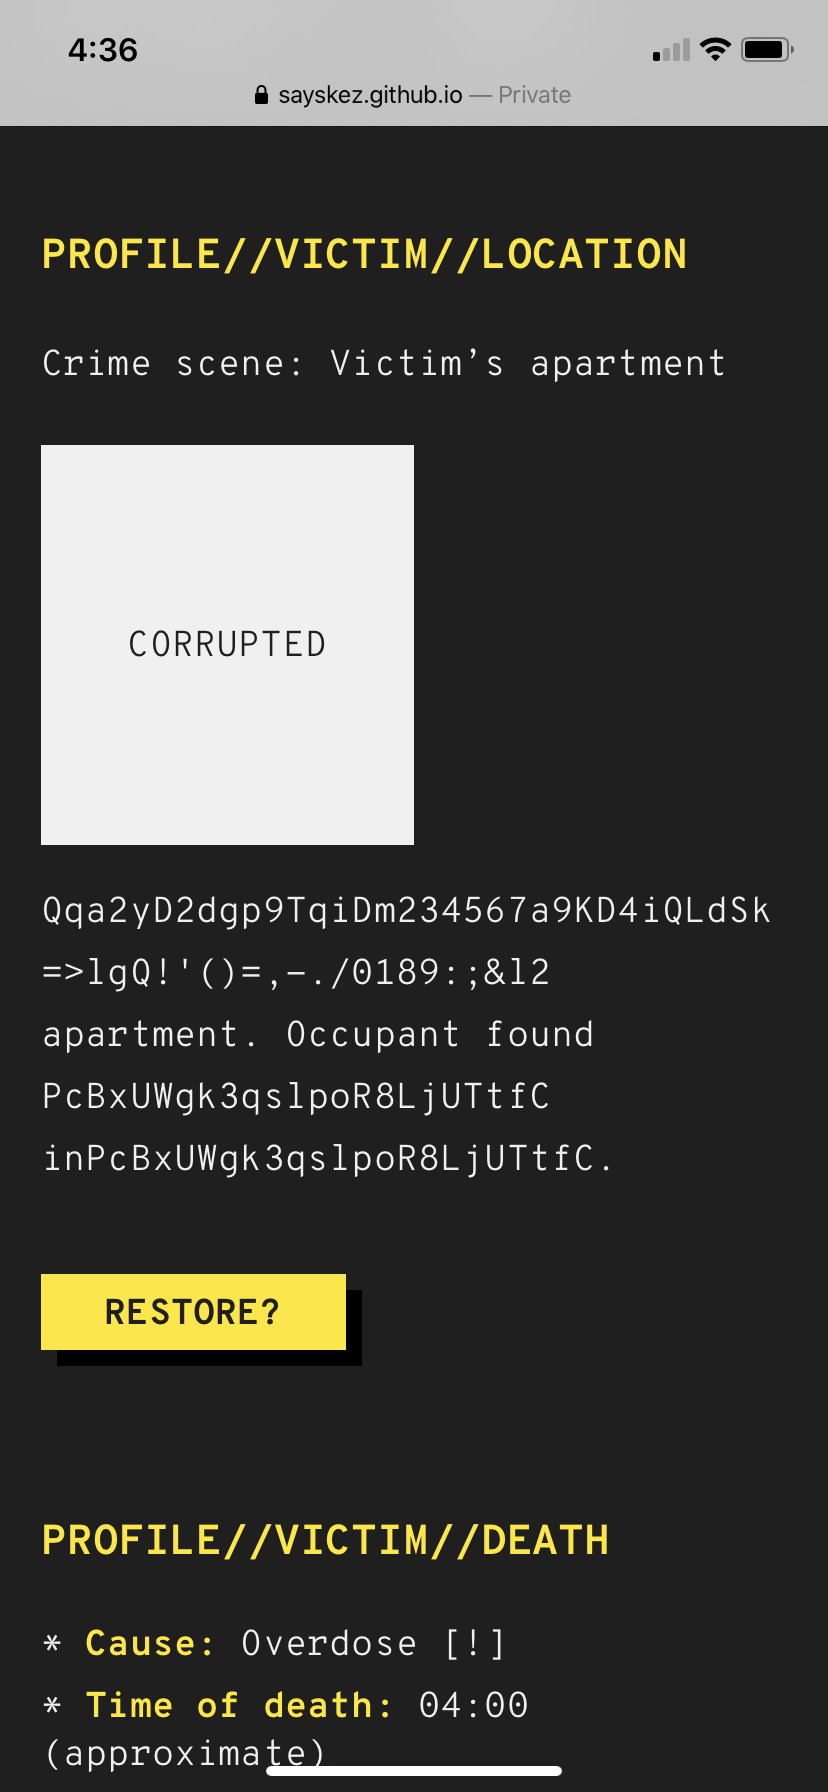
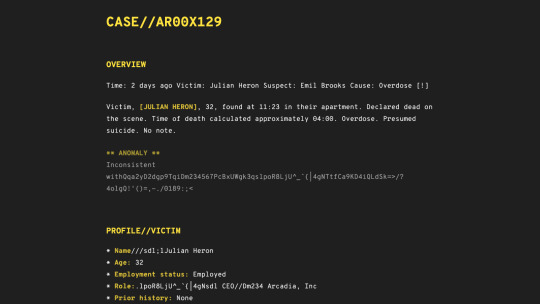
User Testing the Content
Armed with a questionable bundle of HTML pages to imitate the process of reading a case file and hunting down a location, I set out to find some victims volunteers to see what works and what doesn’t.
But first! Plotting the test. I wrote up some brief test instructions to set the context (WTF is Arcadia?), explain what the test is, and what you have to do. My ultimate aim was to answer some questions about the design:
What I set out to learn:
Are location instructions clear?
How did you feel finding the location?
How did you feel about what you unlocked for finding the location?
What did it feel like you were reading?
Try out the prototype for yourself here.
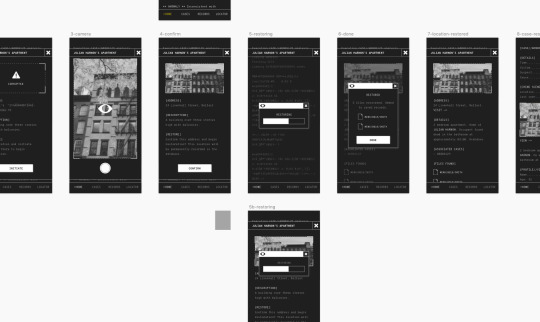
The Prototype
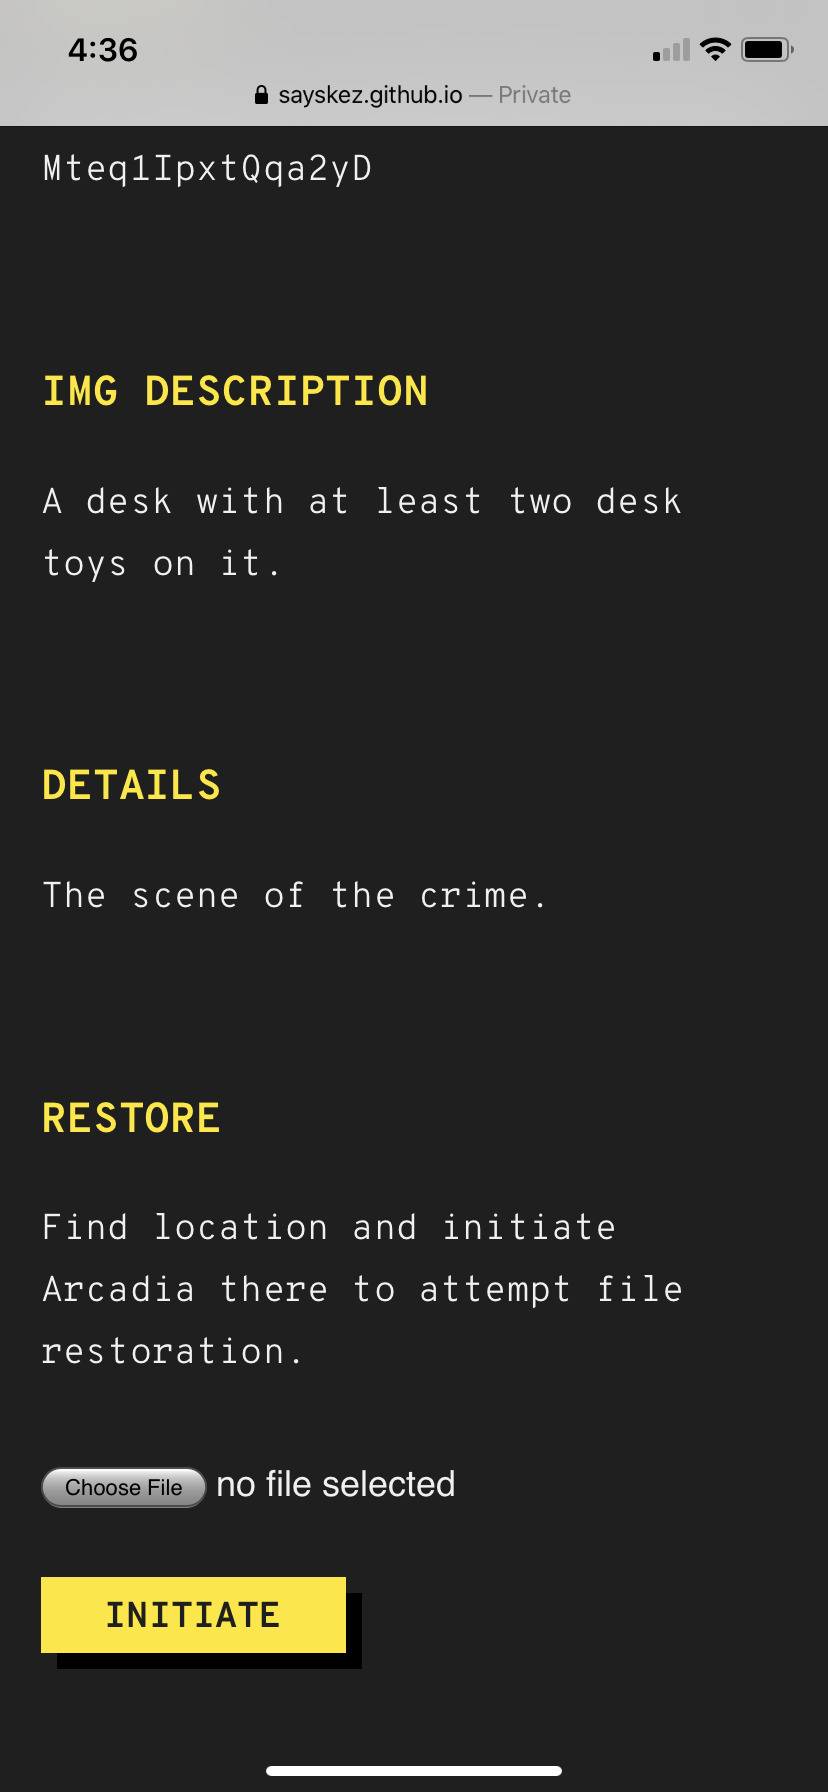
How it works:
Read the case file
Find a location to restore
Take a photo of that location
Restored!


Feedback from Testing with Users
I tried it out with a couple people and though it was designed to be a moderated test I actually had two participants try it out remotely on their own so a nice range.
The Good
“I was intrigued and getting drawn into it.”
“Poor Julian” (Julian being the murder victim)
“Love my citizen number! That’s my birthday”
No one seemed to have trouble reading through the case file, even though I had concerns about the length of it.
“Really parsed through the first bit really thoroughly” (the code read out and garbled text)
The Bad
“Looked intimidating at first”
In all cases the instructions for restoring a location were unclear and people weren’t sure what they were supposed to do.
Can I just take a picture of anything? Isn’t that cheating?
People expected to find something in the garbled text and when they didn’t, it made them doubt themselves. “Like I’ve missed something”
One person googled the garbled text in the address, expecting something to be hidden there or reveal the truth (though this would be cool if there was something hidden there).
The Suggestions from Participants:
“Love my citizen number! That’s my birthday” (this did actually happen and I am totally going to steal it to make citizen numbers personalised to users as another little Easter egg).
If it’s unreadable, don’t render it as regular text
If you can cheat the system or this location can exist anywhere, make that clear.
Maybe that could be part of the story? Like you are actively trying to game the system in order to unlock something?
Maybe there could be puzzles? Even simple anagrams or replacing letters?
Could there be a simple starter case or introduction to the various systems like cameras and clues?
Reflecting on the Feedback
After the initial deflated feeling of total failure on the location front, I picked myself up to look on the bright side.
Key Takeaways:
Thanks to having a barebones prototype, key areas where the location gameplay fall flat were identified. Time to rethink and reframe from both a story and experience perspective.
Participants had some great suggestions in terms of what they would like to be able to do and what they expected to see. In particular, I wanted to look at how I use the garbled/corrupted text to hide clues and as a form of puzzle.
The suggestion of a starter case has me rethinking onboarding as potential case zero to get people started.
Double down on what is working: I’ve been playing it safe on the mystery front but time to up the game. People seem to be engaged by the idea so I should encourage and reward that inclination.
So all in all, the test was a total success! Now I know which areas need to go back to the drawing board for the next iteration.
0 notes
Photo
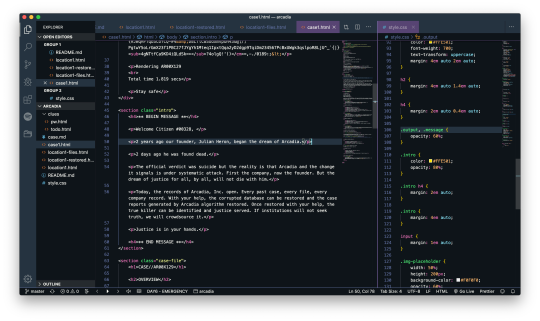

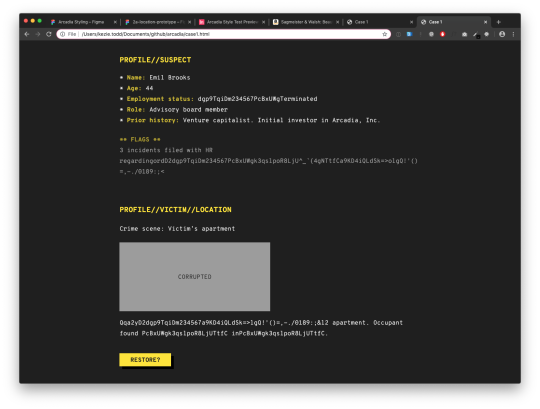
The Simplest Thing You Can Make: Creating a Content Prototype
Check out the content-only prototype on GitHub
One of the biggest challenges I found was how to test the various wireframes I was making because they are so content driven. I can walk people through it but then that makes it tricky to get a feel for if the instructions are really working and how people naturally approach the story and gameplay.
So I sat down to brainstorm not the final design but how to prototype. What is the simplest thing I could make to test?
Finally it hit me, if everything is so text driven, why can’t I make a simple prototype of those text pages? So that’s what I did.
The Goal
Create the simplest possible prototype centred on the content of a case file and location.
Create something shareable and interactive that I can give to people to test out on their phones.
Put the emphasis on the content. Minimal styling or ornamentation.
The Process:
Taking my first draft of the case file, I converted it to HTML and built a quick webpage.
Added minimal styling to capture the general feel of the experience without going overboard.
Did a spot of googling to find out how to trigger the camera app on a phone (surprisingly it is dead simple) so I could fake the iteration.
Faked the act of finding files by linking up static HTML pages so people will be able to follow the flow even though there is no underlying programming.
The Result:
A content prototype that is completely responsive and easy to distribute so people can play it on their desktop or phone out in the wild.
Best of all: with the content mostly written it didn’t take much time at all and will allowing me to start iterating on feedback immediately rather than waiting for a finished product.
Try it out for yourself here
0 notes
Video
tumblr
HTML Arcadia: Content Prototyping
A run through of the content-first HTML prototype I put together to test the case file and location capturing system with users.
Try it out for yourself.
Read about the thought process and making behind it.
0 notes
Video
tumblr
Figma Prototype: Locations
Screen recording of my first prototype using Figma. Compared to the version from Marvel, even in the 15 minutes speed test I gave myself to import the file from Sketch to Figma and wire it up, I was able to get more granular animations.
This helped me get a feel more for how it might actually work and I also got some valuable feedback from one of the designers at work who asked:
What about pixelated icons to be more in keeping with the style?
Could a serif monospaced font work better and be more readable?
The hierarchy of the text could use some work in the case file.
Plenty more to explore, that’s for sure!
Test out the Figma Prototype for yourself
0 notes
Photo
Location Prototype Take 2: To Figma We Go!
Test out the Figma Prototype for yourself
Spending the afternoon creating my initial location capture prototype, I was paying half attention to the work slack channel where they were discussing Figma as a potential alternative to Sketch.
I first tried Figma years ago but without a need for the collaborative aspect and lacking in design capabilities compared to Sketch at the time, I never pursued it. However chatting about its new features and prototyping capabilities got me interested.
And would you look at that, they also have Sketch file import! So I grabbed my location prototype and added to Figma for a wee test run.
Figma Test:
It is surprisingly seamless! The UI took a bit of adjusting to coming from Sketch but it had all the capabilities I needed and the import was flawless once I got the fonts loaded in.
I found selection a bit odd and finicky compared to Sketch but other than that, the experience was smooth.
The prototyping: this is what I was here for! Unlike Sketch and Marvel, which pack some simple screen to screen prototyping but nothing too granular, Figma has decent smart animate capabilities and tricks so you can do a lot more (and all without leaving the tool).
Updating the Prototype:
I gave myself 15 minutes for a speed run to update the prototype so it’s still pretty rough transitions but even in that time there is a huge difference compared to Marvel:
Gentler fade outs
Actually loading progress bar
Expanding windows
Shrinking photos
Awesome to see the possibilities and I will definitely be experimenting with Figma more. It may not be for a high degree of polished prototyping but for general tasks, it might just rival Sketch these days.
Test out the Figma Prototype for yourself
Compare to the Sketch + Marvel Prototype
0 notes
Video
tumblr
Prototyping Location Clues
Test out the first pass at the prototype here.
Still iterating on the design but feeling slightly more confident, the next key area I wanted to flesh out was the experience of travelling to locations to uncover clues. This is the biggest ‘unique selling point’ for Arcadia and how it crosses over into the real world so it’s important it is engaging.
1) Lots and lots of sketching
2) Taking said sketches onto the screen and building upon my earlier style test.
My plan was to test the flow and I wanted it to be as simple and focused as possible. Originally I had more around the case file but I stripped even that back and went with monochrome wireframes detailing only a simple location capture.
Putting it together with Marvel
Taking these screens, I pulled them into Marvel. I haven’t used Marvel since second year but I wanted to give it a spin to get a feel for the other prototyping tools out there (plus I’d already used my free prototype on InVision).
The end result is not as smooth as I would like because unfortunately Marvel does not offer much more animation options than InVision but it is still enough to test out the flow and see how it might work.
Give the prototype a try for yourself here.
0 notes