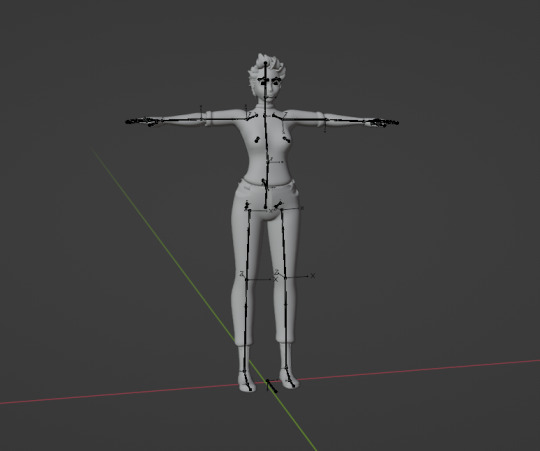
#rigify blender to unreal
Explore tagged Tumblr posts
Visit Tumblr Blog
Explore Tumblr blogs with no restrictions, modern design and the best experience.
Last Seen Tumblr Blogs


Fun Fact
When “GIF” was named word of the year in 2012, Oxford Dictionaries U.S.A. credited Tumblr for pushing the word.
Video
youtube
Blender to Unreal Engine 5.4 - IK Rig (No errors! No plugins!)
#youtube#easy rig#rigify blender to unreal#U5.4 tutorial#Unreal rig tutorial#how to export from blender to unreal engine 5.4
0 notes
Text
3D Game Modeling with Blender - Beginner to Advanced

3D Game Modeling with Blender – Beginner to Advanced
Meta Description: Learn 3D game modeling with Blender from beginner to advanced levels. Master character design, environments, and game-ready assets step-by-step.
Introduction to 3D Game Modeling with Blender
Blender is one of the most powerful and free open-source 3D modeling software tools used for game development, animation, and visual effects. Whether you're just starting or looking to advance your skills, mastering 3D game modeling with Blender opens up a world of creative opportunities. In this article, we’ll guide you from beginner to advanced levels in Blender 3D modeling for games.
Why Choose Blender for Game Modeling?
Blender has become the go-to choice for indie developers and professionals alike due to its:
Free and open-source nature
Powerful modeling and sculpting tools
Seamless integration with game engines like Unity and Unreal Engine
Large, active community and vast learning resources
Beginner Level – Getting Started with Blender
1. Installing Blender
Start by downloading the latest version from Blender.org. Installation is straightforward and compatible with Windows, macOS, and Linux.
2. Understanding the Interface
Learn the basics of Blender’s UI:
Viewport
Tool panels
Timeline
Outliner
Properties editor
3. Basic Modeling Techniques
Practice these foundational tools:
Extrude (E)
Loop Cut (Ctrl + R)
Subdivision Surface Modifier
Mirror Modifier
4. Creating Your First Game Asset
Try modeling a simple object such as a low-poly crate, barrel, or weapon. Export it as an FBX or OBJ for game engine use.
Intermediate Level – Refining Your Skills
1. Sculpting and Retopology
Use Blender’s Sculpt Mode to add detail. Then apply retopology techniques to create game-friendly mesh topology.
2. UV Unwrapping and Texturing
Master UV mapping to lay out textures.
Use Blender’s Texture Paint or external tools like Substance Painter.
Apply PBR (Physically Based Rendering) textures for realism.
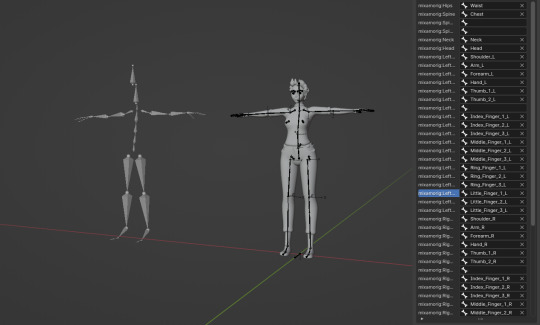
3. Rigging and Animation Basics
Create a simple armature (skeleton) for your models.
Animate basic movements such as idle, walk, or attack cycles using keyframes.
4. Exporting to Game Engines
Learn how to:
Export models to Unity, Unreal Engine, or Godot.
Ensure correct scale, rotation, and origin points.
Use GLTF or FBX formats for compatibility.
Advanced Level – Game-Ready Production Techniques
1. Advanced Modeling Techniques
Use Booleans, Modifiers, and Shaders for complex shapes.
Master non-destructive workflows with procedural modeling.
2. High to Low Poly Baking
Create high-detail sculpts and bake normal maps onto low-poly models.
Learn how to bake ambient occlusion (AO) and curvature maps for realistic lighting effects.
3. Optimization for Performance
Reduce polygon count while maintaining detail.
Create Level of Detail (LOD) models.
Optimize UV layouts and texture resolution.
4. Full Character Creation Pipeline
Model a stylized or realistic game character.
Sculpt details and bake maps.
Rig using Blender’s Rigify Addon.
Animate and export with NLA editor.
Bonus Tips for Success in Game Modeling
Stay organized: name objects, materials, and layers properly.
Use reference images for accuracy and consistency.
Join Blender communities on forums, Discord, or Reddit.
Always back up your Blender files and use version control.
0 notes
Text
Lvl80 Blog. Part 2
After some time, I decided to scrap the blog idea. I decided to write about how to import the animations into a custom rig in Blender.
After doing some blueprint work in the Unreal engine, at some point - the locomotion system got broken for an unknown reason. With that - the original starting animations and the model died.
I decided it would be a good idea to try to import my own model into Unreal Engine and learn the ways of how I could import animations into my rig.
Thanks to the motion class classes which I have attended recently, I already had an idea to just use the motion capture software to import the animations - and I was right! I could use the Rokoko blender addon to do that! I have watched the tutorial on YouTube, prepared my model and the source rig with the animation and just touched the settings around to see how it works.
References:
MK Graphics (2023) 'How To Use Mixamo Animations In Blender Rigify Rig' Available at: https://www.youtube.com/watch?v=_qHfUAniTM0&pp=ygU3YmxlbmRlciBob3cgdG8gaW1wb3JyIGFuaW1hdGlvbnNpbnRvIGN1c3RvbSByaWcgYmxlbmRlcg%3D%3D
0 notes
Text
Auto-Rig Pro 3.41.54 for Blender 2.8 Full Version
Auto-Rig Pro is an advanced automatic rig addon for Blender, for bipeds, quadrupeds and similar characters. I first developped it for my personal use, and thought it could be useful to many, so here it is.
It includes some tools to quickly position the bones on the character model, based on a body recognition solver.
-Bipeds and multiple-peds support with presets (human, dog, horse…) -Automatic bone placement solver based on mesh recognition (for bipeds only) -Edit Reference Bones feature to easily go back to the reference bones to adjust the rig anytime -Modular: choose how many fingers and toes are needed, optional tail, ears, breasts, duplicate or remove limbs…
-Bone picker -Stretchy spine -IK-FK snap with auto-keying -Knees and elbows pinning -Multiple Child-Of constraints for the IK hands and feet -A complete set of secondary controllers for advanced pose sculpt -Facial controls -Shape keys drivers creation tool -Bone remapper, a universal retargetting tool to remap any armature action on a different armature (e.g. BVH files retargetting). -Game engine export module, in Fbx format to ensure correct rig export to Unreal and Unity. Gltf format will come soon.
Position the reference bones so that they match your character proportions. To speed up this process, the smart tool will automatically try to find the body parts locations for you (bipeds only so far). Then, edit the result if needed (if your character is not a biped/ or for more accuracy), eventually place the facial bones and other extra limbs, and generate the final rig. Based on a non-destructive workflow, the armature remains easily editable anytime after the generation. Check the product documentation and the youtube channel for more informations.
Modular
Customize the rig definition in a few clicks: fingers, toes amount, spine bones, multiple neck bones, tail, breasts, ears and much more. Duplicate or remove limbs to rig spiders, centaurs… or whatever!
Video tutorial, rig a centaur with the multi-limb feature: Centaur Rig
The picker panel dynamically updates, so you can select any bone from the separate panel easily.
Intuitive tool to edit the bone shapes, with automatic mirror:
Customizable UI: fully editable layout, buttons positions, colors, background pictures…
Remap
The Remap feature allows retargetting of any armature action to another one, with different bone names and bone orientations, supporting imported .bvh/.fbx armatures for example. It’s universal: works with Auto-Rig Pro, Rigify, custom rigs… Define the source armature, the target armature, and the animation will retarget according to the bones names matches and bones original orientation.
It support IK feet, hands for accurate motion tracking, and an interactive offset tool to remap to different characters proportions.
Downlaod Auto-Rig Pro 3.41.54 for Blender 2.8 Full Version
Downlaod Auto-Rig Pro 3.41.54 for Blender 2.8 Full Version [ MB]
The post Auto-Rig Pro 3.41.54 for Blender 2.8 Full Version appeared first on Load Plugin.
source https://www.loadplugin.com/blender/auto-rig-pro-3-41-54-for-blender-2-8-full-version/?utm_source=rss&utm_medium=rss&utm_campaign=auto-rig-pro-3-41-54-for-blender-2-8-full-version
0 notes