#Unreal rig tutorial
Explore tagged Tumblr posts
Visit Tumblr Blog
Explore Tumblr blogs with no restrictions, modern design and the best experience.
Last Seen Tumblr Blogs


Fun Fact
In 2020, Tumblr had 29.4 million users in the US.
Video
youtube
Blender to Unreal Engine 5.4 - IK Rig (No errors! No plugins!)
#youtube#easy rig#rigify blender to unreal#U5.4 tutorial#Unreal rig tutorial#how to export from blender to unreal engine 5.4
0 notes
Text
The secret of fluff
There is no secret, only volumes and vectors. Now I will proceed beam the knowledge of simple structures under the details of this drawing straight into your brain.

The best way to achieve fluffy fluff is to get into the right mindset when you go to draw it. It may be made up of thousands of hairs, but unlike long hair, which can be simplified to ribbons, fluff can be simplified to a volume, a solid piece of geometry.

The largest blocks of it are already here, but it's the smaller extra volumes of it that really help sell the illusion.
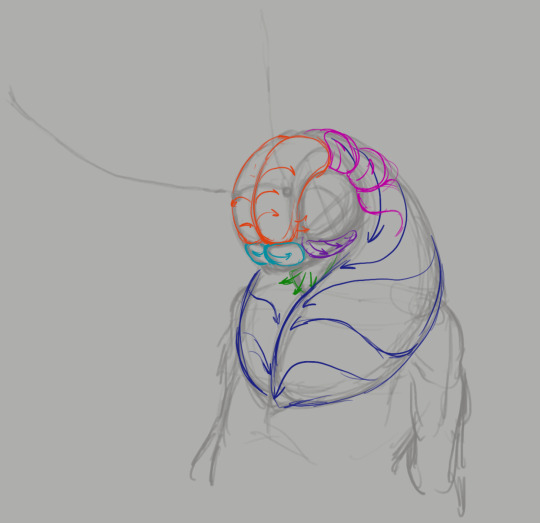
These distinct groups of fluff create a feeling of some kind of growth pattern, rather than an even fur coat thrown over a statue. They also squish and push each other, which adds that extra 3d feeling to the fluff. At this stage I also decide the growth direction of these volumes, these guides are what prevents me from getting lost in all the fur. Well, honestly I've done this so much that the guides are no longer a necessity, but you get my meaning. It's very useful when you're still figuring it out.

Anyway, scratch and scribble your way along the guides until you're happy. I found it most effective to add more lines to the parts of the fur that are facing away from the camera and fewer to the parts that are viewed straight on. It makes the fluff appear more voluminous and soft. Follow the same logic as a fresnel shader, basically.

That's how the effect looks for those who don't know. (Image snatched from Unreal's documentation on fresnel node.) More guides, now on antennae.

Once again, there is coherent geometry guiding the hairs that can wobble and deform in perspective. First - a simplified ribbon, then - hair detailing.

Lastly, shading. For this step don't follow all the individual hairs you've drawn on the detail pass, what you're shading is the entire volumes, not individual fluff clumps. Doesn't hurt to pick out a few strands of course, but don't over do it or the 3d feeling will be lost.
Thanks for reading my quick and dirty tutorial, I'm going back to work. Control rigs don't set themselves up on their own.
611 notes
·
View notes
Text
Adding on to this with some of my favorites!!
Winged Canvas (love love LOVE these guys! they have tons of tutorials and streams for just about anything regarding 2D art and animation)
chupuko (live2D animation tutorials! goes over the whole process from drawing the model to setting it up in vtube studio. her tutorials were what inspired and taught me to make my own vtube model)
Blender Guru (goes over the basics of 3D modeling program Blender, his donut tutorials are kinda considered the classic starting point for beginners)
And some programs:
ibisPaint X (free, lots of tools available including one for comic paneling. can get it on your phone)
Aseprite ($20, for pixel art, you can find it on Steam)
Live2D Cubism (free but also has a paid version with some extra features. used for animation and rigging, and usually the go-to for rigging vtube models but can be used for other animation too. i'd recommend just getting the free version, it has everything you need and the paid version is pretty pricey)
FlipaClip (free animation app, you can get it on your phone)
Procreate Dreams ($20. procreate's animation app, but i wouldn't recommend it as of now since it's still pretty shoddy and missing a lot of core features. i'll put it in here regardless since it's the one i have experience in)
ToonSquid ($10. for animation as well. haven't tried this one yet but i've heard it's pretty good! i've been considering getting it to replace Dreams actually just haven't decided yet)
Shotcut (free, video editing)
Audacity (free, audio editing)
OBS Studio (free live streaming/recording software)
OpenUtau (free vocaloid alternative. an updated version the original UTAU, you don't need to change your locale for this version and it's compatible with all UTAUloids. shareware so anyone can create a voicebank for the program, the main downside is that there's no one place to find a voicebank so you gotta hunt for em a little, but here's Kasane Teto and Adachi Rei - ignore the "download faster" thing to the left of the screen for Rei, it's not necessary to download the file and idk why it's there either. and you only need one of the voicebank downloads from each of em it depends on which language/voicebank type you wanna use so it's probably best to look into that a little bit first)
RPG Maker (pricey, but a solid game development engine. it has a ton of different iterations so i'd recommend doing lots of research before settling on anything, but it's a good tool if you're interested in game design. there are also a lot of plugins made by community members that can really enhance your game, my favorite plugin dev is Caethyril! They have a bunch of free plugins for both MV and MZ - and here's their tweaks for MZ as well!)
Ren'Py (free visual novel maker)
Twine (free choose-your-own-adventure maker that you can use on your browser, just be careful about clearing cookies cause it'll clear your Twine stuff as well. there is also a downloadable version though)
Unity (free 3D game development software)
Unreal (another free 3D game development software)
cheer, resources be upon ye!
Can't afford art school?
After seeing post like this 👇

And this gem 👇
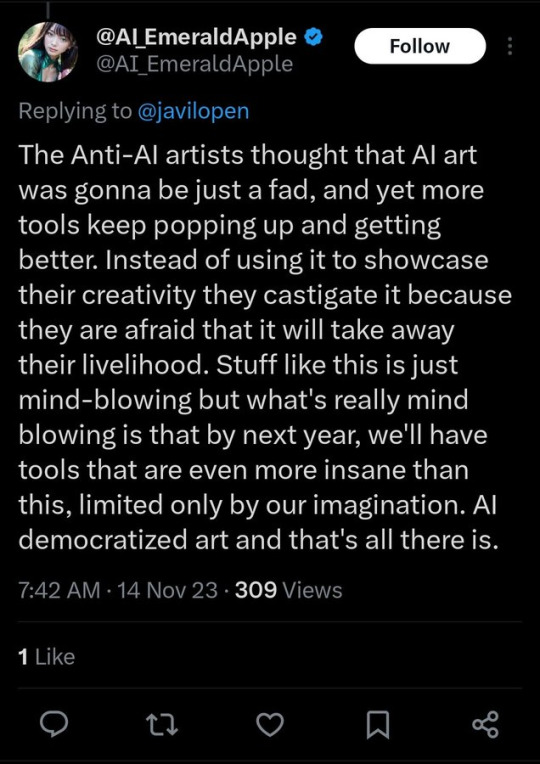
As well as countless of others from the AI generator community. Just talking about how "inaccessible art" is, I decided why not show how wrong these guys are while also helping anyone who actually wants to learn.
Here is the first one ART TEACHERS! There are plenty online and in places like youtube.
📺Here is my list:
Proko (Free)
Marc Brunet (Free but he does have other classes for a cheap price. Use to work for Blizzard)
Aaron Rutten (free)
BoroCG (free)
Jesse J. Jones (free, talks about animating)
Jesus Conde (free)
Mohammed Agbadi (free, he gives some advice in some videos and talks about art)
Ross Draws (free, he does have other classes for a good price)
SamDoesArts (free, gives good advice and critiques)
Drawfee Show (free, they do give some good advice and great inspiration)
The Art of Aaron Blaise ( useful tips for digital art and animation. Was an animator for Disney)
Bobby Chiu ( useful tips and interviews with artist who are in the industry or making a living as artist)
Second part BOOKS, I have collected some books that have helped me and might help others.
📚Here is my list:
The "how to draw manga" series produced by Graphic-sha. These are for manga artist but they give great advice and information.
"Creating characters with personality" by Tom Bancroft. A great book that can help not just people who draw cartoons but also realistic ones. As it helps you with facial ques and how to make a character interesting.
"Albinus on anatomy" by Robert Beverly Hale and Terence Coyle. Great book to help someone learn basic anatomy.
"Artistic Anatomy" by Dr. Paul Richer and Robert Beverly Hale. A good book if you want to go further in-depth with anatomy.
"Directing the story" by Francis Glebas. A good book if you want to Story board or make comics.
"Animal Anatomy for Artists" by Eliot Goldfinger. A good book for if you want to draw animals or creatures.
"Constructive Anatomy: with almost 500 illustrations" by George B. Bridgman. A great book to help you block out shadows in your figures and see them in a more 3 diamantine way.
"Dynamic Anatomy: Revised and expand" by Burne Hogarth. A book that shows how to block out shapes and easily understand what you are looking out. When it comes to human subjects.
"An Atlas of animal anatomy for artist" by W. Ellenberger and H. Dittrich and H. Baum. This is another good one for people who want to draw animals or creatures.
Etherington Brothers, they make books and have a free blog with art tips.
As for Supplies, I recommend starting out cheap, buying Pencils and art paper at dollar tree or 5 below. For digital art, I recommend not starting with a screen art drawing tablet as they are more expensive.
For the Best art Tablet I recommend either Xp-pen, Bamboo or Huion. Some can range from about 40$ to the thousands.
💻As for art programs here is a list of Free to pay.
Clip Studio paint ( you can choose to pay once or sub and get updates)
Procreate ( pay once for $9.99)
Blender (for 3D modules/sculpting, ect Free)
PaintTool SAI (pay but has a 31 day free trail)
Krita (Free)
mypaint (free)
FireAlpaca (free)
Libresprite (free, for pixel art)
Those are the ones I can recall.
So do with this information as you will but as you can tell there are ways to learn how to become an artist, without breaking the bank. The only thing that might be stopping YOU from using any of these things, is YOU.
I have made time to learn to draw and many artist have too. Either in-between working two jobs or taking care of your family and a job or regular school and chores. YOU just have to take the time or use some time management, it really doesn't take long to practice for like an hour or less. YOU also don't have to do it every day, just once or three times a week is fine.
Hope this was helpful and have a great day.
105K notes
·
View notes
Text
Using Blender Software for Game Development
In today’s game development landscape, high-quality 3D assets are essential—and Blender software stands out as one of the most accessible and powerful tools for creating them. Whether you’re an indie developer or an aspiring game designer, learning how to use Blender software can give you a huge advantage. It’s completely free, open-source, and packed with features used by professionals across the industry.
Blender software enables game developers to model characters, environments, weapons, and more with precision and artistic freedom. It offers a full 3D pipeline, including modeling, sculpting, texturing, rigging, animation, and even rendering—all within one platform. With real-time viewport shading and support for PBR (Physically Based Rendering) materials, artists can create assets that look game-ready from the start.
One of Blender’s biggest advantages in game development is its seamless integration with game engines like Unity and Unreal Engine. You can export your models in formats such as FBX, OBJ, or glTF, and easily bring them into your game projects. Plus, with Blender's animation tools, you can create character rigs, walk cycles, and more—without needing external software.

If you’re new to 3D or game asset creation, enrolling in a Blender 3D Course is highly recommended. A structured course will guide you through the basics of Blender’s interface, modeling techniques, UV unwrapping, texture painting, and how to optimize models for game engines. Many courses also include project-based learning, which is essential for building a strong portfolio.
However, like any tool, Blender software has a learning curve. It may seem complex at first, but with the right guidance and consistent practice, it becomes a highly intuitive and efficient part of your development toolkit. The active Blender community also offers a wealth of tutorials, forums, and plugins to help you along the way.
For game developers looking to bring their ideas to life without spending thousands on expensive software, Blender software is a game-changer. It puts professional-grade 3D tools in the hands of anyone with a computer and the drive to learn.
Ready to start your game development journey? Whether you're creating your first character or building a full game world, Blender software is your gateway into 3D creation.
Take the leap, learn with purpose, and build your future—start your Blender 3D Course today with Gamer2Maker!
0 notes
Text
UHGA_Final project launched
First things first, to check the list I need to present in August.
I was doing deeper research about the Houdini workflow because I want the rotor wash dust effect.
The thing is:
Do I still need Unreal Engine while I can do everything in Houdini?
Am I good enough to master Houdini this quick?
How does the Houdini plug-in in UE5 work? I've tried it on the PC in LRC, but it's kinda confusing and there's not much tutorial I can find on the internet, and this is kinda pushing me away.
If I really need the effect, the best workflow I can assume right now is:
Done everything in UE5, especially the rigging part, and baked the animation and exported it into Houdini to do the VFX part.
Before figuring out all those things, I'll set my goal a bit safer: Except for making the cinematic landing video with VFX all over the scene, my goal is to make a proper dropship design with mechanical rigging and the 360-degree rotation detail render video.
0 notes
Text
week 9
this week I decided to move onto the making of my game as I felt I needed as much time as I can on this portion of my project and was aware that I was falling behind in my project.
youtube
using this video I started to convert my protagonist scan into a file that was able to be animated and imported into unreal engine.
my LiDar scan of my 3D model was good in terms of accuracy and surface texture but as I scanned it with the monster high doll stand, It messed with the mesh and due to time restraints and aesthetic reasons, I thought it would be better to use the LiDar scan as a template for proportions and scale. once this was done, following the tutorial in terms of joining each mesh, I then moved onto materials.
youtube
youtube
after using the basic materials tutorial from above, I thought the lack of detail wasn't what I was looking for and wanted the model to resemble the physical prototype more. while the model is nice and smooth/polished looking, the mask doesn't quite have the detail that I'm looking for which is making the model. that being said, I wanted to proceed, using this as the model for the sake of progress. this is why I adjusted it to include a woven texture on the dress as well as refractive crystals. (see below)

I was a lot happier with this outcome as I feel the tones and texture were a lot more representative of what the physical model was looking for.
the next step in the process was to export the file to Mixamo to start rigging the character. this is a faster way of rigging the character rather than doing so in blender, creating my own animations for each style of movement. I was surprised that you only had to mark the chin, wrists, elbows and knees. especially the chin as I feel there is the most variance with facial features, making it more difficult to track.
[insert image]
the mask and length of the models arms struggled the most to keep to the correct form. to combat the arm issue, I could extend the original model's arms to accommodate this, however I'm unsure how to keep the character's mask rigid as it is important that it keeps this shape/ size and there aren't extra markers in Mixamo that you can add to help with this. I decided this was something to come back to as I would rather check that the process of importing the files into unreal engine worked.
next I kept following the instructions in the video to import the files into unreal engine. this was very successful, however the more complex textures such as the woven fabric and the crystals did not import correctly so this will need some troubleshooting.
0 notes
Text
Pre-Production: 22
Blog#44
13/04/25
Last semester, for my assignment, I focused on creating clothing for a doctor character. I rigged the asset in Blender and posed it, but since it was just weighted to a basic human rig, the shirt's sleeves appeared very stiff. I want clothing to animate better and interact more naturally with the body.
For my final major project, I aim to understand how to rig and simulate clothes, ropes, and other similar objects for game animations. I found a couple of helpful tutorials on YouTube that explain cloth simulation in Unreal Engine.
youtube
This is the first method I found by TriGon, where he used the proxy mesh technique in Unreal Engine to simulate cloth with Chaos Cloth. He explained the entire process, from creating a proxy mesh in Maya to integrating it in Unreal Engine for improved cloth interaction. This method could work well for me since I have a similar drapery style for my character.
youtube
This is the second method I found, where he used a blueprint and additional techniques to achieve much better cloth simulation results. I’ll test which method provides the best outcome.
References:
TUF (2025). The Only Cloth Simulation Tutorial You Need – Full Workflow By TUF – The Unreal Forge. [online] YouTube. Available at: https://www.youtube.com/watch?v=Z57ggNKZDy8
TriGon (2021). Unreal Engine 5 Cloth Simulation - For Characters. [online] YouTube. Available at: https://www.youtube.com/watch?v=zXjpX-SirM0
0 notes
Text
Getting Started with 3D Game Development

3D game development is a captivating field that combines creativity and technical skills to create immersive gaming experiences. With advancements in technology, developing 3D games has become more accessible to developers of all skill levels. In this post, we’ll explore the basics of 3D game development, tools you can use, and tips for getting started.
What is 3D Game Development?
3D game development involves creating video games that utilize three-dimensional graphics. Unlike 2D games, 3D games allow for more realistic environments, characters, and interactions, enhancing the player's immersive experience.
Why Choose 3D Game Development?
Realism: Create visually stunning and realistic environments.
Immersion: Provide players with a more engaging experience through depth and perspective.
Flexibility: Design a wide range of game genres, from action and adventure to simulations.
Market Demand: 3D games are popular, with a vast audience across various platforms.
Essential Tools and Technologies
Game Engines: Unity, Unreal Engine, Godot
3D Modeling Software: Blender, Maya, 3ds Max
Version Control: Git for managing project files
Texturing Tools: Substance Painter, Photoshop
Audio Software: Audacity, FL Studio for sound design
Basic Workflow for 3D Game Development
Concept Development: Start with an idea, define the game's genre, target audience, and core mechanics.
Game Design Document (GDD): Outline the game's features, story, characters, and gameplay mechanics.
3D Modeling: Create 3D models for characters, environments, and objects using modeling software.
Implement Gameplay: Use a game engine to program game mechanics, controls, and interactions.
Testing: Regularly playtest the game to find and fix bugs, improve gameplay, and ensure stability.
Launch: Prepare for release by marketing the game and deploying it on relevant platforms.
Key Concepts to Learn
3D Graphics: Understand rendering, lighting, and shading techniques.
Physics: Learn how to implement realistic movements and collisions in 3D space.
Animation: Create character animations and transitions using rigging and skeletal animation.
Artificial Intelligence: Program non-player character (NPC) behaviors and pathfinding.
Networking: Understand multiplayer game architecture if developing online games.
Beginner-Friendly Game Ideas
A simple 3D platformer
An endless runner game
A 3D maze exploration game
A basic first-person shooter
A virtual reality experience
Resources for Learning
Udemy – Courses on Unity, Unreal Engine, and more
Coursera – Offers courses from top universities
YouTube – Many channels dedicated to game development tutorials
Unity Learn – Official tutorials and resources from Unity
Best Practices
Keep your code organized and modular for easier maintenance.
Document your design decisions and processes.
Stay updated with industry trends and new technologies.
Engage with the game development community for support and feedback.
Conclusion
3D game development is an exciting and rewarding field that combines art and technology. With the right tools, resources, and a passion for creativity, you can create immersive gaming experiences that captivate players. Start small, continue learning, and enjoy the journey of bringing your 3D games to life!
0 notes
Text
The Best Software for Creating 3D Game Assets in 2025

Creating high-quality 3D game assets is crucial for game developers, whether they're working on indie projects or AAA titles. As the gaming industry evolves, so does the technology used to design immersive 3D game environments and intricate character models. In 2025, various software options cater to different aspects of 3D modeling games, from hard surface modeling to organic sculpting. This blog explores the best software available for creating 3D game assets, including props 3D models, 3D vehicle modeling, and 3D environment modeling.
1. Blender – The Best Free 3D Game Asset Creation Software
Blender remains a top choice for 3D modeling games, offering a powerful and completely free solution for both beginners and professionals. It provides an extensive set of tools for 3D hard surface modeling, sculpting, texturing, and rendering.
Key Features:
Sculpting & Modeling – Excellent for both organic and hard surface modeling.
Geometry Nodes – Great for procedural 3D game environment creation.
Eevee & Cycles Render Engines – Real-time rendering for quick asset visualization.
Large Community Support – Access to thousands of tutorials and plugins.
For developers working on 3D vehicle modeling, Blender offers robust tools to create high-poly and low-poly car 3D models, making it ideal for both indie developers and large studios.
2. Autodesk Maya – Industry-Standard for 3D Game Assets
Maya remains a dominant force in the gaming industry, widely used for AAA 3D game assets. While its steep learning curve might be intimidating, the results are worth it.
Key Features:
Advanced Rigging & Animation Tools – Essential for game-ready character models.
NURBS & Polygonal Modeling – Ideal for complex 3D hard surface modeling.
Powerful UV Mapping & Texturing – Helps in creating realistic textures for 3D game environments.
Many game studios use Maya for high-end 3D game environments and detailed props 3D models due to its precise modeling capabilities and integration with game engines like Unity and Unreal Engine.
3. 3ds Max – A Favorite for Hard Surface & Vehicle Modeling
For those focusing on 3D hard surface modeling and 3D vehicle modeling, 3ds Max remains a powerhouse. Its flexibility and ease of use make it a preferred choice for designing car 3D models and mechanical assets.
Key Features:
Polygonal & Spline-Based Modeling – Perfect for mechanical and hard surface modeling.
Powerful Rendering Tools – Supports Arnold, V-Ray, and other renderers.
Automation with MAXScript – Speeds up workflow for large projects.
Whether you’re working on props 3D models or complex 3D game environments, 3ds Max’s precision and stability make it an excellent choice.
4. ZBrush – The Ultimate Sculpting Tool for 3D Game Assets
When it comes to sculpting highly detailed 3D game assets, ZBrush is unrivaled. It is widely used for creating characters, creatures, and organic 3D environment modeling.
Key Features:
Dynamic Sculpting Tools – Enables high-detail modeling without topology constraints.
ZRemesher – Optimizes high-poly models for game-ready assets.
Immense Detail Control – Perfect for texturing and detailing 3D game environments.
ZBrush is ideal for artists working on highly detailed 3D game environments, statues, and organic props, making it an essential tool for fantasy and sci-fi game development.
5. Houdini – The Best for Procedural 3D Game Environment Modeling
For developers looking to create massive, procedurally generated 3D game environments, Houdini is a top-tier option. It is widely used in AAA games for its powerful procedural tools.
Key Features:
Node-Based Workflow – Speeds up 3D game environment creation.
VFX & Simulations – Ideal for realistic destruction, smoke, and water effects.
Game Engine Integration – Seamless workflow with Unreal Engine and Unity.
If your project requires large-scale 3D environment modeling, such as cities, forests, or landscapes, Houdini is the best choice for procedural generation.
6. Substance Painter & Substance Designer – Best for Texturing 3D Game Assets
Creating realistic 3D game assets isn’t just about modeling; texturing plays a crucial role. Adobe’s Substance Suite offers the best tools for material creation and painting.
Key Features:
PBR Workflow – Supports industry-standard physically based rendering.
Smart Materials & Generators – Speeds up asset texturing for 3D game environments.
Game Engine Support – Direct export to Unreal Engine, Unity, and other engines.
If you need lifelike textures for props 3D models, 3D vehicle modeling, or 3D game environments, Substance Painter and Designer are must-have tools.
7. Unreal Engine & Unity – Best for Integrating 3D Game Assets
After creating 3D game assets, developers need a game engine to bring their creations to life. Unreal Engine and Unity are the top choices.
Unreal Engine Features:
Nanite & Lumen – Supports high-resolution 3D game environments.
Blueprint Visual Scripting – Allows artists to develop gameplay mechanics without coding.
Photorealistic Rendering – Ideal for AAA 3D modeling games.
Unity Features:
URP & HDRP Pipelines – Customizable rendering for different game styles.
Asset Store Integration – Thousands of ready-made props 3D models and tools.
Flexible Scripting with C# – Excellent for indie and mobile game development.
Both engines support seamless import of 3D game assets from Blender, Maya, 3ds Max, and other modeling tools, making them essential for game development in 2025.
Conclusion
Choosing the right software for 3D modeling games depends on your specific needs. Blender is the best free solution, while Maya and 3ds Max dominate the industry with their robust features for 3D hard surface modeling and 3D game environments. ZBrush is unbeatable for sculpting, while Houdini excels in procedural 3D game environment modeling. Lastly, Unreal Engine and Unity ensure seamless game integration.By leveraging these tools, game artists and developers can create stunning 3D game assets, from car 3D models to intricate props 3D models, shaping the future of game design in 2025.
0 notes
Text
youtube
tutorials on exporting characters with rigs into unreal
0 notes
Text
25- Vr Development project
for the last post for this project the last thing that I figure out is fixing the animation of the clock to work with the new texture, so I see this tutorial about how to animate clocks.
clock in game
proof that is moving in game.
This are the reference that I use to make the animation:
First for the bones I use this video Blender Secrets - Easy Piston Rigging (Blender Secrets and van den Hemel, 2022)
For how to do a clock animation this video: [2.8] Blender Tutorial: Rig and Animation For Clocks - YouTube (Olav3D Tutorials, 2020)
And for exporting to unreal this one: Import Rigs & Animations (BLENDER to UNREAL) (Royal Skies, 2023)
References:
Blender Secrets and van den Hemel, J. (2022). Blender Secrets - Easy Piston Rigging. [online] YouTube. Available at: https://www.youtube.com/watch?v=st84B470kLk [Accessed 1 Dec. 2024].
Olav3D Tutorials (2020). [2.8] Blender Tutorial: Rig and Animation For Clocks. [online] YouTube. Available at: https://www.youtube.com/watch?v=lhhnUo6EjrM [Accessed 26 Mar. 2025].
Royal Skies (2023). Import Rigs & Animations (BLENDER to UNREAL). [online] www.youtube.com. Available at: https://www.youtube.com/watch?v=L4OcpF7-YB0.
0 notes
Video
youtube
Unreal Engine - Modular Foot rig hot fix
#youtube#unreal engine 5 rig#rig2u5#blender game rig to unreal engine tutorial#modular control rig unreal engine 5
1 note
·
View note
Text
Horror Game Idea: How I'll make it work.

For my FMP, I created three different ideas, out of all of those ideas, as of right now I want to make a horror game. For this I went and grabbed a bunch of monsters/ ideas as to what I could use and the idea of using Jorōgumo has interested me as it is a Japanese folklore tale of a spider that takes the form of a woman to lure in men to eat them. This tale intrigues me as it allows for a lot of creativity with the project and how I can work things around, as well as allowing for a creepy factor to already be implemented into the project as spiders are a major fear for people. To create this project I will need to utilize everything I have learnt up until now and also try something new I've been wanting to try for a while now. I know I want to try and make an animation play at one point during the game and I will either do this by recording a cinematic or simply having the animation play when the player has control. As of right now my idea is quite simple and open to interpretations and changes, The game will start off with a black screen and some white text to give some context as to what happened/ what's happening and how the player ended up there. As soon as this goes away the player will gain control and see themselves in a room. As of right now I don't know if I want the player to be trapped in a room/ trapped in a web inside a room or simply be in a room casually but that will depend on how I take the story of the game. Either way, the player will need to find an exit and an escape, I have a basic idea of having the monster "toy" with their food and so add creepy details throughout the game which is where the animation will come in, I want to try and have a humanoid female model with spider legs just as displayed in the image ( from Pinterest) on the mindmap but have it crawl on the walls/ ceilings.
youtube
youtube
youtube
To achieve this I will be learning from some tutorials how the animation process for characters work in Unreal Engine. I plan to either create the character by: Using free assets such as a low poly female model and adding some spider legs onto it then simply rigging the character model, potentially using AI to help? or spending some time trying and learning to create it myself, either way the process of creating the character will be researched into and documented. For the surroundings of the game I want to have the map start of as being inside a house then halfway through the game end up in a cave full of cobwebs and a bunch of other aspects that could make the game as creepy as possible. My idea right now for an ending would be the player getting away or potentially burning the area down to get rid of the monster ending in a cliffhanger with a scream. Overall this game would be a horror game using Japanese folklore as a monster and it would have puzzle aspects to it as well with the player needing to escape similar to a mobile game called Granny.
youtube
0 notes
Text
Bite the bullet, let’s dig into 3D
post 4 - by Chong Lin Wai
As a concept artist, who mainly focuses on 2D visual design and workflows, this was my very first experience working with Unreal Engine. However, as our group only has 4 group members, I had to share the workload in the project to prevent others from becoming overloaded. Given my knowledge of Zbrush, I was responsible for creating the figurative sculpture scene.
The metaphorical meaning of the scene is internal conflict. I wanted to convey the idea of struggling and painful emotions through the human sculptures. Here are some research and reference images:
Rigging in blender
Due to lack of time, instead of creating a human model from scratch, I decided to use the default human models in Zbrush. The T pose function in Zbrush is very limited, so I decided to use the rig feature in Blender for better posing. I first turned the the male and female models into the lowest subdivision level, and exported them into .fbx files for importing to Blender. I followed a beginner tutorial of rigging in Blender to practice rig controlling.
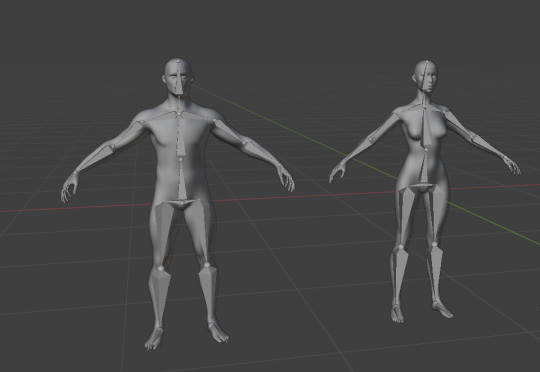
Fig.1 Rigged models

Fig.2 Three designs of the sculpture
I rigged the models and controlled the rigs to pose the figures into a variety of poses. I created several designs to see which one was the best for the sculpture design.

Fig.3 Low poly cave mesh
I also used a cylinder to create a simple low poly mesh for the cavern. I exported the models in .obj files and imported them into Zbrush for further polishing.
Polishing in Zbrush
After importing meshes into Zbrush, I bumped into the issue that there was abnormal behaviour happening on the Zbrush viewport.

Fig.4 Abnormal behavior in Zbrush viewport
The figurative models were facing in the wrong direction whenever the viewport was rotated. I spent some time to figure out that the normal orientations were messed up.

Fig.5 False normal orientation
I opened up Blender again, and fixed all the normal orientations one by one, and then imported the models to Zbrush again. I used a smooth brush to polish the model and sculpted an artistic wall behind it. I also added some detailing textures on the models’ surface using different brushes.

Fig.6 Stone Slate material on the sculpture in UE

Fig.7 Cave texture and imported to UE
I then unwrapped the UV maps and exported all the models in fbx files and used Substance painter for texturing. After I bake the material map of all the models, I assigned a stone slate material for the models and painted some ground sand details on the cave mesh.
Gets started with Unreal Engine
It is impossible for me to create a complicated scenery with intricate blueprints in a very short time. I decided to start with something simple, following the UE beginner tutorial step by step. I followed Neil's suggestion on Unreal Sensei's tutorial to start learning some basic commands.
youtube
Fig.8 Unreal Sensei - UE5 Starter Course
The interface and camera movement were overwhelming at first, however I enjoyed the process of learning new things, and everything came to handy after I spent some time on practicing and recognising certain major features.
Kitbashing
I was very glad that my teammates were aware of my situation as a UE beginner, so one of my teammates, Chuang Xin taught me how to use premade assets, by importing some static meshes and dragging them from the content drawer, to create a simple scenery. I really appreciate her help, she also shared some of the useful assets with me, which are related to the environment I was responsible for. I started to build the cave with simple shapes and then I added all the premade assets to decorate both the exterior and interior of the cavern.
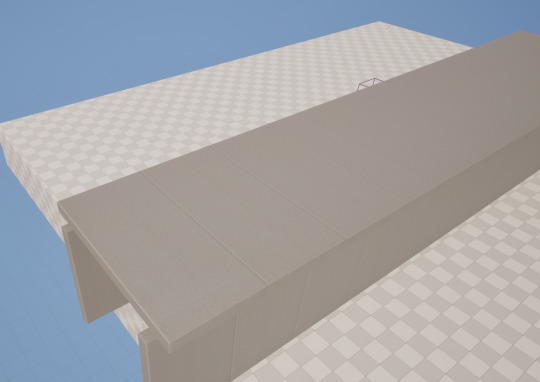
Fig.9 Blocking out with default cubes
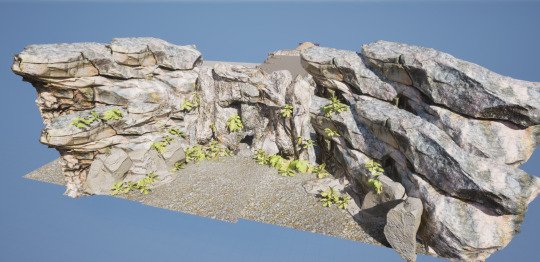
Fig.10 Exterior design of the cave
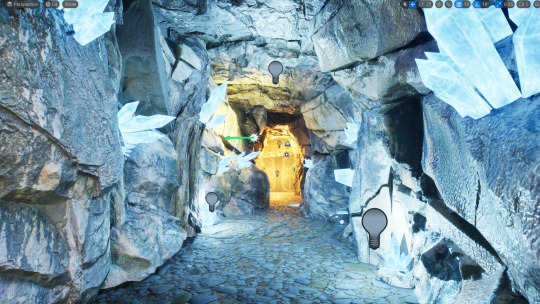
Fig.11 Interior design of the cave

Fig.12 Modified interior design 2 of the cave
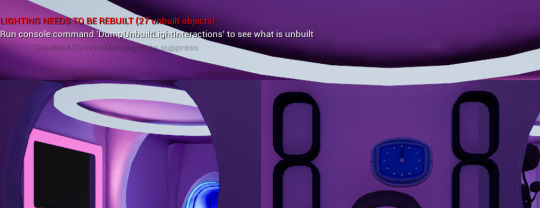
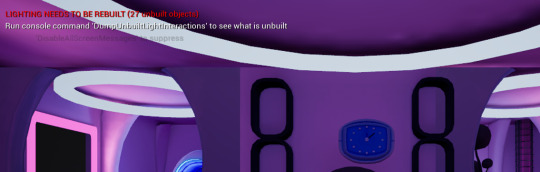
Lighting
There was some issue with my lighting. The rendered video appears to be extremely dark, no matter how I cranked up the intensity value. I then noticed that there was a cross out icon on some of my spotlight actors. I searched for a solution and found that this issue is related to the limitation in Unreal Engine. Lighting actors cannot be overlapped, otherwise the distribution of the light map would be messed up, thus, some of the spotlight actors did not take effect. Therefore, I solved the problem by adjusting the area of my spotlights.
1 note
·
View note
Text
Animation work
Rooshil Hibbert
Over the weekend I was working on the main animation for the large statues. The first thing I did was convert the existing rigs into IK rigs which would be easier to animate.
To understand the functionality of Blender’s animation system I looked at a few tutorials, which were relatively easy to understand. The main workspaces I needed were the Timeline, Dope Sheet and Graph Editor. The Timeline and Dope Sheet were used for the basic setting up of keyframes while the Graph Editor was used for more minute changes and adjustments of motion paths. It took some experimentation to figure out how changing the curves in the Graph Editor affected the movements of the character, and throughout the animation process I needed to continuously go back to adjust previous movements and make sure they were smooth and natural.
The most difficult part of the animation process was tracking the hand of the statue to the shape of the dome the viewer would reside in. This took quite some time to get right, but the result was very satisfying.
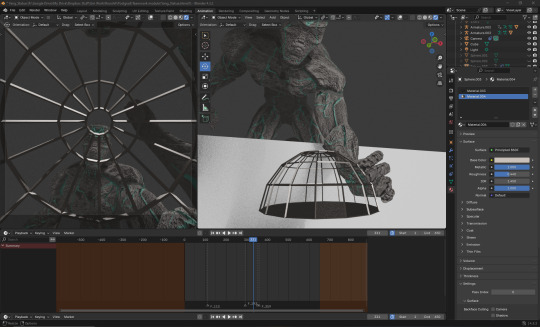
Following a meeting with my group, the movements needed to be made much slower and drawn out to make the size of the statue seem more believable. I also needed to add some buildup before the statues grabbed the viewer, further developing that sense of drama.
This was the final result:
Learning how to export animations so that they work in Unreal Engine was slightly frustrating, but I eventually got it working. Unfortunately I was unable to keep the dome and the statue attached in the transfer process.
0 notes
Text
Practice 2: Apache VR
Blog#15
05/03/25
I have rigged the character and completed a basic walk cycle animation.
I have also created eating and ideal animations for the character. For now, I’ll tweak these to achieve better results. To test the animations in Unreal, I followed a tutorial.
youtube
I first imported the FBX file containing the character mesh and the main rig into Unreal Engine. After that, I imported the other animations as FBX files without the mesh by unticking the option for importing the mesh. I used the original skeletal mesh for all of the animations.
References:
YouTube (n.d.). Import Rigs & Animations (BLENDER to UNREAL). [online] Available at: https://www.youtube.com/watch?v=L4OcpF7-YB0
0 notes