#runaway steam-kin
Text

I got to go infinite(?)! Jeska’s Will and Reiterate while I had Electrostatic Field on board. At least, it’s my understanding based on what my friend said because he has a galaxy brain and I don’t. We think Runaway Steam-Kin also factored into it, but my brain was fried at this point.
2 notes
·
View notes
Text
I'll be borrowing that
//Main
1 Vadrok, Apex of Thunder #!Commander
1 Cartographer's Hawk
1 Glitterfang
12 Island
12 Mountain
12 Plains
1 Run Away Together
1 Sea-Dasher Octopus
1 Swords to Plowshares
1 Tidal Barracuda
//Vadrok on 4
1 Agitator Ant
1 Aven Mindcensor
1 Dreadhorde Arcanist
1 Eiganjo Uprising
1 Fable of the Mirror-Breaker // Reflection of Kiki-Jiki
1 Kayla's Command
1 Komainu Battle Armor
1 Lore Drakkis
1 Runaway Steam-Kin
1 Zurgo Bellstriker
//Treason!
1 Act of Treason
1 Besmirch
1 Claim the Firstborn
1 Custody Battle
1 Furnace Reins
1 Goatnap
1 Harness by Force
1 Heat Shimmer
1 Hijack
1 Kari Zev's Expertise
1 Price of Loyalty
//"Gifts"
1 Battlemage's Bracers
1 Bloodthirsty Blade
1 Endless Evil
1 Goldvein Pick
1 Inquisitor's Flail
1 Mirror Mockery
1 Spirit Loop
1 Trickster's Talisman
1 Wings of Hubris
//Don't Hit Me
1 Coronation of Chaos
1 Disrupt Decorum
1 Ghostly Prison
1 Propaganda
1 Tenuous Truce
//Curse your slow and inevitable betrayal package
1 Faithless Looting
1 Inevitable Betrayal
//Ramp
1 Arcane Signet
1 Boros Signet
1 Commander's Sphere
1 Legion's Landing // Adanto, the First Fort
1 Loyal Warhound
1 Sevinne's Reclamation
1 Sol Ring
1 Sol Talisman
1 Solemn Simulacrum
1 The Restoration of Eiganjo // Architect of Restoration
//Card Draw
1 Behold the Multiverse
1 Compulsive Research
1 Cut a Deal
1 Field Research
1 Hard Evidence
1 Infiltration Lens
1 Love Song of Night and Day
1 Mnemonic Sphere
1 Secret Rendezvous
1 Secrets of the Golden City
//Maybeboard
1 Murder Investigation
1 Prying Blade
0 notes
Text
Historic Mono Red in MTG Arena: A Guide to Crushing Your Foes!

Hey there, fellow Planeswalkers! It's your old friend from MTGA Central, back with another guide to help you conquer the battlefield. Today, we're diving deep into the fiery world of Historic Mono Red in MTG Arena. If you're looking to add some heat to your game, you've come to the right place!
Key Takeaways: Historic Mono Red in MTG Arena
- Historic Mono Red is an aggressive deck archetype in MTG Arena focused on dealing damage quickly.
- Key cards in a Historic Mono Red deck include Goblin Chainwhirler and Runaway Steam-Kin.
- Early game strategies involve establishing a strong board presence and chipping away at your opponent's life total.
- Mid-game strategies involve maintaining momentum and keeping pressure on your opponent.
- Late game strategies involve closing out the game with high-damage cards and protecting your life total.
- Understanding your opponent's strategy and adapting your own is crucial to mastering the Historic Mono Red playstyle.
- Common mistakes to avoid include overextending your resources and mismanaging your mana.
- Maximizing card synergies and utilizing surprise tactics can help secure a win.
A Brief Overview of Historic Mono Red in MTG Arena
Historic Mono Red, or as some like to call it, "monored historic", is a deck archetype that's been a staple in Magic: The Gathering since the early days. It's all about speed, aggression, and burning your opponents down before they even know what hit them. In the Historic format of MTG Arena, this deck type has found a new home, and let me tell you, it's a blast to play!
The Historic format allows us to use cards from all sets available in MTG Arena, giving us a vast pool of fiery options to build our deck. Whether you're a fan of the classic mono red aggro historic style or prefer the tribal synergy of mono red goblins historic, there's a Historic Mono Red deck for you.
Why Choose Historic Mono Red?

Now, you might be wondering, "Why should I play Historic Mono Red?" Well, my friend, there are a few good reasons. First off, it's incredibly fun. There's nothing quite like the thrill of unleashing a flurry of spells and creatures, watching your opponent's life total dwindle down.
Secondly, it's a great choice for players on a budget. Many of the key cards in a Historic Mono Red MTG Arena deck are commons or uncommons, making it relatively cheap to build. But don't let that fool you - this deck can pack a serious punch!
Finally, Historic Mono Red is a fantastic deck for learning the ropes of the Historic format. It's straightforward to play, but it also teaches you important concepts like tempo, resource management, and strategic aggression. Plus, it's a great way to get familiar with the broader card pool in Historic.
So, are you ready to turn up the heat and start playing Historic Mono Red in MTG Arena? Stick around, and I'll show you everything you need to know to start crushing your foes with this fiery deck archetype. Let's get started!
Remember, the journey of a thousand miles begins with a single step, or in our case, a single card. So, let's shuffle up and get ready to play some Magic!
Understanding the Basics of Historic Mono Red
Alright, now that we've covered why you might want to play Historic Mono Red in MTG Arena, let's get down to the nitty-gritty. Understanding the core mechanics and key cards of this deck type is crucial to mastering its playstyle. So, let's dive in!
The Core Mechanics of Historic Mono Red
Historic Mono Red, or as some folks call it, "monored historic," is all about aggression and speed. Your goal is to reduce your opponent's life total to zero as quickly as possible. To do this, you'll need to understand a few core mechanics that this deck type revolves around.
Firstly, we have the concept of "aggro." This is a strategy that focuses on attacking your opponent early and often with creatures. In a mono red aggro historic deck, you'll be playing a lot of low-cost creatures that can start dealing damage right away.
Secondly, there's "burn." Burn refers to spells that deal direct damage to your opponent or their creatures. These spells are a key part of the Historic Mono Red strategy, allowing you to bypass your opponent's defenses and hit them directly.
Lastly, there's "tempo." Tempo is all about gaining and maintaining the upper hand in a game. In the context of a Historic Mono Red deck, this often means making efficient use of your mana and cards to keep the pressure on your opponent.
Key Cards in a Historic Mono Red Deck
Now, let's talk about some of the key cards you'll find in a Historic Mono Red deck. These are the cards that really make the deck tick, and understanding how to use them effectively is crucial to your success.

One of the most iconic cards in any Mono Red deck is Goblin Chainwhirler. This goblin warrior is a staple in mono red goblins historic decks, dealing damage to each opponent and each creature and planeswalker they control. Talk about a fiery entrance!

Another key card is Runaway Steam-Kin. This elemental can quickly become a powerhouse on the battlefield, gaining a +1/+1 counter whenever you cast a red spell.

For those of you who love a good burn spell, Light Up the Stage is a must-have. This spell lets you exile the top two cards of your library, and you can play them until the end of your next turn. It's a great way to keep the cards flowing and the pressure on.

And let's not forget about Cavalcade of Calamity. This enchantment is the star of any mono red cavalcade historic deck, dealing damage to the opponent each time a creature with power 1 or less attacks.
These are just a few examples of the key cards in a Historic Mono Red deck. There are many more out there, each with their own strengths and synergies. The beauty of Historic Mono Red MTG Arena is that you can mix and match these cards to create a deck that suits your personal playstyle.
So, now that we've covered the basics, are you ready to start building your own Historic Mono Red deck? Let's move on to the next section, where I'll guide you through the process of choosing the right cards and balancing your deck for optimal play. Let's keep the fire burning, my friends!
Building Your Historic Mono Red Deck
Alright, my fiery friends, it's time to roll up our sleeves and start building our Historic Mono Red MTG Arena deck. This is where the magic really happens (pun intended!). We'll be choosing the right cards and balancing our deck for optimal play. So, let's get started!
Choosing the Right Cards for Your Deck

When it comes to building a Historic Mono Red deck, choosing the right cards is crucial. You'll want a good mix of creatures, burn spells, and a few other tricks up your sleeve to keep your opponents on their toes.
For creatures, you'll want to focus on low-cost, aggressive options. Cards like Ghitu Lavarunner and Viashino Pyromancer are great choices for a mono red aggro historic deck. They hit the battlefield running and start dealing damage right away.

For burn spells, you can't go wrong with classics like Shock and Lightning Strike. These spells allow you to deal direct damage to your opponent or their creatures, keeping the pressure on.
And don't forget about your other spells and enchantments! Cards like Experimental Frenzy and Cavalcade of Calamity can give your deck a unique edge and catch your opponents by surprise.
Balancing Your Deck for Optimal Play
Once you've chosen your cards, it's time to balance your deck. A well-balanced deck is key to consistent performance in Historic Mono Red MTG Arena.
A typical Historic Mono Red deck will have around 24 lands, giving you a reliable mana base to cast your spells. The rest of your deck should be a mix of creatures, spells, and a few enchantments.
Here's a rough guideline for a balanced Historic Mono Red deck:
Card TypeQuantityLands24Creatures20-24Spells10-14Enchantments/Artifacts2-6
Remember, these numbers aren't set in stone. Feel free to tweak them based on your personal playstyle and the specific cards in your deck. The most important thing is that your deck feels consistent and fun to play.
Building your own Historic Mono Red deck is a journey, my friends. It's all about experimenting, learning, and most importantly, having fun. So, go ahead and start building. I can't wait to see what you come up with!
In the next section, we'll dive into some strategies for playing Historic Mono Red. So, stick around, and let's keep the fire burning!
Strategies for Playing Historic Mono Red

Now that we've built our Historic Mono Red MTG Arena deck, it's time to take it for a spin! But before we do, let's talk strategy. Knowing how to play your deck is just as important as the cards in it. So, let's dive into some strategies for the early, mid, and late game.
Early Game Strategies
In the early game, your goal is to establish a strong board presence as quickly as possible. This means playing your low-cost creatures and starting to chip away at your opponent's life total.
Remember, Historic Mono Red is all about aggression. Don't be afraid to attack early and often. Your creatures are your best weapon in the early game, so use them!
Also, don't forget about your burn spells. These can be used to clear the way for your creatures or to deal direct damage to your opponent. A well-timed burn spell can swing the game in your favor.
Mid-Game Strategies
As the game progresses, your strategy will start to shift. You'll need to start thinking about how to maintain your momentum and keep the pressure on your opponent.
This is where cards like Light Up the Stage and Experimental Frenzy come into play. These cards allow you to keep the cards flowing and maintain your aggressive stance.
Also, keep an eye on your opponent's board. If they start to build up a strong defense, you might need to switch gears and focus on removing their creatures with your burn spells.
Late Game Strategies
In the late game, things can get a bit tricky. If your initial onslaught hasn't won you the game, you'll need to start thinking about how to close it out.
This is where your big hitters come into play. Cards like Goblin Chainwhirler and Runaway Steam-Kin can deal a significant amount of damage and turn the tide in your favor.
Also, don't forget about your life total. If the game has gone on this long, chances are your opponent has been able to deal some damage to you as well. Be mindful of your life total and do what you can to protect it.
Playing Historic Mono Red in MTG Arena is a thrilling experience. It's all about aggression, speed, and strategic decision-making. So, get out there, start playing, and set the battlefield ablaze! In the next section, we'll delve deeper into mastering the Historic Mono Red playstyle. Keep the fire burning, my friends!
Mastering the Historic Mono Red Playstyle

We've built our deck, we've talked strategy, and now it's time to truly master the Historic Mono Red MTG Arena playstyle. This is where we go beyond the cards and delve into the mindset and tactics that can make you a true force to be reckoned with. So, let's get started!
Understanding Your Opponent's Strategy
One of the keys to mastering any deck in Magic: The Gathering, including Historic Mono Red, is understanding your opponent's strategy. This means paying attention to the cards they're playing, the moves they're making, and trying to anticipate their next steps.
For example, if you're playing against a control deck, you'll need to be prepared for their counter spells and removal. This might mean holding back some of your creatures or spells to avoid losing them to a well-timed counter.
On the other hand, if you're up against another aggro deck, it's all about who can deal the most damage the fastest. In this case, you'll want to be as aggressive as possible, while also keeping an eye on your own life total.
Adapting Your Strategy Based on the Game State
Another important aspect of mastering the Historic Mono Red playstyle is being able to adapt your strategy based on the state of the game. This means being flexible and ready to change your approach as the game evolves.
For instance, if you've managed to deal a lot of damage early on, you might want to switch to a more defensive strategy to protect your lead. This could involve holding back some creatures to block, or using your burn spells to remove your opponent's threats instead of dealing direct damage.
Conversely, if you're behind, you might need to take some risks to turn the game around. This could mean going all in on an attack, or playing a high-risk, high-reward card that could swing the game in your favor.
Mastering the Historic Mono Red MTG Arena playstyle is a journey, my friends. It's about learning, adapting, and above all, enjoying the game. So, keep practicing, keep playing, and most importantly, keep having fun. In the next section, we'll talk about some common mistakes and how to avoid them. So, stick around, and let's keep the fire burning!
Common Mistakes and How to Avoid Them
Alright, my fiery friends, it's time for some real talk. Even the best Planeswalkers make mistakes from time to time. But the key to becoming a master of Historic Mono Red MTG Arena is learning from those mistakes and knowing how to avoid them in the future. So, let's dive into some of the most common pitfalls and how to steer clear of them.
Overextending Your Resources
One of the most common mistakes I see players make when playing Historic Mono Red is overextending their resources. This usually happens when a player gets a little too excited and plays all their cards at once, leaving them with nothing in hand for the next turns.
Remember, Magic: The Gathering is a game of strategy and patience. It's important to maintain a balance between applying pressure and keeping some resources in reserve. If you play all your cards at once, you'll have nothing left to respond to your opponent's moves.
So, how do you avoid this? The key is to be mindful of your hand and think ahead. Don't just play a card because you can - play it because it's the right move at the right time.
Mismanaging Your Mana
Another common mistake is mismanaging your mana. In a Historic Mono Red MTG Arena deck, your mana is your lifeblood. It's what allows you to cast your spells and keep the pressure on your opponent.
Mismanaging your mana can happen in a few ways.
Read the full article
0 notes
Text
How Raji: An Ancient Epic Was Ported to Mobile: In Conversation With Nodding Heads Games
The handheld gaming segment has seen a surge in popularity, in recent years — mainly owing to the runaway success of the Nintendo Switch and the more recent Steam Deck, which offered enough horsepower to run quality titles with portable convenience. It’s no secret that its closest kin is the ordinary smartphone, which already has its own library of games, albeit none too alluring for the…

View On WordPress
0 notes
Text
Torbran, Doubler
Decklist:
Torbran, Thane of Red Fell *CMDR*36 Lands: 36
Dwarven Mine
Mountain (x 31)
Nykthos, Shrine to Nyx
Reliquary Tower
Rogue’s Passage
Temple of the False God25 Creatures: 20
Angrath's Marauders
Auntie Blyte, Bad Influence
Bedlam Reveler
Bonecrusher Giant
Chandra's Spitfire
Consulate Skygate
Dragonmaster Outcast
Efreet Flamepainter
Electrostatic Field
Fiendish Duo
Fortune Thief
Guttersnipe
Heartless Hidetsugu
Magus of the Wheel
Malignus
Runaway Steam-Kin
Satyr Firedancer
Smoldering Egg
Young Pyromancer38 Non-Creatures: 38
Anger of the Gods
Annihilating Fire
Blasphemous Act
Browbeat
Chaos Warp
Conjurer's Bauble
Crimson Wisps
Demonfire
Descent of the Dragons
Desperate Ritual
Disintegrate
Dragon Fodder
Empty the Warrens
Expedite
Flame Javelin
Gratuitous Violence
Insult // Injury
Jaya Ballard
Lightning Bolt
Lightning Greaves
Lightning Strike
Magma Jet
Mizzium Mortars
Overblaze
Overmaster
Punishing Fire
Pyretic Ritual
Pyromancer's Goggles
Quietus Spike
Risk Factor
Ruby Medallion
Scytheclaw
Skullclamp
Shock
Sol Ring
Spikefield Hazard
Swiftfoot Boots
Thought Vessel
Tallies:
High Cost: 15/20
Angrath's Marauders
Descent of the Dragons
Efreet Flamepainter
Empty the Warrens
Fiendish Duo
Fortune Thief
Gratuitous Violence
Heartless Hidetsugu
Jaya Ballard
Junktroller
Malignus
Overblaze
Pyromancer's Goggles
Scytheclaw
Torbran, Thane of Red FellProtection:
Lightning Greaves
Swiftfoot BootsDraw/Tutor:
Bedlam Reveler
Conjurer's Bauble
Crimson Wisps
Disintegrate
Overmaster
Risk Factor
SkullclampRecursion:
Conjurer's Bauble
Junktrolle
MayberBoard Wipes:
Anger of the Gods
Blasphemous Act
BrowbeatSpot Removal:
Descent of the Dragons
Disintegrate
Lightning Bolt
Lightning Strike
Magma Jet
ShockFlying:
ORamp/Rituals:
Pyromancer's Goggles
Ruby Medallion
Runaway Steam-Kin
Sol Ring
Spikefield Hazard
Thought VesselExile:
Annihilating Fire
Spikefield HazardHidetsugu Backups:
Malignus
Quietus Spike
ScytheclawGratuitous Violence Backups:
Angrath's Marauders
Fiendish Duo
Insult // Injury
OverblazeSpell Slinging: 22
Anger of the Gods
Annihilating Fire
Blasphemous Act
Browbeat
Crimson Wisps
Demonfire
Descent of the Dragons
Disintegrate
Dragon Fodder
Empty the Warrens
Expedite
Flame Javelin
Insult // Injury
Lightning Bolt
Lightning Strike
Magma Jet
Mizzium Mortars
Overmaster
Punishing Fire
Risk Factor
Shock
Spikefield Hazard
Maybe:
-Aethersphere Harvester-Bitter Feud-Blood Moon-Bolt of Keranos-Brainstone-Brash Taunter-Burn Trail-Burning Earth-Chain Lightning-Chandra, Fire of Kaladesh-Chandra's Phoenix-Command Beacon-Curse of Bloodletting-Custodian of the Trove-Dangerous Wager-Desperate Gambit-Dictate of the Twin Gods-Embereth Shieldbreaker-Embermaw Hellion-Fire Servant-Flare-Fork-Furnace of Rath-Goblin Goliath-Goblin Offensive-Goblin Rally-Hedron Archive-Hordeling Outburst-Incendiary Flow-Infiltration Lens-Invoke Calamity *-Koth of the Hammer-Koth, Fire of Resistance-Kuldotha Rebirth-Magmatic Insight-Mana Geyser-Needle Drop-Nesting Dragon-Nyx Lotus-Past in Flames-Pillar of Flame-Play with Fire-Quest for Pure Flame-Reliquary Tower-Reverberate-Searing Blood-Seething Song- Solphim, Mayhem Dominus-Sunbird's Invocation- Uncivil Unrest-Valakut Awakening-Vandalblast-Violent Eruption-Wall of Torches-Wheel of Fate-Warlord's Fury
0 notes
Photo
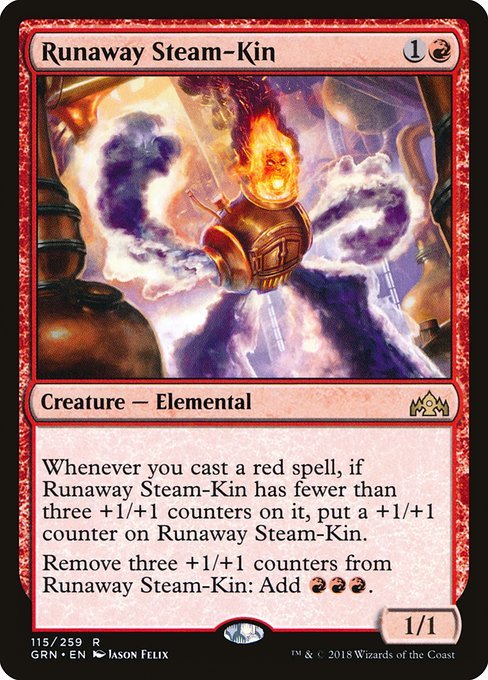
Runaway Steam-Kin
Artist: Jason Felix
TCG Player Link
Scryfall Link
EDHREC Link
#mtg#magic the gathering#tcg#$0.31#jason felix#runaway steam-kin#guilds of ravnica#creature#elemental
14 notes
·
View notes
Note
Hi judge! Question about the interaction between Runaway Steam-Kin and Experimental Frenzy: let's say I have both in play, and Steam-Kin has 3 counters. Can I announce I'm casting Shock off the top of my library, then look at the next card down before I decide whether I'm using Steam-Kin's ability to pay for Shock? And if I do use Steam-Kin's ability, will I still get a +1/+1 counter from casting Shock?
No, the second ruling on Experimental Frenzy applies here:If the top card of your library changes while you’re casting a spell or activating an ability, you can’t look at the new top card until you finish casting that spell or activating that ability. This means that if you cast the top card of your library, you can’t look at the next one until you’re done paying for that spell.

19 notes
·
View notes
Text
So, turns out, casting a Syr Carah and then using a Runaway Steam Kin to crack off a Jeska's Will into Mana Geyser into a dozen copies of Dragon's Approach on turn 5 is uuuuuuh good.
7 notes
·
View notes
Photo

the Damage Red set finally complete.
Goblin Chainwhirler - Torbran, Thane of the Red Fell - Rampaging Ferocidon
Runaway Steam-Kin - Gamble - Harsh Mentor
soon on https://www.altersleeves.com/
#mtg#card#blender#magic the gathering#alter#magic the gathering alter#art#drawing#pixelart#card game
2 notes
·
View notes
Note
Thoughts on Syr Gwyn, Hero of Ashvale and Syr Carah the Bold?

I think Syr Gwyn is worth comparing to Kestia, the Cultivator. Both of them reward you when you attack with a narrow subset of cards. The main differences are that Kestia is significantly cheaper, is in a better color identity, and the things that trigger Kestia only require the commitment of a single card, whereas Syr Gwyn (generally) needs you to commit both a creature card and an equipment card to assemble a card-generating unit.
There are some exceptions to this rule: Living Weapon equipment come with a creature attached, as do the two equipment from M20 with a similar ability. Bloodforged Battle-Axe copies itself so you don’t have to commit as many real equipment to the board.
While there are a few low-casting cost high-equip cost cards like Colossus Hammer and Blackblade Reforged that really reward you for committing to Knights, most of the best equipment costs 1-2 mana to equip. I’m not sure saving 1-2 mana is worth committing to the Knight creature type.
Instead, I’d probably run the cheap doublestrikers in these colors (many of which are, admittedly, Knights) and a bunch of cards that synergize with equipment (not just Stoneforge and Puresteel; I think I’d also run Kor Duelist). In general, I want the deck to function without Syn Gwyn on the battlefield, since she costs a bunch of mana and isn’t very resilient to spot removal. Slapping a Mask of Memory on a Fencing Ace seems like a solid plan A in case Gwyn can’t get it together.
Sample decklist: Syr Gwyn

With Syr Carah, the name of the game is cheap spells that hit multiple opponents. Fortunately, Red has a ton of these that are relatively cheap and so Carah makes it so you can draw a ton of cards for relatively little mana (spending 2 to draw 4 is a pretty common occurrence). If some of those cards net mana (e.g., rituals, moxes), then you can keep the combo going.
FYI Runaway Steam-Kin is probably the single best card in this deck and is the sole reason I’m running Flamekin Harbinger and Imperial Recruiter.
Sample decklist: Syr Carah, the Bold
31 notes
·
View notes
Photo


Magic: the Gathering - Guilds of Ravnica 9-11
This post o be updated as others are posted :
New previewed cards out today ::
• Deafeaning Clarion
• Ionize
• Runaway Steam-Kin
• Beast Whisperer
• Nullhide Ferox
• Blade Instructor (earlier)
• Guild Summit
• District Guide
• Goblin Cratermaker
43 notes
·
View notes
Text
Finally did the thing and ordered two cards for my Eruth deck. Birgi, God of Storytelling and Lier, Disciple of the Drowned. The former to kick off infinite mana with Grinning Ignus and Runaway Steam-Kin, and the latter for applying flashback to my spells.
Just need to insure I have plenty of blue mana available because a lot of red mana does me nothing. Unless I throw in an X spell for maximum chaos 🤔
3 notes
·
View notes
Note
Hey Mark, can you high-five the editors for using "fewer than" (rather than "less than") on Runaway Steam-Kin? It's the little things.
Will do.
40 notes
·
View notes
Photo

Can Runaway Steam-Kin replace Baral, Chief of Compliance to make Mono-Red Storm a possibility in Modern? Instant Deck Tech: Mono-Red Steam-Kin Storm (Modern). https://www.mtggoldfish.com/articles/instant-deck-tech-mono-red-steam-kin-storm-modern
12 notes
·
View notes
Text
Torbran 8x8
Decklist:
Torbran, Thane of Red Fell *CMDR*35 Lands: √
Dwarven Mine
Mountain (x 30)
Nykthos, Shrine to Nyx
Reliquary Tower
Rogue’s Passage
Temple of the False God28 Creatures: 11
Auntie Blyte, Bad Influence
Bedlam Reveler
Bonecrusher Giant
Fiendish Duo
Firebrand Archer
Guttersnipe
Heartless Hidetsugu
Malignus
Monastery Swiftspear
Runaway Steam-Kin
Young Pyromancer35 Non-Creatures: 30
Ancestral Anger
Anger of the Gods
City on Fire
Desperate Ritual
Empty the Warrens
Gratuitous Violence
Insult // Injury
Invoke Calamity
Koth, Fire of Resistance
Lightning Bolt
Lightning Greaves
Magma Jet
Mizzium Mortars
Overblaze
Overmaster
Pillar of Flame
Pyretic Ritual
Pyromancer’s Goggles
Quest for Pure Flame
Quietus Spike
Reverbrate
Ruby Medallion
Scytheclaw
Seething Song
Skullclamp
Sol Ring
Sunbird's Invocation
Spikefield Hazard
Swiftfoot Boots
Warlord's Fury
Tallies:
High Cost: 15/20
City on Fire
Empty the Warrens
Fiendish Duo
Gratuitous Violence
Heartless Hidetsugu
Invoke Calamity
Malignus
Mizzium Mortars
Overblaze
Pyromancer’s Goggles
Quietus Spike
Scytheclaw
Sunbird's Invocation
Torbran, Thane of Red Fell8x Card Draw:
Ancestral Anger
Bedlam Reveler
Overmaster
Skullclamp
Warlord's Fury8x Mana Ramp:
Desperate Ritual
Koth, Fire of Resistance
Pyretic Ritual
Ruby Medallion
Runaway Steam-Kin
Seething Song
Sol Ring8x Targeted Removal:
Anger of the Gods
Lightning Bolt
Mizzium Mortars
Pillar of Flame
Spikefield Hazard8x Major Damage (Hidetsugu Alts):
Heartless Hidetsugu
Quietus Spike
Scytheclaw8x Damage Enhancers (Gratuitous Alts):
City on Fire
Fiendish Duo
Firebrand Archer
Gratuitous Violence
Guttersnipe
Insult // Injury
Overblaze
Quest for Pure Flame8x Spell Damage:
Magma Jet
Stomp (Bonecrusher Giant)8x Recursion/Copies:
Invoke Calamity
Pyromancer’s Goggles
Reverbrate
Sunbird's Invocation
Swiftfoot Boots8x Battlefield:
Auntie Blyte, Bad Influence
Empty the Warrens
Lightning Greaves
Malignus
Monastery Swiftspear
Young Pyromancer
Maybe:
Ramp:
Hematite Talisman
Chandra, Bold Pyromancer
Koth
Myriad LandscapeRecursion/Copy:
Dualcaster Mage
Fork
Jaya Ballard
Chandra, the FirebrandTargeted Removal:
Jaya's Greeting*prioritize trample for Malignus to hit
0 notes
Photo

Runaway Steam-Kin
Artist: Jason Felix
TCG Player Link
Scryfall Link
EDHREC Link
#mtg#magic the gathering#tcg#$2.01#jason felix#runaway steam-kin#guilds of ravnica promos#creature#elemental
21 notes
·
View notes
Last Seen Blogs

pileofstars
Insipid pile of stars that have failed

kommandonuovidiavoli
BEST FRIENDS V-EVER
triple-pupil
Triple Pupil


liv-cross
Olivia Cross