#s3: functional obj
Explore tagged Tumblr posts
Visit Tumblr Blog
Explore Tumblr blogs with no restrictions, modern design and the best experience.
Last Seen Tumblr Blogs


Fun Fact
BuzzFeed published a report claiming that Tumblr was utilized as a distribution channel for Russian agents to influence American voting habits during the 2016 presidential election in Feb 2018.
Text

Download.
5 notes
·
View notes
Text
Integrate your Amazon DynamoDB table with machine learning for sentiment analysis
Amazon DynamoDB is a non-relational database that delivers reliable performance at any scale. It’s a fully managed, multi-Region, multi-active database that provides consistent single-digit millisecond latency and offers built-in security, backup and restore, and in-memory caching. DynamoDB offers a serverless and event-driven architecture, which enables you to use other AWS services to extend DynamoDB capability. DynamoDB provides this capability using Kinesis Data Streams for DynamoDB and DynamoDB Streams with AWS Lambda. When you enable DynamoDB Streams on a DynamoDB table, it captures a time-ordered sequence of item-level modifications in the table and stores this information in a change log for up to 24 hours. Downstream AWS services can access these change logs and view the data items as they appeared before and after they were modified, in near-real time, using a Lambda function. This allows the DynamoDB table to integrate functionally for additional use cases like machine learning (ML), ad hoc queries, full text search, event alerting, and more, such as the following: Processing DynamoDB data with Apache Hive on Amazon EMR for data warehousing use cases Configuring AWS credentials using Amazon Cognito to authenticate access to DynamoDB tables for mobile application Using Amazon API Gateway and Lambda with DynamoDB for a front-end serverless architecture In this post, I show you how to integrate ML with Amazon DynamoDB using Amazon Comprehend to analyze sentiments on incoming product reviews. Serverless and event-driven architecture When you perform create, read, update, and delete (CRUD) operations on a DynamoDB table, DynamoDB Streams keep a 24-hour change log of all CRUD operations. The stream offers you four options of log attributes. For more information, see Enabling a Stream. Lambda functions process each incoming log event, extract the necessary information required for downstream services, and invoke said services, such as in the following situations: A function can loop back to a DynamoDB table to create or update the aggregate item, like a summary item or average of statistics in real time. You can use a function to send specific attributes to Amazon Elasticsearch Service (Amazon ES) for full text search use cases. For historical analysis or ad hoc queries, the function sends the updates to Amazon Simple Storage Service (Amazon S3) in optimized format through Amazon Kinesis Data Firehose, where you can run ad hoc queries or analytics using Amazon Athena You can use the recently announced option to export DynamoDB table data to Amazon S3 for the initial setup of data for analysis; however, you can’t use it for continuous read requirements. Additionally, using Kinesis Data Firehose for data export offers optimized Apache Parquet If you want to be updated on a specific event on the DynamoDB table like the deletion of a critical record, Lambda can notify you through Amazon Simple Notification Service (Amazon SNS). The following diagram illustrates this event-driven architecture. Using ML and analytics with the DynamoDB solution You can configure Amazon review analysis and analytics by running AWS CloudFormation on your own account. This solution uses a serverless event-driven architecture with automated steps. The solution checks the sentiment on the incoming Amazon product review, creates a product review summary based on the sentiment, and keeps updates in optimized format for future ad hoc queries and analytics. The following diagram illustrates this architecture. For this post, the solution uses the incoming Amazon product reviews by putting a review object in the S3 bucket in the form of JSON records. The S3 bucket publishes the s3:ObjectCreated:put event to Lambda by invoking the Lambda function, as specified in the bucket notification configuration. Lambda is meant for quick processing, so the solution limits the size of the product review object on Amazon S3 to smaller than 5 KB. If you want to run this solution in your account, follow these steps: Download the following artifacts: CloudFormation template – Part 1 CloudFormation template – Part 2 Sample gz file for testing – test.json.gz Deploy the CloudFormation Part 1 stack. Check the CloudFormation documentation for instructions. Once Part 1 stack deployment is complete, deploy the Part 2 stack. Once Part 2 stack deployment is complete, upload the sample gz file to the S3 bucket (-amazonreviewsbucket-*) with Server-side encryption option. Check Amazon S3 documentation for instructions. The CloudFormation Part 1 stack creates the following resources: A Glue database and table for cataloging, Two Lambda functions and associated permissions, Required roles and policies, CloudWatch LogStream and LogGroup, Kinesis Firehose for sending streams data to S3 for analysis, Two S3 buckets for incoming reviews and parquet output for analysis, DynamoDB table and associated Streams. The CloudFormation Part 2 stack imports the resources created and setup a managed policy. You can run the stacks on all regions where these services are supported. I tested it on US regions, North Virginia, Oregon and Ohio. Please note running this solution in your account will incur costs. The Lambda function amazon-review-processing runs and assumes the AWS Identity and Access Management (IAM) role created by AWS CloudFormation. The function reads the Amazon S3 events it receives as a parameter, determines where the review object is, reads the review object, and processes the records in the review object. The function breaks the incoming record into multiple records and DynamoDB items: a review item and product item (if it doesn’t already exist). This allows you to retrieve an individual item based on the partition key and sort key. If you want all the product items, you can query items based on just the product partition key. The following screenshot shows product summary item. The following screenshot shows review items associated with the product. The following Lambda code add the review data to DynamoDB table when review file is uploaded to S3 bucket. import io import os import gzip import json import boto3 def get_records(session, bucket, key): """ Generator for the bucket and key names of each CloudTrail log file contained in the event sent to this function from S3. (usually only one but this ensures we process them all). :param event: S3:ObjectCreated:Put notification event :return: yields bucket and key names """ s3 = session.client('s3') response = s3.get_object(Bucket=bucket, Key=key) with io.BytesIO(response['Body'].read()) as obj: with gzip.GzipFile(fileobj=obj) as logfile: records = json.load(logfile) return records def handler(event, context): """ Checks for API calls with RunInstances, TerminateInstances, and DeleteDBInstance in CloudTrail. if found, send specific records to SQS for processing :return: 200, success if records process successfully """ session = boto3.session.Session() dynamodb = boto3.resource("dynamodb", region_name='us-east-1') table = dynamodb.Table('AmazonReviews') # Get the S3 bucket and key for each log file contained in the event for event_record in event['Records']: try: bucket = event_record['s3']['bucket']['name'] key = event_record['s3']['object']['key'] print('Loading Amazon Reviews file s3://{}/{}'.format(bucket, key)) records = get_records(session, bucket, key) print('Number of records in log file: {}'.format(len(records))) for record in records: response = table.get_item(Key={'pk': record['product_id'], 'sk': '2099-12-31#PRODUCTSUMMARY'}) if 'Items' not in response: table.put_item( Item={ 'pk': record['product_id'], 'sk': '2099-12-31#PRODUCTSUMMARY', 'marketplace': record['marketplace'], 'product_parent': record['product_parent'], 'product_title': record['product_title'], 'product_category': record['product_category'], } ) table.put_item( Item={ 'pk': record['product_id'], 'sk': record['review_date'] + '#' + record['review_id'], 'customer_id': record['customer_id'], 'star_rating': record['star_rating'], 'helpful_votes': record['helpful_votes'], 'total_votes': record['total_votes'], 'vine': record['vine'], 'verified_purchase': record['verified_purchase'], 'review_headline': record['review_headline'], 'review_body': record['review_body'] } ) except Exception as e: print (e) return {'Exception status': e} else: print("records processed successfully!!") return { 'statusCode': 200, 'body': json.dumps('records inserted successfully to DynamoDB!!') } After the review records are added to the DynamoDB table, the items enter the DynamoDB stream in real time with new and old images. The amazon_reviews_summary Lambda function captures the stream records from the stream and processes them one by one. This Lambda function has multiple responsibilities: Capture review text from the stream record and call Amazon Comprehend for sentimental analysis. Amazon Comprehend limits review strings to fewer than 5,000 characters, so the code truncates review text to 4,999 characters before calling the Amazon Comprehend sentiment API. Add the sentiment response for the review record and create a product review summary record with sentiment counts. Flatten the DynamoDB streaming JSON logs and add the record to the Kinesis Data Firehose delivery stream. Invoke the Firehose delivery stream put_record API for putting updates in the S3 bucket. The following Lambda code processes the incoming DynamoDB Streams for sentiment analysis and save it to S3 for analytics. import json import boto3 import os def convert_file(f): out = {} def convert(element, name=''): if type(element) is dict: for sub in element: convert(element[sub], name + sub + '_') elif type(element) is list: ctr = 0 for sub in element: convert(sub, name + str(ctr) + '_') ctr += 1 else: out[name[:-1]] = element convert(f) return out def handler(event, context): cmphd = boto3.client(service_name='comprehend', region_name='us-east-1') fh = boto3.client('firehose') ddb = boto3.resource('dynamodb', region_name='us-east-1') dt=ddb.Table('AmazonReviews') FIREHOSE_URL = os.environ['FIREHOSE_URL'] for rec in event['Records']: if (rec['eventName'] == 'INSERT' and ('review_body' in rec['dynamodb']['NewImage'])): convt=convert_file(rec) response = fh.put_record( DeliveryStreamName=FIREHOSE_URL, Record={'Data': json.dumps(convt)} ) review_body=rec['dynamodb']['NewImage']['review_body']['S'] review_body=review_body[:4999] pk=rec['dynamodb']['Keys']['pk']['S'] sk=rec['dynamodb']['Keys']['sk']['S'] res=cmphd.detect_sentiment(Text=review_body, LanguageCode='en') st=res['Sentiment'] try: d_response = dt.put_item( Item={'pk': pk, 'sk': sk + '#' + 'SENTIMENT', 'sentiment': st} ) if st == "POSITIVE": d_s_response = dt.update_item( Key={'pk': pk,'sk': '2099-12-31#REVIEWSUMMARY'}, UpdateExpression="set positive_sentiment_count= if_not_exists(positive_sentiment_count, :start) + :inc",ExpressionAttributeValues={':inc': 1,':start': 0},ReturnValues="UPDATED_NEW" ) elif st == "NEGATIVE": d_s_response = dt.update_item( Key={'pk': pk,'sk': '2099-12-31#REVIEWSUMMARY'}, UpdateExpression="set negative_sentiment_count= if_not_exists(negative_sentiment_count, :start) + :inc",ExpressionAttributeValues={':inc': 1,':start': 0},ReturnValues="UPDATED_NEW" ) elif st == "NEUTRAL": d_s_response = dt.update_item( Key={'pk': pk,'sk': '2099-12-31#REVIEWSUMMARY'}, UpdateExpression="set neutral_sentiment_count= if_not_exists(neutral_sentiment_count, :start) + :inc",ExpressionAttributeValues={':inc': 1,':start': 0},ReturnValues="UPDATED_NEW" ) elif st == "MIXED": d_s_response = dt.update_item( Key={'pk': pk,'sk': '2099-12-31#REVIEWSUMMARY'}, UpdateExpression="set mixed_sentiment_count= if_not_exists(mixed_sentiment_count, :start) + :inc",ExpressionAttributeValues={':inc': 1,':start': 0},ReturnValues="UPDATED_NEW" ) else: print("No sentiment value: " + st) except Exception as e: return {'Exception status': e} else: print("record processed successfully") The amazon_reviews_summary Lambda function calls the Amazon Comprehend detect_sentiment API with the review text, and Amazon Comprehend returns one of the four sentiments: positive, negative, neutral, or mixed. If you want more granular sentiments, you can replace Amazon Comprehend with your own ML model. The amazon_reviews_summary Lambda function calls the DynamoDB table to update the sentiment response on the review item and create product review summary items (or update them if they already exist). The following screenshot shows sentiment item associated with review. The following screenshot shows review summary item. The amazon_reviews_summary Lambda function calls the Firehose delivery stream to flatten the DynamoDB streaming JSON payload. The delivery stream converts the record format to Parquet and adds these records to the S3 bucket. Kinesis Firehose is configured with Record format conversion enabled and Output format as Apache Parquet. You can now catalog the S3 bucket on Athena and run ad hoc queries. See the following query and result: SELECT * FROM "amazon_review"."amazon_reviews" where dynamodb_keys_pk_s ='B00004U2JW' eventid,eventname,eventversion,eventsource,awsregion,dynamodb_approximatecreationdatetime,dynamodb_keys_sk_s,dynamodb_keys_pk_s,dynamodb_newimage_total_votes_n,dynamodb_newimage_star_rating_n,dynamodb_newimage_sk_s,dynamodb_newimage_verified_purchase_s,dynamodb_newimage_pk_s,dynamodb_newimage_customer_id_n,dynamodb_newimage_helpful_votes_n,dynamodb_newimage_vine_s,dynamodb_newimage_review_body_s,dynamodb_newimage_review_headline_s,dynamodb_sequencenumber,dynamodb_sizebytes,dynamodb_streamviewtype,eventsourcearn 35f3c7ce3083aa72eb6b39cd56f3681d,INSERT,1.1,aws:dynamodb,us-east-1,1598908834,2000-09-07#R3MA96SRZSSBER,B00004U2JW,27,4,2000-09-07#R3MA96SRZSSBER,N,B00004U2JW,48308880,5,N,"cool camera with functions whitch i do need, but I cant buy her /and others from my wish list/ because I am not living in U.S. Amazon hurry, she is one of my favourite...",cool but to long way to get her to me,8.53782E+25,393,NEW_AND_OLD_IMAGES,arn:aws:dynamodb:us-east-1:080931190378:table/amazon-reviews-v1/stream/2020-08-14T06:28:33.219 Cleaning up To avoid incurring future costs, delete the resources you created with the CloudFormation stack: Delete the contents of the review bucket and Parquet analytics bucket. Delete the Part 2 CloudFormation stack first and then delete the Part 1 CloudFormation stack. Conclusion In this post, I showed how you can integrate your DynamoDB table with Amazon Comprehend for sentiment analysis and Athena for ad hoc queries across historical activities. You can use your own ML model instead of Amazon Comprehend if you want more granular sentiment analysis. You can also use other AWS services to integrate with DynamoDB by using DynamoDB Streams to extend DynamoDB features. I welcome your feedback, suggestions or questions on this post, please leave me comments below. About the author Utsav Joshi is a Technical Account Manager at AWS. He lives in New Jersey and enjoys working with AWS customers to solve architectural, operational, and cost optimization challenges. In his spare time, he enjoys traveling, road trips, and playing with his kids. https://aws.amazon.com/blogs/database/integrate-your-amazon-dynamodb-table-with-machine-learning-for-sentiment-analysis/
0 notes
Text
Building Your First Serverless Service With AWS Lambda Functions
Many developers are at least marginally familiar with AWS Lambda functions. They’re reasonably straightforward to set up, but the vast AWS landscape can make it hard to see the big picture. With so many different pieces it can be daunting, and frustratingly hard to see how they fit seamlessly into a normal web application.
The Serverless framework is a huge help here. It streamlines the creation, deployment, and most significantly, the integration of Lambda functions into a web app. To be clear, it does much, much more than that, but these are the pieces I’ll be focusing on. Hopefully, this post strikes your interest and encourages you to check out the many other things Serverless supports. If you’re completely new to Lambda you might first want to check out this AWS intro.
There’s no way I can cover the initial installation and setup better than the quick start guide, so start there to get up and running. Assuming you already have an AWS account, you might be up and running in 5–10 minutes; and if you don’t, the guide covers that as well.
Your first Serverless service
Before we get to cool things like file uploads and S3 buckets, let’s create a basic Lambda function, connect it to an HTTP endpoint, and call it from an existing web app. The Lambda won’t do anything useful or interesting, but this will give us a nice opportunity to see how pleasant it is to work with Serverless.
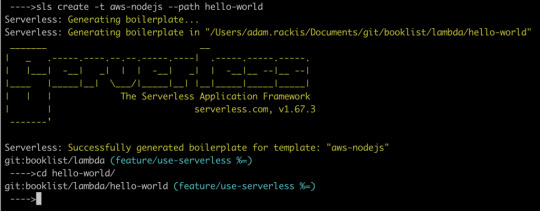
First, let’s create our service. Open any new, or existing web app you might have (create-react-app is a great way to quickly spin up a new one) and find a place to create our services. For me, it’s my lambda folder. Whatever directory you choose, cd into it from terminal and run the following command:
sls create -t aws-nodejs --path hello-world
That creates a new directory called hello-world. Let’s crack it open and see what’s in there.

If you look in handler.js, you should see an async function that returns a message. We could hit sls deploy in our terminal right now, and deploy that Lambda function, which could then be invoked. But before we do that, let’s make it callable over the web.
Working with AWS manually, we’d normally need to go into the AWS API Gateway, create an endpoint, then create a stage, and tell it to proxy to our Lambda. With serverless, all we need is a little bit of config.
Still in the hello-world directory? Open the serverless.yaml file that was created in there.
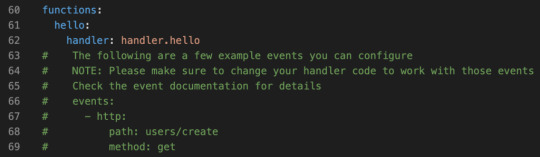
The config file actually comes with boilerplate for the most common setups. Let’s uncomment the http entries, and add a more sensible path. Something like this:
functions: hello: handler: handler.hello # The following are a few example events you can configure # NOTE: Please make sure to change your handler code to work with those events # Check the event documentation for details events: - http: path: msg method: get
That’s it. Serverless does all the grunt work described above.
CORS configuration
Ideally, we want to call this from front-end JavaScript code with the Fetch API, but that unfortunately means we need CORS to be configured. This section will walk you through that.
Below the configuration above, add cors: true, like this
functions: hello: handler: handler.hello events: - http: path: msg method: get cors: true
That’s the section! CORS is now configured on our API endpoint, allowing cross-origin communication.
CORS Lambda tweak
While our HTTP endpoint is configured for CORS, it’s up to our Lambda to return the right headers. That’s just how CORS works. Let’s automate that by heading back into handler.js, and adding this function:
const CorsResponse = obj => ({ statusCode: 200, headers: { "Access-Control-Allow-Origin": "*", "Access-Control-Allow-Headers": "*", "Access-Control-Allow-Methods": "*" }, body: JSON.stringify(obj) });
Before returning from the Lambda, we’ll send the return value through that function. Here’s the entirety of handler.js with everything we’ve done up to this point:
'use strict'; const CorsResponse = obj => ({ statusCode: 200, headers: { "Access-Control-Allow-Origin": "*", "Access-Control-Allow-Headers": "*", "Access-Control-Allow-Methods": "*" }, body: JSON.stringify(obj) });
module.exports.hello = async event => { return CorsResponse("HELLO, WORLD!"); };
Let’s run it. Type sls deploy into your terminal from the hello-world folder.
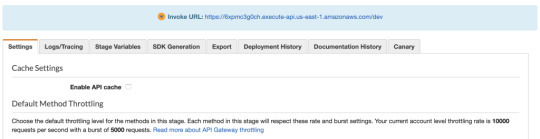
When that runs, we’ll have deployed our Lambda function to an HTTP endpoint that we can call via Fetch. But… where is it? We could crack open our AWS console, find the gateway API that serverless created for us, then find the Invoke URL. It would look something like this.
Fortunately, there is an easier way, which is to type sls info into our terminal:
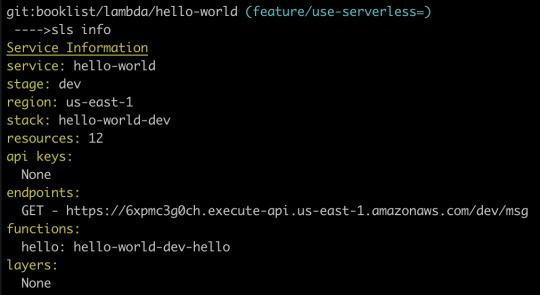
Just like that, we can see that our Lambda function is available at the following path:
https://6xpmc3g0ch.execute-api.us-east-1.amazonaws.com/dev/ms
Woot, now let’s call It!
Now let’s open up a web app and try fetching it. Here’s what our Fetch will look like:
fetch("https://6xpmc3g0ch.execute-api.us-east-1.amazonaws.com/dev/msg") .then(resp => resp.json()) .then(resp => { console.log(resp); });
We should see our message in the dev console.
Now that we’ve gotten our feet wet, let’s repeat this process. This time, though, let’s make a more interesting, useful service. Specifically, let’s make the canonical “resize an image” Lambda, but instead of being triggered by a new S3 bucket upload, let’s let the user upload an image directly to our Lambda. That’ll remove the need to bundle any kind of aws-sdk resources in our client-side bundle.
Building a useful Lambda
OK, from the start! This particular Lambda will take an image, resize it, then upload it to an S3 bucket. First, let’s create a new service. I’m calling it cover-art but it could certainly be anything else.
sls create -t aws-nodejs --path cover-art
As before, we’ll add a path to our HTTP endpoint (which in this case will be a POST, instead of GET, since we’re sending the file instead of receiving it) and enable CORS:
// Same as before events: - http: path: upload method: post cors: true
Next, let’s grant our Lambda access to whatever S3 buckets we’re going to use for the upload. Look in your YAML file — there should be a iamRoleStatements section that contains boilerplate code that’s been commented out. We can leverage some of that by uncommenting it. Here’s the config we’ll use to enable the S3 buckets we want:
iamRoleStatements: - Effect: "Allow" Action: - "s3:*" Resource: ["arn:aws:s3:::your-bucket-name/*"]
Note the /* on the end. We don’t list specific bucket names in isolation, but rather paths to resources; in this case, that’s any resources that happen to exist inside your-bucket-name.
Since we want to upload files directly to our Lambda, we need to make one more tweak. Specifically, we need to configure the API endpoint to accept multipart/form-data as a binary media type. Locate the provider section in the YAML file:
provider: name: aws runtime: nodejs12.x
…and modify if it to:
provider: name: aws runtime: nodejs12.x apiGateway: binaryMediaTypes: - 'multipart/form-data'
For good measure, let’s give our function an intelligent name. Replace handler: handler.hello with handler: handler.upload, then change module.exports.hello to module.exports.upload in handler.js.
Now we get to write some code
First, let’s grab some helpers.
npm i jimp uuid lambda-multipart-parser
Wait, what’s Jimp? It’s the library I’m using to resize uploaded images. uuid will be for creating new, unique file names of the sized resources, before uploading to S3. Oh, and lambda-multipart-parser? That’s for parsing the file info inside our Lambda.
Next, let’s make a convenience helper for S3 uploading:
const uploadToS3 = (fileName, body) => { const s3 = new S3({}); const params = { Bucket: "your-bucket-name", Key: `/${fileName}`, Body: body };
return new Promise(res => { s3.upload(params, function(err, data) { if (err) { return res(CorsResponse({ error: true, message: err })); } res(CorsResponse({ success: true, url: `https://${params.Bucket}.s3.amazonaws.com/${params.Key}` })); }); }); };
Lastly, we’ll plug in some code that reads the upload files, resizes them with Jimp (if needed) and uploads the result to S3. The final result is below.
'use strict'; const AWS = require("aws-sdk"); const { S3 } = AWS; const path = require("path"); const Jimp = require("jimp"); const uuid = require("uuid/v4"); const awsMultiPartParser = require("lambda-multipart-parser");
const CorsResponse = obj => ({ statusCode: 200, headers: { "Access-Control-Allow-Origin": "*", "Access-Control-Allow-Headers": "*", "Access-Control-Allow-Methods": "*" }, body: JSON.stringify(obj) });
const uploadToS3 = (fileName, body) => { const s3 = new S3({}); var params = { Bucket: "your-bucket-name", Key: `/${fileName}`, Body: body }; return new Promise(res => { s3.upload(params, function(err, data) { if (err) { return res(CorsResponse({ error: true, message: err })); } res(CorsResponse({ success: true, url: `https://${params.Bucket}.s3.amazonaws.com/${params.Key}` })); }); }); };
module.exports.upload = async event => { const formPayload = await awsMultiPartParser.parse(event); const MAX_WIDTH = 50; return new Promise(res => { Jimp.read(formPayload.files[0].content, function(err, image) { if (err || !image) { return res(CorsResponse({ error: true, message: err })); } const newName = `${uuid()}${path.extname(formPayload.files[0].filename)}`; if (image.bitmap.width > MAX_WIDTH) { image.resize(MAX_WIDTH, Jimp.AUTO); image.getBuffer(image.getMIME(), (err, body) => { if (err) { return res(CorsResponse({ error: true, message: err })); } return res(uploadToS3(newName, body)); }); } else { image.getBuffer(image.getMIME(), (err, body) => { if (err) { return res(CorsResponse({ error: true, message: err })); } return res(uploadToS3(newName, body)); }); } }); }); };
I’m sorry to dump so much code on you but — this being a post about Amazon Lambda and serverless — I’d rather not belabor the grunt work within the serverless function. Of course, yours might look completely different if you’re using an image library other than Jimp.
Let’s run it by uploading a file from our client. I’m using the react-dropzone library, so my JSX looks like this:
<Dropzone onDrop={files => onDrop(files)} multiple={false} > <div>Click or drag to upload a new cover</div> </Dropzone>
The onDrop function looks like this:
const onDrop = files => { let request = new FormData(); request.append("fileUploaded", files[0]);
fetch("https://yb1ihnzpy8.execute-api.us-east-1.amazonaws.com/dev/upload", { method: "POST", mode: "cors", body: request }) .then(resp => resp.json()) .then(res => { if (res.error) { // handle errors } else { // success - woo hoo - update state as needed } }); };
And just like that, we can upload a file and see it appear in our S3 bucket!

An optional detour: bundling
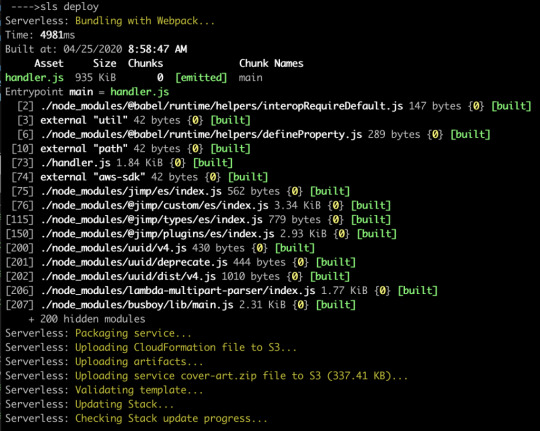
There’s one optional enhancement we could make to our setup. Right now, when we deploy our service, Serverless is zipping up the entire services folder and sending all of it to our Lambda. The content currently weighs in at 10MB, since all of our node_modules are getting dragged along for the ride. We can use a bundler to drastically reduce that size. Not only that, but a bundler will cut deploy time, data usage, cold start performance, etc. In other words, it’s a nice thing to have.
Fortunately for us, there’s a plugin that easily integrates webpack into the serverless build process. Let’s install it with:
npm i serverless-webpack --save-dev
…and add it via our YAML config file. We can drop this in at the very end:
// Same as before plugins: - serverless-webpack
Naturally, we need a webpack.config.js file, so let’s add that to the mix:
const path = require("path"); module.exports = { entry: "./handler.js", output: { libraryTarget: 'commonjs2', path: path.join(__dirname, '.webpack'), filename: 'handler.js', }, target: "node", mode: "production", externals: ["aws-sdk"], resolve: { mainFields: ["main"] } };
Notice that we’re setting target: node so Node-specific assets are treated properly. Also note that you may need to set the output filename to handler.js. I’m also adding aws-sdk to the externals array so webpack doesn’t bundle it at all; instead, it’ll leave the call to const AWS = require("aws-sdk"); alone, allowing it to be handled by our Lamdba, at runtime. This is OK since Lambdas already have the aws-sdk available implicitly, meaning there’s no need for us to send it over the wire. Finally, the mainFields: ["main"] is to tell webpack to ignore any ESM module fields. This is necessary to fix some issues with the Jimp library.
Now let’s re-deploy, and hopefully we’ll see webpack running.

Now our code is bundled nicely into a single file that’s 935K, which zips down further to a mere 337K. That’s a lot of savings!
Odds and ends
If you’re wondering how you’d send other data to the Lambda, you’d add what you want to the request object, of type FormData, from before. For example:
request.append("xyz", "Hi there");
…and then read formPayload.xyz in the Lambda. This can be useful if you need to send a security token, or other file info.
If you’re wondering how you might configure env variables for your Lambda, you might have guessed by now that it’s as simple as adding some fields to your serverless.yaml file. It even supports reading the values from an external file (presumably not committed to git). This blog post by Philipp Müns covers it well.
Wrapping up
Serverless is an incredible framework. I promise, we’ve barely scratched the surface. Hopefully this post has shown you its potential, and motivated you to check it out even further.
If you’re interested in learning more, I’d recommend the learning materials from David Wells, an engineer at Netlify, and former member of the serverless team, as well as the Serverless Handbook by Swizec Teller
Serverless Workshop: A repo to learn the core concepts of serverless
Serverless Auth Strategies: A repo that walks through different strategies for authorizing access to functions.
Netlify Functions Worksop: Netlify lessons on the core concepts of using serverless functions
Serverless Handbook: Getting started with serverless technologies
The post Building Your First Serverless Service With AWS Lambda Functions appeared first on CSS-Tricks.
Building Your First Serverless Service With AWS Lambda Functions published first on https://deskbysnafu.tumblr.com/
0 notes
Text
Building Your First Serverless Service With AWS Lambda Functions
Many developers are at least marginally familiar with AWS Lambda functions. They’re reasonably straightforward to set up, but the vast AWS landscape can make it hard to see the big picture. With so many different pieces it can be daunting, and frustratingly hard to see how they fit seamlessly into a normal web application.
The Serverless framework is a huge help here. It streamlines the creation, deployment, and most significantly, the integration of Lambda functions into a web app. To be clear, it does much, much more than that, but these are the pieces I’ll be focusing on. Hopefully, this post strikes your interest and encourages you to check out the many other things Serverless supports. If you’re completely new to Lambda you might first want to check out this AWS intro.
There’s no way I can cover the initial installation and setup better than the quick start guide, so start there to get up and running. Assuming you already have an AWS account, you might be up and running in 5–10 minutes; and if you don’t, the guide covers that as well.
Your first Serverless service
Before we get to cool things like file uploads and S3 buckets, let’s create a basic Lambda function, connect it to an HTTP endpoint, and call it from an existing web app. The Lambda won’t do anything useful or interesting, but this will give us a nice opportunity to see how pleasant it is to work with Serverless.
First, let’s create our service. Open any new, or existing web app you might have (create-react-app is a great way to quickly spin up a new one) and find a place to create our services. For me, it’s my lambda folder. Whatever directory you choose, cd into it from terminal and run the following command:
sls create -t aws-nodejs --path hello-world
That creates a new directory called hello-world. Let’s crack it open and see what’s in there.
If you look in handler.js, you should see an async function that returns a message. We could hit sls deploy in our terminal right now, and deploy that Lambda function, which could then be invoked. But before we do that, let’s make it callable over the web.
Working with AWS manually, we’d normally need to go into the AWS API Gateway, create an endpoint, then create a stage, and tell it to proxy to our Lambda. With serverless, all we need is a little bit of config.
Still in the hello-world directory? Open the serverless.yaml file that was created in there.

The config file actually comes with boilerplate for the most common setups. Let’s uncomment the http entries, and add a more sensible path. Something like this:
functions: hello: handler: handler.hello # The following are a few example events you can configure # NOTE: Please make sure to change your handler code to work with those events # Check the event documentation for details events: - http: path: msg method: get
That’s it. Serverless does all the grunt work described above.
CORS configuration
Ideally, we want to call this from front-end JavaScript code with the Fetch API, but that unfortunately means we need CORS to be configured. This section will walk you through that.
Below the configuration above, add cors: true, like this
functions: hello: handler: handler.hello events: - http: path: msg method: get cors: true
That’s the section! CORS is now configured on our API endpoint, allowing cross-origin communication.
CORS Lambda tweak
While our HTTP endpoint is configured for CORS, it’s up to our Lambda to return the right headers. That’s just how CORS works. Let’s automate that by heading back into handler.js, and adding this function:
const CorsResponse = obj => ({ statusCode: 200, headers: { "Access-Control-Allow-Origin": "*", "Access-Control-Allow-Headers": "*", "Access-Control-Allow-Methods": "*" }, body: JSON.stringify(obj) });
Before returning from the Lambda, we’ll send the return value through that function. Here’s the entirety of handler.js with everything we’ve done up to this point:
'use strict'; const CorsResponse = obj => ({ statusCode: 200, headers: { "Access-Control-Allow-Origin": "*", "Access-Control-Allow-Headers": "*", "Access-Control-Allow-Methods": "*" }, body: JSON.stringify(obj) });
module.exports.hello = async event => { return CorsResponse("HELLO, WORLD!"); };
Let’s run it. Type sls deploy into your terminal from the hello-world folder.
When that runs, we’ll have deployed our Lambda function to an HTTP endpoint that we can call via Fetch. But… where is it? We could crack open our AWS console, find the gateway API that serverless created for us, then find the Invoke URL. It would look something like this.

Fortunately, there is an easier way, which is to type sls info into our terminal:

Just like that, we can see that our Lambda function is available at the following path:
https://6xpmc3g0ch.execute-api.us-east-1.amazonaws.com/dev/ms
Woot, now let’s call It!
Now let’s open up a web app and try fetching it. Here’s what our Fetch will look like:
fetch("https://6xpmc3g0ch.execute-api.us-east-1.amazonaws.com/dev/msg") .then(resp => resp.json()) .then(resp => { console.log(resp); });
We should see our message in the dev console.
Now that we’ve gotten our feet wet, let’s repeat this process. This time, though, let’s make a more interesting, useful service. Specifically, let’s make the canonical “resize an image” Lambda, but instead of being triggered by a new S3 bucket upload, let’s let the user upload an image directly to our Lambda. That’ll remove the need to bundle any kind of aws-sdk resources in our client-side bundle.
Building a useful Lambda
OK, from the start! This particular Lambda will take an image, resize it, then upload it to an S3 bucket. First, let’s create a new service. I’m calling it cover-art but it could certainly be anything else.
sls create -t aws-nodejs --path cover-art
As before, we’ll add a path to our HTTP endpoint (which in this case will be a POST, instead of GET, since we’re sending the file instead of receiving it) and enable CORS:
// Same as before events: - http: path: upload method: post cors: true
Next, let’s grant our Lambda access to whatever S3 buckets we’re going to use for the upload. Look in your YAML file — there should be a iamRoleStatements section that contains boilerplate code that’s been commented out. We can leverage some of that by uncommenting it. Here’s the config we’ll use to enable the S3 buckets we want:
iamRoleStatements: - Effect: "Allow" Action: - "s3:*" Resource: ["arn:aws:s3:::your-bucket-name/*"]
Note the /* on the end. We don’t list specific bucket names in isolation, but rather paths to resources; in this case, that’s any resources that happen to exist inside your-bucket-name.
Since we want to upload files directly to our Lambda, we need to make one more tweak. Specifically, we need to configure the API endpoint to accept multipart/form-data as a binary media type. Locate the provider section in the YAML file:
provider: name: aws runtime: nodejs12.x
…and modify if it to:
provider: name: aws runtime: nodejs12.x apiGateway: binaryMediaTypes: - 'multipart/form-data'
For good measure, let’s give our function an intelligent name. Replace handler: handler.hello with handler: handler.upload, then change module.exports.hello to module.exports.upload in handler.js.
Now we get to write some code
First, let’s grab some helpers.
npm i jimp uuid lambda-multipart-parser
Wait, what’s Jimp? It’s the library I’m using to resize uploaded images. uuid will be for creating new, unique file names of the sized resources, before uploading to S3. Oh, and lambda-multipart-parser? That’s for parsing the file info inside our Lambda.
Next, let’s make a convenience helper for S3 uploading:
const uploadToS3 = (fileName, body) => { const s3 = new S3({}); const params = { Bucket: "your-bucket-name", Key: `/${fileName}`, Body: body };
return new Promise(res => { s3.upload(params, function(err, data) { if (err) { return res(CorsResponse({ error: true, message: err })); } res(CorsResponse({ success: true, url: `https://${params.Bucket}.s3.amazonaws.com/${params.Key}` })); }); }); };
Lastly, we’ll plug in some code that reads the upload files, resizes them with Jimp (if needed) and uploads the result to S3. The final result is below.
'use strict'; const AWS = require("aws-sdk"); const { S3 } = AWS; const path = require("path"); const Jimp = require("jimp"); const uuid = require("uuid/v4"); const awsMultiPartParser = require("lambda-multipart-parser");
const CorsResponse = obj => ({ statusCode: 200, headers: { "Access-Control-Allow-Origin": "*", "Access-Control-Allow-Headers": "*", "Access-Control-Allow-Methods": "*" }, body: JSON.stringify(obj) });
const uploadToS3 = (fileName, body) => { const s3 = new S3({}); var params = { Bucket: "your-bucket-name", Key: `/${fileName}`, Body: body }; return new Promise(res => { s3.upload(params, function(err, data) { if (err) { return res(CorsResponse({ error: true, message: err })); } res(CorsResponse({ success: true, url: `https://${params.Bucket}.s3.amazonaws.com/${params.Key}` })); }); }); };
module.exports.upload = async event => { const formPayload = await awsMultiPartParser.parse(event); const MAX_WIDTH = 50; return new Promise(res => { Jimp.read(formPayload.files[0].content, function(err, image) { if (err || !image) { return res(CorsResponse({ error: true, message: err })); } const newName = `${uuid()}${path.extname(formPayload.files[0].filename)}`; if (image.bitmap.width > MAX_WIDTH) { image.resize(MAX_WIDTH, Jimp.AUTO); image.getBuffer(image.getMIME(), (err, body) => { if (err) { return res(CorsResponse({ error: true, message: err })); } return res(uploadToS3(newName, body)); }); } else { image.getBuffer(image.getMIME(), (err, body) => { if (err) { return res(CorsResponse({ error: true, message: err })); } return res(uploadToS3(newName, body)); }); } }); }); };
I’m sorry to dump so much code on you but — this being a post about Amazon Lambda and serverless — I’d rather not belabor the grunt work within the serverless function. Of course, yours might look completely different if you’re using an image library other than Jimp.
Let’s run it by uploading a file from our client. I’m using the react-dropzone library, so my JSX looks like this:
<Dropzone onDrop={files => onDrop(files)} multiple={false} > <div>Click or drag to upload a new cover</div> </Dropzone>
The onDrop function looks like this:
const onDrop = files => { let request = new FormData(); request.append("fileUploaded", files[0]);
fetch("https://yb1ihnzpy8.execute-api.us-east-1.amazonaws.com/dev/upload", { method: "POST", mode: "cors", body: request }) .then(resp => resp.json()) .then(res => { if (res.error) { // handle errors } else { // success - woo hoo - update state as needed } }); };
And just like that, we can upload a file and see it appear in our S3 bucket!

An optional detour: bundling
There’s one optional enhancement we could make to our setup. Right now, when we deploy our service, Serverless is zipping up the entire services folder and sending all of it to our Lambda. The content currently weighs in at 10MB, since all of our node_modules are getting dragged along for the ride. We can use a bundler to drastically reduce that size. Not only that, but a bundler will cut deploy time, data usage, cold start performance, etc. In other words, it’s a nice thing to have.
Fortunately for us, there’s a plugin that easily integrates webpack into the serverless build process. Let’s install it with:
npm i serverless-webpack --save-dev
…and add it via our YAML config file. We can drop this in at the very end:
// Same as before plugins: - serverless-webpack
Naturally, we need a webpack.config.js file, so let’s add that to the mix:
const path = require("path"); module.exports = { entry: "./handler.js", output: { libraryTarget: 'commonjs2', path: path.join(__dirname, '.webpack'), filename: 'handler.js', }, target: "node", mode: "production", externals: ["aws-sdk"], resolve: { mainFields: ["main"] } };
Notice that we’re setting target: node so Node-specific assets are treated properly. Also note that you may need to set the output filename to handler.js. I’m also adding aws-sdk to the externals array so webpack doesn’t bundle it at all; instead, it’ll leave the call to const AWS = require("aws-sdk"); alone, allowing it to be handled by our Lamdba, at runtime. This is OK since Lambdas already have the aws-sdk available implicitly, meaning there’s no need for us to send it over the wire. Finally, the mainFields: ["main"] is to tell webpack to ignore any ESM module fields. This is necessary to fix some issues with the Jimp library.
Now let’s re-deploy, and hopefully we’ll see webpack running.
Now our code is bundled nicely into a single file that’s 935K, which zips down further to a mere 337K. That’s a lot of savings!
Odds and ends
If you’re wondering how you’d send other data to the Lambda, you’d add what you want to the request object, of type FormData, from before. For example:
request.append("xyz", "Hi there");
…and then read formPayload.xyz in the Lambda. This can be useful if you need to send a security token, or other file info.
If you’re wondering how you might configure env variables for your Lambda, you might have guessed by now that it’s as simple as adding some fields to your serverless.yaml file. It even supports reading the values from an external file (presumably not committed to git). This blog post by Philipp Müns covers it well.
Wrapping up
Serverless is an incredible framework. I promise, we’ve barely scratched the surface. Hopefully this post has shown you its potential, and motivated you to check it out even further.
If you’re interested in learning more, I’d recommend the learning materials from David Wells, an engineer at Netlify, and former member of the serverless team, as well as the Serverless Handbook by Swizec Teller
Serverless Workshop: A repo to learn the core concepts of serverless
Serverless Auth Strategies: A repo that walks through different strategies for authorizing access to functions.
Netlify Functions Worksop: Netlify lessons on the core concepts of using serverless functions
Serverless Handbook: Getting started with serverless technologies
The post Building Your First Serverless Service With AWS Lambda Functions appeared first on CSS-Tricks.
source https://css-tricks.com/building-your-first-serverless-service-with-aws-lambda-functions/
from WordPress https://ift.tt/2ZPUMO4 via IFTTT
0 notes
Text
Future of Commerce AR using ARkit over the web
This year at WWDC 2019, Apple announced ARKit 3 and RealityKit which bring additional capabilities to the already growing augmented reality (AR) framework. Last year at WWDC 2018, Apple’s ARKit 2 introduced Quick Look features over the web for iOS 12, which allows 3D rendered models to be viewed and interacted with in the real world directly through Safari on iOS. This is achieved by making use of the native platform technologies for supported browsers — think PWA features, making use of available browser APIs. As of this year, Google has recently announced similar ARCore features to be made available over the web in Android Q, which is currently pending public release. Having already implemented ARkit over the web using ARKit 2, I felt it’s time to get the word out there on the true capabilities of these features. Now without further adieu, we’ll dive into the details on how we incorporated ARkit’s Quick Look features into our PWA.
Reference Experience
As of October 25 2018, the React PWA (Progressive Web App) Reference Storefront, incorporates ARKit2’s Quick Look functionality over the web to allow shoppers the ability to view 3D models of products they may browse in the storefront.
Let’s venture into how we achieved our ARKit implementation through our Reference Storefront PWA. Our intention was to give shoppers of our storefront the option of an AR experience of a product when they visit a product’s display page that supports the functionality.
Firstly, creation of augmented reality requires knowledge of 3D modelling or at least a tool to help with the creation of models. Models can be created from images, from scratch, or from templates available on the web. We used Vectary (https://vectary.com) for our implementation, which is a subscription based 3D modelling web application however you can use any modelling application of your choice.
Second, ARKit mandates usdz as the file format for rendering 3D models. This was easy, since Vectary can export our models to a variety of file types (.obj, .usdz, etc.). If you’re not using Vectary, Apple has created a tool to help with this generation/conversion here: https://developer.apple.com/augmented-reality/quick-look/.
Lastly, we had to host our usdz files somewhere so they can be picked up by our Reference Storefront application. ARKit usdz files are externalized through content URLs within the storefront application configuration. The default URLs are configured to reference the usdz files, which are located on Amazon S3 however, any other CMS (Content Management System) provider may be used. Note that depending on the content hosting system you’re using to deliver your usdz files, you may need to configure CORS to allow HEAD requests.
We added some configuration properties for our project to use:
"arKit": { "enable": true, "skuArImagesUrl": "https://s3.amazonaws.com/referenceexp/ar/%sku%.usdz" },
arKit.enable: Enable ARKit’s Quick Look capability to load on a product display page.
arKit.skuArImagesUrl: The path to the usdz files hosted on an external CMS. Set this parameter to the complete URL of the files by replacing the sku/file-name parameter with %sku%. This parameter is populated when the page is loaded with values retrieved by Cortex
We were able to create all the necessary implementations around this strictly within our React component responsible for loading the product information on the product details page (productdisplayitem.main.jsx).
To start, we have to determine if a corresponding usdz file for our product is hosted on our configured content delivery provider. We’ll add an initial check to see if the “arKit” configuration has been set, and that the ar tag is supported by our browser.
After validating that the ARkit can be supported on the current browser, we then check for the corresponding usdz file by initiating a HEAD request to the usdz file location, and update our components state to indicate whether or not the file exists. We execute this whenever our component mounts, or when it receives new properties. We surround our request in a function urlExists() to simplify our calls.
urlExists(url, callback) { this.funcName = 'UrlExists'; fetch(url, { method: 'HEAD' }).then((res) => { callback(res.ok); }); } ... if (Config.arKit.enable && document.createElement('a').relList.supports('ar')) { this.urlExists(Config.arKit.skuArImagesUrl.replace('%sku%', res._code[0].code), (exists) => { this.setState({ productData: res, arFileExists: exists, }); }); } ...
Next, we’ll need to render our product image to display the usdz file we fetched (if the file exists). Upon rendering our component we’ll wrap our product image in an anchor tag with rel=”ar” if the usdz file exists. This will position the ARKit Quick Look icon directly around our product image, so that tapping it will direct the shopper into Quick Look with our 3D object file.
if (arFileExists) { return ( { e.target.src = imgPlaceholder; }} alt={intl.get('none-available')} className="itemdetail-main-img" /> ); }
When the image is called to the storefront, the required usdz files are retrieved on a per-SKU basis as they are available from the CMS provider. The storefront only displays the required AR tags, if the file exists. Any SKUs without a corresponding usdz file will not have an AR tag displayed on the product display page.
youtube
A quick demonstration.
Summary
We chose to implement augmented reality into our PWA using this solution as it was (and presently still is) the most viable to implement for a general practice. The implementation solely relies on features at the browser level, without any need for integrating with custom libraries/dependencies. This also makes the ARKit implementation a standard to conform to in order to ensure future features that can be added through this implementation are easily adapted. Google has proceeded to follow a similar pattern by introducing their own ARCore technologies over the web, which is expected to be made available with Android Q.
By following these general practices for making AR available over the web, we have ensured our PWA can accommodate features that may further enhance the experiences of augmented reality. This opens us up to consume some of the features in ARKit 3 and RealityKit such as people occlusion and facial tracking.
In the current state of this implementation, usdz files must be created on a case-by-case basis for each product in a catalog to which ARKit is desired to be supported for. Depending on the size of the catalog, modelling these products as 3D models may take quite a bit of effort and time. To alleviate this effort, we would further investigate dynamically rendering object files from product photos, or integrating with a 3D object modelling service. These would be common hurdles that need to be accomplished by any means, as generating the necessary 3D models still require some sort of 3D modelling experience — for now.
Future of Commerce AR using ARkit over the web published first on https://getyourcoupon.tumblr.com/
0 notes
Text
公開日時指定可能な静的コンテンツ配信システムをサーバレスで作ってみた
こんにちは、インフラストラクチャーグループの沼沢です。 今回は、タイトルの通り 公開日時の指定が可能な静的コンテンツ配信用のシステムを、サーバレスで作ってみました。
なお、リージョンは全て東京リージョンとします。
構成図
まずは構成図です。

公開日時が指定可能な仕組み
S3 には、時間で公開状態へ移行するような設定や仕組みがありません。 これを実現するために、S3 オブジェクトのキーをもとに、Lambda を利用して、あたかも公開日時を指定しているかのような動きを実装します。 なお、本稿では分まで指定できる設定としていますが、要件によってカスタマイズすることも可能です。
S3
「非公開 S3 バケット」と「公開用 S3 バケット」を用意
「非公開 S3 バケット」のバケット直下には、プレフィックスに 公開したい年月日時分を示す yyyymmddHHMM ���式のディレクトリ を作成
2020年1月1日0時0分に公開したい場合は 202001010000
作成した公開予定ディレクトリの配下に、公開予定のファイルをアップロード
余談ですが、バケット���リシーを駆使すれば非公開と公開でバケットを分けなくても実現は可能なのですが、今回は分けています。 というのも、バケットポリシーは設定を誤ると root 以外操作できない状態になったり、非公開のつもりのディレクトリが公開状態になっていて公開前情報が流出しまったり…
とにかく、2つ用意したからってコストに差がでるわけでもありませんので、なるべく設定をシンプルにするためにバケットを2つ用意することにしました。
CloudFront
「公開用 S3 バケット」をオリジンとして、CloudFront を経由してコンテンツを配信します。
今回用意する仕組みでは 公開済みファイルの上書きも可能 となっていて、分毎にコンテンツが上書きされる可能性があるため、CloudFront の Default TTL を60秒としておくのが良いでしょう。
また、S3 への直アクセスを防ぎ、必ず CloudFront を経由するようにするため、Origin Access Identity を設定することをおすすめします。
Lambda
「非公開 S3 バケット」から「公開用 S3 バケット」にファイルをコピーする処理を行う公開用 Lambda を用意します。(ソースコードは後述) この Lambda では、ざっくりと以下の処理をしています。
起動した年月日時分に該当するディレクトリが「非公開 S3 バケット」直下に存在するか確認
存在すればその配下のファイルを全て公開用バケットにコピー
コピーする際は、プレフィックスの yyyymmddHHMM は除いたキーでコピー
ディレクトリ構成も全てそのままコピーする
例えば、202001010000 ディレクトリが存在する場合のコピーは以下の様なイメージ。
s3://非公開S3バケット/202001010000/aaa.html s3://非公開S3バケット/202001010000/hoge/bbb.html s3://非公開S3バケット/202001010000/hoge/fuga/ccc.html ↓ s3://公開用S3バケット/aaa.html s3://公開用S3バケット/hoge/bbb.html s3://公開用S3バケット/hoge/fuga/ccc.html
その他、この Lambda には以下のような設定をしておきます。
IAM ロールには AWSLambdaBasicExecutionRole と AmazonS3FullAccess のマネージドルールをアタッチ
ただし、AmazonS3FullAccess は強力なので、本番利用の際は適切に権限を絞ったカスタムポリシーの用意を推奨
タイムアウト値は、コピーするファイルの量にもよるので、要件に合わせた設定を推奨
CloudWatch Events
公開用 Lambda を毎分キックするように CloudWatch Events を設定
Cron 式で * * * * ? * を指定
Cron 式の詳細は こちら を参照
Lambda Function のソースコード
今回は Python 3.7 用のソースコードを用意しました。 やっていることは単純なので、得意な言語に書き換えても良いと思います。
unpublish_bucket と publish_bucket の値だけ変更すれば動くと思います。
import json import boto3 from datetime import datetime, timedelta, timezone JST = timezone(timedelta(hours=+9), 'JST') s3 = boto3.client('s3') unpublish_bucket = 'unpublish_bucket' # 非公開 S3 バケット publish_bucket = 'publish_bucket' # 公開用 S3 バケット def lambda_handler(event, context): now = "{0:%Y%m%d%H%M}".format(datetime.now(JST)) # 現在日時(分まで) now_format = "{0:%Y/%m/%d %H:%M}".format(datetime.now(JST)) # 現在日時(分まで) unpublished_list = s3.list_objects( Bucket=unpublish_bucket, Prefix=now + '/' ) if not 'Contents' in unpublished_list: print(f'[INFO] {now_format} に公開予定のファイルはありません。') return flag = False for obj in unpublished_list['Contents']: unpublished_path = obj['Key'] if unpublished_path.endswith('/'): continue publish_path = unpublished_path.replace(now + '/', '') copy_result_etag = publish_file(publish_path, unpublished_path) get_result_etag = publish_file_check(publish_path) if copy_result_etag == get_result_etag: print(f'[SUCCESS] s3://{unpublish_bucket}/{unpublished_path} -> s3://{publish_bucket}/{publish_path} にコピーしました。') flag = True else print(f'[FAILED] s3://{preview_bucket}/{unpublished_path} -> s3://{publish_bucket}/{publish_path} のコピーに失敗しました。') if flag == False: print(f'[INFO] {now_format} 用のディレクトリ(s3://{unpublish_bucket}/{now}/)はありましたが、ファイルがありませんでした。') def publish_file(publish_path, unpublished_path): result = s3.copy_object( Bucket=publish_bucket, Key=publish_path, CopySource={ 'Bucket': unpublish_bucket, 'Key': unpublished_path } ) if 'CopyObjectResult' in result: return result['CopyObjectResult']['ETag'] else: return None def publish_file_check(publish_path): result = s3.get_object( Bucket=publish_bucket, Key=publish_path ) if 'ETag' in result: return result['ETag'] else: return None
注意事項
前述の通り、Lambda 用の IAM ロールに付与する権限には注意してください
CloudWatch Events は分が最小単位です
正確にその分の0秒に Lambda が起動するわけではありません
よって、秒まで指定した公開日時を指定することは本稿の内容では実現できません
コストについて
大抵の Lambda 実行は空振りになってしまってコストがもったいないと思うかもしれませんが、Lambda は無料利用枠の恩恵が大きく、この仕組だけでクラウド破産のようなことにはならないかと思いますので、そこはご安心を。
EC2 等、時間単位で課金されるものを利用していないため、トラフィックによる従量課金を除いた場合に発生する主要なコストとしては以下のものぐらいかと思います。
Lambda の無料利用枠を超えた分
CloudWatch Logs(Lambda のログ) への転送量と保存容量
S3 の保存容量
Lambda のコードをチューニングしたり、「非公開 S3 バケット」を低頻度アクセスストレージにしたりすると、更にコストを抑えられます。
その他
分毎ではなく時間毎など他の間隔にする
例えば時間毎で公開設定をしたい場合は、本稿の仕組みを以下のように修正すれば実現可能です。
アップロード時のプレフィックスを 公開したい年月日時を示す yyyymmddHH 形式のディレクトリ を作成する
CloudWatch Events の Cron 式に 0 * * * ? * を指定
Lambda のコードの現在時刻を取るフォーマットを時間までのものにする
ついでに CloudFront のキャッシュ時間も、公開間隔に合わせて調��することでキャッシュ効率も上がります。
非公開日時の指定をできるようにする
本稿の仕組では、非公開(「公開用 S3 バケット」からのファイル削除)日時の指定までは行っていません。 そこで、CloudWatch Events と Lambda の組み合わせをもう一組作るのも良いと思います。
Lambda でのエラー発生時のリカバリ策を仕込む
本稿では、Lambda でエラーが発生した際のリカバリを考慮していません。 コピー失敗などが発生すると、公開されるべきコンテンツが公開されず、エンドユーザやビジネスへの影響が出る事故になりかねません。
Lambda のコードでは、print で CloudWatch Logs に [SUCCESS] や [FAILED] を出力するようにしてあるので、その文字列を CloudWatch などで監視して、検知をトリガーにリカバリ用の仕組みがキックされるようにしておくと、事故の発生率を下げることができます。
簡単に思いつくリカバリの方法としては、もう一度 Lambda をキックするなどしょうか。 もしくは Twilio 等の電話通知を行い、それに気付いた運用者が、「非公開 S3 バケット」から「公開用 S3 バケット」へ、手動でコンテンツをコピーする形でも良いかもしれませんね。
あとがき
今回は、公開日時指定可能な静的コンテンツ配信システムをサーバレスで作成しました。
AWS を利用する場合、安易に EC2 でごにょごにょしようとせず、「可能な限りサーバ管理を AWS に任せる」という発想のもと、マネージドサービスを活用した設計を心がけてみましょう。
そうすることで、実際のインフラコストだけではなく、構築時や運用開始後の人的コストが劇的に下がり、エンジニアが より価値を生み出す生産的な活動に時間を割けるようになる ので、ぜひ検討してみてください。
ちなみに、この仕組みは3時間程度でできました。 本稿の執筆にかかった時間の方が長いです。
お後がよろしいようで。
0 notes
Text
Tom Brady es Thanos, y tiene la piedra infinita final: Gridiron Heights S3, E2 en Noticias de Futbol y Deportes en México y el Mundo
Noticia nueva en https://delapatada.news/tom-brady-es-thanos-y-tiene-la-piedra-infinita-final-gridiron-heights-s3-e2/52137/
Tom Brady es Thanos, y tiene la piedra infinita final: Gridiron Heights S3, E2

Cooks Gave a Super Gift to This Rams EmployeeMahomes Loves Ketchup as Much as Torching DefensesBears Hoping to Ride Club Dub to the Super BowlThe Worst Fantasy Football Punishments for Last PlaceNFL Players Bring Soccer Traditions to the NFLJuJu Is a Man of the PeopleBills Superfan 'Pancho Billa' Continues to InspireHappy 26th Birthday to OBJ… Noticias Relacionadas Frank Reich: los jefes superaron a los Colts ̶... 0 Cómo perder peso de forma fácil y segura 0 Noticias del Tottenham: los goles de Dele Alli Pre... 3 Nápoles-Lazio, Acerbi expulsó a veinte minutos del... 0 jQuery(document).ready(function( $ ) //jQuery('.yuzo_related_post').equalizer( overflow : 'relatedthumb' ); jQuery('.yuzo_related_post .yuzo_wraps').equalizer( columns : '> div' ); )
#Noticias
0 notes
Text
[GAS][V8]Symbol オブジェクト
概要
GAS が V8 に対応したら、もう JavaScript の勉強したほうが早いんじゃないかな?という観点から早速 本 を購入。 面白そうな箇所をつまみ食いしてると、知らない子が混ざってるじゃないですか?! というわけで、早速調べてみます。
まとめとコード
なにが書かれているかわからないユニークなキーを生成してくれるところまでは理解した。 が、またしても全然わからん。コードと語り合おう。
function myFunction() { const s1 = Symbol('s'); console.log(typeof s1); // symbol console.log(s1.toString()); // Symbol(s) const s2 = Symbol('s'); console.log(s1 === s2); // false: 引数が同じでも別々に作成されたシンボルは別物 const obj = { [s1]: 'hoge', [s2]: () => console.log('fuga'), s3 : 'piyo', s4 : () => console.log('gao') }; console.log(obj[s1]); // hoge obj[s2](); // fuga console.log(obj.s3); // piyo obj.s4(); // gao for (var key in obj) { console.log(`${key}: ${obj[key]}`); // 1. s3: piyo, 2. s4: () => console.log('gao') } }
なるほどなるほど、プロパティ・メソッド名のバッティングに対応するために作られたのね。 あまり使い所なさそうだけど。そして for of と出会う。
参照サイト・本
『改訂新版JavaScript本格入門 ~モダンスタイルによる基礎から現場での応用まで』 - 山田 祥寛 Symbol - JavaScript | MDN ECMAScript6にシンボルができた理由 - Qiita
0 notes
Photo

shUnit2 で awscli を使ったシェルスクリプトのユニットテストを書くまでの諸々 https://ift.tt/2wWxwkD
tl;dr
shUnit2 — shUnit2 とは — shUnit2 で Hello World — shUnit2 諸々 —– 詳細については… —– Assert —– assertEquals —– assertNotEquals —– Setup/Teardown —– oneTimeSetup —– oneTimeTearDown —– ちなみに, setUp と tearDown
awscli を使ったシェルスクリプトでテストする — さて, 今回 — サンプル —– シェルスクリプト —– テスト
以上
tl;dr
とある勉強会で, @pyama86 さんに「うちではシェルスクリプトのテストは shunit2 で書いていますよー」って教えて頂いたので, 早速導入してみた話をダイジェストで.
shUnit2
shUnit2 とは
Bourne Shell をベースとした, シェルスクリプトの為のユニットテストフレームワークです.
shunit2 - shUnit2 is a xUnit based unit test framework for Bourne based shell scripts. kward/shunit2 - GitHub
github.com
README をざっと読んだ限りだと, xUnit と呼ばれるテストフレームワークと同じような使い方が出来るようなので, xUnit を少しでも触ったことがあれば, すんなりと利用することが出来そうです.
shUnit2 で Hello World
早速, Hello World してみたいと思います.
事前に, shunit2 を任意のディレクトリにダウンロードしておきます.
wget https://raw.githubusercontent.com/kward/shunit2/master/shunit2
今回はシンプルに以下のようなディレクトリ構成にしました.
$ tree sample sample ├── sample_test.sh └── shunit2 0 directories, 2 files
そして, 以下のようなスクリプトを書きました.
#!/usr/bin/env bash # filename: sample_test.sh # テストされる側の関数 function sample() { echo "Hello World" } # テスト関数 testSample() { output=`sample` assertEquals "${output}" "Hello World" } # shUnit2 は最後に読み込んであげる必要がある . ./shunit2
assertEquals で, sample 関数の実行結果が Hello World と出力されることをテストしています.
実際にこのスクリプトを実行すると, 以下のように出力されてテストが通ります.
$ chmod +x sample_test.sh $ ./sample_test.sh testSample Ran 1 test. OK
LGTM.
shUnit2 諸々
詳細については…
shunit2 の詳細については README を見て頂くとして, 自分が実際に利用した Asserts 関数や Setup/Teardown 関数についてメモっておきます.
Assert
assertEquals
expected と actual の文字列が同一であることをテストします.
assertEquals [message] expected actual
以下のように書くと, 同一でなかった場合に指定したメッセージを出力させることが出来ます.
# テスト関数 testSample() { output=`sample` assertEquals "残念でした." "${output}" "Hello World" }
実行すると, 以下のように出力されます.
$ ./sample_test.sh testSample ASSERT:残念でした. expected:<ello World> but was:<Hello World> Ran 1 test. FAILED (failures=1)
assertNotEquals
assertNotEquals [message] expected actual
他にも assertSame や assertNull 等がありますが, 個人的に, これらの Assert だけで事足りた次第です.
Setup/Teardown
oneTimeSetup
全てのテストが実行される前に一度だけ呼び出される関数です.
# テスト関数 testSample1() { assertEquals "Hello World" "Hello World" } # 全てテストが実行される前に一度だけ呼び出される関数 oneTimeSetUp() { echo "oneTimeSetup が呼び出されました" }
実行すると, 以下のように出力されます.
$ ./sample_test.sh oneTimeSetup が呼び出されました testSample1 Ran 1 test. OK
oneTimeTearDown
全てのテストが完了した際に一度だけ呼び出される関数です.
# テスト関数 testSample1() { assertEquals "Hello World" "Hello World" } # 全てのテストが実行された後に一度だけ呼び出される関数 oneTimeTearDown() { echo "oneTimeTearDown が呼び出されました" } . ./shunit2
実行すると, 以下のように出力されます.
$ ./sample_test.sh testSample1 oneTimeTearDown が呼び出されました Ran 1 test. OK
ちなみに, setUp と tearDown
setUp() や tearDown() はそれぞれのテスト前後に呼び出されます.
# テスト関数 testSample1() { assertEquals "Hello World" "Hello World" } # テスト関数 testSample2() { assertEquals "Hello shUnit2" "Hello shUnit2" } # テストが実行される前に毎回呼び出される関数 setUp() { echo "setUp が呼び出されました" } # テストが実行される後に毎回呼び出される関数 tearDown() { echo "tearDown が呼び出されました" } # shUnit2 は最後に読み込んであげる必要がある . ./shunit2
実行すると, 以下のように出力されます.
$ ./sample_test.sh setUp が呼び出されました testSample1 tearDown が呼び出されました setUp が呼び出されました testSample2 tearDown が呼び出されました Ran 2 tests. OK
イイ感じです.
awscli を使ったシェルスクリプトでテストする
さて, 今回
awscli をラップするシェルスクリプトを作る機会がありましたので, このシェルスクリプトのテストを shUnit2 で書いてみました. その際に, AWS の API レスポンスを返してくれる moto という Python のライブラリと組み合わせることで, 生の AWS リソースに対する API リクエストを行うことなくテストを行うことが出来たので, moto_server はお薦めのツールだと思います.
moto - Moto is a library that allows your python tests to easily mock out the boto library spulec/moto - GitHub
github.com
ちなみに, moto を少しこじらせてしまって, PyFukuoka #4 で LT させて頂きました.
speakerdeck.com
サンプル
シェルスクリプト
以下のような超シンプルなシェルスクリプト (関数) を用意しました.
#!/usr/bin/env bash -e # filename: sample.sh function get_objects() { ####################################### # S3 オブジェクトを取得する # Globals: # None # Arguments: # None # Returns: # オブジェクトの内容 ####################################### bucket=${1} key=${2} if [ "${_ENV}" == "test" -o "${_ENV}" == "debug" ];then obj=$(aws --endpoint=http://127.0.0.1:5000/ s3 cp s3://${bucket}/${key} -) else obj=$(aws s3 cp s3://${bucket}/${key} -) fi echo $obj }
関数の引数で指定した S3 バケットとキーの内容を出力する関数です. 以下のように利用することを想定しています.
#!/usr/bin/env bash ... 省略 ... get_objects ${your_bucket} ${your_key}
尚, シェルスクリプトを実行する際に _ENV=test 又は _ENV=debug を付与して実行した場合, moto で用意した API レスポンスを擬似的に返すサーバー (moto_server) 向けにリクエストを送信するように --endpoint=http://127.0.0.1:5000/ を指定しています.
テスト
テストスクリプトは以下のように書きました. oneTimeSetUp 関数で moto_server を起動して, テスト用のオブジェクトを moto_server 上に作成した S3 バケットに登録しています. また, oneTimeTearDown 関数で moto_server を停止させる処理を実行しています. 尚, moto_server を利用する為には, 事前に moto_server をインストールしておく必要があります. 詳しくは moto の README を御確認下さい.
#!/usr/bin/env bash # filename: sample_test.sh . ./sample.sh oneTimeSetUp() { ####################################### # moto_server の起動, S3 バケットを作成, S3 バケットにオブジェクトを登録 ####################################### moto_server s3 > moto_server.log 2>&1 & echo "foo bar baz" > data1.txt aws --endpoint=http://127.0.0.1:5000 s3api create-bucket --bucket=sample-bucket > /dev/null aws --endpoint=http://127.0.0.1:5000 s3api put-object --bucket=sample-bucket --key=data1 --body=data1.txt > /dev/null rm -f data1.txt } oneTimeTearDown() { ####################################### # moto_server の停止 ####################################### pid=$(ps aux | grep [m]oto_server | awk '{print $2}') kill ${pid} } testGetObjects() { ####################################### # get_objects のテスト ####################################### assertEquals "$(get_objects 'sample-bucket' 'data1')" "foo bar baz" } . ./shunit2
テストを実行すると, 以下のように出力されてテストは成功します.
$ _ENV=test ./sample_test.sh testGetObjects Ran 1 test. OK
一応, moto_server.log を見てみます.
$ cat moto_server.log * Running on http://127.0.0.1:5000/ (Press CTRL+C to quit) 127.0.0.1 - - [30/Apr/2018 22:48:15] "PUT /sample-bucket HTTP/1.1" 200 - 127.0.0.1 - - [30/Apr/2018 22:48:17] "PUT /sample-bucket/data1 HTTP/1.1" 200 - 127.0.0.1 - - [30/Apr/2018 22:48:20] "HEAD /sample-bucket/data1 HTTP/1.1" 200 - 127.0.0.1 - - [30/Apr/2018 22:48:20] "GET /sample-bucket/data1 HTTP/1.1" 200 -
テストが実行された際のアクセスログが記録されています.
イイ感じです.
以上
超簡単に shUnit2 について紹���させて頂きました. 今後はシェルスクリプトを作った際には, 出来るだけ shUnit2 を使ったテストを書けるようになりたいと思います. また, moto (moto_server) と組み合わせることで, 生の AWS リソースを触ることなく awscli を使ったシェルスクリプトのテストについても shUnit2 で書くことが出来るので, 無理の無い範囲でテストを書いていければと考えています.
有難うございました.
元記事はこちら
「shUnit2 で awscli を使ったシェルスクリプトのユニットテストを書くまでの諸々」
May 21, 2018 at 12:00PM
0 notes
Text

Napping Mat by Arsil
14 notes
·
View notes
Link
via www.peterbe.com
tl;dr; It's faster to list objects with prefix being the full key path, than to use HEAD to find out of a object is in an S3 bucket.
Background
I have a piece of code that opens up a user uploaded .zip file and extracts its content. Then it uploads each file into an AWS S3 bucket if the file size is different or if the file didn't exist at all before.
It looks like this:
for filename, filesize, fileobj in extract(zip_file): size = _size_in_s3(bucket, filename) if size is None or size != filesize: upload_to_s3(bucket, filename, fileobj) print('Updated!' if size else 'New!') else: print('Ignored')
I'm using the boto3 S3 client so there are two ways to ask if the object exists and get its metadata.
Option 1: client.head_object
Option 2: client.list_objects_v2 with Prefix=${keyname}.
But why the two different approaches?
The problem with client.head_object is that it's odd in how it works. Sane but odd. If the object does not exist, boto3 raises a botocore.exceptions.ClientError which contains a response and in it you can look for exception.response['Error']['Code'] == '404'.
What I noticed was that if you use a try:except ClientError: approach to figure out if an object exists, you reset the client's connection pool in urllib3. So after an exception has happened, any other operations on the client causes it to have to, internally, create a new HTTPS connection. That can cost time.
I wrote and filed this issue on github.com/boto/boto3.
So I wrote two different functions to return an object's size if it exists:
def _key_existing_size__head(client, bucket, key): """return the key's size if it exist, else None""" try: obj = client.head_object(Bucket=bucket, Key=key) return obj['ContentLength'] except ClientError as exc: if exc.response['Error']['Code'] != '404': raise
And the contender...:
def _key_existing_size__list(client, bucket, key): """return the key's size if it exist, else None""" response = client.list_objects_v2( Bucket=bucket, Prefix=key, ) for obj in response.get('Contents', []): if obj['Key'] == key: return obj['Size']
They both work. That was easy to test. But which is fastest?
Before we begin, which do you think is fastest? The head_object feels like it'll be able to send an operation to S3 internally to do a key lookup directly. But S3 isn't a normal database.
Here's the script partially cleaned up but should be easy to run.
The results
So I wrote a loop that ran 1,000 times and I made sure the bucket was empty so that 1,000 times the result of the iteration is that it sees that the file doesn't exist and it has to do a client.put_object.
Here are the results:
FUNCTION: _key_existing_size__list Used 511 times SUM 148.2740752696991 MEAN 0.2901645308604679 MEDIAN 0.2569708824157715 STDEV 0.17742598775696436 FUNCTION: _key_existing_size__head Used 489 times SUM 249.79622673988342 MEAN 0.510830729529414 MEDIAN 0.4780092239379883 STDEV 0.14352671121877011
Because it's network bound, it's really important to avoid the 'MEAN' and instead look at the 'MEDIAN'. My home broadband can cause temporary spikes.
Clearly, using client.list_objects_v2 is faster. It's 90% faster than client.head_object.
But note! this was 1,000 times of B) "does the file already exist?" and B) "No? Ok upload it". So the times there include all the client.put_object calls.
So why did I measure both? I.e. _key_existing_size__list+client.put_object versus. _key_existing_size__head+client.put_object? The reason is that the approach of using try:except ClientError: followed by a client.put_object causes boto3 to create a new HTTPS connection in its pool. Again, see the issue which demonstrates this in different words.
What if the object always exists?
So, I simply run the benchmark again. The first time, it uploaded all 1,000 uniquely named objects. So running it a second time, every time the answer is that the object exists, and its size hasn't changed, so it never triggers the client.put_object.
Here are the results this time:
FUNCTION: _key_existing_size__list Used 495 times SUM 54.60546112060547 MEAN 0.11031406286991004 MEDIAN 0.08583354949951172 STDEV 0.06339202669609442 FUNCTION: _key_existing_size__head Used 505 times SUM 44.59347581863403 MEAN 0.0883039125121466 MEDIAN 0.07310152053833008 STDEV 0.054452842190700346
In this case, using client.head_object is faster. By 20% but the median time is 0.08 seconds! Even on a home broadband connection. In other words, I don't think that difference is significant.
One more time, excluding the client.put_object
The point of using client.list_objects_v2 instead of client.head_object was to avoid breaking the connection pool in urllib3 that boto3 manages somehow. Having to create a new HTTPS connection (and adding it to the pool) costs time, but what if we disregard that and compare the two functions "purely" on how long they take when the file does NOT exist? Remember, the second measurement above was when every object exists.
So we know it took 0.09 seconds and 0.07 seconds respectively for the two functions to figure out that the object does exist. How long does it take to figure out that the object does not exist independent of any other op. I.e. just try each one without doing a client.put_object afterwards. That means we avoid the bug so the comparison is fair.
The results:
FUNCTION: _key_existing_size__list Used 499 times SUM 123.57429671287537 MEAN 0.247643881188127 MEDIAN 0.2196049690246582 STDEV 0.18622877427652743 FUNCTION: _key_existing_size__head Used 501 times SUM 112.99495434761047 MEAN 0.22553883103315464 MEDIAN 0.2828958034515381 STDEV 0.15342842113446084
The client.list_objects_v2 beats client.head_object by 30%. And it matters. Above I said that 20% difference didn't matter but now it does. That's because the time difference when it always finds the object was 0.013 seconds. When it comes to figuring out that the object did not exist the time difference is 0.063 seconds. That's still a pretty small number but, hey, you gotto draw the line somewhere.
In conclusion
Using client.list_objects_v2 is a better alternative to using client.head_object.
If you think you'll often find that the object doesn't exist and needs a client.put_object then using client.list_objects_v2 is 90% faster. If you think you'll rarely need client.put_object (i.e. that most objects don't change) then client.list_objects_v2 is almost the same performance.
0 notes
Text
Scaling the serverless summit requires environmental sympathy with dev & ops
The only way to gain confidence that a feature branch will work in the cloud is to run it in the cloud — with environmental sympathy
In the wake of Serverlessconf 2017 in Austin, there’s been an increasing number of discussions about today’s cold reality of serverless. While we can see the glory of serverless manifesting in the not-too distant future, the community still finds it difficult to test, deploy, debug, self-discover, and generally develop serverless applications.
The discussion has been amplified in recent days with tweet storms and the great threads on the Serverless Slack channel from Paul Johnston that prompted this post. The common sentiment is that the difficultly with serverless gets more acute when developing applications composed of multiple sets of functions, infrastructure pieces, and identities evolving over time.
On the one hand, the serverless approach to application architecture does implicitly address some of the high-availability aspects of service resiliency. For instance, you cloud assume — without empirical evidence — that AWS transparently migrates Lambda execution across Availability Zones in the face of localized outages. This is unlike a more traditional VM/container model, where you must explicitly distribute compute across isolated failure domains and load balance at a higher logical level (e.g. ELB and ALB).
While this intrinsic reliability is undoubtedly a good thing, overall resiliency isn’t so easily satisfied. Take for instance the canonical “Hello Serverless” application: an event-based thumbnailing workflow. Clients upload an image to an S3 bucket, a Lambda function handles the event, thumbnails the image, and posts it back to S3. Ship it.
Except, how do you actually test for the case when the S3 bucket is unavailable? Or can you? I’m not thinking of testing against a localhost mock API response, but the actual S3 bucket API calls — the bucket you’re accessing in production, via a dynamically injected environment variable.
Another example is when you have two Lambda functions, loosely coupled. The functions are blissfully ignorant of one another, although they share a mutual friend: Kinesis. In this use case, “Function A” publishes a message, perhaps with an embedded field whose value is another service’s event format (like an S3 triggering event) that’s consumed by “Function B”. While there’s no physical coupling, there’s potentially a deep logical coupling between them — one which might only appear at some future time as message contents drift across three agents in the pipeline.
How can we guard against this? How can we be certain about the set of functions which ultimately defines our service’s public contract?
Are they coherent? Are the functions secure? Resilient? Correct? Observable? Scalable? How can we reduce uncertainty around non-functional requirements?
body[data-twttr-rendered="true"] {background-color: transparent;}.twitter-tweet {margin: auto !important;}
Serverless is an implementation detail, not an architectural pattern.
— @mweagle
function notifyResize(height) {height = height ? height : document.documentElement.offsetHeight; var resized = false; if (window.donkey && donkey.resize) {donkey.resize(height); resized = true;}if (parent && parent._resizeIframe) {var obj = {iframe: window.frameElement, height: height}; parent._resizeIframe(obj); resized = true;}if (window.webkit && window.webkit.messageHandlers && window.webkit.messageHandlers.resize) {window.webkit.messageHandlers.resize.postMessage(height); resized = true;}return resized;}twttr.events.bind('rendered', function (event) {notifyResize();}); twttr.events.bind('resize', function (event) {notifyResize();});if (parent && parent._resizeIframe) {var maxWidth = parseInt(window.frameElement.getAttribute("width")); if ( 500 < maxWidth) {window.frameElement.setAttribute("width", "500");}}
The non-functional requirements of serverless
The great thing about non-functional requirements is that they’re … non-functional. They speak to a system’s characteristics — how it should be — not what it should do, or how it should be done. In that sense, non-functional requirements both have nothing and everything to do with serverless.
The slide from Peter Bourgon’s presentation on the microservice toolkit for Go
The slide above is from Peter Bourgon’s excellent presentation on the design decisions behind go-kit, a composable microservice toolkit for Go. The concerns listed apply equally to a JVM monolith, a Go-based set of microservices, or a NodeJS constellation supported by FaaS. If you’re running something in production, those *-ilities lurk in the shadows whether or not they’re explicitly named.
In that sense, serverless is less a discontinuity with existing practice and more the next stage in the computing continuum — a theme emphasized in Tim Wagner’s closing keynote. It’s a technique that embeds more of the *-ilities into the vendor platform itself, rather than requiring secondary tools. Serverless enables us to deliver software faster and with fewer known unknowns — at least those that are externally observable.
Although serverless offloads more of these characteristics to the vendor, we still own the service. At the end of the day, each one of us is responsible to the customer, even when conditions change. We need to own it. And that means getting better at Ops. Or more specifically — cloud-native development.
Charity Majors does an excellent job describing the operational best practices for serverless
The Base Camp — “Works on My Machine”
For many of us, the end result of our furious typing is in many cases a cloud-native application. In more mature organizations, our software constructs go through a structured CI/CD pipeline and produce an artifact ready to ship. This artifact has a well-defined membrane through which only the purest configuration data flows and all dependencies are dynamic and well behaved.
On a day-to-day basis, though, there is often a lot of bash, docker-compose, DNS munging, and API mocks. There is also a lot of “works on my machine” — which may be true, at least at this instant — but probably doesn’t hold for everyone else on the team. And it definitely doesn’t provide a lot of confidence that it will work in the cloud.
The only way to gain confidence that a feature branch will work in the cloud is to run it in the cloud.
Operations is the sum of all of the skills, knowledge and values that your company has built up around the practice of shipping and maintaining quality systems and software. — Charity Majors, WTF is Serverless Operations
If everyone on the team is developing their service feature branch in the cloud, complete with its infrastructure, then we’re all going to get better at ops. Because it’s development and ops rolled together. And we’re all going to share a sense of Environmental Sympathy.
To the Summit — From #NoOps to #WereAllOps
Environmental Sympathy, inspired by Mechanical Sympathy, is about applying awareness of our end goal of running in the cloud to the process of writing software.
While it’s always been possible to provision isolated single-developer clusters complete with VMs, log aggregators, monitoring systems, feature flags, and the like, in practice it’s pretty challenging and expensive. And perhaps most aggravating, it can be very slow. Short development cycles are critical to developer productivity and that’s not really a hallmark of immutable, VM-based deploys.
Serverless, precisely because it’s so heavily reliant on pre-existing vendor services and billed like a utility, makes it possible for every developer to exclusively develop their “service” in the cloud.
The service can have its own persistence engine, cache, queue, monitoring system, and all the other tools and namespaces needed to develop. Feature branches are the same as production branches and both are cloud-native by default. If during development, the *-ilities tools prove too limiting, slow, or opaque, developer incentives and operational incentives are aligned. Together we build systems that make it easier to ship and maintain quality systems and software. Which will also help to minimize MTTR as well.
Serverless, for both financial and infrastructure reasons, makes it possible to move towards cloud-native development and Environmental Sympathy. It represents a great opportunity to bring Dev and Ops — and QA, and SecOps) together. This allows us to mov from “worked on my machine” to “works in the cloud — I’ll slack you the URL.”
From #NoOps to #WereAllOps.
Scaling the serverless summit requires environmental sympathy with dev & ops was originally published in A Cloud Guru on Medium, where people are continuing the conversation by highlighting and responding to this story.
from A Cloud Guru - Medium http://ift.tt/2rFik4J
0 notes
Text
Broadleaf with Groovy and Gradle - Part 2
This post is part 2 of my dive into Gradle and Groovy. If you are just getting caught up, check out part 1. You can also skip straight to the code on GitHub.
Since we already talked about Gradle, let's go over my goals for writing a Groovy Broadleaf module:
Write something very self-contained (needed to finish it in a few days)
Operate alongside of our normal Java code in the rest of the Broadleaf framework
See how good the IDE support is (I use Eclipse)
Try to be as idiomatic as possible - make sure my code conformed to The Groovy Way as much as possible
Keeping it small
I decided to bite off an implementation of the FileServiceProvider interface. We had recently finished writing an Amazon S3 provider so that assets and site maps could be uploaded automatically to S3 and I thought that a Rackspace Cloud Files implementation could also be compelling. It also did not require a ton of code and Rackspace was already pushing JClouds to take additional boilerplate out of it.
The environment
I was very impressed with the first-class Groovy and Gradle dependency management support in Eclipse. I installed the following plugins from the Eclipse Marketplace to facilitate this:
Gradle Integration for Eclipse - this gave me a 'Gradle Dependencies' library on my build path just like 'Maven Dependencies' for Maven projects
Groovy/Grails Tool Suite - this gave me a bit better language support for Groovy which was most helpful in the Gradle build file DSL. It included some Grails features that I didn't use but didn't hurt anything to add in
Once I imported in the project, I got a nice build out which looked very similar to my experience with Maven projects
Enabling the DSLD support gave me some code-completion content-assist in my build.gradle file. It was a little sparser than I would have liked and I found myself going back and forth to official documentation for the various plugins I was using:
The code
On to the fun part! Again, I tried to be as idiomatic as I could with my code.
Domain objects and closures
There are a few connection properties to connect to the Cloud Files API. I modeled this as a simple DTO (Domain Transfer Object):
class CloudFilesConfiguration { static final String USERNAME_PROP = 'broadleaf.rackspace.cloudfiles.username' static final String APIKEY_PROP = 'broadleaf.rackspace.cloudfiles.apikey' static final String ENDPOINT_PROP = 'broadleaf.rackspace.cloudfiles.endpoint' static final String CONTAINER_PROP = 'broadleaf.rackspace.cloudfiles.container' static final String CONTAINER_SUBDIR_PROP = 'broadleaf.rackspace.cloudfiles.containerSubDirectory' def username def apikey def endpoint def zone def container def containerSubDirectory }
A few things about this snippet:
No getters or setters - Groovy adds getters/setters automatically for you
No scope keywords - Everything in Groovy defaults to the public scope. Combine this with no getters/setters and DTOs just got a hell of a lot simpler
No semicolons - Semi-colons are optional. Since I was trying to be like Groovy (which tries to be like Ruby) I decided to leave them off for this project
There is even a setting in Eclipse that will automatically remove semicolons for you on save:
But the REAL power of this DTO comes in instantiation. Check out this very simple method to grab a CloudFilesConfiguration object:
protected CloudFilesConfiguration lookupConfiguration() { new CloudFilesConfiguration().with { username = BLCSystemProperty.resolveSystemProperty(CloudFilesConfiguration.USERNAME_PROP) apikey = BLCSystemProperty.resolveSystemProperty(CloudFilesConfiguration.APIKEY_PROP) container = BLCSystemProperty.resolveSystemProperty(CloudFilesConfiguration.CONTAINER_PROP) endpoint = BLCSystemProperty.resolveSystemProperty(CloudFilesConfiguration.ENDPOINT_PROP) containerSubDirectory = BLCSystemProperty.resolveSystemProperty(CloudFilesConfiguration.CONTAINER_SUBDIR_PROP) it } }
Code just simply does not get more readable than that.
with - closure that gives us an execution context to work with. In this case, everything within the with block is just like writing code within theCloudFilesConfiguration` class itself. I can set member variables without qualification
it - the current object contained in the with execution context. This statement just returns the newly-initialized CloudFilesConfiguration back to the caller
No .class - It's all implied in Groovy (finally!)
Compare it to an equivalent snippet that I'm sure plenty of Java programmers have read and/or written:
CloudFilesConfiguration config = new CloudFilesConfiguration(); config.setUsername(BLCSystemProperty.resolveSystemProperty(CloudFilesConfiguration.class.USERNAME_PROP)); config.setApikey(BLCSystemProperty.resolveSystemProperty(CloudFilesConfiguration.class.APIKEY_PROP)); config.setContainer(BLCSystemProperty.resolveSystemProperty(CloudFilesConfiguration.class.CONTAINER_PROP)); config.setEndpoint(BLCSystemProperty.resolveSystemProperty(CloudFilesConfiguration.class.ENDPOINT_PROP)); config.setContainerSubDirectory(BLCSystemProperty.resolveSystemProperty(CloudFilesConfiguration.class.CONTAINER_SUBDIR_PROP)); return config;
Another closure example that I used is in a for loop (.each):
void addOrUpdateResources(FileWorkArea workArea, List<File> files, boolean removeFilesFromWorkArea) { files.each { File file -> SwiftObject obj = client.newSwiftObject() obj.info.name = buildResourceName(FilenameUtils.getName(file.getAbsolutePath())) obj.setPayload(file) CloudFilesConfiguration conf = lookupConfiguration() if (!client.containerExists(conf.container)) { client.createContainer(conf.container) } client.putObject(conf.container, obj) client.close() } }
The point of no return
You might have caught in the code snippets above that there is no return statement in the lookupConfiguration() method. That's Groovy taking another page from the Ruby book. Just like Ruby, the last statement in the function is always returned. Since the last statement in the lookupConfiguration() method is to instantiate a new CloudFilesConfiguration object, that's what gets returned to the caller.
This is in various places in the code, like the removeResource method:
boolean removeResource(String name) { client.removeObject(lookupConfiguration().container, buildResourceName(name)) true }
While leaving off return statements is definitely more idiomatic, I found myself occasionally including it for readability
Input/Output
Since I was writing a file provider, I had to deal with some input and output streams reading/writing from/to various file objects. Lucky for me, Groovy provides operator overloading!
SwiftObject remoteFile = client.getObject(lookupConfiguration().container, buildResourceName(name), null) InputStream inStream = remoteFile.payload.openStream() OutputStream outStream = new FileOutputStream(localFile) localFile.withOutputStream { out -> out << inStream } inStream.close()
by wrapping the file within a withOutputStream closure, the output stream is automatically closed at the end of the execution. Within the closure, I am shifting the input stream to the output stream.
I am explicitly closing the inStream from the remote payload as it is not in an automatically-closed closure
Operator overloading is really great and is definitely one of my favorite parts of C++ (they are referred to as 'friend' functions there). If this was available in the JVM, we could transform this code:
Money amt1 = new Money(BigDecimal.ONE); Money amt2 = new Money(BigDecimal.TWO); Money sum = amt1.add(amt2);
into the slightly more readable:
Money amt1 = new Money(BigDecimal.ONE); Money amt2 = new Money(BigDecimal.TWO); Money sum = amt1 + amt2;
Java type system
I found myself using this way more than I thought I would. I figured that I would let the complier help me out as much as possible and it definitely aided in readability (especially in method parameters). Content-assist was also a problem; when I used the defkeyword Eclipse didn't always know what I meant and would not always give me relevant content-assist results.
As I've gone back to this project, it looks like the def support for content-assist has gotten much better
Testing and static method mocks
There were not a whole lot of interesting results in testing with Groovy, just more of the idiomatic paradigms that I used in the file provider implementation. That said, I was really excited to mock objects with Groovy's ExpandoMetaClassand not bring in an extra mocking framework. However, the class that I needed to mock was a static method in a Broadleaf class (the BLCSystemProperty class) which is not completely instrumented by Groovy (since it is a core Java class). Because of this, it does not have the ExpandoMetaClass features and I had to instrument the mocking with PowerMock.
This turned out to be a pretty simple configuration. I annotated my test with:
@RunWith(PowerMockRunner) @PrepareForTest(BLCSystemProperty) class CloudFilesTest {
and then mocked up the systemPropertiesService method:
static def propMap = [:] @Before void setup() { // initialize propMap and populate with property values PowerMockito.mockStatic(BLCSystemProperty) SystemPropertiesService propService = PowerMockito.mock(SystemPropertiesService) when(propService.resolveSystemProperty(any())).thenAnswer(new Answer() { public Object answer(InvocationOnMock invocation) { Object[] args = invocation.arguments Object mock = invocation.mock propMap[args[0]] } }) when(BLCSystemProperty.systemPropertiesService).thenReturn(propService) provider.fileService = new BroadleafFileServiceImpl() }
Mr. Jenkins
I was a little disappointed with the Jenkins Gradle plugin. It hasn't been updated in almost a year and it does not have feature parity with the Maven Jenkins plugin. The main feature that it is missing is the 'Perform Maven Release' functionality that we use extensively at Broadleaf.
That said, I was still able to set up a continuous build. The configuration was pretty straightforward:

These Gradle executions build the app, run cobertura reports, installs the artifacts to the local Maven repository and then uploads the artifacts to the Broadleaf nexus (both of which utilize the highly recommended Gradle Nexus plugin).
I have pretty good test coverage, if I do say so myself:

Conclusions
Writing something with Groovy and Gradle was definitely a fun venture and it was easy to see why people think it's a great improvement over core Java. Operator overloading and the with closure were definitely my favorite syntactic sugar molecules. I was really surprised at how much I found myself using the Java type system and how little I wanted to use def. If a tried-and-true strongly-typed compiler can help you write more self-documenting and bug-free code, why not use it!
Similar to the part 1 talk about Gradle, some of the Maven features were a bit lacking on Jenkins. I really wanted a release plugin that worked as well as the Maven release plugin but I'm sure one will come along eventually (or I'll write it).
Finally, Apache JClouds specifically was a bit of a pain to deal with in terms of the Rackspace API. I was able to figure out a relatively straightforward solution eventually but in general it felt a bit overarchitected. I could tell that it made some complicated stuff somewhat easier (namely, dealing with multiple providers at once) but it made some of the easy stuff astronomically more painful then they should have been.
Have you had similar experiences with Groovy and Gradle? Let us know! Updating our outdated Grails module is on the road map but we would love some help to take it to GA!
0 notes
Text

The Homeless Pet by sim_man123
2 notes
·
View notes
Text

Download.
3 notes
·
View notes
Text


Two of Us by LilyOfTheValley
8 notes
·
View notes