#select image compression type
Explore tagged Tumblr posts
Visit Tumblr Blog
Explore Tumblr blogs with no restrictions, modern design and the best experience.
Last Seen Tumblr Blogs


Fun Fact
Tumblr has been banned in Indonesia for providing people with access to pornographic content.
Text
Learning all kinds of neat
thin
#...gs about what the right arrow is capable of doing since mine is REFUSING TO BEHAVE#Random Timbit#for instance you can move through parts of your post. Or move between results types on a search engine#(i.e. web; image;shopping;maps etc.)#When you use shift+Windows+S to screenshot you can adjust your selection with the arrow keys. Didn't know that.#Really annoying to have that be a test of reaction speed and timing now#I /did/ know you can use arrow keys to navigate apps in expose view or whatever it's called on windows (alt+tab)#....also in case it's not obvious while the main text body of a tumblr post has arrow control the tags don't. At least not in the same way#I really am gonna have to take this thing apart and take compressed air to it and maybe clean the keyboard contacts and hope that fixes it
0 notes
Text

I couldn't fit the tutorial on a reply lmao, here's a full post explaining my process :]]
STAMP TUTORIAL (TF2 edition, but works for everything)
99% of the process is done on the website ezgif. Ezgif carries the stamp-making process lmao
1. Get your GIF
Tenor: Ok place to grab your GIFs. Average quality of the GIFs is good enough, and looks ok when resized to the size of the stamp. You'll find like 1 normal GIF every 4 buff characters GIF tho.
GIPHY: Average quality of the GIF is better (I don't think the web compresses the GIFs that are uploaded)… If you find what you're looking for. You'll have to SCROLL before finding what you're looking for because there are always non-related GIFs on the top of your searches or the same GIF multiple times, it's crazy.
makeagif: You will find cool GIFs, but the quality is pretty low (I think the web itself compresses the GIFs a lot). It looks bad even when resized down. And it has a watermark, which I recommend cropping because it's not even visible when resized, it just looks like a gray blob on the corner.
Google: Best option by far, quality is pretty good and the ratio of “things I was looking for/things I actually find” is SLIGHTLY in favor of “things I was looking for” (and most of “things I actually find” are just the characters rotating, not NSFW, so that's only a nice change from Tenor). You won't have to scroll much to see different and interesting GIFs. JUST REMEMBER TO FILTER BY GIFS.

You search whatever > Images > Tools > Type > GIF
Make it on your own: Aka, you download your video, go to ezgif's “Video to GIF” (then you can crop it, CUT IT. THIS IS IMPORTANT, YOU DON'T NEED TO GO ANYWHERE ELSE TO CUT YOUR CLIP, YOU CAN DO IT ON EZGIF ITSELF). Ok, I lied, it wasn't Google, this is the best oftion by far. You get exactly what you want, the best quality if you don't compress it much until after the GIF has been resized into the size of a stamp… It's just super time-consuming, and you'll have to spend like an entire hour just watching a video to find the clips.
OK, I HAVE MY GIF NOW
Hehe, his legs go pipupipu
2. Resize
Go to ezgif, this is where the fun begins (if you weren't on ezgif already). You download your GIF, or copy the link and insert it, or you'll have it there if you made it yourself.
A STAMP MAKES 99px × 56px
THE INNER PART OF THE STAMP MAKES 91px × 47px
I RECOMMEND MAKING YOUR GIF 92px × 48px
BTW, THESE MEASURES ARE FOR THE TEMPLATE I'LL GIVE YOU LATER. If you use another template, just go to an image editor and see what the inner size of the stamp is.
So, you set your GIF's width to 92px.

Then crop it, so your height is 48px.

Or you can resize it so it's directly 92px × 48px, but the crop will be in the center, and SOMETIMES YOU DON'T WANT THAT.
For example:

It's a vertical GIF whose area of interest is not in the center, so if we resize it directly-

oops-
ANYWAY
Once you have your GIF resized:
IMPORTANT: BEFORE THE NEXT STEP, REMEMBER TO CONVERT TO GIF IF THE FILE YOU'RE WORKING ON ISN'T A GIF ALREADY
Sometimes you'll be working with a webp without even noticing (EW, I hate webp) and transparencies don't work particularly well with that extension.
3. Overlay

Click on this icon.
Ok, now that that's fixed:

Extend the size of the canvas.

Select your template and Upload image!

This is the template, btw.

Then move the overlay around until it contains the GIF nicely, or just set Left to 43, Top to 20 and Generate image! (I have these numbers memorized, it saves you like 20 seconds lmao)
Also, again, these numbers work on MY template, if you use another one, you'll have to figure it out yourself.
4. Crop

THIS OPTION IS A TIME-SAVER FR
5. Optimize (optional, highly recommend)

I always set my optimization method to Lossy GIF and level 10 because I find that there is no quality loss, and the file size might drop by 30%-70% (actually crazy). These percentages don't change much in higher compressions, even though you'll start seeing a drop in quality around level 35 of compression (the default).
6. Save

YIPPE!!! Your stamp is done :D
You can save it and look at it and place it on your profile or website.


Here it is btw, in case someone wanted it :]] The Sniper GIF but correctly cropped and made into a stamp as well.
Now do that another… eleven times, and you'll have a stamp pack to make into a Tumblr post... Oof TT
There's no website that lets you make stamps faster lmao (I wish)
@sir-broken-bones (I'm @ them so they actually see it, I made this tutorial for them after all lol)
#team fortress 2#tf2#tf2 scout#tf2 sniper#stamps#da stamps#tutorial#graphics#old graphics#neocities#old web graphics#old web
192 notes
·
View notes
Text
Tidbit: The “Posterization” Effect of Panels Due to the Consequences of GIF Color Quantization (and Increased Contrast (And Also The Tangential Matter of Dithering))
There’s this misconception that the color banding and patterned dithering found in panels is an entirely deliberate, calculated effect Hussie manipulated the image into looking with some specific filter, but this isn’t the case, exactly. It wasn’t so much a conscious decision he took but rather an unavoidable consequence of the medium he partook in: digital art in an age where bandwidth and storage was at a premium.
Not to delve too deeply into the history and technicalities of it, but the long and the short of it is back in the early nineties to late aughts (and even a bit further into the 10s), transferring and storing data over the web was not as fast, plentiful, and affordable as it is now. Filesize was a much more important consideration than the fidelity of an image when displaying it on the web. Especially so when you’re a hobbyist on a budget and paying for your own webhosting, or using a free service with a modest upload limit (even per file!). Besides, what good would it be to post your images online if it takes ages to load them over people's dial-up Internet? Don't even get me STARTED on the meager memory and power the average iGPU had to work with, too.

The original comic strip's resolution was a little more than halved and saved as a GIF rather than a large PNG. That's about an 82.13% reduction in filesize!
So in the early days it was very common for people to take their scans, photographs, and digital drawings and scale them down and publish them as smaller lossily compressed JPEGs or lossless GIFs, the latter of which came at the cost of color range. But it had a wider range of browser support and the feature to be used for animations compared to its successor format, PNG ("PNG's not GIF").
You'd've been hard-pressed to find Hussie use any PNGs himself then. In fact, I think literally the only times he's ever personally employed them and not delegate the artwork to a member of the art team were some of the tiny shrunken down text of a character talking far in the distance and a few select little icons.
PNGs support semi-transparency unlike GIFs, which is why Hussie used them to preserve the anti-aliasing on the text without having to add an opaque background color.
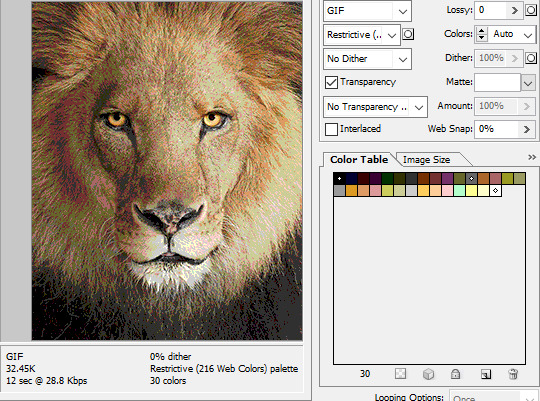
While PNGs can utilize over 16 million colors in a single image, GIFs have a hard limit of 256 colors per frame. For reference, this small image alone has 604 colors:

For those who can't do the math, 256 is a pretty damn small number.
Smaller still were the palettes in a great deal of MSPA's panels early on in its run. Amazingly, a GIF such as this only uses 7 colors (8 if you count the alpha (which it is)).

Not that they were always strictly so low; occasionally some in the later acts of Homestuck had pretty high counts. This panel uses all 256 spots available, in fact.
If he had lowered the number any smaller, the quality would have been god-awful.
To the untrained eye, these bands of color below may seem to be the result of a posterization filter (an effect that reduces smooth areas of color into fewer harsh solid regions), but it's really because the image was exported as a GIF with no dithering applied.

Dithering, to the uninitiated, is how these colors are arranged together to compensate for the paltry palette, producing illusory additional colors. There are three algorithms in Photoshop for this: Diffusion, Pattern, and Noise.

Above is the original image and below is the image reduced to a completely binary 1-bit black and white color palette, to make the effect of each dithering algorithm more obvious.

Diffusion seemingly displaces the pixels around randomly, but it uses error diffusion to calculate what color each pixel should be. In other words, math bullshit. The Floyd-Steinberg algorithm is one such implementation of it, and is usually what this type of error diffusion dithering is called in other software, or some misnomer-ed variation thereof.
The usage of Pattern may hearken back to retro video game graphics for you, as older consoles also suffered from color palette limitations. Sometimes called Ordered dithering because of the orderly patterns it produces. At least, I assumed so. Its etymological roots probably stem from more math bullshit again.
True to its name, Noise is noisy. It’s visually similar to Diffusion dithering, except much more random looking. At least, when binarized like this. Truth be told, I can’t tell the difference between the two at all when using a fuller color table on an image with a lot of detail. It was mainly intended to be used when exporting individual slices of an image that was to be “stitched” back together on a webpage, to mitigate visible seams in the dithering around the edges.
To sate your curiosity, here's how the image looks with no dithering at all:
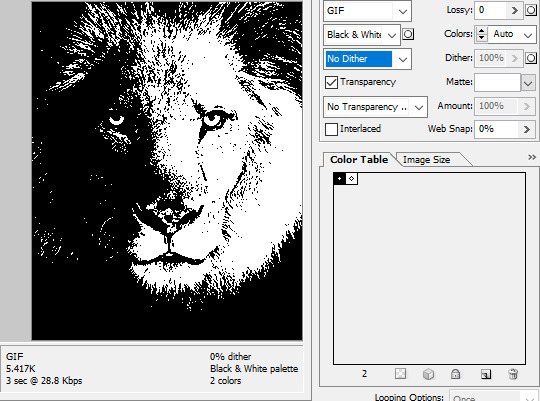
People easily confuse an undithered gif as being the result of posterization, and you couldn't fault them for thinking so. They look almost entirely the same!
Although I was already aware of this fact when I was much younger, I'm guilty of posterizing myself while editing images back then. Figured I may as well reduce the color count beforehand to help keep the exported GIF looking as intended. I view this as a complete waste of time now, though, and amateurish. Takes away a bit of the authenticity of MSPA art, how the colors and details are so variable between panels. As for WHY they were so variable to begin with, choosing the settings to save the image as requires a judicious examination on a case-by-case basis. In other words, just playing around with the settings until it looks decent.
It's the process of striking a fine balance between an acceptable file size and a "meh, good enough" visual quality that I mentioned earlier. How many colors can you take away until it starts to look shit? Which dithering algorithm helps make it look not as shit while not totally ruining the compression efficacy?
Take, for example, this panel from Problem Sleuth. It has 16 colors, an average amount for the comic, and uses Diffusion dithering. Filesize: 34.5 KB.

Then there's this panel right afterwards. It has 8 colors (again, technically 7 + alpha channel since it's an animated gif), and uses Noise dithering this time. Filesize: 34.0 KB.
The more colors and animation frames there are, and the more complicated dithering there is, the bigger the file size is going to be. Despite the second panel having half the color count of the first, the heavily noisy dithering alone was enough to inflate the file size back up. On top of that, there's extra image information layered in for the animation, leaving only a mere 0.5 kilobyte difference between the two panels.
So why would Hussie pick the algorithm that compresses worse than the other? The answer: diffusion causes the dithering to jitter around between frames of animation. Recall its description from before, how it functions on nerd shit like math calculations. The way it calculates what each pixel's color will be is decided by the pixels' colors surrounding it, to put it simply. Any difference in the placement of pixels will cause these cascading changes in the dithering like the butterfly effect.
Diffusion dithering, 16 colors. Filesize: 25.2 KB
This isn't the case with Noise or Pattern dithering, since their algorithms use either a texture or a definite array of numbers (more boring nerd shit).
Noise dithering, 16 colors. Filesize: 31.9 KB
Pattern dithering, 16 colors. Filesize: 23.1 KB
There's a lot more I'd like to talk about, like the different color reduction algorithms, which dither algorithms generally compress better in what cases, and the upward and downward trends of each one’s use over the course of a comic, but since this isn’t a deep dive on GIF optimization, I might save that for another time. This post is already reaching further past the original scope it was meant to cover, and less than 10 images can be uploaded before hitting the limit, which is NOWHERE near enough for me. I should really reevaluate my definition of the word “tidbit”… Anyway, just know that this post suffers from sample selection bias, so while the panels above came from an early section of Problem Sleuth that generally had static panels with diffusion dithering and animated panels with noise dithering, there certainly were animated panels with diffusion later on despite the dither-jittering.
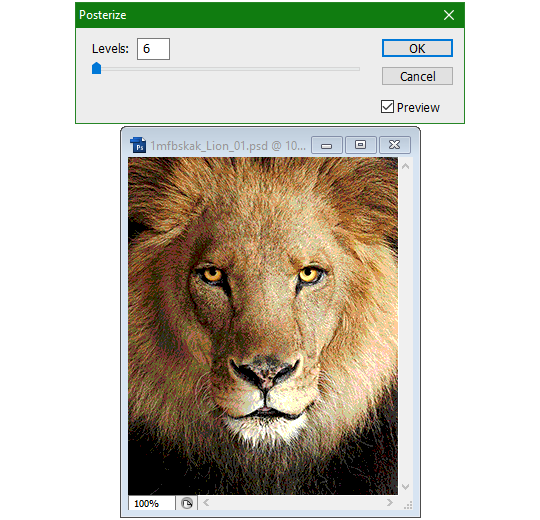
Alright, time to shotgun through the rest of this post, screw segueing. Increasing the contrast almost entirely with “Use Legacy” enabled spreads the tones of the image out evenly, causing the shadows and highlights to clip into pure black and white. The midtones become purely saturated colors. Using the Levels adjustment filter instead, moving both shadow and highlight input level sliders towards the middle also accomplishes the same thing, because, you know, linear readjustment. I'm really resisting the urge to go off on another tangent about color channels and the RGB additive color model.
Anyway, there aren't any examples in MSPA that are quite this extreme (at least in color, but I'll save that for a later post), but an image sufficiently high in contrast can be mistaken for being posterized at a glance. Hence the Guy Fieri banner. In preparation for this post, I was attempting to make a pixel-perfect recreation of that panel but hit a wall trying to figure out which and how many filters were used and what each one's settings were, so I sought the wisdom of those in the official Photoshop Discord server. The very first suggestion I got was a posterization filter, by someone who was a supposed senior professional and server moderator, no less. Fucking dipshit, there's too much detail preserved for it to be posterization. Dude totally dissed me and my efforts too, so fuck that moron. I spit on his name and curse his children, and his children's children. The philistines I have to put up with...
In the end, the bloody Guy Fieri recreation proved to be too much for me to get right. I got sort of close at times, but no cigar. These were some of the closest I could manage:

You might be left befuddled after all this, struggling to remember what the point of the blogpost even was. I had meant for it to be a clarification of GIFs and an argument against using the posterization filter, thinking it was never used in MSPA, but while gathering reference images, I found a panel from the Felt intermission that actually WAS posterized! So I’ll eat crow on this one... Whatever, it’s literally the ONE TIME ever.

I can tell it's posterization and not gif color quantization because of the pattern dithering and decently preserved details on the bomb and bull penis cane. There would have had to have been no dithering and way fewer colors than the 32, most of which were allotted to the bomb and cane. You can't really selectively choose what gets dithered or more colors like this otherwise.
Thank you for reading if you've gotten this far. That all might have been a lot to take in at once, so if you're still unclear about something, please don't hesitate to leave a question! And as always, here are the PSDs used in this post that are free to peruse.
371 notes
·
View notes
Text

HOW TO SCREENCAP & POST YOUR CAPS : A MOSTLY COMPREHENSIVE GUIDE
i got an ask about this, and it felt like it was too long of an explanation to answer in an ask so i made this guide. i am definitely not the expert (as proven by the fact that my VLC tutorial is two links to better tutorials than i could ever make) , but i hope this is helpful!
TABLE OF CONTENTS - finding stuff to cap - capping 101 - storage
FINDING STUFF TO CAP the less "crime" you do while doing this the better honestly. make someone else do it for you and if you absolutely must sail the seven seas 🏴☠️ for the love of god use a good vpn and anti-virus. the safest way to find downloads is to find pages who post them for you to use - on tumblr that is hdsources ! we love hdsources here - there are also pages on instagram (and apparently the site formerly known as twitter, but i don't use those) who post downloads of stuff. my favorites on insta are megaawrld_ , logolessfiles, djatsscenes, sadisticscenes and elyse.logoless . to get into these pages you do have to have an instagram account, but once you get in you can get links to them posting shows and movies. this is significantly safer than p*racy. the next step if these pages don't have what you want is to get them yourself through other ways. if you have to do that, GET A FUCKING VPN.
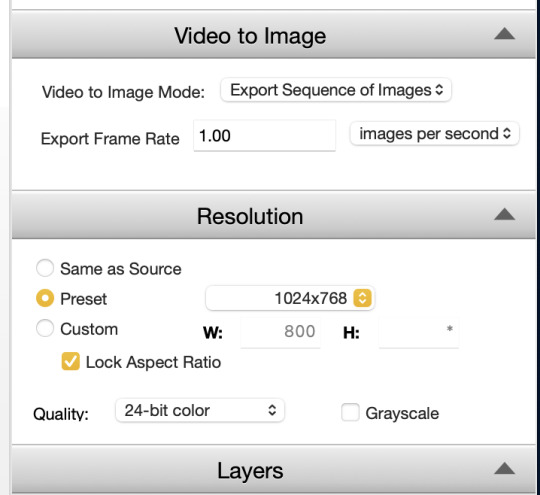
CAPPING 101 now that you have something to cap, it's time to actually make screencaps. you're gonna wanna download a program to do that. most people use VLC, i use adapter for the most part but it can be fickle so i'm learning to use VLC too.
adapter doesn't require much in depth so here's a quick tutorial: - have file and drop it into the window (it can read mp4 and mkv files) - select where you want your screencaps to end up, i make a folder for them - select your frame rate (how many images you want to generate per second of video. i tend to do 1, and anything over 5 creates so many pictures that its too much to deal with, but if you're making gifs you want more pictures) - select your file size and image quality.
i could not explain VLC to you if i tried, i am still figuring out how to use it. this tutorial & this tutorial have been very helpful though !
STORAGE
honestly this should have probably come first, but i didn't want to scare people. there are two types of storage, physical and cloud storage. to run a resource blog you need both.
physical storage comes in the form of space on a hard drive. your computer has a limited amount of space and i truly do not suggest keeping every screencap you've ever made on your computer's hard drive. screencaps take up A LOT of space. get an external hard drive and get the beefiest one you can afford. ssds (solid state drives) are fast as fuck. depending on how much content you make (and how much you can afford) get at LEAST 2 tbs but maybe get more. i like this guy cause it's fast and small!
if you just came here to learn how to screencap you can stop here unless you want to learn how to back up your files because that's really what cloud storage is for.
cloud storage is storage that is not on your actual computer. you cannot touch it but it's important if you want to make your screencaps available for other people to use.
i'm a big fan of dropbox, mega, mediafire and if you absolutely must use it google drive. (my preferences are in that order) unfortunately, cloud storage gets really expensive really fast and there's kind of no way to avoid it. compress your files when you upload them so they take up less space in whatever form of cloud storage you do get, and pray.
that's what i got for ya! if you have any questions feel free to send an ask or join my discord server!
15 notes
·
View notes
Text

i made some cute food themed mouse cursors! read more if you want them for yourself
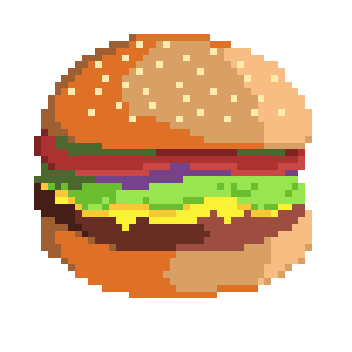
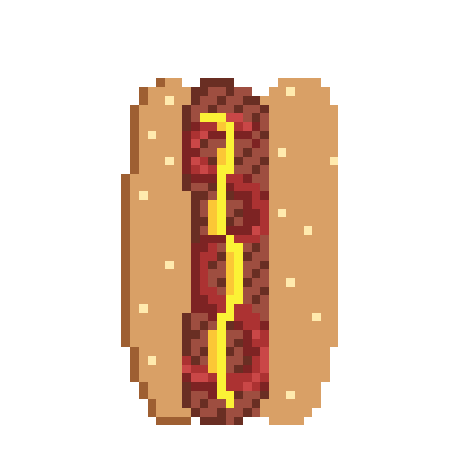

you guys can use these for anything btww idgaf also feel free to request more and i may get around 2 them eventually
[*NOTE: the pixel art above has been resized and is NOT the same as the .cur files, you have to download and use those. Link below.]
cursor file download (WeTransfer) (dm me if link expires)
Cursor replacement tutorial for a Windows PC (sorry mac users):
Open the Start Menu or press the Windows button
Type "Mouse" and hit enter
Click "Additional Mouse Options"
In the pop-up, go to the tab labeled "Pointers"
Download the .cur files (Cursor files) from the link above ^
Select which pointer you want to replace, and click "Browse..."
Find where you downloaded the .cur files
Select them, and hit "Apply"
and boom, you're done! If you don't like them you can re-select the ones you want to change, and hit "Use Default" To revert back to your computer's original settings.
How to make your own:
If you would like to make your own cursors, you can download any small .png image (has to be .png because .jpg doesn't support transparency). You can also use any image editing websites or software to shrink/tweak larger images - I use Aseprite for my pixel art, and I highly recommend it for no compression or pixel loss when resizing images, but I'm sure there are free alternatives out there.
After you somehow acquire a small transparent image you can convert them using this handy online tool. Convert it to .CUR for image cursors, or .ANI for animated/gif cursors.
Have fun! Thanks for reading <3
27 notes
·
View notes
Note
Do you have any tips or guides on how to make gifs?
I do! Firstly, this guide here is probably the best guide I've seen for gif making. It's concise and easy to follow, and it's what I used to learn myself. They have a lot of resources as far as programs go, but I'll list what I use below. As always, never download and install anything from unknown sources without doing your own due diligence. Run everything through your antivirus and/or virustotal before installing always always always!
This is kinda long, so imma put it under the cut lol. Also note that I use windows (Win10), so things may not work the same way for mac or linux
Before you can actually make the gifs, you need a way to download high quality videos! I like jdownloader 2 because I find the interface to be user friendly, it gives you the option to download multiple elements (like srt files), and it works with more websites than lots of other video downloaders (and their user support is leagues better as well). My second choice is yt-dlp, which isn't necessarily more complex but might look a little more intimidating. Both are great programs, but a quick note about jd2: DO NOT download it from anywhere else but the link above. The developers package adware in all their installers EXCEPT for that one (I hate it too, and I think it's fundamentally unethical, but at least they're up front about it and they have an adware free version). Both methods automatically download the highest quality video available in your source link, so you don't have to worry about fiddling with that.
Now on to extracting frames! My method of choice is ffmpeg. It looks more intimidating than it is, and it's honestly the best way to extract frames imo. Like yt-dlp, it uses your computer's command console, which means you'll need the relevant command lines to run it. This tutorial is great to get you started, and it includes a command line for if you only want to extract frames from a specific part of your video. If you want to extract every frame from the entire video, you can either input the start and end times of the video into that command line, or you can use this version (I use both depending on what I'm doing):
ffmpeg -i "file path" "out-%05d.png"
Always make sure you're working with png files. To make quality gifs you have to start with quality images, and png files, unlike jpg, are lightweight and lossless, meaning you won't end up with compression artifacts and fuzziness
To get the file path for your video, select the file, then in the upper left hand corner of your window select home > copy path. It will copy the path in quotes, so replace the entire section "file path" with the path you just copied. Then copy and paste the entire line into your command console. The tutorial above says this as well, but be sure to create a folder for your frames, go into that folder and click the file path bar at the top of the window, then type "cmd" to open the console. This will ensure your files are dumped in that folder
So now you need a way to actually MAKE the gif. This is... a little more tricky. You can use gimp, I think, though it's certainly not my program of choice. You could buy PS but like... ew. OR you could do what I did and arr it. I use a portable version of CS6 that I downloaded literally a decade ago, and unfortunately the website I got it from isn't up anymore. I did a quick search and found this on reddit, but again, do your due diligence before downloading and installing anything!
Now I'll talk a little bit about my actual process. The actual process of making frames into layers into a gif I got from that first tutorial I linked. I took that process and made an action on PS so that I never have to do it manually again because I'm lazy and my memory is dogshit and I didn't want to have to consult a guide every time I wanted to do something lol. Everything else I learned through experimenting and my own experience as a photographer, so I encourage you to play around with everything to see what you like and what works for you
For coloring, I fiddle with levels, brightness/contrast, and color balance adjustment layers until I'm happy with how it looks. You can use curves instead of levels if you want finer control (or if you want to produce effects like matte), but levels works just as well and has a histogram right there in the panel, which makes it easier to adjust the exposure based on the image's actual data
For sharpening, I have a couple of custom actions I use. Here's what they look like:

The first one (bound to the F2 key) gives a smoother appearance, and I like to use it for kpop gifs where the subjects are already airbrushed and smooth without much texture, or wide shots where detail isn't super important
The second one (bound to the F3 key) is the one I use when I want to preserve texture in the image. Closeups of people where you can see their skin texture, or busy images with lots of detail benefit most from this one
The basic gist of it is, the "sharpen" filter does exactly what it says on the tin and it's usually all the sharpening an image needs, and the "surface blur" filter erases or dampens artifacting created by the sharpening filter. Sometimes I'll run the action twice, or use them both in combination to get the effect I want. Here's what the difference looks like in practice, featuring two very cute dudes:
F2 sharpening action


F3 sharpening action


You'll notice in the first two gifs, there's not much in the way of texture to preserve. Yoongi's skin is smooth and airbrushed, and the scenery is all metal and concrete shot with a wide aperture, which makes the background nice and blurry and smooth. In the second set, Jesse has facial hair and stubbly texture on his throat that I wanted to preserve, so I used the action with the lighter surface blur
My advice on all of this though, again, is to play around with it and see what you like! And if you have any more questions, feel free to ask! I'm by no means an expert, but I'll do what I can to help!
edit: oh, a quick note about speed! The tutorial I linked above mentions changing the delay to 0.05, and that's great for full speed gifs! But if you want them slow like my gifs above, I set the delay to 0.08. Sometimes I'll slow them down even more by setting the delay to 0.09 or 0.1, but any higher and you start to lose some of that smoothness
15 notes
·
View notes
Text
What is a Website? A Complete Beginner’s Guide

In today’s digital age, having an online presence is not a luxury — it’s a necessity. Whether you're a business owner, content creator, or just someone curious about the web, understanding what a website is and how it functions is essential. In this guide, we’ll cover everything you need to know about websites, their components, types, benefits, and how to create one.
What is a Website?
A website is a collection of publicly accessible web pages that are linked together and share a single domain name. These pages are hosted on a web server and can include text, images, videos, forms, and other elements that users interact with online.
In simpler terms, a website is your virtual space on the internet — like your home or office in the digital world. It allows you to communicate, sell, educate, entertain, or showcase anything to a global audience.
Why is a Website Important Today?
In a world dominated by smartphones, search engines, and social media, a website acts as your central hub online. Here's why it’s important:
Visibility: A website helps you appear in search results when people look for your products, services, or information.
Credibility: A professional-looking site builds trust among your audience.
Accessibility: Your website is available 24/7, allowing customers to reach you anytime.
Marketing: It's the foundation for all your digital marketing efforts.
Sales: With e-commerce, your website can directly generate revenue.
Core Components of a Website
Every website has several key components that make it function properly:
1. Domain Name
This is your site’s address (e.g., www.digitalcreator.org.in). It’s what users type in their browser to visit your site.
2. Hosting Server
Web hosting stores your website’s data and serves it to users when requested.
3. Content Management System (CMS)
A CMS like WordPress, Joomla, or Shopify makes it easy to build and manage content on your website without coding.
4. Web Pages
These include the homepage, about us, contact, services, blog, etc., that make up your website.
5. Navigation
Menus and internal links guide visitors through your website.
Types of Websites
Different websites serve different purposes. Here are some common types:
1. Business Website
Used by companies to promote services, share information, and connect with clients.
2. E-commerce Website
Allows users to buy and sell products online. Examples include Amazon and Flipkart.
3. Portfolio Website
Ideal for creative professionals to showcase their work.
4. Blog or Personal Website
Used by individuals to share ideas, stories, or niche content regularly.
5. Educational Website
Used by schools, institutions, or educators to provide learning materials.
6. Non-profit or Government Website
Focused on delivering information and services to the public.
How to Create a Website (Step-by-Step)
Creating a website doesn’t require you to be a tech expert. Follow these steps:
Step 1: Choose a Domain Name
Pick a short, relevant, and memorable domain name. Make sure it reflects your brand or purpose.
Step 2: Get Web Hosting
Choose a reliable hosting provider like Bluehost, SiteGround, or Hostinger.
Step 3: Select a CMS or Website Builder
Use platforms like WordPress, Wix, or Shopify to start building your website.
Step 4: Design Your Website
Choose a theme or template. Customize colors, fonts, and layout to match your brand.
Step 5: Add Content
Create and publish pages like Home, About, Services, and Contact. Use quality visuals and optimized text.
Step 6: Optimize for SEO
Use keywords (like website) naturally, optimize images, and ensure fast load speed.
Step 7: Launch and Promote
Once satisfied, make your website live. Share it on social media and start your SEO or ad campaigns.
Best Practices for a Great Website
Responsive Design: Ensure your site works well on all devices.
Fast Loading Speed: Use compressed images and optimized code.
Clear Navigation: Make it easy for users to find what they need.
Secure (HTTPS): Use an SSL certificate to protect data.
Call-to-Action (CTA): Guide visitors toward actions like “Buy Now” or “Contact Us.”
Examples of Great Websites
A well-designed and fully functional example is www.digitalcreator.org.in. It demonstrates how a website can showcase services, build trust, and attract new clients efficiently.
LSI Keywords to Keep in Mind
While writing or optimizing your website, include these Latent Semantic Indexing (LSI) keywords to enhance search performance:
Web design
Online presence
Website development
Internet site
Web page
Digital platform
Domain and hosting
CMS (Content Management System)
Website builder
E-commerce site
Frequently Asked Questions (FAQs)
1. What is the purpose of a website?
A website helps individuals or businesses share information, sell products, provide services, or connect with others online.
2. How much does it cost to build a website?
Costs vary based on design, features, and hosting. Basic websites can cost as low as ₹3,000–₹10,000, while advanced ones may go up to ₹1 lakh or more.
3. Do I need coding skills to create a website?
No. Tools like WordPress or Wix allow you to build a full website without writing any code.
4. How long does it take to build a website?
A simple website can be built in 1–2 days. More complex sites may take a few weeks.
5. What makes a website successful?
A successful website is user-friendly, fast, mobile-optimized, secure, and offers valuable content with clear calls-to-action.
Conclusion
Understanding what a website is is the first step toward establishing your digital footprint. Whether you're planning to launch a personal blog, online store, or professional portfolio, your website will serve as the foundation of your online presence.
If you're ready to build or improve your website, visit www.digitalcreator.org.in — your one-stop destination for digital marketing and website development solutions.
2 notes
·
View notes
Note
hi! sorry if this is a silly question, when i you use SWRE for sims 4 screenshots it makes the file size huge and i can’t upload it to places like tumblr. what do you use to compress your image size? i tried a website i found but it made the colours look awful! :(
You don't want to compress it, you want to resize it. Keep the original, but resize it to upload. You can do that in any image editor. I resize to dimensions that fit on my monitor.
I keep all the originals (I have hundreds of gigs of screenshots now) and upload them to flickr. If I have more than one shot to resize at a time, I use FastStone to resize them in one go. It makes it really quick and easy. Just point it at the folder where the screenshots are, select the ones you want to resize, set up the size you want, the image type, and where you want to save it to. I choose Lanczos3 as my method for resizing (Lanczos2 is too sharp imo because many platforms apply their own sharpening algorithm when you upload things, and it ends up looking awful).
21 notes
·
View notes
Text
15 Common SEO Interview Questions and Answers (Recently Asked)
Land your job with the help of 15 common SEO Interview Questions and Answers
SEO Fundamentals
What is SEO?
SEO stands for Search Engine Optimization. It's the process of optimizing a website to improve its ranking in search engine results pages (SERPs) for relevant keywords.
Why is SEO important?
SEO helps businesses attract organic traffic (visitors who find the website through search engines), which can lead to increased brand awareness, leads, and sales.
What are the different types of SEO?
On-page SEO: Optimizing website content, structure, and code for search engines.
Off-page SEO: Building backlinks and online reputation to improve website authority.
Technical SEO: Ensuring website crawlability, mobile-friendliness, and speed.
Keyword Research & Targeting
What is keyword research and why is it important?
Keyword research involves identifying relevant keywords users search for and optimizing content around those keywords. It helps target the right audience and improve ranking potential.
What factors do you consider when selecting keywords?
Search volume: How often a keyword is searched for.
Competition level: Difficulty of ranking for a particular keyword.
User intent: What the user is trying to achieve with their search (informational, transactional, etc.).
What are long-tail keywords and how are they beneficial?
Long-tail keywords are more specific phrases with lower search volume but higher conversion rates. They target users further along the buying journey.
On-Page Optimization
How can you optimize a webpage for a specific keyword?
Include the keyword naturally throughout the content (title tags, headings, body text).
Write high-quality, informative content that addresses user search intent.
Optimize meta descriptions with the keyword and a compelling call to action.
Use relevant internal linking to connect related pages on the website.
What is the importance of title tags and meta descriptions?
Title tags and meta descriptions are like mini-advertisements for your webpage in search results. They should be clear, concise, and include the target keyword to entice users to click.
What is image optimization and why is it important?
Image optimization involves using relevant alt tags, compressing image size, and using descriptive file names. This improves website loading speed and user experience, and helps search engines understand the content of your images.
Technical SEO
What are some common technical SEO issues?
Slow loading speed.
Mobile-friendliness issues.
Broken links.
Website security concerns (e.g., not using HTTPS).
Duplicate content.
How can you identify and address technical SEO issues?
Use SEO crawl tools and website analysis tools to identify issues. Work with developers to fix technical errors and improve website performance.
Off-Page SEO & Link Building
What is the role of backlinks in SEO?
Backlinks are links from other websites pointing to yours. They act as a vote of confidence and improve your website's authority in the eyes of search engines.
What are white-hat link-building strategies?
Create high-quality content that others want to link to.
Guest blog on relevant websites in your niche.
Build relationships with other industry professionals and websites.
Participate in online communities and forums, providing valuable insights.
What are black-hat link-building strategies and why should you avoid them?
Black-hat strategies involve manipulating backlinks through methods like link buying or automated link building. These tactics are against search engine guidelines and can lead to penalties.
Content & SEO
How does content marketing contribute to SEO?
Creating high-quality, informative, and engaging content helps attract organic traffic, improves user experience, and establishes topical authority on relevant subjects. For Know More question visit here
2 notes
·
View notes
Text
GOTG Review: Hypnospace Outlaw
This is the next game in my Backlog Roulette series, where each month I spin a wheel to randomly select a game on my massive backlog that I must play (though not necessarily to completion). These wheel spins occur on the monthly preview episodes I co-host with my friends on The Casual Hour podcast.
Both of my parents were educators at my elementary school (they're retired now.) Mom was a 3rd grade teacher and Dad taught gym. They both would stay after classes were over to work on lesson plans or grade papers or move equipment, and I got to freely choose which one to spend time with before we got to go home. With Dad, I would mostly practice free throws in the gym (though I never got any good at them). But with Mom, I’d often get to play on her computer (when I wasn’t watching Digimon Adventure on her classroom TV.
That was probably my first real experience with computers. I’d play things like Oregon Trail II (the best one, by the way) or an awful typing program called PAWS featuring a freaky Cheshire-Cat-like mascot. But sometimes, I would load up Netscape Navigator and just poke around on the late ‘90s internet.
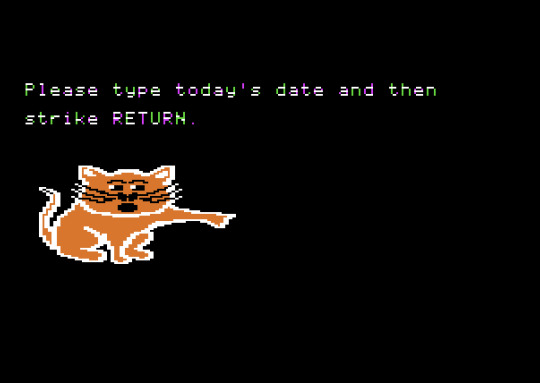
I hated this cat so much as a kid.
I only remember bits and pieces of that time online. A Sokoban block-pushing puzzler, a Super Mario Bros. fan game with all-new levels, some first-person hovercraft racer that had multiplayer LAN capabilities (I’ve never been able to find that game since, it’s definitely not Hover! by Microsoft.) a fansite for the Sonic Underground cartoon. Even with my fragmented memory, I remember the joy and adventure I had just digging around. Anything could be around that next corner, and that was half the fun.
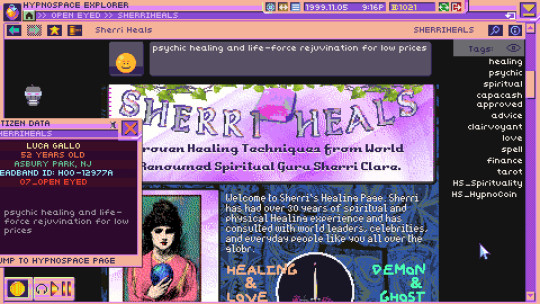
Hypnospace Outlaw is the closest I’ve ever come to reliving those formative computer experiences. Set in an alternate 1999, you are thrust into Hypnospace — an internet stand-in that’s part GeoCities and part forum chatroom — and are asked to moderate and police this online Wild West.
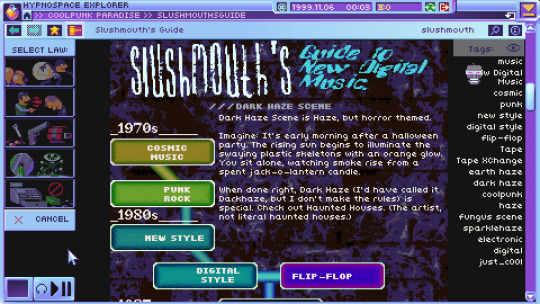
Developer Tendershoot has nailed the tone and aesthetic of this era. The highly compressed bitmap images, the way pages auto-play (incredible) music when they load, the terrible, terrible fonts, the fileshare servers that are completely inscrutable unless you know exactly what you’re looking for — it’s all just perfect. And it’s not just Hypnospace. The game has its own little desktop computer experience complete with email, virtual pets, a download manager and more. It reminds me of Cibele or Her Story, but much more freeform and robust. But all that is just aesthetic — the game itself is pretty cool too. As a Hypnospace moderator, you’re given little jobs as you explore the various pages and zones of the browser: Take down some copyrighted material here, censor some threatening speech there, find some lost files that are hanging around…somewhere. Some of these tasks just require you to pay close attention to the pages themselves, while others force you to put on your hacker cap as you cross reference ID codes with unlisted pages, crack passwords or decrypt files, all while a corporate conspiracy bubbles up around you.
It’s truly satisfying to use your online sleuthing skills to their fullest. And whether you’re stopping a virus from breaking the virtual world or just banning a kid who can’t seem to stop making offensive webcomics, you just feel this sense of power.
In many ways, Hypnospace Outlaw the platonic ideal of the concept of late-90s computing. I do wonder if that hyper-specific aesthetic and mechanics gives it too narrow of an audience, but as someone who is part of that narrow audience, I found my experience with it to be incredibly fun. And it’s one I won’t soon forget.
5 notes
·
View notes
Text
Demystifying Digital Images and Video: Formats, Tools, Copyright, and More.
Introduction
In today's digital age, images and videos have become an integral part of our daily lives. From personal photographs shared on social media to professional content uploaded on platforms like YouTube and Twitch, understanding the intricacies of image and video file formats, codecs, and manipulation tools is essential. This blog post aims to provide a comprehensive overview of these digital elements, focusing on the definitions of common file types, export settings for popular broadcasting platforms, image manipulation tools, and the critical aspects of image copyright.
Definitions of Commonly Used Image and Web Video Formats, Wrappers, and Codecs
Image Formats:
JPEG (Joint Photographic Experts Group): JPEG is the most widely used image format for photographs and digital images. It uses lossy compression, which reduces file size while maintaining reasonable image quality.
PNG (Portable Network Graphics): PNG is preferred for images with transparent backgrounds or crisp, high-quality graphics. Unlike JPEG, it uses lossless compression.
GIF (Graphics Interchange Format): GIFs are a popular choice for short, looping animations and simple graphics. They use lossless compression and support transparency.
TIFF (Tagged Image File Format): TIFF is a versatile format commonly used in professional photography and graphic design. It supports lossless compression and maintains high image quality.
BMP (Bitmap): BMP is a Windows-native format known for its lack of compression. It results in large file sizes but retains image quality.
Video Formats and Codecs:
MP4 (MPEG-4): MP4 is a widely supported video format that uses the H.264 codec. It offers a balance between quality and file size, making it ideal for streaming and sharing on the web.
AVI (Audio Video Interleave): AVI is an older format that supports various codecs. It is not as efficient as MP4 in terms of compression and is used less frequently nowadays.
MOV (QuickTime Movie): MOV is a format developed by Apple and is popular among Mac users. It can use various codecs, such as H.264 and ProRes, for high-quality video.
MKV (Matroska): MKV is an open-source container format that can contain videos with a variety of codecs, making it highly customizable.
Export Settings for Popular Broadcast Platforms
When it comes to sharing images and videos on popular broadcasting platforms like YouTube, Twitch, and Facebook, selecting the right export settings is crucial for optimal quality and compatibility.
YouTube: For video content on YouTube, the recommended format is MP4 with H.264 video codec and AAC audio codec. The ideal resolution is 1080p (1920x1080) or 4K (3840x2160) for higher quality. These settings balance quality and compatibility across devices.
Twitch: Twitch also prefers the MP4 format with H.264 video and AAC audio codecs. A resolution of 720p (1280x720) or 1080p is recommended, depending on the viewer's internet speed and quality preferences.
Facebook: Facebook accepts a wide range of video formats, including MP4 and MOV. However, MP4 with H.264 video and AAC audio codecs is a reliable choice. The resolution should be adapted to the target audience and device capabilities.
Commonly Used Image Manipulation Tools and Techniques
Image manipulation tools are essential for enhancing and editing images. Here are some commonly used tools and techniques, along with their purposes:
Adobe Photoshop: Photoshop is a versatile image editing software that can be used for tasks like retouching, color correction, and compositing.
Adobe Lightroom: Lightroom is perfect for photo organization and enhancement, with features like exposure adjustment, color grading, and batch processing.
GIMP (GNU Image Manipulation Program): GIMP is a free alternative to Photoshop, offering similar features for image editing and manipulation.
Canva: Canva is a user-friendly online tool for creating graphics and social media content. It simplifies design tasks for non-designers.
Cropping and Resizing: These techniques are fundamental for adjusting image dimensions and removing unwanted parts of an image.
Image Copyright Essentials
Artists and content creators must be aware of copyright laws to protect their intellectual property. Key copyright essentials include:
Ownership: Creators automatically own the copyright to their work upon creation, but registration provides additional legal protection.
Fair Use: Fair use allows limited use of copyrighted material without permission for purposes like criticism, commentary, news reporting, and education.
Licensing: Creators can license their work under specific terms, such as Creative Commons licenses, allowing others to use their work while respecting their rights.
Public Domain: Works in the public domain are not protected by copyright and can be used freely.
DMCA Takedowns: The Digital Millennium Copyright Act (DMCA) enables copyright owners to request the removal of infringing content from online platforms.
Attribution: When using copyrighted material, proper attribution is often required to credit the creator.
Conclusion
Understanding digital image and video formats, codecs, export settings, image manipulation tools, and copyright essentials is essential for content creators, whether amateur or professional. By adhering to best practices and legal guidelines, creators can ensure their work is of high quality, reaches the right audience, and is protected from unauthorized use. Whether you're a budding photographer, a vlogger, or a graphic designer, the knowledge presented in this blog post can serve as a valuable resource to navigate the digital content landscape successfully.
References
Reference list
Arts Law Centre of Australia 2010, Copyright - Arts Law Centre of Australia, Arts Law Centre of Australia.
Attorney-General's Department 2022, Copyright basics, Attorney-General’s Department.
Image Manipulation: The What, How, and Why 2021, Clipping Path Campus.
Image Processing: Techniques, Types, & Applications [2022] n.d., www.v7labs.com.
Video File Formats, Codecs, and Containers Explained | TechSmith 2018, Welcome to the TechSmith Blog.
By: Juan Gutierrez.
4 notes
·
View notes
Text
A Beginner's Guide to Digital Images & Video
In today's society where people are consuming more online content than ever, it can sometimes feel overwhelming for an aspiring content creator. The purpose of this blog is to give you the basic knowledge of commonly used image manipulation tools and techniques, different image and video formats and the best export settings to post your video on social media. I will also go over the essentials of copyright and creative commons licensing that is extremely important for every artist to be aware of.
Common Image Manipulation Tools & Techniques:
You begin with your piece of art, whether it's a photo or a video, and now you want to edit it to match your vision. Some of the most-used image manipulation techniques are cropping, color correcting/grading, and retouching. These can be done with a large array of programs, such as Adobe Photoshop or DaVinci Resolve. Cropping is a basic but fundamental technique that allows you to select what part of the image you want to be the focus by pruning away the unnecessary parts. Color correcting is when you balance the colors in the image to appear natural, while color grading is used to adjust the color and contrast to achieve a stylistic look. Retouching covers a variety of things, but essentially refers to minor cosmetic changes, such as removing wrinkles, stray hair, or a distracting spot on the image.
Common Image & Video Formats:
Now that you have finished editing you image or video, what type of format should you save it as? Let's go over the ones you've probably already heard of. JPEG is most commonly used because of its small file size, making it easy to use on web and mobile platforms. However, because it uses lossy compression, the image will lose quality the more compressed it becomes. PNG, on the other hand, offers superior image quality due to lossless compression, as well as transparency. This makes it a good choice for overlays and logos. GIF is great for simple animation and images and is often used for short clips and memes. It can also support transparency. SVG is a vector format for web design and is great for digital design due its small file sizes and lossless quality. A PDF image can contain vector, bitmap images and text, making it ideal for displaying finished documents or graphics, but isn't the best if you want to edit them later.
In contrast to image formats, video files typically need wrappers/containers to hold multiple elements like video and audio, together. The most popular video wrapper online is the MP4 because it is supports the most-used codecs- the program that codes and decodes the audio and video files. MP4s are often compressed using the AVC (H.264) codec which is great for use in videoconferencing and offers multiple views of the same scene, enhancing sense of depth in the video. The HEVC (H.265) codec is very efficient with high-quality video (including 8K), but is not as widely supported as H.264.
Export Settings for Popular Platforms:
Now that your video is ready to upload, what is the best export setting depending on which social media outlet you're posting on?
With YouTube, it is recommended to export the video as an MP4 using a H.264 codec. Standard video aspect ratio is 16:9 (1920x1080 HD), but YouTube's player will automatically change to match your video if it is different. YouTube re-compresses all uploaded videos so it is suggested to start with high quality to help preserve detail (YouTube Help, 2024). The target bitrate is 8Mbps with AAC(Advanced Audio Coding) audio.
On Twitch, the settings are a bit different for live streaming. A minimum upload speed of 3-6Mbps is recommended for lower quality video, while 6-8Mbps is suggested for 1080p HD. For 720p streaming, a bitrate of 2500-4000kbps is a good balance for quality while also accommodating most viewer's internet speeds. If you are streaming HD, then the maximum allowed bitrate is 6000kbps on Twitch.
For Facebook, they recommend if uploading an edited video, to use the H.264 video with AAC audio in MOV or MP4 format (Facebook Help, 2017). The aspect ratio should not exceed 4000px wide and a maximum frame rate of 30fps for mobile-friendly playback.
Understanding Copyright and Creative Commons Licensing:
Even though you have successfully created and uploaded your digital creation online, it's important to understand the copyright rights of your creation, as well as that of anyone else's that you may have used in your work. Copyright here refers to the protection of an IP (Intellectual Property), which is an original creation of the mind, such as film, sound recordings, and literary or artistic works. Establishing ownership in digital art is complex, especially with the introduction of AI-generated works.
Under the Australian Copyright Act 1968, once an original image is created it is copyrighted, meaning you can't use it without the owner's permission. Sometimes creators are more than happy to let others use their work, but have certain conditions, like not monetising it. This falls under the Creative Commons License, which allows people to share their work while adhering to copyright law. You can easily apply a Creative Commons License to your original work by choosing one of the six options, and stating it clearly on your work. You can find all the information at www.creativecommons.org.
Lastly, you can find plenty of royalty-free assets available on stock image websites like Shutterstock, or selecting the Creative Commons Licenses option under Usage Rights, when using Google image search.
I hope that you now have an understanding of the basics of digital image creation. Now get out there and start making some art!
View Bibliography
0 notes
Photo

Fossil Snake Vertebra PALAEOPHIS TOLIAPICUS London Clay Eocene Isle of Sheppey Kent UK Authentic Specimen
This listing features a fossilised vertebra of the extinct marine snake Palaeophis toliapicus, from the renowned London Clay Formation of the Isle of Sheppey, Kent, UK. This is a carefully selected specimen from the Lower Eocene Epoch, and comes with a Certificate of Authenticity.
Palaeophis toliapicus is an extinct marine snake, part of the family Palaeophiidae, known for their elongated vertebrae and presumed aquatic adaptations. These snakes lived during the Ypresian Stage of the Eocene (~56 to 47.8 million years ago) and are considered some of the earliest large marine snakes to evolve after the extinction of the non-avian dinosaurs.
The London Clay Formation is a world-famous fossil-bearing deposit laid down in a subtropical marine shelf environment, rich in marine and terrestrial fauna. The Isle of Sheppey exposures are particularly renowned for vertebrate fossils, including sharks, crocodiles, turtles, and snakes such as Palaeophis.
Morphological Features:
Elongated centrum with a slightly compressed form
Lateral foramina (small holes for blood vessels)
Well-defined neural canal and arch facets
Adaptations suggest a streamlined body ideal for swimming
These features make the vertebrae of Palaeophis instantly recognisable and highly sought after by collectors and researchers alike. Their rarity and scientific importance make them outstanding additions to any vertebrate fossil collection.
This is the exact specimen photographed for the listing. Scale rule cubes/squares = 1cm. Please refer to the image for full sizing.
Specimen Details:
Species: Palaeophis toliapicus
Fossil Type: Snake Vertebra (Reptile Bone)
Formation: London Clay Formation
Age: Early Eocene (Ypresian Stage)
Location: Isle of Sheppey, Kent, UK
Depositional Environment: Subtropical marine shelf
Family: Palaeophiidae
Order: Squamata
This is a rare opportunity to acquire an authentic specimen of a prehistoric marine snake from one of the most productive fossil sites in Europe. Ideal for collectors, educators, and anyone with an interest in paleo-reptiles or Eocene marine ecosystems.
All of our Fossils are 100% Genuine Specimens & come with a Certificate of Authenticity.
#Palaeophis toliapicus vertebra#fossil snake bone#London Clay fossil#Eocene reptile fossil#snake fossil Sheppey#Kent fossil snake#UK reptile fossil#Eocene snake vertebra#Palaeophis fossil for sale#Eocene vertebrate fossil#Isle of Sheppey fossil#authentic Palaeophis vertebra#snake fossil UK#marine snake fossil#rare Palaeophis fossil#vertebra fossil London Clay
0 notes
Text
Knee replacement surgery in Chennai
Dr. Madan Mohan Reddy is a highly skilled orthopedic surgeon based in Chennai, specializing in knee replacement surgeries. His practice prioritizes personalized care, advanced surgical techniques, and long-term recovery for patients dealing with chronic knee pain and mobility issues. With a focus on both partial and total knee arthroplasty, he brings extensive experience to the operating table.
Who Benefits from Knee Replacement?
Knee replacement is ideal for:
Severe osteoarthritis leading to constant pain and stiffness.
Rheumatoid arthritis or other inflammatory conditions damaging the joint.
Past injuries or deformities resulting in impaired movement.
Persistent discomfort and disability unresponsive to conservative treatments like physiotherapy, medications, or injections.
The aim is to restore function, reduce pain, and enable everyday activities with improved comfort and mobility.
Types of Procedures
Total Knee Replacement (TKR) Complete replacement of both femoral and tibial surfaces; used for widespread arthritis or joint damage. This is the most common form performed.
Partial (Unicompartmental) Knee Replacement Targets only the damaged compartment medial, lateral, or patellofemoralmpreserving healthy tissue. Benefits include smaller incisions, shorter recovery, and more natural motion post‑surgery.
Revision Knee Replacement For patients whose previous implants have worn out, loosened, or become infected, requiring replacement or reconstruction.
Dr. Reddy assesses each case individually, choosing the least invasive option that achieves optimal outcomes.
Preoperative Evaluation & Preparation
Before surgery, patients undergo:
Detailed clinical exam and imaging (X‑ray, MRI) to pinpoint damage and alignment.
Understanding overall health through blood tests, cardiac assessments, and medication review.
Discontinuing blood thinners like aspirin or warfarin well before surgery.
Personalized “prehabilitation” program exercises to strengthen leg muscles and improve flexibility.
Education sessions outlining procedure steps, expected recovery, and how to prepare home for aftercare.
These steps build patient confidence and ensure they're physically and emotionally ready for surgery.
Surgical Approach & Techniques
Key components of Dr. Reddy’s technique include:
Precise Bone Resection Diseased cartilage and bone are removed, preserving ligaments when possible; the joint is reshaped using cutting guides for accurate alignment.
High‑Quality Implants Modern metal and polyethylene components are selected for durability and joint performance.
Ligament Management Depending on the implant design, Dr. Reddy may retain or replace ligaments such as the posterior cruciate.
Hemostasis & Closure During the procedure, bleeding is controlled, drains may be placed, and meticulous closure is done to optimize healing.
Pain‑Control Strategy Emphasis on multimodal analgesia to minimize opioid dependence and foster early rehab.
Minimally invasive and tissue-sparing techniques help reduce blood loss, soft tissue disruption, and postoperative discomfort.
Risks & How They’re Managed
Dr. Reddy proactively addresses potential complications:
Infection Strict protocols including IV antibiotics, sterile operating environments, and perioperative skin preparation. Early signs are monitored vigilantly.
Blood Clots (DVT/PE) Use of compression devices, early mobilization, and blood thinners tailored to patient risk to minimize thrombotic events.
Prosthesis Complications Modern implants and precision alignment reduce the risk of loosening or wear. Follow-up visits track implant integrity.
Persistent Pain or Stiffness Personalized rehab, motion exercises, and occasional pain-modality interventions to prevent chronic discomfort.
Wound Healing Delays Close metabolic and nutritional optimization, wound checks, and prompt intervention if healing delays occur.
Nerve or Vessel Injury Careful surgical technique preserves surrounding structures, reducing chances of numbness or weakness.
Each risk is systematically managed through planning, backup strategies, and patient education.
Post-Operative Rehabilitation
Rehabilitation is a cornerstone of Dr. Reddy’s program:
Immediate Mobilization Within 24 hours, patients begin walking with aids under supervision to prevent complications and build confidence.
Personalized Exercise Plan A physiotherapy regimen strengthens muscles, improves range of motion, and reduces swelling. Early-stage exercises may include quadriceps sets, heel slides, and stationary cycling.
Pain & Swelling Management Cryotherapy is used to reduce inflammation, alongside continued medications and elevation protocols.
Progressive Loading Gradual advancement from partial weight-bearing to full weight as comfort and strength allow.
Milestones
2 weeks: Knee flexion often exceeds 90°, able to walk more comfortably.
6–8 weeks: Daily activities like stair-climbing become manageable.
3 months onward: Return to low-impact recreation; full independence is typically achieved by 6–12 months.
Regular follow-ups ensure steady progress and reinforce motivation.
Success Rates & Long-Term Outlook
High patient satisfaction, with the majority experiencing significant pain relief and restored mobility.
Longevity of implants when placed correctly can exceed 15–20 years; younger patients sometimes need future revision.
Achieving long-term success depends on ongoing commitment to rehabilitation, maintaining a healthy weight, and joint protection habits like avoiding excessive high-impact activities.
Why Choose Dr. Reddy’s Clinic
Proven Expertise: Specialized practice in knee arthroplasty with consistent outcomes.
Cutting-Edge Technology: Use of latest implant designs, navigation tools, and minimally invasive methods.
Comprehensive Care: From prehab to long-term follow-up including pain management and rehab support.
Transparent Communication: In-depth patient education about surgery, expectations, and lifestyle modifications.
Holistic Support Team: Includes physiotherapists, nurses, and coordinators for streamlined care coordination.
Patients consistently highlight clear communication, emotional support, and functional improvement after surgery under Dr. Reddy’s care.
Practical Information
Location: Chennai consultation and surgery arranged upon appointment.
Hospital Affiliation: Access to multi-specialty facilities, rehabilitation wards, and advanced support services.
Appointments & Planning: Contact clinic to schedule consultations, receive treatment plans, and prepare for preoperative and postoperative stages.
Financial Planning: Transparent cost estimates consultation, implants, surgery, hospitalization, therapy are provided upfront.
Conclusion
Dr. Madan Mohan Reddy’s knee replacement service in Chennai offers a comprehensive, patient-focused solution for joint pain and impaired mobility. His approach blends meticulous surgical technique, individualized care, and long-term rehabilitation support. From detailed preoperative planning to the final phases of functional recovery, every step is crafted to help you regain pain-free movement and quality of life.
If you're considering knee replacement, Dr. Reddy's team offers expert guidance to determine the right procedure be it partial, total, or revision arthroplasty and supports you through a successful recovery journey with confidence. Read Also : https://drmadanmohanreddy.com/best-orthopedic-doctor-in-chennai/
0 notes
Text
How Commercial Painters in Sydney Help Businesses Make a Lasting First Impression

In today’s competitive market, how your business looks matters more than ever. Whether it’s a corporate office, a retail storefront, a hospitality venue or a strata property, the paintwork plays a key role in shaping how customers and clients perceive your brand.
For businesses in Australia’s largest city, hiring experienced commercial painters in Sydney isn’t just about freshening up walls. It’s about enhancing your professional image, protecting your property from wear and weather, and creating an environment that supports productivity and trust.
In this guide, we’ll explore what makes commercial painting different, when and why to invest in it, and how teams like Aston & Co’s expert commercial painters deliver quality work without disrupting your day-to-day operations.
What Makes Commercial Painting Different from Residential Work?
Painting a commercial space involves more than just brushwork. Unlike homes, commercial properties often have larger surface areas, more complex substrates, higher traffic demands, and stricter compliance requirements.
Professional commercial painters must be equipped to handle:
Multi-storey access (using scaffolding or boom lifts)
Surface preparation across various materials (concrete, render, metal cladding, etc.)
Fast turnaround to minimise business downtime
Colour matching with brand guidelines
After-hours or staged scheduling
Durable, low-VOC paint systems that meet health and safety regulations
Additionally, commercial projects must often align with workplace health standards and council requirements. Hiring a team like https://astonandcopaintingdecorating.com.au/commercial-painting-sydney/ ensures both workmanship and compliance are covered from start to finish.
Types of Commercial Properties That Benefit from Professional Painting
Sydney’s commercial landscape is as diverse as its architecture. Whether you manage a modern high-rise in the CBD or an industrial warehouse in the west, there’s a solution that suits your building type and operating schedule.
Common property types serviced by commercial painters include:
Office buildings and co-working spaces
Hospitals and healthcare facilities
Shopping centres and retail outlets
Hotels, motels, and restaurants
Educational institutions and universities
Warehouses and industrial plants
Aged care and retirement communities
Government buildings and cultural venues
Strata complexes and apartment blocks
To see examples of how commercial painters transform these environments, check out this Tumblr post on workspace design trends showing how colour schemes can influence staff morale and client perception.
The Importance of Paint Selection in Commercial Environments
Choosing the right paint is just as important as the application. Commercial projects often require coatings that are:
Washable for hygiene-sensitive areas like hospitals or kitchens
Fade-resistant for sun-exposed facades and signage
Graffiti-resistant in urban locations
Low-odour and low-VOC for safe indoor application during business hours
Slip-resistant for floors, ramps, and car parks
Fire-retardant in compliance-heavy sectors
Experienced painters will assess your environment and recommend a product system that balances durability, maintenance, and visual impact.
Teams like Aston & Co’s expert commercial painters use premium brands and carefully match products to each surface—whether it’s concrete render, steel beams, timber, or compressed fibreboard.
When Is the Right Time to Repaint Your Commercial Property?
If it’s been more than five years since your last repaint—or if your paint is showing visible wear—it might be time to refresh. Key signs include:
Fading or patchy colour
Cracked or peeling surfaces
Water stains or mould growth
Poor adhesion in high-traffic areas
Outdated branding or signage colours
Paint bubbling or chalking on exterior walls
Beyond appearance, old or damaged paint can expose your building to structural issues. Water seepage, UV damage, or corrosion often begins when coatings break down.
To avoid these issues, many Sydney businesses opt for cyclical maintenance painting, which keeps their property protected and reduces future repair costs. If you’re unsure when to repaint, consider an annual inspection by a trusted local painter.
For insights into how maintenance painting prevents major repairs, this Tumblr blog on facilities management outlines proactive strategies for commercial buildings.
Why Hiring Licensed Commercial Painters in Sydney Matters
With so many providers in the market, choosing a professional team makes all the difference. Look for painters who are:
Fully licensed and insured
Experienced in commercial and industrial projects
Equipped with access solutions (EWP, scaffolding, etc.)
Committed to safe work practices (SWMS and WHS compliance)
Transparent with quotes and scopes of work
Available for after-hours or low-interruption scheduling
Backed by written warranties and product guarantees
Sydney’s competitive business environment means appearances count—and delays cost money. A reliable team respects both your deadlines and your premises, ensuring the process is seamless and the finish lasts.
Aston & Co’s expert commercial painters offer flexible scheduling, premium workmanship, and full coverage across Sydney’s metro and surrounding suburbs.
Interior vs Exterior Commercial Painting
Both interior and exterior paintwork require specialised planning and execution.
Interior painting often involves navigating around furnishings, IT infrastructure, or customer areas. It needs to be non-disruptive and may require after-hours scheduling, fast-drying products, and exceptional attention to detail.
Exterior painting involves durability and weather resistance. It may require abseil painters, scaffolding, or traffic management if the building fronts a busy street.
In both cases, surface preparation is critical to ensure adhesion and a long-lasting result. Proper sanding, patching, washing, and priming take time—but without it, even the best paint won’t perform well.
How Long Does a Commercial Painting Project Take?
The duration depends on the size, scope, and type of building. A small retail shop may be completed in two to three days, while a multi-storey commercial tower could take weeks. Factors influencing timing include:
Total square metre coverage
Number of coats required
Type of paint system
Weather conditions (for exterior work)
Access logistics (e.g. high-rise equipment)
Operating hours of the business
An experienced commercial painting company will conduct a site inspection, develop a detailed project timeline, and communicate clearly at every stage.
Final Thought: Fresh Paint Builds More Than Just Kerb Appeal
A professional paint job isn’t just a visual upgrade—it’s a strategic investment in your brand, property, and operations. Whether you want to improve your first impression, protect your assets, or align your building with updated brand guidelines, commercial painters in Sydney can help you achieve it.
By choosing the right team, products, and process, you’ll extend your building’s lifespan and impress every customer, client, or tenant who walks through your door.For trusted service, long-lasting results, and minimal disruption to your business, connect with https://astonandcopaintingdecorating.com.au/commercial-painting-sydney/ to get started.
0 notes
Text
How to Build a Cohesive Product Grid Using Edited Images

Creating a cohesive product grid is essential for any eCommerce platform aiming to make a memorable first impression.
Whether you're selling on your own site or third-party marketplaces, consistent and professionally edited images help build trust and drive sales.
A clean, uniform product grid doesn't just look good—it communicates professionalism, attention to detail, and brand identity.
eBay Image Size Requirements are just one of the many standards that sellers need to meet to stay competitive and appealing.
At Clipping Way, we specialize in helping businesses create visually harmonious product listings through expertly edited images, ensuring every photo contributes to a polished, professional online storefront.
In this article, we’ll guide you through how to build a cohesive product grid using edited images—an approach that combines technical accuracy with creative strategy.
Why Image Consistency Matters
Imagine browsing a product page where every image is shot from a different angle, under different lighting, or with inconsistent backgrounds.
It feels chaotic, right? Now contrast that with a product grid where every item is aligned, lighting is even, and the background is uniform. The second scenario looks more trustworthy, professional, and easier on the eyes.
A consistent product grid helps:
Improve user experience and navigation
Increase brand trust and recognition
Boost conversion rates
Meet platform standards like Amazon or eBay Image Size Requirements
This is where image clipping path services come into play—removing background distractions, aligning products properly, and resizing according to platform specifications.
Step-by-Step: Building a Cohesive Product Grid
1. Plan Your Product Photography
Start with a blueprint. Decide on angles, lighting setups, and background style. Uniform lighting and camera settings go a long way in reducing the amount of post-production editing required.
2. Use Clipping Path for Background Removal
The clipping path technique is the gold standard for precise object selection and background removal. At Clipping Way, we ensure each product is neatly separated from the background so it can be placed on a white, transparent, or branded background.
3. Standardize Image Sizes and Ratios
Platforms like eBay have specific image size requirements (minimum 500px on the longest side). We help businesses crop and resize images uniformly to meet these standards without losing quality.
4. Align and Center Products
A cohesive grid depends heavily on visual symmetry. That means centering products, making sure they are vertically aligned, and ensuring that the same product types are displayed in the same orientation across the board.
5. Optimize for Load Speed and SEO
Every image is compressed without compromising quality and includes relevant alt tags—improving your website's SEO and user experience.
Why Choose Clipping Way?
100% Manual Clipping Path
Affordable Pricing Without Compromising Quality
Fast Turnaround Time
Free Trial Available
Instant Quote Option
Our experienced graphic designers use Photoshop’s pen tool for the most accurate clipping path, ensuring your product images are polished and professional.
Whether you're an Amazon seller, Shopify merchant, or eBay vendor, we adapt our editing to meet the specific demands of each platform.

Real Business Impact of Edited Product Grids
One of our clients saw a 40% increase in conversion rate within the first month of uploading a newly edited product grid.
Not only did their site appear more trustworthy, but the clean visuals also kept visitors engaged longer, decreasing bounce rates.
Inconsistent, poorly edited images often lead to mistrust or confusion, ultimately affecting sales.
Investing in professional image editing is no longer optional—it's a necessity in today’s competitive market.
FAQ
1. What is a product grid?
A: A product grid is a layout of product images displayed in rows and columns on an eCommerce platform. A cohesive grid uses consistent backgrounds, sizes, and alignments to create a unified visual experience.
2. Why is clipping path important for product grids?
A: Clipping path ensures precise background removal and product isolation, helping to create a consistent look across all product images, which is essential for a clean product grid.
3. What platforms do your edited images support?
A: Our images are optimized for platforms like eBay, Amazon, Shopify, WooCommerce, Etsy, and custom eCommerce websites. We adhere to platform-specific requirements, including eBay Image Size Requirements.
4. Do you offer a free trial?
A: Yes! We provide a Free Trial so you can assess our service quality before committing. This allows you to experience our accuracy, speed, and attention to detail risk-free.
5. How can I get a quotation for my project?
A: Simply visit our website and click on Get Quotation. Provide a few details about your project, and we'll respond quickly with a tailored estimate.
Conclusion
In the visually-driven world of online shopping, building a cohesive product grid using edited images is crucial.
It’s more than just aesthetics—it impacts your branding, customer experience, and ultimately, your bottom line.
With services like manual clipping path, background removal, alignment, and resizing, Clipping Way empowers you to stand out in crowded marketplaces.
Take advantage of our Free Trial and Get Quotation options today to elevate your product listings at a low, competitive price. Let us help you transform scattered product images into a seamless, sales-boosting grid.
0 notes