#unnotificationattachment
Explore tagged Tumblr posts
Visit Tumblr Blog
Explore Tumblr blogs with no restrictions, modern design and the best experience.
Last Seen Tumblr Blogs


Fun Fact
Tumblr’s reach among the 26-to-35-year-olds in the US is 11%.
Text
SwiftUI Local Notification Tutorial
Notifications can be used in an application to schedule an alert to notify the user about an event. These notifications contains a message and can include a type of media and a sound alert. Notifications initiated by apps running on a device are referred to as local notifications. In this tutorial a local notification is scheduled containing an image. SwiftUI requires Xcode 11 and MacOS Catalina, which can be downloaded at the Apple developer portal.
Open Xcode and either click Create a new Xcode project in Xcode’s startup window, or choose File > New > Project. In the template selector, select iOS as the platform, select the Single View App template, and then click Next. Enter SwiftUILocalNotificationTutorial as the Product Name, select SwiftUI as the User Interface and click Next. Choose a location to save the project on your Mac.
An image will be used as an attachment of the notification. Download the image and drag it inside the project folder. In the canvas, click Resume to display the preview. If the canvas isn’t visible, select Editor > Editor and Canvas to show it.
In the Project navigator, click to select ContentView.swift. Change the code inside the ContentView struct to
struct ContentView: View { var body: some View { Button("Send Notification") { // 1. UNUserNotificationCenter.current().requestAuthorization(options: [.alert, .badge, .sound]) { success, error in if success { print("authorization granted") } else if let error = error } // 2. let content = UNMutableNotificationContent() content.title = "Notification Tutorial" content.subtitle = "from ioscreator.com" content.body = " Notification triggered" content.sound = UNNotificationSound.default // 3. let imageName = "applelogo" guard let imageURL = Bundle.main.url(forResource: imageName, withExtension: "png") else let attachment = try! UNNotificationAttachment(identifier: imageName, url: imageURL, options: .none) content.attachments = [attachment] // 4. let trigger = UNTimeIntervalNotificationTrigger(timeInterval: 5, repeats: false) let request = UNNotificationRequest(identifier: "notification.id.01", content: content, trigger: trigger) // 5. UNUserNotificationCenter.current().add(request) } } }
The UNUserNotificationCenter manages the notification-related activities. To use the notification the user needs to be asked for permission with the requestAuthorization method.
The UNMutableNotificationContent object contains the data of the notification.
The UNNotificationAttachment object contains the media content of the notification.
An UNNotificationRequest is generated which will trigger at the timeinterval of 10 seconds.
The notification is scheduled for delivery.
Build and Run the project. When the “Send Notification” button is clicked. The user will be asked for permission and when granted the notification is scheduled.
Press the home icon to put the app in the background. After 10 seconds the notifcation will be triggered.,
The source code of the SwiftUILocalNotificationTutorial can be downloaded at the ioscreator repository on Github.
0 notes
Text
iOS 10 Notifications (What is new) - Part 1
I must admit that I have a huge crush on the notifications API regardless of the platform (oh yeah I really like the notifications API in Android too) and I have never shut up about it since iOS 7 now in iOS 10 things get even better. There is a new framework altogether to handle notifications both remote and local, the UserNotifications framework. Previously all the notifications API were bundled within the UIApplication class of UIKit and Apple has realized that notifications play a crucial part in the way users interact with the platforms which is evident in all the WWDC sessions and no wonder they plugged a lot of things out. Not just plugging out has happened but there is a lot of new features too.
If you have been using the UILocalNotification class as you have been doing since ages we need to move on to the new UserNotifications framework. Yes here comes the truth UILocalNotification is deprecate since iOS 10.
If you go see the UILocalNotification class you would find this,
@available(iOS, introduced: 4.0, deprecated: 10.0, message: “Use UserNotifications Framework’s UNNotificationRequest”) public class UILocalNotification : NSObject, NSCopying, NSCoding
Even the way we were receiving notifications are changed, we need to move on to the new framework.
@available(iOS, introduced: 4.0, deprecated: 10.0, message: “Use UserNotifications Framework’s -[UNUserNotificationCenterDelegate willPresentNotification:withCompletionHandler:] or -[UNUserNotificationCenterDelegate didReceiveNotificationResponse:withCompletionHandler:]”)
optional public func application(_ application: UIApplication, didReceive notification: UILocalNotification)
After seeing all this it was pretty much clear that the whole of UILocalNotification is going to be flushed away from iOS 10.
So after going through all the sessions and with my experience with notifications in iOS I am pretty sure that I need to make a lot of changes in the existing code and was pretty surprised of the many changes done here.
So coming to the new features that have been introduced, apps can now send notification with enriched content and users can see the content without even opening the app. The most important types of attachments that were talked about are,
Images
Videos
Audio
Last but not least GIFs!
The other new feature worth mentioning is the custom UI that apps can now show during notification presentation yes you can modify the UI format in which notifications are presented in your app. Hmmmmm I guess that is a pretty big topic and lets just cover that in another post, please!!
Ok then I just started tinkering with local notifications using the UNUserNotificationCenter class in the UserNotifications framework and tried to send some notifications with attachments,
So lets get our hands dirty with some code to send a simple notification with the UserNotification APIs,
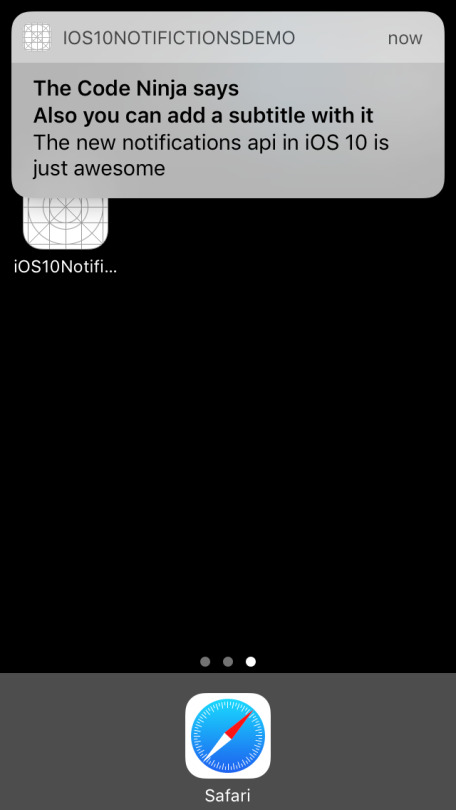
///Creating a UNMutableNotificationContent object that will specify the notification content details let content = UNMutableNotificationContent() ///Setting the title content.title = "The Code Ninja says" ///Setting the body content.body = "The new notifications api in iOS 10 is just awesome" ///Setting the subtitle property, this is new for iOS 10 alone. content.subtitle = "Also you can add a subtitle with it" ///Setting the trigger time let trigger = UNTimeIntervalNotificationTrigger(timeInterval: 5, repeats: false) ///Setting the identifier to identify different types of notifications let requestIdentifier = "TheCodeNinja_Identifier" ///Creating a UNNotificationRequest object with the identifier, content and the trigger object let request = UNNotificationRequest(identifier: requestIdentifier, content: content,trigger: trigger) /// last step, Adding the request to UNUserNotificationCenter.current()'s queue so that it presents the notification when the trigger happens. UNUserNotificationCenter.current().add(request) { (error) in}
I ran the app, BOOM I got a notification with an image like below,
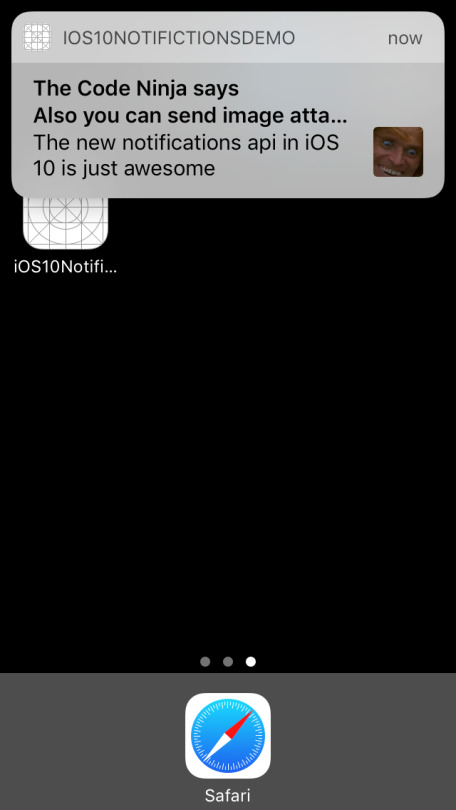
Now let us try a bit more interesting, we’ll try to add an image attachment to the notification, to do that add the below code before sending the notification
/// Creating a image URL from bundle let imgURL = Bundle.main().urlForResource("notification", withExtension: "jpg") /// Creating an attachment object let notificationImageAttachment = try UNNotificationAttachment(identifier: "jpg_identifier", url:imgURL! , options: nil) content.attachments = [notificationAttachment!]
Hit Run, you will get something like below…
Isn’t that just great, but I was running in the simulator and could not interact much with the attachment but if you have a device with 3D touch you could try out how will you can interact with the notification attachment.
I tried different types attachments like audio, video and GIF’s but could not test all on the simulator and the framework automatically tries to crack the file type for you, if you are trying to do anything apart from common file formats then you can specify the file type like below mentioning the hint key to the API,
let notificationOptions = [UNNotificationAttachmentOptionsTypeHintKey:kUTTypeMP3] /// Creating an attachment object let notificationImageAttachment = try UNNotificationAttachment(identifier: "audio_identifier", url:imgURL! , options: notificationOptions)
All the code I have been doing so far is here. See you all for now, will post more soon on my discoveries on the new notifications API.
UPDATE 1
The code has been upgraded to the changes in Xcode 8 beta 2.
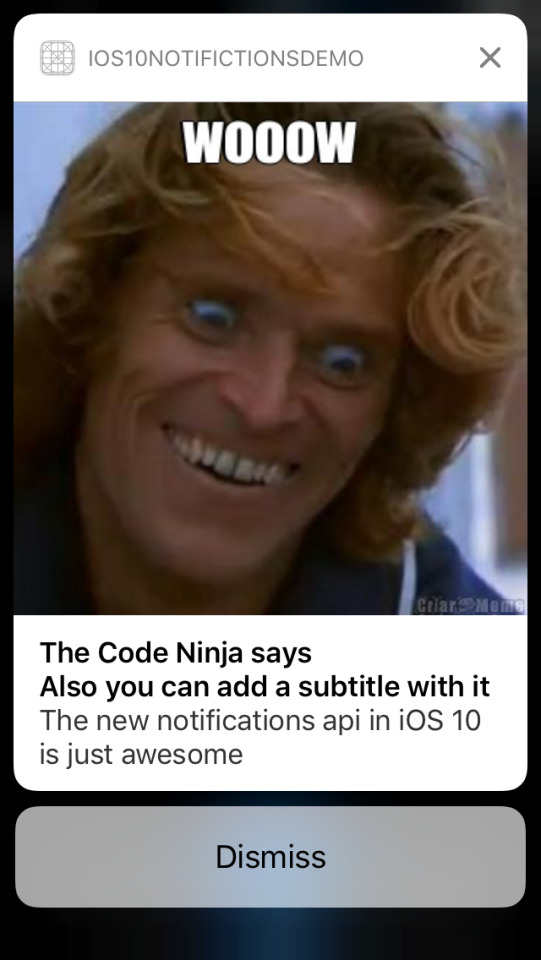
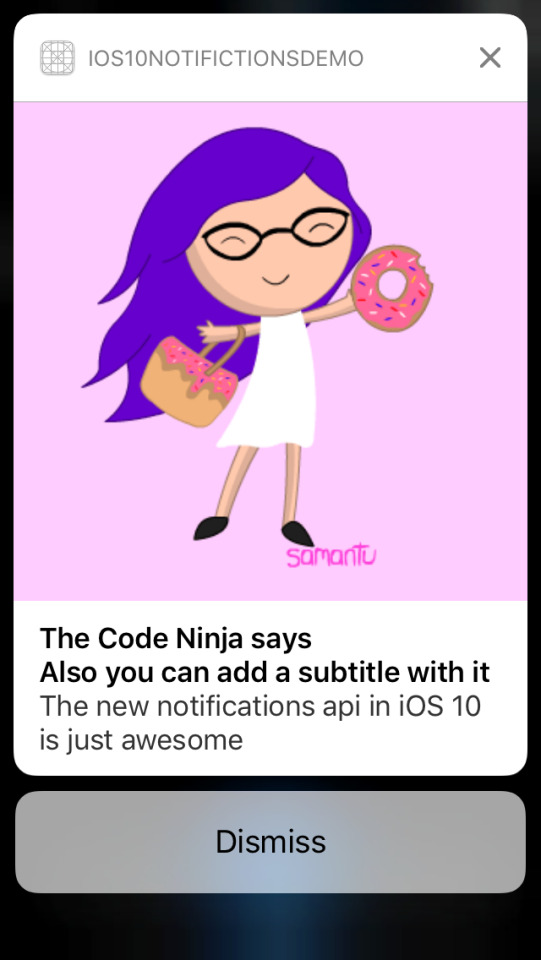
Screenshots of the various attachments I tried, so to view notification attachments the user needs to swipe down the notification banner and he can see the notification attachment.
Image Attachment
GIF (the GIF starts to play when the user swipes down)
Audio Attachment (the user is given a play/pause button and a seek bar to control the audio)
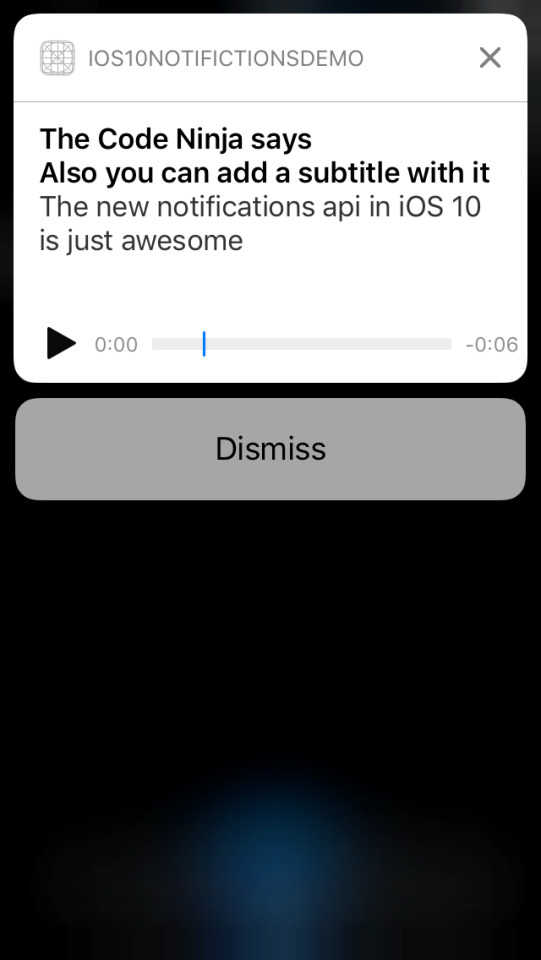
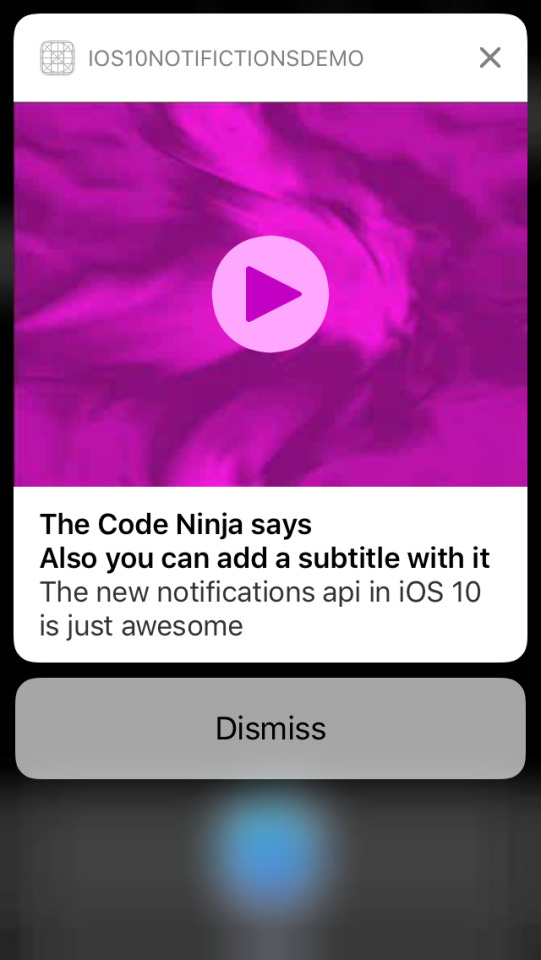
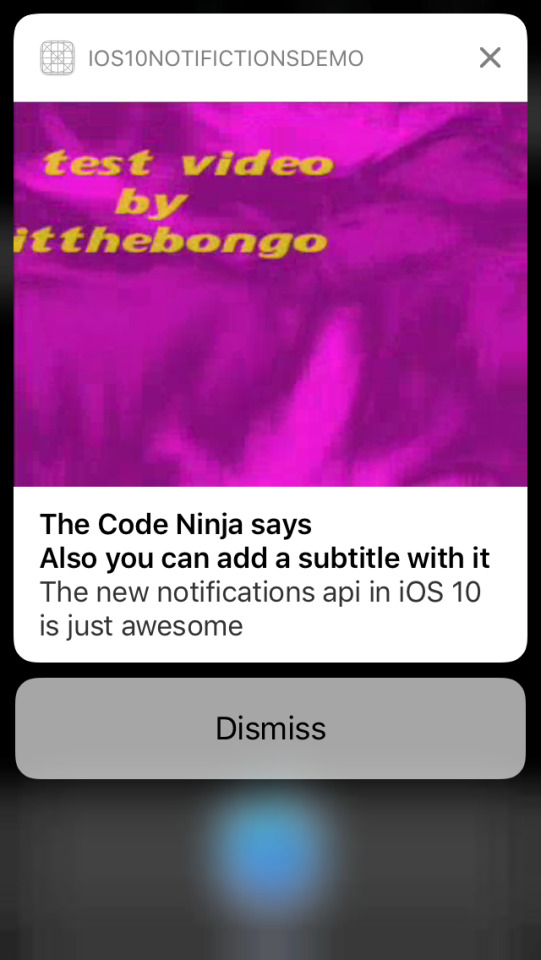
Video attachment (the user is given a play/pause button and a seek bar to control the video)
See you soon guys!!
#unusernotification#ios10#usernotifications framework#unnotificationattachment#unusernotificationcenter#unnotificationrequest#untimeintervalnotificationtrigger#unmutablenotificationcontent#unnotificationattachmentoptionstypehintkey#import usernotifications
6 notes
·
View notes
Text
Local Notification iOS Tutorial
Local notifications are a way for an application that isn’t running in the foreground to let its users know it has information for them. In iOS 10 Apple introduces rich notifications, which can include different type of media . In this tutorial we will create a local notification including an image. This tutorial is made with Xcode 10 and built for iOS 12.
Open Xcode and create a new Single View App.
For product name, use IOSLocalNotificationTutorial and then fill out the Organization Name and Organization Identifier with your customary values. Enter Swift as Language and choose Next.
Go to the Storyboard and drag a Button to the Main View and give it a title of "Send Local Notfication". Select the Resolve Auto Layout Issues button and select Reset to Suggested Constraints.
The Storyboard should look like this.
Open the Assistant Editor and make sure the ViewController.swift file is visible. Ctrl and drag from Button to the ViewController class to create the following Action.
Go to the ViewController.swift file and import the UserNotifications framework
import UserNotifications
Change the viewDidLoad method to
override func viewDidLoad() { super.viewDidLoad() UNUserNotificationCenter.current().requestAuthorization(options: [.alert]) { (granted, error) in if granted { print("yes") } else { print("No") } } }
The UNUserNotificationCenter manages the notification-related activities. To use the notification the user needs to be asked for permission with the requestAuthorization method.
An image will be used as an attachment of the notification. Download the image and drag it inside the project folder. Next, implement the sendNotification action method
@IBAction func sendNotification(_ sender: Any) { // 1 let content = UNMutableNotificationContent() content.title = "Notification Tutorial" content.subtitle = "from ioscreator.com" content.body = " Notification triggered" // 2 let imageName = "applelogo" guard let imageURL = Bundle.main.url(forResource: imageName, withExtension: "png") else { return } let attachment = try! UNNotificationAttachment(identifier: imageName, url: imageURL, options: .none) content.attachments = [attachment] // 3 let trigger = UNTimeIntervalNotificationTrigger(timeInterval: 10, repeats: false) let request = UNNotificationRequest(identifier: "notification.id.01", content: content, trigger: trigger) // 4 UNUserNotificationCenter.current().add(request, withCompletionHandler: nil) }
The UNMutableNotificationContent object contains the data of the notification.
The UNNotificationAttachment object contains the media content of the notification.
An UNNotificationRequest is generated which will trigger at the timeinterval of 10 seconds.
The notification is scheduled for delivery.
Build and Run the Project. The user will be asked for permission.
Select Allow, select the "Send Local Notification" Button to schedule the Notification. Press the Home button in the Simulator(Shift + Command + H). Within 10 seconds the Notfication will be delivered.
You can download the source code of the IOSLocalNotificationTutorial at the ioscreator repository on Github.
0 notes