#winscp
Explore tagged Tumblr posts
Visit Tumblr Blog
Explore Tumblr blogs with no restrictions, modern design and the best experience.
Last Seen Tumblr Blogs


Fun Fact
Tumblr’s reach among the 26-to-35-year-olds in the US is 11%.
Text
Step-by-Step Guide: Using Public Key for WinSCP Authentication
Discover the benefits of using public key authentication for WinSCP. Learn how to enhance data security while simplifying the login process.
In this blog post, we will discuss using a public key authentication instead of a username and password for WinSCP. In today’s digital landscape, security is paramount when transferring sensitive data. Traditional password-based authentication methods, while convenient, pose significant risks due to their susceptibility to theft, guessing, and phishing attacks. You can significantly enhance…
0 notes
Text
Sailing into a Lightly Modded Valheim
I have a long, complicated, and mixed relationship with mods for games. On the whole I like the idea of mods and how they can expand on and improve a game. But I had all the usual problems with incompatible mods, mods where the author walks away and the next big game update breaks the mod forever, to having them simply mess up games and corrupting saves so badly that you simply have to wipe…

View On WordPress
0 notes
Text
【要課金】WinSCPのバージョン更新をワンクリックで行う方法
FTPクライアント「WinSCP」のバージョン更新をワンクリックで行う方法のご紹介です。 Continue reading 【要課金】WinSCPのバージョン更新をワンクリックで行う方法
View On WordPress
0 notes
Text
Download WinSCP For Mac: 11 Free Alternatives
WinSCP For Mac, the renowned open-source SFTP client and file manager, is a favorite among Windows users for its robust functionality and ease of use. However, Mac users often face challenges since WinSCP isn't natively available for macOS. Fortunately, several alternatives offer similar, if not enhanced, functionalities. This article explores these alternatives, helping Mac users find the best tools for their file management and FTP needs.

What is WinSCP?
WinSCP stands out as one of the most versatile open-source SFTP clients and file managers. It supports various protocols including FTP, FTPS, SFTP, SCP, WebDAV, and S3. Users appreciate its intuitive interface, built-in text editor, and comprehensive file transfer capabilities. The standout feature of WinSCP is its ability to move and copy files seamlessly between local and remote computers, making it a preferred choice for many.
Best Mac Alternatives to WinSCP
Here are some of the best alternatives for Mac users seeking similar functionalities to WinSCP.
1. FileZilla
FileZilla is a well-known open-source FTP solution. It is highly regarded for its speed and efficiency in handling file transfers. Frequently updated, FileZilla ensures secure file transfers and is particularly adept at managing large files. Although its user interface might not be the most engaging, features like the QuickConnect tool offer rapid connectivity to websites, making it a reliable option for users who prioritize functionality over aesthetics.
2. FUGU
FUGU serves as a front-end for SFTP programs on Mac, providing a simple and secure way to transfer files. Its user-friendly interface makes drag-and-drop file transfers straightforward. FUGU also supports SSH connections and saves directory information, enhancing its usability for both novice and advanced users.
3. Bitvise SSH2
Bitvise SSH2, primarily designed for Windows, is a powerful SFTP client with a strong feature set. It includes automatic resumption, recursive subfolder transfers, and efficient management of transfer lists. Although it’s not a native Mac application, its capabilities make it worth considering for those who also operate in a mixed OS environment.
4. SmartFTP
SmartFTP is a versatile FTP client supporting protocols such as FTP, FTPS, SFTP, WebDAV, S3, and SSH. It excels in transferring files between local computers and remote servers. With features like secure file transfers, synchronization, and a built-in terminal, SmartFTP provides a comprehensive solution for file management and transfer needs.
5. SecureFX
SecureFX offers a visual layout that’s easy to navigate, making it a strong contender for both novice and experienced users. It supports SFTP via SSH2, SCP, and FTP over SSL/TLS. SecureFX's advanced features include site synchronization and automation, ensuring efficient and secure file transfers.
6. Cyberduck
Cyberduck is a popular choice for those needing to transfer files swiftly and efficiently. Supporting FTP, SFTP, WebDAV, and S3, Cyberduck integrates seamlessly with external editors and services like Dropbox. While users have occasionally reported issues with SSL connections, its ease of use and robust functionality make it a preferred option for many.
7. ForkLift
ForkLift is a powerful FTP client with a unique dual-pane interface, enhancing its usability. It supports FTP, SFTP, WebDAV, and Amazon S3, providing a robust platform for file transfers. Features like batch editing and a well-designed interface make ForkLift an excellent choice, despite the lack of scheduling options for file transfers.
8. AnyClient
AnyClient is a straightforward FTP tool supporting SFTP and WebDAV. Although free and easy to use, it has some limitations regarding security. However, its stability and speed in transferring files make it a viable option for those seeking a no-frills FTP client.
9. Interarchy
Interarchy provides a reliable file manager with support for all major transfer modes. Regular updates ensure it remains a solid choice for Mac users. Its ease of use and quick file uploads make Interarchy a popular alternative to WinSCP.
10. Fetch
Fetch offers an intuitive interface and supports simultaneous file transfers. Compatible with all major file-sharing protocols, Fetch is an excellent choice for users needing a reliable and user-friendly FTP client.
11. Captain FTP
Captain FTP is a robust FTP client featuring a simple interface and rapid transfer speeds. It supports features like Sync Browsing, transfer scheduling, and protocol preferences. Although it struggles with files larger than 2GB, its other capabilities make it a strong contender for Mac users.
Conclusion
While WinSCP remains unavailable for macOS, numerous alternatives provide comparable functionalities, ensuring Mac users have access to reliable FTP tools and file managers. Whether you prioritize security, speed, or ease of use, the options listed above offer diverse features to meet various needs. Explore these alternatives to find the best FTP client for your Mac, ensuring efficient and secure file management and transfers.
0 notes
Quote
今でも、デイリーポータルZで大きな企画をやろうとすると、「クラウドファンディングがいいんじゃないか」って勧めてくれる人もいるんですけど、会社には「稟議」というもっと手っ取り早くお金がもらえる方法があるんです。だったら稟議書書くわ、って思いますよね。稟議最高です(笑)。
「伊勢丹に行くたびに、負けられないなって思うんです」みたいな | おしえて、ウェブのセンパイ! | 文春オンライン (via winscp)
15 notes
·
View notes
Text
My winter fit I made this year is SSTS! I never got to show it off because a mix of seasonal depression and WinSCP acting stupid


5 notes
·
View notes
Note
Due to a unfortunate lightning strike a couple of weeks ago, I was made to get a new PC. I just got it built and ready to go today, and its a hell of an upgrade to boot. What are your "day one install" for any games or programs for a new build?
I used to have a full-on doc with all the steps I'd need to take to backup an existing PC manually along with apps I'd need to install, but I don't really keep one these days.
But for starters I'd probably say...
Steam
Discord
WinSCP (or Filezilla, I find myself going back and forth)
Notepad++
Firefox
VLC
Audacity
I used to have to manually backup, like, my email inbox and stuff because that used to be something you stored locally. It's kinda cool how easy a lot of it has become.
20 notes
·
View notes
Text
Ransomware Attacks Target VMware ESXi Infrastructure Following Interesting Pattern

Cybersecurity firm Sygnia has shed light on a concerning trend where ransomware attacks targeting VMware ESXi infrastructure follow a well-established pattern, regardless of the specific file-encrypting malware deployed. According to the Israeli company's incident response efforts involving various ransomware families, these attacks adhere to a similar sequence of actions.
The Attack Sequence
- Initial access is obtained through phishing attacks, malicious file downloads, or exploitation of known vulnerabilities in internet-facing assets. - Attackers escalate their privileges to obtain credentials for ESXi hosts or vCenter using brute-force attacks or other methods. - Access to the virtualization infrastructure is validated, and the ransomware is deployed. - Backup systems are deleted, encrypted, or passwords are changed to complicate recovery efforts. - Data is exfiltrated to external locations such as Mega.io, Dropbox, or attacker-controlled hosting services. - The ransomware initiates execution and encrypts the "/vmfs/volumes" folder of the ESXi filesystem. - The ransomware propagates to non-virtualized servers and workstations, widening the scope of the attack.

Mitigation Strategies
To mitigate the risks posed by such threats, organizations are advised to implement the following measures: - Ensure adequate monitoring and logging are in place - Create robust backup mechanisms - Enforce strong authentication measures - Harden the environment - Implement network restrictions to prevent lateral movement
Malvertising Campaign Distributing Trojanized Installers
In a related development, cybersecurity company Rapid7 has warned of an ongoing campaign since early March 2024 that employs malicious ads on commonly used search engines to distribute infected installers for WinSCP and PuTTY via typosquatted domains. These counterfeit installers act as a conduit to drop the Sliver post-exploitation toolkit, which is then used to deliver more payloads, including a Cobalt Strike Beacon leveraged for ransomware deployment. This activity shares tactical overlaps with prior BlackCat ransomware attacks that have used malvertising as an initial access vector, disproportionately affecting members of IT teams who are most likely to download the infected files.
New Ransomware Families and Global Trends
The cybersecurity landscape has witnessed the emergence of new ransomware families like Beast, MorLock, Synapse, and Trinity. The MorLock group has extensively targeted Russian companies, encrypting files without first exfiltrating them and demanding substantial ransoms. According to NCC Group's data, global ransomware attacks in April 2024 registered a 15% decline from the previous month, with LockBit's reign as the top threat actor ending in the aftermath of a sweeping law enforcement takedown earlier this year. The turbulence in the ransomware scene has been complemented by cyber criminals advertising hidden Virtual Network Computing (hVNC) and remote access services like Pandora and TMChecker, which could be utilized for data exfiltration, deploying additional malware, and facilitating ransomware attacks. Read the full article
4 notes
·
View notes
Text
it spared 7-Zip, Notepad ++, and WinSCP but everything else is gone. man what the fuck.
4 notes
·
View notes
Text
Setting up a Factorio server on Ubuntu 22.04!
This blog documents me setting up a Factorio server on an Ubuntu 22.04 server.
Step 1 - Downloading the Factorio binary
The latest binary can be accessed from this (https://www.factorio.com/get-download/stable/headless/linux64) link. Download it on your Linux server however you like. For me, I like to download it on my local machine and use WinSCP to transfer it over to my server.
Once the Factorio binary tarball is in your server, extract it using: tar xf factorio_*
This will create a new directory "factorio". This directory has all the data for your Factorio gameserver! I HIGHLY recommend taking a look at the gameserver settings under ~/factorio/data/server-settings.example.json. If you'd like to change anything, copy the file under "server-settings.json" using cp server-settings.example.json server-settings.json.
If you want your gameserver to show up in the public game listing. You can see the options for that in this file.
Step 2 - Save files!
You need somewhere to put your world saves. Let's make a directory for that. This directory needs to be in the Factorio directory that was created when your unballed the binary tarball, and be called "saves". So just make a "saves" directory in the factorio directory.
In the saves directory, you can either upload your own savefile, or create one using: ~/factorio/bin/x64/factorio --create /factorio/saves/initial.zip
Step 3 - Running your gameserver.
Running the Factorio server is done with the binary in ~/factorio/bin/x64/. You can put this in a SystemD service, or PM2 if you want. Just make sure to include the following parameters: (adjust this command to your system, like you should with any other directories I mention in this blog)
~/factorio/bin/x64/factorio --server-settings ~/factorio/data/server-settings.json --start-server-load-latest --console-log ~/factorio/logs.log
Additionally - Admin List
If you'd like to add admins to your server (which is highly recommended). Create another json file under ~/factorio called "server-adminlist.json". And put your admins Factorio name in there in an array.
Bonus - Mods
Mods are a quite popular in Factorio. And you can add some to your server!
In your gameserver files, you can see a "mods" directory under ~/factorio. Simply add any mod files there, and they'll load with your server!
3 notes
·
View notes
Text
BlackCat Operators Distributing Ransomware Disguised as WinSCP via Malvertising

Source: https://thehackernews.com/2023/07/blackcat-operators-distributing.html
More info: https://www.trendmicro.com/en_us/research/23/f/malvertising-used-as-entry-vector-for-blackcat-actors-also-lever.html
2 notes
·
View notes
Text
Automate SFTP Upload with PowerShell: A Step-by-Step Tutorial
Automating file transfer processes can significantly improve the efficiency and accuracy of data management. In this tutorial, we will walk through a PowerShell script that utilizes WinSCP to connect to an SFTP server, upload files from a local folder, and then move the files to an archive folder. Prerequisites Before you get started, ensure that you have the following: WinSCP is installed on…
0 notes
Text
WordPress aufräumen: So entlarvst du ungenutzte Dateien mit Python

In diesem Beitrag möchte ich dir gerne einen Weg aufzeigen, wie du sehr einfach und ebenso sicher nicht verwendete Dateien in deiner WordPress-Instanz finden kannst. Du benötigst dafür ein wenig technisches Verständnis – aber keine Sorge: Ich nehme dich an die Hand und führe dich Schritt für Schritt durch den gesamten Prozess. https://youtu.be/T3iVrIGbtl8 Der Bedarf für diese Lösung entstand aus einem ganz praktischen Grund: Mein eigener Blog hat mittlerweile satte 174.000 Dateien angesammelt – da wird es höchste Zeit, etwas auszumisten und wieder Platz auf dem Server zu schaffen. Für das Finden von nicht benötigten Dateien unter WordPress gibt es diverse Plugins. Diese haben jedoch alle den Nachteil, dass sie direkt auf der WordPress-Instanz laufen, Systemressourcen verbrauchen und – wie viele Kommentare zeigen – nicht immer zuverlässig oder sicher funktionieren. Daher habe ich mir folgenden Weg überlegt: Ich exportiere die WordPress-Beiträge als JSON-Datei mit den wichtigsten Feldern (ID, Titel, Inhalt). Anschließend lade ich das Upload-Verzeichnis herunter und lasse ein Python-Skript prüfen, ob die Dateien in den Beiträgen referenziert werden. Alle nicht gefundenen Dateien können theoretisch als ungenutzt eingestuft und anschließend überprüft oder gelöscht werden. ⚠️ Wichtiger Hinweis: Ich empfehle dir dringend, vor dem Löschen von Dateien ein vollständiges Backup deiner WordPress-Instanz anzulegen. Idealerweise testest du die Löschung zunächst in einer Staging-Umgebung oder auf einer Kopie deiner Seite. In seltenen Fällen kann es vorkommen, dass Dateien fälschlich als ungenutzt erkannt werden – insbesondere wenn sie über PageBuilder, Custom Fields oder Medien-IDs referenziert werden.
Warum bestehende Plugins nicht immer zuverlässig arbeiten
Es gibt diverse Plugins wie Media Cleaner, DNUI (Delete Not Used Image) oder ähnliche, die versprechen, ungenutzte Mediendateien automatisch zu erkennen und zu löschen. Grundsätzlich eine praktische Idee – doch in den Kommentaren dieser Plugins häufen sich Berichte über falsch gelöschte Dateien, die offenbar doch noch in Verwendung waren. Die Wiederherstellung solcher Dateien ist oft aufwendig und erfordert entweder Backups oder manuelle Nacharbeit. Meine Lösung setzt daher auf einen anderen Ansatz: Sie analysiert die Inhalte kontrolliert und nachvollziehbar außerhalb des WordPress-Systems – und ist damit deutlich sicherer und transparenter.
Schritt 1 – Export der Tabelle wp_posts als JSON
Als Erstes werden die Spalten ID, post_title und post_content aus der WordPress-Tabelle wp_posts exportiert. Der Tabellenpräfix wp_ kann bei dir abweichen – diesen findest du in der Datei wp-config.php unter: $table_prefix = 'wp_'; In manchen Fällen sind mehrere WordPress-Instanzen in einer Datenbank vorhanden. Achte also darauf, den richtigen Präfix zu verwenden. Der Export über phpMyAdmin ist dabei besonders einfach: Du führst lediglich ein SELECT-Statement aus, das dir die relevanten Inhalte liefert. Der eigentliche Export als JSON erfolgt über die integrierte Exportfunktion. SQL-Statement: SELECT ID as "id", post_title as 'Titel', post_content as 'Content' FROM wp_posts WHERE post_type in ('page', 'post'); Wenn du dieses SQL-Statement in phpMyAdmin ausführst, erscheint eine Tabelle mit den Ergebnissen. Scrolle nun ganz nach unten – dort findest du den Link „Exportieren“. Ein Klick darauf öffnet eine neue Seite, auf der du den Exporttyp von SQL auf JSON umstellst. Danach nur noch mit OK bestätigen, und der Export startet.


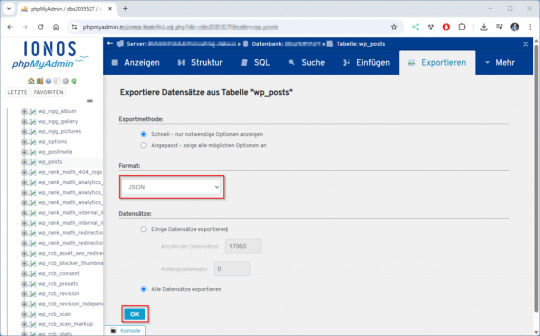
Je nach Anzahl der Beiträge kann der Download ein paar Sekunden dauern.
Schritt 2 – Download des Upload-Verzeichnisses
Im zweiten Schritt wird das komplette Upload-Verzeichnis deiner WordPress-Installation heruntergeladen. Dieses befindet sich standardmäßig unter: /wp-content/uploads/ Ich verwende dafür das kostenlose Tool WinSCP, das eine einfache und übersichtliche Oberfläche bietet. Du benötigst lediglich die SFTP-Zugangsdaten zu deinem Webspace. Diese findest du in der Regel im Kundenbereich deines Hosting-Anbieters. Falls dir kein direkter Zugriff per SFTP möglich ist, bieten viele Hoster eine alternative Lösung an: Du kannst das Verzeichnis online als ZIP-Archiv erstellen und anschließend herunterladen. 💡 Tipp: Achte darauf, die Ordnerstruktur beizubehalten – das Python-Skript analysiert später jede Datei im Originalpfad.
Schritt 3 – Ausführen des Python-Skripts zur Suche nach verwaisten Bildern
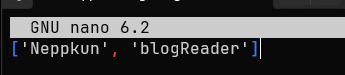
Für das Skript wird lediglich Python 3 benötigt – weitere externe Bibliotheken sind nicht erforderlich. Das Skript kann direkt über die Kommandozeile im Projektverzeichnis ausgeführt werden: python3 findunusedfiles.py Während der Ausführung listet das Skript alle Bilder aus dem Upload-Verzeichnis auf und zeigt direkt in der Konsole an, ob sie verwendet (✅) oder nicht verwendet (❌) wurden. Die Laufzeitausgabe sieht zum Beispiel so aus:

Nach Abschluss wird eine Datei namens unused_images.txt erzeugt. Darin enthalten ist eine Liste aller Bildpfade, die im Export der WordPress-Datenbank (siehe Schritt 1) nicht referenziert wurden.
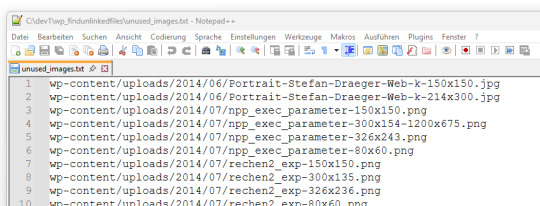
Diese Datei dient als Grundlage zur manuellen Prüfung oder zum späteren Löschen der nicht verwendeten Dateien. 🔗 Hinweis: Das hier verwendete Skript findunusedfiles.py sowie ein Beispiel-SQL-Generator findest du ebenfalls auf GitHub: github.com/StefanDraeger/wp-unused-files-cleaner Python Skript zur Suche nach nicht benutzen Bildern in wordPressHerunterladen Quellcode #!/usr/bin/env python3 # -*- coding: utf-8 -*- """ Titel: WordPress Upload-Verzeichnis auf ungenutzte Dateien prüfen Beschreibung: Dieses Skript durchsucht das lokale Upload-Verzeichnis einer WordPress-Installation nach Bilddateien und vergleicht diese mit den Inhalten aller Beiträge und Seiten, die zuvor als JSON-Datei aus der Tabelle `wp_posts` exportiert wurden. Dateien, die in keinem Beitrag referenziert sind, werden als potenziell ungenutzt gelistet. Autor: Stefan Draeger Webseite: https://draeger-it.blog """ import os import json import sys # Konfiguration UPLOADS_DIR = './wp-content/uploads' JSON_FILE = './wp_posts.json' IMAGE_EXTENSIONS = ('.jpg', '.jpeg', '.png', '.tiff', '.bmp') def format_size(bytes_value): if bytes_value < 1024: return f"{bytes_value} Bytes" elif bytes_value < 1024 ** 2: return f"{bytes_value / 1024:.2f} KB" elif bytes_value < 1024 ** 3: return f"{bytes_value / (1024 ** 2):.2f} MB" else: return f"{bytes_value / (1024 ** 3):.2f} GB" def load_json_data(json_file): if not os.path.isfile(json_file): print(f"❌ Fehler: Datei '{json_file}' nicht gefunden.") sys.exit(1) try: with open(json_file, 'r', encoding='utf-8') as file: raw_json = json.load(file) except json.JSONDecodeError: print(f"❌ Fehler: Datei '{json_file}' ist kein gültiges JSON.") sys.exit(1) for obj in raw_json: if obj.get('type') == 'table' and obj.get('name') == 'wp_posts': return obj.get('data', ) print("❌ Fehler: Keine Daten zur Tabelle 'wp_posts' gefunden.") sys.exit(1) def scan_uploads(content_list): if not os.path.isdir(UPLOADS_DIR): print(f"❌ Fehler: Upload-Verzeichnis '{UPLOADS_DIR}' nicht gefunden.") sys.exit(1) unused_files = checked_count = 0 for root, dirs, files in os.walk(UPLOADS_DIR): for file_name in files: if file_name.lower().endswith(IMAGE_EXTENSIONS): full_path = os.path.join(root, file_name) relative_path = os.path.relpath(full_path, '.').replace('', '/') checked_count += 1 found = False for i in range(len(content_list)): if relative_path in content_list: content_list = content_list.replace(relative_path, '') found = True if found: content_list = print(f"✅ Verwendet: {relative_path}") else: unused_files.append(relative_path) print(f"❌ Nicht verwendet: {relative_path}") return unused_files, checked_count def write_unused_list(unused_files): with open('unused_images.txt', 'w', encoding='utf-8') as f: for path in unused_files: f.write(path + 'n') print("📝 Datei 'unused_images.txt' wurde erstellt.") def write_sql_files(unused_files): with open('delete_attachments.sql', 'w', encoding='utf-8') as del_out: del_out.write("-- SQL-Befehl zum Löschen verwaister Medien aus wp_posts (Typ: attachment)nn") del_out.write("DELETE FROM wp_postsnWHERE post_type = 'attachment'nAND guid IN (n") for i, path in enumerate(unused_files): end = ",n" if i < len(unused_files) - 1 else "n" del_out.write(f" '{path}'{end}") del_out.write(");n") print("🗑️ Datei 'delete_attachments.sql' wurde erzeugt.") with open('select_attachments.sql', 'w', encoding='utf-8') as sel_out: sel_out.write("-- SQL-Befehl zur Prüfung verwaister Medien aus wp_posts (Typ: attachment)nn") sel_out.write("SELECT ID, guid FROM wp_postsnWHERE post_type = 'attachment'nAND guid IN (n") for i, path in enumerate(unused_files): end = ",n" if i < len(unused_files) - 1 else "n" sel_out.write(f" '{path}'{end}") sel_out.write(");n") print("🔍 Datei 'select_attachments.sql' wurde erzeugt.") def write_log(unused_files, checked_count): total_size_bytes = sum( os.path.getsize(os.path.join('.', path)) for path in unused_files if os.path.isfile(os.path.join('.', path)) ) formatted_size = format_size(total_size_bytes) with open('cleanup_log.txt', 'w', encoding='utf-8') as log: log.write("📄 Ausführungsprotokoll – WordPress Dateiaufräumungn") log.write("==================================================nn") log.write(f"📦 Verarbeitete Dateien: {checked_count}n") log.write(f"🗂️ Ungenutzte Dateien gefunden: {len(unused_files)}n") log.write(f"💾 Speicherverbrauch (gesamt): {formatted_size}nn") log.write("📝 Die folgenden Dateien wurden erstellt:n") log.write("- unused_images.txtn") log.write("- delete_attachments.sqln") log.write("- select_attachments.sqln") print("🧾 Logdatei 'cleanup_log.txt' wurde erstellt.") def main(): entries = load_json_data(JSON_FILE) content_list = unused_files, checked_count = scan_uploads(content_list) print("nAnalyse abgeschlossen.") print(f"Geprüfte Dateien: {checked_count}") print(f"Nicht referenzierte Dateien: {len(unused_files)}n") if unused_files: print("⚠️ Nicht referenzierte Bilddateien:") for path in unused_files: print(path) write_unused_list(unused_files) write_sql_files(unused_files) write_log(unused_files, checked_count) if __name__ == "__main__": main()
Schritt 4 – Aufräumen der WordPress-Datenbank
⚠️ Wichtiger Hinweis vorab: Bevor du Änderungen an deiner Datenbank vornimmst, solltest du ein vollständiges Backup deiner WordPress-Datenbank erstellen. So kannst du im Fall eines Fehlers jederzeit alles wiederherstellen. WordPress speichert alle hochgeladenen Medien – also auch Bilder – in der Tabelle wp_posts. Dabei handelt es sich um Einträge mit dem Post-Typ attachment, wobei in der Spalte guid der Pfad zur Datei gespeichert ist. Wenn du mit dem Python-Skript verwaiste Bilder identifiziert und vielleicht schon gelöscht hast, verbleiben deren Einträge trotzdem in der WordPress-Mediathek. Diese kannst du gezielt aus der Datenbank entfernen. Vorgehen: - Öffne die Datei unused_images.txt, die du im vorherigen Schritt erhalten hast. - Jeder darin aufgeführte Pfad (z. B. wp-content/uploads/2023/08/beispiel.jpg) lässt sich mit einem einfachen SQL-Befehl entfernen: DELETE FROM wp_posts WHERE post_type = 'attachment' AND guid LIKE '%wp-content/uploads/2023/08/beispiel.jpg'; - Um diese Aufgabe bei vielen Dateien zu automatisieren, kannst du folgendes Python-Skript nutzen. Es erstellt dir aus unused_images.txt eine vollständige SQL-Datei mit allen nötigen Löschbefehlen: # generate_delete_sql.py with open('unused_images.txt', 'r', encoding='utf-8') as infile, open('delete_attachments.sql', 'w', encoding='utf-8') as outfile: outfile.write("-- SQL-Befehle zum Löschen verwaister Medien aus wp_posts (Typ: attachment)nn") for line in infile: path = line.strip() if path: outfile.write(f"DELETE FROM wp_posts WHERE post_type = 'attachment' AND guid LIKE '%{path}';n") - Führe die generierte Datei delete_attachments.sql anschließend in phpMyAdmin oder über ein externes SQL-Tool aus. Optional: Erst prüfen, dann löschen Wenn du sicherstellen willst, dass die Statements korrekt sind, kannst du sie vor dem Löschen zunächst mit SELECT testen: SELECT ID, guid FROM wp_posts WHERE post_type = 'attachment' AND guid LIKE '%wp-content/uploads/2023/08/beispiel.jpg'; Mit diesem Schritt entfernst du nicht nur die Bilddateien selbst, sondern auch die dazugehörigen Mediathek-Einträge – für eine wirklich aufgeräumte WordPress-Installation.
Aufräumen via SSH
⚠️ Wichtiger Sicherheitshinweis: Bevor du Dateien vom Server löschst, solltest du unbedingt ein vollständiges Backup deiner WordPress-Installation und der Datenbank anlegen. In seltenen Fällen können Dateien fälschlich als ungenutzt erkannt werden – z. B. wenn sie über PageBuilder, Shortcodes oder Custom Fields eingebunden sind. Teste den Löschvorgang idealerweise zuerst in einer Staging-Umgebung. Wenn du Zugriff auf deinen Webserver per SSH hast, kannst du die ungenutzten Dateien aus der Datei unused_images.txt direkt automatisiert löschen – ohne mühsames Durchklicken per Hand. Voraussetzungen: - Die Datei unused_images.txt befindet sich auf dem Server (z. B. via WinSCP oder scp hochgeladen). - Du befindest dich im WordPress-Stammverzeichnis oder die Pfade in der Datei stimmen relativ zur aktuellen Position. Optional: Dry-Run vor dem Löschen Damit du vorab prüfen kannst, ob die Dateien wirklich existieren: while IFS= read -r file; do if ; then echo "Würde löschen: $file" else echo "❌ Nicht gefunden: $file" fi done < unused_images.txt Dateien sicher löschen (nach manueller Prüfung) while IFS= read -r file; do if ; then rm "$file" echo "✅ Gelöscht: $file" fi done < unused_images.txt Optional: Löschvorgang protokollieren while IFS= read -r file; do if ; then rm "$file" echo "$(date +"%F %T") Gelöscht: $file" >> deleted_files.log fi done < unused_images.txt
Fazit
Ein überfülltes Upload-Verzeichnis ist nicht nur unübersichtlich, sondern kann auch unnötig Speicherplatz und Backup-Zeit kosten. Mit dem hier vorgestellten Ansatz hast du eine sichere, transparente und Plugin-freie Lösung, um gezielt ungenutzte Dateien in deiner WordPress-Installation zu identifizieren und aufzuräumen. Durch die Kombination aus Datenbank-Export, Python-Skript und optionaler Löschung via SSH behältst du die volle Kontrolle – und vermeidest die Risiken automatischer Plugin-Löschungen. Zudem hast du mit den generierten SQL-Dateien und dem Log eine solide Dokumentation deines Bereinigungsprozesses. 💡 Tipp zum Schluss: Behalte die Anzahl deiner Medien im Blick, deaktiviere nicht benötigte Thumbnails und führe diese Art von Aufräumaktion regelmäßig durch – so bleibt dein System langfristig sauber und performant. Read the full article
0 notes
Text
Hướng dẫn fix chạy lệnh scp trên Windows để copy file cookies.json từ máy Windows lên server L inux.
🌿💖 Được nha bạn ơi! Bạn hoàn toàn có thể chạy lệnh scp trên Windows để copy file cookies.json từ máy Windows lên server Linux. Có vài cách làm tuỳ vào công cụ bạn đang dùng 💻🍀 ✅ 1️⃣ DÙNG WinSCP (CỰC DỄ – giao diện kéo thả) 👉 Cách phổ biến nhất và dễ dùng nhất cho người không rành dòng lệnh. ⚙️ Các bước: Tải và cài đặt WinSCP Mở WinSCP → điền thông tin: Host name: IP của server Linux Username:…
0 notes
Text
Senior QA Engineer (Manual)
and Android platforms. Other commonly used tools are WinSCP, Jira, Spira, Cycle etc What you’ll do: Analyze and review… Apply Now
0 notes