#wordpress file list plugin
Explore tagged Tumblr posts
Visit Tumblr Blog
Explore Tumblr blogs with no restrictions, modern design and the best experience.
Last Seen Tumblr Blogs


Fun Fact
There are dozens of funny blogs to kill time on Tumblr.
Text
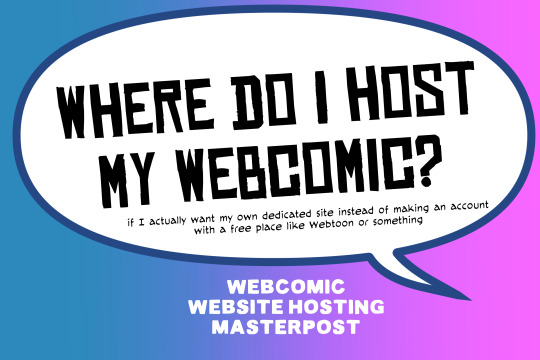
There are many web hosting companies to choose from if you're taking the plunge into making your own website with a comic content management system (CMS) like ComicControl or Grawlix, a Wordpress comic theme like Toocheke or ComicPress, or a HTML template to cut/paste code like Rarebit. While these solutions are generally free, finding a home for them is... generally not. It can be hard to choose what's best for your webcomic AND your budget!
We took a look at a few of the top hosting services used by webcomics creators using webcomic CMSes, and we put out a poll to ask your feedback about your hosts!
This post may be updated as time goes on as new services enter the hosting arena, or other important updates come to light.
Questions:
💻 I can get a free account with Wix/Squarespace/Carrd, could I just use those for my comic? - Web hosts like this may have gallery functions that could be adapted to display a series of pages, but they are very basic and not intended for webcomics.
📚 Wait, I host on Webtoon, Tapas, Comic Fury, or some other comic website, why are they not here? - Those are comic platforms! We'll get into those in a future post!
🕵️♀️Why does it say "shared hosting"? Who am I sharing with? - "Shared hosting" refers to sharing the server space with other customers. They will not have access to your files or anything, so it is perfectly fine to use for most comic CMSes. You may experience slowing if there is too much activity on a server, so if you're planning to host large files or more than 10 comics, you may want to upgrade to a more robust plan in the future.
Web Host List
Neocities

Basic plan pricing: Free or $5/month. Free plan has more restrictions (1 GB space, no custom domain, and slower bandwidth, among other things)
Notes: Neocities does not have database support for paid or free accounts, and most comic CMS solutions require this (ComicCtrl, Grawlix, Wordpress). You will need to work with HTML/CSS files directly to make a website and post each page.
Hostinger

Basic plan pricing: $11.99/month or $7.99/month with four year commitment (monthly, 1, 2, and 4 year plans available).
Notes: Free domain for the 1st year. Free SSL Certifications. Weekly backups.
KnownHost

Basic plan pricing: $8.95/month or $7.99/month with four year commitment (monthly, 1, 2, and 4 year plans available).
Notes: Free DDOS protection. Free SSL Certifications.
InMotion Hosting

Basic plan pricing: $12.99/month or $9.99/month with three year commitment (monthly, 1, and 3 year plans available).
Notes: Free SSL Certifications, free domain names for 1 and 3 year plans. 24/7 live customer service and 90-day money-back guarantee. Inmotion also advertises eco-friendly policies: We are the first-ever Green Data Center in Los Angeles. We cut cooling costs by nearly 70 percent and reduce our carbon output by more than 2,000 tons per year.
Reviews:
👍“I can't remember it ever going down.”
👍“InMotion has a pretty extensive library full of various guides on setting up and managing websites, servers, domains, etc. Customer service is also fairly quick on responding to inquiries.” 👎“I wish it was a bit faster with loading pages.”
Ionos Hosting

Basic plan pricing: $8/month or $6/month with three year commitment (monthly, 1, 2 and 3 year plans available).
Notes: Free domain for the first year, free SSL Certification, Daily backup and recovery is included. Site Scan and Repair is free for the first 30 days and then is $6/month.
Reviews:
👍“Very fast and simple” 👎“Customer service is mediocre and I can't upload large files”
Bluehost

Basic plan pricing: $15.99/month or $4.95/month with three year commitment (monthly, 1, 3 year plans available).
Notes: Free domain and SSL certificates (for first year only). 24/7 Customer Service. Built to handle higher traffic websites. Although they specialize in Wordpress websites and provide updates automatically, that's almost a bad thing for webcomic plugins because they will often break your site. Their cloud hosting services are currently in early access with not much additional information available.
Reviews:
👎"The fees keep going up. Like I could drop $100 to cover a whole year, but now I'm paying nearly $100 for just three months. It's really upsetting."
👎"I have previously used Bluehost’s Wordpress hosting service and have had negative experiences with the service, so please consider with a grain of salt. I can confirm at least that their 24/7 customer service was great, although needed FAR too often."
Dreamhost

Basic plan pricing: $7.99/month or $5.99/month with three year commitment (monthly, 1, 3 year plans available).
Notes: Free SSL Certificates, 24/7 support with all plans, 97-day moneyback guarantee. Not recommended for ComicCtrl CMS
Reviews:
👍“They've automatically patched 2 security holes I created/allowed by mistake.” 👍“Prices are very reasonable” 👎 “back end kind of annoying to use” 👎 “wordpress has some issues” 👎 “it's not as customizable as some might want“
GoDaddy

Basic plan pricing: $11.99/month or $9.99/month with three year commitment (monthly, 1, 2, and 3 year plans available).
Notes: Free 24/7 Customer service with all plans, Free SSL Certificates for 1 year, free domain and site migration.
Reviews:
👍Reasonable intro prices for their Economy hosting, which has 25GB of storage 👍Migrated email hosting service from cPanel to Microsoft Office, which has greater support but may not be useful for most webcomic creators. 👎 Many site issues and then being upsold during customer service attempts. 👎 Server quality found lacking in reviews 👎 Marketing scandals in the past with a reputation for making ads in poor taste. Have been attempting to clean up that image in recent years. 👎 “GoDaddy is the McDonald's of web hosting. Maybe the Wal-Mart of hosting would be better. If your website was an object you would need a shelf to put it on. You go to Wal-Mart and buy a shelf. It's not great. It's not fancy. It can only hold that one thing. And if we're being honest - if the shelf broke and your website died it wouldn't be the end of the world.The issue comes when you don't realize GoDaddy is the Wal-Mart of hosting. You go and try to do things you could do with a quality shelf. Like, move it. Or add more things to it.” MyWorkAccountThisIs on Reddit*
Things to consider for any host:
💸 Introductory/promotional pricing - Many hosting companies offer free or inexpensive deals to get you in the door, and then raise the cost for these features after the first year or when you renew. The prices in this post are the base prices that you can expect to pay after the promotional prices end, but may get outdated, so you are encouraged to do your own research as well.
💻 Wordpress hosting - Many of the companies below will have a separate offering for Wordpress-optimized hosting that will keep you updated with the latest Wordpress releases. This is usually not necessary for webcomic creators, and can be the source of many site-breaking headaches when comic plugins have not caught up to the latest Wordpress releases.
Any basic hosting plan on this list will be fine with Wordpress, but expect to stop or revert Wordpress versions if you go with this as your CMS.
�� You don't have to go it alone - While free hosts may be more limited, paid hosting on a web server will generally allow you to create different subdomains, or attach additional purchased domains to any folders you make. If you have other comic-making friends you know and trust, you can share your server space and split the cost!
Want to share your experience?
Feel free to contribute your hosting pros, cons, and quirks on our survey! We will be updating our list periodically with your feedback!
156 notes
·
View notes
Text
"how do I keep my art from being scraped for AI from now on?"
if you post images online, there's no 100% guaranteed way to prevent this, and you can probably assume that there's no need to remove/edit existing content. you might contest this as a matter of data privacy and workers' rights, but you might also be looking for smaller, more immediate actions to take.
...so I made this list! I can't vouch for the effectiveness of all of these, but I wanted to compile as many options as possible so you can decide what's best for you.
Discouraging data scraping and "opting out"
robots.txt - This is a file placed in a website's home directory to "ask" web crawlers not to access certain parts of a site. If you have your own website, you can edit this yourself, or you can check which crawlers a site disallows by adding /robots.txt at the end of the URL. This article has instructions for blocking some bots that scrape data for AI.
HTML metadata - DeviantArt (i know) has proposed the "noai" and "noimageai" meta tags for opting images out of machine learning datasets, while Mojeek proposed "noml". To use all three, you'd put the following in your webpages' headers:
<meta name="robots" content="noai, noimageai, noml">
Have I Been Trained? - A tool by Spawning to search for images in the LAION-5B and LAION-400M datasets and opt your images and web domain out of future model training. Spawning claims that Stability AI and Hugging Face have agreed to respect these opt-outs. Try searching for usernames!
Kudurru - A tool by Spawning (currently a Wordpress plugin) in closed beta that purportedly blocks/redirects AI scrapers from your website. I don't know much about how this one works.
ai.txt - Similar to robots.txt. A new type of permissions file for AI training proposed by Spawning.
ArtShield Watermarker - Web-based tool to add Stable Diffusion's "invisible watermark" to images, which may cause an image to be recognized as AI-generated and excluded from data scraping and/or model training. Source available on GitHub. Doesn't seem to have updated/posted on social media since last year.
Image processing... things
these are popular now, but there seems to be some confusion regarding the goal of these tools; these aren't meant to "kill" AI art, and they won't affect existing models. they won't magically guarantee full protection, so you probably shouldn't loudly announce that you're using them to try to bait AI users into responding
Glaze - UChicago's tool to add "adversarial noise" to art to disrupt style mimicry. Devs recommend glazing pictures last. Runs on Windows and Mac (Nvidia GPU required)
WebGlaze - Free browser-based Glaze service for those who can't run Glaze locally. Request an invite by following their instructions.
Mist - Another adversarial noise tool, by Psyker Group. Runs on Windows and Linux (Nvidia GPU required) or on web with a Google Colab Notebook.
Nightshade - UChicago's tool to distort AI's recognition of features and "poison" datasets, with the goal of making it inconvenient to use images scraped without consent. The guide recommends that you do not disclose whether your art is nightshaded. Nightshade chooses a tag that's relevant to your image. You should use this word in the image's caption/alt text when you post the image online. This means the alt text will accurately describe what's in the image-- there is no reason to ever write false/mismatched alt text!!! Runs on Windows and Mac (Nvidia GPU required)
Sanative AI - Web-based "anti-AI watermark"-- maybe comparable to Glaze and Mist. I can't find much about this one except that they won a "Responsible AI Challenge" hosted by Mozilla last year.
Just Add A Regular Watermark - It doesn't take a lot of processing power to add a watermark, so why not? Try adding complexities like warping, changes in color/opacity, and blurring to make it more annoying for an AI (or human) to remove. You could even try testing your watermark against an AI watermark remover. (the privacy policy claims that they don't keep or otherwise use your images, but use your own judgment)
given that energy consumption was the focus of some AI art criticism, I'm not sure if the benefits of these GPU-intensive tools outweigh the cost, and I'd like to know more about that. in any case, I thought that people writing alt text/image descriptions more often would've been a neat side effect of Nightshade being used, so I hope to see more of that in the future, at least!
246 notes
·
View notes
Text
Automattic, the company that owns WordPress.com, is required to remove a controversial login checkbox from WordPress.org and let WP Engine back into its ecosystem after a judge granted WP Engine a preliminary injunction in its ongoing lawsuit. In addition to removing the checkbox—which requires users to denounce WP Engine before proceeding—the preliminary injunction orders that Automattic is enjoined from “blocking, disabling, or interfering with WP Engine’s and/or its employees’, users’, customers’, or partners’ access to wordpress.org” or “interfering with WP Engine’s control over, or access to, plugins or extensions (and their respective directory listings) hosted on wordpress.org that were developed, published, or maintained by WP Engine,” the order states. In the immediate aftermath of the decision, Automattic founder and CEO Matt Mullenweg asked for his account to be deleted from the Post Status Slack, which is a popular community for businesses and people who work on WordPress’s open-source tools.
“It's hard to imagine wanting to continue to working on WordPress after this,” he wrote in that Slack, according to a screenshot viewed by 404 Media. “I'm sick and disgusted to be legally compelled to provide free labor to an organization as parasitic and exploitive as WP Engine. I hope you all get what you and WP Engine wanted.” His username on that Slack has been changed to “gone 💀” Mullenweg began to publicly denounce WP Engine in September, calling the web hosting platform a “cancer” to the larger Wordpress open-source project and accusing it of improperly using the WordPress brand. He’s “at war” with WP Engine, in his own words. In October, Mullenweg added a required checkbox at login for WordPres.org, forcing users to agree that they are not affiliated with WP Engine. The checkbox asked users to confirm, “I am not affiliated with WP Engine in any way, financially or otherwise.” The checkbox was still present and required on the WordPress.org login page as of Wednesday morning. Automattic and Mullenweg have 72 hours from the order to take it down, according to the judge’s order. WP Engine sent a cease and desist demanding that he “stop making and retract false, harmful and disparaging statements against WP Engine,” the platform posted on X. Automattic sent back its own cease and desist, saying, “Your unauthorized use of our Client’s intellectual property has enabled WP Engine to compete with our Client unfairly, and has led to unjust enrichment and undue profits.” WP Engine filed a lawsuit against Automattic and Mullenweg, accusing them of extortion and abuse of power. In October, Mullenweg announced that he’d given Automattic employees a buyout package, and 159 employees, or roughly 8.4 percent of staff, took the offer. “I feel much lighter,” he wrote. But shortly after, he reportedly complained that the company was now “very short staffed.” All of this has created an environment of chaos and fear within Automattic and in the wider WordPress open-source community. Within 72 hours of the order, Automattic and Mullenweg are also required to remove the “purported” list of WP Engine customers contained in the ‘domains.csv’ file linked to Automattic’s website wordpressenginetracker.com, which Automattic launched in November and tracks sites that have left WP Engine. It’s also required to restore WP Engine’s access to WordPress.org, including reactivating and restoring all WP Engine employee login credentials to wordpress.org resources and “disable any technological blocking of WPEngine’s and Related Entities’ access to wordpress.org that occurred on or around September 25, 2024, including IP address blocking or other blocking mechanisms.” The judge also ordered Mullenweg to restore WP Engine’s access to its Advanced Custom Fields (“ACF”) plugin directory, which its team said was “unilaterally and forcibly taken away from its creator without consent” and called it a “new precedent” in betrayal of community access. “We are grateful that the court has granted our motion for a preliminary injunction,” a spokesperson for WP Engine told 404 Media. “The order will bring back much-needed stability to the WordPress ecosystem. WP Engine is focused on serving our partners and customers and working with the community to find ways to ensure a vigorous, and thriving WordPress community.” A spokesperson for Automattic told 404 Media: “Today’s ruling is a preliminary order designed to maintain the status quo. It was made without the benefit of discovery, our motion to dismiss, or the counterclaims we will be filing against WP Engine shortly. We look forward to prevailing at trial as we continue to protect the open source ecosystem during full-fact discovery and a full review of the merits.”
16 notes
·
View notes
Text
Top WordPress Plugins to Supercharge Your Website in 2024

Building and maintaining a WordPress site is both exciting and challenging. While the platform provides a robust foundation, the true power of WordPress lies in its plugins. From enhancing site functionality to improving user experience, WordPress plugins are indispensable tools for developers, businesses, and bloggers alike. In this blog, we’ll explore the best WordPress plugins that can transform your website into a highly functional, user-friendly, and SEO-optimized powerhouse.
What Are WordPress Plugins?
WordPress plugins are software add-ons designed to extend the functionality of your WordPress site. Whether you need to improve site speed, enhance SEO, secure your website, or add unique design features, there’s likely a plugin for that. Plugins allow both beginners and advanced users to customize their sites without coding expertise.
With over 60,000 plugins available on the WordPress Plugin Directory alone, the options can feel overwhelming. Choosing the right plugins for your website’s goals is critical for success. Below, we’ve rounded up some of the most essential WordPress plugins to consider.
Must-Have WordPress Plugins for Every Website
1. Yoast SEO
SEO is crucial for driving organic traffic to your site, and Yoast SEO is one of the best tools for optimizing your content. This plugin provides on-page optimization tips, readability analysis, and technical SEO tools to help your site rank higher on search engines.
2. Elementor
Looking to build a visually stunning website without hiring a designer? Elementor is a drag-and-drop page builder that makes designing websites easy. Its intuitive interface and vast array of widgets allow you to create professional-looking pages in minutes.
3. WPForms
For websites that rely on user interaction, a contact form is a must-have feature. WPForms allows you to create customizable, mobile-responsive forms effortlessly. Whether it’s contact forms, surveys, or payment forms, this plugin has you covered.
4. WooCommerce
If you’re running an online store, WooCommerce is the go-to plugin. It transforms your WordPress site into a fully functional e-commerce platform, complete with features for product listings, payment gateways, and inventory management.
5. Akismet Anti-Spam
Spam comments can clutter your website and ruin user experience. Akismet Anti-Spam automatically filters out spam comments, keeping your site clean and professional.
6. Jetpack
Created by Automattic, the team behind WordPress, Jetpack is a multipurpose plugin offering features like performance optimization, security, site analytics, and social media integration.
7. Rank Math
Another excellent SEO plugin, Rank Math provides advanced features like schema integration, keyword tracking, and detailed analytics. It’s an excellent alternative to Yoast SEO for more advanced users.
8. UpdraftPlus
Backup and restoration are critical for any website. UpdraftPlus allows you to schedule automatic backups and store them securely on cloud services like Google Drive or Dropbox.
9. Smush
Site speed plays a major role in user experience and search engine rankings. Smush compresses images without compromising quality, helping your site load faster.
10. MonsterInsights
Understanding how visitors interact with your site is essential. MonsterInsights integrates Google Analytics directly into your WordPress dashboard, offering real-time insights into traffic, user behavior, and more.
11. W3 Total Cache
Slow-loading websites lose visitors and revenue. W3 Total Cache improves website performance by caching static files and optimizing server resources.
12. Sucuri Security
Cybersecurity is non-negotiable in today’s digital landscape. Sucuri Security offers malware scanning, firewall protection, and blacklist monitoring to keep your site secure.
13. Social Snap
Boost social media engagement with Social Snap, a powerful social sharing plugin. It offers customizable sharing buttons and in-depth analytics to track your social media performance.
14. Litespeed Cache
For websites hosted on LiteSpeed servers, LiteSpeed Cache is a high-performance optimization plugin that enhances speed and reduces server load.
15. TablePress
If your site needs to display complex data, TablePress is a lifesaver. It lets you create and manage tables without requiring any coding knowledge.
Why Use WordPress Plugins?
Enhanced Functionality: WordPress plugins extend the capabilities of your site, making it easier to achieve your goals.
Ease of Use: Many plugins are beginner-friendly and require no technical expertise.
Scalability: Whether you’re running a blog, an e-commerce store, or a portfolio, plugins grow with your needs.
Cost-Effective: Most plugins offer free versions with premium features, making them accessible for all budgets.
Tips for Choosing the Right WordPress Plugins
Identify Your Needs: Start by determining what features your site requires.
Check Reviews and Ratings: Plugins with high ratings and positive reviews are generally more reliable.
Update Frequency: Look for plugins that are updated regularly to ensure compatibility with the latest WordPress version.
Avoid Overloading: Too many plugins can slow down your site. Stick to essential ones.
Final Thoughts
WordPress plugins are the backbone of a successful website. By selecting the right ones, you can enhance your site’s functionality, user experience, and performance. Whether you’re aiming to boost your SEO, secure your site, or create stunning designs, there’s a plugin tailored for your needs.
Experiment with the plugins mentioned above and watch your WordPress site thrive. Remember to regularly review your plugin list and update them to ensure optimal performance.
4 notes
·
View notes
Text
The Best Free WordPress Plugins You Should Use

If you're running a WordPress website, plugins are essential for adding functionality, improving performance, and optimizing the user experience. At Island Wizards, a company dedicated to providing WordPress headless and Shopify services, we understand the importance of selecting the right plugins for your website. To help you get started, we've compiled a list of the best free WordPress plugins that you should consider for your site.
1. Yoast SEO
Yoast SEO is one of the most popular and comprehensive SEO plugins available. It helps you optimize your content for search engines by providing keyword analysis, readability scores, and detailed SEO suggestions.
Key Features:
Real-time page analysis
XML sitemap generation
On-page optimization for readability and keywords
This plugin ensures that your content is SEO-friendly, which can boost your site's visibility in search engine results pages (SERPs).
2. WPForms
Every website needs a reliable contact form, and WPForms is one of the easiest form builders out there. With its drag-and-drop functionality, you can create beautiful forms in minutes, even if you're not tech-savvy.
Key Features:
Drag-and-drop builder
Mobile responsive
Spam protection
WPForms makes it simple for your visitors to get in touch with you, making it a must-have for businesses like Island Wizards.
3. Elementor
For those looking to design stunning web pages without coding, Elementor is the go-to plugin. This free page builder offers a user-friendly interface that allows you to create custom layouts and designs.
Key Features:
Drag-and-drop editor
100+ templates
Mobile-friendly designs
At Island Wizards, we recommend Elementor for clients who want full control over their website's appearance without relying on custom coding.
4. WooCommerce
If you're running an online store, WooCommerce is the ultimate plugin for e-commerce. It powers more than 30% of all online stores, and it's fully customizable, allowing you to sell anything from physical products to digital downloads.
Key Features:
Built-in payment processing
Inventory management
Customizable product pages
As experts in WordPress and Shopify, we at Island Wizards often integrate WooCommerce for clients looking to build a robust online store.
5. UpdraftPlus
Backing up your website is crucial, and UpdraftPlus simplifies this process. This backup plugin allows you to store your backups in the cloud or download them for safekeeping.
Key Features:
Scheduled backups
Cloud storage integration
Easy restoration
At Island Wizards, we always advise our clients to have a backup strategy, and UpdraftPlus is the perfect solution for that.
6. Smush
Website speed is critical for user experience and SEO, and Smush helps by compressing your images without sacrificing quality. This image optimization plugin reduces file sizes, making your site faster and more efficient.
Key Features:
Lossless image compression
Bulk image optimization
Lazy loading
Faster websites tend to rank higher in search engines, and at Island Wizards, we prioritize performance for all our clients.
7. Wordfence Security
Security is a top priority for any website, and Wordfence provides a comprehensive security plugin to protect your site from malicious attacks.
Key Features:
Firewall and malware scanner
Login security
Real-time threat defense feed
With security being a major concern, we at Island Wizards strongly recommend Wordfence to all our WordPress clients.
Conclusion
Whether you're just starting out with your WordPress site or looking to enhance its functionality, these free plugins are essential tools for success. At Island Wizards, we specialize in WordPress development and can help you integrate these plugins into your site seamlessly. Choosing the right plugins can significantly improve your site's performance, security, and overall user experience, ensuring your website operates at its full potential. Explore more about our service… https://islandwizards.com/blogs/when-you-should-consider-moving-your-store-to-shopify/ https://islandwizards.com/blogs/understanding-the-importance-of-ui-ux-in-website-design/
#shopify#headless wordpress development services#island wizards#wordpress#island wizards uk'#shopify partner program#wizards island#seo#white label agency
2 notes
·
View notes
Text
If I disappear from society, don't be surprised.
I am so so so tired of capitalism.
For Christmas I got a Raspberry Pi. The goal was to host my own website off it. This was entirely for fun.
Step one: set up raspberry Pi so I can host a site on it. Easy. Ubuntu is free (thank fuck), I know how to set it up, but hold on! According to xfinity, I cannot change dmz or dms rules on their router. I can't even REQUEST it. I can't even use a workaround because I'm not allowed to edit the port forward that was automatically added to my router. I dig through years old forums and find out that this is because I'm using the modem provided by xfinity. I now have to buy a new modem from xfinity's "approved list".
Step two: get a domain. I swim through 4 million outrageous prices that say shit like "pay $0.01 for the first year!" with the text below saying "with purchase of 3 year agreement". I finally get to godaddy and am able to convince the stupid checkout to give me 1 year of my domain (after, of course, it corrected my awful mistake to 3 years and, if I hadn't been hyper-vigilant, I wouldn't have noticed. I have to dig through 5 pages in settings to find a way to turn off auto pay because I know better by now. While I'm there I also turn off all email notifications, which were all automatically on. It also didn't tell me that I can't transfer my domain outside of godaddy for 60 days, so I just essentially paid for something I can't use for 2 months. Great. (out of curiosity, I dug through godaddy for some time. The 60 day thing appears nowhere except on the help center page when specifically searching for it.)
Step three: create a site. WordPress, once my most beloved website creation software, now slams subscription fees on me like cardi B audios on teenager girls's tiktoks. Unrelenting. Bloodthirsty. I power through to just get past "let AI design your site!" and "pick one of our patterns" so I can reach the point where I can edit the template. I already have a free template zip file. I drop it in the box. "wait!" says WordPress, in a screen-covering popup "upgrade to the creator plan to access the theme install features!" I click the only button on the screen. It takes me IMMEDIATELY to a filled out checkout page. WordPress Creator is $300 per year. Per. Year.
I read through the "features included with your purchase" to see things like "sftp/SSH certificates", "github deployments", "free staging site", and "install plugins and themes". All of these were free 5 years ago. "Save 20% by paying for two years!" No, I don't think I will.
Out of pure spite against the demon that is modern capitalism, I'm teaching myself html and css. I would kiss the creator of w3schools on the mouth, right after I kiss the creator of Ubuntu. I'm so angry. The internet is useless now.
5 notes
·
View notes
Text
How to Create Sitemap XML for your Website?
🚀 Ready to boost your website's visibility? Learn how to create a dynamic sitemap.xml to enhance your SEO game! 🌐Hey there, fellow digital trailblazers! Are you looking to supercharge your website's search engine optimization (SEO) efforts? One surefire way to give your site a leg up in the digital landscape is by creating a sitemap.xml.

What exactly is a sitemap.xml, you ask? It's a roadmap for search engine crawlers, guiding them through your website's pages and content. By providing this organized structure, you can help search engines better understand and index your site, improving its visibility in search results.
How can you create a sitemap.xml for your website? Fear not, I've got you covered with a simple yet practical guide:
1. Understand Your Website Structure: Take a comprehensive look at your website's structure and identify all the pages you want to include in your sitemap.
2. Utilize Online Tools: Several online tools and plugins can help you automatically generate a sitemap.xml file. Platforms like WordPress offer plugins that can handle this task seamlessly.
3. Manually Create Your Sitemap: If you prefer a more hands-on approach, you can create your sitemap.xml file manually. Use a text editor to list the URLs of your website's pages in a structured format.
4. Submit Your Sitemap to Search Engines: Once your sitemap.xml file is ready, remember to submit it to Google and Bing. This will ensure that search engine crawlers are aware of your sitemap and can index your website effectively.
You must update your sitemap.xml regularly, particularly if you add or modify content on your site frequently. You're assisting search engines in learning about the most recent information on your website by doing this. By creating and maintaining a sitemap.xml, you're taking a proactive step toward improving your website's SEO performance. So, why not watch your site soar in search engine rankings? 🚀
#technical seo#seo#seo company#seo marketing#seo services#technical services#technical skills#seo optimization
4 notes
·
View notes
Text
Technical SEO refers to the practices and techniques used to optimise a website’s technical infrastructure and architecture in order to improve its visibility and ranking in search engines. It’s an important component of SEO because it helps to ensure that search engines can crawl and index a website’s pages efficiently, which is necessary for the... Technical SEO refers to the practices and techniques used to optimise a website's technical infrastructure and architecture in order to improve its visibility and ranking in search engines. It's an important component of SEO because it helps to ensure that search engines can crawl and index a website's pages efficiently, which is necessary for the website to rank well in search results. There are several factors that can affect it, including the website structure, the use of header tags, the presence of broken links, the speed of the website, and the use of mobile-friendly design. To do it well, it's important to focus on these and other technical factors to ensure that the website is optimised for search engines. Here are some tips and tricks for beginners looking to improve their technical SEO: Technical SEO Guide - Key PointsUse an XML sitemapUse header tagsFix broken linksOptimize website speedUse a mobile-friendly designURL structurePage titles and meta descriptionsImage optimizationInternal linkingUse of social media tagsConcluding our Technical SEO guide. Use an XML sitemap An XML sitemap is a file that lists all of the pages on a website and helps search engines understand the structure and organisation of the site. Creating and submitting a sitemap to search engines can help to improve the crawlability of a website. Use header tags Header tags (H1, H2, etc.) help to structure the content of a webpage and make it easier for search engines to understand the hierarchy of the information on the page. Using header tags appropriately can help to improve the SEO of a website. Fix broken links Broken links can be frustrating for users and can also hurt a website's SEO. Regularly checking for and fixing broken links can help to improve the user experience and the SEO of a website. Optimize website speed A slow-loading website can be frustrating for users and can also hurt a website's SEO. Optimising the speed of a website can help to improve the user experience and the SEO of the site. If you use WordPress, there are lots of speed optimisation plugins available, for example. You could install one, or a combination, to achieve the results you need. Use a mobile-friendly design With more and more users accessing the internet from mobile devices, it's important to ensure that a website is mobile-friendly. Since Google and other search engines are becoming mobile-first in their approach to scoring your site for their indexes, using a responsive design or a separate mobile version of the website can help to improve the SEO of the site. URL structure Having a clear and logical URL structure can help search engines understand the content of a website and can also make it easier for users to navigate the site. Page titles and meta descriptions Page titles and meta descriptions are HTML elements that appear in the search results and can help to inform users about the content of a page. Including relevant keywords and a compelling description in these elements can help to improve a website's SEO, but avoid keyword stuffing. Image optimization Optimising images by using relevant file names and alt text can help to improve the SEO of a website. It can also help to ensure that the images on a website load quickly, which can improve the user experience. Internal linking Internal linking refers to the practice of linking to other pages on the same website. Internal linking can help to improve the ranking of a website by helping search engines understand the structure and organisation of the site and by helping users navigate it. For example, if you want a page to rank for
Pillar Pages in SEO, then you'd definitely want a page about Technical SEO to link back and vice-versa, to help build a topic cluster around the topic and demonstrate the concept. Use of social media tags Including social media tags (such as Twitter Cards and Open Graph tags) on a website can help to improve the SEO of the site by allowing social media platforms to better understand and display the content of the website. Concluding our Technical SEO guide. Technical SEO refers to the practices and techniques used to optimise a website's technical infrastructure and architecture in order to improve its visibility and ranking in search engines. There are many factors to consider, including the website's structure and organisation, the use of header tags and other HTML elements, the presence of broken links, the speed of the website, and the use of mobile-friendly design. Other important factors include the website's URL structure, the use of relevant keywords in page titles and meta descriptions, the optimization of images, the use of internal linking, and the inclusion of social media tags. By working on these points, as well as creating a solid Local SEO presence, you can definitely help to improve the visibility and ranking of your website in search engines. This article was first published on AIO Spark: https://www.aiospark.com/technical-seo-a-rough-guide?utm_source=Tumblr&utm_medium=fs-share&utm_campaign=auto-social
2 notes
·
View notes
Text
10 Essential WordPress Plugins Every Business Website Should Have in 2025

Building a website with WordPress gives you a huge advantage: plugins. These handy tools extend the functionality of your site — allowing you to add features without writing a single line of code.
But with over 60,000 plugins available in the WordPress repository, choosing the right ones can be overwhelming. Whether you're setting up a local business site or a full-fledged online store, this guide will help you select the most essential plugins to make your site faster, more secure, and easier to manage.
Need help installing and configuring plugins? A reliable WordPress Development Company in Udaipur can assist you in customizing your site professionally.
What Are WordPress Plugins?
Plugins are like apps for your website. They allow you to:
Add contact forms
Improve SEO
Secure your site
Create backups
Sell products online
Track website analytics
Instead of coding features manually, you install plugins that handle the job.
1. Yoast SEO – Optimize for Search Engines
Yoast SEO is the most popular SEO plugin and a must-have for any business website.
Key Benefits:
Add custom meta titles and descriptions
Generate XML sitemaps
Get real-time SEO analysis for content
Improve click-through rates with schema markup
Yoast helps your website appear higher on Google and ensures that every blog or page is optimized for search engines.
2. WPForms – Build Contact and Inquiry Forms
Want customers to contact you? Use WPForms to easily create:
Contact forms
Booking request forms
Feedback and quote request forms
Its drag-and-drop builder is beginner-friendly, and you can integrate email notifications, spam protection, and CRM tools easily.
3. WooCommerce – Set Up Online Selling
For product-based businesses, WooCommerce turns your website into a complete e-commerce store.
Features Include:
Product listings with filters
Secure payment gateways (Razorpay, Stripe, PayPal)
Inventory and shipping management
Discount codes and tax settings
WooCommerce powers over 25% of all online stores — and it’s free!
4. Wordfence Security – Protect Against Hacks
Security is critical, especially if you collect user data or accept payments. Wordfence provides real-time protection by:
Blocking suspicious login attempts
Scanning files for malware
Enabling 2-factor authentication
Providing firewall protection
It keeps your WordPress site safe from bots, brute-force attacks, and vulnerabilities.
5. UpdraftPlus – Automate Backups
Imagine your website crashing or being hacked — and losing everything. UpdraftPlus ensures that never happens.
With it, you can:
Schedule automatic daily/weekly backups
Store backups on cloud services (Google Drive, Dropbox)
Restore your site in one click
It’s a peace-of-mind plugin every business should have.
6. LiteSpeed Cache – Speed Up Your Website
Website speed matters. It affects both user experience and SEO rankings. LiteSpeed Cache boosts your website's speed by:
Caching pages and files
Optimizing images and CSS/JS files
Integrating with CDN services
This ensures your visitors stay longer — and Google ranks you higher.
7. MonsterInsights – Google Analytics Made Easy
Want to know how visitors find and use your website? MonsterInsights helps you integrate Google Analytics and gives insights right inside your WordPress dashboard.
You can track:
Pageviews
Bounce rate
Referral traffic
E-commerce conversions
It’s great for making data-driven decisions to improve performance.
8. Smush – Image Compression Without Quality Loss
Large images slow down your site. Smush automatically compresses and resizes images without losing quality, improving your load times.
Key features:
Lazy loading
Bulk image optimization
Auto-resize on upload
Faster images = better user experience.
9. WPML – Make Your Site Multilingual
If your business serves a multilingual audience, WPML lets you:
Translate content into multiple languages
Add language switchers
Maintain SEO for each version
It’s ideal for tourism businesses, international brands, or service providers expanding beyond one region.
10. Redirection – Manage Broken Links and Redirects
Broken links hurt your SEO and frustrate users. Redirection helps you:
Set up 301 redirects
Track 404 errors
Improve site structure over time
It’s a lightweight but powerful tool for keeping your site user- and SEO-friendly.
How to Avoid Plugin Overload
Too many plugins can slow down your site and cause conflicts. Here’s how to manage them smartly:
Only install well-rated, updated plugins
Avoid multiple plugins that do the same job
Deactivate and delete unused ones
Monitor speed and functionality after adding new plugins
Pro tip: Use a staging site to test new plugins before applying them on your live site.
When to Hire a WordPress Plugin Expert
Plugins are easy to install, but configuration, compatibility, and performance tuning often require a professional’s touch.
A seasoned web design company in Udaipur can:
Recommend the right plugin stack based on your industry
Customize plugins without bloating your site
Optimize speed, security, and backups
Monitor plugin health over time
This ensures your business website is both functional and future-ready.
Final Thoughts: Plugins Build Power Into Your Website
WordPress plugins are what make the platform so flexible and scalable. By choosing the right set of tools, your business website can:
Generate leads
Sell products
Rank higher on search engines
Stay fast and secure
Offer great user experience
But with great power comes great responsibility — choose wisely, update regularly, and don’t hesitate to get expert help.
0 notes
Text
Learn How to Build a WordPress Block Theme Style Variation — Speckyboy
New Post has been published on https://thedigitalinsider.com/learn-how-to-build-a-wordpress-block-theme-style-variation-speckyboy/
Learn How to Build a WordPress Block Theme Style Variation — Speckyboy
WordPress block themes offer plenty of flexibility. You can make style and layout changes within your web browser – no coding knowledge is required. They can also include extras like block patterns and style variations.
Style variations give you a head start on design. They allow us to create multiple color and typography combinations. They also house custom block styles defined in the Site Editor. Anything in a theme.json file can also be included in a style variation.
This is handy for web professionals and users alike. Choose the variation that suits your needs and start building your site.
Creating a custom block theme style variation is easier than you think. The entire process takes place in the WordPress Site Editor. A simple variation can be built in minutes.
So, follow along as we build a style variation! We’ll show you how to point and click your way to a custom design.
Style Variation Project Requirements
The requirements for building a custom style variation are minimal. You’ll need:
We don’t recommend using a production website for this process. A staging or local WordPress installation is the safer way to go.
Let’s Build a Style Variation
Now, it’s time to start building! Log in to your WordPress website and follow the steps below.
Step 1: Open the WordPress Site Editor
First, navigate to Appearance > Editor in the WordPress admin to open the Site Editor. Then, click the Styles link in the left sidebar.
The Styles panel includes links for Typography, Colors, Background, Shadows, and Layout. You’ll also find a Browse Styles link that displays available style variations for the theme.
Finally, the Blocks link allows you to customize individual block styles across the site.
Step 2: Change Your Theme’s Styles
This step is all about personal preference. Work your way through the Styles panel and start making changes.
Color and typography are the most obvious changes, but you can take things further. For example, you can change the layout width and spacing. Plus, every block included with WordPress can be customized. Add margins, padding, borders, or custom CSS.
We covered the basics in our variation, including:
Created a custom color palette;
Installed new fonts from Google Fonts;
Added custom spacing for the Group and Paragraph blocks;
Changed the look of the Button block;
The result is an earthy look that aims for simplicity. But you can do as much or as little as you like. Just remember to save your changes when done.
Step 3: Save Your Style Variation
Our next task involves saving our custom style variation. This functionality is part of the Create Block Theme plugin.
The feature is located within the Site Editor. Here’s how to find it:
While in the Site Editor, click on the right panel, highlighted in green below:
Click the wrench icon on the upper right of the screen and select Create Theme Variation:
Name the variation and ensure the Save Fonts box is checked. We’ll call ours “Beautiful Earth.”
Click the Create Theme Variation button to save the settings.
Once saved, the new variation is added to the list in the Browse Styles area of the theme editor. Hovering over the variation reveals its name.
How to Use Your Style Variation on Another Site
Style variations are portable and can be used on multiple websites. The process involves copying the generated JSON file and adding it to the desired site.
Locate the style variation’s JSON file in /wp-content/your-theme/styles/ Replace your-theme with the name of the theme you’re using (ours is twentytwentyfive).
For reference, our JSON file is called beautiful-earth.json
Copy your style variation’s JSON file.
On your new website, paste the file into /wp-content/your-theme/styles/ – you may need to upload the file via SFTP or your web host’s file manager.
You’ll now be able to choose the style variation within the Site Editor.
About Custom Fonts
Earlier, we mentioned the ability to add custom fonts to a style variation. It requires a few extra steps to work when moving your variation to a new site.
Locate the custom fonts you added at /wp-content/themes/your-theme/assets/fonts/
Copy each font’s respective folder.
Paste the font folders into the same directory on your new site. Once again, you may need to upload them.
Give Your Block Theme a Custom Look
Style variations are a convenient way to add personality to your block theme. You can build them to suit your project requirements.
They also act as a starting point for designers. You can continue to add custom styles after applying a variation. The changes you make will be saved in the site’s database.
There’s also an option to reset the styles to the variation’s defaults. That makes it easy to experiment without losing the key elements of your design.
The best part is that style variations don’t require coding expertise. That puts custom design within everyone’s reach.
Related Articles
Related Topics
Written by Eric Karkovack
Eric Karkovack is a web designer and WordPress expert with over two decades of experience. You can visit his business site here. He recently started a writing service for WordPress products: WP Product Writeup. He also has an opinion on just about every subject. You can follow his rants on Bluesky @karks.com.
Read more articles by Eric Karkovack
#ADD#admin#Articles#assets#background#borders#box#browser#Building#Business#change#coding#Color#colors#content#CSS#Database#Design#designers#displays#earth#easy#folders#fonts#Google#google fonts#green#how#how to#How to Use
1 note
·
View note
Text
Jobs Portal Nulled Script 4.1

Download the Best Jobs Portal Nulled Script for Free Are you looking for a powerful, customizable, and free job board solution to launch your own employment platform? The Jobs Portal Nulled Script is your ideal solution. This fully-featured Laravel-based job board script offers premium functionality without the high cost. Whether you're building a local job site or a global hiring platform, this nulled script gives you everything you need—completely free. What is the Jobs Portal Nulled Script? The Jobs Portal Nulled Script is a premium Laravel-based job board application designed for businesses, HR agencies, and entrepreneurs who want to build a seamless job posting and recruitment website. The script comes packed with advanced features like employer and candidate dashboards, resume management, email notifications, location-based job search, and more—all without any licensing fees. Why Choose This Nulled Script? Unlike expensive premium plugins or themes, this Jobs Portal Nulled Script offers unmatched value. It provides a user-friendly interface, customizable design, and enterprise-level tools to make recruitment easier for both job seekers and employers. Plus, it's completely free to download from our site, allowing you to save money while building a professional job board. Technical Specifications Framework: Laravel 8+ Database: MySQL 5.7 or higher Language: PHP 7.4+ Responsive Design: Fully mobile-optimized API Ready: RESTful API endpoints available SEO Optimized: Built-in tools for on-page SEO Top Features and Benefits Employer & Candidate Dashboards: Tailored experiences for recruiters and job seekers. Smart Resume Management: Easily manage and filter resumes by job category and skills. Advanced Job Search: Location and keyword-based filtering for accurate results. Email Alerts: Automated job notifications for registered users. Payment Integration: Support for paid job postings with multiple gateways. Multi-language Support: Reach users across the globe effortlessly. Who Can Use This Script? The Jobs Portal Nulled Script is versatile and ideal for: HR agencies wanting a digital recruitment platform. Startups looking to monetize job listings or applications. Universities or colleges offering campus recruitment tools. Freelancers who want to provide job board services to clients. How to Install and Use Installing the Jobs Portal Nulled Script is straightforward: Download the script from our website. Upload the files to your server using FTP or a file manager. Create a MySQL database and import the provided SQL file. Edit the .env file to include your database credentials. Run the Laravel migration and seed commands to set up the tables. Visit yourdomain.com to start configuring your job portal! No technical expertise? No worries. The documentation provided makes it easy even for beginners to set up a complete job board system. FAQs – Frequently Asked Questions Is the Jobs Portal Nulled Script safe to use? Yes, we carefully scan and verify all files to ensure they are free of malware or backdoors. However, always install scripts in a secure environment. Can I customize the script? Absolutely. Since it’s built on Laravel, you have full control to customize routes, models, views, and controllers to fit your unique business model. Does the script support third-party integrations? Yes. You can integrate third-party services like payment gateways, newsletter tools, and analytics platforms with ease. Is it legal to use a nulled script? While we provide the script for educational and testing purposes, always ensure you comply with local software laws and licensing terms if you go live. Recommended Tools for WordPress Users If you're managing your site with WordPress, we recommend using UpdraftPlus Premium nulled for effortless backups and restoration. For search engine optimization, All in One SEO Pack Pro is a must-have tool to help your website rank faster and more effectively.
Take your online recruitment platform to the next level today. Download the Jobs Portal and build a modern, scalable, and highly effective job board without spending a dime!
0 notes
Text
How fast does your website load? The speed of the website is very important to visitors and business owners. Do you know search engine, Google takes page speed into account when ranking websites? In 2010, Google included site speed in search rankings. If your site responds slowly, the Google rankings of your site would drop. WordPress is a great publishing tool and platform, but its sluggish performance may impact your business and cause a loss of potential customers and subscribers. So what can you do better to boost your site performance? Here are ten quick fixes that will improve the load time of the site.Good HostDo you know 40 percent of website visitors leave a website that takes more than 3 seconds to load? Poor website performance and page load speed adversely impact any business and end up losing potential sales. For business, it’s critical to have their websites stay up and running all the time with great performance, security and reliability. A fast web host can give your website great speed boost and responsiveness. It’s not only good for your business and website visitors, but also helpful for SEO (search engine optimization). If your web host is decelerating your business, it’s time to replace. Here is a list of trusted and fast hosting providers for wordpress.If you can afford, you must also consider dedicated hosting options.Caching PluginThere are many ways, one can improve the speed of a WordPress website, one of the techniques is caching. A cache is an interim storage place where developers store data of a particular website. When the visitors return to pages they have recently visited, the data from the cache files are utilized to load up the pages rather than downloading it again. The stored data take some place and slow down your website’s performance. You can manage to cache, simply by installing WordPress plugins. At the same time installing many plugins may add lots of trash to your site and site files, therefore, remove the unwanted or inactive plugins. One of the most popular caching solutions is W3 Total Cache and WP Super Cache.Content Delivery Networks (CDN) A content delivery network (CDN) is a distributed servers system that replicates your site on all of their location nodes. When the visitors request your site, the closest server location will serve the request. A CDN clone all the static files including CSS, JavaScript, media files, images and more, and allow visitors to download them as quick as possible by serving the files on closest servers.You can speed up your WordPress website with a Content Delivery Network. The content will be delivered faster to the user because the CDN server will be closer to the user geographically. It also protects from traffic spikes. CDNs are usually not very cheap however you can always create your own low cost CDN using open source software.Compressing ImagesA large number of images on a website not only slows down your web page to a crawl but also takes bandwidth. In general, one should use JPEG for photographic images and GIF or PNG-8 for text. Another option is compression of images; you can resize images, but make sure the quality of the image is not comprised. You can use the WP SmushIt plugin, WPMU DEV WordPress Smush API. In case, you don’t want to install this plugin, you can always use free programs such as Paintshop Pro, Gimp or Image Compressor.Optimizing Your DatabaseWordPress uses the database to store web posts, web pages, comments, trashed items, Pingbacks, settings and plugin information. The entire database-driven site requires optimization of the database as it automatically saves everything. Whenever a web page is reloaded it reads your database. If the database is heaving, it may take a longer time to display the information. It’s very important to optimize your database because the page load speed affects your business performance accordingly. To manage the database optimization, you can always use the WP-Optimize plugin or WP-DB Manager,
these options not only allows you to optimize your database but program next regular database optimization. Choose a Good Theme Choosing the right theme framework is very important as it is also one of the factors influencing the speed of your WordPress Website. Before you apply any theme, watch the load speed of the theme’s demo page. Many WordPress themes are extremely slow and poorly coded result in slowing your site to load. Nowadays, I recommend people to apply Twenty Sixteen- the newest default WordPress Theme. The Twenty Sixteen theme is built on a responsive approach that means all your images are a perfect fit, you can watch them resize on any of your devices. Some good and popular themes can found on ThemeForest. Pick themes that have high rating and good user review comments.Enable Keep-AliveKeep-Alive is a way to allow the same single Transmission Control Protocol (TCP) connection for HTTP conversation instead of opening a new request. It not only allows the user’s system to download multiple files without repetitively requesting for permission but saves bandwidth as well. To enable Keep-Alive, just copy and paste the code Header set Connection keep-alive in your .htaccess file.Use a Quick Caching PluginCaching is an important process as it provides the web content to the visitors, without requesting it from the database every time they send a request. As we have discussed earlier, using a caching plugin simplifies the process and serves the content to the visitors from the cache. You can use W3 Total Cache plugin to cache the content. It reduces a lot of processing on the servers.Optimizing CSS, Java Scripts Files Merging many small CSS files and JavaScript files into one big file reduce request on the server. The compressing of files will improve the speed to retrieve the files. You can use sub domains to share the load, lower the number of dynamic HTTP calls. Secondly, use external scripts in your header.php file, this allows the browser to cache the script. You can use the WP Minify (automated approach) or the YUI Compressor (manual approach) to minify your site CSS and JavaScript files. Optimizing Your HomepageThere are many ways you can optimize the structure the homepage, you can post short excerpts instead of full posts. Secondly, bring down the number posts displayed on the Home page, displaying 5 to7 posts would be great. Get rid of inactive widgets and plugins, also, remove unwanted sharing widgets from the home page. Remove Unwanted PluginsYou may want to cleanup unused or less used plugins. Sometimes too many plugins affect the wordpress performance. Also avoid installing plugins from untrusted developers. One bad plugin can ruin your whole website performance.ConclusionToday, web users want websites to be lightning fast. After applying these simple measures and tips, you can make a great difference in your WP website speed. WordPress is a great platform, with some hacks and add-on you can actually pick up excellent website speed. Optimizing your website would also encourage visitors to revisit the website and deliver a great user experience.Saurabh Sharma is a dedicated Wordrpess developer and content writer at Girnar Software SEZ Private Limited – a company that offers best Wordpress CMS Development Services in India & USA. He has been in web design & development industry for 5+ years and specializes in PHP Programming. Connect with Girnarsoft on Twitter @girnarsoft
0 notes
Text
Fix 403 Forbidden Error: Understanding Server Permissions Gone Wrong
When your website refuses to let you in, it’s often not personal—it’s a server permission problem. This in-depth description of how to fix 403 Forbidden Error breaks down common causes such as incorrect file permissions, corrupted .htaccess files, or DNS misrouting. It explains how these silent backend gremlins create a wall between you and your visitors, and what steps to take to resolve them safely.

Learn about file structures, how WordPress plugins may trigger access blocks, and the importance of setting correct folder and file permission levels via FTP clients. Whether you're facing this issue on your business site or personal blog, the detailed fix strategies outlined here empower you to take action without breaking your site’s structure. DNS settings, index file uploads, and malware scans also make the list of fixes.
This guide also reminds you why regular security checks, plugin audits, and proper CDN configurations can prevent the issue from recurring. For professionals, developers, or even bloggers managing their own sites, this resource is a must to keep your website running smooth and accessible. Fixing the 403 error isn’t a patch job—it’s a structural audit. This guide doesn’t just patch the hole; it lays new bricks for future protection.
0 notes
Text
Top 10 Essential Plugins Every WordPress Developer Should Know
WordPress has evolved into one of the most powerful and flexible content management systems available today. With over 40% of the web powered by WordPress, developers have an incredible opportunity to build robust, high-performing websites tailored to any niche or industry.
One of the key reasons behind WordPress's popularity is its vast plugin ecosystem. Plugins enhance functionality, streamline development, improve security, and boost performance—saving developers time and effort. But with over 60,000 plugins in the WordPress repository, choosing the right ones can be overwhelming.
To help you cut through the noise, here are 10 essential WordPress plugins every developer should know. Whether you’re building custom themes, working on client projects, or managing your own website, these tools are must-haves in your toolkit.
1. Advanced Custom Fields (ACF)
Purpose: Add and manage custom fields
Advanced Custom Fields is a staple for WordPress developers. It allows you to add custom fields to posts, pages, users, and more—giving you complete control over content structure.
Whether you're building a real estate site with custom listings or a portfolio with dynamic content types, ACF simplifies data entry and enhances your site's flexibility.
Why it’s essential:
User-friendly interface for clients
Supports complex field types (repeaters, galleries, flexible content)
Saves development time
2. Yoast SEO
Purpose: Optimize site for search engines
While it’s widely known among content creators, Yoast SEO is also an important tool for developers. It ensures that every page and post is properly optimized with SEO best practices in mind.
For developers, Yoast offers customizable breadcrumbs, schema integration, and control over robots.txt and sitemaps.
Why it’s essential:
Enhances search visibility
Adds structured data
Developer-friendly filters and actions
3. WP Rocket
Purpose: Performance optimization
Speed is a ranking factor and a user experience booster. WP Rocket is a powerful caching plugin that makes WordPress sites load faster with minimal configuration.
It handles page caching, browser caching, lazy loading, database cleanup, and CDN integration—all in one.
Why it’s essential:
Boosts Core Web Vitals
Developer hooks for customization
Compatible with eCommerce and multilingual sites
4. Query Monitor
Purpose: Debugging and performance analysis
Query Monitor is a must-have for diagnosing issues in WordPress development. It tracks database queries, PHP errors, hooks, REST API calls, and much more.
If your site is running slowly or you’re dealing with unexpected behavior, Query Monitor helps pinpoint the problem quickly.
Why it’s essential:
Real-time debugging
Works with themes and plugins
Identifies performance bottlenecks
5. Custom Post Type UI
Purpose: Create and manage custom post types and taxonomies
WordPress development often involves creating custom content structures beyond posts and pages. Custom Post Type UI provides an easy interface for registering custom post types and taxonomies without touching code.
It’s perfect for speeding up development and can be used alongside ACF for full control over content models.
Why it’s essential:
No-code setup for post types
Export functionality for use in themes/plugins
Saves hours of manual coding
6. Duplicator
Purpose: Site migration and backup
Duplicator makes it easy to clone, move, or back up a WordPress site. Whether you're moving from staging to production or delivering a completed project to a client, this plugin simplifies the process.
It packages your site files and database into a single archive for easy deployment.
Why it’s essential:
Hassle-free migrations
Great for creating boilerplate templates
No need for manual database edits
7. WP All Import
Purpose: Import data into WordPress
When working with client data, bulk content, or WooCommerce products, WP All Import is an invaluable tool. It allows you to import data from XML or CSV files into any post type.
It integrates seamlessly with ACF, WooCommerce, and custom taxonomies—giving developers control over how data is mapped and displayed.
Why it’s essential:
Handles large datasets
Flexible import options
Developer-friendly with PHP functions
8. User Role Editor
Purpose: Manage and customize user roles and capabilities
In complex WordPress sites, controlling access levels is crucial. User Role Editor lets you fine-tune permissions for different user roles, or even create entirely new roles tailored to your project.
This is particularly helpful for membership sites, eLearning platforms, and client dashboards.
Why it’s essential:
Easy UI for managing capabilities
Useful for multisite setups
Secure role management
9. Regenerate Thumbnails
Purpose: Recreate image sizes
When changing themes or modifying image dimensions in your functions file, WordPress doesn’t automatically apply those changes to existing media. Regenerate Thumbnails lets you update image sizes in bulk.
This ensures consistency in your layouts and prevents layout issues.
Why it’s essential:
Saves hours of manual editing
CLI support for automation
Works well in dev and production environments
10. Wordfence Security
Purpose: WordPress site security
Security should never be an afterthought. Wordfence offers real-time threat defense, malware scanning, login protection, and firewall features to keep your WordPress sites safe.
While developers might also work with server-level tools, Wordfence provides an easy layer of protection that’s client-friendly and highly effective.
Why it’s essential:
Real-time firewall and malware scanning
Brute force protection
Detailed traffic and threat reports
Final Thoughts
The WordPress plugin ecosystem is vast, and while there’s no one-size-fits-all solution, these ten plugins provide a solid foundation for any WordPress developer. They help speed up workflows, improve site performance, enhance SEO, secure data, and streamline debugging.
As a developer, knowing when and how to use these tools—and when to avoid unnecessary plugins—is part of mastering WordPress. Choose wisely, keep your stack lean, and always test for compatibility in your development environment.
Are there any plugins you can’t live without? Let us know in the comments!
0 notes
Text
The Future of Mobile Applications: How Technology is Transforming the Way We Interact
Every e-commerce person needs to know how to build pages with WP bakery page builder. This theme provides support for the Visual Composer plugin as well as a custom-made plugin named “Visual Composer Extension” for our customers. The Visual Composer plugin and extension adds a range of drag-and-drop plugins to your dashboard, allowing you to create your site quickly and easily. This theme provides support for the Visual Composer plugin as well as a custom-built plugin named “Visual Composer Extension” for our customers.
The Visual Composer plugin and extension adds a plethora of drag-and-drop plugins to your dashboard, allowing you to create your site quickly and easily. Creating pages for your WordPress platform is also as simple as a few clicks and drag-and-drop operations with WPBakery Page Builder‘s elaborate but intuitive front-end and back-end editors. I’ll teach you how to add WPBakery Page Builder to your WordPress installation and walk you through all of the key features in this Visual Composer guide.
Requirements for WP Bakery Page Builder
You’ll need the following items to follow along with this WPBakery Page Builder tutorial:
WordPress 5.0 or higher is essential.
a subscription to Envato
In addition, I recommend reading the following article to better understand how to use Visual Composer and why you should use WPBakery Page Builder instead of any of the other page-builder plugins available today:
WPBakery Page Builder Installation
WPBakery Page Builder is a WordPress premium plugin. It’s available on Code Canyon, so sign up with your Envato account and buy a license. It’s still commonly is in reference as Visual Composer. Once you’ve paid for it, you’ll be able to download a ZIP file containing various plugin data.
Look for a file called js composer.zip after extracting the ZIP file. This is a WordPress plugin archive file that you must add to your server. So, go to Plugins > Add New in your WordPress admin line. Then pick js composer.zip from the Upload Plugin drop-down menu. To begin the update, click the Install Now button. When the installation is over, click the Enable Plugin button. You’ll be guided to the WPBakery Page Builder welcoming screen as soon as you do so.
Make Sure WPBakery Page Builder Plugin Is Installed & Active
Make sure the WPBakery Page Builder plugin is turned on. Since this plugin is not included with the theme (for good reason), it must be installed and allowed as described in the “Installing Recommended Plugins” guide. You should have been asked to install the recommended plugins after downloading the theme. Now is the time to install the Visual Composer if you haven’t already.
Configuring the WP Bakery Page Builder Plugin
It’s easy to learn how to use WPBakery Page Builder. The plugin is highly customizable, with hundreds of configuration choices to tailor it to your specific needs. To see them, press the Settings button on the welcome pad.
WP Bakery Page Builder with general settings
The plugin comes with a well-thought-out default setup that will suffice for the majority of use cases. For example, you can see that it supports responsive design right out of the box in the General Settings tab. The plugin also attempts to add different optimizations so that the pages you generate with it load quickly. For example, it defaults to using only the Latin script subset of Google fonts. All you have to do is change the Google fonts subsets option to accept other scripts.
You’ll note that this plugin is only available for your WordPress site’s pages in the Role Manager tab. Select Custom in the Post styles list and allow the post feature if you want it to be eligible for your posts as well.
Configuring post types:
Scroll down and press the Save Changes button once you’ve made the changes.
Finally, go to the Template Options tab and search the Use custom design area if you want to configure the look and feel of WPBakery Page Builder’s content elements. You’ll be able to adjust the plugin’s pre-set colors, margins, and widths after you’ve done so.
Define Main Settings for WP Bakery Page Builder
To configure the plugin, go to Settings > WPBakery Page Builder. The most crucial step is to turn on the composer for the post forms you choose to use it for. This is achieved through the “Role Manager” tab and the “Post Types” options. You can make the page builder accessible based on the user function, but you’ll really just want to change the “Administrator” settings.
Using the WP Bakery Page Builder Plugin
The Visual Composer is really simple and doesn’t need much explanation; for a short guide, see the screenshots below (you can also check out this more detailed Visual Composer guide). To begin, choose if you want to use the Backend or Frontend editor and press the appropriate button.
The Visual Composer Backend Editor
In this Visual Composer tutorial, this is a crucial step. There are two powerful editors included with WPBakery Page Builder: a back-end editor and a front-end editor. They can only be accessed from inside a website or a tweet. As a result, I recommend that you make a new page by heading to Pages > Add New for the time being. You can select which editor you want to use in the page construction GUI. To open the backend editor, first press the Backend Editor button.
You can conveniently connect a number of widely used elements to the website using this editor. Simple elements including text blocks, pictures, and separators are available in WPBakery Page Builder. Advanced features include Facebook “Like” icons, Google Maps, charts, and animated carousels. The components are grouped into four groups for easy access: text, social, structure, and WordPress widgets.
The elements that are available are listed below:
Content elements, as the name implies, are elements that are often used to construct the contents of a blog or an article. Social features, on the other hand, are ones that make it simple for people to share your profile on social media sites. Structure components, on the other hand, are intended for more experienced users who are familiar with writing code. They allow you to add raw HTML and JavaScript to your website directly.
To add an element, simply click the Add Element button and choose the desired element. Alternatively, you should use the Add Text Block button to add text to the website directly.
Text editor
If you don’t like the way an aspect looks by default, you can always change its styles by going to the Design Options page. Once you’ve added a few items, you’ll find that each one has a toolbar with a few buttons associated with it. These buttons show intuitive icons and enable you to perform essential operations like dragging and dropping an entity to alter its position, duplicating, removing, or editing its contents.
Keep in mind to save your page once you’ve finished adding components.
The Visual Composer Frontend Editor
The frontend Visual Composer has the same page building choices as the backend Visual Composer. The main distinction is that instead of position holders, you will see the individual page elements when you insert theme.
Using the WYSIWYG Front-End Editor
The back-end editor is perfect for pages with a number of elements that are lengthy and complicated. You get to deal on the final presentation of your website right from the start if you use the WYSIWYG front-end editor instead. You can swap between editors at any time, so scroll up and click the Frontend Editor button to launch the latest one.
Frontend Editor
Only when you mouse over a feature in this editor can you see the toolbars associated with it. Toolbars and the features they provide are somewhat close to those provided by the back-end editor in frontend editors demo options. You will now see how the website appears on different screen sizes using the front-end editor. You can also continue editing the page in whatever screen size you choose.
Using Templates
Using models is another critical part of learning how to use WPBakery Page Builder. Any page or post you make with WPBakery Page Builder can be turned into a prototype. You will reduce the amount of tedious work you do when making pages for your WordPress site by using this feature.
Open the Templates dialogue, assign the template a tag, and click the Save Template button to save the new layout of your page as a template.
Save the template in the Save Template dialogue box
Working with your own models isn’t the only choice. This plugin has a huge template library that is maintained on a daily basis. Switch to the Template Library tab and hit the Access Library button to access the library. In the template library, you’ll find that the library has a large number of high-quality layout models. You will do any of them for free. However, before you can use them, you must first unlock your WPBakery Page Builder certificate.
0 notes
Text
Structured Data for Product Images

In today's digital marketplace, product images are more than just visuals—they're the silent salespeople of your online store.
But what if your product images could speak directly to search engines and increase your visibility?
That’s exactly what structured data does for you. As an eCommerce seller or marketer, understanding structured data for product images can make or break your product’s online visibility.
How to Resize Image for Amazon is just one part of optimizing your visuals—but structured data takes it to a whole new level.
At Clipping Way, we specialize in Image Clipping Path Services that make your product images not just look perfect—but work perfectly.
With affordable pricing, a Free Trial, and instant quotation, we help your images get seen and sell.
What Is Structured Data for Product Images?
Structured data is a standardized format for providing information about a page and classifying the page content.
When applied to product images, structured data helps search engines understand what’s in the image, how it's related to the product, and when it should be shown in rich snippets or Google Shopping results.
For example, using structured data, you can tell Google:
This image is the primary product image.
This image shows a side view.
This image is meant for mobile display.
When your images are marked up correctly, your products are more likely to appear with enhanced features in search results, which can lead to more clicks and conversions.
Why Structured Data for Product Images Matters
Imagine spending hours creating high-quality product photos but not getting any visibility. Without structured data, your images are practically invisible to search engines.
Here’s why structured data matters:
Improved SEO Visibility: Structured data helps Google and other search engines index your images more accurately.
Better User Experience: Rich product previews often lead to higher click-through rates.
Enhanced E-commerce Performance: Product listings with image metadata convert better.
And here’s the kicker: Structured data isn't just about SEO.
It enhances accessibility, supports machine learning tools, and provides consistency across platforms like Amazon, eBay, Shopify, and WooCommerce.
How to Implement Structured Data for Product Images
Adding structured data can be done in various formats, including JSON-LD (preferred by Google), Microdata, or RDFa. For most eCommerce sites, JSON-LD is the easiest and most effective.
Here's a simplified example:
{ "@context": "https://schema.org/", "@type": "Product", "name": "Premium Leather Wallet", "image": [ "https://example.com/images/wallet-front.jpg", "https://example.com/images/wallet-side.jpg" ], "description": "Handmade leather wallet with RFID protection.", "sku": "WAL12345", "offers": { "@type": "Offer", "priceCurrency": "USD", "price": "29.99", "availability": "https://schema.org/InStock" } }
You can add this code to the HTML of your product pages. For platforms like Shopify or WordPress, plugins can simplify this process.
If you're not sure where to start, Clipping Way can help you with both image enhancement and technical optimization.
Clipping Way: More Than Just Clipping Path
At Clipping Way, we know that having the right structured data is only useful if the image is flawless to begin with. That’s why we provide:
Professional Clipping Path Services
Background Removal
Shadow Creation
Image Retouching
Amazon-Ready Image Optimization
With our Free Trial, you can see the quality of our work before you commit. Need a quick estimate? Use our Get Quotation form—it’s fast, accurate, and commitment-free. Best of all? We offer low-cost pricing that doesn’t sacrifice quality.
SEO Tips: Combine Structured Data with Image Optimization
Here are a few bonus SEO tips to maximize the impact of your product images:
Use Descriptive File Names (e.g., leather-wallet-front.jpg)
Add ALT Text with keywords
Compress Images for faster loading
Use Correct Dimensions for each platform (e.g., Amazon, Shopify)
Add Structured Data to each image individually
Need help resizing images for Amazon or optimizing them for other marketplaces? Our team at Clipping Way is just a click away.
FAQs
1. What is the purpose of structured data for product images?
A: Structured data helps search engines understand the content and context of your product images, enabling enhanced visibility in search results.
2. How does structured data affect SEO?
A: It improves click-through rates by making your product listings more engaging in search results through rich snippets and image previews.
3. Do I need a developer to add structured data?
A: Not always. Many eCommerce platforms offer plugins or apps that can help. However, custom-coded websites may require developer assistance—or you can reach out to Clipping Way for help.
4. What kind of images benefit most from structured data?
A: High-quality, clean-background product images benefit the most. This is why our clipping path and retouching services are essential first steps.
5. Can Clipping Way help with Amazon image requirements?
A: Absolutely. We provide resizing, background removal, and shadow effects to meet Amazon’s strict image standards.
Conclusion
Structured data is a hidden gem in the world of eCommerce SEO. It takes your beautifully edited product images and gives them a powerful voice in search engines.
Combined with professional image editing from Clipping Way, your products can outshine the competition, attract more buyers, and boost sales.
Whether you’re just starting or scaling up, our Free Trial, Get Quotation feature, and budget-friendly pricing make Clipping Way your trusted partner for image perfection.
0 notes