#wordpress menu
Explore tagged Tumblr posts
Visit Tumblr Blog
Explore Tumblr blogs with no restrictions, modern design and the best experience.
Last Seen Tumblr Blogs


Fun Fact
Tumblr has 4 main sources of revenue.
Text
How to Add Icons in a WordPress Menu
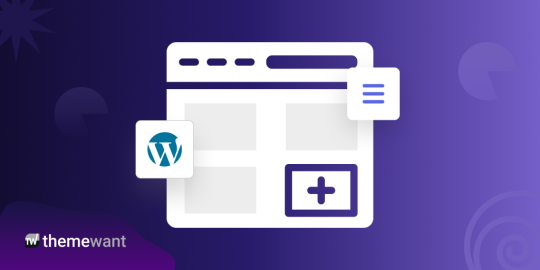
Does your WordPress menu look dull and uninspiring? Without the right visual elements, even the most beautifully designed websites can struggle to hold attention. Navigating your site should be a seamless and engaging experience for visitors, not a chore.
The good news is that adding icons to your WordPress menu can instantly enhance your site’s appeal and user experience.
In this article, we’ll walk you through the simple steps to add icons in a WordPress menu, making your website more attractive, user-friendly, and professional.
Method 1: Adding Menu Icons with Custom Code
If you prefer a code-based approach, follow these steps to add icons to your WordPress menu:
Add Custom Fields to Menu Items
By default, WordPress does not have a built-in option to add icons to menu items. To achieve this, we’ll use the “CSS Classes” option.
Go to your WordPress dashboard and navigate to “Appearance” > “Menus.”
In the top-right corner, click on “Screen Options” and check the “CSS Classes” box to enable it.
Add a Custom CSS Class to Each Menu Item
For each menu item, add a unique CSS class under the “CSS Classes” field (e.g., menu-icon-home, menu-icon-about).
Add Custom CSS to Display Icons
Next, you need to add some custom CSS to display the icons. You can add the CSS in “Appearance” > “Customize” > “Additional CSS” or in your theme’s style.css
Method 2: Adding Menu Icons with the Easy Menu Icons Plugin
If coding isn’t your preferred method, the “Easy Menu Icons” plugin provides a simple and intuitive way to add icons to your menus.
Install the Easy Menu Icons Plugin
Navigate to “Plugins” > “Add New” in the WordPress dashboard.
Search for “Easy Menu Icons” and install it.
Activate the plugin.
Add Icons to Menu Items
Go to “Appearance” > “Menus” and edit your menu.
For each menu item, you’ll find an option to add an icon.
The free version supports Dashicons, while the premium version includes more than 8 different types of icon fonts and allows adding custom images like SVG, PNG, and JPG.
Save Your Menu
Once you’ve added the icons, click “Save Menu” to update your website.
Process to add Menu Icon
Read Full Article >>
0 notes
Text
How to Easily Add Social Media Buttons to Your WordPress Website

Are you looking to boost your WordPress website's social media presence? Adding social media buttons can be a great way to encourage visitors to connect with you on various platforms. In this guide, we'll walk you through the simple steps to add social media buttons to your WordPress site. But before we dive in, if you're interested in integrating social media icons directly into your WordPress menu, check out our comprehensive guide on How to Add Social Media Icons to WordPress Menu.
Why Add Social Media Buttons?
Social media buttons serve as convenient shortcuts for visitors to follow your profiles, share your content, and engage with your brand. By incorporating these buttons into your WordPress site, you make it easier for users to interact with you across different platforms, ultimately increasing your online visibility and fostering community engagement.
Choosing the Right Social Media Buttons Plugin
The first step in adding social media buttons to your WordPress website is selecting the right plugin. Fortunately, there are numerous plugins available that make this process quick and hassle-free. One popular option is the "Simple Social Icons" plugin, which allows you to customize the appearance and placement of your social media buttons with ease.
Installing and Activating the Plugin
Once you've chosen a social media buttons plugin, the next step is to install and activate it on your WordPress site. To do this, navigate to the "Plugins" section of your WordPress dashboard, click on "Add New," and search for your chosen plugin. Once you've found it, click "Install Now" and then "Activate" to enable the plugin on your site.
Configuring Your Social Media Buttons
After activating the plugin, you'll need to configure it to display the social media buttons of your choice. Typically, this involves entering the URLs for your social media profiles and adjusting any settings related to button appearance or placement. Most social media button plugins provide intuitive interfaces that make this process straightforward and user-friendly.
Adding Social Media Buttons to Your Website
Once you've configured the plugin to your liking, it's time to add the social media buttons to your WordPress website. Depending on the plugin you've chosen, this may involve using a shortcode, widget, or customizer option to insert the buttons into your site's design. Simply follow the plugin's instructions for adding the buttons to your desired location, whether it's in the sidebar, footer, or elsewhere on the page.
Optimizing Your Social Media Buttons
To maximize the effectiveness of your social media buttons, consider their placement and design carefully. Position them prominently on your website where they're easily visible and accessible to visitors. Additionally, choose button styles and colors that align with your site's overall aesthetic and branding. By optimizing the appearance and placement of your social media buttons, you can encourage more users to engage with your content and connect with you on social platforms.
Conclusion
Adding social media buttons to your WordPress website is a simple yet effective way to enhance your online presence and encourage user engagement. By following the steps outlined in this guide, you can quickly integrate social media buttons into your site and start reaping the benefits of increased visibility and interaction. So why wait? Get started today and watch your social media following grow!
Now that you've learned how to add social media buttons to your WordPress site, take your website customization to the next level by exploring our guide on How to Add Social Media Icons to WordPress Menus.
0 notes
Text
7+ Best Art Portfolio Website WordPress Premium Theme

Art Portfolio Website WordPress Premium Theme
Creating an art portfolio website is essential for artists, designers, and creatives to showcase their work and attract potential clients. Let’s explore some of the best WordPress premium themes specifically designed for art portfolio websites:
1. Dabble – Creative Agency & Portfolio WordPress Theme:

A sophisticated and stylish theme with multiple menu layouts, sliders, and preset blog post styles.
Features a portfolio system using a custom post type, allowing you to display your projects effectively.
Available in both free and premium versions, with advanced controls in the premium version.
2. Rubrash – Personal Portfolio WordPress Theme:

Known for its rock-solid coding and fantastic support.
Offers full-width portfolio layouts, including checkerboard style and carousel options.
Utilize the drag-and-drop Elementor Builder to create stunning pages for each portfolio entry.
3. Swipy – Creative Agency WordPress Theme:
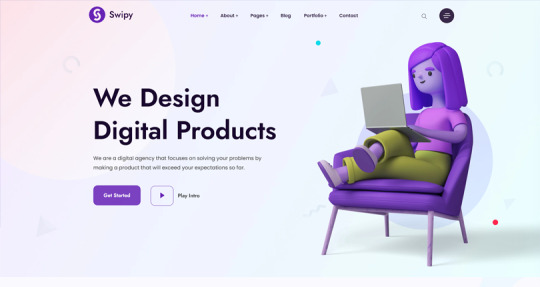
A flexible and feature-rich theme powered by the Elementor page builder plugin.
Suitable for various types of websites, including art portfolio website.
Explore its extensive library of over 300 templates for startups, freelancers, and personal sites.
4. Kulluu – Creative Agency WordPress Theme:
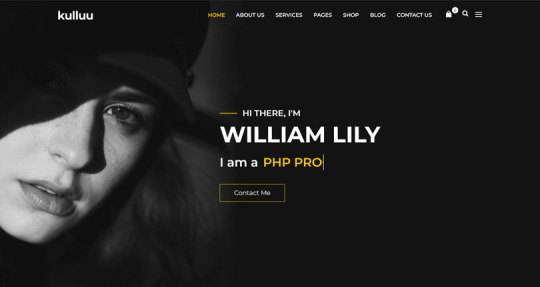
A minimalist freelancer and agency portfolio theme.
Ideal for showcasing your work with a clean and modern design.
5. Bionic- Personal Portfolio WordPress Theme:

Another portfolio WordPress theme that emphasizes simplicity.
Perfect for artists, photographers, and creative professionals.
6. Cretic – Creative Agency WordPress Theme:

A multi-concept artist and creative agency theme.
Offers versatility and a variety of options for different types of art portfolio website.
7. Mifo – Creative Minimal Portfolio WordPress Theme:
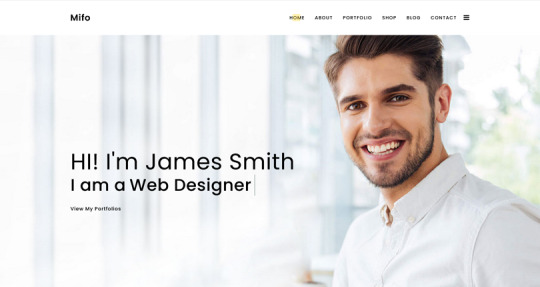
A clean and minimal multipurpose theme suitable for art portfolio website.
Focuses on elegant design and typography.
Remember to choose a theme that aligns with your artistic style, provides an excellent user experience, and effectively showcases your work. Happy creating! 🎨🖌️
For more options, you can explore other themes from ThemeForest. Each of these themes has unique features and customization options to suit your specific needs.
#premium wordpress themes#premium wordpress theme#app landing wordpress theme#wordpress premium themes#education wordpress theme#education & online course wordpress theme#paid wordpress themes#consulting business wordpress theme#online learning wordpress theme#wordpress plugins#art portfolio website#Art Portfolio Website WordPress Premium Theme#Creating an art portfolio website is essential for artists#designers#1. Dabble – Creative Agency & Portfolio WordPress Theme:#A sophisticated and stylish theme with multiple menu layouts#sliders#and preset blog post styles.#Features a portfolio system using a custom post type#allowing you to display your projects effectively.#Available in both free and premium versions#with advanced controls in the premium version.#2. Rubrash – Personal Portfolio WordPress Theme:#rubash#Known for its rock-solid coding and fantastic support.#Offers full-width portfolio layouts#including checkerboard style and carousel options.#Utilize the drag-and-drop Elementor Builder to create stunning pages for each portfolio entry.#3. Swipy – Creative Agency WordPress Theme:#swipy
4 notes
·
View notes
Photo

WordPress Menü (Menu) Nedir?
0 notes
Text
Can Someone Please Explain….
We’ve been having trouble with this website, so much so that we’ve discussed calling it a day. It started with difficulty in linking with certain other bloggers’ sites (hello Sarah!), for instance difficulty in leaving comments or even giving a like. Or making us sign in with password to sites to which we already subscribe, every time we commented. But then on this last trip it all went to…
0 notes
Text


How to use Classic and Block editors simultaneously in WordPress?
#Classic Editor#Classic Widget#Classic Menu#Gutenberg#Classic Theme#Block Themes#Technology#Magazine#WordPress#Make Money Online#Online Learning#Web Development
0 notes
Text
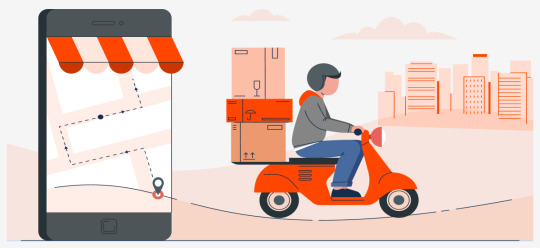
9 Best Practices to Create a Seamless Online Food Ordering Experience
Today, when smartphones have become our constant companions, restaurants should embrace online food ordering methods to offer customers quick and easy ways to order their favorite meals from their smartphones. Therefore, using an efficient food ordering process is no longer a trend for restaurants. It’s a must.
In this blog, we will explore ten best practices to help you create a smooth online food ordering experience. If you can elevate customers’ online order journey, keeping them coming back for more will be an easy breeze for you.

Practices to Create a Seamless Online Food Ordering Experience
01. Create a Website for Your Food Business
Build a well-designed website to showcase your menu, accept orders, and manage payments. You can consider WordPress for creating your website as it doesn’t require any technical knowledge. Make sure your website aligns with your brand and looks professional.
If you need any restaurant theme for your website, we recommend checking out WP Food Manager’s wide range of themes, designed for different types of food businesses.
With a user-friendly and eye-catching website, you can instill trust in your customers and add to your brand’s credibility.
02. Adopt Technology to Accept Orders
Embrace technology to thrive in the digital age of dining. Integrate an online food ordering plugin into your WordPress website to streamline the ordering process of your restaurant and generate more sales. This innovative restaurant ordering system will allow your customers to place orders with just a few clicks. Not only will it offer convenience for your customers but will also help you manage multiple orders simultaneously. Additionally, you don’t have to manually calculate the number of orders placed at the end of the day. All these jobs can be done by your plugin accurately.
During food delivery, pay attention to the delivery instructions your customers have mentioned. If they have mentioned extra cheese for their ordered pizza, you should give them that. Double-check before packing the food to prevent dissatisfaction of customers.
However, to avail the benefits of providing online food ordering service to your customers, you should use the best plugin available in the market.
You can consider the Online Order plugin of WP Food Manager.
Why?
Our Online Order plugin includes the following features:
Easy food ordering process.
Order confirmation notification.
WooCommerce integration.
Topping options.
Using our online food ordering process is easy. But, you need WooCommerce on your website along with our two plugins namely WP Food Manager and Restaurant Manager to use the plugin efficiently.
03. Communicate Clearly
Clarity is crucial when it concerns online ordering for restaurants. Make sure your customers are clearly understanding the process of placing orders online. Whether you’re using a third-party delivery service or an online food ordering plugin, you can provide easy-to-find buttons to guide the customers. Sometimes, customers fail to explain their orders properly over the phone, or the staff can’t write down the orders correctly. In such a situation, you will deliver the wrong order, hampering your restaurant’s reputation. Hence, assign only well-trained staff to take orders.
04. Build a Striking Online Menu
Creating a stellar online menu is more than just listing dishes. Rather, your menu should be like a graphic novel to captivate the hungry eyes. It should be easy to read and should have a clear CTA. Organize the food items logically to help customers find the food they crave.
Upload delicious images of your food and write descriptions to evoke their essence. Highlight special dishes to raise curiosity. Incorporate interactive elements to engage your customers more.
A striking online menu reflects your brand’s personality, calling customers to indulge in a wonderful dining experience.
If you’re not sure how to display your food menu stylishly, you can use the WP Food Manager plugin. Using it, you can create the menu the way you have desired.
You may want to know what’s the benefit of using the WP Food Manager plugin. So, here’s the answer.
Benefits:
Some of the benefits of using WP Food Manager are:
Attract more audience.
Enable customers to find their food items quickly through filtering option.
Showcase your food menu in a stylish way.
Update menu anytime.
Show food stock status.
All the above-mentioned benefits enable restaurateurs to turn their food listing website into a blessing for foodies.
Visit here to redefine food listings with our plugin.
If you need some menu design ideas, read this blog.
05. Ensure Efficient Delivery Tracking
In today’s fast-paced world, delivering food from restaurants to customer doorsteps has remained important. No doubt, it has become one of the fastest-growing markets today. And, the credit goes to the super-fast delivery it gives.
Restaurants using reliable food delivery plugins keep track of their deliveries to ensure that they are on time, thus making more customers happy. Tracking and tracing orders in real time helps restaurateurshave a clear knowledge about their deliveries. Consequently, they can inform their customers.
Finding a reliable food delivery WordPress plugin is like finding a needle in a haystack.
Don’t worry! We’re here to help.
Use our Food Delivery plugin to manage the food delivery process seamlessly. When you improve your food delivery service, you’re likely to get more online orders.
But, the question is why you should invest in our plugin when there’s no dearth of options. Scroll down to get the answer.
Reasons:
Delivery availability checker.
Real-time delivery tracking.
Display food delivery time.
Showing delivery status to update customers.
Dashboard to track and manage orders.
However, you need WP Food Manager and Online Order plugins to use our Food Delivery plugin without any hassle.
06. Offer Discounts and Promotions
Give enticing discounts and promotions to drive in more online orders. Any restaurant offering online food ordering considers its business needs and plans promotions to reach its targeted audience. If you have a dish that isn’t very popular among your customers, create a combo including that dish with a popular one, and reduce the dish’s overall price. Offering early-bird discounts during holidays and downtimes also increases online order profitability.
Highlight the deals prominently on your website. Track the performance of your promotions to refine the strategy, if needed.
07. Start Loyalty Programs
Implement loyalty programs to accelerate sales by leaps and bounds. Encourage repeat business by offering rewards for each online order. Consider customer preferences and give them rewards like freebies, discounts, etc. Leverage your social media channels and other platforms to promote your loyalty programs. Highlight the benefits the audience can enjoy joining the programs. Collect data from customers to make the promotions more alluring.
08. Offer Multiple and Secure Payment Options
Give your customers multiple and secure payment options to build trust and gain more customers. Therefore, we advise you to look for WooCommerce-integrated plugins. WooCommerce protects customer’s personal and banking details providing a reliable platform for online transactions.
The Online Order addon of WP Food Manager has WooCommerce integration to ensure secure transactions.
Further, provide your customers with a wide range of payment options like online banking, digital wallets, etc, so that they can choose the suitable one.
09. Gather Reviews/ restaurant review addon
Encourage customers to give reviews for your online food ordering and delivery services. Whether positive or negative, respond to their reviews to make them feel valued. Get an in-depth insight from their reviews to find loopholes in your services and find ways to resolve them fast.
You can use a plugin like Restaurant Review from WP Food Manager to add the restaurant review feature to your website. Discover the plugin now!
Wrapping Up
In conclusion, implementing these practices can boost your sales by increasing customer satisfaction and reducing abandoned carts. Leverage technology and customer data to tap into the online food ordering trend and grow your revenue. Consider data analytics and feedback to make effective decisions and stay ahead of your competitors. All the tips, if practiced together, will surely increase your sales.
#online food ordering experience#food order#food ordering app#plugin#restaurant#food business#food business management plugin#food management#wordpress#restaurant growth#restaurants plugin#restaurant manager#restaurant business#food ordering website wordpress#wp food manager#food menu plugin wordpress#woocommerce
0 notes
Text
WordPress Performance: Caching Navigation Menus
Background In the before time, WordPress developers used to build themes (and plugins?) using PHP. When we wanted to add a user generated navigation menu to sites, we had to use a function called wp_nav_menu(). Of course, now that we’re in the future, we don’t need to worry about such things. But if you’re still using PHP to build WordPress sites, and still using wp_nav_menu() you might not…

View On WordPress
#caching#navigation menus#Performance Optimization#php#plugins#themes#Web Development#website speed#WordPress#wp_nav_menu
0 notes
Text
This video I made can help you if you are a WordPress developer.
#freelance#manan broti#Freelancer Manan Broti#wordpress tutorial#wordpress course#Free WordPress Course#wordpress developer#wordpress development#wordpress design#Sticky Navigation Tutorial#WordPress Sticky Navigation Menu#web designer#Web Developer
1 note
·
View note
Text
How to Make WordPress Simpler and Easier to Use for Clients | Edit Role Wise Menu Item
How to Make WordPress Simpler and Easier to Use for Clients | Edit Role Wise Menu Item | Admin Menu Editor As a WordPress site owner, the WordPress admin dashboard is the most important part of your website. It’s like a control center where you can find all the information, tools, and plugins to manage your site easily. You can create new pages, change themes, and set up your entire site with…
View On WordPress
0 notes
Text
How to Create Dynamic Drop Down Menu in WordPress?
Understanding Dynamic Menus in WordPress
Setting Up a Basic Dynamic Menu
Customizing Dropdown Navigation
Responsive Design for Dropdown Menus
Creating Nested Menus for Deeper Navigation
To Learn More, Click this Link:
0 notes
Text
[solved] How do you add a WordPress admin page without adding it to the menu?
[solved] How do you add a WordPress admin page without adding it to the menu?
There are several ways to add a WordPress admin page without adding it to the menu. One way is to use a plugin such as Advanced Custom Fields, which allows you to create custom admin pages and fields without adding them to the menu. Another way is to modify the code in your theme or plugin to add a custom admin page. To add a WordPress admin page without adding it to the menu using Advanced…
View On WordPress
0 notes
Text
Unraveling Excellence: The Most Advanced Plugin for WordPress

When it comes to WordPress plugins, the quest for excellence is perpetual. Website owners and developers alike are constantly on the lookout for tools that can push the boundaries of functionality and innovation. In this dynamic landscape, one question often arises: What defines the epitome of advancement in the realm of WordPress plugins?
Introducing the most advanced plugin for WordPress. This isn't just any ordinary tool; it's a catalyst for transformation, a powerhouse of features designed to elevate your website to new heights. But what sets it apart from the rest?
Advanced features, seamless integration, and unparalleled performance are the defining characteristics of the most advanced WordPress plugins. They go beyond the basics, offering solutions to complex challenges while setting new standards in functionality and user experience.
Whether you're looking to optimize site speed, enhance security measures, or streamline content management, the most advanced plugins have you covered. They're not just tools; they're strategic assets that empower users to achieve their digital goals with ease.
But amidst the sea of options, how do you navigate your way to the ultimate plugin for your needs? It's crucial to consider factors such as compatibility, reliability, and user reviews. Additionally, seeking recommendations from trusted sources and exploring real-world use cases can provide invaluable insights.
As we embark on this journey to uncover the most advanced plugin for WordPress, it's essential to recognize the importance of seamless website navigation. After all, a well-structured navigation system enhances user experience and contributes to overall site performance.
For those seeking to optimize their website's navigation with the best WordPress menu plugins, look no further than Best WordPress Menu Plugins. Elevate your website's user experience and streamline navigation with these top-tier solutions.
In conclusion, the pursuit of excellence in WordPress plugins is a testament to the ever-evolving nature of digital innovation. By prioritizing functionality, performance, and user experience, you can harness the full potential of your website and stay ahead in the competitive landscape.
0 notes
Photo
New Post has been published on https://themesnulled.us/slick-menu-v1-5-2-responsive-wordpress-vertical-menu/
Slick Menu v1.5.2 - Responsive WordPress Vertical Menu
0 notes
Text
How Can I Change Off-Canvas Menu Position from Right to Left?
Introduction
When it comes to web design and development, user experience plays a crucial role in determining the success of a website. One aspect that significantly impacts user experience is the off-canvas menu. An off-canvas menu is a popular design pattern used to create mobile-friendly and responsive navigation menus. By default, many off-canvas menus slide in from the left side of the screen. However, there may be instances when you need to change the off-canvas menu position from right to left. In this article, we will explore various methods to achieve this, catering to different website setups and development technologies.
Table of Contents
- Understanding Off-Canvas Menus - Reasons to Change the Off-Canvas Menu Position - How to Change Off-Canvas Menu Position from Right to Left - Using CSS - With JavaScript - Framework-Specific Solutions - Ensuring Responsiveness and Accessibility - Testing and Troubleshooting - Common Challenges and Solutions - Leveraging CSS Media Queries - Taking Advantage of Frameworks and Libraries - Performance Considerations - Best Practices for Off-Canvas Menus - Conclusion - FAQs
1. Understanding Off-Canvas Menus
An off-canvas menu is a hidden menu that slides in from the side of the screen when triggered, usually by clicking a menu icon. This design pattern allows website developers to create a clean and uncluttered layout, especially for mobile and small-screen devices. The menu stays out of sight until it is needed, conserving valuable screen real estate and providing a seamless navigation experience.
2. Reasons to Change the Off-Canvas Menu Position
While the default left-side positioning of the off-canvas menu is common and widely accepted, there are specific scenarios where switching the position to the right may be preferred. Some of the reasons include: - Cultural Considerations: In certain cultures and languages, people are accustomed to menus and navigation elements appearing from the right side. - Existing Layout Constraints: The website's layout or design might better accommodate a right-side off-canvas menu. - Consistency with Desktop Navigation: If the website's desktop navigation menu is on the right side, keeping the off-canvas menu consistent can enhance user familiarity.
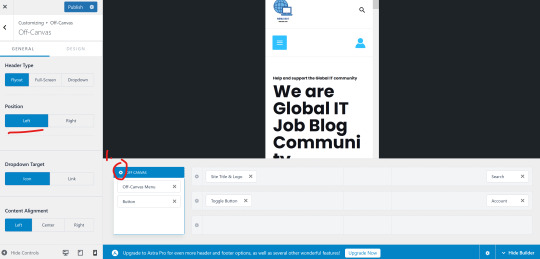
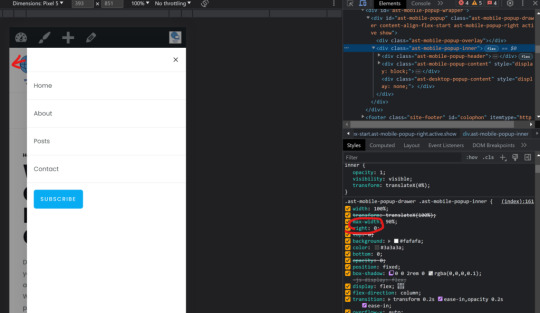
3. How to Change Off-Canvas Menu Position from Right to Left
Customizing Menu The best way, you can change to position in Customizing - Off-Canvas

Using CSS One of the simplest ways to change the off-canvas menu position is by using CSS. By adjusting the CSS properties responsible for positioning, you can make the menu slide in from the left side. Here's a basic example: cssCopy code/* Assuming the off-canvas menu has the class name "off-canvas-menu" */ .off-canvas-menu { /* Position the menu on the left side */ right: auto; left: 0; } With JavaScript In some cases, the off-canvas menu might be controlled by JavaScript. In such situations, you can modify the JavaScript code responsible for triggering the menu to slide from the left side: javascriptCopy code// Assuming the menu trigger function is named "openMenu" function openMenu() { // Code to open the off-canvas menu // Set the menu position to the left side } Framework-Specific Solutions If your website is built using a popular frontend framework like React, Angular, or Vue.js, there may be specific solutions or libraries available to customize the off-canvas menu position. Check the documentation or community forums for relevant guidance.
4. Ensuring Responsiveness and Accessibility
When modifying the off-canvas menu position, it's crucial to ensure responsiveness and accessibility across different devices and screen sizes. Test the website thoroughly on various devices to guarantee that the menu works seamlessly and remains usable.
5. Testing and Troubleshooting
After implementing the changes, it is essential to conduct thorough testing and address any potential issues that may arise. Test the menu on different browsers and devices to ensure compatibility and smooth functionality.
6. Common Challenges and Solutions
Changing the off-canvas menu position may present some challenges, such as overlapping content or unexpected behavior. To address these issues, consider using z-index and CSS transforms to manipulate the stacking order and positioning of elements.
7. Leveraging CSS Media Queries
To maintain a responsive design, leverage CSS media queries to adjust the off-canvas menu position based on the device's screen size. This ensures a seamless user experience across various devices.
8. Taking Advantage of Frameworks and Libraries
If you're using a frontend framework or library, explore available plugins or components that facilitate changing the off-canvas menu position. These can simplify the implementation process and provide additional customization options.
9. Performance Considerations
Keep in mind that any modification to the off-canvas menu position should not negatively impact website performance. Optimize your CSS and JavaScript to ensure fast loading times and a smooth user experience.
10. Best Practices for Off-Canvas Menus
When designing off-canvas menus, consider these best practices: - Keep the menu simple and easy to navigate. - Provide a clear and visible close button for easy menu dismissal. - Ensure that the menu works flawlessly with touch and keyboard interactions.
Conclusion
Changing the off-canvas menu position from right to left can enhance the user experience, particularly in specific cultural contexts or layout preferences. By utilizing CSS or JavaScript, and considering responsive design principles, web developers can create intuitive and user-friendly off-canvas menus for their websites.
FAQs
- Can I use frameworks like Bootstrap to create off-canvas menus with customizable positions? Yes, frameworks like Bootstrap offer components that can help you create off-canvas menus with the flexibility to adjust their positions. - Is it possible to have the off-canvas menu slide from both left and right depending on the user's language preference? Yes, with JavaScript, you can detect the user's language and conditionally set the menu position accordingly. - Does changing the off-canvas menu position affect SEO? No, changing the off-canvas menu position typically does not have a significant impact on SEO as long as the content and structure remain unchanged. - Are there any performance implications of changing the menu position with JavaScript? Implementing changes with JavaScript may have minor performance implications, but optimizing your code can mitigate any adverse effects. - What are some alternatives to off-canvas menus for mobile navigation? Alternatives include a traditional top or bottom fixed navigation bar, a hamburger menu, or a tab-based navigation system. Read the full article
0 notes
Text
How to EFFECTIVELY Use Empty Standby List to Reduce Flashing and Crashing
This tutorial is for TS2. Obviously. This is virtually the last "chapter" of advice for the Pink Flashing Survey Report (still forthcoming as a single readable thing but posted in bits and pieces over the last six months). PS it's a lonnnnnnng post. Ctrl+F "tldr" for the very short version once you open the cut.
"Part 1" of the Empty Standby List ("ESL") tutorial was already written comprehensively with screenshots by Digi at her wordpress. Following Digi's tutorial will get you set up with ESL as a routine automated background task your computer runs, typically every five minutes.
@gayars set up two instances of the routine, each running every five minutes, staggered two/three minutes apart. In other words, task 1 runs at 12:00, task 2 runs at 12:03, task 1 runs at 12:05, task 2 runs at 12:08, etc. However, I found that this negatively impacted the graphical performance of my game, notably by having the ESL task window flash over the game window, which I had never seen before, nor since reverting back to a single 5-minute task routine.
Anyway. Go do Digi's tutorial if you haven't already; I'll wait.

Background on Why this Matters
So, now your computer will be wiping the standby memory every five minutes. The thing is, this won't be able to have much impact on your game unless you wait to let it wipe before you do a major loading action.
Major loading actions are, in general order of strain (most to least strenuous):
Loading a full neighborhood.
Loading a large (3x4 or bigger) populated lot.
Loading a large unpopulated lot.
Loading actual CAS, if you have a lot of non-defaulted CC.
Loading a medium (3x3) populated lot.
Loading a medium unpopulated lot.
Loading a small (2x3 or smaller) populated lot.
Loading a small unpopulated lot.
Loading CAS catalogs from within a lot (e.g. using FFS clothing tool, "Change Appearance" on the mirror, shopping for clothes/trying on clothes on a community lot).
Turning up your lot view settings (generating other lots' lot imposters within your current lot)/panning the camera around.
You should already be doing at least all medium- and large-lot loading with the Lot View Settings Juggling Method, and “uint LotSkirtIncrease” removed from your userstartup.cheat - otherwise whenever you load a lot you are compounding the strain by also having the neighborhood load at the same time.
Using Resource Monitor Effectively
If you watched the Jessa Channel tutorial on flashing, she recommended downloading a third-party RAM usage monitoring software. This is unnecessary. For purposes of reducing your crashing, all you need is the native Windows program "Resource Monitor" that she also recommends.

To open it:
Click the Windows symbol/start menu.
Begin typing "Resource Monitor."
Click Resource Monitor when it shows up.

Once it is open, get to the useful information:
Click the "Memory" tab.
Make sure the "Processes" and "Physical Memory" subs are fully open, as above.
Sort by "Commit (KB)."
Each time you reopen Resource Monitor, it should restore your last view settings, so you won't have to repeat these steps.

While Resource Monitor is still open, "Pin" it to the taskbar so it will always be readily accessible.
Right-click the icon on the taskbar.
Click "Pin to taskbar."
If it says "Unpin from taskbar" you have already done this step :)

Now comes the monitoring part. You will focus on the dark-blue "Standby" block of the bar graph on Physical Memory.
Every fifth minute, when the ESL task runs, this will flash down to 0 and then pop up to about 30-75, depending on what you are doing. It will go higher faster if you are doing stuff, obviously, and hover pretty low if your computer is just sitting still. TLDR the remainder of this tutorial: only take stress actions when Standby is below 100.
As we all know too well, TS2 has a 4gb RAM limit. The problem is, TS2 seems to count the memory that is in standby, too, not just the committed/working set. Thus, before you take a major loading action (that is going to push up to 1.5gb into Standby), you need to wait for Standby to wipe so the game doesn't accidentally think it's using more memory than it is. Got it?

This is how much RAM my game is using when my neighborhood opens, pretty closely zoomed in on any particular lot. If it is zoomed out further - like a whole city block - both committed and working set are easily over 2.2gb. When I pan around the neighborhood, it continues going up. Portions of the hood that go back out of view seem to get relegated to standby, but yes, my game has crashed just from looking too much at my neighborhood from too wide an angle. Unless I slow down and let ESL run before moving on to the next section.
Six months of diligent Resource Manager monitoring has resulted in substantial reductions of crashing and flashing on my first hood view load and first lot view load. It is not 100% guaranteed, but it cuts it back to Very Playable Levels. And when I have tested the theory by purposefully not letting ESL run before a stress point, it always flashes and/or crashes within the next couple minutes.
SO! Here's what I do when I'm launching my game.
Because of overheating concerns, I always fully shut down my computer when I'm not using it for more than an hour. If I have been playing and experience a flash or crash, I will restart before trying again. @infinitesimblr, a survey Respondent who reported virtually no flashing or crashing despite a vast CC catalog, also recommends restarting between using Bodyshop or SimPE and the full game. I have found it may make a difference with Bodyshop (which I use too rarely to make a pseudoscientific claim) but that I have found basically no impact going from SimPE to the game. YMMV.
Immediately after Windows is done loading, I open Resource Monitor and wait a few minutes. Often background updates begin running and the Standby bar goes crazy - sometimes filling up the entire available RAM - and I just let it sit and do its thing. (Usually I start the computer right before my kid's bedtime so I am not actively waiting on it or anything. Go take a shower or make a sandwich or drink some water, like you did in the old days when the game itself took 20 minutes to load.)
Once the standby bar levels out and is consistently peaking no higher than about 250mb between ESL wipes, after the next ESL wipe, I will launch the game. (Usually between logging into Windowsat the beginning of storytime and checking Resource Monitor before we go do tuck-in, it is reliably hanging out below 100 unless a big TS4 or Windows update was downloading.)
Reminder: do not delete thumbnails anymore prior to launching the game. I also have turned off RPC's clear caches option and have observed faster loading times with minimal increases in crashing.
After the neighborhood selection screen comes up, wait for ESL to run again before opening your neighborhood.
If you have continue to have more than VERY sporadic hood load flashing after taking these steps, you should try launching into a subhood if you have one, then pivoting to the main hood if that's where you're playing that session after yet another ESL wipe. If that doesn't help you simply need to thin out your hood or accept the flashing. (I ended up deleting about 25% of my deco trees and 10-15 outer-lying lots that will be re-placed in a subhood.)
After the hood is loaded, navigate to the lot you want, but DO NOT actually load that lot until ESL runs yet again. Ditto for CAS - Do not select "Create New Family" until ESL has run again.
Play should be proceed as normal at this point. You probably don't need to alt-tab back to Resource Monitor again unless your sims are going traveling or you are changing play lots.
BONUS TIP #1: You can put a shortcut to the ESL routine on your desktop and push it manually (just double click the icon) if you don't feel like waiting once the game is loaded. I have had imperfect results with this vs. just waiting the five minutes, though, because the game wants to run through some stuff and flush it. But it's an option for you to experiment with.

BONUS TIP #2: If you have a really deep clothing/hair CC catalog, try to avoid using the FFS clothing tool option where you select every outfit for the sim, and their hair and makeup, at the same time. Instead, choose individual outfits by type and use the regular mirror option to change appearance (or SimBlender has it, I think, so they can do it where they already are).
241 notes
·
View notes