welcome to yeahgimp, where you find can all things gimp. go exploring and discover all the tutorials, resources, and more. if you have questions, the ask is open. not currently taking an tutorial requests, but xcf requests are fine. <3
Don't wanna be here? Send us removal request.
Photo
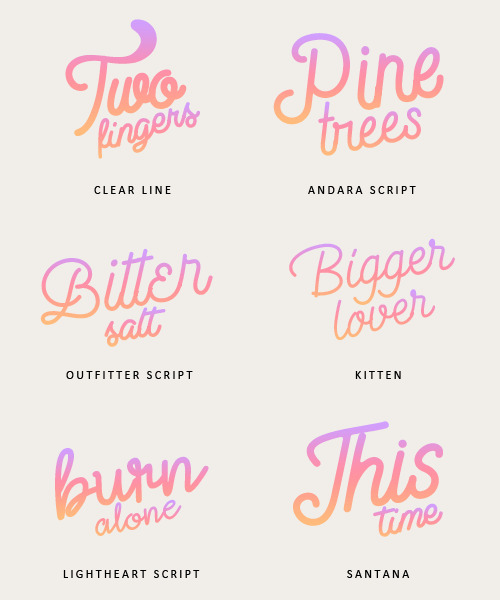
Please, like or reblog if you download it
Clear line Andara script Outfitter script Kitten Lightheart script Santana
#fonts#resources#clear line#kitten#andara script#outfitter script#lightheart script#santana#long live the queue
3K notes
·
View notes
Photo

Please, like or reblog if you download it
Chronos Arlene Lucy rose Fat flamingo Migur Steadfast Soria Red velvet Itc fenice std Finches Phosphorus Potter barn
#resources#fonts#red velvet#chronos#arlene#lucy rose#fat flamingo#migur#steadfast#soria#ltc fence std#finches#phosphorus#potter barn
1K notes
·
View notes
Photo

Please, like or reblog if you download it
Facile sans Valairya Sheilazain Roadway Leixo Billy ohio Alberts script Gobold
4K notes
·
View notes
Text
How to Change Hair Color: Blonde to Brunette
This tutorial is going to show you how to change hair color from blonde to brunette. Depending on the picture you are using there will be some adjustments needed. But the example I’m going to demonstrate this on is the picture of Dianna Argon shown below:

and we’re going to turn it into this:

Step 1
Once you have you image open, make a new transparent layer. Have your foreground layer set to #966c55. Using the airbrush tool on 100% opacity and Hardness 075 brush, slowly brush on the brown colors over the hair. For any parts were the strands are thinner/more parted(for example, the hair that is on Dianna’s shoulder where some parts of her hair is separated) try changing the size of your brush to a smaller one. Try to be as accurate as you can but it doesn’t have to be exact. Set this layer on Color at 100% opacity.
Duplicate this layer, change the mode to Multiple and lower the opacity to around 30%.

Duplicate this layer again and set it on Soft Light this time but keep the opacity the same.
Step 2
Next we will switch the foreground color to #6c4e3d. We are going to make a new transparent layer and repeat the airbrush step. This layer will be on Color bu at 75% opacity.
Now we will duplicate the layer but switch the mode to Hue at 30% opacity.

We will duplicate this layer twice more and set on on Subtract at 13% and one on Soft Light at 46%.

Step 3
We’re going to now switch the foreground color to #2a1e18 and repeat the airbrush technique again. This layer will be on the layer mode Burn at 25%.
We’re going to duplicate this layer and set it on Overlay at 32%.

And we’re done!
Here+ is a similar tutorial if you want to try changing hair color from blonde to red hair.
Please follow for more things gimp and if you found this useful make that ♥ red.
7 notes
·
View notes
Photo


Xcf 38
1 coloring xcf
like or reblog if [download]
enjoy!
7 notes
·
View notes
Photo


Random fonts
Please, like or reblog if you download it
Curvy thins Magnite Minty Snowy skies Volletra script Lovely home The hills Asyiela
#fonts#resources#curvy thins#magnite#minty#snowy skies#volletra script#lovely home#the hills#asyiela
2K notes
·
View notes
Text
Stranger Things Edit
So we will be making this:

All you will need is an image or screencap of a(n) person/multiple people/object.
Step 1
Open a new image with the dimensions 270x350.

Paste down your image and then cut out and/or the background. There is a tutorial here+ if you need some help or guidance.
Next, we are going to choose a color for our background. I used a tan/beige color (#d4b99a) but feel free to use any color you want. For this edit I recommend a light and/or pastel color.

Step 2
This part is optional. If you are using a screencap or image with a lot of shadows I would go ahead and do this step. Go to Colors<Brightness-Contrast and put in a value from 25-35 for brightness and a value between 12-22 for contrast.

Next duplicate this image and put the new layer on screen.
Step 3
Make a new transparent layer. Now go back to one of the image layer. Right click on it and go down to alpha to selection. You should now have a flickering border over the outline of you image.
Go back to the new layer you just made. Select a light gray/almost white color (#f5f5f5) and using the bucket fill tool fill in the outline with this color.
Now go up to Select<Shrink and put in 1px and click okay. Now press delete and/or use eraser tool to get rid of the inside of selection. You should now have a very thing border around your central image.

Next we will erase part of this outline. I chose to erase the outline that was around the inside of the backpack strap, the left side of his face, and the top part of his arm. Next I shifted the outline two to the left and one up.
Step 4

For text I use Seravek Bold Italic on size 18. I did the flipped text by typing out ‘Upside’ and then using the Flip Tool on vertical. Lastly, I just moved it so it would almost touch the upright ‘Upside.’
The last step would be to sharpen (I used Sharpen on 30 and then Unsharp Mask on .15) and then for coloring all I did was use Hue-Saturation (under Colors Tab).

And done!
Please follow for more things gimp and if you found this useful make that ♥ red.
10 notes
·
View notes
Photo
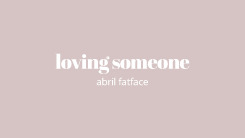


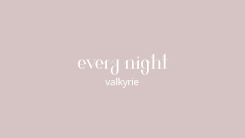
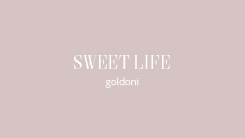
M A N Y R E S O U R C E S - font pack 01.
Abril Fatface · Morva · Jitzu · Red Velvet · The Queen · Bodoni 72 · Valkyrie · Goldoni
Our first ever font pack with our favorite serif fonts. Please like/reblog if you decide to download/use any, and look out for a handwritten multipack soon! ♥
2K notes
·
View notes
Text
Hey guys, idk how long I will be back but hopefully this time it will be permanent. I will keep the inbox open for questions but at the moment I am not taking any tutorial requests. I will post when I am again.
xx
0 notes
Text
Yellow-Blue Graphic Tutorial
Yellow Blue Graphic Tutorial
So this is the graphic we will be making:

Keep in mind that you can definitely add on to this such as adding coloring, text, and filters.
Step 1
First, open a new image (File<New). I’m going to go with 540x620 pixels. Paste down your main image/central image and try to move it so it is near the center of the canvas. I would recommend finding an image that has a lot of empty space or doesn’t have a lot happening in part of the image such as the once I’ve picked.

Using the eyedropper tool, find a color that you like from the image to set as the background color. If your image is more on the light/bright side I recommend finding a dark color and if your image is on the dark/contrasted side I recommend finding a lighter color. I picked the navy blue from the man/s cardigan and using the bucket fill tool filled in my background that color.


Step 2
Using the eye dropper tool again pick another color in the image the stands out. This time I picked a light yellow from the girl’s vest. Click on the ellipse tool. On the tool options dialog check the fixed box, have it on aspect ratio and then type in 1:1.

Drag a circle along your surface. I made mine big enough to include both of their faces (see below). Then using the bucket fill tool, fill in the circle with the color you picked earlier.

Then go to Select<Shrink and input 3px for Shrink Selection By. After clicking okay, press delete and/or use the Eraser Tool to get rid of the inside of the circle. Now you will have a circular border.
Step 3
Duplicate the central image and then using the scale tool, resize it to around 180x120. Move this image to the left edge of the canvas. Making two more copies of the smaller image and move them so they are stacked like so:

Now we will turn all these small image black and white by going to Colors<Desaturate and then choosing the Luminosity option.
Next the eye dropper tool will come again to find a light color in the main image. I am using a pale yellow for this step but you can also use white (#ffffff). Taking the airbrush tool on low opacity (can control this in Tool Options dialog) slowy start making soft circle like blow.

Then go the Filters<Blur<Gaussian Blur and put in any value from 70 to 100.
Next, leave this layer on Normal mode put lower the opacity to approximated 40%. Duplicate this layer and go to Filters<Artistic<Softglow. The default settings should be fine. Put this layer on Normal and 90% opacity. Duplicate this layer and switch the mode to Softlight.

Step 4
Next we are going to add the lines coming off the circular border. This will be done using the Paths tool. First, make a new layer (transparency). Start the path near the top right of the circle and drag it down to some part of the top small image like so:

Make sure to have your foreground color set to the same color as the circular border (for me pale yellow). Go to Tool options and click Stroke path and have the options filled out below and then press Stroke :

Move this layer so it is below the glowy lighting layer we made earlier. Repeat these step to make the other two lines, having each line lower than the previous one.
Step 5
Make a new transparent layer. Using the ellipse tool again make a circle a tad bit bigger than the circular border (same fixed 1:1 setting). Bucket fill the circle the same color as the circular border. Place it where you want the central focus of your image to be. Change the layer mode to soft light and lower the opacity to 70-80%
Step 6
Now we will finish the borders. You will need three to four images (or more or less) fo this. Scale these images down so they will put the border (mine are around 180-200px in width and 140-150 px in height). Set these images to black and white (Colors<Desaturate, Luminosity). Switch the layer mode to value and lower the opacity to 65-75%.

Place the images next to each other and make sure they don’t overlap.
And done!
Please follow for more things gimp and if you found this useful make that ♥ red.
5 notes
·
View notes
Photo


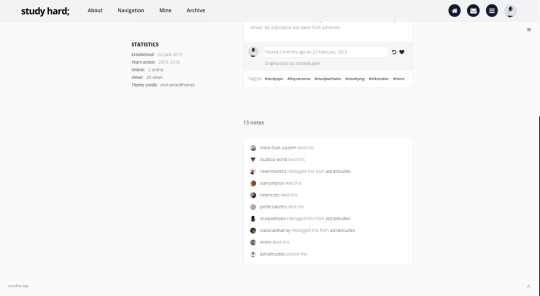
bibliophile (fansite & blog theme)
two sidebars fansite | preview (index page) - code (raw), alternate one sidebar blog theme | preview (permalink page) - code (raw), alternate
a minimalistic fansite and blog theme inspired by the home page of goodreads, that features
a full-screen header image, up to six custom links, short title, and icon
custom colours for text, links, links hover and others
custom colours for topbar and navigation background and borders
four fonts and five font-sizes
four post widths (400px, 450px, 500px and 540px)
three margin widths (25px, 50px and 75px)
optional tags, like and reblog buttons on index page
optional search bar and scroll to top
dashboard-style or normal captions
pagination, infinite scroll or load more
and more with a full list of features that can be found here
as the sidebar needs to be edited in the code, basic coding knowledge is required. instructions on how to edit areas such as personal/fansite blog, a dark topbar, the header image and the sidebars can all be found on the guide. please read all of that before customising and sending me any questions.
un-nest dashboard captions plugin by magnusthemes and neothm. credits for other various items can be found here. if there are any issues or glitches, don’t be afraid to send me an ask here!
thank you to Jennifer @grangersdesigns for looking over the code and helping me!
this is my christmas and holiday present to all of you as a very very very big thank you for supporting me and my codes for this past year. I am constantly overwhelmed by the response you guys give my codes and especially when I see one of them being used, it makes me sooo happy. thank you so much and here’s to 2017!
reblog/like if using and please do not repost or steal!
3K notes
·
View notes
Photo

¸.*☆ texture pack, n° 4 (large) ☆*¸. if you download this, please make sure to click the heart button, or reblog this post. don’t repost it, please. {mediafire}
427 notes
·
View notes
Photo

¸.*☆ texture pack, n° 6 ☆*¸. if you download this, please make sure to click the heart button, or reblog this post. don’t repost it, please. {cl.ly}
360 notes
·
View notes
Photo

¸.*☆ texture pack, n° 3 ☆*¸. if you download this, please make sure to click the heart button, or reblog this post. don’t repost it, please. {cl.ly}
189 notes
·
View notes
Photo


theme: pretense / preview | code
customisable post, sidebar and text sizes
optional avatar, title, description, captions, tags, scroll to top
header or no header
various fonts to choose from
left or right sidebar
choose sidebar text alignment
four navigation styles: simple, icons, numbers or roman numerals
3 custom links (+3 custom header links)
pagination, infinite scroll or manual load
search box
updates tab included
choose updates tab alignment
please like/reblog if using.
notes: (probably the) last theme for this year! happy holidays and thank you for your support throughout this year! ♥
4K notes
·
View notes
Photo

THEME #5, HAILEY
preview | download
Is just a simple fansite theme for tumblr. Is pretty simple to edit but maybe you should have some html knowledge to edit some stuff but if you are in trouble just send me a message and I’ll help you if I can.
Please like or reblog if using, I will really apreciate it. Don’t remove the credit. Thank you :)
215 notes
·
View notes
