#Slackware Linux Project
Explore tagged Tumblr posts
Visit Tumblr Blog
Explore Tumblr blogs with no restrictions, modern design and the best experience.
Last Seen Tumblr Blogs


Fun Fact
25% of US internet users with an annual income of $80-100K use Tumblr.
Text
How I ditched streaming services and learned to love Linux: A step-by-step guide to building your very own personal media streaming server (V2.0: REVISED AND EXPANDED EDITION)
This is a revised, corrected and expanded version of my tutorial on setting up a personal media server that previously appeared on my old blog (donjuan-auxenfers). I expect that that post is still making the rounds (hopefully with my addendum on modifying group share permissions in Ubuntu to circumvent 0x8007003B "Unexpected Network Error" messages in Windows 10/11 when transferring files) but I have no way of checking. Anyway this new revised version of the tutorial corrects one or two small errors I discovered when rereading what I wrote, adds links to all products mentioned and is just more polished generally. I also expanded it a bit, pointing more adventurous users toward programs such as Sonarr/Radarr/Lidarr and Overseerr which can be used for automating user requests and media collection.
So then, what is this tutorial? This is a tutorial on how to build and set up your own personal media server using Ubuntu as an operating system and Plex (or Jellyfin) to not only manage your media, but to also stream that media to your devices both at home and abroad anywhere in the world where you have an internet connection. Its intent is to show you how building a personal media server and stuffing it full of films, TV, and music that you acquired through indiscriminate and voracious media piracy various legal methods will free you to completely ditch paid streaming services. No more will you have to pay for Disney+, Netflix, HBOMAX, Hulu, Amazon Prime, Peacock, CBS All Access, Paramount+, Crave or any other streaming service that is not named Criterion Channel. Instead whenever you want to watch your favourite films and television shows, you’ll have your own personal service that only features things that you want to see, with files that you have control over. And for music fans out there, both Jellyfin and Plex support music streaming, meaning you can even ditch music streaming services. Goodbye Spotify, Youtube Music, Tidal and Apple Music, welcome back unreasonably large MP3 (or FLAC) collections.
On the hardware front, I’m going to offer a few options catered towards different budgets and media library sizes. The cost of getting a media server up and running using this guide will cost you anywhere from $450 CAD/$325 USD at the low end to $1500 CAD/$1100 USD at the high end (it could go higher). My server was priced closer to the higher figure, but I went and got a lot more storage than most people need. If that seems like a little much, consider for a moment, do you have a roommate, a close friend, or a family member who would be willing to chip in a few bucks towards your little project provided they get access? Well that's how I funded my server. It might also be worth thinking about the cost over time, i.e. how much you spend yearly on subscriptions vs. a one time cost of setting up a server. Additionally there's just the joy of being able to scream "fuck you" at all those show cancelling, library deleting, hedge fund vampire CEOs who run the studios through denying them your money. Drive a stake through David Zaslav's heart.
On the software side I will walk you step-by-step through installing Ubuntu as your server's operating system, configuring your storage as a RAIDz array with ZFS, sharing your zpool to Windows with Samba, running a remote connection between your server and your Windows PC, and then a little about started with Plex/Jellyfin. Every terminal command you will need to input will be provided, and I even share a custom #bash script that will make used vs. available drive space on your server display correctly in Windows.
If you have a different preferred flavour of Linux (Arch, Manjaro, Redhat, Fedora, Mint, OpenSUSE, CentOS, Slackware etc. et. al.) and are aching to tell me off for being basic and using Ubuntu, this tutorial is not for you. The sort of person with a preferred Linux distro is the sort of person who can do this sort of thing in their sleep. Also I don't care. This tutorial is intended for the average home computer user. This is also why we’re not using a more exotic home server solution like running everything through Docker Containers and managing it through a dashboard like Homarr or Heimdall. While such solutions are fantastic and can be very easy to maintain once you have it all set up, wrapping your brain around Docker is a whole thing in and of itself. If you do follow this tutorial and had fun putting everything together, then I would encourage you to return in a year’s time, do your research and set up everything with Docker Containers.
Lastly, this is a tutorial aimed at Windows users. Although I was a daily user of OS X for many years (roughly 2008-2023) and I've dabbled quite a bit with various Linux distributions (mostly Ubuntu and Manjaro), my primary OS these days is Windows 11. Many things in this tutorial will still be applicable to Mac users, but others (e.g. setting up shares) you will have to look up for yourself. I doubt it would be difficult to do so.
Nothing in this tutorial will require feats of computing expertise. All you will need is a basic computer literacy (i.e. an understanding of what a filesystem and directory are, and a degree of comfort in the settings menu) and a willingness to learn a thing or two. While this guide may look overwhelming at first glance, it is only because I want to be as thorough as possible. I want you to understand exactly what it is you're doing, I don't want you to just blindly follow steps. If you half-way know what you’re doing, you will be much better prepared if you ever need to troubleshoot.
Honestly, once you have all the hardware ready it shouldn't take more than an afternoon or two to get everything up and running.
(This tutorial is just shy of seven thousand words long so the rest is under the cut.)
Step One: Choosing Your Hardware
Linux is a light weight operating system, depending on the distribution there's close to no bloat. There are recent distributions available at this very moment that will run perfectly fine on a fourteen year old i3 with 4GB of RAM. Moreover, running Plex or Jellyfin isn’t resource intensive in 90% of use cases. All this is to say, we don’t require an expensive or powerful computer. This means that there are several options available: 1) use an old computer you already have sitting around but aren't using 2) buy a used workstation from eBay, or what I believe to be the best option, 3) order an N100 Mini-PC from AliExpress or Amazon.
Note: If you already have an old PC sitting around that you’ve decided to use, fantastic, move on to the next step.
When weighing your options, keep a few things in mind: the number of people you expect to be streaming simultaneously at any one time, the resolution and bitrate of your media library (4k video takes a lot more processing power than 1080p) and most importantly, how many of those clients are going to be transcoding at any one time. Transcoding is what happens when the playback device does not natively support direct playback of the source file. This can happen for a number of reasons, such as the playback device's native resolution being lower than the file's internal resolution, or because the source file was encoded in a video codec unsupported by the playback device.
Ideally we want any transcoding to be performed by hardware. This means we should be looking for a computer with an Intel processor with Quick Sync. Quick Sync is a dedicated core on the CPU die designed specifically for video encoding and decoding. This specialized hardware makes for highly efficient transcoding both in terms of processing overhead and power draw. Without these Quick Sync cores, transcoding must be brute forced through software. This takes up much more of a CPU’s processing power and requires much more energy. But not all Quick Sync cores are created equal and you need to keep this in mind if you've decided either to use an old computer or to shop for a used workstation on eBay
Any Intel processor from second generation Core (Sandy Bridge circa 2011) onward has Quick Sync cores. It's not until 6th gen (Skylake), however, that the cores support the H.265 HEVC codec. Intel’s 10th gen (Comet Lake) processors introduce support for 10bit HEVC and HDR tone mapping. And the recent 12th gen (Alder Lake) processors brought with them hardware AV1 decoding. As an example, while an 8th gen (Kaby Lake) i5-8500 will be able to hardware transcode a H.265 encoded file, it will fall back to software transcoding if given a 10bit H.265 file. If you’ve decided to use that old PC or to look on eBay for an old Dell Optiplex keep this in mind.
Note 1: The price of old workstations varies wildly and fluctuates frequently. If you get lucky and go shopping shortly after a workplace has liquidated a large number of their workstations you can find deals for as low as $100 on a barebones system, but generally an i5-8500 workstation with 16gb RAM will cost you somewhere in the area of $260 CAD/$200 USD.
Note 2: The AMD equivalent to Quick Sync is called Video Core Next, and while it's fine, it's not as efficient and not as mature a technology. It was only introduced with the first generation Ryzen CPUs and it only got decent with their newest CPUs, we want something cheap.
Alternatively you could forgo having to keep track of what generation of CPU is equipped with Quick Sync cores that feature support for which codecs, and just buy an N100 mini-PC. For around the same price or less of a used workstation you can pick up a mini-PC with an Intel N100 processor. The N100 is a four-core processor based on the 12th gen Alder Lake architecture and comes equipped with the latest revision of the Quick Sync cores. These little processors offer astounding hardware transcoding capabilities for their size and power draw. Otherwise they perform equivalent to an i5-6500, which isn't a terrible CPU. A friend of mine uses an N100 machine as a dedicated retro emulation gaming system and it does everything up to 6th generation consoles just fine. The N100 is also a remarkably efficient chip, it sips power. In fact, the difference between running one of these and an old workstation could work out to hundreds of dollars a year in energy bills depending on where you live.
You can find these Mini-PCs all over Amazon or for a little cheaper on AliExpress. They range in price from $170 CAD/$125 USD for a no name N100 with 8GB RAM to $280 CAD/$200 USD for a Beelink S12 Pro with 16GB RAM. The brand doesn't really matter, they're all coming from the same three factories in Shenzen, go for whichever one fits your budget or has features you want. 8GB RAM should be enough, Linux is lightweight and Plex only calls for 2GB RAM. 16GB RAM might result in a slightly snappier experience, especially with ZFS. A 256GB SSD is more than enough for what we need as a boot drive, but going for a bigger drive might allow you to get away with things like creating preview thumbnails for Plex, but it’s up to you and your budget.
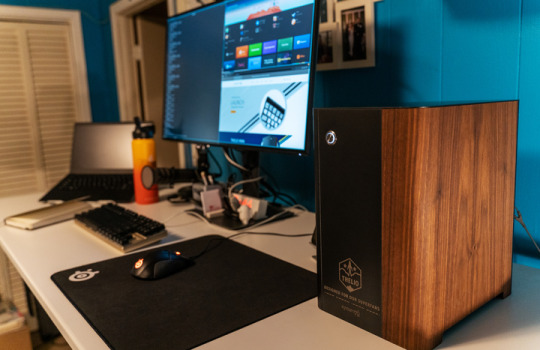
The Mini-PC I wound up buying was a Firebat AK2 Plus with 8GB RAM and a 256GB SSD. It looks like this:

Note: Be forewarned that if you decide to order a Mini-PC from AliExpress, note the type of power adapter it ships with. The mini-PC I bought came with an EU power adapter and I had to supply my own North American power supply. Thankfully this is a minor issue as barrel plug 30W/12V/2.5A power adapters are easy to find and can be had for $10.
Step Two: Choosing Your Storage
Storage is the most important part of our build. It is also the most expensive. Thankfully it’s also the most easily upgrade-able down the line.
For people with a smaller media collection (4TB to 8TB), a more limited budget, or who will only ever have two simultaneous streams running, I would say that the most economical course of action would be to buy a USB 3.0 8TB external HDD. Something like this one from Western Digital or this one from Seagate. One of these external drives will cost you in the area of $200 CAD/$140 USD. Down the line you could add a second external drive or replace it with a multi-drive RAIDz set up such as detailed below.
If a single external drive the path for you, move on to step three.
For people with larger media libraries (12TB+), who prefer media in 4k, or care who about data redundancy, the answer is a RAID array featuring multiple HDDs in an enclosure.
Note: If you are using an old PC or used workstatiom as your server and have the room for at least three 3.5" drives, and as many open SATA ports on your mother board you won't need an enclosure, just install the drives into the case. If your old computer is a laptop or doesn’t have room for more internal drives, then I would suggest an enclosure.
The minimum number of drives needed to run a RAIDz array is three, and seeing as RAIDz is what we will be using, you should be looking for an enclosure with three to five bays. I think that four disks makes for a good compromise for a home server. Regardless of whether you go for a three, four, or five bay enclosure, do be aware that in a RAIDz array the space equivalent of one of the drives will be dedicated to parity at a ratio expressed by the equation 1 − 1/n i.e. in a four bay enclosure equipped with four 12TB drives, if we configured our drives in a RAIDz1 array we would be left with a total of 36TB of usable space (48TB raw size). The reason for why we might sacrifice storage space in such a manner will be explained in the next section.
A four bay enclosure will cost somewhere in the area of $200 CDN/$140 USD. You don't need anything fancy, we don't need anything with hardware RAID controls (RAIDz is done entirely in software) or even USB-C. An enclosure with USB 3.0 will perform perfectly fine. Don’t worry too much about USB speed bottlenecks. A mechanical HDD will be limited by the speed of its mechanism long before before it will be limited by the speed of a USB connection. I've seen decent looking enclosures from TerraMaster, Yottamaster, Mediasonic and Sabrent.
When it comes to selecting the drives, as of this writing, the best value (dollar per gigabyte) are those in the range of 12TB to 20TB. I settled on 12TB drives myself. If 12TB to 20TB drives are out of your budget, go with what you can afford, or look into refurbished drives. I'm not sold on the idea of refurbished drives but many people swear by them.
When shopping for harddrives, search for drives designed specifically for NAS use. Drives designed for NAS use typically have better vibration dampening and are designed to be active 24/7. They will also often make use of CMR (conventional magnetic recording) as opposed to SMR (shingled magnetic recording). This nets them a sizable read/write performance bump over typical desktop drives. Seagate Ironwolf and Toshiba NAS are both well regarded brands when it comes to NAS drives. I would avoid Western Digital Red drives at this time. WD Reds were a go to recommendation up until earlier this year when it was revealed that they feature firmware that will throw up false SMART warnings telling you to replace the drive at the three year mark quite often when there is nothing at all wrong with that drive. It will likely even be good for another six, seven, or more years.

Step Three: Installing Linux
For this step you will need a USB thumbdrive of at least 6GB in capacity, an .ISO of Ubuntu, and a way to make that thumbdrive bootable media.
First download a copy of Ubuntu desktop (for best performance we could download the Server release, but for new Linux users I would recommend against the server release. The server release is strictly command line interface only, and having a GUI is very helpful for most people. Not many people are wholly comfortable doing everything through the command line, I'm certainly not one of them, and I grew up with DOS 6.0. 22.04.3 Jammy Jellyfish is the current Long Term Service release, this is the one to get.
Download the .ISO and then download and install balenaEtcher on your Windows PC. BalenaEtcher is an easy to use program for creating bootable media, you simply insert your thumbdrive, select the .ISO you just downloaded, and it will create a bootable installation media for you.
Once you've made a bootable media and you've got your Mini-PC (or you old PC/used workstation) in front of you, hook it directly into your router with an ethernet cable, and then plug in the HDD enclosure, a monitor, a mouse and a keyboard. Now turn that sucker on and hit whatever key gets you into the BIOS (typically ESC, DEL or F2). If you’re using a Mini-PC check to make sure that the P1 and P2 power limits are set correctly, my N100's P1 limit was set at 10W, a full 20W under the chip's power limit. Also make sure that the RAM is running at the advertised speed. My Mini-PC’s RAM was set at 2333Mhz out of the box when it should have been 3200Mhz. Once you’ve done that, key over to the boot order and place the USB drive first in the boot order. Then save the BIOS settings and restart.
After you restart you’ll be greeted by Ubuntu's installation screen. Installing Ubuntu is really straight forward, select the "minimal" installation option, as we won't need anything on this computer except for a browser (Ubuntu comes preinstalled with Firefox) and Plex Media Server/Jellyfin Media Server. Also remember to delete and reformat that Windows partition! We don't need it.
Step Four: Installing ZFS and Setting Up the RAIDz Array
Note: If you opted for just a single external HDD skip this step and move onto setting up a Samba share.
Once Ubuntu is installed it's time to configure our storage by installing ZFS to build our RAIDz array. ZFS is a "next-gen" file system that is both massively flexible and massively complex. It's capable of snapshot backup, self healing error correction, ZFS pools can be configured with drives operating in a supplemental manner alongside the storage vdev (e.g. fast cache, dedicated secondary intent log, hot swap spares etc.). It's also a file system very amenable to fine tuning. Block and sector size are adjustable to use case and you're afforded the option of different methods of inline compression. If you'd like a very detailed overview and explanation of its various features and tips on tuning a ZFS array check out these articles from Ars Technica. For now we're going to ignore all these features and keep it simple, we're going to pull our drives together into a single vdev running in RAIDz which will be the entirety of our zpool, no fancy cache drive or SLOG.
Open up the terminal and type the following commands:
sudo apt update
then
sudo apt install zfsutils-linux
This will install the ZFS utility. Verify that it's installed with the following command:
zfs --version
Now, it's time to check that the HDDs we have in the enclosure are healthy, running, and recognized. We also want to find out their device IDs and take note of them:
sudo fdisk -1
Note: You might be wondering why some of these commands require "sudo" in front of them while others don't. "Sudo" is short for "super user do”. When and where "sudo" is used has to do with the way permissions are set up in Linux. Only the "root" user has the access level to perform certain tasks in Linux. As a matter of security and safety regular user accounts are kept separate from the "root" user. It's not advised (or even possible) to boot into Linux as "root" with most modern distributions. Instead by using "sudo" our regular user account is temporarily given the power to do otherwise forbidden things. Don't worry about it too much at this stage, but if you want to know more check out this introduction.
If everything is working you should get a list of the various drives detected along with their device IDs which will look like this: /dev/sdc. You can also check the device IDs of the drives by opening the disk utility app. Jot these IDs down as we'll need them for our next step, creating our RAIDz array.
RAIDz is similar to RAID-5 in that instead of striping your data over multiple disks, exchanging redundancy for speed and available space (RAID-0), or mirroring your data writing by two copies of every piece (RAID-1), it instead writes parity blocks across the disks in addition to striping, this provides a balance of speed, redundancy and available space. If a single drive fails, the parity blocks on the working drives can be used to reconstruct the entire array as soon as a replacement drive is added.
Additionally, RAIDz improves over some of the common RAID-5 flaws. It's more resilient and capable of self healing, as it is capable of automatically checking for errors against a checksum. It's more forgiving in this way, and it's likely that you'll be able to detect when a drive is dying well before it fails. A RAIDz array can survive the loss of any one drive.
Note: While RAIDz is indeed resilient, if a second drive fails during the rebuild, you're fucked. Always keep backups of things you can't afford to lose. This tutorial, however, is not about proper data safety.
To create the pool, use the following command:
sudo zpool create "zpoolnamehere" raidz "device IDs of drives we're putting in the pool"
For example, let's creatively name our zpool "mypool". This poil will consist of four drives which have the device IDs: sdb, sdc, sdd, and sde. The resulting command will look like this:
sudo zpool create mypool raidz /dev/sdb /dev/sdc /dev/sdd /dev/sde
If as an example you bought five HDDs and decided you wanted more redundancy dedicating two drive to this purpose, we would modify the command to "raidz2" and the command would look something like the following:
sudo zpool create mypool raidz2 /dev/sdb /dev/sdc /dev/sdd /dev/sde /dev/sdf
An array configured like this is known as RAIDz2 and is able to survive two disk failures.
Once the zpool has been created, we can check its status with the command:
zpool status
Or more concisely with:
zpool list
The nice thing about ZFS as a file system is that a pool is ready to go immediately after creation. If we were to set up a traditional RAID-5 array using mbam, we'd have to sit through a potentially hours long process of reformatting and partitioning the drives. Instead we're ready to go right out the gates.
The zpool should be automatically mounted to the filesystem after creation, check on that with the following:
df -hT | grep zfs
Note: If your computer ever loses power suddenly, say in event of a power outage, you may have to re-import your pool. In most cases, ZFS will automatically import and mount your pool, but if it doesn’t and you can't see your array, simply open the terminal and type sudo zpool import -a.
By default a zpool is mounted at /"zpoolname". The pool should be under our ownership but let's make sure with the following command:
sudo chown -R "yourlinuxusername" /"zpoolname"
Note: Changing file and folder ownership with "chown" and file and folder permissions with "chmod" are essential commands for much of the admin work in Linux, but we won't be dealing with them extensively in this guide. If you'd like a deeper tutorial and explanation you can check out these two guides: chown and chmod.

You can access the zpool file system through the GUI by opening the file manager (the Ubuntu default file manager is called Nautilus) and clicking on "Other Locations" on the sidebar, then entering the Ubuntu file system and looking for a folder with your pool's name. Bookmark the folder on the sidebar for easy access.

Your storage pool is now ready to go. Assuming that we already have some files on our Windows PC we want to copy to over, we're going to need to install and configure Samba to make the pool accessible in Windows.
Step Five: Setting Up Samba/Sharing
Samba is what's going to let us share the zpool with Windows and allow us to write to it from our Windows machine. First let's install Samba with the following commands:
sudo apt-get update
then
sudo apt-get install samba
Next create a password for Samba.
sudo smbpswd -a "yourlinuxusername"
It will then prompt you to create a password. Just reuse your Ubuntu user password for simplicity's sake.
Note: if you're using just a single external drive replace the zpool location in the following commands with wherever it is your external drive is mounted, for more information see this guide on mounting an external drive in Ubuntu.
After you've created a password we're going to create a shareable folder in our pool with this command
mkdir /"zpoolname"/"foldername"
Now we're going to open the smb.conf file and make that folder shareable. Enter the following command.
sudo nano /etc/samba/smb.conf
This will open the .conf file in nano, the terminal text editor program. Now at the end of smb.conf add the following entry:
["foldername"]
path = /"zpoolname"/"foldername"
available = yes
valid users = "yourlinuxusername"
read only = no
writable = yes
browseable = yes
guest ok = no
Ensure that there are no line breaks between the lines and that there's a space on both sides of the equals sign. Our next step is to allow Samba traffic through the firewall:
sudo ufw allow samba
Finally restart the Samba service:
sudo systemctl restart smbd
At this point we'll be able to access to the pool, browse its contents, and read and write to it from Windows. But there's one more thing left to do, Windows doesn't natively support the ZFS file systems and will read the used/available/total space in the pool incorrectly. Windows will read available space as total drive space, and all used space as null. This leads to Windows only displaying a dwindling amount of "available" space as the drives are filled. We can fix this! Functionally this doesn't actually matter, we can still write and read to and from the disk, it just makes it difficult to tell at a glance the proportion of used/available space, so this is an optional step but one I recommend (this step is also unnecessary if you're just using a single external drive). What we're going to do is write a little shell script in #bash. Open nano with the terminal with the command:
nano
Now insert the following code:
#!/bin/bash CUR_PATH=`pwd` ZFS_CHECK_OUTPUT=$(zfs get type $CUR_PATH 2>&1 > /dev/null) > /dev/null if [[ $ZFS_CHECK_OUTPUT == *not\ a\ ZFS* ]] then IS_ZFS=false else IS_ZFS=true fi if [[ $IS_ZFS = false ]] then df $CUR_PATH | tail -1 | awk '{print $2" "$4}' else USED=$((`zfs get -o value -Hp used $CUR_PATH` / 1024)) > /dev/null AVAIL=$((`zfs get -o value -Hp available $CUR_PATH` / 1024)) > /dev/null TOTAL=$(($USED+$AVAIL)) > /dev/null echo $TOTAL $AVAIL fi
Save the script as "dfree.sh" to /home/"yourlinuxusername" then change the ownership of the file to make it executable with this command:
sudo chmod 774 dfree.sh
Now open smb.conf with sudo again:
sudo nano /etc/samba/smb.conf
Now add this entry to the top of the configuration file to direct Samba to use the results of our script when Windows asks for a reading on the pool's used/available/total drive space:
[global]
dfree command = /home/"yourlinuxusername"/dfree.sh
Save the changes to smb.conf and then restart Samba again with the terminal:
sudo systemctl restart smbd
Now there’s one more thing we need to do to fully set up the Samba share, and that’s to modify a hidden group permission. In the terminal window type the following command:
usermod -a -G sambashare “yourlinuxusername”
Then restart samba again:
sudo systemctl restart smbd
If we don’t do this last step, everything will appear to work fine, and you will even be able to see and map the drive from Windows and even begin transferring files, but you'd soon run into a lot of frustration. As every ten minutes or so a file would fail to transfer and you would get a window announcing “0x8007003B Unexpected Network Error”. This window would require your manual input to continue the transfer with the file next in the queue. And at the end it would reattempt to transfer whichever files failed the first time around. 99% of the time they’ll go through that second try, but this is still all a major pain in the ass. Especially if you’ve got a lot of data to transfer or you want to step away from the computer for a while.
It turns out samba can act a little weirdly with the higher read/write speeds of RAIDz arrays and transfers from Windows, and will intermittently crash and restart itself if this group option isn’t changed. Inputting the above command will prevent you from ever seeing that window.
The last thing we're going to do before switching over to our Windows PC is grab the IP address of our Linux machine. Enter the following command:
hostname -I
This will spit out this computer's IP address on the local network (it will look something like 192.168.0.x), write it down. It might be a good idea once you're done here to go into your router settings and reserving that IP for your Linux system in the DHCP settings. Check the manual for your specific model router on how to access its settings, typically it can be accessed by opening a browser and typing http:\\192.168.0.1 in the address bar, but your router may be different.
Okay we’re done with our Linux computer for now. Get on over to your Windows PC, open File Explorer, right click on Network and click "Map network drive". Select Z: as the drive letter (you don't want to map the network drive to a letter you could conceivably be using for other purposes) and enter the IP of your Linux machine and location of the share like so: \\"LINUXCOMPUTERLOCALIPADDRESSGOESHERE"\"zpoolnamegoeshere"\. Windows will then ask you for your username and password, enter the ones you set earlier in Samba and you're good. If you've done everything right it should look something like this:

You can now start moving media over from Windows to the share folder. It's a good idea to have a hard line running to all machines. Moving files over Wi-Fi is going to be tortuously slow, the only thing that’s going to make the transfer time tolerable (hours instead of days) is a solid wired connection between both machines and your router.
Step Six: Setting Up Remote Desktop Access to Your Server
After the server is up and going, you’ll want to be able to access it remotely from Windows. Barring serious maintenance/updates, this is how you'll access it most of the time. On your Linux system open the terminal and enter:
sudo apt install xrdp
Then:
sudo systemctl enable xrdp
Once it's finished installing, open “Settings” on the sidebar and turn off "automatic login" in the User category. Then log out of your account. Attempting to remotely connect to your Linux computer while you’re logged in will result in a black screen!
Now get back on your Windows PC, open search and look for "RDP". A program called "Remote Desktop Connection" should pop up, open this program as an administrator by right-clicking and selecting “run as an administrator”. You’ll be greeted with a window. In the field marked “Computer” type in the IP address of your Linux computer. Press connect and you'll be greeted with a new window and prompt asking for your username and password. Enter your Ubuntu username and password here.

If everything went right, you’ll be logged into your Linux computer. If the performance is sluggish, adjust the display options. Lowering the resolution and colour depth do a lot to make the interface feel snappier.

Remote access is how we're going to be using our Linux system from now, barring edge cases like needing to get into the BIOS or upgrading to a new version of Ubuntu. Everything else from performing maintenance like a monthly zpool scrub to checking zpool status and updating software can all be done remotely.

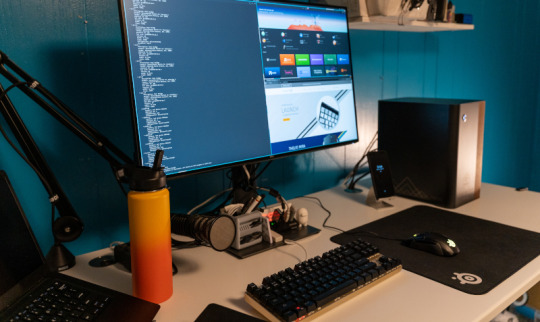
This is how my server lives its life now, happily humming and chirping away on the floor next to the couch in a corner of the living room.
Step Seven: Plex Media Server/Jellyfin
Okay we’ve got all the ground work finished and our server is almost up and running. We’ve got Ubuntu up and running, our storage array is primed, we’ve set up remote connections and sharing, and maybe we’ve moved over some of favourite movies and TV shows.
Now we need to decide on the media server software to use which will stream our media to us and organize our library. For most people I’d recommend Plex. It just works 99% of the time. That said, Jellyfin has a lot to recommend it by too, even if it is rougher around the edges. Some people run both simultaneously, it’s not that big of an extra strain. I do recommend doing a little bit of your own research into the features each platform offers, but as a quick run down, consider some of the following points:
Plex is closed source and is funded through PlexPass purchases while Jellyfin is open source and entirely user driven. This means a number of things: for one, Plex requires you to purchase a “PlexPass” (purchased as a one time lifetime fee $159.99 CDN/$120 USD or paid for on a monthly or yearly subscription basis) in order to access to certain features, like hardware transcoding (and we want hardware transcoding) or automated intro/credits detection and skipping, Jellyfin offers some of these features for free through plugins. Plex supports a lot more devices than Jellyfin and updates more frequently. That said, Jellyfin's Android and iOS apps are completely free, while the Plex Android and iOS apps must be activated for a one time cost of $6 CDN/$5 USD. But that $6 fee gets you a mobile app that is much more functional and features a unified UI across platforms, the Plex mobile apps are simply a more polished experience. The Jellyfin apps are a bit of a mess and the iOS and Android versions are very different from each other.
Jellyfin’s actual media player is more fully featured than Plex's, but on the other hand Jellyfin's UI, library customization and automatic media tagging really pale in comparison to Plex. Streaming your music library is free through both Jellyfin and Plex, but Plex offers the PlexAmp app for dedicated music streaming which boasts a number of fantastic features, unfortunately some of those fantastic features require a PlexPass. If your internet is down, Jellyfin can still do local streaming, while Plex can fail to play files unless you've got it set up a certain way. Jellyfin has a slew of neat niche features like support for Comic Book libraries with the .cbz/.cbt file types, but then Plex offers some free ad-supported TV and films, they even have a free channel that plays nothing but Classic Doctor Who.
Ultimately it's up to you, I settled on Plex because although some features are pay-walled, it just works. It's more reliable and easier to use, and a one-time fee is much easier to swallow than a subscription. I had a pretty easy time getting my boomer parents and tech illiterate brother introduced to and using Plex and I don't know if I would've had as easy a time doing that with Jellyfin. I do also need to mention that Jellyfin does take a little extra bit of tinkering to get going in Ubuntu, you’ll have to set up process permissions, so if you're more tolerant to tinkering, Jellyfin might be up your alley and I’ll trust that you can follow their installation and configuration guide. For everyone else, I recommend Plex.
So pick your poison: Plex or Jellyfin.
Note: The easiest way to download and install either of these packages in Ubuntu is through Snap Store.
After you've installed one (or both), opening either app will launch a browser window into the browser version of the app allowing you to set all the options server side.
The process of adding creating media libraries is essentially the same in both Plex and Jellyfin. You create a separate libraries for Television, Movies, and Music and add the folders which contain the respective types of media to their respective libraries. The only difficult or time consuming aspect is ensuring that your files and folders follow the appropriate naming conventions:
Plex naming guide for Movies
Plex naming guide for Television
Jellyfin follows the same naming rules but I find their media scanner to be a lot less accurate and forgiving than Plex. Once you've selected the folders to be scanned the service will scan your files, tagging everything and adding metadata. Although I find do find Plex more accurate, it can still erroneously tag some things and you might have to manually clean up some tags in a large library. (When I initially created my library it tagged the 1963-1989 Doctor Who as some Korean soap opera and I needed to manually select the correct match after which everything was tagged normally.) It can also be a bit testy with anime (especially OVAs) be sure to check TVDB to ensure that you have your files and folders structured and named correctly. If something is not showing up at all, double check the name.
Once that's done, organizing and customizing your library is easy. You can set up collections, grouping items together to fit a theme or collect together all the entries in a franchise. You can make playlists, and add custom artwork to entries. It's fun setting up collections with posters to match, there are even several websites dedicated to help you do this like PosterDB. As an example, below are two collections in my library, one collecting all the entries in a franchise, the other follows a theme.

My Star Trek collection, featuring all eleven television series, and thirteen films.

My Best of the Worst collection, featuring sixty-nine films previously showcased on RedLetterMedia’s Best of the Worst. They’re all absolutely terrible and I love them.
As for settings, ensure you've got Remote Access going, it should work automatically and be sure to set your upload speed after running a speed test. In the library settings set the database cache to 2000MB to ensure a snappier and more responsive browsing experience, and then check that playback quality is set to original/maximum. If you’re severely bandwidth limited on your upload and have remote users, you might want to limit the remote stream bitrate to something more reasonable, just as a note of comparison Netflix’s 1080p bitrate is approximately 5Mbps, although almost anyone watching through a chromium based browser is streaming at 720p and 3mbps. Other than that you should be good to go. For actually playing your files, there's a Plex app for just about every platform imaginable. I mostly watch television and films on my laptop using the Windows Plex app, but I also use the Android app which can broadcast to the chromecast connected to the TV in the office and the Android TV app for our smart TV. Both are fully functional and easy to navigate, and I can also attest to the OS X version being equally functional.
Part Eight: Finding Media
Now, this is not really a piracy tutorial, there are plenty of those out there. But if you’re unaware, BitTorrent is free and pretty easy to use, just pick a client (qBittorrent is the best) and go find some public trackers to peruse. Just know now that all the best trackers are private and invite only, and that they can be exceptionally difficult to get into. I’m already on a few, and even then, some of the best ones are wholly out of my reach.
If you decide to take the left hand path and turn to Usenet you’ll have to pay. First you’ll need to sign up with a provider like Newshosting or EasyNews for access to Usenet itself, and then to actually find anything you’re going to need to sign up with an indexer like NZBGeek or NZBFinder. There are dozens of indexers, and many people cross post between them, but for more obscure media it’s worth checking multiple. You’ll also need a binary downloader like SABnzbd. That caveat aside, Usenet is faster, bigger, older, less traceable than BitTorrent, and altogether slicker. I honestly prefer it, and I'm kicking myself for taking this long to start using it because I was scared off by the price. I’ve found so many things on Usenet that I had sought in vain elsewhere for years, like a 2010 Italian film about a massacre perpetrated by the SS that played the festival circuit but never received a home media release; some absolute hero uploaded a rip of a festival screener DVD to Usenet. Anyway, figure out the rest of this shit on your own and remember to use protection, get yourself behind a VPN, use a SOCKS5 proxy with your BitTorrent client, etc.
On the legal side of things, if you’re around my age, you (or your family) probably have a big pile of DVDs and Blu-Rays sitting around unwatched and half forgotten. Why not do a bit of amateur media preservation, rip them and upload them to your server for easier access? (Your tools for this are going to be Handbrake to do the ripping and AnyDVD to break any encryption.) I went to the trouble of ripping all my SCTV DVDs (five box sets worth) because none of it is on streaming nor could it be found on any pirate source I tried. I’m glad I did, forty years on it’s still one of the funniest shows to ever be on TV.
Part Nine/Epilogue: Sonarr/Radarr/Lidarr and Overseerr
There are a lot of ways to automate your server for better functionality or to add features you and other users might find useful. Sonarr, Radarr, and Lidarr are a part of a suite of “Servarr” services (there’s also Readarr for books and Whisparr for adult content) that allow you to automate the collection of new episodes of TV shows (Sonarr), new movie releases (Radarr) and music releases (Lidarr). They hook in to your BitTorrent client or Usenet binary newsgroup downloader and crawl your preferred Torrent trackers and Usenet indexers, alerting you to new releases and automatically grabbing them. You can also use these services to manually search for new media, and even replace/upgrade your existing media with better quality uploads. They’re really a little tricky to set up on a bare metal Ubuntu install (ideally you should be running them in Docker Containers), and I won’t be providing a step by step on installing and running them, I’m simply making you aware of their existence.
The other bit of kit I want to make you aware of is Overseerr which is a program that scans your Plex media library and will serve recommendations based on what you like. It also allows you and your users to request specific media. It can even be integrated with Sonarr/Radarr/Lidarr so that fulfilling those requests is fully automated.
And you're done. It really wasn't all that hard. Enjoy your media. Enjoy the control you have over that media. And be safe in the knowledge that no hedgefund CEO motherfucker who hates the movies but who is somehow in control of a major studio will be able to disappear anything in your library as a tax write-off.
1K notes
·
View notes
Photo

Web site: damnvulnerablelinux.org (not active) Origin: Germany Category: Security Desktop environment: KDE Architecture: x86 Based on: Slax Wikipedia: Damn Vulnerable Linux Media: Live DVD The last version | Released: 1.5 | January 26, 2009
Damn Vulnerable Linux (DVL) – a live Linux distribution based on Slax, which is based on Slackware.
According to the project Web site: “Damn Vulnerable Linux (DVL) is everything a good Linux distribution isn’t. Its developers have spent hours stuffing it with broken, ill-configured, outdated, and exploitable software that makes it vulnerable to attacks.”
The idea behind this distribution is to train Linux admins.
https://www.youtube.com/watch?v=jsGW-uHncT4
https://www.youtube.com/watch?v=6lwauRlR0DA
https://www.youtube.com/watch?v=JzSQdc2-lnE
https://www.youtube.com/watch?v=7ecbrCnGqow
IT IS NOT recommended you install this, not even on a VM, especially with internet access.
4 notes
·
View notes
Text
System76 Spotlight with Adam Balla

Welcome to the first of an ongoing series where we get to know some of the amazing people behind System76! This week, we kick things off with one of our newest members, Adam Balla (AKA chzbacon), who has just joined the Marketing Team as our Content Producer. Learn what makes his content creation heart go pitter-patter, and why his electric smoker is his must-have cooking appliance.
When did you first become interested in Linux computer systems?
When my roommate introduced me to Slackware in 1999, he was working as a Linux system admin and he really got me interested in Linux. I was going to the Art Institute of Houston at the time for a Multimedia Design degree, and the thought that you could create your own desktop operating system really appealed to me. I didn’t need to stare at the same old tacky operating system I’d used for years.
I found myself, like many nerds of the era, at a Micro Center in the early 2000s rummaging through the discount software bins, trying to snag up multi-CD Linux distributions. This journey exposed me to several of today’s most popular Linux distros. One of those was SUSE Linux 5.3, of which I still keep the tattered book on a bookshelf as a reminder. I did however finally find my place in the world of Debian, which is where I essentially live today. Honestly not much has really changed other than using Pop!_OS as my main distribution—though like any Linux diehard, I still love to download, test, and sometimes install all the Linux.
When did you start becoming a champion for open source hardware and software?
It was a few years after that. Once I got back from the Art Institute and I was working in the area, we needed a server for the screen printing shop that I worked at. Knowing about Linux at that point, I was able to set up a server using consumer-grade gear that we could store all of our artwork and assets on. Moving forward, I set up a server for the newspaper that I worked at for a decade, which I know is still running to this day. After using Linux in that sort of environment and knowing it was good enough for a business, I knew it was good enough for me and my needs.
How did you get involved in content creation as a career?
My father was an engineer. When I was young I was always, like most kids, into drawing cars and doodles and cartoons, but I was used to having a drafting table at the house. Computing came around, and my father bought an IBM 486 and one of the original digitizing tablets, and so I got to play around with that. Eventually, he got upset because I was on the computer more than he was, so he bought me an IBM 386 to use.
Around 1995, my dad learned from a coworker about Photoshop. I begged him to get me a copy, and he finally did for Christmas. That’s when I started playing around in Photoshop and really fell into wanting to create for a living. Similar to what my father does, but maybe not as stringent in the decision that I make—no building is going to fall down from my creative process.
And that’s how I got into the whole content creation piece. I created a cover for the album of my high school bands and then started doing work for more local bands. Back then, there were no digital art courses, so I learned a lot by doing and trial/error.
What is your favorite part of the creative process?
Working together as a team during the initial brainstorming process. Going through all of the ideas and details, sometimes writing them down, sometimes not, and even laughing at myself at how ridiculous an idea may sound. I love the process of the very first step. I love to set the vision for the project work from there to turn that vision into reality.
How did you first learn about System76?
I first learned about System76 through Chris Fisher and Jupiter Broadcasting. I believe they were reviewing the Leopard Extreme in 2012, on what at that time was the Linux Action Show. That’s when I started to look at System 76 and their offerings and wondered if it would be better for me to build my own Linux desktop, or adopt something and support the open source community. It’s been a little while since then, and I’ve always kept my eye on System76. Then with the release of Thelio, that really pushed me to the point of, “Wow, these guys are creating their own beautiful custom chassis and they’re incorporating different materials together. What a beautiful machine.”
I was speaking to my wife (financial advisor) about purchasing one in 2019, and I spoke to Emma and some other people at System76 about my desire for one, and I don’t know how, but Emma encouraged me not to buy one! And then I was given the opportunity to come to System76 for the Superfan event, where I was fortunate enough to be one of a dozen people who were gifted a Thelio desktop. It sits on my desk to this day; I even bought a larger desk just so I could put it up there and see it every day. I really appreciate the humble beginnings of System76, and I’m so glad to finally be a part of this amazing team.
Let's get into that creative brain. What is your favorite viral video and/or ad, and why do you love it so much?
I have a few ads that I like. I’ve always liked Honda’s messaging and their ads.
I like these ads because of the way in which they go through their history and lineage and the way that Honda itself has marketed its products as “People First” products—very similar to when they introduced their motorcycles to the US with their “You meet the nicest people on a Honda,” campaign. I think that was in 1962, so this was during the height of the motorcycle gang craze. Then comes this little Japanese motorcycle company and markets their products in a completely opposite image from the rest of the industry. They dared to be different and it paid off for them. Selling over 100 million Honda Cubs since 1958. Being given the title of most produced motor vehicle in the world.
This may come as a surprise to some, but I also really love the original Orwellian-inspired Macintosh commercial, which only aired once during the 1984 Super Bowl. Created by Steve Hayden, Brent Thomas and Lee Clow. In my opinion, these guys really created disruptive advertising, so much so that the ad still resonates today as much as it did then. While I don’t think you need to incite fear to sell a product, it showed that Apple dared to be different.
I’m not sure what constitutes a viral video these days. I’m not sure if it’s having a billion trillion views or just simply infecting one person who saw your video. One that always gives me a chuckle has to be “News Anchor Laughs At Worst Police Sketch Fail”. The honesty on the anchor's face makes me lose it every time.
When you’re not helping to lead the Open Source revolution, what do you like to do with your free time?
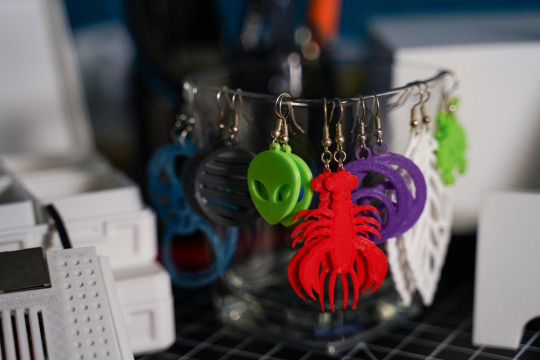
I really like going on walks and taking photos. Photography to me is one of the last honest art forms. What you see really is what you get. I love to tinker and make things, I have a 3D printer that my wife and I purchased as a joint valentine’s gift to each other last year. We started using it right when COVID broke out, so we made around 900 face shields which we distributed to schools, day cares, dentist's offices, anyone who needed one. That’s what we did for about the first 6 months when we first got it. Now, my wife loves to print earrings, for example, and I like to build different fun electronics projects.

I also love to cook, especially for large groups. I just got done with an Easter Weekend + Birthday celebration where we cooked 100 lbs of crawfish, 10 lbs of pork shoulder, sausage, and boudin (which is basically rice and pieces of pork that have been mixed together with seasonings and then put into a casing like sausage). One of my main requirements actually for a place in Denver is somewhere I can bring my electric smoker. It’s a must-have for any Texan.

What are you most excited about with your new role here at System76? To help change the computing landscape as we know it today. Into a future where technology is free and open. A world where you're encouraged to break things, fix things, and learn how they work. Aside from changing the world and stuff, I'm really excited to have a chance to work with such an insanely talented group of people.
#system76#open source#content#content creation#linux#hardware#software#firmware#laptops#desktops#servers#Thelio#Pop!_OS#Launch#Adam Balla#chzbacon#Jupiter Broadcasting#meat#nerd#covid 19#Ubuntu#Debian#SUSE#engineering#design#STEM#3d printing#creative#Denver#Texas
9 notes
·
View notes
Text
Montar y Desmontar ISO en GNU/Linux desde TTY
Montar y Desmontar ISO en GNU/Linux desde TTY

Buenas noches! hace tiempo que no escribía por éstos lugares, volví con muchas ganas de hacer mini how-to nuevamente para todos los newbie o los que recién comenzan en éste mundo de GNU/Linux.
En ocaciones necesitamos montar y también desmontar una imagen .isopara visualizar su contenido y por ahí en vez de perder tiempo usando alguna aplicación, veremos lo simple que es usando nuestra amada…
View On WordPress
#Arch#Archlinux#Debian#Grupos de Telegram#Linuxmint#mkdir#mount#Slackware#Slackware 14.2#Slackware Linux Project#sudo#Telegram#Tutorial#tutorial arch#tutorial arch 2017#tutorial archlinux#tutorial archlinux 2017#Tutorial GNU/Linux#Tutorial Linux#Tutorial sudo#Tutorial Ubuntu#Tutoriales#tutoriales slackware#tutoriales slackware 14.2#Ubuntu#umount#Video Tutorial#Video Tutorial Debian#video tutorial linux#Video Tutorial MOC
0 notes
Link
0 notes
Text
Activation code for easy translator 12.5

#ACTIVATION CODE FOR EASY TRANSLATOR 12.5 UPDATE#
#ACTIVATION CODE FOR EASY TRANSLATOR 12.5 UPGRADE#
#ACTIVATION CODE FOR EASY TRANSLATOR 12.5 SOFTWARE#
Now, we can dive into a more elaborate answer.
#ACTIVATION CODE FOR EASY TRANSLATOR 12.5 SOFTWARE#
Does the Linux Kernel need software engineering? – Maíra Canalįor those looking for a short answer: yes, it does.**kicontheme**, **kid3**, **kidentitymanagement**, **kidletime**, **kig**, **kigo** from the Slackware **kde** package set. GNU World Order (Audio Show) ☛ GNU World Order 474.One of the most often complaints that you will hear about Linux is that there are too many distros that all do the same thing Video ☛ Manjaro and EndeavourOS are like Ding Dongs and Zingers – Invidious.
#ACTIVATION CODE FOR EASY TRANSLATOR 12.5 UPDATE#
On this episode of This Week in Linux: Happy 25th Birthday to GNOME, KDE Gear 22.08 Released, LibreOffice 7.4 Released, Android 13 Released, GLIBC Update Breaks Easy Anti-Cheat, John Deere Tractor Hacked To Run Doom, Krita 5.1 Released, Introducing the Horizon Linux project, Neptune 7.5, Humble Bundle Summer Sale, Spider-Man Remastered On Linux Via Proton, all that and much more on Your Weekly Source for Linux GNews!
Tux Digital ☛ 210: GNOME, KDE, LibreOffice, Android 13, DEF CON, Krita, Spider-Man and more Linux news!.
The longer version of this is in How we handle Ubuntu LTS versions.
#ACTIVATION CODE FOR EASY TRANSLATOR 12.5 UPGRADE#
The every two year machines upgrade to every LTS version the every four year machines upgrade every other LTS version, as their old LTS version threatens to fall out of support. We have long had a habit of upgrading machines between Ubuntu versions either every two years (for most machines that users log in to or directly use) or every four years (although the past two years are an exception).
uni Toronto ☛ Our slow turnover of servers and server generations.
It abstracts many common kubectl commands and maps them to just a few shortcut keys or clicks of the mouse. Fortunately, there is a terminal UI called K9s that makes interacting with your cluster faster and easier. Not the longest command, but typing things like this over an over can get cumbersome. Kubectl edit deployment/mydeployment -o yaml -save-config For example, here is a command for editing a deployment: Though the CLI is robust, commands can quickly become cumbersome to run. However, one needs to know many commands to fetch metrics and operate a Kubernetes cluster using Kubectl. Kubectl is the de facto and most popular Kubernetes command line tool used for accessing Kubernetes cluster metrics.
Earthly ☛ A guide to swiftly managing your Kubernetes resources using K9s – Earthly Blog.
It dual-boots Windows and Linux and is my only x86-64 computer. And, yes, I’ve installed Ubuntu MATE (a semi-official distro that has dedicated builds for this hardware) and Emacs on it, and I program on it. Granted, I’ve only had it for a month, so it may be a novelty effect that’ll wane over time, but still: I’m impressed. Guess which of these two I find myself using more? That’s right, the GPD Micro. This article forms part of our Linux Around The World series. We cover events and user groups that are running in Kosovo.
Linux Links ☛ Linux Around The World: Kosovo – LinuxLinks.
Freedom of Information / Freedom of the Press.
1 note
·
View note
Text
The Slackware Linux Project
The Slackware Linux Project
Hey folks! It’s been a long time, but as usual we had to get everything just exactly perfect, and you just can’t rush that. We are very happy to announce the availability of the new Slackware 15.0 stable release. There have been way too many changes to even begin to cover them here, but for our dedicated user base suffice to say that you’ll find things modern but also familiar. We’ve gone with…
View On WordPress
0 notes
Text
Linux Distributions
Linux Distributions A Linux distribution is made from a software assemblage, consisting of a Linux kernel and a package dealing with the device. In easy phrases, the Linux distro combines the Linux kernel and to be had open-source software, to create a whole package deal. To install Linux, we need to select a distribution. Linux users normally get their os with the aid of downloading one of the Linux distributions. A standard Linux distribution includes a Linux kernel, gnu libraries and gear, and further software programs.
Distributors of Linux We have commercially assisted distributions, such as Fedora, Ubuntu, and OpenSUSE, and also utterly community-driven distributions, such as Debian, Gentoo, Slackware, and Arch Linux. Let us look at a few of them in detail.
Ubuntu
Ubuntu is famous and is amongst the leading Linux distributions. For using ubuntu, we do no longer need to be technically sound, that's why it is extremely famous and additionally, the suitable area to begin experimenting with Linux.
Debian
Debian is an OS, comprising free and open-source software. In 1993, Ian Murdock declared a new Linux distribution to be developed with the GNU viewpoint.
Fedora
Fedora is supported by Red Hat and is the foundation for the commercial project, Red Hat Enterprise Linux (RHEL). Fedora focuses on free software.
OpenSUSE
OpenSUSE is a community-driven Linux distribution. It started as a German translation of Slackware distribution but went on to grow into its distribution.
Linux Mint
Linux Mint is a distribution built on top of Ubuntu, which makes use of the software repositories provided by Ubuntu.
Arch Linux
Arch Linux is more traditional compared to most of the other Linux distributions. It is designed to be lightweight and flexible.
Slackware Linux
Slackware is one of the oldest Linux distributions out there that still maintains and puts out new releases to date.
Gentoo Linux
Gentoo is founded on the portage package managing system. It is difficult to install and can take up to a few days to finish the installation procedure.
0 notes
Photo

Web site: www.how-tux.org (not active) Origin: Italy Category: Desktop Desktop environment: GNOME Architecture: x86 Based on: Slackware Wikipedia: Media: Live CD The last version | Released: 1.0 | August 23, 2006
How-Tux – a Slackware based Linux distribution built using the Live-Linux scripts. How-Tux is created with modules, in the same way as Slax is done.
The distribution is shipped with a system installer translated into Italian and most applications localized for Italian speakers. How-Tux features GNOME desktop environment, OpenOffice.org suite, and several multimedia and graphics applications.
The project was made in Salento by two Italian programmers. They said that it is: “stable and versatile, suitable for everyone, from children to the most savvy users” and is characterized by “a constantly updated software and, of course, FREE! It is one of the first (if not the first) Slackware-based distro to use as default Window Manager Gnome 2.12 (and for this we must thank the Gware team). But to learn more about the software included in this distro we refer to section Features of our site The installer is almost entirely in Italian (translation by Eros Palnerti, Antonio Perrone and Fabio Viola)”.
1 note
·
View note
Text
Como actualizar HPLIP en Linux Slackware 14.2
Como actualizar #HPLIP en #Linux #Slackware 14.2
Linux Slackware 14.2 actualiza hasta la versión 3.16.5 de HPLIP lo cual no sera funcional si cuentas con un impresor HP nuevo, por el momento la versión mas nueva de HPLIP es la versión 3.21.8. Para actualizarlo habría que descargar los fuentes y como root compilarlo, para descargar el paquete fuente ve al siguiente link https://sourceforge.net/projects/hplip/files/ Luego abre una pantalla de…

View On WordPress
0 notes
Text
Bueno continuando con la configuración de nuestro servidor LAMP en Slackware 14.2, ahora vamos a pasar a explicar como configurar PHP con Apache para evitar conflictos y tener una correcta configuración.
Aclaro nuevamente éstas configuraciones que se ven en el tutorial son seteos “básicos“, en el caso que necesiten algo más personalizado en la parte IV dejaré algunos tips sobré ésto.
Comencemos la segunda parte! Instalación de PHP:
# slackpkg install php
Configuración de PHP:
– Para lograr que Apache funcione correctamente junto a PHP debemos ingresar nuevamente a nuestro archivo /etc/httpd/httpd.conf y editar las siguientes líneas:
<IfModule dir_module> DirectoryIndex index.html <:/IfModule>
A ése módulo le agregamos index.php quedando así:
<IfModule dir_module> DirectoryIndex index.php index.html <:/IfModule>
– Luego agregamos en el apartado de AddType lo siguiente:
AddType application/xhttp-php .php .php3 .php4 .php5 .phtml
– Al final prácticamente eliminamos el “#” de la línea Include /etc/httpd/mod_php.conf quedando así:
– Ahora guardamos y salimos. – Cómo no se generó el archivo mod_php.conf, entonces lo que haremos será crearlo y agregamos éstas líneas:
# cat > mod_php.conf
LoadModule php5_module lib/httpd/modules/libphp5.so
<FilesMatch \.php$> SetHandler application/x-httpd-php </FilesMatch>
Guardamos y salimos. – Para revisar que quede funcionando correctamente vamos a dirigirnos al directorio /var/www/htdocs y creamos un archivo con extención .php
# nano index.php
y agregamos éstas líneas:
<?php phpinfo(); ?>
Guardamos y salimos. – Y para finalizar vamos a reiniciar el servicio y chequeamos si carga la info de PHP con nuestro navegador.
# apachectl -k restart
# elinks http://localhost/index.php
– Listo!
Como siempre dejo el video tutorial también:
¿Qué usamos?
Distribución: Slackware.
Versión: 14.2.
Entorno: Ninguno, sólo TTY.
Editor: nano.
Parte I: Apache. – Parte III: MySQL (MariaDB).
Abrazo de gol!
Instalar LAMP en Slackware 14.2 – Parte II: Apache y PHP Bueno continuando con la configuración de nuestro servidor LAMP en Slackware 14.2, ahora vamos a pasar a explicar como configurar…
#How To#How To Install#How to install apache php#How to install LAMP#how to install php#Instalar Apache y PHP#Instalar Apache y PHP en Slackware#Instalar LAMP#Instalar LAMP en Linux#Instalar LAMP en Slackware#Linux Apache MariaDB PHP#linux apache mysql php#mariadb#MySQL#nano#slackpkg#Slackware#Slackware 14.2#Slackware Linux Project#tty#Video Tutorial#video tutorial linux#Video Tutorial Slackware#VideoTutorial#YouTube#YouTube Tutoral Linux#youtube tutorial linux
0 notes
Text
Linux Operating System Market 2020 Industry Size, Business Opportunities, Top Key Players, and Global Analysis by Forecast to 2027
Fortune Business Insights offers a detailed overview of the global market in a report, titledThe global Linux Operating System market size is projected to reach USD 15.64 billion by the end of 2027. The increasing product applications across diverse industry verticals will bode well for market growth. According to a report published by Fortune Business Insights, titled “Linux Operating System Market Share, Size and Covid-19 Impact Analysis, By Distribution (Virtual Machines, Servers and Desktops), By End-use (Commercial/Enterprise and Individual), and Regional Forecast, 2020-2027,” the market was worth USD 3.89 billion in 2019 and will exhibit a CAGR of 19.2% during the forecast period, 2020-2027.
The report provides a 360-degree overview of the market, listing various factors restricting, propelling, and obstructing the market in the forecast duration. The report also provides additional information such as interesting insights, key industry developments, detailed segmentation of the market, list of prominent players operating in the market, and other Linux Operating System market trends. The report is available for sale on the company website.
The report will include the impact of the Covid-19 pandemic on the global. It will also include the strategies that major companies are adopting to overcome the downfalls during this pandemic.
Click here to get the short-term and long-term impact of COVID-19 on this market.
Please visit: https://www.fortunebusinessinsights.com/linux-operating-system-market-103037
List of companies profiled in the Linux operating system market:
Amazon Web Services, Inc. (US)
Arch Linux
Canonical Ltd. (United Kingdom)
ClearCenter (US)
Debian (US)
Elementary, Inc. (US)
Slackware Linux Project(US)
IBM Corporation (Red Hat, Inc.) (US)
Zorin Group (Ireland)
MontaVista Software, LLC (US)
Oracle Corporation (US)
Plesk International GmbH (SolvasVM) (Switzerland)
SUSE Group (Germany)
Request To Sample PDF of Linux operating system market: https://www.fortunebusinessinsights.com/enquiry/request-sample-pdf/linux-operating-system-market-103037
The Report Answers the Following Queries:
How fierce is the Linux Operating System Market competition?
How will the SCC monitor sensor help the market to gain impetus?
What are the significant drivers and challenges of this market?
Which strategies are adopted by players to earn the lion’s share in the market?
Segmentation Linux operating system market:
By Distribution
Virtual Machines
Servers
Desktops
By End-use
Commercial/Enterprise
Individual
By Region Linux Operating System Market
North America (US and Canada)
Europe ( Germany, U.K., France, Italy, Netherlands, Spain and Rest of Europe)
Asia Pacific ( China, Japan, India, South Korea, Australia, Singapore and Rest of Asia Pacific)
Middle East and Africa (South Africa, GCC and Rest of Middle East and Africa)
Latin America (Brazil, Mexico and Rest of Latin America)
Have Any Query? Speak To Analytics: https://www.fortunebusinessinsights.com/enquiry/speak-to-analyst/linux-operating-system-market-103037
North America to Account for the Largest Share; Increasing Investment in Cloud Platforms Will Aid Growth
The report analyzes ongoing market trends across North America, Latin America, Europe, Asia Pacific, and the Middle East and Africa. Among these regions, the market in North America is projected to emerge dominant in the coming years. The presence of several large scale companies in the United States will have a direct impact on the growth of the market in this region. As of 2018, the market in 2018 was worth USD 675.5 million and this value is projected to increase further in the coming years. Besides North America, the market in Europe will exhibit a considerable CAGR in the coming years driven by the growing efforts to integrate the use of Linux operating system market in desktop systems in several countries across Europe.
Industry Developments:
December 2019:Elementary, Inc. announced the launch of Elementary OS 5.1 Hera linux distribution with the aim of providing more refined end-user experience, and improved productivity for new users.
Get Your Customized Linux Operating System Market Report: https://www.fortunebusinessinsights.com/enquiry/customization/linux-operating-system-market-103037
Table of Content Linux Operating System Market:
1 Introduction
Definition, By Segment
Research Approach
Sources
2 Executive Summary
3 Market Dynamics
Drivers, Restraints and Opportunities
Emerging Trends
4 Key Insights
Macro and Micro Economic Indicators
Consolidated SWOT Analysis of Key Players
5 Global Linux Operating System Market Analysis, Insights and Forecast, 2016-2027
5.1 Key Findings / Summary
5.2 Market Sizing Estimations and Forecasts By Distribution
Virtual Machines
Servers
Desktops
5.3 Market Size Estimates and Forecasts By End-use
Commercial/Enterprise
Individual
5.4 Market Analysis, Insights and Forecast By Region
North America
Europe
Asia-Pacific (APAC)
Middle East and Africa (MEA)
Latin America (LATAM)
6 North America Linux Operating System Market Analysis, Insights and Forecast, 2016-2027
6.1 Key Findings / Summary
6.2 Market Sizing Estimations and Forecasts By Distribution
Virtual Machines
Servers
Desktops
6.3 Market Size Estimates and Forecasts By End-use
Commercial/Enterprise
Individual
6.4 Market Analysis, Insights and Forecast By Country
US
Canada
TOC Continued....!
Industry Developments:
December 2019: Elementary, Inc. announced the launch of Elementary OS 5.1 Hera linux distribution with the aim of providing more refined end-user experience, and improved productivity for new users.
Key Reasons to Purchase
To gain insightful analyses of the market and have comprehensive understanding of the global Linux Operating System Market industry and its commercial landscape.
Assess the production processes, major issues, and solutions to mitigate the development risk.
To understand the most affecting driving and restraining forces in the Linux Operating System Market and its impact in the global market.
Learn about the market shares & strategies that are being adopted by leading respective organizations.
To understand the future outlook and prospects for the market.
Besides the standard structure reports, we also provide custom research according to specific requirements.
Have a Look at Related Research Insights:
Base Station Antenna Market
Project Portfolio Management Market
Cloud IT Service Management Market
Parental Control Software Market
Europe Cloud Managed Networking Market
About Us:
Fortune Business Insights™ offers expert corporate analysis and accurate data, helping organizations of all sizes make timely decisions. Our reports contain a unique mix of tangible insights and qualitative analysis to help companies achieve sustainable growth. Our team of experienced analysts and consultants use industry-leading research tools and techniques to compile comprehensive market studies, interspersed with relevant data.
Contact:
Name: Ashwin Arora
Email: [email protected]
Phone: US +1 424 253 0390 / UK +44 2071 939123 / APAC: +91 744 740 1245
0 notes
Text
Linux Operating System Market 2019 Global Industry Analysis, Recent Trends, Applications, Development, Competitive Landscape and Regional Forecast to 2023 | Analysis of COVID-19
Market Highlights
The global Linux operating system market 2020 is projected to gain competitiveness. Linux is open source operating system which interfaces between hardware and software. It has two execution modes that comes with own advantages. These modes are kernel and user. It is used in different systems such as desktops, workstations, and servers. A report presented by Market Research Future (MRFR) after an assessment of ongoing trends and past data reveals that the global Linux operating system market is supposed to witness rising popularity in the coming years. In this report it has been indicated that the global market is supposed to augment at 18.5% CAGR over the forecast period 2018 to 2023.
With increasing digitization, the demand for open source operating system is rising. It is supposed to drive the growth of the Linux operating system market in the upcoming years. Also, this OS offers better security as compared to Windows. Thus, it is supposed to witness a rapid increase in growth rate of the Linux operating system market in the foreseeable future.
Key Growth Drivers of Linux Operating System Market
Linux is an open-source operating system that edges between the computer software and hardware. Linux OS is similar to other operating systems such as OS X, Windows, or iOS in terms of graphical user interface and software applications, including word processing applications. In the present time, the market of the Linux operating system has witnessed an optimum level of growth that has risen the shares to double-digit. The current study marks that the global Linux operating system is hyped by many factors backing up robustly from the global level.
Some of the critical factors are directed first towards the technological advancements and rising awareness among consumers that have led to increased demand for computer systems, subsequently rising the demand of Linux operating systems and driving the Linux operating systems market. The development of different applications in mobile phones, mainly due to android OS among the youth will open the opportunities of operating system market in the upcoming years.
Moving forward, the expansion of the Linux operating system market is attributing to the rising demand for open-source operating systems and the necessity to obtain a double secure operating system than Windows. In this way, the market is now open up with an array of opportunities owing to the high usage of a user-friendly graphical user interface (GUI) and the rising adoption of Linux operating systems among small and medium-sized enterprises. The aim of this is to condense initial costs and escalate business performance. All these factors are expected to boost the market of operating systems in upcoming years.
Furthermore, various IT organizations are exercising the deployment of Linux OS on their desktops and workstations, owing to the benefits being offered in terms of usability and cost-effectiveness. In the main lead, Linux OS is found to be capable of handling multiple users at the same time, which is the primary need for any IT organization to work. With this, Linux OS also offers virtualization, which makes it ideal for use in workstations. Red Hat, Inc. has been a significant stakeholder with maximum shares in the distribution of Linux OS for enterprise workstations.
Tech-giants such as Amazon, Facebook, Twitter, and Google are known for running gigantic clusters of servers on the Linux operating system. The leading Linux OS for servers is provided by Debian, CentOS, Slackware, Ubuntu Server, and Gentoo. Therefore, features such as automated compliance across multiple environments integrated control features for increased security and simplified software updates are among some of the advantages while working on the Linux operation system. These factors have highly been responsible for the growth of the Linux Operating System Market.
Segmentation:
On the basis of type, the Linux operating system market share has been segmented into user mode and kernel mode.
On the basis of device type, the Linux operating system market has been segmented into workstations and server.
On the basis of application, the Linux operating system market has been segmented into enterprise and individual. The sub-segments of the enterprise segment are large enterprises and SMEs.
Regional Framework
This research report analyzes the global Linux Operating System market, depending on the regional study conducted by MRFR analysts. Geographies include in this research report include Asia Pacific, North America, Europe, and the Rest of the World.
The U.S. is the largest market for Linux operating systems in the entire North American region, owing to the technological advancements and the trend, which is anticipated to continue during the growth period. OS, such as Linux, has accomplished a remarkable position ever since the inception of computers being used professionally. The score of the market goes well as North America acquired the largest market share with 36.5% back in 2017, with a remarkable market value of USD 1,107.0 million. Thus, the market might register a CAGR of 18.7% during the growth period. The growth in the North American market is also mainly driven by the existence of critical stakeholders such as Red Hat Inc. and IBM Corporation.
Similarly, the region of Europe was considered to be the second-largest market back in 2018, valued at USD 929.9 million. Now it is estimated to inflate at the highest CAGR of 20.4%. There is significant adoption of Linux based server farms (data centers) among the financial organizations in the region, which is further probable to drive up the Linux operating system market in Europe in the near future.
Key Market Players
The leading players of global Linux Operating System Market are listed as Ubuntu (Canonical Ltd) (UK), IBM Corporation (US), elementary, Inc., Linux Mint (UK), Debian, Arch Linux, SUSE, Manjaro, and Red Hat, Inc. (US).
Related Reports:
https://www.evernote.com/shard/s652/sh/6732419e-9ef4-97b9-2239-7e9e53802644/5a5c142b425329ed0f2d890c71eb35de
https://www.evernote.com/shard/s652/sh/6735dc4f-5445-8d82-e053-686afff62d42/6a32e46322df286a8df90e362248019d
https://www.evernote.com/shard/s652/sh/9571b92d-a0ef-b1b2-fea7-07ac80f17e7d/ebdc20a5b4df3335c2d452b91f0f303d
https://www.evernote.com/shard/s652/sh/fda65a60-e40d-0572-d804-5105755907b1/9444513096bc29afa299a24e6867804c
0 notes
Text
Buenas noches, ahora voy a explicar como actualizar nuestro sistema luego de instalar Slackware 14.2 (si quieren el tutorial pueden darse una vuelta aquí para ver como es el proceso de una instalación full).
Comencemos!
Bueno ya como root lo que haremos será desde la tty o si utilizan entorno gráfico abren una terminal y haremos lo siguiente:
1 – Vamos a editar los mirrors de dónde queremos actualizar nuestro sistema, en mi caso utilicé los de Brasil porque tienen buena velocidad y están cerca de Argentina.
NOTA: Ustedes deberían elegir los que estén más próximos a su país.
Escribimos lo siguiente en la tty:
# nano /etc/slackpkg/mirrors
Guardamos y salimos.
2 – Ahora vamos actualizaremos los repositorios con la siguiente orden:
# slackpkg update
3 – Una vez finalizado el proceso anterior vamos a proceder con la actualización de nuestro sistema. Dónde nos aparecerán los paquetes para ser actualizados.
3.a – Comenzado dicho proceso ésto demorará de acuerdo a la cantidad de paquetes que tengamos y de acuerdo a los que dejemos seleccionados para que se actualicen y se instalen.
4 – Finalizado ésto ya queda listo nuestro sistema al día con los paquetes estables y listos para reiniciar el sistema y comenzar a trabajar.
5 – Dejo a continuación un video tutorial por las dudas necesiten salir de las dudas con un video:
¿Que usamos?
Distribución: Slackware.
Entorno: Ninguno, sólo TTY.
Manejador de paquetes: slackpkg.
Espero que les haya servido y recuerden recuerden compartir el how to en tus redes sociales para que siga creciendo y aportando más material.
Abrazo de gol.
Actualizar Sistema Slackware 14.2 Buenas noches, ahora voy a explicar como actualizar nuestro sistema luego de instalar Slackware 14.2 (si quieren el tutorial pueden darse una vuelta…
#actualizar sistema#actualizar slackware 14.2#actualizar slackware linux project#como actualizar sistema#como actualizar slackware#GNU/Linux#GNU/Linux Tutorial#How To#How To Upgrade#how to upgrade slackware#how to upgrade slackware 14.2#Linux Tutorial#slackpkg#Slackware#Slackware 14.2#Slackware Linux Project#Terminal#tty#Tutorial#Tutorial Linux#upgrade slackware#Video Tutorial Slackware#YouTube#YouTube Tutoral Linux#youtube tutorial linux
0 notes