#admin panel admin dashboard
Explore tagged Tumblr posts
Visit Tumblr Blog
Explore Tumblr blogs with no restrictions, modern design and the best experience.
Last Seen Tumblr Blogs


Fun Fact
The most popular pages on Tumblr are about Minecraft, GIFs, and David J. Peterson.
Text
Kamatera Review – The Best Scalable Cloud Host Yet?
New Post has been published on https://thedigitalinsider.com/kamatera-review-the-best-scalable-cloud-host-yet/
Kamatera Review – The Best Scalable Cloud Host Yet?
This Kamatera review will help you decide whether the web host is the best option for you!
Being able to scale your resource demand effortlessly as your website grows… paying only for the resources you use… no-single-point-of-failure security guarantee… what’s not to love about cloud hosting?
As a web hosting consultant I have helped hundreds of my clients choose the best web hosts to migrate their websites to – and many times, they were also upgrading from a shared or VPS plan to cloud hosting. Kamatera has always been high up in the list of options when we were considering cloud hosts, so I decided to check out their service and take you along.
In the rest of this Kamatera review, I’ll discuss all the web host’s plans, features you can expect to enjoy, how much you should budget, real-time performance figures, their dedication to customer support, and other important factors you should look out for.
Kamatera Review
Founded in 1995, Kamatera is no new kid on the block. They offer generic cloud hosting and every other cloud hosting hybrid you can think of – from managed and unmanaged cloud servers to virtual private cloud (VPC) services and cloud VPS hosting. They also offer reseller hosting for mini hosting companies and web professionals who want to cross-sell this with their core services.
I get it. The differences between their virtual private cloud hosting and cloud VPS hosting can be subtle but don’t worry we’ll discuss them in detail.
Kamatera’s cloud hosting plans are incredibly affordable too. I also like that on all their core plans, you can choose between ready-made packages or customize your plan yourself by setting the number of CPUs, memory (RAM), traffic, storage, and bandwidth. Kamatera also allows you to choose where you want your servers to be located.
Kamatera has been reviewed by 200 users on TrustPilot and users give them a rather decent 3.2 stars. Their positive reviews are from users praising how easy it to set up a server, transparent pricing, and uncommon level of support.
Kamatera Ratings – My Personal Take
It’s been a tradition for me to always give my personal ratings of each host I recommend – and Kamatera will be no different. there’s really no guarantee you can trust the reviews that many web hosts publish on their websites. Plus many businesses doctor reviews on popular platforms like TrustPilot.
The best approach to know exactly how great a web host’s services are? A non-biased overall rating of the web host through expert eyes.
Considering Kamatera’s key features and their real-life performance, here’s how I’d rate the web host on a scale of 1-5. Note that these scores are not static and only reflect their offerings at the time of this writing:
Quality My rating Why I gave this score Features and specs 5.0 Exceptional scalability, a cloud firewall, load balancing tech, and their specialized disaster recovery service makes Kamatera one of the most reliable cloud hosts on the market. They get a resounding 5.0 stars here. Pricing 4.9 Starting at $4/month for their cloud servers, Kamatera’s services are also undoubtedly some of the cheapest on the market. Many VPS plans from other hosting providers even cost more. Performance stats 4.7 My personal tests of Kamatera’s servers recorded a response time of 270 ms. That’s really decent and up there, even though a good number of hosts still perform better so they get a 4.7 in this category. Ease of use 4.0 One of the chief complaints users filed about Kamatera was how it logged you out repeatedly with an IP error message and I experienced this first-hand. Asides that, Kamatera makes it easy to manage your website backend using cPanel, Plesk, Vesta, and CyberPanel. I give them a 4.0 here Customer support guarantee 4.5 Several call lines for their different support portals, email addresses, ticketing, and a knowledgebase are how Kamatera caters to its users’ inquiries. However, I’d have loved to see a live chat option for real-time support. I give them a 4.5 here.
Kamatera Hosting Plans and Prices – 2024
Kamatera offers cloud servers, managed cloud services, virtual private cloud hosting, cloud VPS hosting, and reseller hosting. One small caveat you need to know about Kamatera’s plans is they don’t have a money back guarantee and even if you cancel your plans within the first month, they still charge you the full month’s fee.
You can pay for any Kamatera hosting plan you’ve decided on using your credit card or via Paypal.
Kamatera cloud servers
Kamatera ‘Simple’ cloud hosting plans come in three tiers and allow you to choose your server location and server specs – Windows, Linux, or SSD-optimized.
These plans start at $4/month and you get between 1-2 vCPUs, 1-2 GB RAM of memory, 20-30 GB SSD storage, and 5TB of data transfer on all plans. I love just how much server flexibility you get with Kamatera’s hosting.
Custom cloud servers on Kamatera
What’s more? Kamatera also allows you to configure your hosting plan – you can choose the number of processors you want, where you want your data centers to be located, the amount of memory you need, amount of storage, your OS, amount of traffic, and number of IPs. You also get to decide whether you want to pay for their services per month or per hour. Amazing!
Who this is for:
Kamatera’s cloud servers are for businesses that need to be able to add or remove hosting resources when necessary. With these plans, you can manage your spending exceptionally and don’t have to pay for infrastructure you may not use. Monthly payment drives home your control over what you spend even further.
Kamatera’s managed cloud hosting
Pro Managed
Features – OS monitoring, firewall & networking management, DNS setup, server resources performance metrics, apps installation and configuration, 24/7 NOC support, dedicated account manager on plans with 10+ servers.
Price – $50/month
Premium Managed
Features – Everything in Pro Managed plus custom and application monitoring, database high availability setup, application/service updates, quicker customer agent response times, and dedicated account managers on all plans.
Price – $150/month
Who this is for:
Kamatera’s managed cloud hosting plans take the hassle of managing the technical aspect of your cloud servers out of your hands. From monitoring and setup, to technical support, reporting, and application management, the host does these critical processes for you. What’s more? Kamatera also dedicates a particular human support agent to you who’ll be in charge of your account and you can count on to respond to any inquiries you might have.
Don’t know much about the server-side of websites? Kamatera’s managed cloud hosting plans might just be for you.
Kamatera’s virtual private cloud hosting
Kamatera’s virtual private cloud (VPC) packages are exactly identical to their cloud server plans on both the ‘Simple’ and ‘Customized’ fronts. They are also priced similarly and give you the same features.
Kamatera’s reseller hosting plans
Want to create your own web hosting business or are you a web dev, IT guy, or marketing professional looking to sell web hosting with your core services as a comprehensive package to your clients? Kamatera’s reseller hosting plans are just for you.
Here are some of the benefits you get to enjoy:
Managed setup
With Kamatera’s reseller hosting, their agents support you through setting up your servers and handling client requests.
Outsourced support
You have access to Kamatera’s support team to service your clients whenever they have inquiries.
Less as you grow
The more customers you get, the more discounts you get and the less you have to pay, meaning more profitability for your business.
Ready to get started with Kamatera’s reseller hosting? You’ll need to contact their sales department by creating a support ticket:
Who this is for:
Selling web hosting is one of the best ways to scale your business as a web dev, marketer, or IT professional. You can offer these as part of a comprehensive package and your clients are more likely to buy from you since they already buy your core services from you.
And for web-hosting-only businesses, you can rest assured that you have a business that’s evergreen. Websites will always need website hosting to stay online and it’s an excellent recurring revenue model.
Kamatera Features
Here’s an overview of some of Kamatera’s main features:
SSD storage
Custom hosting plans
Superior load balancing technology
High-performance block storage
Cloud firewall
Transparent pricing
Kamatera, as a cloud-only host, provides premium features that emphasize superior performance and security with its packages.
But some of its more unique features are the load balancers that instantly distribute workloads across a network of servers, ensuring high speeds and quick response times.
Kamatera’s block storage technology emulates a virtual private disk for your cloud plans and ensures there’s no single point of failure. It also ensures extremely low latency (or very quick response times and data transfer) further improving the performance of your website.
Kamatera Performance Tests
Your web host’s servers are your website home and how they perform are exactly how your website will perform. Some important factors to consider when choosing a hosting provider like Kamatera are the server response speeds and uptime.
The web host’s server speed is a measure of how quickly their servers respond and send back your website data to a visitor. On the other hand, the uptime measures the availability of their servers – i.e how much of the time their servers are online to serve up your website’s content to visitors.
The quicker the server speeds are, the less time it will take for your website to load. And the higher the uptime, the more reliable your website will be and you won’t risk losing traffic just because your website was down.
To measure Kamatera’s speed and uptime, I tested a website hosted on their platform and these were the results I got:
Kamatera’s servers started sending the first byte of data back in 276 ms. Quite impressive, even though I still expected better as some high performers respond in sub 100ms.
For the uptime, the website I tested has been available 100% of the time over the last 30 days:
This confirms their 99.9% uptime guarantee!
Kamatera’s Customer Support
It’s easy for web hosts to promise heaven and earth but once many of them take your money, it’s cricket-y silence. Kamatera does well though in terms of customer support. You can reach out to their agents via:
Phone
Kamatera has phone lines for its sales and account managers, technical support, and billing departments.
Email
You can also reach out to Kamatera via email at [email protected], [email protected], and [email protected].
I tried reaching out to their technical support agents via email and got a response in a few hours – quite decent!
Support ticket
Create a support ticket to talk with an agent, fill in your details and phone, and write down your inquiry. Kamatera will reach out to you via email.
Knowledgebase
Simple and straight-to-the-point, Kamatera’s knowledgebase is just how I like it. The built-in search engine also makes it easy to find answers to questions around server setup and security.
Blog
And finally, Kamatera has an up-to-date blog with relevant posts on latest industry information for website and business owners.
Kamatera Security Features
If there’s one thing I like about Kamatera, it’s their security guarantee. First, is their native Cloud Firewall designed to protect your website from attacks while monitoring your servers in real time.
Kamatera’s Cloud Firewall allows you to set rules and filter data packets, exclusively authorizing the entry of certified and approved data packets to your servers. What’s more? The firewall can also function as a VPN giving you even more functionality!
Another core part of Kamatera’s security is the disaster recovery portal. Unforeseen events can impact your website severely. Kamatera’s disaster recovery provides backups, recovery, and failover systems to minimize service disruptions.
Your website’s database is archived at restore points for immediate recovery. And finally, Kamatera’s backup machines are automatically triggered in the event of a system failure to ensure your user experience is not affected.
Kamatera’s hosting plans also allow you to install a free Lets Encrypt SSL certificate, giving your website the padlock seal of trust in the eyes of search engines.
Kamatera User Friendliness – Ease of Use
How to register an account on Kamatera
Setting up an account on Kamatera is super easy. Simply select the plan you want and click on ‘Create server’. You’ll be redirected to the sign up page:
Fill in your email and choose a password you can remember easily – your password should contain at least one lowercase letter, one uppercase letter, a number, and should be at least 8 characters long. Click on ‘Create Free Account’
You’ll receive a confirmation link in your email. Click on it and your account should be ready to go!
How to create a server on Kamatera
To create a new server on Kamatera, from your account dashboard, navigate to “My Cloud” on the left and under the dropdown options, select “Create New Server”
Next, select your preferred data center location and then the operating system you want on the server.
Once that’s done, choose the number of CPUs and specify your server specs – RAM and SSD storage amount.
And finally, configure the fine print – backup, select whether you want a dedicated account manager, set a password, and select your billing schedule. Click on ‘Create server’ and it should be done in a few minutes.
Kamatera control panel
Kamatera doesn’t come with a custom control panel like some other high performing hosts – SiteGround, Hostinger, and A2Hosting – however, Kamatera gives you access to cPanel, Plesk, Vesta, and CyberPanel.
How to install WordPress on Kamatera
The swiftest way to deploy WordPress on Kamatera is via your control panel. Using cPanel as an example, we’ll use the Softaculous installer:
In your cPanel account, navigate to ‘Tools’ and click on ‘Softaculous Apps Installer’.
In the search engine, type in ‘WordPress’. Click ‘Install’ and then ‘Choose protocol’.
Next, choose the domain name you want WordPress installed on and configure the directory. If you’re not sure, just choose the default values and proceed.
Configure your ‘Site Name’ and ‘Site description’. Whatever you put here will be shown in the title bar of a website visitor’s browser.
Next, configure your ‘Admin Username’, ‘Admin password’, and ‘Admin Email’. These are the login details you will use to access your WordPress dashboard once it is installed.
Select the auto update boxes for WordPress, plugins, and themes.
Now configure where you want your website backups to be stored and check the ‘Automated backups’ so Softaculous makes backups of your website at specified intervals.
Review all the installation options and click ‘Install’. Voila!
Kamatera Server Footprint
If Kamatera had just one thing going for them, it’d be their continent-wide server footprint. Their servers are spread across dozens of data centers in Europe, the Americas, and Asia and several countries in between.
This guarantees exceptional website performance for businesses targeting audiences spread across the globe.
Conclusion – Should You Choose Kamatera?
Kamatera is a very decent dedicated cloud host and their performance and built-in features are no joke. I recommend Kamatera if you’re looking for affordable packages and have outgrown your shared/VPS plans.
Their block storage, load balancers, cloud firewall, and disaster recovery ensure your website performs exceptionally and is protected from bad actors.
My only fault with Kamatera would be their account creation process. Their IP address protocol system glitches often and may log you out for no reason at all.
Visit Kamatera →
FAQs
What is Kamatera?
Kamatera is a cloud hosting company that provides web hosting infrastructure mainly to eCommerce businesses and other enterprises that require exceptionally scalable resources.
What is cloud server monitoring?
Cloud server monitoring is one of the services offered by Kamatera to customers. The host constantly monitors your website servers to prevent malware and minimize service disruptions.
What payment methods does Kamatera accept?
Kamatera accepts payments for their hosting plans via credit cards and standing order. They also accept Paypal payments.
#A2Hosting#admin#agent#agents#amazing#Americas#amp#approach#apps#Asia#backup#backups#Best cloud hosting#Blog#browser#Business#Byte#Cloud#Cloud hosting#cloud services#Companies#comprehensive#content#control panel#credit card#dashboard#data#Data Center#Data Centers#data transfer
2 notes
·
View notes
Text
Why .NET Developers Love EasyLaunchpad’s Tailwind UI + Admin Panel Combo
Building a powerful backend is essential — but what about the admin interface your team will use every day?
Let’s face it: Most admin panels are either outdated, bloated with unused UI components, or too time-consuming to design from scratch.
That’s why .NET developers love the UI stack behind EasyLaunchpad: a clean, production-ready admin panel powered by Tailwind CSS and DaisyUI — fully integrated with the .NET Razor view engine.
In this post, we’ll explore how EasyLaunchpad’s UI architecture empowers developers to move faster, customize more easily, and deliver better internal UX from day one.
💡 Why UI Simplicity Matters in a Boilerplate
Your admin panel is the cockpit of your app — where roles are assigned, emails are configured, users are managed, and plans are published.
It must be:
Fast
Clean
Responsive
Easy to navigate
Simple to extend
Most .NET boilerplates focus heavily on backend setup but neglect frontend design. EasyLaunchpad closes this gap by offering a modern, developer-friendly dashboard built with today’s best UI tools.
🎨 The Tech Behind the UI

Here’s what powers EasyLaunchpad’s frontend:
Technology and Purpose
✅Tailwind CSS: Utility-first CSS framework for fast, responsive styling
✅DaisyUI: Prebuilt Tailwind UI components for forms, tables, modals, and alerts
✅Razor Views: Server-side rendering for .NET Core
✅Partial Views & Layouts: Consistent structure and DRY components
✅Alpine.js (Optional): Lightweight interactivity without a frontend framework
Together, these technologies allow for rapid UI development without introducing SPA complexity (like Angular or React), keeping everything lean and maintainable.
What the Admin Panel Includes
From the moment you launch EasyLaunchpad, you get a beautiful and functional admin UI with:
Module and Purpose
✅ Dashboard Overview: Quick-glance metrics, activity log, shortcut links
✅ User Management: CRUD operations, activation toggle, password reset
✅ Role Management: Assign/remove user roles, filter access
✅ Email Settings: Configure SMTP, test mail delivery
✅ Packages & Plans: Add/edit plans linked to Stripe/Paddle
✅ System Settings: Toggle features, branding, limits
✅ Job Monitoring: Integrated Hangfire dashboard for background jobs
All pages are fully responsive and follow a consistent layout, so new features blend in effortlessly.
Why Tailwind CSS Makes It Better
Tailwind CSS takes a utility-first approach to styling. Rather than writing custom classes or cascading stylesheets, you build UI components using readable, descriptive class names.
Example:
<button class=”bg-blue-600 hover:bg-blue-700 text-white font-bold py-2 px-4 rounded”>
Save Changes
</button>
Advantages:
Faster styling workflow
Consistent spacing, color, and typography
Fully responsive without breakpoints guesswork
No CSS bloat — unused styles are purged in production
Tailwind is the modern CSS solution embraced by frameworks like Laravel, Next.js — and now .NET developers through EasyLaunchpad.
Why DaisyUI Takes It Further
DaisyUI is a UI component library built on top of Tailwind. It provides styled components like:
Alerts
Modal
Tabs
Tables
Forms
Dropdowns
Cards
It dramatically reduces time spent on design and layout. You focus on functionality — DaisyUI handles the visuals.
Example:
<div class=”alert alert-success shadow-lg”>
<div>
<span>Changes saved successfully!</span>
</div>
</div>
In EasyLaunchpad, DaisyUI is integrated from day one, so your forms, tables, and pages look polished without writing custom CSS.
UI Architecture and Extensibility
EasyLaunchpad’s UI is structured in Razor Views with:
_Layout.cshtml for layout consistency
_SidebarPartial.cshtml, _NavbarPartial.cshtml for navigation
Views/Admin/ for page-specific content
Reusable partials for tables, modals, input forms
This makes it easy to:
Reuse components
Add new features quickly
Maintain consistency across all modules
How to Add a New Page in the Admin Panel
Let’s say you want to add a “Feedback Manager.”
Step 1: Create Razor View
Views/Admin/Feedback.cshtml
Step 2: Add a Controller Action
public IActionResult Feedback()
{
return View();
}
Step 3: Add Navigation Link
In _SidebarPartial.cshtml:
<li><a href=”/Admin/Feedback”>Feedback</a></li>
Done. It fits seamlessly with the existing layout and design.
Fully Responsive on All Devices
Tailwind + DaisyUI ensures that all admin pages:
Work flawlessly on desktop and mobile
Adjust automatically to screen size
Maintain clean readability and spacing
This is especially helpful for founders and team leads who manage admin functions on the go.
🎯Developer-Friendly Design
Feature and Why It Helps
✅ Utility-first CSS: No need for deep CSS knowledge
✅ Prebuilt components: Save time building UI from scratch
✅ Razor + Partial Views: Easier to manage and reuse code
✅ No JS framework overhead: Great for teams that want clean .NET-only solutions
✅ Production styling: Look polished out of the box
You’re not forced into a heavy frontend framework — just clean Razor + Tailwind + DaisyUI.
Use Cases and Customization Ideas
The admin panel is great for:
Managing your SaaS backend
Granting roles to beta testers
Viewing plan subscriptions
Monitoring job queues
Sending support emails
You can also extend it with:
Graphs (using Chart.js or ApexCharts)
File uploads
Support ticket system
Multi-language settings
The UI architecture is ready for it all.
Developer Feedback
“I loved how EasyLaunchpad gave me a working admin UI in 5 minutes. Tailwind + DaisyUI just clicked — everything was clean and intuitive.” – Full Stack .NET Developer, Startup Founder
Summary: Why You’ll Love It Too
Feature and Value
✅ Tailwind CSS: Rapid, clean UI styling
✅ DaisyUI: Polished components, ready to use
✅ Razor Views: Familiar for .NET devs
✅ Admin Layout: Fully responsive and extendable
✅ No extra frameworks: Pure .NET simplicity
Final Thoughts
When choosing a boilerplate, don’t settle for just backend setup. Your team — and your users — will thank you for a clean, intuitive, scalable admin interface.
EasyLaunchpad gives you a complete Tailwind + DaisyUI admin panel, tightly integrated into your .NET Core app, so you can ship faster and look better from day one.
👉 Want a beautiful dashboard without wasting weeks on UI work? Start with EasyLaunchpad today → https://easylaunchpad.com
#.net boilerplate#.net development#.net Tailwind Dashboard#Tailwind Ui For .net#Daisyui Admin Panel#Admin Interface#easylaunchpad#prebuilt apps
1 note
·
View note
Text
Unlock Efficiency with Pluto – The Ultimate Free Bootstrap Admin Dashboard Template
Why You Need This Admin Dashboard Template In the fast-paced world of web development, time is everything. Whether you’re building a CRM, analytics panel, or a management interface, starting from scratch can be a costly decision. That’s where Pluto – Free Bootstrap 4 HTML5 Admin Dashboard Template comes in. It’s a lifesaver for developers and agencies looking to deploy professional-looking…
#Admin Dashboard Template#Admin UI Kit#Bootstrap 4 Admin Template#Bootstrap 4 Dashboard Template#Bootstrap 4 HTML5 UI Kit Template#Carousel#Clean#Datatables#Dropdown#free admin templates#Free Bootstrap 4 HTML5 Template#free bootstrap template#Free Responsive Agency Template#free template#Login Form#material design#Multipage#On hover effect#Open Source Admin Panel#Pluto Admin Template#Pricing table#Progress bar#responsive dashboard template#Responsive HTML5 Dashboard#Smooth scroll
0 notes
Text

1 note
·
View note
Text
Upgrade Project Design with Minimal lite Bootstrap Admin Template
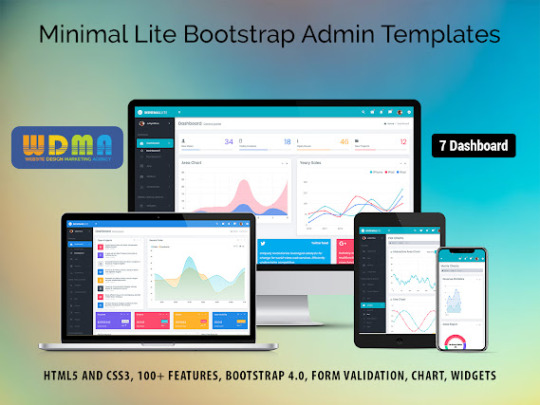
Minimal Lite – Responsive Web Application Kit boasts an extensive array of functionalities, including mobile responsiveness, flexible colour palettes, data presentation utilities, and intuitive interfaces. This Responsive Web Application Kit seamlessly integrates with numerous plugins and add-ons, enriching the administrative dashboard's capabilities. Minimal Lite comes complete with pre-built components, widgets, and styling alternatives, streamlining the development journey. Leveraging the Latest Bootstrap Beta Framework, alongside cutting-edge technologies HTML5 and CSS3, this Premium Admin Template ensures agility and adaptability. Lightweight and highly adaptable, it caters specifically to developers seeking customization options. For inquiries and acquisition of our sophisticated Bootstrap Admin Template.
#Responsive Web Application Kit#Responsive Admin Dashboard Template#Premium Admin Template#Bootstrap Admin Web App#Admin Dashboard Ui Kit#Dashboard Design#Admin Panel Dashboard#Admin Theme#WebApp Template#Dashboard UI Kit
0 notes
Text
How to Write JavaScript
JavaScript is a powerful and versatile programming language used widely in web development. This guide provides beginners with the basic steps necessary to start writing JavaScript code and emphasizes how it can be used to develop dynamic functionalities such as an instant admin panel.
Understanding the Basics
Before diving into JavaScript, it's essential to have a grasp of HTML and CSS, as these technologies work together to create interactive web pages. JavaScript can manipulate the elements and styles defined by HTML and CSS, making it a critical tool for dynamic web applications.
To start writing JavaScript, you can embed the code directly within an HTML document using the <script> tag or link to an external JavaScript file. This separation of concerns promotes cleaner code, easier maintenance and better performance.
Working with Functions and Events
JavaScript functions are blocks of code designed to perform particular tasks when called. Here's a simple example:
To make your webpage interactive, JavaScript uses events. Events are actions that occur as a result of the user's interaction, such as clicks, mouse movements or keyboard actions. You can set up event listeners to trigger functions, enhancing the user experience. For instance, if you're developing an instant admin panel, you might use a button-click event to fetch and display user data dynamically.
Debugging and Tools
As you write more complex JavaScript, debugging becomes crucial. Modern browsers come equipped with developer tools, which include a console where you can test and debug your JavaScript code. These tools also allow you to inspect HTML elements and view any changes made through JavaScript in real time.
With these fundamentals, you'll be well on your way to writing effective JavaScript for various applications, from adding simple animations to creating an admin panel. Practice regularly and utilize online resources to deepen your understanding and refine your coding skills.
Read a similar article about admin panel software here at this page.
0 notes
Photo
false
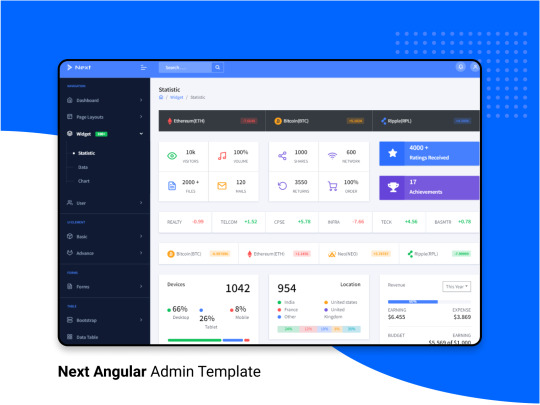
Hello Friend, Next Angular admin is a Premium Admin Dashboard template with a unique & modern design concept.
Next Admin is super manageable, robust, clean & modern responsive. it is a fully customizable template.
#admin dashboard#Web Template#web design#webdev#admin panel#dark theme#web development#web developers#programming#programmers#web design trends#templates#HTML#bootstrap templates#ThemeForest#100daysofcode#coding#angular js#angularjs
3 notes
·
View notes
Text
What Makes DigiCovai the Best eCommerce Development Company in Coimbatore?

Creating a website is not simply a choice in today's digitally-first economy; it is a need for businesses. One thing is certain, regardless of whether you are a manufacturer in Kurichi, a wholesaler in Peelamedu, or a tiny retailer in Town Hall: your consumers are online, and your store should be as well. But picking the perfect companion to guide you there? This is where DigiCovai is useful.
Here are some of the reasons why companies from a variety of sectors regard DigiCovai as the top E - Commerce Development Company in Coimbatore and why they depend on our team to take their brand online.
Built for Sales, Not Just Looks
At DigiCovai, we think your website should do more than just be "live." For this reason, we do more than just design attractive storefronts. We create unique eCommerce websites with backend systems that grow with your company, are optimized for mobile browsing, and are built to convert. Every click, from cart abandonment recovery to product filtering, is designed to have an impact.
24/7 Sales with Web + Mobile
Given that 70% of consumers explore or make purchases on their phones, your online business has to be as responsive as it is on desktops. Our eCommerce solutions are completely mobile-friendly, and for organizations hoping to cultivate enduring client loyalty, iOS and Android app development is a possibility. Since you can own a place in your customers' wallets, why stop at a website?
Methodology-First Method
We listen before we code anything. Every project starts with a strategy meeting to learn about your product, target market, and corporate objectives. After that, we create a user experience that is specific to your target market, regardless of how many goods you sell five or five thousand.
Customized Solutions for All Sectors
Every company is different, and your online store should be no exception. DigiCovai is a Coimbatore-based full-service eCommerce development business that provides tailored solutions for retail stores and boutiques.
Manufacturers Selling Straight to Customers
Delivery of Essentials & Grocery
Skin Care & Cosmetics Brands
Accessories & Electronics
Marketplaces with many vendors
eCommerce Partner All-in-One
DigiCovai is your digital growth team, not just a development company. Everything you need to create, expand, and develop your online store without worry is provided by us, from UI/UX design and secure payment gateway integration to real-time analytics dashboards and post-launch maintenance.
Findings That Make an Order
Mobile apps have improved retention, streamlined backend operations with bespoke admin panels, and increased traffic by up to three times for our clients. What's the best part? They only needed to be prepared to expand; they didn't need to be tech-savvy.
Final Thought
Many developers are available to "build you a website." However, DigiCovai is your partner if you're searching for an E - Commerce Development Company in Coimbatore that creates for outcomes, dependability, and long-term growth.
Together, let's create your 24/7 store.
youtube
2 notes
·
View notes
Text
WiFi Dashboard for Solar Off-Grid Power Plants
This WiFi interface and Data Logger software are used mainly for Solar Off-Grid Power plants This contains wifi connection information, parameter dials, operational status, energy consumption status and fault status of the Unit History option allows the user to access the data history of a particular unit by searching the modem id. Upto 100 entries can be viewed in a single page. Every five minutes the data will be logged in the history and refreshed Data Config option allows the user to configure the data in the dashboard of a particular unit WiFi credential is to connect the unit to the desired wifi network. This can be achieved by entering Modem id, Network name and Password Switch option in the side panel allows the remote operation of the unit. The whole unit or only the charging can be turned ON/OFF from the dashboard by operating the respective ON and OFF tabs User manual option provides the instructions to configure modem to the wifi network and also use the website dashboard
Don’t forget to LIKE, COMMENT, and SUBSCRIBE for more renewable energy solutions and solar projects!
Enquire Now: 9035024760 or [email protected]
Follow our LinkedIn page: https://www.linkedin.com/company/53510028/admin/dashboard/
Follow our Facebook page: https://www.facebook.com/UniparEnergySystemsPvtLtd
Follow our Instagram: https://www.instagram.com/uniparenergysystemspvtltd/
Subscribe our YouTube channel: https://www.youtube.com/watch?v=3hchIw7CFjw
Visit our website: https://unipar.in/
#off grid solar system#off grid solar power systems#off grid solar electric system#grid off solar system#off grid inverter#off grid solar inverter#inverter solar off grid#grid off inverter#inverter grid off#pv inverter off grid#off grid solar#grid solar system
2 notes
·
View notes
Text
⏱Hangfire + Serilog: How EasyLaunchpad Handles Jobs and Logs Like a Pro

Modern SaaS applications don’t run on user actions alone.
From sending emails and processing payments to updating user subscriptions and cleaning expired data, apps need background tasks to stay efficient and responsive.
That’s why EasyLaunchpad includes Hangfire for background job scheduling and Serilog for detailed, structured logging — out of the box.
If you’ve ever wondered how to queue, manage, and monitor background jobs in a .NET Core application — without reinventing the wheel — this post is for you.
💡 Why Background Jobs Matter
Imagine your app doing the following:
Sending a password reset email
Running a weekly newsletter job
Cleaning abandoned user sessions
Retrying a failed webhook
Syncing data between systems
If these were handled in real-time within your controller actions, it would:
Slow down your app
Create a poor user experience
Lead to lost or failed transactions under load
Background jobs solve this by offloading non-critical tasks to a queue for asynchronous processing.
🔧 Hangfire: Background Job Management for .NET Core
Hangfire is the gold standard for .NET Core background task processing. It supports:
Fire-and-forget jobs
Delayed jobs
Recurring jobs (via cron)
Retry logic
Job monitoring via a dashboard
Best of all, it doesn’t require a third-party message broker like RabbitMQ. It stores jobs in your existing database using SQL Server or any other supported backend.
✅ How Hangfire Is Integrated in EasyLaunchpad
When you start with EasyLaunchpad:
Hangfire is already installed via NuGet
It’s preconfigured in Startup.cs and appsettings.json
The dashboard is live and secured under /admin/jobs
Common jobs (like email dispatch) are already using the queue
You don’t have to wire it up manually — it’s plug-and-play.
Example: Email Queue
Let’s say you want to send a transactional email after a user registers. Here’s how it’s done in EasyLaunchpad:
_backgroundJobClient.Enqueue(() =>
_emailService.SendWelcomeEmailAsync(user.Id));
This line of code:
Queues the email job
Executes it in the background
Automatically retries if it fails
Logs the event via Serilog
🛠 Supported Job Types
Type and Description:
Fire-and-forget- Runs once, immediately
Delayed- Runs once after a set time (e.g., 10 minutes later)
Recurring- Scheduled jobs using CRON expressions
Continuations- Run only after a parent job finishes successfully
EasyLaunchpad uses all four types in various modules (like payment verification, trial expiration notices, and error logging).
🖥 Job Dashboard for Monitoring
Hangfire includes a web dashboard where you can:
See pending, succeeded, and failed jobs
Retry or delete failed jobs
Monitor job execution time
View exception messages
In EasyLaunchpad, this is securely embedded in your admin panel. Only authorized users with admin access can view and manage jobs.
🔄 Sample Use Case: Weekly Cleanup Job
Need to delete inactive users weekly?
In EasyLaunchpad, just schedule a recurring job:
_recurringJobManager.AddOrUpdate(
“InactiveUserCleanup”,
() => _userService.CleanupInactiveUsersAsync(),
Cron.Weekly
);
Set it and forget it.
🧠 Why This Is a Big Deal for Devs
Most boilerplates don’t include job scheduling at all.
In EasyLaunchpad, Hangfire is not just included — it’s used throughout the platform, meaning:
You can follow working examples
Extend with custom jobs in minutes
Monitor, retry, and log with confidence
You save days of setup time, and more importantly, you avoid production blind spots.
📋 Logging: Meet Serilog
Of course, background jobs are only useful if you know what they’re doing.
That’s where Serilog comes in.
In EasyLaunchpad, every job execution is logged with:
Timestamps
Job names
Input parameters
Exceptions (if any)
Success/failure status
This structured logging ensures you have a full audit trail of what happened — and why.
Sample Log Output
{
“Timestamp”: “2024–07–20T14:22:10Z”,
“Level”: “Information”,
“Message”: “Queued email job: PasswordReset for userId abc123”,
“JobType”: “Background”,
“Status”: “Success”
}
You can send logs to:
Console (for dev)
File (for basic prod usage)
External log aggregators like Seq, Elasticsearch, or Datadog
All of this is built into EasyLaunchpad’s logging layer.
🧩 How Hangfire and Serilog Work Together
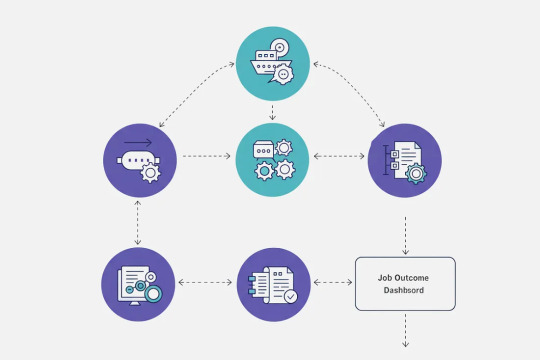
Here’s a quick visual breakdown:
Job Triggered → Queued via Hangfire
Job Executed → Email sent, cleanup run, webhook processed
Job Outcome Logged → Success or error captured by Serilog
Job Visible in Dashboard → Retry if needed
Notifications Sent (optional) → Alert team or log activity via admin panel
This tight integration ensures your background logic is reliable, observable, and actionable.
💼 Real-World Use Cases You Can Build Right Now
-Feature and the Background Job
Welcome Emails- Fire-and-forget
Trial Expiration- Delayed
Subscription Cleanup- Recurring
Payment Webhook Retry- Continuation
Email Digest- Cron-based job
System Backups- Nightly scheduled
Every one of these is ready to be implemented using the foundation in EasyLaunchpad.
✅ Why Developers Love It
-Feature and the Benefit
Hangfire Integration- Ready-to-use queue system
Preconfigured Retry- Avoid lost messages
Admin Dashboard- See and manage jobs visually
Structured Logs- Full traceability
Plug-and-Play Jobs- Add your own in minutes
🚀 Final Thoughts
Robust SaaS apps aren’t just about UI and APIs — they’re also about what happens behind the scenes.
With Hangfire + Serilog built into EasyLaunchpad, you get:
A full background job system
Reliable queuing with retry logic
Detailed, structured logs
A clean, visual dashboard
Zero config — 100% production-ready
👉 Launch smarter with EasyLaunchpad today. Start building resilient, scalable applications with background processing and logging already done for you. 🔗 https://easylaunchpad.com
#.net development#.net boilerplate#Hangfire .net Example#easylaunchpad#Serilog Usage .net#Background Jobs Logging#prebuilt apps#Saas App Development
2 notes
·
View notes
Text
Boost Your Productivity with Quixlab – The Ultimate Free Admin Dashboard Template
Why Quixlab is a Must-Have for Developers and Analysts In today’s data-driven world, a cluttered admin interface is a productivity killer. Whether you’re a solo developer, an agency, or a startup, managing backend operations efficiently can be overwhelming without the right tools. That’s where Quixlab Admin Dashboard Template steps in — a free, responsive, and feature-rich template built on…
#Admin Dashboard Template#Art Studio Bootstrap template#Bootstrap 4 HTML5 UI Kit Template#Clean#Dropdown#Free Admin Panel Template#free template#Fun Fact Counters#Gallery#HTML5 Admin Template#Multipage#Multipurpose#On hover effect#Quixlab Bootstrap Dashboard#responsive dashboard template
0 notes
Text
Bootstrap Admin Template – Developing Complex Progressive Web App
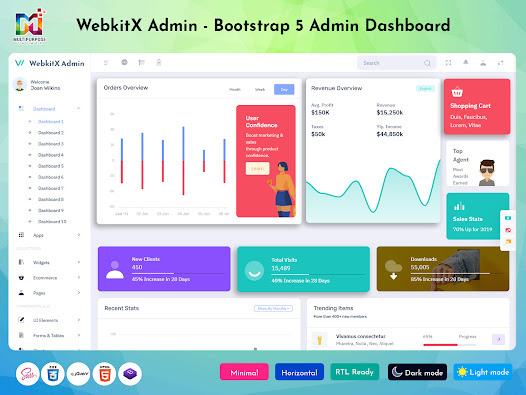
Bootstrap Admin Template have become an integral part of web applications and websites. Whether for managing content, monitoring performance, or tracking business metrics, admin templates provide an organized way to interact with complex data. One of the most popular frameworks for developing admin dashboards is Bootstrap, an open-source front-end framework. Its flexibility, scalability, and ease of use have made it a go-to choice for developers.
Our Bootstrap Admin Template comes with a powerful set of features, including seven analytics dashboards and three CRM dashboards, all built with the latest Bootstrap 5 framework. In this article, we will delve into the importance of Bootstrap admin templates, explore the benefits of our master dashboard, discuss the web development process with our Bootstrap admin template, and explain why we stand out in the competitive market.
1. Importance of Bootstrap Admin Template
Admin templates serve as the backbone of modern web applications, providing users with a structured and functional interface to interact with data. In any web application, especially those dealing with large amounts of information or business operations, managing the backend is just as crucial as the frontend. Here's why a Bootstrap Admin Template is important:
a. Consistency and Efficiency
Bootstrap provides a consistent design system that ensures your Master Dashboard looks polished and professional across all devices. The admin template built on Bootstrap follows this system, which results in a responsive layout, intuitive user interface, and easy-to-use components. By leveraging Bootstrap, you avoid having to create these elements from scratch.
b. Time-Saving
For web developers, time is a precious resource. A pre-built Bootstrap Admin Template like ours saves a significant amount of time during the development process. Instead of building every feature from the ground up, developers can use the template’s pre-built features, like navigation menus, charts, and tables, which speeds up development without compromising on quality.
c. Mobile Responsiveness
In today’s mobile-first world, ensuring that your admin panel works flawlessly on mobile devices is crucial. Bootstrap’s grid system allows developers to create responsive layouts with minimal effort, ensuring your dashboard will look great on screens of all sizes—whether it’s a desktop, tablet, or smartphone.
d. Customization Flexibility
While WebApp Template come with a set of predefined elements, they also offer ample room for customization. Developers can easily modify or extend the templates to meet the specific needs of their project. From changing the color scheme to adding new widgets, Bootstrap admin templates allow easy modification to align with the brand’s identity.
e. Built-In Components and Widgets
Bootstrap is known for its comprehensive library of UI components. From buttons and cards to forms and modals, everything you need to create an admin dashboard is available. Bootstrap 5 offers enhanced features like improved grid layouts, native custom form controls, and additional utilities, all of which help in developing complex admin dashboards.
2. Benefits of Our Master Dashboard
Our Master Dashboard, built with the latest Bootstrap 5 framework, offers a comprehensive solution for managing and monitoring all aspects of your application or business. It is packed with features to ensure an efficient and productive experience for both administrators and end-users. Here are some of the key benefits:
a. Comprehensive Analytics Dashboards
Our dashboard offers seven analytics UI Dashboard, each tailored for specific use cases. Whether you’re tracking user engagement, sales data, traffic patterns, or marketing performance, these dashboards are designed to give you valuable insights at a glance.
Real-Time Data: The analytics dashboards provide real-time data, allowing you to make informed decisions quickly.
Advanced Charts and Graphs: With rich charts, graphs, and tables, the dashboard transforms raw data into digestible, visual representations.
Customizable Widgets: You can add, remove, or customize widgets to suit your specific needs.
b. CRM Dashboards for Customer Relationship Management
Our three CRM dashboards are designed to help businesses track and improve their customer relationships. The dashboards offer valuable insights that assist in managing leads, tracking sales pipelines, and improving customer satisfaction.
Lead Management: Easily track the status of leads and opportunities with detailed reports and timelines.
Customer Interactions: Monitor customer interactions, allowing your team to provide more personalized service.
Task and Activity Tracking: Keep an eye on sales activities, ensuring that important tasks are completed on time.
c. User-Friendly Interface
One of the core principles of our Dashboard UI is its user-friendly interface. Thanks to Bootstrap 5’s sleek and intuitive design, the dashboard is easy to navigate, even for non-technical users. The layout is structured logically, allowing users to access the information they need without confusion.
d. Customization and Scalability
Our Master Dashboard is not just functional but also highly customizable. You can change the design, add new features, or tweak existing ones to better fit your business requirements. Whether you need to add a new widget or adjust the layout for specific devices, the template allows easy modifications. Plus, the modular structure of the dashboard makes it scalable, meaning it can grow as your business or application does.
e. Optimized Performance
Our Admin Dashboard UI is optimized for performance. It’s lightweight, ensuring fast loading times, even when dealing with large datasets. Bootstrap’s modular design helps ensure that only necessary resources are loaded, keeping the page load time to a minimum.
3. Web Development Process with Our Bootstrap Admin Template
The web development process can be complex, especially when building an admin dashboard that requires features like analytics, CRM tools, and real-time data tracking. Our Bootstrap Admin Template simplifies this process and makes it more efficient.
a. Step 1: Planning and Requirement Gathering
The first step is to clearly define the project’s goals and understand the requirements. This involves determining the key metrics you want to track, understanding user roles (admin, manager, user), and identifying the features you need, such as the analytics dashboards, CRM tools, or data visualizations.
b. Step 2: Designing the User Interface
Once the requirements are set, the next step is designing the user interface. The UI design ensures the user experience (UX) is smooth and intuitive. Thanks to Bootstrap 5, developers have access to a modern, responsive grid system that adapts to any device, ensuring a seamless experience across desktops, tablets, and smartphones.
Our template provides pre-designed pages, including dashboards, login screens, and user management, allowing you to build a professional-looking admin panel without the hassle of custom design.
c. Step 3: Setting Up the Template
After the design phase, the next step is integrating the Bootstrap Admin Template into the project. This is where the real development begins. You can begin customizing the provided template, adding your desired components, and incorporating data into the analytics and CRM dashboards.
Our Admin Dashboard UI includes built-in components like charts, tables, forms, and modals, which can be configured to fetch data dynamically and be used in the backend of your web application. The template also includes pre-configured JavaScript and jQuery components for handling events and interactions.
d. Step 4: Data Integration
Once the design and layout are ready, the next step is integrating the data. Whether you are pulling data from a database or external API, you can configure the dashboard to fetch and display data dynamically. The analytics and CRM dashboards will be connected to your backend systems, allowing the data to update in real-time.
e. Step 5: Testing and Optimization
Testing is a critical part of the development process. Our Bootstrap Admin Template is built with cross-browser compatibility in mind, so it works seamlessly on different browsers (Chrome, Firefox, Safari, etc.). You can test the template on various screen sizes and devices to ensure its responsiveness.
Performance testing is another crucial aspect. The template is optimized to handle large datasets without compromising speed or performance. Developers can use tools like Google Page Speed Insights or Lighthouse to test and improve performance.
f. Step 6: Deployment and Maintenance
Once everything is in place and tested, it’s time to deploy the application to a live environment. Our Bootstrap Admin Template ensures that deployment is smooth, whether you’re using shared hosting, VPS, or cloud services. Post-launch, you can continue to make updates and improvements as needed, thanks to the template’s scalability.
4. Why We Are Better?
In a competitive market filled with various Bootstrap admin templates, what makes our Bootstrap Admin Panel stand out? Here are a few reasons why we are the best choice for your project:
a. Built with Latest Bootstrap 5
We’ve used the latest version of Bootstrap (Bootstrap 5), which comes with new features like custom form controls, enhanced grid systems, and improved utilities. This ensures the template is future-proof and delivers an outstanding user experience.
b. Fully Responsive and Customizable
Our Dashboard Template is fully responsive and adaptable to any screen size, providing a seamless experience on desktop, tablet, and mobile devices. Plus, it’s highly customizable, allowing you to tailor it to your specific business needs.
c. Pre-Built Dashboards
We’ve included seven powerful analytics dashboards and three CRM dashboards, offering a comprehensive suite of tools to help businesses track performance and customer data effectively. The dashboards are easy to use and packed with features to boost productivity.
d. Optimized for Performance
Our Bootstrap Admin Theme is optimized for high performance, ensuring quick load times even with large datasets. This makes it suitable for high-traffic web applications and enterprise solutions.
e. Detailed Documentation and Support
We provide detailed documentation, ensuring that developers can easily understand how to use and customize the template. Plus, our dedicated support team is always ready to assist you with any questions or issues you may have.
5. Contact Us
If you are looking for a high-quality Bootstrap Admin Template to power your web application, look no further. Our master dashboard comes packed with all the features you need, from analytics tools to CRM dashboards, all built on the latest Bootstrap 5 framework.
#admin dashboard ui#Bootstrap Admin Panel#Dashboard UI#Bootstrap Admin Template#UI Dashboard#Master Dashboard
0 notes
Text
Why a Cryptocurrency Exchange Script Is the Smartest Way to Launch Your Crypto Business
The cryptocurrency market continues to evolve at lightning speed, offering exciting opportunities for businesses to enter the space. For entrepreneurs looking to launch their own crypto trading platform, a Cryptocurrency Exchange Script is the smartest, most efficient solution. But what exactly is it and why is it so valuable?
What Is a Cryptocurrency Exchange Script?
A Cryptocurrency Exchange Script is a ready-made, customizable software solution that allows you to build and deploy a crypto exchange platform quickly and cost-effectively. These scripts come with pre-built features such as a trading engine, wallet integration, user dashboard, admin panel, and KYC/AML modules; everything you need to run a secure and scalable exchange.
Why Choose a Cryptocurrency Exchange Script?
1. Faster Time-to-Market
Developing an exchange from scratch can take months or even years. A ready-made script shortens that time dramatically, allowing you to go live within weeks.
2. Cost-Effective
Custom development can be expensive. Scripts offer a budget-friendly alternative without compromising on essential features and security.
3. Highly Customizable
Modern scripts are modular and can be tailored to your specific business model — whether it’s spot trading, P2P, derivatives, or a hybrid platform.
4. Advanced Security
Top providers ensure the script is built with enterprise-grade security features like two-factor authentication, data encryption, DDoS protection, and anti-phishing modules.
5. Scalable Architecture
As your user base grows, the script can scale to handle increased trading volume and traffic without downtime or lag.
Key Features to Look For
Real-time trading engine
Multi-currency wallet integration
Admin and user dashboards
KYC/AML compliance modules
Multi-layer security
Mobile responsiveness
Who Should Use a Cryptocurrency Exchange Script?
Whether you’re a startup looking to disrupt the market or an enterprise aiming to expand into crypto, a cryptocurrency exchange script is perfect for:
Fintech startups
Blockchain development firms
Financial service providers
Entrepreneurs entering the crypto space
Final Thoughts
A Cryptocurrency Exchange Script is not just a shortcut — it’s a strategic tool. With the right development partner, you can launch a secure, feature-rich exchange platform tailored to your business goals. At The Crypto Ape, we provide industry-leading crypto exchange scripts that help you go live faster, safer, and smarter.
1 note
·
View note
Text
How to Integrate Your Database Data with External APIs
Application programming interfaces (APIs) are tools that allow you to take action with your data. APIs enable you to connect programs with external sources, such as databases, to create dynamic applications that provide real value to users. At their core, APIs are a set of protocols that govern how different applications exchange data, serving as an intermediary between client and server programs.
The Benefits of Using APIs
There are many reasons to utilize an admin dashboard UI to connect your data to external APIs. The biggest is to enhance the user experience. APIs can greatly improve an application's functionality, creating a data-driven experience that benefits customers, end users and even in-house data teams.
Furthermore, APIs can reduce the costs and complexities of web development. They allow you to scale your applications while significantly improving their performance.
How to Use External APIs
The first step in integrating your database data with an external API is to obtain an API key. That involves registering with the API provider. It's also wise to read all API documentation, ensuring you understand how it works, what data formats it supports, etc.
Then, you must choose which tools and languages you'll use to write and send requests to the API endpoint. Some of the most common include JavaScript, Postman, curl and Python. When integrating the external API, you use those languages to generate and send requests. The API will then produce responses with the requested data in JSON, CSV or XML formats.
Many tools and languages are available to parse those responses and make sense of the data received. From there, your goal is to decide how you display and manipulate the data received from the API. How you approach that task will depend on its purpose.
There are many ways to integrate database data with an external API. But one of the most efficient is to use an admin dashboard UI. With the right tools, you can connect your database to various APIs and put your data to good use. Define attributes of the API connection, track action history, monitor statuses and more.
Master your operations: access the ultimate admin panel now! Click for streamlined management and effortless control.
0 notes
Text
How to Enable Auto-Sync Photos from Dropbox to WordPress?
Managing media files and keeping them organized on your WordPress website can be a daunting task. Dropbox users can now simplify this process with the powerful File Manager for Dropbox (Integrate Dropbox plugin), which allows seamless auto-synchronization of your Dropbox folders with your WordPress site. Whether you're uploading photos, videos, or documents, this plugin ensures your content is always up-to-date and easily accessible. Here’s how you can get started:
What is Integrate Dropbox?
File Manager for Dropbox (Integrate Dropbox) is a WordPress plugin designed to sync your Dropbox content directly to your WordPress pages, posts, or media library. This plugin makes it easy to:
Upload images, videos, or files from Dropbox to your WordPress site.
Auto-sync shared folders for real-time updates.
Showcase Dropbox content on your website without the hassle of manual uploads.
By automating the synchronization process, Integrate Dropbox saves time and improves efficiency for bloggers, photographers, businesses, and anyone managing a WordPress site.
Who Benefits from the Integrate Dropbox Plugin?
Photographers: Automatically sync and display photo albums on your portfolio site.
Content Creators: Keep your website updated with the latest files, presentations, or videos.
Businesses: Share brochures, product catalogs, and documents seamlessly with your clients.
Using the Integrate Dropbox Plugin, you can seamlessly upload photos to your website in real time by creating a Dropbox folder and embedding it on your site using a shortcode. This functionality is perfect for events like photo booths at Christmas or New Year’s parties, where you want the latest uploads to be visible instantly.
How to Auto-Sync Photos from Dropbox to WordPress
youtube
Step 1: Install and Activate the Integrate Dropbox Plugin
Download and install the Integrate Dropbox Plugin from the WordPress Plugin Directory.
Activate the plugin from the Plugins section of your WordPress Dashboard.
youtube
Step 2: Connect Your Dropbox Account
Go to Settings > Integrate Dropbox in your WordPress admin panel.
Click Connect Dropbox Account.
Authorize the connection by logging in to Dropbox and allowing the app access.
Step 3: Create a Dropbox Folder for Uploads
Log in to your Dropbox account.
Create a new folder named, for example, Event Photos.
Share the folder with your event team or photographers, allowing them to upload photos in real time.
Step 4: Sync the Dropbox Folder with Your Website
In your WordPress dashboard, navigate to the Integrate Dropbox section.
Click Shortcode Builder and select Gallery or Slider Carousel module.
Choose the Dropbox folder (Event Photos) you created earlier.
Customize display settings like layout, style, and auto-refresh interval.
Copy the generated shortcode.
Why Use the File Manager for Dropbox Plugin?
Here are a few reasons why Dropbox users find this plugin invaluable
Effortless Media Management: Say goodbye to manually downloading files from Dropbox and re-uploading them to WordPress. With auto-sync, your Dropbox content is always mirrored on your site.
Real-Time Updates: Any changes made in your Dropbox folder are automatically reflected on your WordPress site. This feature is particularly useful for shared folders, ensuring collaboration is seamless.
Streamlined Image and Photo Uploads: Photographers and content creators can easily showcase their work by syncing their image folders directly to WordPress. No need for duplicate uploads or tedious file management.
Embed Dropbox Content: Display Dropbox files in a visually appealing format on your WordPress posts and pages, perfect for portfolios, galleries, or downloadable resources.
Customizable Settings: Configure folder synchronization, access permissions, and display preferences to meet your specific needs.
Wrapping Up
File Manager for Dropbox plugin simplifies your workflow and eliminates the hassle of manual uploads, making it the perfect solution for Dropbox users who rely on WordPress. To learn more about this plugin and its features, visit the plugin directory or explore the settings after installation.
Start syncing your Dropbox folders today and elevate your WordPress site to the next level!
5 notes
·
View notes
Text
Enhance Your WordPress Dashboard with Admin Menu Search

Navigating through WordPress's extensive admin panel can be a tedious task, especially when managing multiple plugins and settings. This is where Admin Menu Search for WordPress proves to be a game-changer. It introduces a search bar within the admin panel, allowing you to easily find the settings or features you need in seconds. To understand the advantages of Admin Menu Search for WordPress, let’s dive into its functionality and how it improves the overall WordPress experience.
How do I search the admin panel in WordPress?
Many users ask, "How do I search the admin panel in WordPress?" Without a search function, finding a specific setting or plugin can take time. The Admin Menu Search plugin fixes this by providing a quick search bar that helps you locate any feature instantly, improving your productivity.
How to get admin menu in WordPress?
The WordPress admin menu can sometimes be cluttered, making it difficult to navigate. If you’re asking, "How to get admin menu in WordPress?," installing Admin Menu Search simplifies the process. It allows you to bypass the standard navigation and search for any menu item directly, ensuring a smoother workflow.
How do I find my WordPress admin?
Finding your WordPress admin dashboard is simple—just go to yoursite.com/wp-admin. However, once inside, it can be overwhelming. Wondering, "How do I find my WordPress admin?" The Admin Menu Search plugin makes navigating the admin dashboard much more efficient, giving you quick access to any section with a simple keyword search.
How important is an Admin Menu Search Plugin?
For website administrators, efficiency is crucial. "How important is an Admin Menu Search Plugin?" It’s highly important! It saves significant time, especially when managing a site with multiple plugins and settings. This tool enhances your admin experience by offering immediate access to everything you need.
How does Admin Menu Search work?
Curious about "How does Admin Menu Search work?" The plugin indexes all available options in your WordPress dashboard. When you type a keyword, it instantly shows relevant results, allowing you to navigate directly to the feature or setting you’re searching for.
How does an Admin Menu Search Plugin help a user?
An Admin Menu Search Plugin makes life easier for anyone managing a WordPress site. So, "How does an Admin Menu Search Plugin help a user?" It eliminates unnecessary scrolling and searching, saving you time and making your WordPress dashboard far more user-friendly.
Which Admin Menu Search Plugin is the Best for WordPress?
When considering, "Which Admin Menu Search Plugin is the best for WordPress?," Swisstoolkit is a standout option. It not only offers a powerful admin search feature but also includes performance optimizations and security tools, making it an all-around essential plugin.
Why would you use Swisstoolkit for WordPress?
If you’re seeking more than just a search function, "Why would you use Swisstoolkit for WordPress?" It offers a range of features, including admin menu search, performance boosts, and security enhancements, making it an indispensable plugin for WordPress users looking to streamline their workflow.
With Admin Menu Search, navigating your WordPress dashboard becomes effortless. You’ll save time, reduce frustration, and keep your focus on managing your site, rather than searching for settings.
#wordpress#wordpress theme#wordpress plugin#wordpress development#wordpress developers#plugin#developer
2 notes
·
View notes