#and I had to search and manually copy paste those
Explore tagged Tumblr posts
Visit Tumblr Blog
Explore Tumblr blogs with no restrictions, modern design and the best experience.
Last Seen Tumblr Blogs


Fun Fact
Tumblr is used by 21% of adults online aged 18-29 years.
Note
Silly Game Time: WRONG ANSWERS ONLY! What does LGBTQ stand for?
Let's Get Back To Quacking 😎🦆
#quil's queries#jikl-fff#silly game time#for some reason my emoji keyboard shortcut stopped working??#and I had to search and manually copy paste those#anyways. quack quack bitches
10 notes
·
View notes
Text
SEARCHING AO3: A (SLIGHTLY) MORE ADVANCED GUIDE
Disclaimer: This is very very geared towards finding fics about a particular character rather than a pairing. My favourite guys tend to be popular-ish women that appear in a lot of fics but only as supporting characters so I’ve had to become v good at combing for things that actually centre them <3
For this guide we’re gonna use my current hyperfixation: Mel Medarda & see what we can find lol
1. Use the tag filter system as your default! It’s superior in every way to the normal search except for the “any field” section which can be pretty useful but unless you’re using it for SPECIFICALLY THAT, don’t bother.

You can access the tag filter by clicking on any common tag (we’re gonna use “Mel Medarda”) and then hitting filters.


This thing is SO useful! Poke about in the dropdown menus; each of them will have the top 10 associated tags for that category. For example the top additional tags for Mel are Angst; Slow Burn and Fluff because,,, well. yk

+ it shows the number of fics with those tags under the “main” tag of Mel Medarda!
2. Keep an eye out for character specific tags! Now that we’re definitely using the tag filtering system we can start actually filtering through those tags <3
Most characters will have common but specific tags that both name them and imply something about their arc in the fic. A frequent example is something like “X character needs a hug”, or more obviously: “X character centric”.

These are my go-to tags for Mel! Most characters will have a variation of this set + some others (“BAMF character name” is also a pretty common one in older fandoms) and any one of these (INDIVIDUALLY, at most filtered in sets of 2) will lead to a few hundred results. It’s not 100% flawless because a lot of authors over-tag, but a solid 80% of the fics under these tags will at least heavily feature the character you’re looking for.
3. Filter by summary!!
At the bottom of the tag filters there’s a section called search within results. This is your Best Friend.
summary: “_”
^ for easy copy/paste
What this script will do is search for whatever you put in the quotation marks and then only give you fics with that thing in the description. I like to use it for character names but it also does a pretty good job filtering for tropes — try using it for vampires lol

Doing this with Mel narrows down her character tag from 7000+ to just under one and a half thousand fics, all of which at the very least include her name in the description.


4. RAREPAIRS ARE YOUR FRIEND! Canon but only semi-popular ships are infinitely more likely to get tagged in the background than say, for example — melvik (nobody is writing background melvik). This tip only works if you’re willing to multiship for more content of your guy but it is very effective.
5. Related to tip 4: Search by otp! If you’re locked in on a particular pairing that’s more popular, you can search for fics that ONLY include that ship.

otp:true
^ for easy copy/paste (again)
This is super useful and also the main reason I don’t tag side pairings in my own fics! Also remember to use this script with ship tag rather than just a character one — otherwise it won’t work.
6. Parent tags exist! This is less of a strategy and requires more trail & error, but lots of tags filter into each other. For another Mel-related example, filtering by the Only Meljay tag would also being up fics tagged with Jayce/Mel Medarda-centric — despite (potentially) not having the original tag you filtered by. This is because Jayce/Mel Medarda-centric is the Parent of the original tag, meaning ao3 has deemed the two tags related enough to appear in each other’s search results.
This is something done manually by ao3 staff so the consistency of parent tags are a little weird sometimes.
More practically, this is an interaction to keep in mind when blocking tags. If for example you were to exclude “Torture” from your search, ao3 would also automatically exclude —
Implied/Referenced Torture
Physiological Torture
Aftermath of Torture
And probably many more.
Even if the broad category of torture isn’t tagged in a fic, the specific referenced type of torture counts — to ao3 — as a tag of torture by itself.
Interestingly, the “sub-categories” of tag don’t feed into each other this way. You can block Physiological Torture and still see fics tagged with Implied/Referenced Torture or Aftermath of Torture.
Knowing this is useful in the sense that the more specific you get with a blocked tag, the less likely you are to accidentally filter out something you would actually be fine with (or inversely blocking a general category you HATE means you don’t have to obsessively filter out every possible iteration of that thing you don’t like).
You can tell tag is a Parent Category by searching for a Sub Category and blocking what you think is the Parent. This will result in 0 results.

Implied/Referenced Torture tag after blocking the Torture tag.
Each of these strategies are things to be done in waves or in combination with one another. Casting a wide net and then narrowing it down is really important, too many tags and you end up with no results.
Ao3 has an INCREDIBLY robust set of archival tools. It’s an amazing site and if a fic exists and you know what you’re doing, you should always be able to find it.
Happy reading <3
375 notes
·
View notes
Note
Hi there! I figure that you might be the best person to ask - in the past I've used Clueyvoter to plan out my Senate vote. It was a fairly good site - if you never used it, you'd rate the parties on a 1-5 scale, and it would then let you adjust candidate positions if desired, then generate a printable sheet in ballot order to take with you to copy onto your ballot. But, it looks like it's not updated for this year - any suggestions for any similar sites\services for this year's election?
First, my apologies for not answering this sooner—I meant to check, then got caught up on completing the reviews and had not looked up options until yesterday afternoon when completing my index of reviews.
I am happy to say that Cluey Voter now includes the 2025 federal election and it is the only ballot creator that I have found for this election that enables you to create a personal how-to-vote card for a below-the-line vote.
Even if you are voting above the line, though, there are a lot of parties and planning your vote ahead of time will save you hassle at the polling place. Sure, you could just make a list from most to least preferred in your word processor or notes app of choice, but having the candidates numbered in ballot order makes voting a lot quicker when you get to the booth and are trying to wrangle the big Senate ballot. You can copy column by column, left to right, rather than searching back and forth for each party or person.
So, here is a quick overview of options for anyone voting tomorrow who wants something in ballot order that they can have on their phone or print and take with them into the booth to transcribe onto the ballot. You must transcribe it onto the official ballot—you can't just stick the printout in the ballot box!
Personal how-to-vote card creators if you are voting above the line in the Senate
Donkey Votie and Build a Ballot both enable you to create a personal how-to-vote card if you are voting above the line. Donkey Votie is simpler, so it is the one I recommend; plus you can enjoy their humorous brief summaries of each party. Build a Ballot also enables you to make a personal how-to-vote card for your lower house electorate—but you have to go through a somewhat tedious quiz first (which to me seems to have been designed to suggest to soft Labor voters that the Greens align more with their views).
Personal how-to-vote card creator if you are voting below the line in the Senate
As noted above, Cluey Voter is the only one I've found. Us BTL voters are more poorly served this election than any I've voted in before when it comes to custom vote creators. I honestly find Cluey Voter a bit cumbersome: you rank parties by 5 general levels of support, then it generates a card and you can manually edit the numbers. This is fiddly, especially if you change your mind on even one candidate's position mid-ranking, but there is at least a feature to check if you have made any mistakes in the count.
If you have a complex vote like I do (reordering candidates within and across numerous tickets), here's my strategy to save time with Cluey Voter. First, list the parties/candidates from most to least preferred in your word processor or notes app of choice. Then go to Cluey Voter, select your state, ignore step 1 entirely, and click "go to step 2: rank candidates". Now, click "minimise preferences", which reduces what's there to just 12 digits. Delete all those. Now, use your ranked list to find each party/candidate, start numbering from 1, and get them into ballot order. Make sure you click "check" to see if there are any errors in your numbering. This is basically what you'd be doing if you took your notes app list into the ballot booth, but you can do it in the privacy of your own home before you go, with the added assurance that you haven't made any mistakes that would invalidate your vote.
(Be confident in your ranking from most to least preferred before you begin, because if you make an adjustment that throws off a large chunk of the ranking, even by one, you'll have to edit the lot manually.)
Once you're done, if you want a paper copy click "printer friendly" and then "print". I found, though, that even when I selected the options in the printer dialog box to try to force it to one page, this worked poorly. I had to shrink it to 70% size to fit on one side of A4 paper, which for me was too small to read comfortably. But then I blew it up to 135%, and for WA that put groups A-J on one side and K-UG on the other of a single sheet of A4. Perfect!
PS if you are wondering who I am putting 49th and last on the Western Australian Senate ballot, it is the one and only "senator in exile", Rodney Cullerton of the Great Australian Party. I thought of leaving the square blank as a wry joke about the fact he is ineligible for election and the AEC has referred him to the Federal Police for a false declaration on his nomination form, but putting the last preference against his name will be even more satisfying.
#auspol#ausvotes#ausvotes25#ausvotes2025#Australian election#Australia#Australian politics#Australia decides#how-to-vote cards#personal how-to-vote card#Senate ballot creator#Senate#below the line#BTL#vote below the line#voting below the line#Australian Senate#ballot creator#HTV cards#HTVs#personal HTV#Cluey Voter#clueyvoter#yes I am a completist political nerd
16 notes
·
View notes
Text
Mental Health May - Mayura/Nathalie Sancoeur - Bloody Bug
My fault is done, the story is lost.
History always captivated me. Not the discovered, mundane history of recent centuries. No. It was the history lost to the ages. Lost before we as humans recorded it. Lost in the dark, never to see the light of day. It was this history that drove me. It was this mystery that consumed me.
I studied for years. I dived into every myth, every story, everything I could. I longed to find truths in fiction of the past. I longed to discover something lost to the ages. In these studies, I found stories of tiny, mythical creatures with almost godlike powers. They were scattered through mythologies, tied into the tales of heroes and even villains. I chased this thread for years. I built my life on uncovering it. I pitched it to any who would listen. And every time, I was dismissed for chasing a fool’s dream. Until another fool heard me.
Gabriel Agreste. A name I knew, but nothing more. Whispered among those in the Paris fashion scene. I was quick to dismiss him, but his fortune tempted me. With him, I could secure funding. I could set out on an expedition. I could find the proof I needed. To my own surprise, he wanted one of these godlike creatures. He shared with me a copy of a book he couldn’t translate. A book that cemented my research. Detailing each hero and villain that used these creatures, and about the creatures themselves. And he wanted me to find the one that was a flamboyant peacock. One that could allow him to create a child for him and his wife.
I accepted. With his funding, I lead us on expeditions to find this jewel. These journeys lead us to an area in Tibet. Lost to the ages, we found what we searched for. A brooch designed like a peacock tail. With it found, we headed home. I documented it, studied it, and discovered a crack on the brooch. I warned Gabriel of this, but he didn’t hear me. Once we were back. I prepared my leave and my research. On the day I was to leave, I found my entire life’s work destroyed and the brooch stolen.
Despair consumed me. I rushed to the Agreste estate, but Gabriel refused to see me. I was blocked, thwarted, and tossed out. I returned to my home with nothing to show for a lifetime worth of research. Nothing to show the proof that I found something lost to the ages. Lost to the times before recorded human history. I slipped into a terrible depression.
For years I stumbled around in a stupor. Every moment a blur. Until I found myself at the Louvre. I was finding comfort in the history around me when she approached me. A woman with fiery red hair and blazing blue eyes. In the fire of her eyes, I saw sorrow and concern for a stranger. She sat with me. Talked with me. In time, I shared my research, and what became of it. Next time I saw her, she shared news of funding from the museum. How her husband secured some funding as the director of the Louvre. A blessing I could never repay.
I was careful this time. I went on the expeditions alone. I searched everywhere until I discovered a box of unknown origin and material. It took ages to pry it open, but once I did, I found records. Millennia ago that spoke of Eden, a paradise for the earliest of mankind. Led by their leaders Adam, and his wife, Eve, in service of their god, Velze. A tragedy was detailed, but most details had been torn from the records. I gathered that Velze was lost, split into the creatures called kwamis. Amongst these records were accounts that differed from the book Gabriel once showed me.
The records shared all research into the kwamis. Their powers, their concepts they manifested as, the jewels they carried, and even how to alter and repair the jewels. Amongst the records were ancient tools with manuals how to use them. I took these back as proof of my discoveries, but I was too late.
Josephine Kubdel. My angel. My saving grace. Your light that guided me, gone from the world. I grieved your death just as your family did. I regretted I couldn’t have shown you before you were taken from us. I shared it with your husband, Alim, but it felt hollow. It was you that believed in me. It was you that helped me. Without you, it felt empty.
I took my findings and fell back into darkness. I studied and tried to find what I could to make it all worthwhile. I tried to find evidence that would lead me to more. To make everything you did worth more. I had to find more. I had to do more. Until opportunity rose.
A decade after Gabriel cut me out, he contacted me. He begged me to help find a solution to his wife’s illness. One caused by using a broken miraculous. One that I had warned him could possibly happen. But I still took it. Funding from him again meant new expeditions. I could use what he gave me to make Josephine’s investment in me truly pay off. For me to live up to my dream. To carve my name into history. For me to repay all she did for me.
I went on expeditions again back to the area of Tibet. Not far from where we discovered the peacock jewel, I discovered the butterfly brooch. I returned with it and shared what it could do. Gabriel was unconvinced until Emilie passed. He grieved for a year. In his grief, he tossed out the peacock brooch that he once kept safe.
I struck while the iron was hot. I rescued the brooch and brought it home. I repaired the break in it. I worked to restore the brooch and its kwami to how they were detailed in the records of old. All while I convinced Gabriel to use the butterfly. To cause terror and panic to draw out the greatest of jewels used to quell chaos: the Ladybug and the Black Cat.
I waited, and in time, they came. A young woman with the ladybug and a young man with the black cat. I watched while they battled Gabriel’s pathetic little monsters. All while I learned from the peacock kwami, Duusu. I learned of the past. I documented new records. Added to old ones. I dared not leave anything out. It filled me with a new purpose hearing the woes of the past.
The kwamis were meant to be gods. They were born from the greatest, Velze. I longed to see Velze in his entirety, but to do so would mean I had to collect all the kwamis. I had to fuse them back together. But if I did, I could undo the destruction of Eden. I could right an ancient wrong. I could usher in a new age. The possibilities were endless.
Time had come. I bore Duusu and became Mayura. I reveled in the power of him. I lorded it over the meager holders using inhibited jewels. I targeted Adrien to make Gabriel squirm. I destroyed Gabriel’s life as he once destroyed mine. I learned the identities of the holders in time. And to my horror and surprise, Josephine’s daughter, Alix Kubdel, held the ladybug. The ember of Josephine’s legacy.
I tried to connect. I wanted Alix to see the truth. I wanted her to understand more than anyone. Just as Josephine did, I wanted, needed, Alix to understand. I hoped she did. I hoped more than anything. I just never would find out.
I convinced the young heroes to go back into time. I convinced them to see the truth in its truest, purest form. I hoped this would help. Maybe it did. But while they learned, I battled. In my possession was five kwamis. Five was all I needed. And the five I made one as I fused them all into a piece of the Amalgamation himself: Velze.
Haze shrouded my mind. I struggled against the haze as my body moved in wild, erratic ways. I lost pieces of the five and returned to normal. I found the heroes until their black cat, until Adrien, used the power of destruction on Duusu.
Everything was dark. My body moved. The only thought was my legacy. I didn’t want to die yet. I hadn’t achieved what I wanted. When a maddened thought consumed me. Nathalie Sancoeur would die, lost to the ages with the rest of history. But Mayura would be torched into history.
In this madness, I consumed Duusu to ascend if only to buy a little more time. When heroes came for their villain, I unleashed everything I had left. I would go out on my terms. I would make history.
#au#miraculous ladybug#alternate universe#miraculous#miraculoustalesofladybugandcatnoir#miraculous au#bloody bug au#nathalie sancoeur#mlb nathalie#tw madness#tw insanity#tw depression#cw depression#cw madness#cw insanity#mental health may#mental health#mental heath awareness
15 notes
·
View notes
Note
I dont know if you've seen anything about this yet, but discord recently partnered with generative AI (called DomoAI) and added hidden bots to servers to scrape messages and images. I know you're very open about your stance on AI so I figured it's something you'd want to know about/ look further into
okay everyone needs to learn to google and try and fact check things before they just believe anything you read or hear. i constantly see things going around discord saying some new thing is scamming or hacking or doing something bad and it's always ended up to be a hoax or misinformation or exaggerated. is discord promoting them? yes and it's shit. however, it is not made by discord, discord did not partner with them. discord is shitty for allowing ai art on their platform, however the claim they partnered with them is just a lie. discord bots exist. i have some in my server, eg pluralkit, but discord didn't make pluralkit they just allow it to exist on discord. now it seems in domo's marketing *they* called it a partnership, but it's not. they just uploaded a thing they made onto discord. that's like saying every app on the apple store has a 'partnership' with apple.
itsoasus on bluesky already listed everything out, so here's the screenshot and alt text underneath. everything in purple are their words, copy and pasted from the alt text on their post.

"This was the info I posted to a server of mine, in case this had spread far. I think I summarised it better here: The claim:
discord partnered with DomoAI
this partnership allows any user to pass images to an AI without consent
server owners are powerless against this ^ NONE OF THIS IS TRUE.
The truth:
the DomoAI people made a bot
the bot was submitted to discord's app directory, just like any other bot
discord accepted the bot to it's app directory, just like any other bot
the app directory is simply a list of discord bots that you can search through inside of discord
ALL discord bots which discord has verified are REQUIRED to use slash commands or "application commands" (right click menu on PC, press and hold menu on mobile)
if a bot dev wants access to text-based commands (like !role or !color etc), the bot has to go through a SECOND application process and prove that their bot is non-functional without such a permission
server owners CAN prevent both slash and application commands from being used
if you're in a server that has those permissions denied, the ONLY way someone can use your content in the DomoAI bot is if the person MANUALLY copies your image/text into a place where the bot CAN run
meaning nothing has changed AT ALL and this is NO DIFFERENT from feeding your image or messages into an AI any other way"
and here's how to turn off 'use external apps' thanks to glitchypsi on blue sky. it's under server settings > roles > edit role @ everyone > ise external apps

it doesn't take much time to try and fact check something. the amount of times ive seen messages on discord claiming all sorts of wild things to be true when theyre not is countless. and they always spread like wildfire because no one tries to check anything for themselves, someone just goes 'heres a screenshot of a message someone sent in a server im in' to another server and then on it goes.
i have rules in my discord server that no one is to post things like this without getting permission from a mod so we can try and fact check it, but you guys should do that yourself first. and i really didn't want to see an ask about this either.
discord lets you have the option to edit images with 'apps'. theyve had this ages. yes it sucks that some of them are ai. no i dont think they should be allowed. but it's like ai filters existing on tiktok, like tiktok didn't make them. do i think that is an excuse? no. i think generate ai apps shouldn't exist on discord. however, it is factually incorrect to say that it is something discord made or 'partnered' with, and incorrect and fearmongering to say it's in ever server (which in a technical sense like.. you can *access* it in every server, but in the same way you can access the youtube activity in every server, it doesnt mean youtube has now read all your messages).

yes that ^ is a screenshot from my discord. no domo is not in my discord. "but its there in the screenshot" its giving you suggestions of apps they have and if you want to use them. if you click on it to use it thats your fault. no, i dont think they should be there at all i think they should be banned. but again, it's like tiktok recommending you a filter, it's not some malware that's hacked into your phone or a bot thats invited itself to your discord. apps dont join your discord server like users or bots, theyre just.. there, the same way that every discord server has access to the youtube or gartic phone activities.
stop spreading misinformation. stop fearmongering. all it took to find discussions on it was searching for it on bluesky. and also the fact that.. i use discord and know the difference between a discord app and discord bot. it literally says 'apps' in the screenshot. people crying that banning it doesnt work.. yeah... cos its not a bot.. its an app.. that people can choose to use.. so just.. dont choose to use it (and yes it would be better if discord banned it) but its not a bot that discord has placed in every server idk im repeating myself now i feel like im going crazy with how many people are believing discord forced an unbannable bot into your servers when it did. not. do. that. and if you dont want anyone else in your server to be able to do it then turn off the external apps permission in your server.
#guys i dont wanna defend discord look what youre making me do. but they literally didnt do that.#the vampire answers
18 notes
·
View notes
Text
Special effects
(light + glow + curve)
For my opening scene, I used some features and visual effects to make the scene look more appealing and realistic. To create an effect of real lighting from the window, I used the feature called 'Light Rays', in which I manually searched for the right position on the screen and the correct amount of light. Furthermore, on close-up shots, I used 'Glow' to show the red lighting again. However, it took a very long time to manually find the right spread ratio or gain or other additional settings. The thing is that I couldn't 'copy&paste' settings as the shots were from different sides and angles along the table. This means that the intensity and the position of the light had to be different in every single close-up shot.
Another problem was to maintain the balace between the actual lighting of the scene and my additional light rays because once I made those rays brighter, the lamps and other bright areas in the shot immediately became excessively lit. So, it took some time to find the right balance in each shot.
For the last couple of shots where the main character stands near the window, I had to use 'Vignette'. There were several reasons for this decision, which are :
● To soothe the edges of the green screen, making them disappear in the darkness of the vignette
● To hide the decor elements on the walls near the window (those did not match the setting of the scene)
During the arc-shot, the attention to those elements is minimum due to the constant movement of the camera. While during a long stable shot, the audience is more likely to wander their gaze around the room, focusing on those unnecessary details.
At the end of the scene, before the titles, I made a transition, also looking like light rays. Due to this transition, it is clearly visible that the main character is absorbed into the mysterious device and travels further into the space, which suggests that he is returning to his time, in the future.


0 notes
Text

Drums and Riffs
An idea I had after seeing Rachid Lotf's amazing artwork of nostalgic PC gaming rooms, one from 1999 and the other from 2003 (as noted by an issue of PC Gaming magazine that has Half-Life 2 on the cover); it did make me think of gaming from the turn of the millennium, what with those big cardboard boxes, game manuals, and those classic beige CRT monitors. I gotta be honest though, I didn't play much that was hot and new at the time; both of my parents have played video games in the past but my dad was/is a boring asshole mostly fixated on paperwork (when he wasn't at work or watching TV) and my mom was (and still is) hilariously incompetent at gaming. It really didn't matter what game she was roped into playing, whether it was Mario Kart or Army Men: Air Combat, she stunk pretty badly every time (although in hindsight, maybe The Sims would have been suited for her). I never got to play most of the big strategy or business management games that were coming out at the time, apart from Zoo Tycoon and Battle for Middle-Earth; one of my cousins did have a copy of Age of Empires II that I desired to play but never got the chance. Some of the games I wouldn't play until like ten, fifteen years after their original release (thanks Steam Store) and I was a grumpy adult who never played them back in their heyday. And that's not even getting into the shooters; I remember my parents constantly hiding the copy of GoldenEye 007 we had and I would always go out of my way to search for it so remembering that, I guess I didn't want to rock the waters too much by begging them to buy me Battlefield 1942 or Medal of Honor: Allied Assault. And the M-rated games (like Deus Ex, Quake, and Half-Life) were completely out of the question although that kind of bit me in the ass when it came to Halo: Combat Evolved but that's a ramble for another day.
Anyway, enough of my rambling, here's the drawing at hand. The process of making the lines took me a bit, since I was trying to figure out how to get the furniture and computer right; the latter is supposed to be a Gateway, with that classic cowprint cube logo (I honestly have no idea what make or model our Windows 98 and original Windows XP PCs were and I'm not sure if my parents even remember what they were either). The clothes drawer I admit I kind of pulled from my ass but it's hardly like the most complex furniture design in the world, I just added one of those bulbous table lamps on top in addition to some what are supposed to be diecast models. Then came the coloring, which is where the soft pastels came into play; I just added some basic colors to the walls and floor, mostly to get the lighting right and set the stage for the coloring pencils. I could've gone darker to contrast the light but I really have no idea what pencils/pastels to use for just that, I don't have a lot of those peachish color options. The posters were a little interesting, trying to figure out what they were and I knew I wanted some specific ones, to indicate that this is the computer room of someone who's attending college (or trade school) so he'd be of a specific age. I started off with Jurassic Park (which in this world is actually Permian Park, the skeleton on the poster is supposed to be a Dimetrodon) then I moved onto some others, most of which became vague, blobby messes. We have what are supposed to be The Matrix, Fight Club, Unreal Tournament, Half-Life, RoboCop, and Age of Empires II; there was also Fellowship of the Ring but that got cut off by the scan; also, there's a couple framed pictures, one of which is a plane of some sort. And then you have the game boxes which are supposed to be, from order, Max Payne, SimCity 3000, a fictional Duke Nukem game (that's supposed to be the 2001 version of Duke Nukem Forever, Return to Castle Wolfenstein, Hitsar 2: Silent Assassin, Battlefield 1942, Myst III: Exile, Neverwinter Nights, Allied Assault, Need For Speed: Hot Pursuit 2, Shogun: Total War, and Serious Sam: The Second Encounter. There were additional boxes for Morrowind, Age of Mythology, Red Alert 2, and No One Lives Forever 2: An Agent In H.A.R.M's Way but those got cut off in the scan.
#art#bellumsaur#scenery#room#computer#computer room#pc gaming#retro pc#nostalgia#y2k#i miss when crt meant big blocky monitors#not commie gnostic brainwashing#traditional drawing#traditional art#colored pencil#pencil drawing#soft pastel#bedroom
1 note
·
View note
Text
CopyClipper Appsumo Lifetime Deal Review

In today’s fast-paced digital environment, efficiency is paramount. Professionals and creatives alike seek tools that streamline tasks and enhance workflow. CopyClipper emerges as a solution, offering advanced clipboard management features designed to optimize text handling across devices.

Get Lifetime Access To CopyClipper today >>>
Understanding CopyClipper
CopyClipper is an AI-powered clipboard manager available exclusively for macOS and iOS platforms. It allows users to save, organize, and enhance text snippets, facilitating quick access and efficient management of frequently used content. This tool is particularly beneficial for individuals managing multiple projects or those who require rapid retrieval of specific text segments.
Key Features of CopyClipper
Unlimited Clipboards and Text SnippetsUsers can create an unlimited number of clipboards (folders) and store countless text snippets. This feature ensures that all necessary information is readily accessible, eliminating the need to search through various documents or applications.
Advanced OCR TechnologyCopyClipper incorporates advanced Optical Character Recognition (OCR) technology, enabling users to extract text from images, PDFs, and videos instantly. This capability simplifies workflows by converting visual content into editable text, reducing manual transcription efforts.
AI-Powered Text EnhancementsThe application offers AI-driven suggestions to rewrite text for different contexts. Users can adjust tone and style for emails, messages, or documents directly within the app, streamlining content refinement and ensuring appropriate communication across various platforms.
Device-Wide Copy HistoryCopyClipper maintains a comprehensive copy history across devices, allowing users to retrieve previously copied text effortlessly. This feature is particularly useful for referencing past information without the need to recopy or retype content.
Unlimited To-Do EntriesBeyond clipboard management, CopyClipper provides functionality for creating unlimited to-do entries. This integration aids in task management, allowing users to organize their responsibilities alongside their text snippets.
System Requirements
To utilize CopyClipper, the following system requirements must be met:
macOS: Minimum version 10.15 (Catalina) or Apple M1 silicon Macs.
iOS: Version 12.1 or later.
These specifications ensure optimal performance and compatibility across Apple devices.
User Feedback and Reviews
As of February 2025, CopyClipper has garnered positive feedback from its user base. On AppSumo, the platform where CopyClipper is available, it holds a 5.00 out of 5 rating based on reviews from verified users. One user, SelinaRod78, highlighted the tool’s utility, stating:
“I use copy and paste probably more than 500 times a day – and very often similar text pieces. E.g., links, messages, etc. This tool is very useful and a no-brainer for this price…”
The development team has also been responsive to user feedback. For instance, in response to a user’s concern about excluding specific applications from the copy history, the founder acknowledged the request and indicated that it had been forwarded to the developer for consideration.
Pricing and Availability
CopyClipper is available for a one-time purchase of $29, providing lifetime access to all features. This pricing model eliminates recurring subscription fees, offering a cost-effective solution for long-term use. The purchase includes:
Access for one user across multiple devices (macOS, iOS, and visionOS).
Unlimited clipboards and text snippets.
Unlimited monthly OCR scans.
Unlimited AI modifications.
Unlimited to-do entries.
Advanced OCR technology.
Device-wide copy history.
A 60-day money-back guarantee is also offered, allowing users to try the tool for two months to ensure it meets their needs.
How To Buy CopyClipper Lifetime Deal In Appsumo $29
Visit the “CopyClipper Lifetime Deal AppSumo” deal page.
Wait for some seconds, A discount popup will appear.
Enter your email address to receive the exclusive benefits.
Continue with the same email ID.
Get a $10 discount at the end.
The discount is valid for new users only.
Conclusion
CopyClipper stands out as a robust tool for individuals seeking to enhance their productivity through efficient text management. Its combination of unlimited storage, advanced OCR capabilities, AI-powered text enhancements, and comprehensive device-wide copy history makes it a valuable addition to any professional’s toolkit. The positive user reviews and responsive development team further underscore its reliability and effectiveness.
For those interested in exploring CopyClipper, it is available exclusively on AppSumo. The platform offers a variety of software deals aimed at entrepreneurs and professionals, providing access to innovative tools like CopyClipper at discounted rates.
So Grab the Now CopyClipper Lifetime Deal For Your Dream Business With an Extra $10 Bonus!
Get Lifetime Access To CopyClipper today >>>
0 notes
Text
The Easiest Way to Get YouTube to Auto-Sync Your Video Script

Not sure how many people this will be useful to here, but I thought I would share, since this tip has saved me a lot of headaches since I discovered it.
Auto-Syncing Subtitles on YouTube
Subtitles are things that are often overlooked on YouTube vids, and as good as AI is getting at creating auto-generated subtitles for vids, there is nothing quite like having personally uploaded, accurate ones for quality control.
However, I have found they can be a little tricky, and doing them manually by hand takes forever!
One way of doing this is paying a company to create a subtitle file from your video and just uploading this. However, for those of us on a budget, this is often a cost we simply cannot afford.
Luckily, YouTube offers great tools to help us out.
The most useful of these for me, is the Auto-Sync option.
Below I'm going to share the most useful tip I have discovered on how to get this option to work quickly and exactly how I want every time.
What you will need to use this method:
the script of your video
YouTube Studio
Method for Flawless Auto-Sync Subtitles
Preformat the script file:
Open your script file in the word processor of your choice - as long as it has a search and replace option.
Add a new paragraph at every point you definitely want a new subtitle - YouTube will auto break longer paragraphs, but it can be very random how it does it and sometimes with large scripts it fails.
This is the important step - search and replace all single paragraph marks with two paragraph marks so paragraphs have a space between them. This will make auto-syncing work like a charm because it will take each paragraph as its own subtitle and has to do way less work.
Inputting the Subtitles:
Open your uploaded video in YouTube Studio and click the subtitles option.
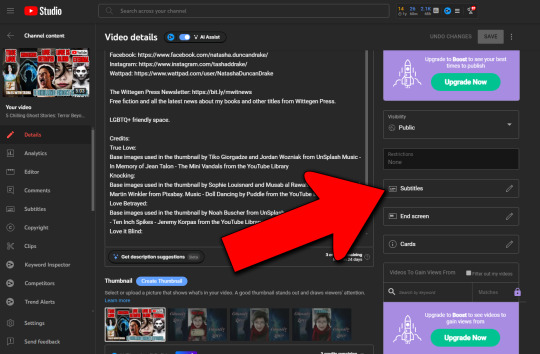
Choose the Auto-Sync option.

Copy and paste the double spaced script into the Auto-sync box and wait while the AI automatically syncs the subtitles to the sound in your video. It should only take a little while (this varies on what time of day it is and how busy the system is).
What to Do If the Auto-Sync Fails
Occasionally the auto-sync fails - it just hangs and never manages to create the subtitles correctly or gives the message "Auto-sync is taking longer than usual" and still never gets there. I have found there are usually one of two reasons for this:
The video has not finished the checking process. In that case I close the subtitle window using the X and choose the "discard changes" option. This means we can start the process over again once the checking of the vid is done and the processes won't interfere with each other.
It's a large script file and it just can't do it. I use the same method of leaving and discarding changes, then I check my file to make script file to make sure there's nothing in it that could be pasting in incorrectly and try again. It usually works the second time.
What to Do If There Are Existing Subtitles and Auto-Sync is Not There
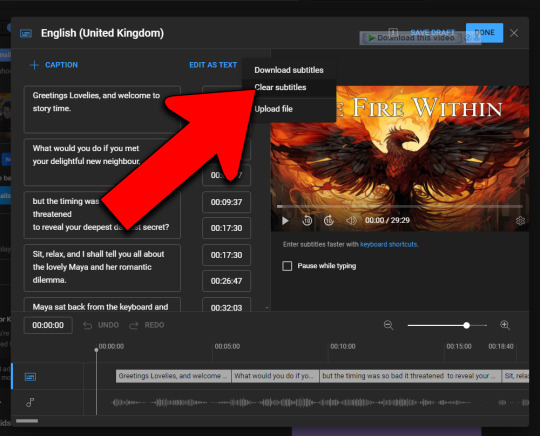
If there are already subtitles on the vid but we wish to add a whole new set, either because they are incorrect or incomplete, we need to first remove the existing subtitles before we can use the Auto-Sync option.
Hence we need to open the subtitles window as usual and choose the clear subtitles option. There are three vertical dots next to the EDIT AS TEXT option at the top of the subtitles screen. Click this and a drop down will appear with the "Clear Subtitles" option. This will delete all subtitles on the vid, so as a precaution, I would download the subtitles first from the same menu. Then if you decide you want them back again for any reason you can just re-upload the file.
Once I discovered the double spacing the paragraphs trick I have not had a subtitle set fail to sync correctly, whereas before it could be a bit hit and miss. I use it for my shorts and my long form and I hope this info will be able to help someone else out if they are having problems.
If you have tips for dealing with some of YouTube's quirks, I would love to hear them in the comments.
1 note
·
View note
Text
# okay I’m clueless on what prev tags are # can anyone explain? # and otherwise youse we’re here first # I don’t get why they’re changing everything for new comers like me
tags from @zenerrocksmc
A lot of the times, people want to respond to what other people have said in the tags! On desktop, the way to do that used to be to either copy and paste the tags like I did, or copy a screenshot of the tags into the reblog.
A recent trend that popped up was for people to just say "prev tags" as a quick shorthand for "go look at the tags of the person I'm reblogging from because that's what I'm talking about with my tags" or "the last person's tags were funny"
There was a whole lot of discourse bc you had to click through to the previous reblog to see what people were talking about, which was annoying for people and meant if the previous reblog got deleted? you'll never know what those prev tags were.
Anyways, you can't click through to previous reblogs anymore! Tadaaaa ✨
So, prev tags now no longer works unless you want to open up the notes menu and search manually. UNfortunately this also had other uses like manually following a reblog chain (including reblogs that didn't add any comments) or seeing if the person one reblog back had any interesting tags.
You can still go to any reblogs that had comments (if you push the LITERALLY invisible button at the top of the reblog) buuut sometimes you want to do more.
Too bad! Objective loss of a functionality be upon ye
Tumblr: we want people to be able to find new blogs to follow so you can find your community!
No not by seeing who people are reblogging from that's not allowed.
No you can't see who people are talking to with prev tags that's not allowed.
No you can't see the icons of the people you're following to know at a glance who's reblogging what and know them better. that's not allowed.
Sorry, did we say "find your community?" we meant "trawl through the endless swamp of the internet so you can reblog funny popular things"
#hope this explains everything!#also any annoyance you may detect in this explanation is directed at tumblr staff
724 notes
·
View notes
Text
So I was chatting with @kalira last night and we got to talking about older file formats and programs (because we started writing on Ye Olde Computers), and I mentioned how my very first fics are all in .wri format, which was the old Microsoft Write program from like...Windows 3.1. I had converted a couple of those old documents to .doc and .rtf back in the early aughts, but there were probably 6 or 7 that I’d never converted, which was Not Great as time marched on and .wri files became deprecated.
Over the past ~10 years, literally nothing I have tried would open those files; all the Microsoft stuff I can find basically says to use WordPad, which will (technically) open the files, but they are chock-full of so many random characters that they’re virtually unusable. I figured I’d have to manually pull the content out of each one, but as these are all novel-length stories...uh...that was going to be an Intensive Process.
Anyway, after that, I woke up this morning thinking that, hey, it’s been a few years since I’ve tried; I should search again and see if I can find anything that can open .wri files so I can save them in a newer, readable format.
What I found was an article that said, basically, “try LibreOffice.” The most recent review I found said that it would open most legacy file types, and honestly as long as it would 1) open them in a readable format and 2) let me copy-paste them into a new Word doc, then I was going to be a happy camper.
So I installed it, figuring what the hell, and used it to open the oldest .wri file on my system, a Star Wars fic.
And for the first time in nearly 20 years, I could READ MY FIRST FANFIC.

I’ve now opened and saved all of those old files as .docx files, so God willing, they should be readable for a long time to come.
So this is just a reminder: if you have old files that you haven’t converted to a newer format, do that before you (potentially) lose that ability entirely. And if you have legacy file types like .wri files specifically, give LibreOffice a try to get them open again.
#M rambles#about M#these old fanfics will never see the light of day#I just wanted them available for my own sake#I like to see how far I've come with my writing#also God help me if Microsoft ever transitions to using something other than Word and .doc/.docx files#because the number of files I will have to convert at that point is uhhhhh#A Lot
139 notes
·
View notes
Note
So I had a coding question that I've been trying to find the answer for, for a while. I've tried searching up information online and such but haven't been able to find anything.
I was wondering though how exactly someone would go about creating a main menu screen with the whole being able to create a new game, load one or change the settings? Like I said I've tried searching it up but haven't been able to find anything except for information on creating a transition screen.
You’re going to need an understanding of CSS for this, but I’ll do my best to walk you through it, alongside some basic functions of the UIBar and UI APIs. Also, like pretty much anything to do with coding, there is more than one way to do something (and there may be a more efficient/effective way than mine).
Like all of my tutorials, this is written for SugarCube 2.34.1. Since this one mainly deals with CSS, I’m sure you could adapt it to another format, but I’m not familiar enough with Harlowe, Snowman and Chapbook to add specifics.
Additionally, I use the Twine 2 editor version 2.2.1. This tutorial can be used with later versions; some of my example images may look not look exactly like what you have because later versions of the editor launch test files in your default browser (the 2.2.1 version creates its own mini-browser).
Making a Main Menu Page
Step 1: Hiding the UI Bar
If you want a clear main menu page without the UI bar, you can hide it in several ways.
<<run UIBar.destroy();>>
This will remove the UI bar completely from your game. Not recommended unless you have an alternative way of adding access to the Save, Settings and Restart functions.
<<run UIBar.stow();>>
This stows the UI bar. It will still be partially visible on the side and the player can interact with it to open it. The UI bar can be unstowed manually (without needing the player to do it themselves) on the next passage with:
<<run UIBar.unstow();>>
If you don’t want the UI bar to show up on your main menu, but you want to have access to it later, you can use:
<<run UIBar.hide();>>
To bring it back, you will have to use the following on the passage where you want the player to have access to it.
<<UIBar.show();>>
You may want to use the stow/hide and unstow/show functions together. Hiding the UI bar only makes it invisible; it will still take up space on the left-hand side of your game. Stowing and hiding it makes it a little more even.
To use them together, you can do this:
On the passage you don’t want the UI bar:
<<run UIBar.stow();>><<run UIBar.hide();>>
On the passage you where you want to restore the UI bar:
<<run UIBar.unstow();>><<run UIBar.show();>>
TIP 1: Using <<run UIBar.stow (true)>> gets rid of the slide animation as the UI bar collapses/restores, so you may want to use this so you don’t have any weird animations when you menu passage loads.
TIP 2: If you main menu is the first passage of your game, you can run the scripts for storing and hiding the UI bar in your StoryInit passage and it will run it when your game loads.
TIP 3: You can also use the Config API to have the menu bar be stowed automatically when your game starts.
Pop this code into your Javascript:
Config.ui.stowBarInitially = true;
However, if you have any links that navigate back to the main menu without restarting the game, the UI bar will be in whatever state the player left it in last. If you can only access the main menu by launching the game or hitting restart, don't worry about this.
If you want to double-check the SugarCube documentation for these functions, see here.
Step 2: Tagged Stylesheets
If you want to create a menu page that has a different appearance to your game’s default look, you can do so by using a tagged stylesheets. When using a tagged stylesheet, every passage with the same tag will have its appearance overridden to match what you’ve adjusted in your Story Stylesheet.
Let’s make one called main-menu. You can tag passages like so:
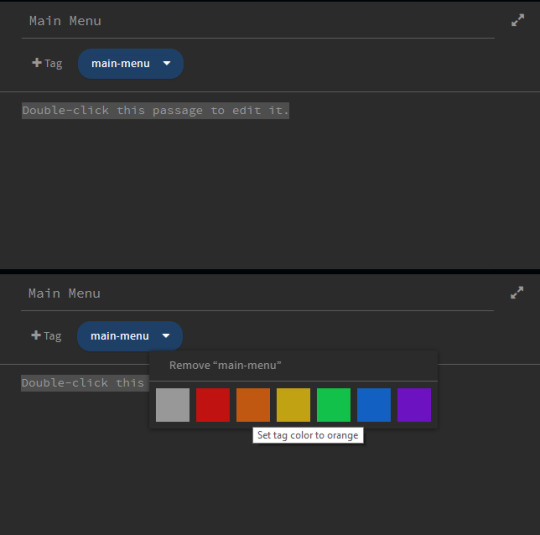
You can also tag the passage a different colour to make it special passages like this one stand out.
Step 3: Adding CSS
Now that the passage is tagged, you need to add a new CSS class to your stylesheet to change its appearance.
To change the appearance, you need to decide which selectors to target and what about them you want to change. Every default SugarCube game has the same set of selectors (you can find them here in the documentation). The most important ones are:
body – the body of the page. You can use this to change the foreground and background colours.
.passages – the element that contains your game’s main text. This is where you can change things like the colour that displays behind your game’s text, the font family, line height, letter spacing, all that stuff.
For the sake of this example, I am going to use the default SugarCube stylesheet and edit it from the ground up. You can find the code for SugarCube’s built-in stylesheets here.
In your stylesheet, you will want to use the tag you created earlier as the new class name.
.main-menu
Put this with the selectors you are going to change.
Let’s start with the body.
body.main-menu { color: #fff; background-color: #000; overflow: auto; }
The color property controls the colour of the font. Here I’ve set it to the hex code #fff and the background-color #000.

So now I have a black page when I start the main menu passage, and thanks to the code for the UI bar I put in earlier, the UI bar is gone.
Adding a Background
Now, we might want to spice up the background with an image to make it more interesting.
To add an image to the background, you need to use the background-image property.
body.main-menu { color: #fff; background-color: #000; background-image: url("images/main-menu.jpg"); background-attachment: fixed; background-repeat: no-repeat; background-size: cover; -webkit-background-size: cover; -moz-background-size: cover; -o-background-size: cover; background-position: center center; overflow: auto; }
You can read more about the different background properties and what they do here on W3Schools, but the code above will center your background image in the middle of the page and also make sure that it covers the entire container.

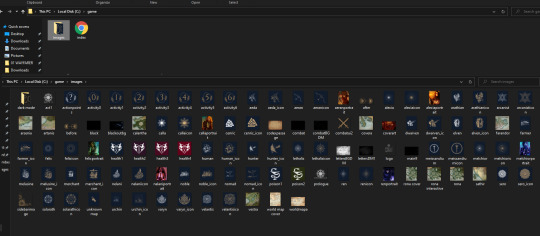
IMPORTANT: If you intend to upload your game as a ZIP file containing a .index HTML file (this is recommended if you have a lot of image assets or don’t want to link to an outside host, like imgur), you will need to use relative paths with any image URLs in your game.
Relative paths mean that the file is relative to the directory it’s in. In the example above, you can see that the background URL is "images/main-menu.jpg". This means that when the file is uploaded to itch.io, it will find the file—main-menu.jpg—inside the images folder, regardless of where the images folder is located.
For reference, this is what my game assets folder looks like for Wayfarer:
Relative paths are different than an absolute path, which begins with the drive letter. For example, the main-menu.png may be stored on my personal computer in a path like this one: C:/game/images/main-menu.jpg.
If I use this absolute path in the game, the image asset will not show up for players once it’s uploaded to itch because the image is not hosted on the player’s device in C:/game/images/main-menu.jpg.
This can cause some finnicky issues with the Twine 2 editor because the editor cannot find and display images from relative paths (unless you’ve put the editor in the same directory as the one you’re storing your assets in; I haven’t bothered to try this, so I’m not sure).
While working on your game in the Twine editor, you may need to use an absolute path to see what your asset looks like while you're editing. When it comes time to publish, make sure you switch it back to a relative path, otherwise the image will not load for players.
Step 4: Adding & Styling Links
Now that we have a background, we’ll want to tackle the links themselves.
Adding Links
You can link to the starting passage of your game using your preferred method—the [[ ]] link markup, the <<link>> macro, etc.
But for Saves and Settings (and also a Resume Game link, if you’re using the autosave feature), you’ll need to manually call the functions for accessing those dialogs. You can do that with this code here:
This will add a Load Game link that opens the Saves dialog when clicked.
<<link 'LOAD GAME'>><<run UI.saves();>><</link>>
This will add a Settings link that opens the Settings dialog when clicked.
<<link 'SETTINGS'>><<run UI.settings();>><</link>>
This will add a Resume Game link that loads the player’s last autosave.
<<link 'RESUME GAME'>><<run Save.autosave.load()>><</link>>
TIP: To enable autosaves on your game, add this code to your Story Javascript:
Config.saves.autosave = true;
This will autosave on every passage.
Config.saves.autosave = ["bookmark", "autosave"];
This will autosave on passages tagged bookmark or autosave.
Styling Your Game Title & Links
So this is where you can get get fancy with your CSS. For now, we’re going to keep everything within the .passage element (which is where any text inputting into the editor goes), but I will show you how to move the links and title to wherever you want further down.
Importing Fonts
First, go font shopping.
Google fonts has a very large library of free-to-use fonts that you can import directly into your game via your Story Stylesheet. After you browser Google fonts for the fonts you want to use, scroll down to the Use on Web section and click @import. Google will automatically generate the code you need to import the fonts you want to use.
Ignore the <style> </style> and copy everything else inside it and paste it in the top of your Story Stylesheet.
For this example, mine looks like this:
@import url('https://fonts.googleapis.com/css2?family=Almendra+Display&family=Nova+Cut&display=swap');
TIP: If you are importing fonts that a bold weight and italics available and intend to use bold and italics, make sure you import the bold weight and the italic versions of the font as well as the regular one. This will stop your fonts from having weird printing issues when you use bold and italics (especially on non-Chromium browsers like Firefox).
Below the import button, Google will show you the CSS rules for each font family. Keep these in mind, you’ll need them later. Mine, for this example, are like this:
font-family: 'Almendra Display', cursive; font-family: 'Nova Cut', cursive;
Basic Styling
In your stylesheet, you’ll want to target the .passage element with the .main-menu class.
.passage.main-menu { background-color: transparent; font-family: 'Nova Cut', cursive; font-size: 3.5em; text-align: center; }
Make sure there isn’t a space between .passage and .main-menu, otherwise it won’t work!
Here, I’ve changed a few properties.
font-family – this changes the font to Nova Cut
font-size – this changes the font size. I’ve used the unit em, which is relative to the element size (you can read more about CSS Units here)
text-align – this centers the text to the middle of the .passage element
I have also added:
background-color: transparent;
This makes the passage background transparent so you can see the background image. This is only necessary if you’ve added a background-color to your default passages.
Now, for the links.
Links have their own separate selector.
a means is the link as it usually displays
a:hover is the link when the player hovers their cursor over it.
It's generally a good idea to use different colours on the links—one for the normal display, one for the hover—so the player can visually see that they are hovering over a clickable link. If you don't want to use different colours, you should consider using some other visual cue to make that differentiation.
.passage.main-menu a { font-family: 'Nova Cut', cursive; color: #C57C25; text-decoration: none; }
.passage.main-menu a:hover { font-family: 'Nova Cut', cursive; color: #dcb07c; text-decoration: none; }
I’ve added an additional property here:
text-decoration: none.
This gets rid of the underline that happens on all default links in the default SugarCube stylesheet. Currently, this only targets the links on passages tagged main-menu; if you want to get rid of the text-decoration on all links, you can change the styling of your links like so:
a:hover { text-decoration: none; }
Choosing Colours
If you’re not sure where to start when it comes to picking hex codes, color-hex.com is a really helpful site. It gives you related tints and shades of for every hex code, which makes it a lot easier to find colours that are slightly darker or slightly lighter than your base hex code.
For choosing colours initially, there are plenty of hex code colour palette generators available online. One of my favourites is the one on Canva, which lets you upload an image and then it creates a colour palette from there. You might not want to use the exact colours it pulls, but checking the colours on color-hex can help you narrow down something that works for your aesthetics.
This is what our template now looks like:

Giving the Title a Unique Style
Right now, the title is styled by the .passage.main-menu selector and it’s default font size and font type is the same as the links below it.
If you want to style it differently, you can make a new class for it. In this case, I’m going to drop the .passage.main-menu and make a class called .game-title.
.game-title { font-family: 'Almendra Display', cursive; color: #ca893a; line-height: 1.0; font-size: 1.8em; text-shadow: 1px 1px #dcb07c; }
Because the font I selected didn’t come with a bold version, I cheated a bit a used the text-shadow property to bulk it up. I also had to adjust the line height. SugarCube’s default .passage styling gives everything a line height of 1.75 and there was too much space once the new font family and font size were applied.
To add this styling to your title, go into your main menu passage and wrap your game’s title in a span, like so:
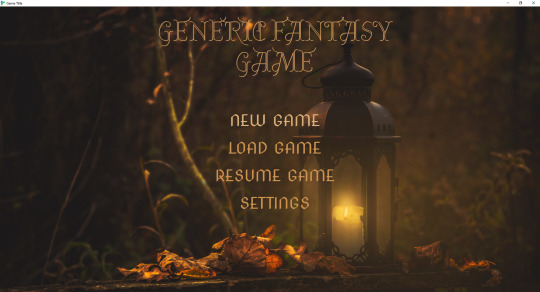
<span class="game-title">GENERIC FANTASY GAME</span>
It now appears like this:
TIP: If you want to play around with your appearance, you can use your browser’s Inspect tool to see the page’s CSS and play around/edit it. Either right click and hit Inspect or hit CTRL + SHIFT + I to open the Inspect tool. Once opened, you can go in and adjust things. If you make and a change and like it, remember to copy the code over to your stylesheet before you close the inspect tool.

Placing a Title & Links Outside the .passage element
If you want your game title and menu links to be elsewhere on the page, you’re going to need re-write some of your CSS and add some additional CSS.
The first thing is that you’ll want to remove the styling from .passage.main-menu. I’ve left background-color to transparent, but you’re not going to be using this to style your game title and menu links.
.passage.main-menu { background-color: transparent; }
For the title:
I’ve created two elements, one called .main-title and one called .main-title-item.
.main-title creates a container that will hold the title. This is what I use to tell it where on the page to appear.
.main-title { display: block; justify-content: space-evenly; position: absolute; top: 10%; left: 4%; }
.main-title-item styles the actual text.
.main-title-item { font-family: 'Almendra Display', cursive; text-transform: uppercase; font-weight: normal; font-size: 6.5em; line-height: 1.0; text-align: left; color: #cf944d; text-shadow: 1px 1px #cf944d; }
To apply this to the game title, go back to the main menu passage and apply your new elements to the game’s title:
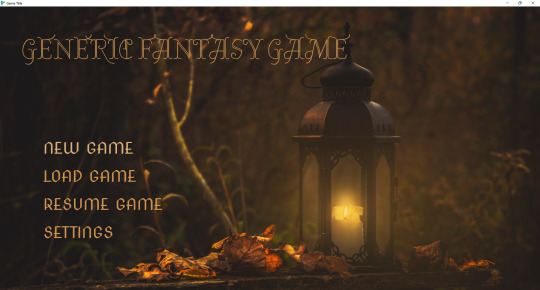
<div class="main-title"><span class="main-title-item">GENERIC FANTASY GAME</span></div>
For the menu links:
Here, we’ll do something really similar—a container to hold the links and a separate element to style them.
.subtitle { display: block; flex-wrap: wrap; flex-direction: column; width: 60%; justify-content: space-evenly; position: absolute; top: 46%; left: 8%; }
.subtitle-item a { font-family: 'Nova Cut', cursive; font-weight: normal; font-size: 3.5em; text-align: left; color: #cf944d; line-height: 1.3em; }
.subtitle-item a:hover { font-family: 'Nova Cut', cursive; font-weight: normal; font-size: 3.5em; text-align: left; color: #dcb07c; text-decoration: none; }
Go back to your main menu passage and apply the elements. Because all of the menu links will be in the same box, you only need to open/close the .subtitle element once.
<div class="subtitle"><span class="subtitle-item">[[NEW GAME]]</span>
<span class="subtitle-item"><<link 'LOAD GAME'>><<run UI.saves();>><</link>></span>
<span class="subtitle-item"><<link 'RESUME GAME'>><<run Save.autosave.load()>><</link>></span>
<span class="subtitle-item"><<link 'SETTINGS'>><<run UI.settings();>><</link>></span></div>
If you want to change where the title and menu links appear, you can use the Inspect tool to figure out different percentages and spacing until you find something that works for you.
There are a lot more things you can add (like animations that appear when you hover your cursor on the link), but I’ll leave it there for now.
Additionally, if you intend to make your game mobile compatible, you’ll want to read up on media queries and learn how to adjust font sizes and any other units of measurement for different viewports. This is how you shrink things appropriate to fit on small screens.
I hope this helps! If you have any questions, please let me know. I’m still a newbie at CSS (so I’m sure there are ways of doing things more effectively), but these are some of the things that I have helped me along the way.
110 notes
·
View notes
Photo

since we’re officially a few weeks into second semester and i’ve had to write another paper by now, i thought it was about time i shared some precious knowledge for the benefit of the greater good.
some basic things i can’t believe no one taught us:
wikipedia IS NOT EVIL. repeat after me. wikipedia IS NOT EVIL. just be smart about using it. (hear me out on this one.)
it can oftentimes be a great place to start because you can get a quick, simple summarization on the topic you’re trying to learn about.
make sure to check out the bibliography at the bottom---a lot of those sources are credible (which means you can cite them in your work!) and can provide further reading/context.
there are a lot of linked topics within the articles---read up on those too if they’re relevant (for a better overall understanding/extra background knowledge).
just don’t quote or paraphrase from wikipedia (the same goes for any other non-scholarly source) and cite it as a source in your paper---your teacher/prof may or not murder you, knowing this site can be edited by their four-year-old child lol.
put quotation marks around specific words (like names, dates, etc.) to narrow down your search results in case the ones that pop up first are irrelevant or too general.
narrow down domains by sticking site:.edu, site:.org, etc. to the end of a search instead of manually sifting through blogs and a bunch of “unusable” stuff.
explore the other advanced search options that don’t have shortcuts by googling something > settings > advanced search to narrow things down based on language, region, publication date, usage rights, etc.
use ctrl+f on articles to find the most relevant passage(s) if you read through the first paragraph and think “yea man this ain’t it” or if the page is super long/wordy. this will save you a lot of wasted time.
figure out how to do a split screen and snap windows on your device! this is great for taking notes during a video/documentary or when manually retyping something that you can’t copy+paste while looking at the source for reference. it’s alt+[ or alt+] for chromebooks and windows key+left arrow key or windows key+right arrow key for windows pcs (google it if you have a mac---didn’t want to give out info i couldn’t test myself).
RECORD ALL (ALL) THE RELEVANT SOURCES YOU ENCOUNTER while you research. i don’t know how many times i’ve read a tidbit of information and didn’t think i’d use it later but then spent like an hour scrolling and clicking through my history to find the right site because it turned out i did need/want that piece of information later once i changed the direction i was going in. my method: pasting the link on a doc and writing a little reminder below it about what info it contains/what i would use it for.
if you’re extra lazy, use the docs.new shortcut to create a new google doc.
when citing, WAIT UNTIL YOU’RE DONE WRITING and then use a generator (fyi: i like easybib.com and hate the google docs add-on) to get the brunt of the work out of the way, edit any incorrect blanks, add to ones you have extra info for, and PROOFREAD THE FINAL CITATION while referencing the criteria of your standard (whether that’s chicago, apa, mla, or whatever) using owl.purdue.edu, as mistakes *do* happen, and you don’t wanna get docked points for something as simple as a citation.
remember you’ll have better results if you stop using a ton of filler words and punctation just to be grammatically correct---use fragments or list key words instead when you search things that are harder to find.
reword and reorder the words in your search in several ways. don’t give up right away if you can’t find things---you’ve gotta show some resilience.
read past the third result. please. i can’t stress this enough, considering how many people i know that don’t do this. you have to realize some things just take digging.
explore “related searches” that are suggested at the bottom. even if they’re not as specific as yours, they might pull up different/more results bc they’re common searches!
there are ways to get through paywalls. i’m *not* saying you should go find the loophole links on tumblr... i’m definitely not saying that *at all*.
#research#researching#research tips#research essay#research paper#research project#tips#essay#paper#project#resource#academia#student#studying#study#studyblr#study tip#study tips#reference#ref
276 notes
·
View notes
Text
play by the rules [1]
Nanami Kento is a well-known bodyguard who always adheres to his own set of principles when completing a job. But when his next assignment is protecting you, he suddenly finds himself second-guessing his morals and questions whether or not some rules are just meant to be broken.
pairing: nanami kento x f!reader
words: 2.7k
warnings: none for this chapter, please look at the series masterlist for general content warnings
notes: i’ve been meaning to write a multichap fic for nanami for so long and i finally got around to outlining most of the story and writing the first chapter yay! i’m a little unsure if the plot will actually be good or not lol but i’m hoping it’ll turn out okay! thanks for reading!
series masterlist

There’s a distinctive knock on your door that pulls you out of your thoughts as you lay on your bed with an unopened book in your lap. You had been meaning to read the story for the past three months after seeing rave reviews about it online, but for some reason, you couldn’t quite find the energy to start reading. Every morning, you pulled the book from your shelf with the full intention of getting past the first page. But every night, it was returned to the same spot on your shelf, remaining untouched.
With a quiet sigh, you force yourself to crawl out of bed, leaving behind the comfortable warmth of your blankets. You drag your feet as you walk over to the door, dreading the imminent conversation you’re about to have.
To be honest, you’d rather he just leave you alone to wallow in self-pity in the comfort of your own room. You knew he had good intentions, but you dreaded his frequent check-ins with you. If he had no good news to deliver, you didn’t want to see him. And there had been no good news for the past three months.
You have no expectations that today will be any different.
With a hesitant hand on the doorknob, you take a deep breath and try to suppress the bitterness you feel towards the person on the other side of the door. Once prepared, you open the door with a wide grin and a bright twinkle in your eyes.
“Hi Dad!” You greet him with a high-pitched, chipper voice.
Your father looks pleased to see your lively expression. “Good morning, princess. Do you mind if I come in?”
You manage to hide your surprise. Most of his visits consist of a quick hello just to confirm you’re alive in your room, but he heads off to go back to work. If he intends to enter your room, there must be something serious he wishes to discuss. You try to ignore the small glimmer of hope that flutters in your chest.
“Of course!” You waltz over to your bed and sit down, patting the space next to you. Your father sits on the plush bed beside you, twiddling his thumbs idly in his lap.
“I’m aware these past three months have been hard on you, princess,” he begins.
You dig your nails into the palm of your hands and bite your tongue to prevent yourself from spitting out a harsh retort.
Yeah, no kidding.
“They’ve been tough for me too.” He pats your leg comfortingly, giving you a sincere, apologetic look. “I hate seeing you stuck in your room all day, but you know I only do this because I love you and because I want to keep you safe.”
Your father’s words are genuinely heartfelt. There’s no doubt he cares for your well-being and bemoans the unfortunate situation, but you’re not in the mood to be swayed by his guilt.
After all, it’s because of him that you’ve been trapped inside for three long months.
“It’s okay, Dad. I don’t blame you.” You try your best to act like a caring daughter who wants to console her father and assuage his fears that you despise him for his actions. “I know it’s for my own good.”
Three months ago, your father fired your personal bodyguard.
This also meant that three months ago, your father shredded your only ticket to the outside world.
You can only venture outside the family’s property lines if a trained professional, tasked with keeping you safe from potential harm, accompanies you to pre-approved destinations.
Your father worries about your safety in public, because he often does business with local mafia groups in the area. He is not an influential or well-known member of the underground economy, but in this line of work, it isn’t unusual to piss off the wrong person in a deal gone bad. Family members are the most common targets, so you are a natural choice for disgruntled clients to take their frustrations out on.
On one hand, you believe it is unfair that you are forced to live a restricted life under the constant protection of a bodyguard because of your father. You have nothing to do with his business, yet you must suffer from the consequences of it.
On the other hand, there is no doubt that you reap the benefits from the success of your father’s career. You had never worked a day in your life and always received any material goods you asked for, so perhaps you do deserve to face at least a share of the consequences.
Your father is insistent that you must have your own personal bodyguard after an incident involving your mother that occurred when you were just a baby. There was an altercation when she had encountered one of your father’s enemies while doing some errands alone in the city.
It hadn’t ended well, to say the least.
So for three long months, you were stuck inside. To his credit, your father had immediately begun the search for a new bodyguard, but his vetting process was so rigorous that it was not a timely process. There had been some mishaps in the past with previous guardians, and your father had vowed to never let those mistakes happen again.
You know you should be grateful that your father cared about your safety enough to have a dedicated group of his team spend endless hours thoroughly investigating each and every potential candidate. You also know you shouldn’t complain about being trapped in a luxurious mansion, but you hate being at home.
You hate seeing your father’s workers around the premises.
You hate thinking about what sort of shady business deals are happening just a floor below you.
You want nothing to do with it. You don’t even want to think about it, which is why you prefer to spend as much time as possible away from home.
“I’m so glad you understand,” your father says with a relieved sigh. “But I have some good news this time.”
Your breath hitches in the back of your throat. The moment feels almost surreal. You had been waiting to hear those words for so long, you almost thought it would never happen.
“I approved your new bodyguard.”
This time, you didn’t have to fake your excitement.
“Really?” you gasp, looking at your father with wide eyes.
He nods at you.
Unable to contain your burst of elation, you throw your arms around your father with a squeal, giving him a fierce hug. “Thank you! Thank you!”
Your father lets out a hearty laugh, patting your back as he revels in seeing your utter joy. “He starts tomorrow, so you may leave the property again in the morning.”
In less than 24 hours, you are free to once again explore the city, visit popular shops, and stop by your favorite restaurants. You can barely contain your enthusiasm as your heartbeat drums in your chest from the rush of adrenaline after hearing such wonderful news. Pulling away from your father, you continue to beam at him, feeling an unusual wave of gratitude towards the man.
A loud beep disrupts the heartfelt moment.
Your father looks at his smartwatch with a tight frown. “I’m so sorry, princess, but I have to go to a meeting now.” He gets off the bed and gives you a small smile. “I’m glad I could finally give you some good news. I’ll hopefully see you for dinner tonight.”
Before your father can leave, you reel in your scattered thoughts after being almost too excited to think straight. “Dad, before you go, can I at least ask for this name?”
You cannot believe you almost forgot to ask such a crucial question.
“Nanami. Nanami Kento.”
You nod at him. “Thank you! Good luck at your meeting!”
Alone once again, you throw yourself a little celebration which consists of childishly dancing around the room blasting your favorite “good vibes” playlist. Afterward, you grab your laptop and plop onto your bed with a satisfied grin. You crack your knuckles.
It’s time to get to work.
In order to maximize your free time tomorrow, you need to have a rough idea about what you want to do and where you want to go. But before you start the task, you need to make one important phone call.
“Hey, Itadori.”
Itadori Yuuji is one of your father’s henchmen, but he’s a sweet boy who had nowhere else to go when his grandfather died. Luckily, he isn’t directly involved in the main operations of your father’s business. Known for his fast feet and powerful arms, he is mostly used as a source of manual labor to move heavy boxes that are brought in or shipped out of the various underground warehouses scattered throughout the property.
The two of you had become friends when you saw him trying to sneak food out of the main kitchen during the late hours of the night. Only your family and your father’s trusted confidants had permission to be in this part of the mansion.
Itadori immediately got on his knees and begged you not to tell anyone that he was stealing food, but you just laughed and showed him where the good snacks were located. Together, the two of you had a mini feast using the leftovers from the culinary staff. It was the first of many secret dinners to be held.
“Hey. What’s up?” he answers.
“Can you do me a favor?”
“Yeah. Sure.”
“Can you sneak into my father’s office and copy a file for me? It’s someone named Nanami Kento.”
There’s a groan. “Seriously? But you know how hard it is to sneak into his office,” he whines over the phone.
“I’m sorry, Itadori,” you apologize. You know you aren’t making his life any easier, but you need him to do this for you. “But I know you can do it. You’ve done it plenty of times before without a problem.”
Itadori sighs. He knows he can’t refuse you, not because he’s afraid that you’ll turn him in for punishment (or worse). No, Itadori genuinely likes you, and he’s grateful for your presence in his life for many reasons. Therefore, he does whatever he can to help you out whenever you ask.
“Alright. You got it.”
“Thanks, Itadori.”
Several hours later, a manila folder is slipped underneath your door. With a victorious grin, you grab the folder and set it on your desk. You shoot Itadori a quick text confirming that you got the delivery and thanking him once again for his help.
Quivering in anticipation, you open the folder and see a grainy, black and white copy of a man’s photo on top of the stack of papers. Even with the image’s poor quality, you can see the man’s sharp cheekbones and styled, light-colored hair. You think he looks rather handsome, but you’re not quite sure with the fuzziness of the copy.
Setting the photo aside, you read his file with an interested hum. Because of your father’s rigorous vetting process, the folder is stuffed full of numerous background reports. You vaguely wonder how Itadori slid such a large stack of papers under your door.
Nanami Kento, huh.
You flip over a page and continue reading.
What an interesting man.
“Did you finally accept a new job?” Gojo asks curiously, craning his neck to get a better look at the papers spread about on Nanami’s desk. He spots a photo of a woman among the various files that catches his attention. “Who’s that?”
Nanami rubs his face with an exasperated groan, wishing his coworker would mind his own business for once. He tries to hide the photo under other papers, but Gojo is too quick. The white-haired man easily snatches the photo off the desk before Nanami can touch it and waves it in front of him in a teasing manner.
“Nice try,” he grins, pulling back to observe the photo up close. “Oh, she’s pretty cute. I’m guessing she’s your new client?”
“No,” Nanami answers begrudgingly. He knows Gojo won’t return the photo or leave him alone unless he partakes in the conversation. “Technically her father is, but she’ll be the one under my protection.”
“Oh, so you did accept a new job then.” Gojo returns the photo with a satisfied grin now that his original question had been answered. “Surprised it took you this long to choose one. How long has it been since you finished your last assignment?”
“About three months. I wasn’t in a rush to start a new job.”
Nanami can afford to be picky about his assignments now. Over the years, he has built a strong reputation as a proficient bodyguard who always follows orders and always gets the job done. Now that he is well-known in the industry with a long list of satisfied clients, Nanami no longer has to scramble to accept any odd job. Plus, as part of Gojo’s renowned bodyguard service agency, he can rely on the secretaries to filter out any scams or seemingly impossible requests before they reach his desk.
Nanami is now constantly flooded with inquiries from influential celebrities, notorious mafia members, and other wealthy figures. These people are always willing to pay big bucks for an extra sense of security as they go about their lives, but Nanami is no longer interested in solely the money now that his multiple bank accounts are flush with cash. Instead, he wants to take it easy with a simple, straightforward assignment that won’t involve a lot of gunfire, blood, or death.
Being a bodyguard is a lucrative career, but it is also both physically and mentally taxing.
Simply put, Nanami is tired.
This is why he waited three long months to find his next job. With each additional request, he ignored how many zeros were listed as compensation and instead took his time to scrutinize the client, their family, and their motivations in seeking a bodyguard. He had a mental image of what he was looking for in his “perfect” job and much to his surprise, he stumbled upon a request that checked almost every box.
While Nanami was lost in his thoughts, Gojo had secretly snatched your file from the desk and had been skimming through it. He couldn’t resist learning more about this new client.
When Nanami returbs to his senses, he sees the missing file on his desk and glares at his white-haired coworker. Gojo just laughs in response.
“Sorry, sorry. I’m just curious to see what kind of person would pique your interest after all this time, Mr. Picky.” He purses his lips. “Hmm, she’s not much younger than us. Surprised she’s still single too. Aren’t most women in these sorts of families forced to marry early to strengthen business ties? Oh, maybe her personality is so bad her father can’t marry her off to anyone!”
Nanami rips the file out of Gojo’s hands with a scowl. “None of that concerns me.”
“Aww, come on, Nanami,” the white-haired man pouts. “You’re going to be spending a lot of time with her. What is she’s a demon in disguise? Women are pretty scary, you know.”
Nanami figures Gojo skipped the part in the file where your father had described you as a “bright, bubbly young woman who loves to shop and eat”.
“I think I can handle it,” Nanami responds flatly. “After all, I can reasonably get along with everyone except you.”
Gojo clutches his chest dramatically, acting like he had just been shot. “Nanami, you’re so cruel to me!” He then drops his hands and places them on his hips with a devious grin. “Alright, I’ll leave you alone now. Good luck! And don’t fall in love!” He lowers his sunglasses and winks. Gojo can’t help but get in one last jab to irk his coworker.
“You don’t have to worry about that.”
Nanami is a serious professional, one who always plays by the rules. He adheres to a certain set of principles in order to remain successful in this line of work. Without them, situations can get messy, and he has all too often witnessed other bodyguards make the mistake of deviating from protocol and facing the consequences.
There are three fundamental rules that Nanami always follows without fail:
Never go above and beyond what a job asks you to do.
Once a job is finished, leave immediately.
Never get personally involved with a client.
And under no circumstances would he ever disregard any of these rules.
107 notes
·
View notes
Text
Word Search
Characters: Jonathan Sims & Sasha James Word count: 1,172 Spoilers: None Other Tags: Nonbinary Sasha, Nonbinary Jon, Agender Jon, Autistic Jon, Autistic Sasha Link on ao3
Summary:
Despite the unwelcome shift his promotion brought to their interactions, rambling about linguistics with Jon was an easy pastime to fall back on. -- Featuring burgeoning Jon and Sasha friendship, mutual infodumping, and Fun with Gender (or lack thereof). Set during early season 1; written for the @t4tma event.
Sasha fidgeted with her jewelry. It wasn’t the usual nervous energy that she rode like an ocean wave while chasing down a lead or digging into a subject that snagged her attention. No, today, she just felt...off. Was it the new outfit? It was a bit dressier than her usual trousers-and-cardigan style, with a full length skirt that she’d finally found to be long enough for her height, and a scarf that she bought for the soft texture alone. Maybe it was the jewelry…? But that was the same as she usually wore, and yet each time she passed the mirrors in the break room or washroom that off-balance feeling returned. Finally, she gave in to the impulse to take off her earrings before snatching a file from her desk and marching towards Jon’s office. A distraction would help.
“Found that statement you said was missing in the sequence, Jon,” Sasha announced as she opened the door and poked her head in. (Oh good, he wasn’t recording. Though she was pretty sure the others were exaggerating how grumpy Jon got when interrupted; he never seemed too bothered when she dropped by out of unannounced boredom.) “Looks like it’s still missing a page, though—no translation with it.”
Sasha was surprised that Jon’s answering sigh didn’t send papers flying off his desk. “If it was translated at all. Nothing about the state of this place would surprise me,” he answered. Jon took the offered file and peered at it with what was now a too-common scowl, but the sourness radiated exhaustion.
Oh, he was wearing earrings again today. Small silver hoops not too different from a pair she saw Tim wear sometimes. I wish I could look like that when I wear earrings. She stomped on that thought with a short shake of her head. Where on earth did that come from?
“Looks like my staples were a good idea,” she pressed on with as much brightness as she could muster. “At least if we get a translated copy, we can be sure it won’t get separated from the rest.”
The tired scowl melted into a tired smile. “Thank you, Sasha. That has been a very helpful solution.”
The gratitude in his voice stifled the usual irritation she felt at being called "helpful" by someone she’d seen fidgeting before his first interview with Mr. Bouchard. How someone who’d been hired during her fourth year here ended up with her dream job...no, she wasn’t in the mood to wallow in that on top of everything. Instead, she flopped down into the chair across from him. “Mandarin, looks like. Don’t we have a sister institute in Beijing? The Pu Songling Research Centre? Maybe it’s from their archives.”
Jon hummed. “We can inquire if they originally lent it to the Institute; I don’t know if they translate to other languages in their collection, but perhaps they could put us in touch with someone who can…?”
“Either that or run it through the ol’ google translate. My Mandarin is a bit rusty.” At that Jon laughed, a tight-lipped huff of a thing. He used to laugh a lot more before his promotion, and she found she missed it. Sasha grinned before she continued. “I did try learning some once! When I was sixteen. I thought the writing was so nice, and wanted to impress my Gran. Didn’t last long, though.”
“I’ve heard it’s remarkably difficult to learn,” he said.
“Oh, for sure. Switching to French was easier, though I wasn’t a fan of memorizing word genders for everything.” Her thoughts skipped ahead a step or two, and she found herself adding, “Did you know that Mandarin only has a single pronoun for all genders?”
Predictably, Jon brightened and sat up in his chair, suddenly looking like someone who’d slept sometime in the past few days. Despite the unwelcome shift his promotion brought to their interactions, rambling about linguistics with Jon was an easy pastime to fall back on. “Is that so?”
“Yup! I won’t pretend that the rest of the grammar wasn’t brutal, but that almost made me jealous, you know?” Sasha answered, toying with the edge of the cardboard folder.
Jon’s attention was like a physical weight. “Jealous how?”
“Dunno, I kind of wish English had something similar, you know? Instead of needing words that say right out ‘I’m a woman’ or ‘I’m a man!’” She kept her voice light, but shifted in the stiff-backed chair. Sasha hadn’t expected the sudden discomfort, but saying the words aloud felt suddenly vulnerable, like pressing a finger just beside an old bruise—just enough to ache.
The Encyclopedia Look immediately fell over Jon’s face (apparently, according to Tim, Sasha had one too; she wondered if it was as obvious as his). “You know, even in English some people use singular ‘they’ for their pronouns. It’s been used as a singular gender-neutral pronoun for hundreds of years; examples easily date back to the fourteenth century. Did you know that ‘you’ used to be plural as well?”
“I did know that! And formal, too—it’s funny to think how ‘thee’ and ‘thou’ were the informal means of address.” Sasha forced down the urge to continue the thought; English shedding the formality divisions in its grammar was a subject she could talk about for hours, but she was curious where this was going. “Still, I had my papers marked up with enough use ‘he or she,’ not ‘they’! back in secondary to know I can’t get away with it now.”
“That’s changing,” said Jon with a sudden fervor. “And besides, people aren’t research papers.”
Sasha hesitated, that off-balance feeling suddenly returning. It wasn’t discomfort this time, but why did it suddenly feel so personal?
Jon seemed to notice her faltering. “O-of course, it’s not the only way to depart from the binary,” he rushed on. “I mean, I still use 'he/him' because those are comfortable for me, and—“ He froze, eyes flicking towards the wall before he picked up the statement and held it in front of him like a shield. “A-anyway, ah...yes. If someone asked me, I’d have no issue using ‘they’ for someone who asked me. Regardless of what the Chicago Manual of Style has to say about it.”
It didn’t seem to be a pointed comment (except a grudge against the style guide), but Sasha felt the sudden conviction it was meant for her, even if Jon didn’t mean it for her. Sasha felt the familiar bite of curiosity that she knew wouldn’t let go, but for once she wasn’t sure if it was directed outwards or inwards. But Jon looked a bit flustered, still feigning interest in the unreadable document in his hands, and it was getting near the time that she agreed to meet Tim for lunch. “Good to know,” she answered easily, then tapped the top of the statement. “I’d best get back to work—let me know if you hear back from the Research Centre.”
She had some thinking to do.
------
Thank you to the Magnus Writers discord for answering the absurd amount of questions and fact-checking I somehow needed for a 1k word fic, to evanescentjasmine and Ixempt for the beta reads, and to TheDeafProphet for inspiring the concept! Also an extra shout-out to the Magnus Writers mod team for being my own Linguistics Mutual Infodumping Squad.
#tma#the magnus archives#t4tma#tma fic#jonathan sims#sasha james#my writing#HEY HEY I WROTE A THING!!!#FINALLY!!!
123 notes
·
View notes
Photo
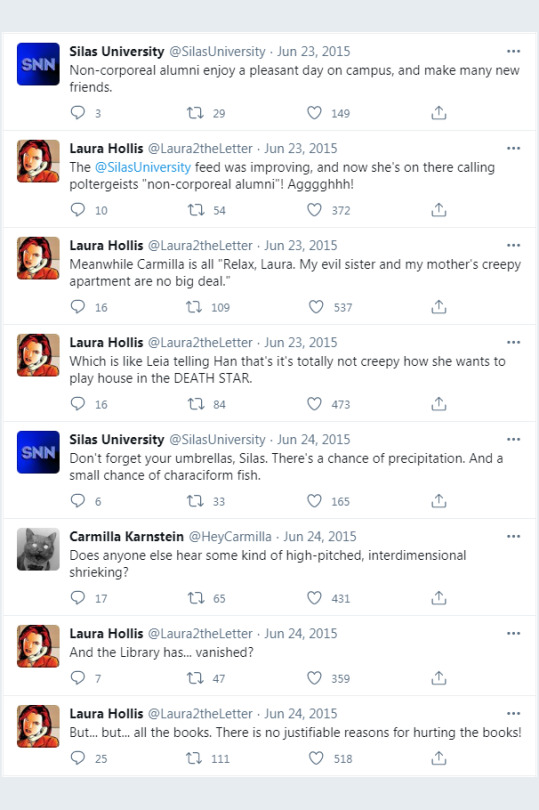
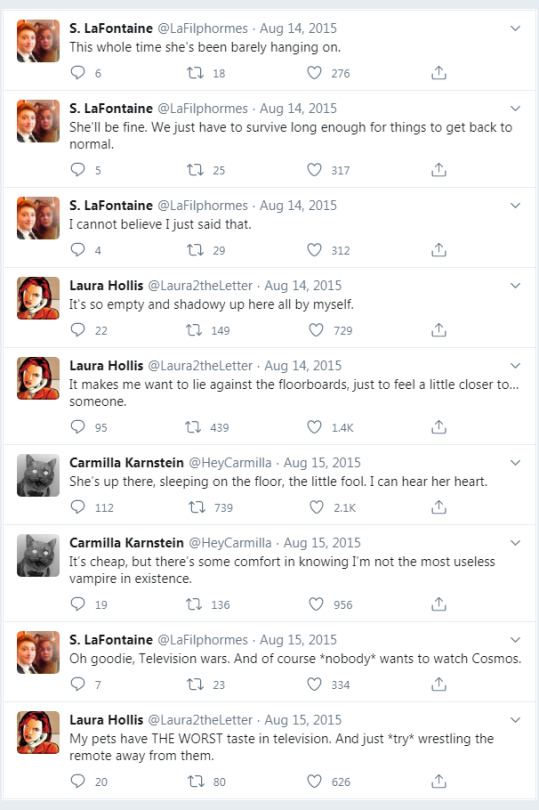
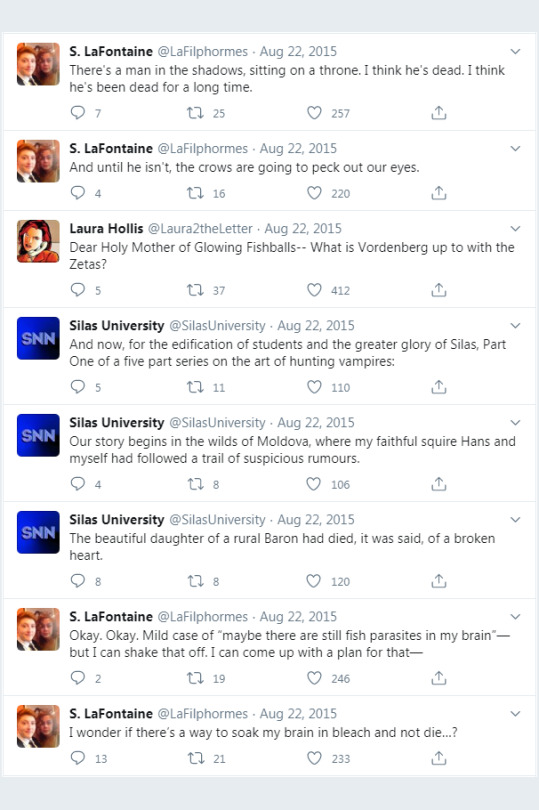
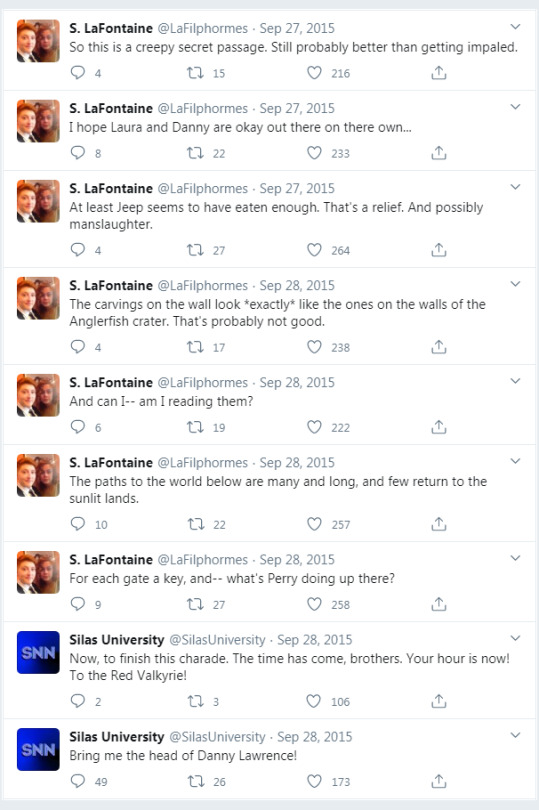

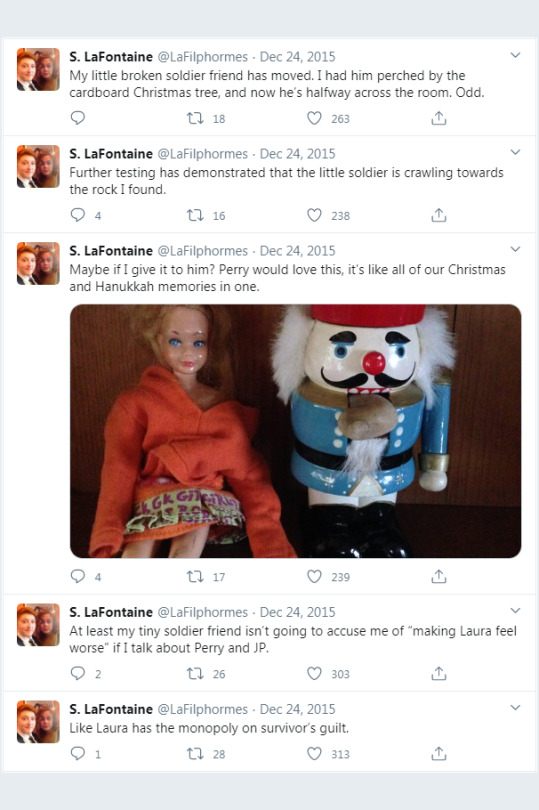
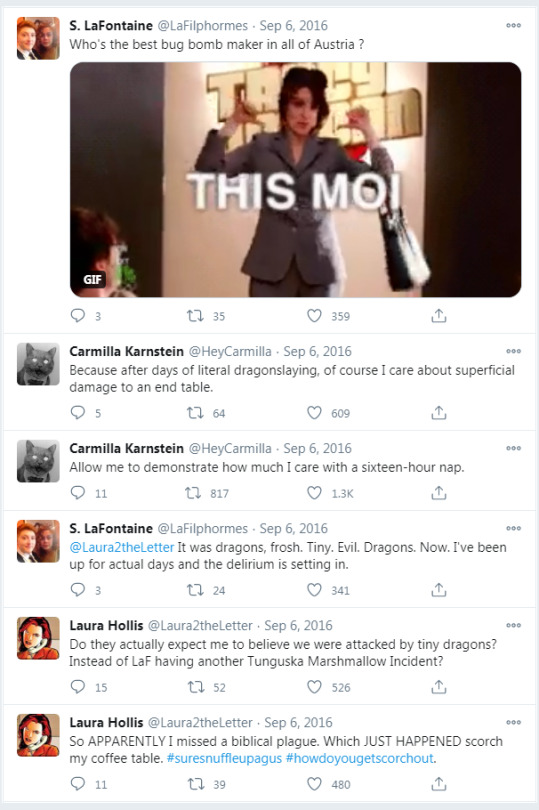
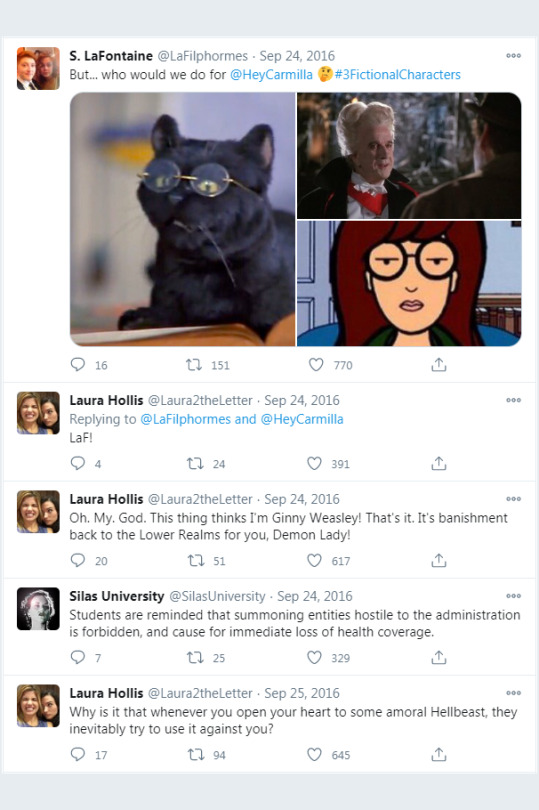
Presenting: The Carmilla Canon Tweets Collection!
I’m only four-and-a-half years late, but I hope people will enjoy this anyway. All four of the canon Twitter accounts, arranged in chronological order, and packaged into a .cbz file for your reading convenience.
Here’s the download link.
If this is the first time you’ve heard of a .cbz file, they can be opened with a program called CDisplay (and other programs too.) Alternatively, you can change the extension to .zip and extract all of the images if you so choose.
For a little more specificity and methodology about this collection: When images were tweeted, the full-size image follows after in a “page” by itself. For links, if they didn’t have an embedded preview within the tweet, I include a single screenshot of the linked site in a “page” by itself. It’s not the full content of the link, just enough to preview the webpage and understand the context of what was being linked.
This collection contains the public tweets, i.e. scripted content. The only replies are the replies to each other. No one else. I did seriously consider including all replies, as well as the tweets to which they were replying, but I ultimately decided against it for a few reasons.
The four canon accounts are still on Twitter and are expected to remain there indefinitely. The accounts are: Laura2theLetter, HeyCarmilla, SilasUniversity, and LaFilphormes. This collection just arranges the tweets from all four accounts together into chronological reading order and uses the icons that the accounts were using at the time the tweets were made.
For the explanation of my reasons for leaving out replies and other highly specific nerdy details:
Reason number one is that the scripted content is essentially the story the writers were telling with these tweets. The rest is sort of in-character ad-libbing, but not necessarily story progression. Reason number two is that a lot of the accounts being replied to have changed names or vanished in the years between then and now. Even a few of the quasi-canon fan-made RP accounts are gone and I wouldn’t have been able to track down all of their tweets or their icons. Reason number three is that if I had included everything I could find then this project would’ve taken me at least ten years to complete instead of four. There are a few gems in the replies, especially from the Silas University account, but I had to make a judgment call. The tweets in this collection are the tweets you would see if you followed all four accounts, but didn’t follow any of the other fans and RP accounts that the canon accounts would occasionally reply to.
Regarding chronological order, there were a few instances in the early days when several tweets seem to have been scheduled for the same time and ended up posting out of order. I rearranged in these instances to present the tweets in what seemed to be the intended order. There was also one instance that I’m reasonably confident was an a.m./p.m. scheduling mixup and I’ve rearranged that one as well. There are other instances where I suspect some tweets might have been inadvertently shuffled somehow, but I didn’t have anything solid enough to justify rearranging.
And this is about to be an extremely nerdy aside within this extremely nerdy aside, but there was one particular tweet that I chose to edit because the formatting or something was causing it to display differently on different devices. It’s one of Laura’s garbled tweets from between S3 Act 2 and S3 Act 3. The characters of the tweet displayed in different orders every time I tried to view the tweet another way. Windows 7, Windows 10, Android Phone, the search results page vs. the status page, and using the mobile.twitter link instead of the regular twitter link.


After much confusion about this, I eventually copied the text of the tweet into a document, and it came out in this order:

And according to Ellen Simpson, what the tweet actually says is that, when you read it backwards, bottom line then top. So, what I did was take the screenshot and then manually rearrange the characters into that (backwards) order, and kept the right alignment that the tweet seemed to have, producing this result:

I also included the tweet in a separate “page” right after, as it appeared in the search results on the Windows 7 laptop that I used to screenshot the rest of the tweets, for authenticity’s sake.
The tweets at this time were all scrambled anyways, but the rest were all readable approximations of Ellen’s translations and I don’t think making it that level of scrambled was intentional. The character’s show up in the right (backwards) order on TweetDeck, just not on any version of the Twitter site.

And lastly, the way tweets appear on Twitter has changed several times since I started this project. The circular icons are probably the most obvious change. I’ve pasted the original square icons over those. However, the width of the tweet column, font, and the replies/retweets/likes have changed over time as well.

I restarted this project several times, hoping to be able to screenshot every tweet in the same layout. Eagle-eyed viewers may spot a small and insignificant difference between certain page groups. Doing the whole project in-between any revisions to the Twitter site proved to be more than I was capable of, but the final result has an overall uniformity of presentation that I’m very satisfied with.
I think that should explain just about anything that anyone as nerdy about this as I am would be curious to know.
65 notes
·
View notes