#editable text effect css
Explore tagged Tumblr posts
Visit Tumblr Blog
Explore Tumblr blogs with no restrictions, modern design and the best experience.
Last Seen Tumblr Blogs


Fun Fact
25% of US internet users with an annual income of $80-100K use Tumblr.
Text

Editable Text Effect CSS
#editable text effect css#text effect css#css text effect#html css#divinector#css#learn to code#html#css3#frontenddevelopment#css text effects
0 notes
Text

CULPA MIA - MULTIMUSE MUSE PAGE !!!
This page is completely free. Please support me and my work by liking or reblogging this post.
[ INFORMATION ]
THIS CODE IS 100% JAVASCRIPT FREE!!!
This code comes in three versions: one with rules pop up and one without. one version is with filters.
Info on the filter version: For the sake of proper styling, the filters won't work on all browsers! A pic preview can be found here. Further explanations can be found in the code! Please read carefully.
The theme will adjust to (almost) all screen sizes.
All colors and effects are easy editable. Not many colors are needed.
The code offers 2 main links (Home and Ask) but also two free individual links.
Muse boxes come in two versions (with and without text box).
Hover effect on the muse pictures that reveal individual links (the amount of links is up to you!). Links can be easily edited out to remove the hover effect.
Grayfilter & Colored overlay for Muse Pictures available! (Please read in the root section of the css code very closely. It comes with explanations)
[ GUIDELINES ]
Do not claim as your own.
Do not remove the credit!
Do not use as a base code or take parts of this code for your theme.
Feel free to edit as much as you want!
Further credits and inspiration credits can be found in the code.
Click the SOURCE LINK to be redirected to the preview and the code!
#multimuse page theme#free theme#muse page#muse page theme#page theme#rp theme#theme#indie rp#rph#rpc
467 notes
·
View notes
Note
sorry if you’ve answered something similar before but how do you format things for your website? in the collections you have for poems
i love how it looks. the book kind of format it has
and i want to do similar/the same formatting for my own works but im really struggling…
i've been asked stuff like this a lot and i don't mind explaining it often because i want people to make websites more. i made a tutorial video at some point but it's kind of hard to make a curriculum or tutorial or whatever around this kind of thing because it's really just a self expression thing. i'll try to break down as much of my thought process as makes sense.
i design my pages in photoshop with either double/single page display in mind and then i use html to set them next to each other. most of the choice here comes down to how overwhelming i want my designs to feel. in the case of the lonely leaver page, the entire book was designed to be something that could be a physical book, and so from the getgo i made the pages in that kind of format. i previewed things in acrobat which has a booklet view mode (which singles out the front and back cover around the contents of the file) & allows you to process double page view as well. as for the actual process in photoshop before that point, i typically will open a canvas that is the size of the full 2 page spread (i.e. 8 inches wide for 2 pages which are both 4 inches wide) and i set grid lines for bleed margins and to mark the center of the page so that i can make the composition something that im comfortable with having a gap in the middle from the book folding. with lonely leaver i had to reformat about half the book at some point because i wanted to make it a larger resolution which was annoying but i just keep my guidelines for a print size in mind while im working. often if im a certain amount of time into a project that i feel like i will be spending a lot more time with i'll create a dummy psd file at this point which is devoid of content but which has all of the margins/resolution stuff set up already so i can just open that up and save a different version of it when i'm done.
my actual writing process and my design process is generally extremely intertwined, that's why things tend to be varying degrees stream of conscious in my work i think. i'll for instance, have a thought im stuck on for several days, and then open photoshop without having a poem or comic in mind, but i'll fill the canvas with some kind of color like red or yellow or a photo or whatever, and then open a text box or start drawing. telling a story through composition (i.e. page layout itself) is generally my favorite aspect of art and design because i enjoy how violent and dramatic framing angles can make the content of a piece feel so i'll try to move stuff around as much as possible in order to get my desired effect, often times using place holder shapes in lieu of finished design elements in order to get a rough blocking. as i do this i tend to react to what i'm writing/making as i'm doing it, and i do a lot of selective self editing during this part. for instance, i'll start manipulating rasterized text or cutting around images or whatever. i'll reread and look at whatever im doing for a couple of hours and then when i'm done with a spread or whatever i will save the document as a psd with a combined full spread and then each page separately as pngs or whatever (split at the middle grid line, back to the example, i'll save 2 different 4 inch wide images by changing the canvas size).
when it's time for me to put stuff on my website i then batch convert whatever pngs i exported into webp's because they load faster and take up less space on the server/my computer. you can look at my direct html/css files in your internet browser's explorer mode to see exactly what i do but essentially i just have either 1 or 2 images in a block and then a series of repeating vertical blocks containing images. i don't have an extremely efficient way of uploading pages and i'll typically just copy the same
"<p><img src="01.png"> <p><img src="02.png">"
like, 30 or 40 times or whatever into a html document. i use visual studio code for this stuff because it lets me do a bunch of stuff like having several files open at once & the navigation pane is nice & there's a live server extension that automatically refereshes the html file in my web browser on file save which is really awesome. i have a css page that i made like, 5 years ago, and i usually just link new projects to that because it has a bunch of different settings in it which i'll toggle on or off depending on the needs of whatever page or i'll add new div id's to it. it's kind of messy at this point, but it gets the job done. i use filezilla and something like bluehost or something for webhosting/file management.
i arrange and organize all of my art extremely methodically so usually in my like "<root catch all poetry folder>" inside of my "<root catch all art folder>" there will be a "<name of specific poem book>" folder which just contains the poems named by their actual name e.g. "dedication to saint eulalia 4.png" and then another folder inside of that is called "paginated" where i, using the acrobat document i arrange stuff in as reference, rename copies of my pages which i have placed in that folder to be named things like "01.png" so that i can then manually flip through it sequentially in the windows photo viewer and also just so that i don't have to go through the arduous process of renaming and tracking stuff inside of the root folder i'm containing that project's files in.
i'm 26 now and i made my first website when i was like 18, and my first zine project and i'm tired of feeling feeling around that same time, so i've got like, coming up on a decade of trial and error behind this and this is generally what has worked for me. my website isn't super complicated and mostly just gets the job done but because i try to think about style and presentation up front with whatever projects i'm doing i tend to just make plans based around that as early as it makes sense. to me having a website for art presentation has always been the Primary Method and intended landing zone for my art so it's genuinely always been a consideration in my process to try to plan around how i will put it on my website. i do this because i believe having my own curated space for containing my art allows it to exist in a context which best heightens whatever message i'm trying to convey. if there's an issues with my website right now they are that i'm very bad at mobile browser formatting & i havent updated the main look of the website in something like 4 years barely at all.
anyway, at the end of the day i think really as long as you can identify whatever your intentions are and do some planning/problem solving around that you should probably be able to find your own method which works for you better than mine might but if you do just want to copy my website the tools to do so are within your brain and internet searches and i believe in you. i think the biggest strength of my website is that it shows how easy it is to just put art big as fuck on a webpage and how effective that kind of minimalism can be. i just want my website to be like a museum's walls. and it's not super complicated to get to that level of html knowledge.
13 notes
·
View notes
Text
Is there an actually complete guide to AO3's limited HTML somewhere? I know for a fact that some features work but only under slightly weird rules.
For example, if you're using the <a> tag to form an anchor to refer to later, you HTML will end up looking like <a name="Anchor" rel="nofollow" id="Anchor"> when it's done auto-correcting in the Preview. If you type in <a name="Anchor"> or <a name="Anchor" id="NotAnchor">, it will autocorrect to that, but if you type <a id="Anchor"> it will correct to an <a> tag whose only attribute is rel, or <a rel="nofollow">. (The rel="nofollow" attribute has no practical effect for most users' purposes.)
I know that AO3 will autocorrect any incompatible HTML to compatible HTML, but I don't know what the compatible HTML is, and the above <a name="Anchor"> example demonstrates that some things are compatible but don't look compatible unless you do them right!
This is especially confusing because the editor will autocorrect some HTML as soon as you switch from the HTML editor to the Rich Text editor - but it won't correct everything. I've attempted to do slightly funky things with styling that seemingly worked just fine in the editor, but vanish when I preview the chapter.
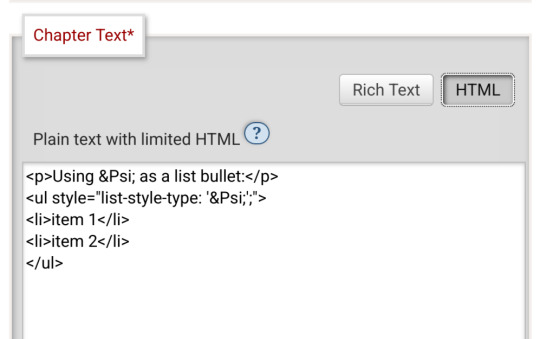
For example, here I am trying to use using the Greek character Ψ as a list bullet. When I originally typed it into the html field, I used the actual character Ψ. As soon as I switched to rich text and then back to html, it had autocorrected to Ψ, which is the escape character for Ψ. (For those who don't know, escape characters are a special code to tell the browser that this is NOT supposed to be code. <p> is an html tag; < p > will literally render "< p >".) So, it accepted the style attribute and the list-style-type, but it forced it into an escape character. So far so good.
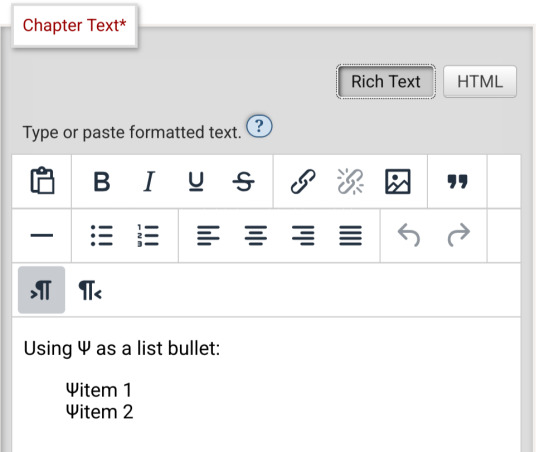
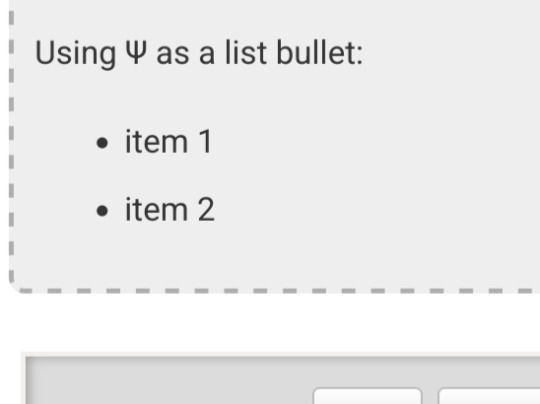
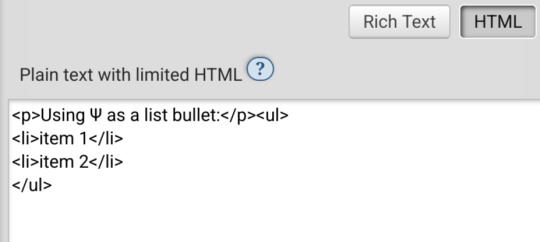
Until I click preview. Now the custom bullet is gone, replaced with the standard circle. If I click edit again, the code has removed the CSS attribute that changed the bullet... and also replaced the escape character Ψ with the character Ψ.
Weird.
#ao3#otw#html#ao3 formatting#ao3 html#I do not mind the lack of a clear standard at all#OTW is a nonprofit full of overworked staff and volunteers#and complete documentation is very hard#I just wanna be able to nerd more effectively#Can anyone direct me to the part of the open-source code that dictates HTML autocorrection? Is that a thing I can examine?
20 notes
·
View notes
Note
Any tips on using fonts in ao3?
going to assume you're familiar with the basics — creating a new workskin at Dashboard → Skins → My Work Skins, and selecting a skin on the Edit Work page. if not, AO3 has a tutorial for this
(though skimming the tutorial, it doesn't seem to mention the <span> tag, which is your best friend when it comes to applying styles to a bit of text within a paragraph)
now for the more specific part of this question. also, be warned i'm going to be embarrassingly technical before i actually answer your question.
this is going to sound funny, but i am by and large not a fan of manipulating fonts as a stylistic device. my personal opinion is that what font a text is displayed in should be for the user to decide, both for preference and for accessibility reasons (e.g. there's fonts designed for dyslexic readers). i also tend to find most font changes to be a a bit goofy and immersion-breaking
it's different when i do it, but i'll explain my cope in a second
anyway, the style property you want to change to set in your work skin is font-family. e.g. font-family: monospace will give text a code/"typewriter" look, and on my own site i use "font-family: Newsreader, serif;". (the comma there essentially says 'if you don't have Newsreader installed, any serif font will do)
but as mentioned, i don't like messing with fonts, and in fact, there is no font styling as such in my fic at all. what gives?
(note: im going include mildly spoilery excerpts from my fic, Hostile Takeover)
but basically, i wrap cyn's dialogue in <code> tags, and most browsers will make that monospaced by default, but it leaves the door open for custom userskins to add their own flair to code blocks.
for example, my site puts little boxes around them

but with all that said, i think i might be taking this question overly literally. i think it's likely you aren't talking specifically about just fonts, and most of the interesting things people want to replicate from my fic aren't about what shape the letters are.
my secret weapon for styling this fic is the humble text-shadow property.
what it does is simple: it creates a copy of the text, and you have four knobs to turn: you can shift it over horizontally or vertically, blur it, and of course change the color
text-shadow: 1px 2px 3px red;
this gives you a copy of the text shifted to the right 1 pixels, down 2 pixels, blurred 3 pixels and colored red.
text-shadow: 1px 2px 3px red, -1px -2px 3px blue;
same deal but now there's another in the opposite directions colored blue, like a chromatic aberration.
you don't have to include the color or the blur if you dont want color or blur.
now i'll run through some real examples
the "pain" effect is what you get when you stack text vertically

text-shadow: 0 -3px 0px, 0 3px 0px;
the "beyond the grave" effect is text stacked horizontally

text-shadow: 2px 0px 0px;
the famous "i want you destroy you" text is of course colored, and here i offer an actual tip

you can predict the offsets, but the color is special
text-shadow: 2px -1px 0px #da38;
full explanation here, but basically, when you write a color with four values, the first three are RGB, but the last is the opacity. i think this matters because, if the earlier part of this post didn't make it clear, i care about readers getting a good experience no matter how they choose their custom styles (within reason, ofc)
by making the color slightly transparent, it blends with the background color, means whether you read with a light them or dark, it meets you half way

(try removing the transparency on that shade, and it's a pretty harsh contrast on both modes — though part of that might be that i made it super saturated to compensate for the transparency.)
i have some complaints about how ao3 handles css, and one of them is that it forbids you from using the very convenient filter: blur() function. to work around this, i cooked up a very "we have blur at home" solution
text-shadow: 0px 0px 6px, 1px 1px 3px, -1px -1px 3px; opacity: 50%;
(it looks much better on my site, where i can filter: blur all i like)
one of the reasons this sucks is that without a doubt the biggest limiter on doing really complicated stuff with text shadows is that they don't stack.
you'll notice that when the "pain" effect shows up, the "blur" effect disappears.
this matters most for what is definitely the most striking and involved use of text shadows in the work: the big man himself

the basic principle here isn't that special. the illusion of depth is accomplished by increasing blur and opacity the 'deeper' the text is supposed to be. the biggest trick here is that instead of the 'px' we've been using everywhere before, the offsets use 'em', which is a unit that relative to the font size.
but there is a nuance. you see:
text-shadow: 0px 1px 0px, 0px -1px 0px, #fd64 2px 2px 2px, #fd68 2em 1em 3px, #fd65 4em 2em 5px; text-shadow: #fd64 2px 2px 2px, #fd65 2em 1em 5px; text-shadow: #fd6 2px 2px 5px, 0px -3px 0px, 0px 3px 0px, #fd68 2em 1em 3px;
the "translate" looks like a combination of the new effect and the pain effect, but i had to give it a special style, specifying both by hand.
if you want to layer things, it will get out of hand, and if you ever opt to revise the specific colors or values, solver help you.
also, this doesnt show up anywhere in HT (yet), but i've used it in the past — only setting the blur of a text-shadow lets you give words an 'aura', and it's a neat and simple effect
(excerpt from Eifre Quest, an original work of mine from years ago. i have mixed feelings about it)
sorry if that was a long ramble or self-indulgent, but hopefully something there was new or helpful.
thanks for asking!
20 notes
·
View notes
Note
I just wanted to say I only just started your IF and haven't got very far yet but already it is so intriguing and I love what you've done with the UI, the music (I remember finding that exact song you have at the beginning when I was looking for music for my IF and I was like gaspppp!! I remember you!!) and the text effects (the glitching 👀👀)! Also the title screen looked so great, I loved the background image and the bg noise with like the fluttering insects 👀--I had to sit there and listen to it for a bit. Great work and can't wait to keep reading!! :3 ❤️👍
YAY! I'm really glad you're enjoying the soundscape! ❤️
Background music evocative of a desert-inspired setting can be difficult to find, and the title ambience is the only thing I'm truly happy with so far - lots of editing and layering involved - so that is especially delightful to hear!
The UI for Garden of Bones isn't anywhere close to complete just yet, but your comments are very kind. Templates helped me finally start to understand CSS last year. And then a twine update destroyed everything. 😭👍 Took weeks to get the code patched up again, lol.
Thanks so much for the lovely message, and if you decide to continue I hope your play-through is entertaining!
All the best with your IF! ✨
~ Effie
3 notes
·
View notes
Text
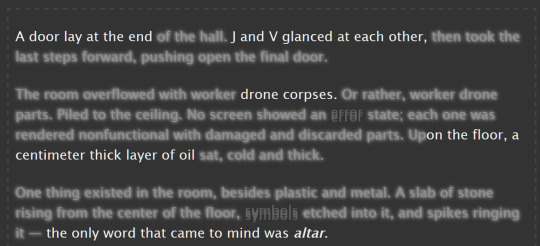
/ramb


the tab title for the blank version reads "Where could this be?", and the lit up version reads "Welcome to the Green Room!" the three doors in this room can be clicked on and lead to various other pages, which i won't describe here in detail as they were already accessible in the original version of the site.
the addition for this version of the site is that the bar in the center is now clickable. it leads to /romb, which is one of the strangest pages in this addition.
more under the cut again!
/romb

this page begins with an image of a pair of double doors. for those unfamiliar, every dark room seen so far in the game is entered through a pair of double doors. i don't believe we've seen this specific doorway anywhere in the game though as of yet. the tab title reads "No one will shed a tear for him."

the mention of a Crystal seems to heavily imply the Shadow Crystals, indicating this may be text seen before or after fighting a secret boss in chapter 3 or 4. clicking on the black text plays a warbly sound effect.
so this seems to be a dead end, right?

during the time in between the page loading, a 96x96 black square floats in the shape of an infinity symbol around the center of the screen. clicking on this square briefly changes the tab title to the text "You can never defeat us!!! Let's rumble." before redirecting to the next page.
/chapter3

this page simply reads "Not applicable." the tab title is an ellipsis "..." however, we can find more on this page by checking the page's css.

this "But..." is being rendered at 120% left, meaning it's pushed off the screen. by changing this to a value like 80%, we can see it on the page.
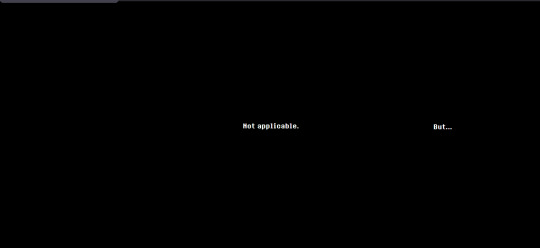
this text seems to indicate that other content can be found on other chapter pages.
/chapter1
this page simply reads "Not applicable." the tab title is once again an ellipsis "..." there is no hidden "but" in the code this time.
/chapter2

this page reads "Applicable." the tab title is once again an ellipsis "..."
/chapter4

this page starts as a black screen. after waiting on it for a minute, a tiny red square will fade in in the middle. this square is clickable. the tab title is the same. clicking on this square leads to /chapter4/message.
/chapter5

this page contains the numbers "2" "4" and "5" in various sizes.

highlighting the text reveals a "1" at an even smaller font than the 4, and a "3" as big as the "2". both of these are in black text when not highlighted. the tab title reads "back"
clicking on the 2 leads to assets/audio/d.mp3. the 3 leads to assets/audio/ma.mp3, and the 5 leads to assets/audio/h.mp3. the 4 redirects back to the /chapter4 page.
(unfortunate note: tumblr is being stupid and won't let me add the audio files now, because while editing this post i exceeded my daily audio upload limit. it also won't let me add back the uploads i already made which got deleted when i edited a draft. tomorrow i will edit this with mp3s, for now just click on the above links to hear!)
d.mp3 is a clip of crashing drums, with 2 synthesized chords playing under them. apparently this plays on the snowgrave route with berdly, lending some significant evidence to the idea that the size of these numbers may relate to how much players choices matter/how much "weird route" potential is in each chapter
ma.mp3 is the warbling effect that plays when clicking on the black sections in the text on /romb.
h.mp3 is a melody played on a synthetic harpsichord(?). none of these audio files are more than 5 or 6 seconds long.
/chapter4/message
this page seems to contain the same graphic as /chapter4, starting completely black and fading in a small red square. this time, however, clicking on the square reloads the page with slightly different content.

highlighting the text with ctrl+a reveals a few black squares below the red dot. these link to either assets/audio/e.mp3 or assets/audio/m.mp3.
e.mp3 is a rumbling sound that cuts off halfway through the file. m.mp3 begins halfway through, and seems to be the second half of the sound effect.
these 3 rows of black squares form the shape of a qwerty keyboard. by noting only the letters that link to m instead of e, you can find the text
these letters, when unscrambled, read "thank you".
T Y U O
A H K
N
/chapter4/thankyou
NOTE: at the time of writing, this page has already been changed! you can view the original version on web archive.

this page contains two rectangles which, upon investigation, are text entry fields. the tab title reads "How long did it take her to smile?"
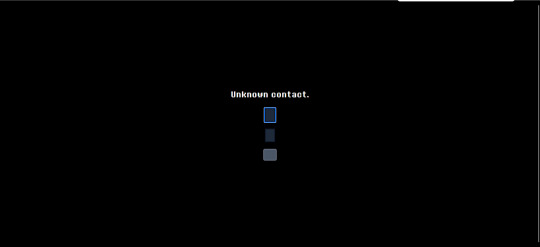
entering anything in the first field causes the text "Unknown contact." to appear. this seemingly implies that this field is used for entering contact information. putting a valid email address causes this text to disappear.

the bottom rectangle is a submit button. entering an email address and leaving the second text field empty causes the text "She never smiled?" to appear. this implies that the field can be filled in with a number answering the question in the tab title ("How long did it take her to smile?")

entering a number and submitting causes the text entry boxes to disappear, replaced only with the text "Thank you."
this seems to imply that the next step may be emailed to those who completed this part of the puzzle, possibly relating to the number entered. i will update if that happens! as of this morning, the text entry box is gone, and the site reads "Thank you" for all visitors.
GOOD MORNING! here is my attempt to recap everything we've found so far on deltarune.com
for those unaware, last night toby released a new newsletter giving information about deltarune's release date. he also released a clip of an alternate ending for the sweepstakes for if silence would've been chosen instead of freedom. (for those even MORE unaware, the spamton sweepstakes were a 2022 2-day event raising money for a charity where all sorts of hidden pages were shown on the DR website.
now, my (and many other people's) immediate reaction to seeing this, as well as this passage in the newsletter,
was that surely the site had been updated with some new content. and it has, a lot of it! and so this is my attempt to document everything so far.
/sweepstakes/silence/
youtube
this page features this short video revealing the alternate ending for the sweepstakes. in it, spamton a. spamton is simply wiped out of existence. not that exciting, but fun to see!

the page also includes a barren version of the main /sweepstakes website, with all the text deleted.
HOWEVER! at the bottom of this page, we can see two links. both of these lead to pages already found in the ORIGINAL run of the sweepstakes.
the rest of this will be under the cut, to avoid spoilers for those interested in exploring the site themselves.
/code

this page is accessible by clicking on the purple square. it was originally found from the main sweepstakes page, on the listing for noelles "fur-thentic cardboard box" from chapter 2. this link leads to the /catpetterz page of noelle's blog, which explains how the Cat Petterz 2 breeding system works. it ends in "Until one day..." which leads to /egg, continuing the story on the previous page. the link at end of /egg brings you to /code, which links back to /egg.
nothing seems to be actually changed on this version of the site, and it only serves as a way to get you back onto /egg.
/egg
this page has all the same text as the 2022 version of the site did, with one exception: the text "secret cats" is now a link! this link leads to /rain.
/rain
this page is an as of yet unseen post from noelle's blog. she describes the experience of staying home from school because of the rain, and a friend coming over to play cat petters. this friend is called "she," making it unlikely to be kris, and as this story takes place in her childhood, it's unlikely to be susie. the postscript says that her friend came over because "she thought that means that I was going to pet HER," which makes me think it might've been catti? if anyone else has any theories, let me know.
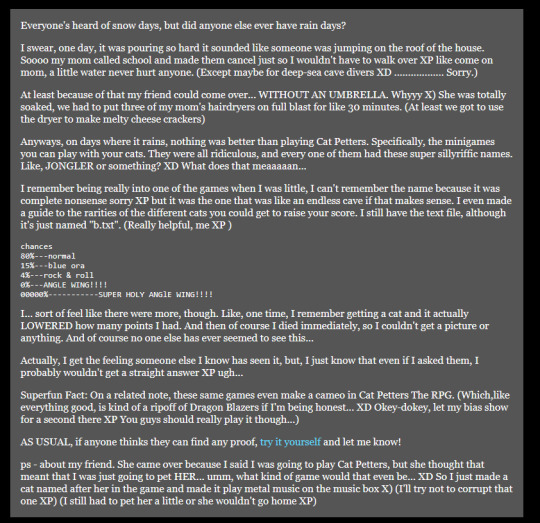
the rest of the page discovers another one of noelle's strange cat petters glitches. her "guide to the rarities of different cats" includes "blue ora (aura?)," "rock & roll," and "angle wing" and "super holy angle wing" are listed at 0% and 00000% respectively. another addition to the pile of mysterious connections between noelle and angel symbolism....
she also describes finding a cat that "lowered the amounts of point she had," making her die immediately. the MOST significant thing on this page by far though is a link to "try it yourself," which leads to a simulation of the cat petters minigame she described.
/rarecats

this page links to a cat collecting minigame. one of these green dancing cats will bounce around the screen like the DVD logo, and clicking on it gives an amount of points. the tab title simply displays the number of points so far.
cat-001.gif

this cat gives 10 points. it's probably the "normal" cat that noelle describes.
cat-002.gif

this cat gives 50 points. it's probably the "blue ora" cat that noelle describes.
cat-005.gif

this cat gives 250 points, and plays a guitar chord instead of the sparkling sounds that clicking the other 2 does. it's probably the "rock & roll" cat that noelle describes.
cat-006.gif

this cat gives 1000 points, and plays a very dramatic musical flourish. it also causes a window sprite to briefly appear before disappearing, as seen below.

this sprite links to the /windows page when clicked on. this cat is probably the "ANGLE WING!!!!" cat that noelle describes.
cat-007.gif

this cat gives 3000, and also generates a window sprite linking to the /windows page. it plays a more extended musical flourish as well. it is probably the "SUPER HOLY ANGlE WING!!!!" cat that noelle describes.
other cats
cat-003.gif
this cat looks like a yellow version of the "blue ora" cat. i don't think there's a way to get this cat in the game.
cat-004.gif

this cat looks like the "rock & roll" cat without the flame effect. i don't think there's a way to get this cat in the game.
cat-008.gif

this cat seems to be an even more powered version of the other two angel cats. it may be possible to get in game with even smaller odds, but since noelle's page only lists 2 "angle cats" i think it's unlikely.
cat-009.gif

this is a png of the yellow and pink smile that appears in spamton's basement. the inclusion of it here suggests to me that it is in fact some kind of "cheshire cat" character/allusion, like people have theorized before!
/windows

this page is simply the stained glass window sprite from /rarecats looped over and over. the tab title reads "Are you forgetting something?" each of these links to a page with the words "forest" "grow" "lost" "the" "where" and "would," in seemingly random order. an example of a few of these are
/wherewouldforestlostgrowthe /thegrowlostwouldforestwhere /thewheregrowwouldforestlost /growwherethelostforestwould
only one of these actually leads anywhere, the rest all lead to the "dogcheck" page which is the default for broken links on deltarune.com.
/lostwheretheforestwouldgrow

this page contains an image of a tree, overlayed with an edited version of the water image that seems to be a recurring motif in deltarune, used most recently in "jockington grows the beard". clicking on it plays a solemn piano chord. after clicking a few times, it instead links to /window. the tab title reads "ROOTS."
/window

this page contains the same repeating stained glass windows as /window did. the tab title once again reads "Are you forgetting something?" this time, each links to page with the letters "cdeehhilnooprrt", in seemingly random order. an example of a few of these are
/lonpecrrohedhit /pdolhehrnriceto /ecrorltipendhoh /creohnptredilho
once again, only one of them leads anywhere.
/thepoorchildren

this page is another black screen. this time, you have the ability to draw with the mouse. clicking creates a trail of white squares. the tab title reads "Therapy".

drawing in the middle of the image for around a minute causes a sprite of the "egg room" tree to slowly fade in.

after drawing for a bit, the tree will move to the front and become clickable. clicking on this just returns you to the /egg page mentioned earlier.
as far as i can see, this is everything to be found on the "noelle's blog" side of updates, the ones accessible from the purple square. unfortunately, tumblr has a limit for how many images i can include in a post, so the stuff from the other link i will include in a reblog! be sure to check it out, it's where stuff gets REALLY crazy!
870 notes
·
View notes
Text
How to Change Fonts in WordPress: 4 Easy Methods for a Unique Look
Fonts might seem like a small detail, but they play a big role in shaping your website’s personality. If you’ve ever tried to adjust the fonts on your WordPress site, you probably noticed that the default options are somewhat limited. WordPress uses system fonts by default, which can make your site feel plain or generic.
Customizing fonts is a smart way to reflect your brand’s voice, improve readability, and give your site a polished, professional feel. In this guide, we’ll walk you through four easy and effective ways to change fonts on your WordPress website—even if you don’t know how to code!
Why Should You Change Fonts in WordPress?
Your site’s font is often one of the first things visitors notice. Whether it's a fun, playful tone or a serious, corporate look, your font communicates your brand message.
Here are some strong reasons to switch up your fonts:
Stand out from competitors: Default fonts like Arial or Times New Roman are overused and uninspiring.
Create visual hierarchy: Font styles help organize content for better readability.
Strengthen brand identity: Fonts aligned with your brand message leave a stronger impression.
Improve user experience: Legible fonts make your content easier to consume.
The right font doesn’t just look better—it makes your content more effective.
The Four Main Font Types You Can Use
Before changing your fonts, it’s helpful to know your options. Here are the four primary font categories commonly used in web design:
Serif Fonts – Traditional and formal, great for print-like reading experiences.
Sans Serif Fonts – Clean and modern, ideal for websites and screens.
Script Fonts – Elegant or playful, often used for decorative headings.
Display Fonts – Bold and attention-grabbing, suitable for headlines and banners.
Tip: Use Sans Serif fonts for body text and Serif or Display fonts for headings to maintain clarity and style.
4 Easy Ways to Change Fonts in WordPress
Let’s explore four practical methods to update your site’s typography.
1. Change Fonts Using the WordPress Theme Customizer
This is the simplest method for most beginners.
Steps:
Log in to your WordPress Dashboard.
Navigate to Appearance > Customize.
Click on Typography or a similar setting (this depends on your theme).
Adjust font family, size, and weight.
Click Publish to apply changes.
Pros:
No coding required
Instant live preview
Cons:
Limited to what your theme supports
If your theme doesn’t support typography settings, try one of the other methods below.
2. Change Fonts Using the WordPress Theme File Editor (CSS)
For users comfortable with code, this method offers full control.
Steps:
Go to Appearance > Theme File Editor in your Dashboard.
Open the style.css file.
Find or add a CSS rule like this: body { font-family: 'Roboto', sans-serif; }
Click Update File.
Pros:
Complete customization
Works with any theme
Cons:
Requires CSS knowledge
Mistakes could affect your site’s display
3. Use a Plugin to Change Fonts in WordPress
Not into coding? No problem. Font plugins are the easiest and safest way to customize your typography.
Recommended Plugins:
Easy Google Fonts
Fonts Plugin – Google Fonts Typography
Local Google Fonts
How to Use Easy Google Fonts:
Install and activate the plugin.
Go to Appearance > Customize > Typography.
Choose from 600+ Google Fonts.
Set styles for headings, body text, etc.
Pros:
No coding required
SEO-friendly
Extensive font library
Cons:
Adds an extra plugin (can slightly impact performance)
4. Change Fonts Using WordPress Page Builders (Elementor, WPBakery, etc.)
If you use a page builder like Elementor, changing fonts is incredibly intuitive.
Steps (Elementor):
Edit your page using Elementor.
Click on a text widget or heading block.
In the left panel, open the Typography settings.
Select your desired Font Family, Size, Weight, and Line Height.
Save and preview your changes.
Popular Page Builders:
Elementor
WPBakery Page Builder
Beaver Builder
Pros:
Visual, drag-and-drop control
Section-specific font changes
Works well with Elementor-optimized themes
Cons:
Only applies to pages/posts built with the builder
Elementor is highly recommended for users who want full design flexibility without writing any code.
Final Thoughts
Fonts are more than just design elements—they influence how people perceive and engage with your brand. Whether you're building a professional blog or a business website, having the right typography can make a big difference.
In this guide, we covered four proven ways to change fonts in WordPress:
Theme Customizer
CSS Editor
Font Plugins
Page Builders like Elementor
Among all these options, Elementor combined with an Elementor-optimized WordPress theme offers the most flexibility and ease of use.
Looking for the Perfect Elementor-Compatible Theme?
Explore WP Elemento’s exclusive collection of Elementor-ready WordPress themes. Each theme is fully customizable and built for performance—so you can control every element of your site, including fonts, without writing a single line of code.
👉 Browse Elementor WordPress Themes on WP Elemento
Would you like SEO-optimized meta descriptions, internal links, and image ideas for this post as well?
0 notes
Text
Deiago Hero Section
Key Features
| LIVE DEMO | BUY NOW |

Perfect Responsiveness
Fully responsive layout optimized for all screen sizes
Mobile-first design with media queries for smooth adaptability
Flexible structure that adjusts to any container or section
Glossy & Modern Design
Elegant glossy background with soft gradient touches
Calming color palette for a professional look
Subtle floating elements with smooth CSS animations
Easy to Customize
Simple structure for quick edits to image, text, and layout
Clear placeholders for product visuals
Works effortlessly with any industry or niche
Modern UI Components
Animated product card with 3D tilt effect (pure CSS)
Stylish gradient buttons with interactive hover states
Feature icons designed for clarity and visual engagement
Performance-Optimized
Lightweight, clean HTML and CSS for faster loading
Efficient animation without extra libraries
Well-organized code, easy to maintain and extend

How to Use:
Just copy and paste the code into your project. Replace the image URL, text, and links as needed — and you're ready to go. Perfect for SaaS, product landing pages, or modern business websites.
. . . . .
#hero section#responsive hero#glossy hero#css hero section#html css landing section#animated hero#ui design#front-end#website template#product showcase#3d tilt effect#modern hero#easy customization#web design#mobile first#neifex#neifex store#html css template#landing page design#website header#animated ui#ui components#creative section#fast loading section#clean code#modern web layout#developer resources#ready to use section#css animation#website hero
0 notes
Text
Node.js Web Scraping Made Easy: A Step-by-Step Guide with Cheerio Web scraping has become an essential skill for developers and data enthusiasts who want to extract useful data from websites efficiently. If you're new to this,Node.js combined with Cheerio provides a powerful yet easy-to-understand way to create web scrapers. This guide will walk you through building a simple web scraper using Node.js and Cheerio, so you can start harvesting web data in no time. What Is web Scraping and Why Use Node.js with Cheerio? Web scraping refers to the automated process of collecting data from websites. Instead of manually copying information, scrapers let your programs access the HTML of web pages and extract specific content like product prices, headlines, or reviews. Node.js is a popular JavaScript runtime that makes it easy to perform network requests and manipulate data asynchronously. Paired with Cheerio,a fast,lightweight library modeled after jQuery,you can parse and traverse HTML with simple,familiar syntax. Benefits of Using Node.js and Cheerio for Web Scraping Speed and Efficiency: Node.js handles asynchronous I/O operations gracefully, enabling swift web requests. Simple API: Cheerio provides jQuery-like selectors for easy DOM parsing without running a full browser. lightweight: Unlike Puppeteer or Selenium, Cheerio does not load a full browser surroundings, keeping resource usage low. Flexibility: Ideal for scraping static pages or pre-rendered HTML content. Prerequisites: What You'll Need Before Starting Before diving into coding,ensure you have the following set up: Node.js installed. You can download it from nodejs.org. A code editor like Visual Studio Code or Sublime text. Basic knowledge of JavaScript. Familiarity with npm and asynchronous programming will help. Step-by-Step Guide to Building a simple Web Scraper 1. Initialize Your Node.js Project mkdir simple-web-scraper cd simple-web-scraper npm init -y This creates a new folder and initializes a package.json file with default settings. 2. Install Required Packages Install axios for making HTTP requests and cheerio for parsing HTML: npm install axios cheerio 3. Create the Scraper Script Create a new file named scraper.js and open it for editing. 4.Import Libraries and Define Target URL const axios = require('axios'); const cheerio = require('cheerio'); const url = 'https://example.com'; // Replace this with the URL you want to scrape 5. Fetch HTML Content and Load into Cheerio async function fetchHTML() try const data = await axios.get(url); return cheerio.load(data); catch (error) console.error('Error fetching the page:', error); return null; 6. Extract Information Using CSS Selectors Once the HTML content is loaded into Cheerio, you can use CSS selectors to target elements. For example, let’s scrape all article titles inside tags with a class of .post-title: async function scrapeTitles() const $ = await fetchHTML(); if (!$) return; const titles = []; $('h2.post-title').each((index, element) => const title = $(element).text().trim(); titles.push(title); ); console.log('Scraped Titles:', titles); scrapeTitles(); Full Example Code const axios = require('axios'); const cheerio = require('cheerio'); const url = 'https://example.com'; // Change to your target URL async function fetchHTML() try const data = await axios.get(url); return cheerio.load(data); catch (error) console.error('error fetching the page:', error); async function scrapeTitles() const $ = await fetchHTML(); if (!$) return; const titles = []; $('h2.post-title').each((i, el) => titles.push($(el).text().trim()); ); console.log('Scraped Titles:', titles); scrapeTitles(); Practical tips for Effective Web Scraping with Node.js and Cheerio Respect the target website’s robots.txt and terms of service. not all websites permit scraping.
Set appropriate user-agent headers when making requests to avoid blocks. Throttle your requests to avoid overloading servers. Test CSS selectors regularly, as website layouts change frequently. Use tools like nodemon to automatically reload your scraper during development. Common use Cases of Node.js Web Scraping With Cheerio Use Case Description Price Monitoring Track product prices from e-commerce sites for alerts or analysis. Content Aggregation Collect blog posts, news articles, or event listings into one place. SEO Research Gather competitor keywords and metadata for SEO optimization. Data Collection & Analysis Compile data for market research or academic projects. Real-world Example: Scraping Blog Post Titles Suppose you want to scrape the latest blog post titles from a technology blog that uses elements.Using the example code above, your script fetches the page’s HTML, parses it, then extracts those titles into a neat array. You can then save these titles to a file, database, or display them in your app. Conclusion: Getting Started with Node.js and Cheerio Web Scraping building a simple web scraper using Node.js and Cheerio is a rewarding way to automate data collection tasks quickly and efficiently.With just a few lines of code, you can pull meaningful information from static websites and use it in your projects. Remember to scrape responsibly by respecting website rules and keeping your requests minimal. To take your skills further, consider diving into more complex scraping tools like Puppeteer for dynamic content or combining scraping with data storage and visualization. But for beginners and many practical applications, Node.js with Cheerio provides a perfect, lightweight starting point. Ready to start scraping? Download Node.js and try the example yourself today!
0 notes
Text
Top Tools and Technologies to Use in a Hackathon for Faster, Smarter Development
Participating in a hackathon like those organized by Hack4Purpose demands speed, creativity, and technical prowess. With only limited time to build a working prototype, using the right tools and technologies can give your team a significant edge.
Here’s a rundown of some of the best tools and technologies to help you hack efficiently and effectively.
1. Code Editors and IDEs
Fast coding starts with a powerful code editor or Integrated Development Environment (IDE).
Popular choices include:
Visual Studio Code: Lightweight, extensible, supports many languages
JetBrains IntelliJ IDEA / PyCharm: Great for Java, Python, and more
Sublime Text: Fast and minimalistic with essential features
Choose what suits your language and style.
2. Version Control Systems
Collaborate smoothly using version control tools like:
Git: The most widely used system
GitHub / GitLab / Bitbucket: Platforms to host your repositories, manage issues, and review code
Regular commits and branch management help avoid conflicts.
3. Cloud Platforms and APIs
Leverage cloud services for backend, databases, or hosting without setup hassle:
AWS / Azure / Google Cloud: Often provide free credits during hackathons
Firebase: Real-time database and authentication made easy
Heroku: Simple app deployment platform
Explore public APIs to add extra features like maps, payment gateways, or AI capabilities.
4. Frontend Frameworks and Libraries
Speed up UI development with popular frameworks:
React / Vue.js / Angular: For dynamic, responsive web apps
Bootstrap / Tailwind CSS: Ready-to-use styling frameworks
These tools help build polished interfaces quickly.
5. Mobile App Development Tools
If building mobile apps, consider:
Flutter: Cross-platform, single codebase for iOS and Android
React Native: Popular JavaScript framework for mobile
Android Studio / Xcode: Native development environments
6. Collaboration and Communication Tools
Keep your team synchronized with:
Slack / Discord: Instant messaging and voice/video calls
Trello / Asana: Task and project management boards
Google Docs / Notion: Real-time document collaboration
Effective communication is key under time pressure.
7. Design and Prototyping Tools
Create UI/UX mockups and wireframes using:
Figma: Collaborative design tool with real-time editing
Adobe XD: Comprehensive UI/UX design software
Canva: Simple graphic design tool for quick visuals
Good design impresses judges and users alike.
8. Automation and Deployment
Save time with automation tools:
GitHub Actions / CircleCI: Automate builds and tests
Docker: Containerize applications for consistent environments
Quick deployment lets you demo your project confidently.
Final Thoughts
Selecting the right tools and technologies is crucial for success at a hackathon. The perfect mix depends on your project goals, team skills, and the hackathon theme.
If you’re ready to put these tools into practice, check out upcoming hackathons at Hack4Purpose and start building your dream project!
0 notes
Text
So I heard about a site called bearblog.dev and decided to make an account. What's interesting about it, is that it's not connected to anything like most social media sites are. So really, the only way for people to find you is through word of mouth, or by paying (which tbh I prefer not being on a discover page tbh).
I liked their mission statement, about never wanting to sell, that it's run on donations and no ads, etc. But the biggest plus for me, was how you can customize things!
I haven't remotely worked on my own theme yet, but I poked around the code a bit, and it seems pretty straight forward; so I think I should be okay! Though, I can only play around the css, and not html without being a paid member.
Buuut I have experience though the sheer torture of having to customize everything through just css, so I think I'll manage.xD
I can't work on it rn, as I am finishing up on my Dreamwidth theme, as well as a drawing I need to get done soon.T.T But apparently, you can customize your dashboard!!! And, well, I couldn't resist.xD

This is, again, just the dashboard; so essentially, only I can see this lol. But I needed a break from my other 2 projects, and it seemed easy enough.xD
I definitely didn't go all out; as this is just my writing page. But I still wanted it to be calm yet exciting for me to work in! I chose colours similar to the Tumblr Classic (low contrast) theme, as I use that as my base on AO3 as well.xD (But I did shift the hue lol)
Initially, it was just gonna be solid plain colours but then...whoops! I had fun, and I did learn a few new things~
I had found a few codes a few months ago, and decided to play around with them, and made something new from them aha!
Which, if you would have asked me months ago, I would not have been able to figure out, but I managed to make something work.xD You can't see it here, but the headers have a subtle rainbow animation.:-P And when you hover over the boxes, they pop up, and have an animated rainbow shadow! Oh, and all links appear white, but when hovered, have animated rainbow on the text.:-) Yes, lots of rainbow!xD
Which like, technically these have been done in the past; but required Java Script back then. Now, they can be done through css only!:-D (Which was super helpful, since I can only play around with the css lol)
I could not install custom fonts, so went with a browser standard. I think for journal themes, it should work? But dashboard seems like a no go! (Idk tho, I'd have to test!)
Also, not very noticeable in the screenshot, but the body has a blur effect, so anything behind it will make it blur.:-)
And yes, couldn't resist adding Ranka.xD She makes me happy!
Also, yes, this is very busy for most. But I made it for me. The spacey background makes me feel calm and a bit nostalgic over some themes I had made in the past, or of other sites I enjoyed browsing. The rainbow is subtle, not too annoying; but still sparks something fun for me! The colours for the body do well for my eyes as I type/edit stuff, which is what I wanted. And having a character I love in the bg/cursor (which you can't see here either) is just a nice bonus aha~
There are still some very minor bugs I need to fix, but that will be for another time. I would like to make this code public eventually, but not sure how or where, or if anyone would actually want to use it.xD I'm thinking once I have an ACTUAL site one day, I'll post it there?
So uh yea, I'm working on a Dreamwidth, I have a Tumblr already; so why the fuck would I want another blogging platform?xD
A few reasons, which I feel like I've already kind of mentioned here lol. But another big reason, is I do enjoy having multiple spaces for different purposes if that makes sense? I like the idea of having Tumblr for whatever the fuck I do here.xD And Dreamwidth for more art and fandom related stuff (and maybe a few other stuff; but definitely long form posts; idk yet, I still haven't tested the waters. But think art/fandom blogging, mainly). And maybe a bearblog for more mmm...personal or intimate entries. Stuff I don't want too many eyes or engagement on.
Like, yea sure I could keep certain thoughts to myself. But I find myself always afraid of sharing thoughts, feelings, or ideas in my own spaces (I have soooo many drafts). Perhaps of fear of being "too much" or making someone mad; but I feel like I should learn to being okay being me, having opinions or thoughts on stuff, to be able to even change over time, and not worry about an algorithm showing it to the wrong person, ya feel?
And yea, I just want another site to test out coding/design without committing to having my own site again JUST YET lol. (I SWEAR I'll make one eventually...I'm just intimidated + unsure of which host to choose lol)
So yup! Uhhh idk when I'll be done all of this lol. I'll definitely finish my Dreamwidth first, which I will announce~! Once that's done, might work on my bearblog, and let you guys know of that.xD
0 notes
Text
Price: [price_with_discount] (as of [price_update_date] - Details) [ad_1] A two-book set for web designers and front-end developers This two-book set combines the titles HTML & CSS: Designing and Building Web Sites and JavaScript & jQuery: Interactive Front-End Development. Together these two books form an ideal platform for anyone who wants to master HTML and CSS before stepping up to JavaScript and jQuery. HTML & CSS covers structure, text, links, images, tables, forms, useful options, adding style with CSS, fonts, colors, thinking in boxes, styling lists and tables, layouts, grids, and even SEO, Google analytics, ftp, and HTML5. JavaScript & jQuery offers an excellent combined introduction to these two technologies using a clear and simple visual approach using diagrams, infographics, and photographs. A handy two-book set that uniquely combines related technologies Highly visual format and accessible language makes these books highly effective learning tools Perfect for beginning web designers and front-end developers Publisher : Wiley; Pck edition (15 August 2014) Language : English Paperback : 1152 pages ISBN-10 : 1118907442 ISBN-13 : 978-1118907443 Item Weight : 1 kg 50 g Dimensions : 18.8 x 6.61 x 23.37 cm Country of Origin : USA [ad_2]
0 notes
Text
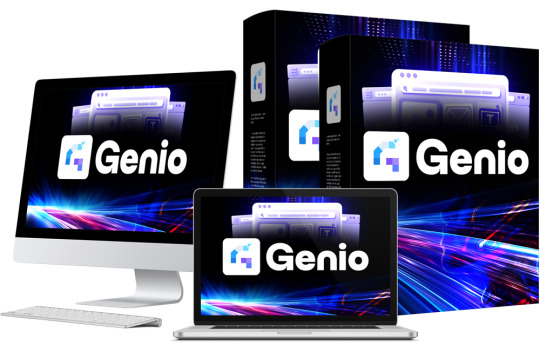
Genio App Review – Build Real Website Using Just by Talking In 12 Seconds
Welcome to my Genio App Review. This AI-driven tool builds functional websites through voice prompts in mere seconds. Imagine describing your website needs and seeing it come to life instantly. No coding skills are necessary. With Genio, anyone can launch a web design agency solo. Genio App transforms the world of web design.
Its voice-to-website engine generates real code from simple spoken commands. This revolutionary tool supports over 80 languages and offers editable code for customization. Users can publish sites instantly on a subdomain and sync projects with GitHub. The built-in AI even crafts compelling site copy.
With Genio’s agency license, users can offer web services, keeping all profits. Speed, ease of use, and scalability make Genio an ideal choice for budding entrepreneurs and seasoned professionals alike. Experience website creation like never before with Genio.
Introduction To Genio App
Genio App innovative tool lets users build real websites by talking. Imagine creating a fully functional website in just 12 seconds. Genio App makes it possible, transforming spoken words into real HTML, CSS, and JavaScript.
What Is Genio App?
Genio App, also known as Genio AI Agent, is designed for those in web design and development. It serves agencies, freelancers, and anyone needing a quick, efficient site-building solution. The app turns voice prompts into websites without coding. Users describe what they need, and Genio creates it, supporting over 80 languages. This tool is perfect for one-person web agencies or those with no coding skills.

Genio App Review: Overview of Product
Product Creator: Seun Ogundele
Product: Genio App
Launch Date: 2025-May-01
Launch Time: 11:00 EDT
Front-End Price: $17 One-Time Payment! (Limited-Time Access)
Official Site: Click Here To Visit Official Salespage
Product Type: Training Courses
Support: Effective and Friendly Response
Recommended: Highly Recommended
Bonuses: YES, Huge Bonuses
Skill Level Required: All Levels
Discount Coupon: Use Code “GNO5OFF” for $5 OFF or code “GNO20OFF” for 20% Off Full Funnel
Refund: YES, 30 Days Money-Back Guarantee
Genio App Review: About Authors

Meet Seun Ogundele, the brilliant inventor of Genio App. Seun’s innovative spirit and forward-thinking attitude to technology have transformed the area of software development with his pioneering work. Seun has created a sophisticated platform that enables users to easily builds high profitable essential business tools using the power of artificial intelligence.
Check out some of his previous successful projects, including OriginSuite, AI Toker, AzonKDP, Qai App, HeyBooks, AI Gigz Hub, GamPAL, WP Genie, Artisia, AvaTalk, RoboCHAT, ZapAI, Kustomizee, GoBuildr, FlowCart, AI Assist, SendALL, ScribAI, and SwipeFunnel, and many others.
Genio App Review: Key Features of Genio App
Voice-To-Website Engine
Just describe what you want and Genio writes real HTML, CSS, and JavaScript from scratch. Not mockups. Not templates.No Drag N Drop BS. Code. Design. Copy. All done in 12 seconds flat.
Edit Websites Just By Talking
No drag-and-drop. No coding. No stress. Just describe what you want to change — with text or voice — and Genio updates your website instantly. “Change the headline to ‘Start Your Fitness Journey’.” “Remove the pricing section.” “Make the background black and center the form.” You speak. Genio edits. It’s that simple
Powered By Gemini 2.5 Pro
You’re not using any average AI model here. You’re using the same dev brain Google trained for its internal teams. It thinks like a senior engineer, writes like a conversion expert, and executes like a 10x team
Live Build Preview
As you speak, your website literally builds itself right in front of your eyes. Every section appears in real time. You watch your idea become reality… before your coffee’s done brewing
Instant Website Publishing!
No hosting? No domain? No problem. With Genio, your website goes live on our subdomain in seconds — no setup, no extra cost, no expiration. Hit “Publish” once, and your site stays live for life. Perfect for demos, clients, side hustles, or flipping fast.
Built-In Copywriting AI
Headlines. CTAs. Testimonials. Body copy. Genio writes everything in your voice, for your niche, in seconds. No more writer’s block. No more hiring copywriters. No more guesswork.
One-Click ZIP Export
Your website. Your code. Your assets. Download the full project instantly and use it however you want no limits, no extra fees, and no locked sections
Editable HTML, CSS, and JS Code
Want to tweak the layout or add custom effects? Every line of code Genio writes is yours to edit, style, or hand off to a dev. It’s real code not some builder fluff
Prompt History + Auto-Save
Never lose a build. Genio stores every project and remembers every prompt. You can reload, reuse, remix, and relaunch anytime
GitHub Integration
Click once and your entire build syncs directly to your GitHub repo. It’s like having your own dev team deliver finished work straight to version control..
Multi-Language Site Generation
Want to build in Spanish, German, Arabic, and French? Genio understands and generates websites in 80+ languages complete with localized copy.
Not Just Websites Apps, Funnels, Blogs, Tools, and More
You’re not limited to pages. Genio builds calculators, quiz apps, portfolios, dashboards, landing pages, SaaS MVPs… anything you can describe
Zero Monthly Fees. Use It Forever.
Stop paying $297/month to a bunch of tools that barely work together. Pay once and get everything, forever. No surprises, no hidden fees, no limits.
Agency Mode Included (No Extra Charge)
Use Genio for clients, not just yourself. Give them their own dashboards, charge what you want, and keep 100%. You’ll look like a SaaS company without writing a single line of code
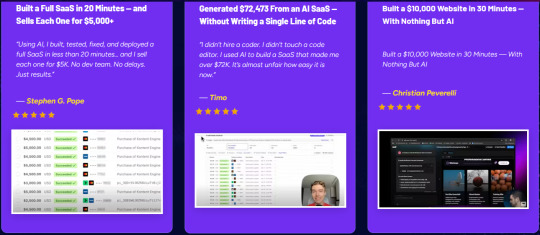
Flipping Sites Has Never Been This Easy
Genio turns your voice into $299 websites.
You talk.
The AI builds.
You get paid.
Build in 12 seconds. List on Fiverr, Freelancer, Flippa and cash out. This isn’t theory. It’s print-on-demand websites.
Genio App Review: How Does It Work?
Build, Launch, And Sell Stunning (Websites, Blogs, Apps, Landing Pages, SaaS, Funnels) Just By Talking
Step #1: Create Your Genio Account
Click on any of the buttons on this page, and instantly get full access to Genio
Step #2: Speak To Genio What You Want To Build
Click on any of the buttons on this page, and instantly get full access to Genio
Step #3: Deploy & Sell
Within seconds, Genio will give you exactly what you asked for if not 10x better.
Verify Users Say About Genio App
Genio App Review: Who Should Use It?
Affiliate Marketers
CPA Marketers
Content Creators
Blog Owners
Complete Beginners
Freelancers
Agencies
SaaS Founders
Flippa Hustlers
Service Providers
Works For Anyone
Genio App Review: OTO’s And Pricing
Genio App offers a unique approach to web design with its voice-to-website engine. It promises to transform the way websites are built by eliminating the need for coding skills. The pricing structure is designed to be cost-effective, providing users with substantial savings compared to traditional web design methods.
Subscription Oto and Pricing Tiers
The Genio App features a straightforward pricing model. Users enjoy lifetime access to its powerful tools with a one-time payment of $17. This means no ongoing monthly fees, making it an attractive option for those who want to keep costs down. Here’s a quick overview:
Add My Bundle Coupon Code “GNO20OFF″ – For 20% Off Any Funnel OTO Below
Front-End (FE): Genio $17
OTO1: Genio Unlimited ($47)
OTO2: Genio Done For You ($197)
OTO3: Genio Automation ($27)
OTO4: Genio Profit Maximizer ($47)
OTO5: Genio Limitless Traffic ($97)
OTO6: Genio Cloned Affiliate Profits ($67)
OTO7: Genio Mobile Payday ($47)
OTO8: Genio Reseller ($197)
OTO9: Genio DFY Profit Site ($47)
Genio App Review: Money Back Guarantee
Try Our 30 Days Iron Clad Money Back Guarantee
We trust our app blindly. We know it works, after all, we have been using it for a year, and not just us. But hey, I know you probably don’t know me, and you may be hesitant, and I understand that. A bit of skepticism is always healthy. However, I can assist you by providing immediate access to Genio App.
Use it and enjoy its features to the fullest. And if, for any reason, you don’t think Genio is worth its weight in gold, Please contact our 24/7 customer support, and we will gladly refund every single penny to you. There are no questions to ask. Worst case scenario, you get Genio and don’t make any money. We will refund every penny you’ve paid.
Genio App Review: Pros and Cons
Advantages: Efficiency, Accessibility, And Usability
Efficiency
Build websites in 12 seconds.
No coding or design skills required.
Instant publishing on a provided subdomain.
Accessibility
Supports over 80 languages.
Voice-to-website engine simplifies creation.
One-time payment, no recurring fees.
Usability
Editable HTML, CSS, and JS code.
Live build preview with real-time updates.
GitHub integration for easy project sync.
Limitations: Potential Drawbacks And Areas For Improvement
Customization: Limited design flexibility for advanced users.
Learning Curve: Requires understanding of voice commands.
Language Support: Some languages may have limited functionality.
Integration: May lack certain third-party integrations.
While Genio offers impressive features, it has areas needing refinement. Its strengths lie in speed and simplicity. Yet, enhancements in customization and integration could enhance its utility.
My Own Customized Exclusive VIP Bonus Bundle
***How To Claim These Bonuses***
Step #1:
Complete your purchase of the Genio App: My Special Unique Bonus Bundle will be visible on your access page as an Affiliate Bonus Button on WarriorPlus immediately after purchase. And before ending my honest Genio App Review, I told you that I would give you my very own unique PFTSES formula for Free.

Step #2:
Send the proof of purchase to my e-mail “[email protected]” (Then I’ll manually Deliver it for you in 24 HOURS).
Genio App Free Premium Bonuses
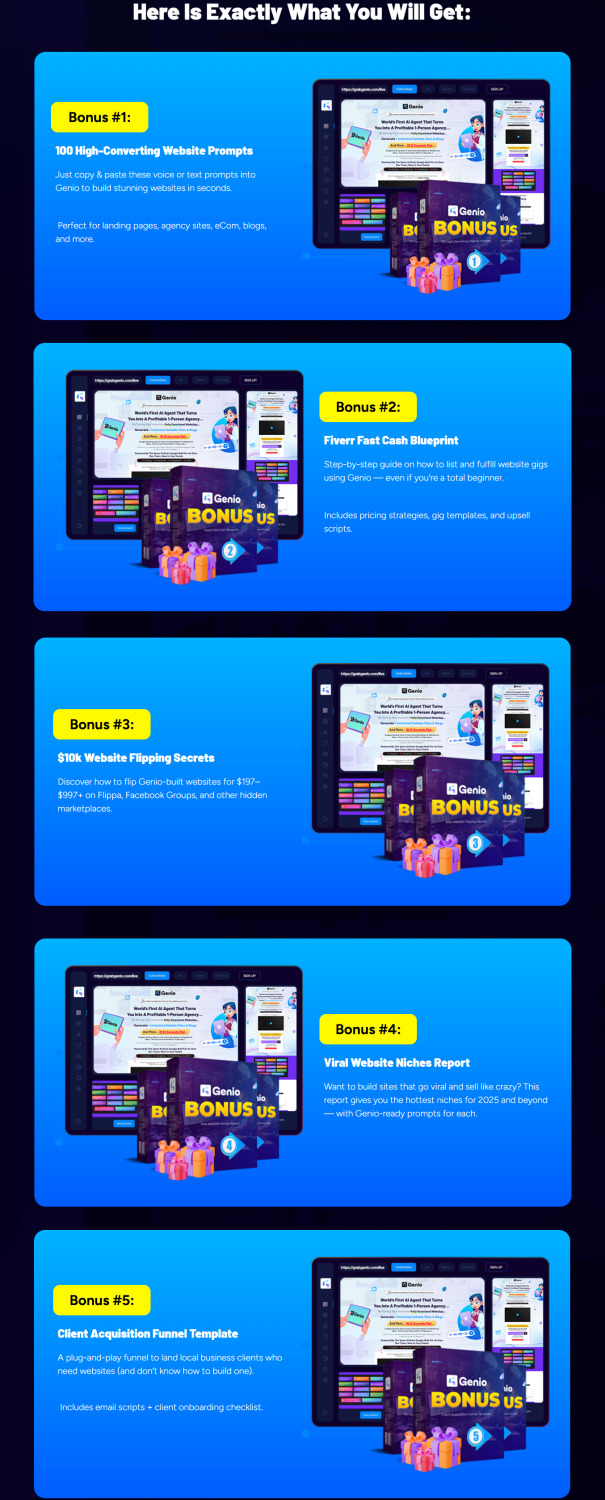
Frequently Asked Questions (FAQ’s)
Q. How Does Genio App Create Websites?
Genio app uses voice commands to build websites. Speak your ideas, and it converts them into a site quickly.
Q. Can Genio App Really Build A Site In 12 Seconds?
Yes, Genio app can create a basic website in 12 seconds using your spoken instructions. It’s fast and efficient.
Q. What Types Of Websites Can Genio App Build?
Genio app can build various sites like blogs, business pages, or portfolios. It adapts to your needs easily.
Q. Is Genio App User-friendly For Beginners?
Absolutely, Genio app is designed for easy use. Its voice command feature makes it accessible for everyone.
Q. Does Genio App Require Coding Skills?
No coding skills are needed with Genio app. Just talk, and it transforms your ideas into a website.
Q. Is Genio App Available On All Devices?
Genio app works on most devices. Check compatibility on their website for specific device requirements.
Final Verdict
Genio App simplifies website creation with its voice-to-website engine. No coding or design skills are needed. Build and publish websites in seconds using this AI-powered tool. Its multi-language support and editable code make it versatile. Perfect for those looking to start a web design agency without technical knowledge.
The lifetime access and money-back guarantee offer peace of mind. With Genio, you can create income-ready sites quickly and efficiently. Visit the product page to explore more. Start building your online presence effortlessly.
🚀 Don’t miss out guys and start your journey with Genio App today!
>>> Click Here to Get Instant Access Genio App with Exclusive Bonuses <<<
Check Out My Previous Reviews: Magicstore AI Review, Millionaire Whistleblower Review, WP AI Engine Review, Creatixio AI Review, and Traffix AI App Review.
Thank for reading my honest “Genio App Review” till the end. Hope it will help you to make purchase decision perfectly.
#genioapp#genio#genioreview#genioappreview#genioappcoupon#genioapphonestreview#genioappfeatures#genioappworks#whatisgenioapp#genioappreviews#buygenioapp#genioappprice#genioappdiscount#genioappfe#genioappoto#getgenioapp#genioappbenefits#genioappbonus#howtogenioappworks#geniosoftware#genioappfunnels#marketingprofitmedia#genioappupsell#genioappinfo#genioappexample#genioappworthgorbuying#traffic#ai#aiapp#aitool
0 notes
Text
How Website Designing Training in Delhi Builds Both Technical and Creative Skills
If you are looking to enter the field of web design, joining a website designing training in Delhi can be the perfect way to start. With the growing demand for visually appealing and user-friendly websites, learning both the technical and creative aspects of web design has become essential. A well-structured training program helps you build the right balance of coding knowledge and artistic skills, making you ready for real-world projects.
Understanding Website Designing
Website designing is the process of planning, creating, and maintaining the layout and visual appearance of websites. It includes tasks such as selecting the right color schemes, fonts, and images while also ensuring the website functions properly on different devices. A good web designer knows how to blend technology with creativity to deliver websites that not only look good but also perform well.
What You Learn in Website Designing Training in Delhi
Delhi offers many options for web designing courses that are designed to give you in-depth knowledge of the subject. Here’s what a typical course covers:
HTML5 and CSS3: Learn how to structure and style web pages.
JavaScript Basics: Add interactive features like image sliders, dropdown menus, and more.
Photoshop for Web Design: Create and edit images and graphics used on websites.
Responsive Design: Design websites that work smoothly on mobile, tablet, and desktop.
User Experience (UX) Principles: Understand how to design websites that are easy to navigate and user-friendly.
Search Engine Optimization (SEO) Basics: Know how to optimize websites to rank better on search engines.
Project Work: Apply your skills to live projects and create a portfolio that can impress potential employers or clients.
Technical Skills Gained from Web Designing Training
Website Structure: Learn how to properly build the backbone of a website using HTML.
Styling and Layouts: Understand CSS techniques to design layouts and manage the appearance of web pages.
Interactivity with JavaScript: Add dynamic features and user interaction to your websites.
Image Editing: Use tools like Photoshop to create web-ready graphics.
Responsive Techniques: Build websites that adjust to different screen sizes for a better user experience.
Basic Coding Knowledge: Understand the logic behind web design and front-end development.
How Creative Skills Are Developed
Design Thinking: Learn how to think from the user’s point of view while designing websites.
Color Theory and Typography: Understand how to choose color palettes and fonts that match the website's theme.
Creative Layouts: Experiment with different design styles to create unique and engaging websites.
Graphic Designing: Gain skills in creating banners, logos, and other visual elements.
Content Presentation: Know how to arrange text, images, and videos effectively to keep the audience engaged.
Importance of Time Management Skill in Web Designing Career
While technical and creative skills are important, managing your time well is also a key factor in building a successful career. Good time management skill helps you meet deadlines, plan projects properly, and avoid last-minute stress. Whether you are working on a client project or handling multiple tasks, time management ensures that you deliver quality work on schedule.
How Time Management Supports Your Learning and Work:
Set Priorities: Focus on tasks that are more important and avoid wasting time on less valuable activities.
Break Down Projects: Divide large projects into smaller tasks for better focus and control.
Use Tools: Make use of project management tools like Trello, Asana, or simple to-do lists to track your progress.
Avoid Distractions: Maintain a disciplined work routine and minimize interruptions.
Meet Deadlines: Deliver projects on time, which helps build trust with clients and employers.
Why Choose DI Infotech for Website Designing Training in Delhi
DI Infotech offers well-designed training courses that help you learn both technical and creative skills required for web designing. Our key highlights include:
Experienced Trainers: Learn from professionals who bring real-world knowledge into the classroom.
Live Project Work: Gain hands-on experience with real-time projects to build your portfolio.
Affordable Course Fees: Quality training at budget-friendly prices.
Practical Approach: Focus on skill development through regular practice and assignments.
Placement Assistance: We help you connect with job opportunities in web design and related fields.
Final Thoughts
Building a career in web designing is not just about coding or creating beautiful layouts. It requires a smart mix of technical know-how, creative thinking, and good time management skill. With the right website designing training in Delhi, you can confidently step into the world of web design, equipped with the skills and knowledge needed to succeed.
To know more about the courses offered by DI Infotech, visit diinfotech.com and take the next step toward your creative career.
0 notes
Text
Common Challenges in Magento to Shopify Migration and How to Overcome Them
Migrating from Magento to Shopify is a strategic move for many businesses looking for a more scalable, user-friendly, and cost-effective eCommerce platform. However, the process comes with its own set of challenges, from data transfer complications to SEO risks. In this guide, we’ll explore the most common migration challenges and how to tackle them effectively to ensure a seamless transition.
1. Data Migration Complexity
Challenge-
Magento stores tend to have big product catalogs, customer information, and order history, so data migration is a complex task. Manually transferring the data may result in data loss, incorrect formatting, or mapping.
Solution-
Utilize automated migration software to simplify the process.
Backup your Magento database prior to migration to avoid data loss.
Check data mapping to make sure products, categories, and customer information are correctly mapped in Shopify.
2. URL Structure & SEO Maintenance
Challenge-
Magento and Shopify use varying URL structures, and if not properly managed, they can affect SEO rankings. Lost indexed URLs lead to broken links, decreased traffic, and lowered search engine positions.
Solution-
Implement 301 redirects from existing Magento URLs to new Shopify URLs to maintain SEO equity.
Move meta titles, descriptions, and alt texts manually or with an SEO migration tool.
Submit a refreshed XML sitemap to Google Search Console to reindex pages promptly.
3. Custom Features & Extensions Compatibility
Challenge-
Magento supports heavy customization with third-party extensions and custom-coded features. Shopify, however, has a distinct app ecosystem that might not be directly substitutable for Magento’s features.
Solution-
Determine essential features of your Magento store and discover Shopify app substitutes (e.g., Yotpo for reviews, Bold Product Options for advanced product customization).
For customized functionalities, hire a Shopify developer to create custom scripts or integrations.
Take advantage of Shopify Flow and Shopify Scripts for automations and higher-level customization on Shopify Plus.
4. Design & Theme Modifications
Problem-
Magento websites tend to have very customized themes that cannot necessarily be duplicated perfectly in Shopify. Shopify employs another templating language (Liquid) than Magento’s PHP-based infrastructure.
Solution-
Select a Shopify theme that best resembles your Magento look. There are numerous editable themes available at the Shopify Theme Store.
Use Shopify’s Theme Editor and manual CSS changes to customize the look and feel.
If necessary, hire a Shopify developer to develop a custom theme that suits your brand.
5. Payment Gateway & Checkout Differences
Challenge-
Magento allows merchants to customize the checkout process, while Shopify has a fixed checkout flow (unless using Shopify Plus). Additionally, some payment gateways used in Magento may not be available on Shopify.
Solution-
Check Shopify’s supported payment gateways and switch to an alternative if necessary.
Shopify Plus users can leverage Shopify Scripts to customize checkout flows. Optimize checkout with express payment options (Shopify Payments, PayPal, Apple Pay) for a seamless user experience.
6. Customer Accounts & Passwords Migration
Challenge-
For security policy reasons, customer passwords in Magento cannot be directly migrated to Shopify, so customers must reset their credentials.
Solution-
Let customers know ahead of time about the migration and offer an easy password reset link after the migration.
Utilize Shopify’s Bulk Invite to send reset directions in a bulk-efficient manner.
Offer discount codes or loyalty rewards to motivate customers to login and change their accounts.
7. Performance & Speed Optimization
Challenge-
Following migration, a few Shopify stores can have slower loading times caused by unoptimized images, excessive third-party apps, or suboptimal theme performance.
Solution-
Utilize Shopify’s native CDN (Content Delivery Network) for quicker image and content loading.
Optimize images with Shopify’s image compression tools (e.g., TinyPNG or Crush.pics).
Restrict unnecessary third-party apps and eliminate unwanted scripts to enhance load speed.
8. Training Your Team on Shopify
Challenge-
Magento users who are comfortable with its backend might feel Shopify’s admin panel is different and need training to effectively handle orders, inventory, and settings.
Solution-
Give hands-on Shopify training to staff through Shopify’s Help Center and Academy.
Establish user roles and permissions so team members have the appropriate level of access.
Utilize Shopify analytics and reports to assist your team in adjusting to Shopify’s dashboard.
Migration from Magento to Shopify is not without challenges, but with the right approach, tools, and professional assistance, migration can be seamless and extremely rewarding. By keeping data integrity, SEO integrity, design portability, and customer satisfaction in mind, companies can best take advantage of Shopify’s ease of use, scalability, and performance to scale their online business.
Need expert help for Magento to Shopify migration? Contact Us for an effortless migration experience with no loss of data and optimal efficiency!
0 notes