#finally downloaded procreate
Explore tagged Tumblr posts
Visit Tumblr Blog
Explore Tumblr blogs with no restrictions, modern design and the best experience.
Last Seen Tumblr Blogs


Fun Fact
BuzzFeed published a report claiming that Tumblr was utilized as a distribution channel for Russian agents to influence American voting habits during the 2016 presidential election in Feb 2018.
Text

Lupus!!! From @askoverkill !!!! Happy Lupus!!
I started this prior to the most recent updates so ,,,, here’s a smiling Lupus for all our souls
#isat overkill#overkill au#overkill lupus#isat au#my artwork#borfwork#finally downloaded procreate#yeahhhhhh painting is a lottt easier in procreate…#I’m gonna test it out but I still love clip paint studio especially for comics#I’m very worried about this looping child#they’re gonna be ok right lololol????#traumatized as hell but#overall#?…
102 notes
·
View notes
Text
eva :)
#mgs#eva#mgs eva#getting more comfortable with how i want to draw her finally#also i downloaded some new procreate brushes which fixed everything wrong with me today#its the ms paint brushes by okami#sooo good#id in alt text
139 notes
·
View notes
Text

#kirby#daily kirby#my art#digital#hal laboratory#nintendo#happyyu_ on twitter put out a couple free brush packs#*for procreate#which can be accessed through their kofi#(/gummyillusration)#and I finally got around to downloading them today :)#(a crayon pack which I used for all the kirbs and a scenery pack which I very briefly used on the bg)#their art has such delightful texture btw#I'm probably going to stick with my default brush but it's fun to have new brushes :)
104 notes
·
View notes
Text
I'm making progress with this piece, gave up and posted a final chunk to a fic today, and started a fic I really want to write. uwu / A good day.
#i need to download more procreate texture brushes for the final stuff on this bc i'll have to transfer it to clip to do the detail work#but i am finally happy with how this is looking at this stage#rio is finally coming together and agatha is respledent
2 notes
·
View notes
Text

i really really need to work on finals (draws kitaro headshot) (draws kitaro headshot) (draws kitaro headshot) (draws kitaro h
#trying out new downloaded procreate brushes#bc we still cant figure out how to use procreate well....#we did!!!!!! work on finals tho!!!!!!!!!#but also this...#- max#my art#gggnk#kitaro
9 notes
·
View notes
Text

happy dungeon meshi thursday!! i finally downloaded some parallel inkers on procreate god bless 🙏🏻
#don’t forget to cuddle your chimera wife#dungeon meshi#farcille#yuri#dungeon meshi fanart#marcille donato#falin touden#wlw post#delicious in dungeon#chimera
842 notes
·
View notes
Text
Edit this screenie with me!


This is an unused screenie of Penny Pizzazz and Marcus Flex. Feel free to save the screenshot (Dropbox link below) and follow along with the instructions, or play around with it and do your own thing! I’m going to keep the instructions as simple as possible; hopefully they make sense.
Note: My process is kinda involved, but it’s a relaxing hobby for me. You do not need to do all of these steps! If the process doesn’t bring you joy, don’t bother!
I’m using procreate, but I’m also a photoshop user. You can use any software that has layers and blend modes :)
Instructions and downloads under the cut!
Dropbox link to the screenshot, and overlays!
1. Let’s start with shadows. The first step is to create a new layer. Put the blend mode to “multiply” (this darkens anything you draw on the layer). Then select a soft brush. We’ll start with Penny’s face. Use the eyedropper tool to choose a shadowy color of her skin (hold your finger on the color you want).

2. Decide where the light will be coming from (we’ll be placing it behind them on the top left). Deepen the shadows already made by the game, and add some shadows opposite to where the light will be. Choose a darker color to match each area you’re drawing on (Penny’s hair, her shirt, Marcus’ skin, his sweater).
When you’re finished drawing the shadows, go into your layer and lower the opacity. Less is more!

3. Choose the eraser (set it to soft brush). With a light hand, soften any shaded areas that are too harsh. Basically you want to blend the shadow with the skin using the eraser. You can also use Gaussian blur!

4. Let’s add some background lighting. This will also be our guide as we add bolder highlights in the next steps. Make a new layer and set the blend mode to “add.” Take your soft brush and a yellowy-orange color, and draw some glowy light coming from the top left.
Lower the opacity and take the eraser and erase much of the light on the right side of Marcus, and erase a bit of the light on their skin/ hair/ etc (like we did with the shadows). You can use Gaussian blur here too!
Note about lighting and highlights: experiment with the color of light, because some will look better depending on the environment and the sims skin tones. Because Penny and Marcus have dark skin, a bolder or darker yellow/orange will look much better than a pale yellow.

5. Let’s start adding more highlights! Make another new layer and change the blend mode to “add.” Choose a yellow-orange and paint some highlights on Penny’s hair, her left shoulder, her chest, cheekbone, and the left side of Marcus’ face. I made the image on the left a different color so you can see where I put the highlights.
Lower the opacity, and use the eraser or Gaussian blur to blend.

6. More highlights! Make a new layer and set the blend mode to “overlay.” Overlay lightens while adding color. I use “light pen” for any outlined highlights (the outer left of Penny’s hair, Penny’s shoulder, the left side of Marcus’ face), and I use a soft brush for the rest. Lower with the opacity, and use the eraser to blend.
This is a great time to play around with other highlight colors! I’m sticking with yellows, so I chose a peach color. Note: the red is to show what I drew.

7. We’re going to import a light leak overlay, and set the layer to “screen.” Then take your eraser, and erase any areas where you don’t want there to be too much light (red areas).

Finally, I’ll merge the layers together and bump up the highlights by going to adjustments > curves. Then I’ll add noise, and a vintage dust overlay. Sometimes I do more than this, sometimes less. I also like to draw hair strands and stuff, but that’s a whole second tutorial.
259 notes
·
View notes
Text
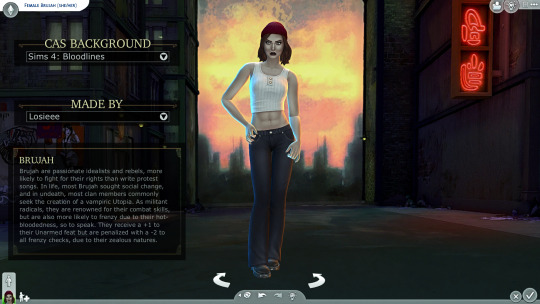

Sims 4: Bloodlines CAS Background By Losieee

Salutations kindred 🦇
The long awaited CAS Background for Sims 4: Bloodlines is finally here!!!
I did my best recreating the background we all know and love from VTM:B and make it fit in the Sims 4. For now it only exists as a flat picture, but i am looking into making a 3d version in the future! (but i can´t promise anything!)
Check out the rest of my Sims 4: Bloodlines project!
How to install
Download the .package file
Drag the .package file into your sims 4 mods folder
Open the game, and the background should appear when you open create a sim.
You should only have one CAS background in use at the time!!
Credits/Resources
S4Studio, Procreate, VTM:B Unofficial Patch, Bloodlines VPK Tool
CAS Background tut + Template

Download (SFS free) Updated link!
RESHADE - CAS LIGHTING
If you use my CAS background and upload screenshots, videos, edits or anyhting else, please @ me! I love to see them!
Please do not claim my content as your own, reupload my content or modify my content.
#sims 4 bloodlines#sims 4 cas background#ts4 cas background#sims 4 download#ts4 download#simblr#cas background#sims 4 mod#sims 4 cc#ts4 mod#ts4 cc#vtmb#sims 4 vtmb#sims 4 vtm#vampire the masquerade bloodlines#sims 4 overrides#sims 4 default replacement#ts4 vtm#ts4 vtmb#sims 4 create a sim#sims 4 cas#ts4#sims 4#ts4 simblr
491 notes
·
View notes
Text
How to format, print, and bind a zine

This is a consolidated version of previous posts on zine making, with more detail and screenshots. For a version of this post on gdocs, click here.
This is a step-by-step guide on how to use InDesign (or similar programs) to format and print a zine. This can be used for fanzines, sketchbooks, anything. It’s also only one way to do things - there are as many methods as there are zines under the sun. If you’re interested in other ways, searching for zinemaking on youtube would be a start.
If you are printing your zine, your total page count must be a multiple of 4.
Examples of multiples of 4 ✅
4, 16, 112
Not a multiple of 4 ❌
7, 99, 31
This is because our book will be made of folded A4 sheets (that’s regular printer paper). 1 folded A4 makes 2 A5 pages. Each A5 page has a front and back. Therefore each sheet of paper makes 4 pages.

How to format
Open InDesign. Go to Create New > Print. Choose A5 and tick Facing Pages. Enter your page number (this can be changed later). I’ve put 12. Hit Create.

Locate the Rectangle Frame Tool.

Draw a rectangle over your whole page, or just the part where you want your images to go.

Press Ctrl+D and insert the image you want on that page.

That’s it! Repeat on every page and you’ll have a book. Promise.

Further reading
I need a free alternative to InDesign.
InDesign is free for the savvy but I also recommend Scribus which is free and open source and very lightweight. The method is exactly the same but the Rectangle Frame Tool is called Image Frame and the Ctrl+D shortcut will now be Right click > Get Image instead.
I need help with designing my A5 pages.
For my first sketchbook zines, I arranged several images on an A5 canvas in a program like CSP or Procreate and exported them as a JPG into InDesign or Scribus. You can do this if your images aren’t already A5 size or you don’t want to waste time with InDesign’s formatting tools.
I need to get fancier with it, format text, or export my file as small as possible.
Here are the InDesign tutorials I used and liked:
How to Add Page Numbers
How to keep Page Numbers on Top
How to Create a Table of Contents
What is Overset Text and How to Fix It <- essential for formatting text onto multiple pages
How to Reduce InDesign File Sizes
Formatting best practices
Remember that in addition to your front and back cover you also have an inside front and inside back cover. You can leave these blank or create an endpaper with a pattern or include a short message or something. Look inside any books or zines on your shelf for inspiration. Or don’t listen to me and put your first drawing or poem there. Just be aware printer paper is thin so you might be able to see it through the cover.
Avoid putting anything important in the gutter (inside edge) or outside edges of the page. Also be careful of creating double page spreads that go across the centre of the book. Because of how we will print and fold the pages, each half of your spread might not meet up perfectly.

How to print it out
Open your completed book’s PDF file in Acrobat Reader (free download: https://get.adobe.com/reader/)
Print with the following settings: Booklet, and Booklet subset: Both sides.
We can see a preview of our print-out on the window on the right. The pages will look jumbled up, but form the book in order when folded.

Congratulations! Now you’ll have a stack of paper. Once it’s folded it should resemble your (unbound) final book. Use a bulldog clip or similar to keep your pages together neatly.

How to bind (2 methods)
If your book is less than 30 pages, I recommend using a long arm stapler, or a stapler that can open to lay flat. They are cheap.
There are also special book binding staplers or heavy duty staplers, if your book is thicker than 30 pages. Just position your book so the staples are in the middle of the spine (or as close as you can get) and send it. They will be a little wonky… that’s fine.
You can also separate your book into staple-able segments and then join them into 1 big book with tape or thread.
For my 112-page zine, I used thread to bind it.
These instructions are copied from the video ‘How to Print & Bind a Zine’ by LFONinja.
You can watch it here: https://www.youtube.com/watch?v=zKYy6G7lIy8
You will need: Ruler, awl, thread, sewing needle
Make 5 holes in the crease of the pages like so. (½ page, then ½ of that, then ½ of that again)

If the paper is thick, be careful when making the holes. It helps to have a piece of blu tack, putty, or soft eraser underneath the spine of the book as you work for the point of the awl to push into.
I don’t recommend separating the papers into smaller stacks as your measurements will likely vary and the holes won’t align.
Use a needle and thread to go through the holes in the following pattern. At the end, tie a knot with the ends of the thread (1 and 9) in the centre of the book. You’re now done.

About page creep
Because we are using folded pages inserted into each other, they push each other out like so:

From: https://www.greenerprinter.com/ support/page-creep/
You can use a heavy duty or industrial paper cutter/trimmer to remove this edge. This is why we kept any important contents away from the edge of the page during formatting, because we don’t want this process to destroy our book’s contents.
About image edges
Because of how the printer works, the images in the book don’t extend all the way to the very edges of the paper and have a thin white border on all sides. It’s possible to crop these edges from your book with a heavy duty paper cutter. Be careful and start small (3mm or less). Depending on how much your pages move during the printing process, the size of the white edge can be different on different pages. Or you can just leave them in.
To read some of the zines featured in this post, check out naumin.itch.io.
104 notes
·
View notes
Text
They're so everything to me
(click for better quality jeezus)

I stole both of the poses from a drawing the user tacodemuerte on Instagram did (they drew it better than me tho)
Speedpaint under the cut (WARNING: flashing imagery)
If you by chance noticed that I posted like one speedpaint besides a drawing I did and never did it again, it's because making speedpaints in firealpaca is A PAIN IN THE ASS. Unlike with other apps like ibis paint or procreate it's not something that it just does automatically for you. No instead you have to manually start a speedpaint and save it as a file on your computer. But of course it isn't just as simple as that no no, you have to manually end the recording as well and export it as a gif, and if you don't the speedpaint isn't going to be able to be opened. That means that if you plan to close the program you need to end the recording and start a new one the next time you start up again, and you better hope your program doesn't crash because the actual drawing might be auto saved but the recording sure as hell won't!
And believe it or not I don't really finish full render drawings in one sitting. But the thing is that even if I did I still wouldn't be able to have only one recording because if you keep it recording for too long the file will crash when you try to end it and your speedpaint will be lost forever, so you have no other choice but to have multiple short parts of it
And an important piece of information to keep in mind is that there is an option for how long you want the gif to be, but I set it as the no specific length option because I don't the different gifs with be different levels of sped up (since in theory if I set every gif to let's say 60 seconds, a recording that is 2h and one that is 20 minutes is going to be the same length which obviously means different levels of getting sped up) which resulted in some of the gifs being up to 3 minutes long. So because I don't want to post like 16 separate 20second to 3 minute gifs here I put it in an editing program where I can put them all together and then speed up the final video which means I have to send them from my computer to my phone via email.
This is where the pain really starts.
The 6th gif doesn't want to load so I send it again. It doesn't want to load again. I connect my charger to the computer so I can transfer it manually. It isn't working. Oh wait nvm I accidentally sent over the png version (because did I fail to mention that it also saves a png for some reason?). Send over the gif version, it doesn't send. Try it like ten more times. It still doesn't send. I try downloading it through email again. Nvm it downloaded
Then all of a sudden the editing app is telling me I don't have enough space to insert the gif in. So I have to clear up some storage in my phone.
When I tell you. Every other time I had to either import the gif or even download it I had to clear up space on my phone. And there were like, 17 gifs. I deleted hundreds of pictures and videos. I deleted apps. I deleted things I cannot get back. For a FUCKING SPEEDPAINT. My phone literally crashed as I was doing this. NEVER IN THE 6 YEARS I HAD THIS FUCKING PHONE DID IT EVER CRASH?!? I cannot begin to describe the awfully repetitive and soul sucking loop that I had to go through. Because of the nature of the program I can't put a gif in and then delete it from my gallery because it would just delete it in the project too
And even once I downloaded and combined all of them I still wasn't done
Because despite all of them being speed paints they were around 26 MINUTES COMBINED.
I mentioned that I speed up the finished result because of this yeah? Well I would usually do this by exporting the unsped combined video and then speeding it up in another project so that I don't have to set each video in the program to a specific speed only to realize "hey I actually want it faster/slower" and go redo all of it. Well today I had to do exactly that considering that if downloading 3 minute gifs was enough to break my phone I didn't want to even think about what would happen if I attempted to download a 26 MINUTE video so yippie
I know a lot of this was my fault considering my storage has been almost full for some time now, but still it's safe to say I won't be making speedpaints for some time
Thank god I don't post on TikTok because if I had to receive a "can I see the speedpaint?" comment on every single drawing I ever made I would have to start putting people's ips in my bio
#though when I look at Nico all I can think about is that he looks like he's about to give Will a knuckle sandwich#percy jackson and the olympians#percy jackon and the olympians#percy jackson#the sun and the star#pjo nico di angelo#pjo nico#pjo will#pjo will solace#solangelo#pjo fanart#pjo ships#hmrhd arts
82 notes
·
View notes
Text

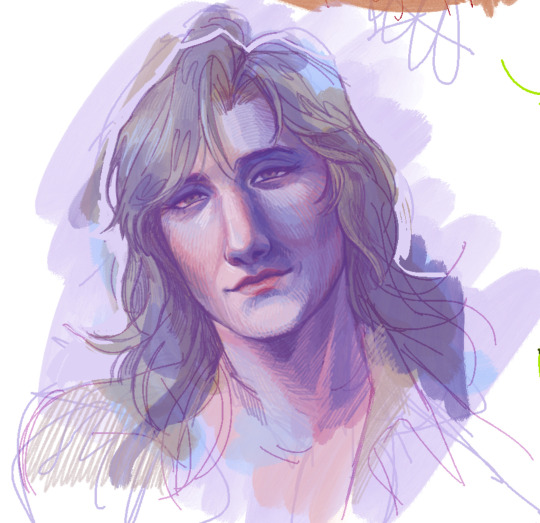
My favorite thing about FFVII:Rebirth is we FINALLY have high quality Vincent references. 💕
This is my first time posting Vincent fan art in many years, so I’m a bit nervous. Hope you all enjoy ❤️
(Edited for a sharper image. More info below cut)
Needed an original header image and I’d been working on this off and on for a few weeks, finally at a place where I’m happy enough to post it. Painted this semi for reference / digital painting practice. I rely pretty heavily on references, it’s definitely my comfort zone… (painting is really an excuse to stare at him for long periods of time lol)
Tools: Procreate / iPad 11 / Apple Pencil
Mostly painted using Ittai Manero’s thick oil paint brush set (free version here)
Time : 5hrs 12 mins
———
(Reminder to use good internet etiquette when sharing. Please do not repost or re-upload to other sites without permission. You can download to enjoy for personal use (wallpapers, avatar crops, etc) without asking first. Please do not use for commercial purposes. Reach out if you have any questions, I promise I am nice. Thank you ❤️)
#vincent valentine#ffvii rebirth#fanart#digital painting#depression-napping art#depression napping art#procreate#I’d like to procreate with him if you know what I mean#it’s the 13th of the month time to post Vincent fanart
246 notes
·
View notes
Note
If you don’t mind me asking, what brushes do you use when drawing?
Alright, I draw on procreate and since I have no idea how to download free brushes I use the basic ones ! Sorry if some of the names are in french but really I only use the basic brushes :')
(Don't mind the pure vanilla cookie too much I doodled him out of memory to explain the brushes+ process hhdjdjs))
Textured pencil brush for the sketch + lineart


Very basic brush for coloring, this one is the least textured and easiest to use with the bucket/autofill


Basic airbrush to add gradients


And that brush for highlights because the pen pressure/brush size ratio is very nice and it's smooth and nice :) (sometimes I use it for lineart but extremely rarely)


And finally when once in a blue moon I decide to plan ahead what colors I will use everywhere I use this "flat brush" and just idk.. add color ??


And for shadows I use a mix of "syrup" and the basic airbrush usually ! (and the multiply filter works it's magic as well)
#yeah last one is a wip I had sitting in the dust for months now but I'll eventually finish it#I was so used to the csp bucket that it was hard for me to get used to the procreate way of doing ough...#but really directly drawing on the tablet with a pen this precise on ipad is too good#and the automatic circles/ellipses and straight lines ?? easier perspective tool ?? yes please
85 notes
·
View notes
Text
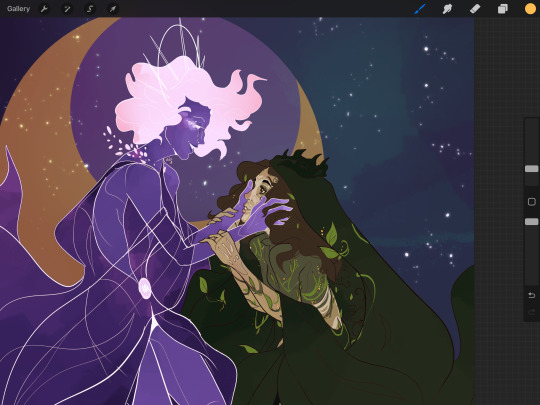
AU Chloé Bourgeois from @princess-of-the-corner
I've been trying out new drawing tools, since I finally gave up on the random bare-bones program I downloaded back in high school, and a coworker recommended procreate. To familiarize myself with it, I decided to draw some of Cornerverse's alternate universe Chloes! Here are the drawings, with the AU explanations under the cut:
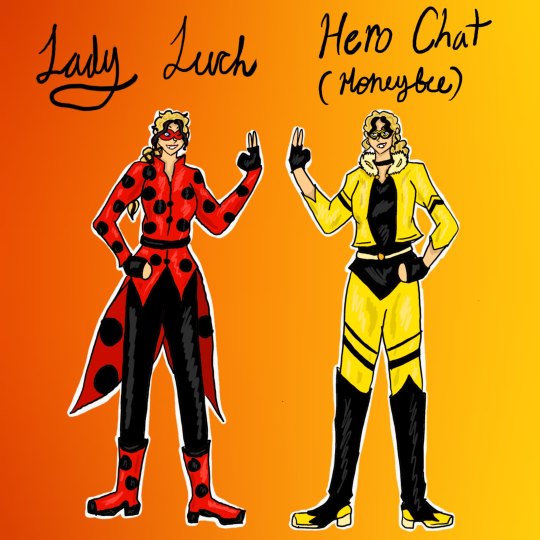


Honeybee (Hero Chat) and Lady Luck:

These are Corner's two main AUs. Hero Chat has the heroes set up a group chat back in season 3 to avoid miscommunications, and canon divergence ensues from there. Chloe and Kagami have both pulled a Catwalker there, but everybody does get a design update (I yoinked the pose, since this was the first one I drew and I didn't want to think too hard).
Lady Luck is a pretty standard fare Kwami Swap AU where Chloe gets the Ladybug, and most other characters' miraculous are also shuffled around, since Chloe is doing the picking. Corner's designs here!
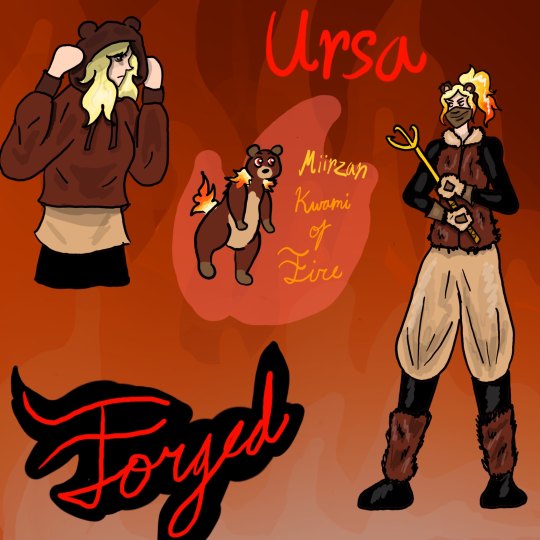
Forged AU

After the events of Miracle Queen, Chloe gets a kwami from a different Miracle Box--Miirzan, the bear Kwami of Fire---and makes protecting the exposed heroes her personal mission, since nobody did it for her.
Chloe takes an interesting route for her hero costume in this AU. The first time she went out, she was actually just trying to use the glamour to not get recognized as a civilian, which meant she went with understated clothing that was functionally a palette swap of what she was wearing that day (pictured on the left). While she continues with this trend in the story, I also wanted to give her a proper hero costume, perhaps after she gains some more stability, so I made one myself ;) (pictured on the right).
Double Trouble
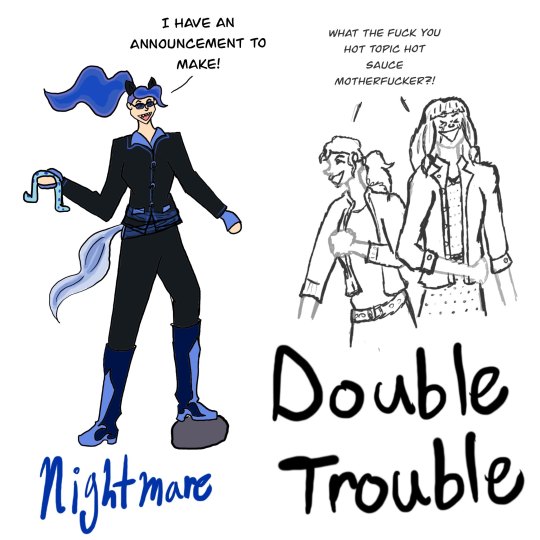
After Miracle Queen, Chloe and Ladybug talk and realize taking away an exposed heroe's only means of protection and benching them won't actually keep them safe. Instead, Ladybug permanently hands out the Miraculous, but shuffles them around so it looks like they picked a completely new team. At the same time, Chloe starts working as a double agent against MothBalls and Mayura (who think she's a double agent for them), and gets paired up with Lila. Some Sonic Adventure 2 fandub jokes go a long way to easing that particular relationship, and the future gets a whole lot brighter.
While the whole AU was built on Sonic fandub jokes, Chloe doesn't ACTUALLY say the "I HAVE AN ANNOUNCEMENT" line. That honor goes to Alya in Hero Chat. But, I figured it was fitting just for the drawing. I ever so slightly adjusted Corner's horse!Chloe design to be an even more explicit Nightmare Moon reference.
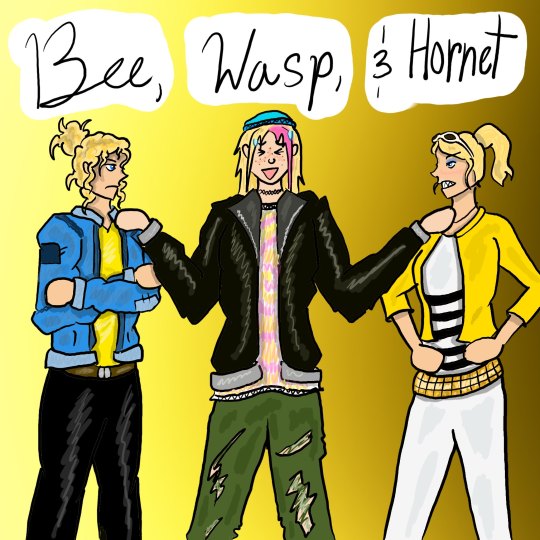
Bee, Wasp, and Hornet:

In an effort to explain the massive personality retcons between season 1-3 Chloe, and season 4-5 Chloe, a theory was proposed that 4-5 Chloe (Joé/Hornet) is actually a sentimonster created by Hawkmoth and 1-3 Chloe (Bee) is somewhere else entirely. She comes back sometime in the middle of season 5 and is pissed as all hell about her replacement, but Zoe (Wasp) considers both of them her sisters and is determined to make things work.
While this AU is sometimes combined with Corner's Isekai!Chloe AU, sometimes she's just yeeted someplace out of the way so she can't be involved in the plot for a bit. Personally, I like the idea that she ended up camped out in the ReVerse and was only able to return after the Paris Special.
(I did lightly redesign Zoe here, just to cater more to how I picture her in my head. Joé's design is just canon!Chloe, but I got to put AU Chloe in whatever the hell I wanted, so I went whole hog on my thing about putting her in blue and giving her the curly hair Corner and I both headcanon as her natural hair texture).
Princess Bee:
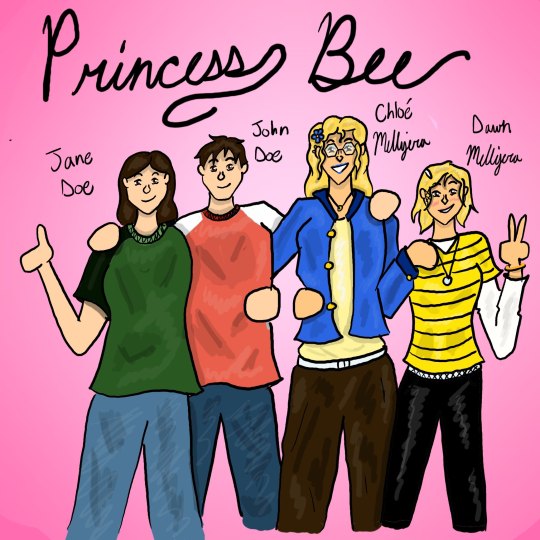
After the Season 5 finale, the dust didn't quite settle as it did in canon. Chloe, now with hard evidence that neither of her parents cared about her, worked her butt off to get into law school with no assistance from them and cut ties completely, down to changing her last name. While there, she befriended the world's most generic dude John Doe, who later married the world's most generic chick Jane Doe and they settled down on a horse farm in Kansas. After some therapy, Chloe decided she wanted a kid, but in vitro would be too much of a hassle, and John agreed to help her out. This is the family photo.
Back in Paris, things got. Complicated. During the final fight, LB and CN ended out having to make a Wish to defeat Hawkmoth. The price was that neither Ladybug nor her allies were able to use the Miraculous ever again.
This meant that when Lila started her grand vengeance plan using the butterfly, she got straight up ghosted. So instead, she just hung on to the butterfly for ~20 years doing low scale cons (and becoming friends with Chester Fester, the best character ever), aimlessly drifting as she grapples with her undiagnosed clinical depression.
Zoe, after witnessing how Andre was willing to up and replace his bio daughter when a shinier new replacement showed up, decided she wanted no part of it and called her dad to help her sort things out. She basically ended out living alone in an apartment in France sponsored by Mr. Lee with him as her legal guardian on paperwork, and more or less avoided talking about the whole situation with the rest of the Miraculous Gang.
Somewhere around the 20 year mark, after everyone has grown up, had kids, and moved on with their lives, everything goes to shit. Andre, who hasn't updated his will in all that time, finally kicks the bucket, and Chloe is dragged kicking and screaming back to Paris (with her daughter Dawn in tow) to deal with the defunct hotel she just inherited.
At the same time, the Adrienette kids finally find the Miraculous stowed in their house, and decide to take them out for a joyride in a burst of teenage stupidity. They immediately end up on the news and Lila comes out of the woodwork to address some unresolved grudges. With the original Miraculous Team incapable of using their powers, and with no other options readily available, the next gen kids are now unfortunately Holders who have to stop her.
Oh, and of course Dawn miraculously (heh) ends up going to the same school as Adrienette's kids and she and Emma are gay as fuck for each other. Their parents are unaware of the connection to their past for a comedically long period of time.
Basically, the next gen kids are in a Magical Girl Anime, Chloe is unwillingly playing Homescapes with the hotel, and the OG Miracuclass are watching the mistakes of their past come back to haunt them :).
Everyone remember to go check out Corner's tumblr and their ao3, there is so much fun fuckery (not just ML fuckery either) going on over there! Thank ya and goodnight!
#giraffe's ramblings#fanart#fanfiction fanart#miraculous fanart#mlb fanart#miraculous ladybug fanart#ml fanart#ml au#miraculous au#miraculous ladybug au#chloe bourgeois#chloe bourgeois fanart#can I just say that drawing the default miis next to the literal main characters was so fucking funny#and also a great art exercise in what makes someone look like a main character#adding all these links was kinda ridiculous I was NOT sure they were gonna fit#is this how you feel all the time Cor? This is insane#Giraffe's Scribblings
35 notes
·
View notes
Text
Hi everyone, I have a bit of an announcement to make. Nobody is in trouble, and yes I’m safe and okay. I just wanted to let everyone know that there may be a slight break or pause on art or emojis for a bit, as I have lost all of my digital art, wips, brushes, bases, YCHs, everything including Procreate. I hope to slowly come back over time.
It started with my iPad misbehaving and not allowing me to enter my password. I thought maybe I had simply forgotten my password of 6 years, and kept trying variations. I kept at this over the course of a few days, praying one of them would work. I was certain someone had tampered with my iPad, whether it was a hacker or family member I’m not sure. Today, I finally reached the dreaded “iPad unavailable” screen, meaning my absolute only option was to factory reset it and download a previous backup. So, of course I Googled and Youtubed everything I could, downloading software on my computer to try and fix everything. But my only option was to wipe it.
Once the deed had been done, I logged in and went to download a backup. Though I was presented with an issue; I had no backups (unless you count my mom’s current phone, as my iPad was still tied to her account). There was nothing from that point I could do to get everything back.
The only truly important things on there were my art things, since any photos had been saved or backed up elsewhere by now. I lost all of my Procreate data, including 6 years of art progress, references I had been working on for art fight next month, all of the emojis I have made and continue to use as bases, self portraits, drawings of pets that have since passed, fanart and gifts for friends, brushes I have made personally or downloaded myself, and a very detailed and extensive animatic I had been working on for about a year. All those frames, layers, and pixels are now lost.
It feels really bad, but also freeing. I have a fresh canvas to start from, and empty library to build up, and that’s exciting to me. I am finally off of my mother’s account and I have my own freedom for that device (yes I know it sounds silly), so hopefully I will try new things and feel a little more relaxed with my art.
All of this being said, art and emojis will likely be slow for a bit, if not completely halted for a few days or more. I’m not sure how long, I really want to keep creating but it’s probably gonna be difficult to face an empty Procreate (after paying the $13 fee again… yuck). I’m really sorry, but this is actually pretty difficult for me. But good at the same time.
In summary, my iPad went kaput and erased all of my data, including Procreate and my digital art. Nothing is recoverable. So I will be on a little art break until I can build everything back up again somehow.
Take care everyone, and thank you for reading.
#artists on tumblr#art#procreate#digital art#emoji blog#emote blog#whimsii yap#announcement#info#ipad
21 notes
·
View notes
Note
Hello! Sorry to bother but do you have any digital art tips? I’m quite new to it and any tips, tricks or advice would be helpful! Your coloring style is very beautiful and I love it a lot!
thank you! 💚💚💚 sorry this is a bit late, hopefully there's still something helpful in it!
(also, it got pretty long, sorry!)
I think the biggest thing is to just take things slow -- digital art feels different than drawing traditionally, and it's SUPER easy to get overwhelmed by the billions of cool features that the digital world offers. (I say, as someone who spends a lot of time downloading cool brushes and textures...and then never using them ever.) there is a ton of really cool stuff you can do digitally, but because there's so much, I think it's really important to take time to figure out what is and isn't working for you. spend some time doodling without any intent to do a finished piece, figure out how you like to hold (or not hold) your tablet, what keyboard shortcuts you end up using a lot (and therefore might want to map to your pen/tablet buttons for quicker use)...that kind of thing!
everyone's workflow and preferred program and style are different, so it's hard to give hard-and-fast general advice. but the things that I think of as the essentials for learning digital art programs, and what I think of as a good order to focus on learning them in (although YMMV, especially depending on what kind of art you're doing):
brush customization (e.g. flow, opacity, softness)
layers and layer masks
selections and transformations (e.g. scale, rotate, flip horizontal/vertical, skew) (skew is underrated and I will die on that hill)
blending modes (e.g. multiply, screen)
adjustments/adjustment layers (e.g. hue/saturation, curves)
and I think most stuff after that is gravy! often very good gravy though! but yeah, as overall advice I recommend just taking things one little bit at a time, spending some time just drawing and messing around with each feature and what you can do with it. whether or not you end up incorporating any of it into your workflow, it's always good to try things out and just see how they feel! :D
and just so there is at least a little more concrete helpfulness in here, here's a few more specific things that I think are super important to keep in mind!
use! your! tablet/pen buttons! I mentioned this earlier, but they are extremely useful for keyboard shortcuts that you use often! most programs will also let you create new shortcuts for other things -- personally, I use the magic wand tool to fill in big color blocks a lot, so I made shortcuts for 'expand selection' and 'fill' and then mapped them to my tablet buttons.
flop your work horizontally often! when you're working on something, you get used to the way it looks, so seeing it mirrored is a quick way to see it with fresh eyes! in my experience, it often feels like this:
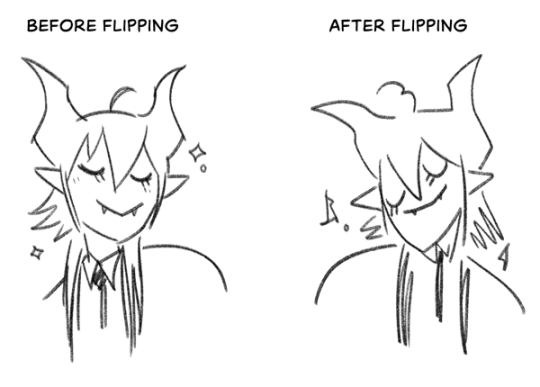
(a common thing is to find that everything is sort of 'leaning' too much one way, which is where skew really comes in handy!) (seriously, I love skew, it is my savior)

if you're working with color, keep a hue/saturation adjustment layer (or a layer filled with black or white and set to Color) on top and toggle it on occasionally to check your values! a lot of people who know a lot more about color than me (and are better at putting it into words) have written about why values are so important, so all I'll say is that the rule of thumb is that your image should still be readable in greyscale:

there are some exceptions and grey areas (do ho ho), but it's a good general rule to keep in mind! (some programs also have a colorblind mode, so you can check to see how your work will look to someone with colorblindness!)
and finally, here's some digital art programs I recommend, if you're still looking for a good one!
free: krita, FireAlpaca
paid: ClipStudio, Procreate (iOS/iPad only)
#art#...sort of#horizontally flipped mal isn't my favorite drawing i've ever done of him#but it's up there#anyway i do personally use photoshop#but i absolutely do not recommend it when there are better and free-er art programs out there#it is the equivalent of texting with a giant 90s-block phone that has been jury-rigged to somehow install whatsapp#because i don't NEED a new phone i KNOW how to use this one it's FINE#(oh god i've become my dad)#someday i will have to actually switch to clipstudio and learn new keyboard shortcuts :(
410 notes
·
View notes
Text
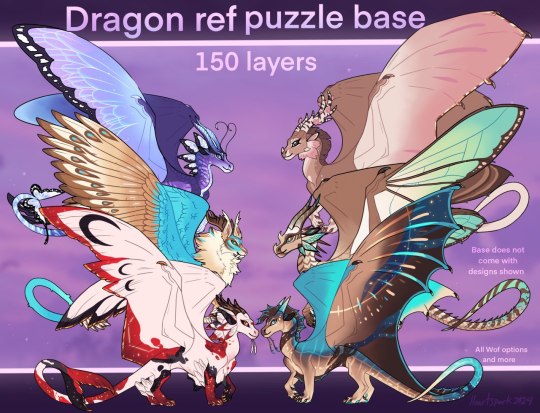
I finally finished my new dragon base, this took me so much longer than I thought it would to complete due to how large it is! it's a puzzle base as well, meaning you can mix and match parts to better make unique characters!
It's a base meant for standing references to show off a design well, but you are of course free to use it for adoptables as well! It has all of the typical wings of fire layers + general dragon stuff so if you'd like to make a fluffy, antlered, feathered, shark dragon you can definitely do that as well! There are 150 layers all together though I had to split the base up into 3 files as the linework is pretty big. So please be sure you have a system that can handle it before purchasing! As well as s system that can open a procreate or PSD file!
I actually wanted to add even more layers for customizing but I didn't want this to be too huge 😅 in the future if this base is popular enough id be more than happy to provide a very cheap ad on for those interested!
Anyways, each file is around 19.50 MB! please be SURE your device can handle this before downloading!
https://kamimaru.sellfy.store/
#dragon ref base#dragon#wings of fire#wof#sandwing#nightwing#mudwing#rainwing#icewing#skywing#silkwing#leafwing#hivewing#heartspark#my art#myartwork#my artwork#myart#hybrid#base#linework#lineart
178 notes
·
View notes