
Don't wanna be here? Send us removal request.
Statistics
We looked inside some of the posts by 9beautyfashion and here's what we found interesting.
Average Info
Notes Per Post
1
Likes Per Post
1
Reblog Per Post
0
Reply Per Post
0
Time Between Posts
3 days
Number of Posts By Type
Text
17
Last Seen Tumblr Blogs


Fun Fact
Tumblr has 4 main sources of revenue.
Text
Complete Guide to Using Eyebrow Powders

Tired of your eyebrows looking sparse when you head to the office or dull when you party after work? Then you need to level up your eyebrow game by using a powder to add definition to them, and ensure they complement your hair color. But finding the right powder for your brows can be difficult, and you can quickly get overwhelmed by the deluge of brow powders, as sophisticated offerings continually arrive in the market. So keep reading as we have the information you need to navigate the flood of eyebrow powders and get the best option. We also have tips you can use to find eyebrow powders that are ideal for your hair color, because every eyebrow enthusiast knows one color does not suit all. Making use of our tips that are formulated by experts you can also apply brow powder correctly, and use it to fill and define your eyebrows to perfection. So prepare to say goodbye to sparse and dull eyebrows forever! Finding The Right Brow Powder Shades Here is how you should go about finding the right color of eyebrow powder, because if you choose the wrong one it can make your brows look unnatural. We recommend choosing a brow powder based on your skin tone or hair color. How To Choose Eyebrow Powders Based On Skin Tone If you have dark-hued skin an eyebrow powders dark brown is ideal. Alternatively, you can use a powder that is two shades lighter when compared to your skin tone.An eyebrow powder medium brown is ideal if you have olive-toned skin.Using an eyebrow powder dark blonde or an eyebrow powder putty with has an ashy tone is ideal for those with skin that has pink tones. An eyebrow powder light brown also suits this skin tone. How To Choose Eyebrow Powders Based On Hair Color For Black Hair: Ensure that you use eyebrow powder dark brown or an eyebrow powder soft black. So that your brows do not look unnatural and too dark. For Red Hair: People who have red hair should choose an eyebrow powder blonde or a darker shade of blonde. As this will give their brows a golden tint.For Brown Hair: Ideally, those who have completely brown hair or red highlights intermixed. They should opt for an eyebrow powder auburn which can be blended with browns. The best eyebrow powder for brunettes is about 1-2 shades lighter than their hair color.For Blonde Hair: The best eyebrow powder for blondes is often a darker shade compared to their hair. So, they should use an eyebrow powder putty that has an ashy tone.For Gray Hair: The best color for people who have gray hair is often similar to eyebrow powder soft charcoal, while an eyebrow powder moonstone gives a striking metallic finish. Get A Good Eyebrow Powder Kit After you choose the eyebrow powders you need to get a brow powder kit for applying it. A good kit consists of a spoolie, a slant tip tweezer, and an angled tip eyebrow powder brush. In most kits, a spoolie is present on one end of a long stem and an angled tip brush on the other end.
How To Use Eyebrow Powders
1) Get Your Eyebrows Into Shape Your eyebrows need to be in shape before you start brushing powder through them. So start by using a precision eyebrow scissors to trim long hair, after which you should use tweezers to remove stray hairs. 2) Run A Spoolie Through Your Brows As your brush your eyebrows with a spoolie ensure that you use short strokes that flow upwards and stray hairs are removed. 3) Apply An Eyebrow Primer Using an eyebrow primer pencil add wax to your eyebrows. Applying a layer of wax is important, as it allows the powder to adhere to your eyebrow hair and skin beneath it. The wax also supplies a waterproof finish. 4) Measure Where You Eyebrows Start And Finish If you don’t know where your eyebrow should start and finish, then you need to use the stem of a spoolie brush to find these areas along with the arch. Once the start, the high point of the arch, and tail are marked you can proceed to the next step and apply powder. 5) Apply One Or Two Shades Of Powder Dip a brush with an angled tip in the powder and using the thin edge draw a soft line at the bottom of each eyebrow. Then using a bit more powder draw a heavier line at the top of each brow. These two lines will serve as guidelines and you can then start applying powder between them.Use the angled brush to apply the brow powder to your eyebrows and ensure sparse areas are filled. The thicker part of the brush should be used along the arch while the angled tip should be used along the start and tail.Applying two shades of eyebrow powder and blending them allows for your brows to get a unique color that you prefer. Blending two shades is also ideal when you have auburn, blonde or red highlights in your hair. 6) Brush Your Brows To Spread The Powder As you are applying the powder you can use a spoolie to brush your brows and spread it. After you have finished brushing your brows with a spoolie, you can add more powder if required. 7) Apply A Brow Gel Finisher If you want your eyebrow powder to remain in place all day without flaking, you should apply a coat of brow gel over it. A clear eyebrow gel acts as a finisher and keeps your eyebrows styled perfectly. The gel also adds volume and makes your brows appear fuller. 8) Use A Highlighter And Concealer Using a 2-in-I brow definer that contains a highlighter and concealer gives your eyebrows a wow finish. The concealer helps cover up blemishes around the eye, while drawing a line with the highlighter under your brows will give you an instant eyelift and make you look younger. The Benefits Of Using Eyebrow Powders A brow pencil allows you to draw individual hairs and fill up sparse areas on your eyebrows but it cannot provide full coverage like a powder.Using a brow pencil is time consuming when compared to an eyebrow powder which can be easily and swiftly applied.Using a brow powder you can provide your eyebrows with a soft finish and make them appear natural.With an eyebrow powder you can effortlessly create fuller appearing brows. At Savarnas Mantra® we have an eyebrow powders collection that includes several trendy shades. We also have a range of clear and tinted brow gels and eyebrow shapers. Our brow and lash care products give you several options for filling and defining your eyebrows daily and helps keeps them stylish and beautiful. Dream brows are just a step away when you use eyebrow powders that we offer. Recommended articles: Important Tips To Get Best & Simple Eyeshadow LooksLet Your Brows Do The Talking With 7 Best Eyebrow Pencils Of 2020Keep Your Eyebrows On Fleek With Our Best Tips On How To Apply Eyebrow Highlighters Read the full article
#besteyebrowpowderforblondes#besteyebrowpowderforbrunettes#browpowderkit#eyebrowpowderblonde#eyebrowpowderbrush#eyebrowpowderdarkbrown#eyebrowpowderkit#eyebrowpowdermoonstone#eyebrowpowderputty#eyebrowpowdersoftblack#eyebrowpowders
0 notes
Text
10 Best Gel Eyeliners in India

Most readers who are reading this blog are looking for a gel eyeliner that is long-lasting and does not smudge. Many girls prefer using a gel eyeliner as opposed to the liquid eyeliner as it is relatively smooth, versatile, and more convenient to apply. Whether you are going for a subtle line or go all out by making a winged cat-eye look, gel eyeliner will last all day long. This blog entails a list of the best gel eyeliners in India that will match the diverse needs of you girls and is budget-friendly.
Top 3 Reasons Why You Should Have Gel Eyeliners
If you still do not know the wonders a gel eyeliner can do to complete your look, then don’t worry as in this section, we will discuss the top 3 reasons why a gel eyeliner is a must-have for every girl. Applying gel eyeliners is much more convenient as compared to its alternatives that are available in the market.It is quite versatile and can be used in various ways to experiment with your eye look without putting too much effort.Girls, you can get a precise line without smudging your eyeliner, so don’t have double-thoughts and grab your hands on the best gel eyeliners.
Know The 10 Best Gel Eyeliners In India
In this section, we will discuss the 10 best gel eyeliners in India that are a must-have for every girl as it can do wonders and complete your overall look. So let’s look at the top 10 gel eyeliners that will fit into every budget and will last all day long. 1) Maybelline New York Lasting Drama Gel Eyeliner If you have just started applying gel eyeliners, then this one of the best options as it is budget-friendly, an all-time favorite of many girls, and can be applied effortlessly. It is quick to dry and long-lasting. This gel eyeliner is recommended by many experts and is a go-to product so don’t think twice before buying it as it is well-pigmented, smooth, and will perfectly blend across your lids in no time. It is long-lasting, travel-friendly, highly-pigmented, and smudge-proof 2) Swiss Beauty Eyebrow & gel Eyeliner Next on the list of thebest gel eyeliners is this gel-based eyeliner that is loved by so many girls as it is a 2-in-1 product and can be used for both eyebrow and eyes. It contains the oil-free formula and it glides perfectly without creaming. This is a safe bet and you can never go wrong with this as it is affordable, long-lasting, smudge-free, and easy to apply. It does not run and is safe for the eyes. 3) L'Oreal Paris Super Liner Gel Intenza Eyeliner This gel eyeliner is another one of the best gel eyeliners in India and comes with a brush and glass pot. The texture of this is smooth and will last up to 36 hours, so you don’t have to worry about its durability as it has a great staying power. Many beauty experts recommend it as it is sweat, tear, and water-proof. This eyeliner is affordable, has impressive staying power, and glides smoothly. 4) Inglot AMC Matte Eyeliner Gel If you are looking for a gel eyeliner that will last a full day, then this is one of the best options. It is easy to carry and is definitely travel-friendly as it comes in a plastic pot. It is available in multiple shades so every girl will find the perfect one that fits their expectations. Inglot AMC Matte Eyeliner Gel is well-pigmented, quick to dry, and get a wonderful eye look in just one swipe. It is easy to carry, long-wearing, and highly-pigmented. 5) Coloressence Long-Wear Eye Liner This is one of the super contenders in the 10 best gel eyeliners as it blends perfectly, long-lasting, and has a smooth texture. If you are looking for a water-proof and smudge-free eyeliner, then go for it. This gel eyeliner is great for sensitive eyes and will not cause any irritation. It is accompanied by a brush and blends perfectly. 6) SUGAR Cosmetics Born To Wing Gel Eyeliner Now, this is another great gel eyeliner that gives a perfect stroke and will last up to 12 hours. Besides, offering a classic black shade, it comes in different color variants. It has impressive staying capacity and contains the waterproof formula. Grab this if you want to create a dramatic look or experiment with your eye makeup. It is dermatologically tested and comes with an in-built brush. 7) INCOLOR Scandaleyes Long Lasting Waterproof Gel Eyeliner If you are a beginner and you can’t make perfect cat-eyed wings, then this is perfect for you as it is easy to apply. This gel eyeliner has a smooth and pigmented formula that lasts for a long time. You can get rich color and a smooth line in just one step. Without smudging and smearing, this definitely is a must-have in your makeup. It comes in great packaging and lasts for a long time. 8) Music Flower Long Lasting Gel Eyeliner This is another long-lasting gel eyeliner as it will not smear and budge. It effortlessly blends across your eyelid and gives a dramatic eye look. Get a perfect eye look with this gel eyeliner as it does a wonderful job. No doubt, it is light weighted, has a smooth texture, and is well-pigmented, so grab your hands on this one. It does not smear and has a smooth texture. 9) REVLON Colorstay Creme Eyeliner Well, Revlon gel eyeliner is innovative and scores full marks on its application and texture. Get a flawless and precise line in just one go as it is extremely pigmented and has a gel-based texture. Get a creaseless and perfect line with this eyeliner as it is easy to apply and you can never go wrong with this one. It is easy to use, affordable, and lab tested. 10 Lakme Absolute Gel Addict Eyeliner And finally, this gel eyeliner has got you covered as you can rely on it as it lasts for long hours and is easy to apply. This is great for its smooth formula and is undoubtedly the best gel eyeliner available out in the market. With impressive staying capacity and a rich texture, this is one of the best gel eyeliners. It has no parabens, easy to use, and is long-wearing. This blog mentions the best gel eyeliners that are easy to apply, won’t run, and are recommended by many experts. Read the entire blog to get a smudge-free and affordable gel eyeliner that can be applied in multiple ways and easily. Recommended articles: 4 Gorgeous Colorful Eye Looks To Try Out This SummerGet The Most Defined Eye-Look With 10 Best Kajal & Kohl Eye PencilsKeep Your Lash Game Strong With 6 Best Eyelash Glue Of 2020 Read the full article
#affordablegeleyeliners#besteyeliners#bestgeleyeliners#blackeyeliners#geleyeliners#howtoapplygeleyeliner#whyusegeleyeliners
0 notes
Text
5 Exceptional Best Makeup Beauty Hacks

Makeup is a beautiful art that is only enhanced with regular practice. However, just like there is a loophole is everything in this big, wide, and beautiful universe— similarly, there are a few beauty hacks that you can follow while doing your makeup. These little hacks not only improve your makeup skills but also enhance your overall look while saving you time. These hacks take minimal time and make the best of your makeup. It also makes your makeup stay longer, rather just look better. So, let us get started with the 5 best makeup beauty hacks that every makeup junkie should know, whether beginner or pro!
What Are The 5 Best Makeup Beauty Hacks You Must Know?
Here are the 5 best makeup beauty hacks that will change your beauty game forever and we promise once you try them out, you won’t be able to do without them: Hack #1: Using White Eyeliner To Make Your Eyes Look Bigger And More Beautiful To make your eyeshadow look more vibrant, thereby making your eyes appear bigger and more beautiful, it is advised to use white eyeliner. All you have to do is blend the white eyeliner all over your eyelids before starting your makeup. Thereafter, apply your eyeshadow and notice your eyeshadow pop up in no time. Another trick is to apply the white eyeshadow in the inner corners of the eyes and get a bold and beautiful look instantly. Hack #2: Get The Perfect Lip Shade By Making An ‘X’ Over Your Lips Tried many lip liners, gloss, matte lip shades but still cannot fill your lips the way you desire? This hack is what you need to apply in your daily life. Simply make an ‘X’ using a lip liner similar to the shade of your lipstick that aligns perfectly with your natural lip line. Now, softly fill all the blocks of the ‘X’ created by you with the lip shade you had planned to wear. Get ready to impress the crowd with perfectly shaded lips! Hack #3: Use The Geometrical Pattern Of A Triangle To Conceal Your Under Eyes Don’t want your insomnia to reflect in your pictures? Well, a concealer can be your savior in such a case! But many people do not understand why their eyes still look baggy even after using a good amount of concealer. The trick here is to simply draw a triangle in your undereye area — the tip of the triangle should be pointing towards your cheeks. Blend it well and be ready for brighter eyes with no dark circles or under-eye bags — looking absolutely stunning by creating the best professional look. Hack #4: Flaunt Your Smokey Eyes Attained With The Hashtag Sign Want the Diva like eyes? The smokey eyes look is calling out for you! Do not stress over messing it up, here is what you can do- draw a hashtag (#) using a kajal or black eyeshadow or pencil at the outer lid of your eye. Now, simply blend it inwards and get a smoking hot eye look without much hassle! Complete the look with eyeliner and probably some glitter or alternate shade on your outer eyelid and lower waterline! Hack #5: Curl Your Eyelashes Faster And Make Them Look Denser If using false lashes is not your thing, that does not mean you cannot fulfill your dream of attaining a bold and deep look with dense and long eyelashes. Let us tell you the ultimate secret to have longer lashes using an eyelash curler and a hairdryer. Yes, you heard it right— a hairdryer! Bring your hairdryer to more uses than just settling your hair. Turn your hairdryer on and heat the eyelash curler at the usual temperature. Now, leave it to cool down and use for longer and fuller eyelashes. The above-mentioned hacks will do wonders for your makeup routine. These hacks are easy to imply, take really less time, and instantly give a radiating look to your makeup. So if you feel that the cherry on the cake is missing for your makeup look then go ahead and try them out and rule the reign with your beauty game! Do not forget to complete your makeup with a setting spray and blotting paper— looks like we just gave your more beauty hacks! Recommended articles: Complete Makeup Guide By Professional Makeup Artist – Jai BabbarBest Face Concealers which works like magic on your skinTop 6 Hacks On How To Make Lipstick Last Longer Read the full article
#beautyhacks#beautytips#beautytips&tricks#bestbeautyhacks#bestbeautytips#bestmakeupbeautyhacks#bestmakeuphacks#bestmakeuptips#makeupbeautyhacks#makeuphacks#makeuptips#makeuptips&tricks
0 notes
Text
How To Remove Blackheads At Home?

There is something about blackheads that is so stubborn that it often makes you unhappy in attempts to get clear them off. It is often beyond the improvement of face masks and soaps and in some of the cases, it also needs a serious dermatological treatment from your doctor. Well, knowing how to remove blackheads at home can be a great relief for those who don’t want to spend a lot of money on skincare products. They are nothing but few bumps that are caused when your skin pores get clogged or choked. When these choked pores are exposed in open, it further decays and takes a dark color. There are many factors that can come up with blackheads such as surplus sebum oil production. It is the oil produced by sebaceous glands present within our human skin to prevent our skin from getting dry. Although they are different from regular pimple or acne. Some of them are formed due to the involvement of acne-causing bacteria on your epidermis. It is always essential that you keep yourself exfoliated, irritation in the hair follicles can give rise to these. Sometimes side effects, some medication, or changes in the hormones can also cause blackheads on your skin. The great news is that Blackheads can be removed at your home. With the help of natural ingredients present at your kitchen shelf. How To Remove Blackheads In this article, we’ll talk about how to remove blackheads at home so that you are no more feeling uncomfortable when you are at public places and parties. 1) Exfoliate If you have not started yet, it’s time to include exfoliation as an in your skincare regimen. Use a cosmetic or natural scrub, that is suitable for your skin type to get rid of blackheads and dead skin cell from your skin. Concentrate on the blackhead-infected area while you are at it. Exfoliate at least once or twice a week for better results. 2) Investing in the right products If you have blackhead-prone skin, it’s time you consider your skincare products again. Buy non-comedogenic products which are specially invented to not clog the pores. Also using the right kind of moisturizer and skin care products which is suitable for your skin can give natural glowing skin. For example, using ointments or gels with salicylic acid can help prevent blackheads. It is a kind of chemical that is often used in pimple and acne treatment creams. It is also recommended by many doctors to help remove the outer layer of the skin and is often used to treat acne, ringworm, dandruff, warts, psoriasis, and ichthyosis. Using salicylic-based creams can keep your skin fresh and grime-free by exfoliating the top layer of your skin, thus avoiding blackheads. 3) Keeping skin clean Every time you step out of your home, your skin attracts a lot of dirt. If not properly cleaned, well it may lead to clogged pores increasing the chances of nasty blackheads. Makeup can also have the same effect on the skin and if not cleaned out properly, it might result in blackheads and even breakouts which can cause irritation to your skin. Always remember to wash your face before calling it a day. 4) Using clean laundry As you sleep in your bed at night, dirt and oil from your face get rubbed on bedsheets and pillowcases. Not cleaning them frequently can lead to accumulation of dirt which can get transferred to your face and clog pores, encouraging nasty blackheads. It’s best to sleep on fresh and clean pillowcases and bedsheets as often as you can. 5) Moisturize Recharge your skin’s moisture after each wash by applying a suitable moisturizer. Use non-comedogenic moisturizers so that you can get rid of clogged skin and blackheads too. 6) Avoid picking and blackhead removal tools Trying to pop blackheads is a complete no-no since it will do nothing to uproot it from deep within. It may also lead to the spread of bacteria. Also never try to remove blackheads using pointed tools or tweezers. You might end up hurting yourself while trying to poke at a blackhead. Home Remedies To Remove Blackheads Naturally Blackheads can be minimized and even eradicated with the use of correct ingredients. Here are some of the natural ways and home remedies for getting rid of those stubborn blackheads. 1) Honey Lemon Mask Use of lemon is an effective way to get rid of the stubborn blackheads. Just applying a honey lemon mask on your face can show you great benefits. Since lemon has a lot of astringent properties which opens up the clogged pores. On the contrary, honey has a lot of antibacterial properties which keeps the bacterial action at bay. 2) Sugar Scrub Still, thinking about how to remove blackheads at home? You can quickly prepare an effective sugar scrub at your home that can be made with only two ingredients –sugar and jojoba oil. This scrub prevents blackheads and helps to cut down the dead skin. 3) Oatmeal Scrub It is certain that you just thought oats as a morning breakfast. Helping you lose some extra pounds. But it can do wonders for your skin too. The scrub made up of yogurt, a half lemon juice, and oatmeal can exfoliate your skin to give a naturally glowing skin. 4) Baking Soda and Clay Use Baking soda is as a natural exfoliator can give a lot of great benefits when it comes to removing blackheads. Create a mixture using water and baking soda and apply on the blackhead affected area. Use your fingers to gently scrub the skin for five to ten minutes and then wash off with cold water. This should be done twice a week to get long-lasting results. The fascinating properties of clay make it ideal for clearing extra dirt and oil from the skin along with other impurities. Masks made from kaolin clay and fuller’s earth, when used regularly on the face can help clear out the dirt and prevent clogging of the pores and give a naturally glowing skin. This will eventually make your skin smooth and glowing. No need to worry about how to remove blackheads at home, if you are going to follow these steps are going to work wonders. Recommended articles: Amazing Home Remedies for Skin Pigmentation10 Steps On How To Get Soft Lips NaturallyAmazing Tips On How To Get Soft Feet At Home Read the full article
#Homeremedies#homeremediestoremoveblackheads#howtogetridofblackheads#howtogetridofblackheadsnaturally#howtoremoveblackheads#howtoremoveblackheadsathome#howtoremoveblackheadsnaturally#removeblackheadsathome
0 notes
Text
10 Amazing Tips On How To Get Smooth Hair Naturally?

Smooth, silky, and shiny hair who doesn’t like having it on their head. It could be challenging for most people to have healthy locks. Also, genes do play a significant role in deciding the quality, strength, and volume of your hair. But that doesn’t mean that you don’t have any control over your tresses. In this article, we’ll talk about how to get smooth hair so that you are no more feeling uncomfortable when you are attending those weekend parties with your friends. 1) An Oil Massage An oil massage before you rinse your locks the next day will give a shiny and silky appearance to your hair. Oil floats on water and seals the moisture. You can use coconut and olive oil or the combination of both and apply it on your scalp to have wonderful results. 2) Boost Your Nutrients Intake Like the rest of your human body, your hair does need certain vitamins and minerals to be strong and healthy. Nevertheless, it has been shown by a lot of researches that nutritional deficiencies might be linked to loss of hair growth. Some essential nutrients are: Vitamin A: found in carrots, sweet potatoes, leafy vegetables, pumpkin, etc.B vitamins, especially biotin: found in egg yolk, liver, salmon, avocados, nuts and seeds, and dairy products.Vitamin C: good sources include citrus fruits, lemon, and peppersIron: found in oysters, eggs, clams, red meat, and spinachZinc: good sources include beef, oysters, lentils, and pumpkin seeds 3) Prepare An Egg Yolk Mask Egg yolk contains a lot of nutrients that make a strong hair follicle. Peptides present in the egg yolk can act as a stimulant for hair growth. You can make your own egg yolk mask by following these steps: Use 3 egg yolks and 2–3 tbsp. of warm coconut oil.Stir the two ingredients well.Once the mixture is well-mixed, apply to your scalp and roots.Let it sit on your head for 15–20 minutes.Wash it out with cool water. 4) Try Out Trimming! The most important thing you can do with your hair is trimming if you want to maintain your curls smooth and healthy. It helps remove the split ends and would prevent your hair from becoming dry. You can follow the practice of trimming your hair every four to five weeks. 5) Deep Conditioning How to get smooth hair can be a challenging question for a lot of among us. But frequently conditioning your hair can help you answer that question. You can use conditioners which is relevant to your hair type. Additionally, you can try using homemade conditioners made up of olive and coconut oil which are great stimulants for the growth of hair. 6) Apply Serum On Tame Tresses The serum is an effective way to keep curls at bay if your hair tends to be coarse and dry. Smooth some in after taking a cold shower, or you can apply it while your hair is dry. Serum might be costly for many among us but it’s an effective way to make your locks smooth, silky, and shiny. Log in to your Amazon account to get the best serum which is suitable for your hair type. 7) Replace Your Towel For A T-Shirt According to the researchers and experts, rubbing your wet hair with a synthetic cloth towel after hair wash can cause hair loss and damage due to the friction that is caused between the hair and your towel. Alternatively, you can use a T-shirt that is made up of smooth fabric like cotton. This will create less friction when drying and, therefore less damage and frizz to your hair. You can follow the below steps: After rinsing and washing, gently squeeze parts of your locks to remove as much water as possible.You can wrap the T-shirt around your head like a turban.Wait for 10 to 15 minutes so that extra water has been absorbed by the T-shirt.Gently squeeze the T-shirt around any parts of your hair that have excess water, then let it dry as usual. 8) Use of Coldwater Having a shower with hot water continuously over a period of time can cause damage to your hair both at the root and follicle. Steam in the shower can open up the follicle on your hair, which may result in hair that’s frizzy, dry, and prone to breakouts. To protect with your hair, rinse your hair with lukewarm water. Then complete your shower with cool water on your hair. This may help protect and seal your hair follicle, making it quite easier for your locks to retain moisture and help you answer the question of how to get smooth hair. 9) Maximize Your Diet With A Lot Of Protein Getting enough proteins during the day and adding a significant amount of protein to your whole diet is important for your hair growth, as flocks are mainly protein. A lot of research has been done it has been found that lack of protein in your diet can result in significant hair loss and hair thinning. A few of the rich protein sources are listed below: EggsFish, like salmon and mackerelNuts (almonds, walnuts, etc.) and seedsLean meatsSpinach and kale (leafy vegetables)Beans, legumes, and Sprouts are a few of the healthy options which make your hair strong. Also, you can make tasty delicious salads with the help of the above-listed protein sources which is delicious and healthy. 10) Careful Brushing Please go easy with combing your hair. Again brushing or combing will create a lot of friction which will make your hair frizzy. Refrain combing your hair to a bare minimum and only do it when your hair is dry. Because wet hair is more prone to damage, detangling your hair along with a wide-toothed comb is very helpful in getting rid of tangles. Still worrying about how to get smooth hair, you shouldn’t, just follow these above steps and you will find more than just a solution to your problem. Recommended articles: Proven Benefits Of Apple Cider Vinegar – For Skin, Hair & HealthOur Top 10 Picks Of The Miracle Remedy – Onion Oil For Hair RegrowthBenefits of Aloe Vera for Hair Read the full article
#besthomeremediesforhair#haircare#hairtipsandtricks#howtogetsmoothhair#howtogetsmoothhairathome#howtogetsmoothhairnaturally#naturalhaircare#organichaircare#smoothhair
0 notes
Text
15 Best Professional Mehndi Artists For Karwa Chauth In India

A lot of festivities are considered incomplete without applying Mehendi to make those beautiful hands even more stunning especially by professional mehndi artists. Different designs, colors, patterns but one enchanting fragrance. That is how Mehendi or henna is summed up. Marriages, Fasting rituals, Eid, Karwa Chauth, you name the festival. Talkin’ about Karwa Chauth, In the long and prestigious line-up of festivals in India, it is especially and essentially dedicated to Love. The bond, respect and, Love between a married couple. Whether you had a love marriage or an arranged one, or the fusion of both, the festival holds a special tender corner in everyone’s heart. Now, gone are the days, when only women used to do the revered all-day fasting. Men have become much more considerate in the matter and a lot of them fast along with their wives, which makes it all the more special. Hence to look prettier for their better halves (and for their own selves), women tend to put henna on their hands. And when it comes to impressive their husbands, they trust no one but the professionals and experts. As the festival is coming up in some time, we have a list of Professionals Mehndi Artists you can follow, or contact, for dazzling Mehendi ideas.
Professional Mehndi Artists In India
1) Mehndi by Bhagyashree 2) Mehandi by Rashi 3) Mehandi by Shebin 4) Varshika Mehandi Designs 5) Mehendi Artist Sofi 6) Nishi Dalal 7) Mehandi by Feeniya Nizan 8) Henna By Anushree 9) Alankaar Mehndi by Riya 10) Drashti Mehandi 11) Jeni’s Mehandi 12) Riddhi Nakrani 13) Disha Mehta 14) Hasmeeta Karaniya 15) Snehal's Mehndi 1) Mehndi By Bhagyashree https://www.instagram.com/p/CEHWOiBlzfK/?utm_source=ig_web_copy_link The first one in our Professional Mehendi Artists list, Bhagyashree has a total of 73000 people following her on Instagram, and a youtube channel subscribed by 140,000 plus people, which says something about the kind of work she does. Her designs are obviously pleasing to look at, the pictures on her profile are clearly taken, so you could follow the designs to try it for yourself. The tutorials are well-explained in a friendly tone, not to forget various tips she gives you, for instance how to make a Mehendi cone. Also, she received a silver play button from Youtube, acknowledging and appraising her good work and efforts. 2) Mehandi By Rashi https://www.instagram.com/p/CDnyXOEBPIC/?utm_source=ig_web_copy_link Rashi is one of those Professional Mehendi artists whose designs are more on the modern and chic side. The kind that makes you wow right on the first look. She is quite thorough and detailed with her work. Her full-fledged Mehendi designs are so laden with modern-ness which makes them more aesthetically stunning. Sheis also open to collaborations and personal Mehendi Gigs, so you can call her if you like her designs. 3) Mehandi by Shebin https://www.instagram.com/p/CCoJYEvBf2r/?utm_source=ig_web_copy_link Next up in our quest for Professional Mehendi artists, is an artist from the beautiful land of Kerela, Shebin has a touch of minimalist beauty to her Mehendi designs. She has other stuff to offer too, like organic Mehendi, specially crafted Mehendi cones, expertly put-together kits for beginners, etc. Some of her designs are so intricately done and breathtaking, that you’d want one too. In case you do, don’t hesitate in getting in touch with her. 4) Varshika Mehandi designs https://www.instagram.com/p/CDBAooyj8MM/?utm_source=ig_web_copy_link Varshika is our next artist in the Professional Mehendi artists compilation. Her designs are fine, and from the looks of it, wholly traditional Indian which is beautiful in itself. On her Instagram feed, she has a Mehendi design for every occasion. She has also worked with several brides, who from the feedback, looks like have absolutely loved her works, as she customizes the henna designs according to your personality and preferences. 5) Mehendi Artist Sofi https://www.instagram.com/p/CEYEUhyhLn7/?utm_source=ig_web_copy_link Sofi is our next professional to make it to the special Karwa Chauth compilation of Professional Mehendi artists. Her designs target the normal audience, they are such that, with a steady hand and a little effort, you can get success with them. Sofi has also got special Mehendi oils, to enhance the Mehendi color and give it the darkest tint possible. 6) Nishi Dalal https://www.instagram.com/p/BpasxweBVA3/?utm_source=ig_web_copy_link Nishi Dalal has a really versatile design portfolio, ranging from bridal Mehendi to occasions like mothers’ day, in case you’re someone who’d like to honor your loved ones. She has a distinct style of henna application, which is lighter, but no less beautiful and ethnic. She is one of those professional Mehendi artists, who love to share their art and so she takes classes too. You can sign up, if you’re interested and can hone your talent or try your hand at it. 7) Mehandi By Feeniya Nizan https://www.instagram.com/p/CEMCwNFgnU8/?utm_source=ig_web_copy_link The most special thing about the majority of these artists is their organic Mehendi. The next of our professional artists isn’t an exception. With a whopping 29000+ followers on Instagram, Feeniya Nizaan is a big name when it comes to the art of Henna, her designs, an epitome of style and tradition. Not to mention, with stress on photography, they are presented in a uber-chic way. So, you could collaborate with her, and chances are you’ll get a beautiful photoshoot done of your pretty hands. 8) Henna By Anushree https://www.instagram.com/p/B52d_qZlWV8/?utm_source=ig_web_copy_link Our next artist, Anushree, Her Mehendi can be described as no-nonsense, immensely beautiful-looking. Also, the shots are closely taken to show every little pattern, which makes it significantly easy for people to try and attempt it, should you wish to do it on your own, this Karwa Chauth. So if you like something with is on the traditional lines, yet, not at all gaudy, I suggest you give her a call. 9) Alankaar Mehandi By Riya https://www.instagram.com/p/B5tyZQDhhje/?utm_source=ig_web_copy_link Next up in our list of Professional Mehndi artists is Riya, with her designs as unique as is her Instagram handle. She also undertakes Mehandi learning classes, so if you’ve got a knack for it, you can go ahead and book yourselves for them. Also, she has Mehendi for every occasion, from Karwa Chauth to Weddings to baby showers. You name the day and Riya has got you covered. 10) Drashti Mehandi https://www.instagram.com/p/B7-4MUZJfrK/?utm_source=ig_web_copy_link Drashti is another artist you should look out for. Her designs capture you the very first time you behold them. They’re truly magical, with Indian Princesses and Gods beautifully appearing in the palm of your hand in henna color. In the pictures, you can see the progress of her Mehandi process for every client, not to mention the steps in the pictures can help anyone significantly who wants to redo that particular design. 11) Jeni’s Mehandi https://www.instagram.com/p/B6FK0ykhRRY/?utm_source=ig_web_copy_link From the looks of it, Jeni is one of those Professional Mehndi artists who are a Pro in doing heavy, full-hand Mehandi. All her designs are an amalgamation of delicacy and finesse. Its no surprise that she has more than 29000 people following her on Instagram. She depicts Indian traditions and weddings with the help of her henna, also owing to the fact that Jeni uses the best quality Henna, the colors left by it are dark and the fragrance enticing. 12) Riddhi Nakrani https://www.instagram.com/p/B0Nj2YDJawU/?utm_source=ig_web_copy_link Another one of the Top Trained and Professional Mehndi artists, Riddhi with her super cool designs that every millennial, as well as Adults, are bound to love. She seems to follow the agenda on keeping it simple and elegant. Moreover, she covers every occasion you could name. In addition, She does full-hands, bridal Mehandi and customized ones too, so you could take your pick depending on what you need. 13) Disha Mehta https://www.instagram.com/p/CEW_2IRh-k5/?utm_source=ig_web_copy_link Whether it’s your Mehendi, a function at your college, or maybe you want to sport a cool tattoo without any pain, you could count on Disha to fulfill your cause with her stunning henna designs. So if you are looking to surprise your husband, and make all the other ladies jealous, Disha is the artist for you. The designs are classic, the kind of Mehendi Designs that when you see on peoples’ hands and it makes you go wow. 14) Hasmeeta Karaniya https://www.instagram.com/p/B_m8zhxBeEd/?utm_source=ig_web_copy_link Next in the list of Professional Mehndi artists is this Young girl from Mumbai with her impossibly fine and detailed designs, which are a combination of light and dark hues. She also does customized portrays on hands, which gives the art a whole other dimension. Also, she is an expert in making the henna designs come alive on hands and feet too. So you could get a whole package of Henna on hands, legs, and feet this Karwa Chauth if you contact her. 15) Snehal’s Mehandi https://www.instagram.com/p/B37JY3Thnsg/?utm_source=ig_web_copy_link Snehal, another talented one among the Professional Mehndi artists, has carefully and completely explained tutorial on her Instagram feed along with captivating ethnic Indian Designs. She also teaches how to apply Mehandi, so you could sign up for the classes if you are a do-it-yourselfer. She has everything from basic to advanced courses, so you don’t have to worry about starting from scratch. Recommended articles: The Trending 5 Best Makeup Artist In GurgaonComplete Makeup Guide By Professional Makeup Artist – Jai Babbar4 Gorgeous Colorful Eye Looks To Try Out This Summer Read the full article
#bridalmehndiartist#hennaartist#karwachauth#karwachauthmehndiartist#mehandiartist#mehendiartist#mehndiartist#ProfessionalhennaArtist#ProfessionalMehndiArtists
1 note
·
View note
Text
Difference Between Classic and Russian Volume Eyelash Extensions?

Classic extensions and Russian lash extensions have subtle differences and both have their pros and cons. Let’s dive in and look at the main differences between the two eyelash extensions options.
Classic Lash Extensions

Classic lash extensions is a method where one lash extension is glued to one natural lash, this is known as one to one. The perfect method if you already have a lot of lashes but you want to add more length or diameter (thickness) for a more natural look. The process takes up to two hours to complete and a touch up (refill) is recommended every two/three weeks for maintenance so your lashes are always full and pretty. A typical full set of classic lashes can vary from having forty extensions to hundreds per eye, depending on the desired look and of course how many natural healthy lashes you have to begin with! The classic extensions are a little easier to maintain, so working this into your daily beauty regime is very easier than any other eyelash type.
Russian Volume Eyelash Extensions

Also known simply as volume lashes, Russian lash extensions work by adding volume rather than length, applying two to eight extensions onto one single natural eyelash, this is known as the feathering technique. The technique requires a lot of skill. We always advise you to visit a professional beautician for this type of lash extension. The process won’t damage your natural lashes and will leave them looking larger and fuller. The final look is soft and lush, giving a beautiful overall appearance. It is important not to extend the lashes too much, keeping to the advised safe length,. Having extensions that are too long will speed up the shed cycle. Also, it could cause permanent damage to the lash follicles. Although this process takes a little longer and requires more skill on the half of the beautician. People seem to be amazed at how they look afterward and can see the value in waiting that long. This option is probably better suited for special occasions or big nights out when you want to look that little bit special. However as beautiful as Russian eyelash Extensions are, working this into your daily beauty regime may be a little tricky. All in all, eyelash extensions are most defiantly going to catch that extra attention, no matter which type. The Russian eyelash extensions are so full and lush, that we can’t say a bad word about them. They are fixed, and firm in place, at a perfect length, that feels comfortable and natural to wear. Classic eyelashes are always good for a quick and easy application. However, for me, the Russian extensions will always look bigger, bolder, and more lush. Recommended articles: Keep Your Lash Game Strong With 6 Best Eyelash Glue Of 20205 Popular Types of Eyelash Extensions You Need To Know4 Gorgeous Colorful Eye Looks To Try Out This Summer Read the full article
#beautifuleyelashes#Classiceyelashextension#DifferenceBetweenClassicandRussianVolumeEyelashExtensions#Eyelashcurler#eyelashextensionuses#eyelashextensions#eyelashglue#eyelashmascara#eyelashes#fakeeyelashes#pickrighteyelashglue#Russianvolumeeyelashextension
0 notes
Text
Do You Know These 8 Surprising Facts About Dark Spots?

Spots, Hyperpigmentation, Melasma, Pregnancy Spots, Sun Damage. They go by many names, but it's all relatively the same. It's the pigmentation of the skin that causes visible dark patches and freckles on the skin. 1. Dark Spots are often confused for other Common Terms.

They are often referred to as: spots, sun spots, pregnancy spots, brown spots, sun damage. Dark spots are made by melanocyte cells overreacting to UV sun damage, hormones, the environment, inflammation, and genetics. 2. The Number #1 cause of Dark Spots is the Sun.

Overall, the sun is the main cause of dark spots. UVA and UVB Light that comes from the sun causes melanocyte cells in your skin to produce more pigment. In simple terms: More sun, More Spots. 3. Dark Spots can be removed, but it Takes Time.

'There is no such thing as an 'Overnight Dark Spot Miracle Cream' Some dark spots may be reduced forever by using the proper products and with lifestyle changes. These spots usually are lighter and have only been present for a short time. Dark spots that are darker and have been around for a while can improve. But remember, they can easily come back. Especially if you are prone to dark spots, the natural causes of aging will bring them back over time. 4. Dark Spots can be reduced

If you've tried products in the past and have seen little or no results, or, if you've tried a lot of products, consider this: Every product uses a different scientific approach. Remember, there is no magic cure. It can take weeks to months to reduce spots. Results will differ from person to person. Your best option is choosing a powerful, scientifically-developed routine and sticking to it. 5. You probably aren't using enough Sunscreen

Did you know you should wear sunscreen before you drive in the car? What about when you are inside on a sunny day? Even cloudy days? These statements are all true. If you suffer from dark spots, it's especially important to apply sunscreen throughout the day. UV rays can penetrate clouds. They bounce off walls. They are all around us. That’s why you should always wear sunscreen every day, even if you’re indoors. 6. Higher SPF doesn't mean less spots

The more time you spend in the sun, the more prone your skin will be to dark spots. While higher SPF prevents UV rays from damaging the skin, it can't block all of it. If you suffer from spots, limit your time of sun exposure. It’s also important to protect your skin with other protective measures. Wear a hat that shades your face or bring an umbrella next time you go to the beach. 7. You shouldn't Spot treat Dark Spots

The dermatologist's instinct is to treat the affected area. But your face is not like a shirt with a stain. If you're suffering from dark spots, chances are they could pop up anywhere on your face. The best solution is to find a Dark spot treatment mask with powerful natural ingredients and use those products on your entire face. 8. Stay away from Hydroquinone.

If used improperly, hydroquinone can make your dark spots come back even darker. So always be careful. Recommended articles: Everything About Glycolic Acid Face Wash & 7 Best Products In IndiaEverything About Hyaluronic Acid Face Serum With 10 Best ProductsBenefits Of Jade Rollers For Facial Massage With Our 10 Best Jade Rollers Read the full article
#causesofdarkspots#darkcircles#darkspots#Facecare#factsaboutdarkspots#Glowingskin#howtocureHyperpigmentation#howtogetglowingskin#howtogetridofdarkspots#Hyperpigmentation
0 notes
Text
Everything About Glycolic Acid Face Wash & 7 Best Products In India

If you add a glycolic acid face wash to your skincare routine, it will definitely help you reduce acne, remove dark marks, and smooth your skin. The word glycolic might be sounding a little intimidating to you but once you learn about it, it would sound like a magical ingredient. It works great in clearing your skin, avoid aging and many other wonders. Adding it to our skincare routine is the best thing we could ever do in order to make our face glow more than before. In this article, you will get to know some of the most amazing glycolic acid face wash products and some extravagant benefits associated with them. But before that, it is of utmost importance for you to understand what exactly is glycolic acid and how does it play a significant role on our faces. Let’s have a look:
What Is Glycolic Acid For The Face?
Are you suffering from hyperpigmentation woes? Well, glycolic acid for face is the solution to all the problems associated with the skin. Being an ingredient that enhances luminosity, these work wonders in exfoliating the dead layer of your skin and hence bring a glow to your face. People generally go for scrubs but never think that they are aggressive and literally affect your skin condition. Glycolic acid is a completely different form of removing flaws from your face. Are glycolic acid for face wash if used correctly can actually make a difference and make you shine amongst others.
Best Glycolic Acid Face Wash Products In India
1) Glycolic Skin Lightening Face Wash If you are looking for the best ever solution to all your skin problems, trying out glycolite skin lightening face wash will be the best choice. It works wonders in rejuvenating your skin and lightening all the dark spots available. The process of rejuvenation takes place by working on old and dead skin cells. Another important aspect is that it enhances skin texture as well as tobe and cleanses the pore. 2) Globus Pimple Clear Facewash Globus pimple clear face wash acts a vital role in order to reduce acne, eradicate dark spots, as well as more than the skill. Having glycolic acid in it, it works wonders in increasing skins cal turnover, hence eliminating dead skin cells from your skin. This is how it unclogs the pores of your skin and helps you get rid of acne. It is the most amazing glycolic acid face wash and a must-have to make you shine. 3) Plum Green Tea Pore Cleansing Face Wash It is a soap-free gentle and nondrying face wash that works wonders in deep cleansing your clogged pores. With the help of antioxidant-rich green tea, it plays a vital role in helping you combat acne. The availability of glycolic acid is the reason why you get brighter and clearer skin using the face wash. This glycolic acid face washis known for giving you a fresher appearance by controlling sebum levels. 4) O3+ Glycolic Acid Face Wash This O3 plus glycolic acid face wash plays a significant role in exfoliating skin cells. if you have been worried about your skin getting affected due to aging, it is the perfect solution to it. The best part is that there is no such risk of skin irritation for sensitivity. Just get a whiter and brighter skin instantly. There are numerous benefits associated with it such as exceptional skin hydrating and soothing properties. 5) Innila Skin Whitening Foaming Face Wash It is the best chemical-free face wash which is extremely effective in reducing acne. it would definitely help you improve your skin tone and eradicate all the dirt and pollution from it. The best part is that you only need a little amount of foam and it will do wonders. another amazing thing about it is that it is suitable for all skin types, be it sensitive or nonsensitive. Sooner you will start feeling that your skin is getting soft and better than before. This glycolic acid face wash has many benefits tied to it. So no matter what type of skin you have or what color it is, trying out Innila Skin whitening foaming face wash will be the best decision of your life and it is actually very effective. 6) Glycolite Max Foaming Facewash Well, there is no other word than BEST when we talk about glycolite Max foaming face wash. Having oily and acne-prone skin is not easy to tackle and hence it is is actually required for you to select the best possible products. We all have to deal with sebum accumulation as well as clog pore in our day to day life. It is when this product works wonders. Be it removing acne, clearing those dark spots, or any other thing, it will totally transform your skin type and make it look prettier. It is a glycolic acid face wash and hence exfoliates all the dead skin cells sooner. 7) Toulon Glycolic Acid Facial Cleanser Containing powerful properties of vitamin C, this glycolic acid face wash protects your skin from the outcoming of free radicals. Our skin gets affected by aging and we get worried about that. No more worries as Toulon glycolic acid facial cleanser actually deals with aging effects and diminishes its signs very soon. Can I Use Glycolic Acid Face Wash Every Day? It completely depends on the concentration of glycolic acid present in the particular face wash. Using glycolic acid face wash provides enormous benefits such as it eradicates acne, dark spots, dull, pollution, and dust from your skin. But it is a fact that it contains acid. There's no problem in using it every day if the concentration of the acid available is fine enough. Excess application of acid on your face can lead to irritation and bumps and hence it is always recommended to check the concentration before using the same. It works perfectly for your skin, no matter what problem you're going through. So, if you are looking for face washes to better your skin, you can always go for a glycolic acid face wash to make an impact. Recommended articles: Everything About Hyaluronic Acid Face Serum With 10 Best Products11 Best Face Wash For Oily Skin7 Best Face Wash For Dry SkinSecret To The Ultimate Skin Spa With 101 Guide On Facial Cleansing Brushes Read the full article
#benefitsofglycolicacid#benefitsofglycolicacidfacewash#benefitsofglycolicacidforface#bestfacecleanser#bestfacewash#bestfacewashinindia#BestGlycolicAcidFaceWashInIndia#facewashinindia#glycolicacid#glycolicacidfacewash#skincare#skincaretips
0 notes
Text
10 Best Affordable Makeup Brushes In India
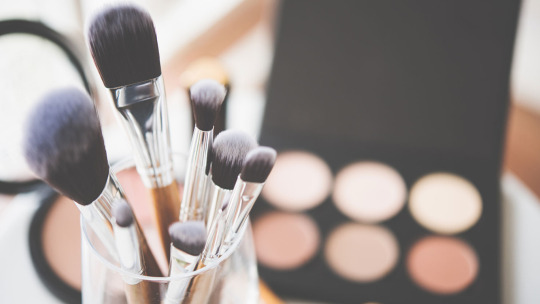
We all know that makeup is an art of self-love and is used to portray our best appearance in the world. It is a fact that without the right set of tools, no piece of art is complete. With the help of makeup tools, you can have a perfectly polished look by using our favorite products. Applying makeup is a secondary, first, you should have the right makeup tool kit and it is a good choice to invest in high-quality and affordable makeup brushes to make yourself shine. Most people don't prefer using makeup brushes as it is time-consuming but it actually gives astounding results. The right makeup brush can make the difference from a dry look tour ravishing appearance. Be it lips, cheeks, or eyelids, makeup brushes are available for all your makeup application. Obviously, you do not want your pocket to get heavy, and hence you might be looking for affordable makeup brushes to make an impact. Here is a look at some of the most amazing as well as reasonable brushes in India.
Affordable Makeup Brushes in India
1) Generic Foundation, Eyeshadow Makeup Brush Set
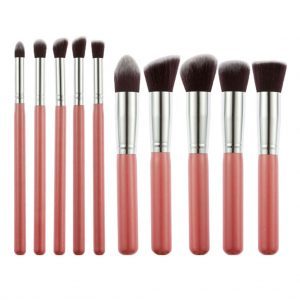
Image: Amazon When it comes to choosing affordable makeup brushes, there is no better option than this. With high-quality e and amazing material, it provides you you an incredible appearance under budget. Applying it is simple you just have to run the bristles in warm water and apply some shampoo to it. Wash it properly and you will find out that brush is containing makeup that was used before. Rinse it until it gets cleaned properly. It is considered as one of the best products at an affordable price. 2) Rozia 24pcs Makeup Brush Set
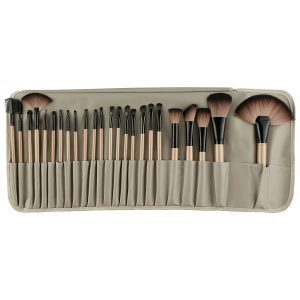
Image: Amazon Rosia 24 pieces makeup brush set is the best thing to make you feel comfortable all the time. We all get tired of those pretty lines and loose dresses honor face. But it offers a complete professional makeup application that saves our sanity e and letters look fabulous. 3) Tribecca 24pcs Makeup Brush Set
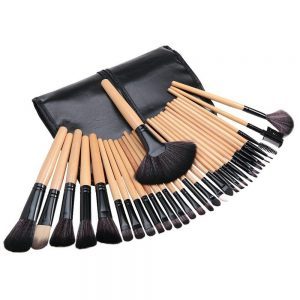
Image: Amazon Spending lots of time watching make-up tutorials might lead to a thought in your mind that you need a hefty amount to buy those amazing brushes. But here's good news! Tribecca 24pc makeup brush set is one of the most affordable makeup brushes with short handles. It becomes easier to control them and works great in enriching your look. 4) Kabuki Makeup Brush Kit
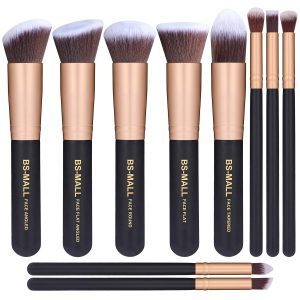
Image: Amazon Kabuki makeup brushes have been one of the best sellers and are mostly used by professional makeup artists. This kit will help you get all the tools you require to complete your look like a pro. These kabuki professional brushes are made of the finest quality materials and contain 100% synthetic bristles. 5) Puna Store Makeup Brush Set
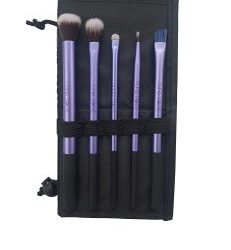
Image: Amazon Puna Store has been recognized for providing amazing professional cosmetic makeup brush set that it comes under a soft leather bag. Isn't it like a cherry on the cake? These brushes have high hair density and comfortable to use. The best part is that you can use it for both personal or for studio purposes. 6) NESA Professional Bamboo Handle Makeup Cosmetic Set Face Brush
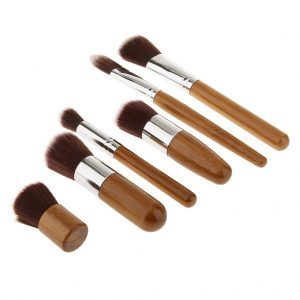
Image: Amazon NESA professional bamboo-handled makeup face brush set is very comfortable and soft to use. the best part is that natural cotton has been used to make the aluminum cosmetic bag as well as a durable bamboo material handle. The length for the eyeshadow brush is 13 cm and 10.5 for concealer brush. When it comes to blusher's length, it is around 11 cm. An amazing part is that even after being so amazing it is one of the best and most affordable makeup brushes. 7) MINISO Makeup Brush Set

Image: Amazon If you are looking out for a low priced yet powerful makeup brush set, miniso would be the right choice for you. It has a soft blending oval brush that works wonders in properly blending the makeup without any flaws. Being high quality, affordable, and stylish, miniso has been adopted by most of the fashion and makeup stylists to get their jobs done. 8) SHIVEMXIM Cosmetic Makeup Brush
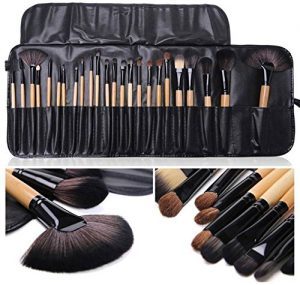
Image: Amazon Are you looking out for a perfect brush for your regular use? Well, SHIVEMXIM brushes are the best things when it comes to everyday makeup. Which software bristles, it works wonders in helping you blend color naturally. The best part is that bristles do not shade even after using it for a long time and the finest quality bamboo bristles are used. Because of which, most women prefer this as they go out of their place every day. Applying makeup with this makeup brush would glam up their look and they will look even more ravishing and natural as well. 9) Start Makers Marble Pattern Makeup Brushes Set
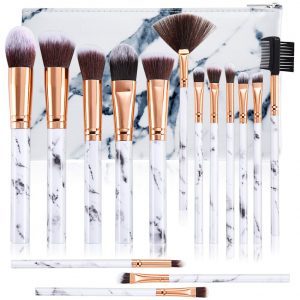
Image: Amazon If we talk about star makers marble makeup brush set, they are made up of high-quality material and are very convenient to clean. Having soft bristles, they do not harm your skin. Also, at the same time, don't fall off while you are applying the makeup. These brushes help you blend foundation and other things easily on your face without any difficulty. Moreover, It happens because of the high quality it provides. Nobody likes playing with their faces. Isn’t it? So, with its finest quality, you need not worry about any side-effects or anything of that sort. 10) JIAOER Professional Makeup Cosmetic Foundation Brush Set
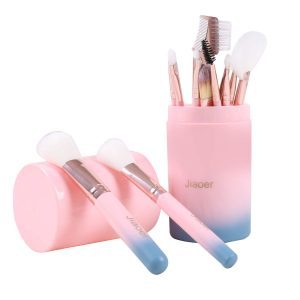
Image: Amazon Having a JIAOER professional makeup cosmetic foundation brush set will add charm to your collection. The brushes are designed meticulously as well as its dresses are either of synthetic or natural hair. No matter if you want it for personal use or professional, this set should be there in your makeup kit to have an enriching appearance. Another beautiful part is that it is one of the best and most affordable makeup brushes available online. So this was the collection of best affordable makeup brushes in India and you can go for any of them according to your choices and preferences. Do not worry as each one of them has its own benefits and charm. Waiting anymore does not make sense as you might lose the opportunity to buy such wonderful makeup tools. Recommended articles: Complete Makeup Guide By Professional Makeup Artist – Jai BabbarThe Trending 5 Best Makeup Artist In GurgaonAn Ultimate Guide to Best Makeup Foundations With 13 Best Products Of 2020 Read the full article
#affordablemakeupbrushes#bestaffordablemakeupbrushes#bestmakeupbrushes#blendingbrush#concealerbrush#eyelinerbrush#eyeshadowbrush#flawlessmakeup#flawlessmakeupapplication#foundationbrush#makeupapplicator#makeupbrushes
0 notes
Text
Amazing Home Remedies for Skin Pigmentation

This issue of skin pigmentation has been very common. Whether it is freckles, age spots, or sun damage. It is said that flaws are beautiful but yes if not taken care of properly, then those small brown spots can actually become a very tough thing. If these spots have occurred because of the lack of skincare, you should take important measures to fade them. Skin Pigmentation is basically the discoloration of the skin and these lead to dark patches on your skin. It can be encountered by both men and women and can occur due to excess melanin. If you are coming across the same problem, have a look to understand the causes as well as home remedies for skin pigmentation.
Causes Of Skin Pigmentation
If you would conduct proper research, you will understand that the main culprit behind the occurrence of skin pigmentation is UV rays. The main thing is that UV rays do not show its impact immediately but sometimes later. For example, the damage that occurred on your skin a decade ago can develop pigmentation now. Even if you are applying sunscreen for all your life, you can still experience skin pigmentation. You need not worry as there are many other factors that lead to it. Some of them include: Post-inflammatory pigmentation - it is basically the damage your skin receive due to an injuryMelasma - You get some hormonal changes during your pregnancy and it can result in the issue. However, there are many skin pigmentation home remedies you can try.Different skin rashes skin also play a vital role in the occurrence of skin pigmentationSkin infectionsSome medical conditions such as untreated diabetes can also be the culprit. If you are noticing sudden changes in your skin color or some spots, it is very important to have a word with your doctor so that they can suggest some chemical peels to take you out of the problem. Other than that, there are many home remedies for skin pigmentation that have proven their efficiency in removing blemishes.
Skin Pigmentation Home Remedies
1) Apple Cider Vinegar With the availability of polyphenolic compounds that are known for offering several health benefits, apple cider vinegar plays a vital role in benefiting your skin. All you need to do is to create a mixture of 1 tablespoon of water and apple cider vinegar. You can buy WOW Raw Apple Cider Vinegar from Amazon. Use a cotton swab to apply the mixture on your face and then leave it for 2 to 3 minutes. Once it dries, rinse it off with lukewarm water. Make sure you do this procedure 2 times a day. 2) Green Tea There is an enzyme in our body that is known for causing pigmentation and it is called tyrosinase. The best part is that the extracts of green tea have been evident enough to deal with this enzyme, resulting in the benefit of our skin. It is one of the most amazing home remedies for skin pigmentation and the easiest to use. Have a cup of hot water and dip a green tea bag inside it. Wait for it to cool down and then use it on the affected areas. 3) Aloe Vera Aloe vera consists of aloin which is a very active element for lighting the skin. You just have to get one teaspoon of honey and to 2 tablespoons of aloe vera gel. Mix it properly and let it sit for 5 to 10 minutes. After that, use the mixture in the affected area and wait for it to dry. Once done, use new warm water to wash it. 4) Red Onion It is a well-known fact that red onion works wonders in lightening scars. It has been found that it consists of ingredients that have enough potential for skin whitening cosmetics. Using this formula is simple. You are just required to rub it on the affected area and let it be there for around 10 minutes. To get the best results from one of the best skin pigmentation home remedies, try to do it twice a day. 5) Tomato Having lycopene, tomato works wonders in reducing the long-term effects of the damage. As it is told above that pigmentation is a long-term result of photodamage, using tomato will help you lighten them. All you are required to do is to rub a slice of tomato on the affected area and then let it dry. Use lukewarm water to rinse it off. 6) Lemon Lemon has always been a bleaching agent and contains skin lightening ingredients. just make sure that you do not have sensitive skin if you are going to apply this method because it might hurt you. Apply it on your arm before using it on the face do you know how it affects your skin type. Do not forget to use sunscreen after completing this process because your skin might get photosensitive after applying lemon juice. All you need is a tablespoon of lemon juice and a teaspoon of honey. Mix them properly and apply them on the face and wait for around 15 to 20 minutes. Finally, wash it off with lukewarm water. Again it is one of the most recommended home remedies for skin pigmentation. 7) Orange Peel If you are looking for a perfect solution to all the problems such as fade dark spots, melanin deposits, and finding ways to brighten your skin, Orange peel is the best answer for you. Simply dry the orange peels and makeup powder and then added to a container having lemon juice and honey. Use it as a face mask and do it three times a week. 8) Potato Containing azelaic acid, potato works wonders in reducing hyperpigmentation and blemishes resulted from breakouts and acne. It is one of the simplest skin pigmentation home remedies where you just have to slice a potato and rub the same on the affected area. Once it dries, rings it off and then repeat the process every day. We have been facing the issue of hyperpigmentation in some form and it’s actually not possible to remove them all overnight. You need to maintain consistency with the treatment. Above were some of the most wonderful home remedies for skin pigmentation which will help you get rid of them and avoid them in0 the future. However, it is highly recommended to have a word with a doctor before opting for any of the natural remedies. Recommended articles: 7 Exquisite Banana Face Mask Recipes for Glowing and Healthy Skin7 Proven Ways On How To Lighten Facial Hair Naturally10 Best Coffee Face Pack & Benefits That Will Transform Your Skincare Read the full article
#FaceMask#facemaskforglowingskin#facepackforglowingskin#Glowingskin#HealthySkin#Homeremedies#homeremediesforglowingskin#HomeRemediesForSkinPigmentation#naturalfacepack#naturalhomeremedies#naturalskincare#NaturalSkincareguide#skinpigmentation#Skinpigmentationhomeremedies#skintransformation#skincare
0 notes
Text
8 Incredible Benefits Of Olive Oil For Hair

Generally, people do consider the usage of olive oil limited to the kitchen but it’s time to show how wonderfully it affects your hair. Do you know what ‘liquid gold’ is? Well, it is something that provides a solution to all the myriad problems as well as promotes hair growth. It is not so much in recognition that olive oil is wonderful for your hair as well. Instead of just focusing on it as a dip with your bread as well as to be used while cooking your favorite food, let's focus on some incredible benefits of olive oil for hair. 1) It Kicks Dandruff Out When your scalp gets dry, you might find it itchy and that is because you have got dandruff now. It can be extremely irritating if you do not solve this problem as soon as possible. If you want a very general solution, mixing 2 teaspoons of olive oil as well as lemon juice with water will be enough to make the difference. After applying it on your hair, you are required to massage it well and then leave for 20 minutes before washing your hair with warm water. If you are looking for a long term relief from dandruff, do not skip this treatment and do it at least once a week. Other than this, using gently heated olive oil on your hair and leaving it overnight will be enough as well. 2) Say Goodbye To Split-Ends One of the most important benefits of olive oil for hair is that it deals with breakages and split-ends. We all are aware that our hair gets dry in winters and gets targeted by split ends. If you are looking for a perfect fix to the problem, try out olive oil as it works wonders in adding weight and moisture to your hair. Simply put some drops of olive oil between the fingers and massage your hair thoroughly. It will definitely act as a serum and fix all the split ends. The best part is that if you maintain regular usage, you will be preventing new breakages from developing. 3) Softens Your Hair Having brittle hair can be quite irritating when you run the comb through it. This roughness can also lead to pain at times because you get to face hair fall. There is a perfect solution for it. Guess what! The olive oil which you had been using in your kitchen can actually do great in helping you reduce the frizz. Mix 2 tablespoons of olive oil with the same amount of honey and then massage it on your scalp for about 10 minutes. Once you are done with the massage, leave it for 20 minutes and then rinse it off with lukewarm water. The olive oil consists of vitamins A and E that work great in smoothening the hair. This is one of the major olive oil hair benefits. 4) Manage Your Unruly Locks If you use straighteners or curlers to style your hair on a regular basis, it can lead to the exposure of heat. After some time, you would start feeling that it's getting difficult for you to manage your hair. This is where olive oil hair benefits prove it's worth it. If you have decided to go for a party tomorrow, simply apply olive oil a night before you are about to style your hair. This will give an excellent transformation and texture to your hair. You just have to massage your scalp with olive oil for 30 minutes and then leave it overnight. Once you wake up in the morning, rinse it off. 5) Leads To Stronger Hair One of the major benefits of olive oil for hair is that it helps in maintaining scalp and hair health. You would not be facing cell damage and plus you will get the proper nourishment to your hair, hence improving its quality. By removing and reducing breakage and split ends, olive oil works wonders in improving the quality of your hair and helps to grow even stronger. All you need to do is use honey e olive oil and cinnamon in order to prevent hair loss. 6) Longer Hair The benefits of olive oil for hair will be evident here. When you use olive oil on a regular basis, it actually plays a vital role in helping your hair grow longer by providing nutrition to your scalp. Honey, whisk, and olive oil hair mask is well known for promoting hair growth. Simply mix all of them together and then apply on your head to see the most amazing result after sometime. After preparing it, start mixing the mixture through your hair strands properly. Make a ponytail and then wait for 20 minutes. Finally, wash it off to see the olive oil hair benefits. 7) Repair Damaged Hair It is mentioned above that olive oil contains vitamin e and A, and hence is a wonderful ingredient. The existence of these nutrients works wonders in repairing damaged hair, especially when you have colored your hair. The most important part is that it fights with fungus and bacteria and improves the blood circulation, resulting in fixing of damaged hair. All you are required to do is make a mixture of olive oil and coconut oil in order to repair damaged hair. Just warming one tablespoon of coconut oil and 3 tablespoons of olive oil will give you the magic. Simply use it on the hair and massage it properly on your complete scalp. After this, use a hot towel to cover your hair for 20 minutes and then rinse it off. 8) Deals With Irritating Scalp It is a fact that when your scalp is dry and itchy, it leads to endless irritation. It is generally caused by bacteria and fungus. Olive oil hair benefits include nourishing the scalp and moisturizing the hair in the most significant way. Just use one egg white and to tablespoons of olive oil to answer week to make a difference to your hair. Put the egg in the refrigerator before applying it. This mixture needs to be applied on your scalp and you have to cover your hair for 20 minutes. Wash your hair and see how egg whites will play a significant role in the killing of infection and bacteria. After checking out all the incredible benefits of olive oil for hair, you should not wait anymore and just order it. Start applying it from today itself to have long shiny and beautiful hair. Recommended articles: Proven Benefits Of Apple Cider Vinegar – For Skin, Hair & HealthOur Top 10 Picks Of The Miracle Remedy – Onion Oil For Hair RegrowthHow using Castor Oil for hair can give you that perfect look Read the full article
#benefitsofoliveoilforhair#essentialoilforhair#Hairgrowth#hairgrowthhacks#Hairhealth#HairMasks#hairoil#hairtipsandtricks#haircare#oliveoil#oliveoilbenefits#oliveoilforhair#oliveoilforhairbenefits#oliveoilhairbenefits
0 notes
Text
Vintage Engagement Ring History – You Need To Know

A vintage engagement ring is those rings that are designed to resemble antique rings but antique. Vintage can also refer to products that are aged 20 to 100 years. Vintage rings for engagement are a popular choice because they have distinctive designs, including unique bands and stones. The vintage engagement ring can design their own following the old type of hundreds or even years. Times are the most popular Victorian era where the beads have been popular in engagement rings, Edwardian era where sapphires were outstanding beloved, and also the Art Deco period when geometric patterns that have paid the honor of Egypt, Native American and Asian styles. Currently, Art Deco rings are the most popular among couples. The current ring most popularly purchased vintage is the art deco engagement rings that made during the 1920-30s. In this period shows a tendency to ring antique geometric is extremely well-liked history. Now vintage engagement ring is still a variety of popular styles, so it is not hard to find vintage engagement rings that duplicate this bold design. If we talk about the craft on a vintage engagement ring, they are awesome. Even if there are different kinds of styles that vintage rings have, most of them are made from gold but may use another gem outside the moissanite. Besides, they have designs like laces and jewels to enhance the beauty of the ring. The craftsmanship is so good that you can see the elegance on it, perfectly made for women or women using the corresponding gem. There are also rings with styles that signify different eras. They use stones copiously.

Difference Between Vintage Engagement Ring And Antique Ring The difference between vintage and antique art deco rings is that the antique was made during the period in which a vintage ring is more likely a copy of a fashion statement. When you buy vintage engagement rings, you would normally consider any written description and gemologist report thoroughly. You need to know about the rings before you buy them. You also have to make certain the seller can provide detailed explanations on the vintage engagement ring for you. Start with the internet or a jeweler nearby for more details on who would be able to provide or make a vintage ring based on your preferences. Also, check out an antique shop, second-hand, and close classifieds to find a vintage engagement ring for you. A thought of choice is a pawn shop; they tend to wear more jewelry, including vintage pieces. Wherever you store with, it is essential to inspect the ring for defects or imperfections that do not add character but hinder form or quality. As an antique engagement ring offers matchlessness, elegance, and creativity of old design. Yes, they require much research, and once found, they leave a mark like no other. Make Sure You Know Your Budget Before Purchasing A Vintage Engagement Ring. First, you need to ask yourself, jewelry store, ask for one or if they know of a jewellery store that sells them Second, you should ask the jewellery shop certified gemologist to know that this is a vintage engagement ring, gold and precious stones and what quality they are. You can also read an article about moissanite engagement rings and Blue moissanite rings. We hope our article can add your knowledge about Vintage engagement rings. The vintage ring can be a gorgeous ring for your beloved person. Since this kind of ring has an excellent taste. The excellent taste of this ring will gather a romantic atmosphere. Every detail in the vintage style is beautiful and unique. If you purchase a ring with vintage or we can also call it an antique ring, you will get a very high price. However, do not you worry; if you are not a fatty budget kind of person, there is always away. Nowadays, many jewelers create some vintage designs for the modern ring, so the price is not too high. Having a vintage ring can make you have special pride, timeless taste, and elegance only on your finger. This kind of ring comes into various eras. The first era is a Victorian-era from 1835 to 1900, and then the second is the Edwardian era from 1900 to 1920. Also, the last era is the Art Deco era. This era is 1920 to 1930. You can choose one of them for your antique ring. The jewellers will give you some advice about that. Making a Vintage Ring If you wish vintage style for your ring, you can make it come true by the way. Before going to a jewelry shop, it is better for you if you know about your budget. Choose a vintage ring that will fit appropriately in your budget. Making this ring by your own choice is interesting. Since everything is on your hand. Choose your own gemstones choice, the material of your ring, the shape of your ring, and something like that. You can use a book about antique jewelry for getting some inspirations. Do some research about this kind of ring, for example in the Edwardian era. A ring from that era will represent about rose-cut moissanite and sapphire birthstones For the alternative, you can also try to find the ring characteristic in the Art Deco era. A ring from Art Deco is crafted with more of geometrical shapes with sharp edges and has bold colors. Do not forget to choose a suitable material like yellow gold, white gold and even platinum. A vintage ring is gorgeous when it is made from those materials. After knowing everything about your ring-making plan, you can go to the jeweler to discuss it. Gemstones Choice in Vintage Ring

For making an antique ring, you do not always think about the gemstone. Another gemstone-like moissanite, emerald, or pearl will be great too on your antique ring. However, you have to be careful if you choose one of them, because they are very soft gemstone. Three kinds of gemstones will be easier to crack. Furthermore, if you go to a jeweler, make sure that he or she will understand the vintage style for a ring. Your plan about making an antique ring will be useless if you go to a modern jeweler who does not know anything about vintage style for making a vintage ring. Recommended articles: 10 Best Gold Plated Chains For Women In India7 Best Luxury Watches For Women With Elegant Style Statement8 Best Women’s Belts To Accentuate Your Appeal10 Different Types Of Handbags For Women Read the full article
#BeautifulEngagementRings#BudgetEngagementRing#DiamondEngagementRing#DiamondRings#EngagementRings#VintageEngagementRing
0 notes
Text
7 Mind-Blowing Tips On How To Cure Dandruff Naturally
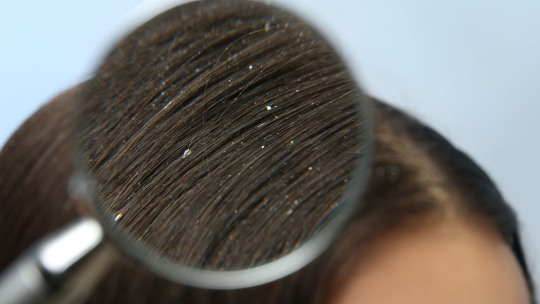
The hair on our head is probably our most defining element. Wanna pep up your boring look? Zap your hair up. Get a new haircut or for all the ladies out there, get a few strips of mahogany in your hair. And it could alter your whole countenance. But as much as we love our hair, they don’t come without issues. Sounds familiar? Yeah. There is hair fall, hair not growing, split ends, and what not! Left something out, haven’t I? You can’t even begin counting hair problems without the worthy inclusion of dandruff. It is a problem which, at some point or the other, has haunted all of us. We have a fungi Malassezia to blame for our dandruff related issues. It lives off oily materials that are on our scalp and scatters them further into elements that may ruin the scalp in one way or the other. It could be a mere white speck on some guy’s shirt or could be a whole damned fountain on someone else’s shoulder. Can’t you remember the look on Jack Gellar’s face when Chandler joked saying “oh, was it snowing out there?”. Well if you’ve been in a similar situation, then I can comprehend how badly you’d want to reduce incoming of the nuisance that dandruff is and how intrigued you are to know how to cure dandruff. But you know, to get to the root of something we gotta find its origin and analyze how it came into existence in the first place. After all, what we know is a drop, and what we don’t know is an ocean. On those lines, There are a few factors that result in those white specks on your shoulders.
Causes Of Dandruff
Like I told briefly just now, the fungi living off oily materials breaking ‘em to other materials can profoundly disturb the skin of the scalp making it to shed that scabrous thing we all so hate, but hardly ends here. For one, maybe you’re too stressed. Yes, it is a thing, and secondly NO, it can’t necessarily be the reason why flakes are born. Not directly at least. But that surely gives a kick to those elements who could be accounted for its formation. Keep your diet proper to boost your immunity in order to shield against the dandruff-causing elements. Furthermore, pollution is all-existing nowadays, you can’t really leave them behind so I won’t be surprised to know that it is the reason for all that dandruff. Head wash is another out of the box reason why you could have dandruff. If we do clean up our hair too frequently it’d lead to dryness and doing less than required could deposit a layer of some oily substance. Another and the prime reason-- Dry Scalp Skin!! Isn’t it obvious? Dry Scalp is like the breeding ground for dandruff. It can also be an outcome of the infamous skin defect seborrheic dermatitis. As tricky and tongue-breaking the name is, you’d do well to remember it. It is bound to come out when I tell you how to cure dandruff.
How To Cure Dandruff
Well, while we’re talking about how to cure dandruff, let me say it, out loud, for once. It is a long shot. Not impossible too, but one really long tiring shot. There are a few tricks which you can heartily try playing around with. 1) Baking Soda - Not Just For Cakes? Don’t we all love how adding a pinch of soda makes our cakes, muffins, and bread rise like miracles? But would you believe me if I told you it could relinquish those flakes back to the dead, dry, and dark places where it came from? Supposedly handy at abolishing dead and dry skin, it is the term I am positive everyone has heard of is “Exfoliating”. Ingredients for the required recipe are a few drops of your hair shampoo in your upwards turned palm, a pinch of pearly white powder, whooshing it up. Don’t take my word, try it for yourself. 2) Vinegar - The Sourness helping out We all have a spare bottle of vinegar tucked in some cupboard of our kitchens. So its time you pull it out, unscrew the cap and give it a breather. Because, as it turns out, it can change your hair game for you, by knocking dandruff out for good. Just take a cap full of it, lather it up along with your hair-wash, scoop it up your scalp. For best effects, wait a few minutes before de-lathering your hair. And yeah, they actually will start feeling super-soft, even before you can see a visible change in the other department. 3) Neem - Bitterness At Work Neem. A name that we equalize to bitterness and those horrible tasting potions we were made to gulp down as kids to get rid of sore throats. That’s what we’re going to do in this step to learn how to cure dandruff. We’re going to shove hoards of garlic paste down our white-faced flaky enemy’s face. Now, to whip it up, pluck a few neem leaves. Give those fists of yours a bit of action by crumbling the leaves. Grab a rolling pin and paste them up nice and fine and Tadaa! 4) Garlic - Kill ‘Em With Scent This small white misshaped one has been an integral part of many many medicinal stews, potions and now a handful of cloves of garlic will have you rethink all those times when you brushed it aside for what effect its smell had on your nostrils. Garlic has, not without reasons made it to our how to cure the dandruff guide. Even if we don’t take into consideration, its properties, the only smell is enough to drive the flakes down the scalp and out of the door. Mash the garlic lightly, before you toss it to the liquid to have the smell out in the open in all its glory. Then just de-lather those shiny with that garlic water. That’s it!! 5) Aspirin - Giving A Headache To Head Villain Aspirin has been our travel partner and savior on all those business and family trips. Be it that headache from that annoying relative’s blah talk or the blinding one after you have more than a few shots at the party. The next one down our list of remedies on how to cure dandruff has seen us through all of it. The Med comes bearing an acid that we can credit to slack our arch-enemy from its home ground, till it gets finally detached. So go out and find yourself Salicylic rich hair-wash, note down the name if you have to. Can’t do that much hassle? Can’t get hold of the product? Well, not to worry. Just smush a tablet of too and toss the residue into your hair-wash. Easy-peasy!! 6) Fenugreek Seeds - The ease will blow your mind Also known as methi seeds, the ingredient derives its name from methi which is a loved-by-all vegetable in our country. It could, however, be your companion to get rid of your white fiend. So ultimately we have to get it in the form of a runny but not-too-runny substance. To be able to do that, the preparation begins a day early. Keep the seeds in water for the whole night. Then along with some drops of that water, put them in a blender and then you know the drill. Blend!! Once the mixture is done, take it out, apply it on your dandruffy scalp. Then after a good half an hour wait, place your head under running water so that all of it flows out. It can serve as one valuable tip whilst we learn about how to cure dandruff, to some extent. Take your favorite scented shampoo and wash your mane to get rid of the smell, if any. 7) Coconut Oil And Lemon - A Deadly Yet Gentle Combo Lemon and Coconut oil when used in tandem will bestow the last ever bit of encounter with the flaky little thing with you. Whilst we ramble on and on about how to cure dandruff, Let me account for it is the least demanding of ways. Get both ingredients in separate bowls. Combine them well to whip up the mixture that dreams are made of. Do your chores for the next 20 minutes or so, or watch an episode of F.R.I.E.N.D.S maybe, wash your hair after the interval. Recommended articles Our Top 10 Picks Of The Miracle Remedy – Onion Oil For Hair RegrowthYour Perfect Partner For Fighting Dandruff – Best Anti-Dandruff ProductsLet’s Take an Oath to Ensure your Hair Growth Read the full article
#anti-dandruff#bestanti-dandruffproducts#curedandruff#haircare#homeremediesforhair#homeremediestocuredandruff#howtocuredandruff#naturalhaircare#naturalhairmask#naturalhomeremedies#naturalremediestocuredandruff#tipstocuredandruff
0 notes
Text
7 Proven Ways On How To Lighten Facial Hair Naturally

Hair although do protect you from a lot of stuff, are often termed “unwanted” anywhere but on the head. Especially women who are usually frowned upon for having body hair. So, to live up to those unfortunate society norms or maybe for their own satisfaction, we do things to either eliminate the hair or make them go unnoticed. For hair on arms and legs, some of us ladies prefer razors or waxing to get them from the roots. But when we talk about areas on our faces, we’re usually too concerned or even scared to put anything sharp or hot on them. Then what happens? We visit those high-end parlors that claim to make you look ravishing by rendering all of that facial hair invisible. As absurd does that sound, they can do it by using chemical-laden creams and other products on your precious face. So much for not putting anything harmful on the face, huh? And all of us let them go ahead with it, in the absence of other options! Imagine that! No more. Because we always have options. Have you ever asked yourself “how to lighten facial hair naturally?”. No? Its time you did that. And I’m here with a hoard of answers. Read on to know various ways that can enlighten you on how to lighten facial hair without the use of chemicals, or without applying hot elements on your skin, nor using any sharp object which can leave you with several cuts.
Tips To Lighten Facial Hair
The internet is flooded with little tinkerings you could do at home with some basic easy-to-find ingredients from your kitchen. So its time you got rid of your facial hair related pet peeve and came as the confident diva that you are, by learning how to get rid of facial hair readily and effectively. 1) Lemon All The Way There is no better and versatile ingredient for lightening purposes. Squeeze it, take out the juice, mix it up with an ingredient or two and you have whipped up a perfect product to lighten your facial hair. For instance, you can pair it up with squished up tomatoes, mix them up to make an even-ish paste, leave them on your face for like 15 minutes, and wash it up. You’d have to do it for a couple of weeks, once or twice a week, for favorable results. This one way in our guide on how to lighten facial hair not only does the job but also blesses with soft, beautiful skin. 2) Potatoes For The win You’ll remember this the next time you devour those french fries. Potatoes make dealing with the facial hair as easy as eating a plate of hash brown clean. Just slice one of ‘em, splash some water, and slide them lightly on your face. Wash your face afterward to get rid of potato residues. Doing it religiously for like 2 weeks can lead to you witnessing significant results, and that I hope answers your question on how to lighten facial hair, without much hassle. I mean, what could be easier. All you’ll need is a potato and a Knife! 3) Papaya, The Allrounder Who knew that along with like a thousand health benefits good ol’ papaya could do this too? Way to go papaya! which is the next element to make it to how to lighten facial hair guide. Just peel it off, measure half a cup of it, mash it in the form of pulp, pour some milk into the pulp. Mix ‘em together till you see the texture getting gooey, then apply it directly to your face. Leave it like that, and sip your coffee in the meantime. When the coffee is finished, take some water in your folded palms, slosh in on your face and wash it off to see amazing results. 4) Sugar, For Sweet Results We have all used those overpriced harsh scrubs on our faces and got burnt before we could figure out how to lighten facial hair, without torturing our skin, whether sensitive or not. But no more of that. You could make your own facial scrubs. All you need is some sugar and one more magical ingredient. Any guesses? LEMON! Again!! Take some sugar, mix it with 1/3rd amount of lemon juice along with some water, mix all of them together, until a non-dripping paste has taken shape. Apply it on your face, the tip is, though, to rub the paste in the same direction your hair growth. Wash it after a few minutes. 5) Salt --Not A Curry, still works As unusual as it is, it is in no way less effective! Whip up a scrub by taking a few pinches of salt, some turmeric, squeeze a lemon, and take some milk along with all of that. Combine them all along to form a scrub-ish texture. Rub and massage your face lightly using your hands. Do it for a couple of minutes before you wash it all together. The thing to remember here is to keep a tight reign over how much turmeric you add, as it can yellow out your skin tone. So don’t add too much of it. Salt acts as an excellent exfoliator on its own and when combined with all those elements it works wonders for your skin, answering all your prayers on how to lighten facial hair, and dramatically so! 6) Chickpeas-- Much loved for All the Good Reasons Now, this proves that chickpeas can be of more use than just for making that delectable hummus. When used with an ingredient or two more, it can lighten all those troublesome facial hair like they weren’t even there. Grind the chickpeas in a blender or food processor to make powdery-sh flour. To that floor, again add the amount of turmeric which won’t turn our skin yellow, combine both fry elements by adding some water to them. You can use cotton or a brush to get it on your face. Let it dry for, say, 115-20 minutes. Rinse it off gently with warm water. Also don’t scratch it. That was another way in answer to your how to lighten facial hair question. The fact is, the hair will stick on the mixture and will come off along with the mixture. 7) Radish, Last But Certainly Not The Least It really does not get easier than this. All you got to do is blend the fresh and washed radish. Obtain its juice by using a cloth. To do that take a clean cloth, pour the blended paste into it. Make a knot of the cloth and squeeze it to get out the extract. Take a bowl of cotton and dab the juice on the juice. Rinse it off after it has been on for a few minutes and dried up. Tadaa! Recommended articles: Homemade Papaya Face Pack For Glowing SkinBeautiful Uses & Benefits Of Rose Water7 Best Clay Face Masks For Oily Skin You Need This Summer Read the full article
#Homeremedies#homeremediesToLightenFacialHair#HowToLightenFacialHair#HowToLightenFacialHairNaturally#LightenFacialHair#LightenFacialHairathome#naturalhomeremedies#naturalskincare#NaturalSkincareguide#removefacialhair#removefacialhairathome#Removefacialhairnaturally
0 notes
Text
7 Best Yoga Poses for Beginners

Staying fit is no less than a challenge in modern times. An 8-9 hour sitting job that offers no physical activities has not only made the sapiens lazy and stressed but has most of us gaining weight and falling prey to all kinds of ailments. Those who realize it sooner than the others can be witnessed playing around with all sorts of ways to tackle the problems. Some of us get up at 5 in the morning for that much needed daily run. But those who cannot leave their beds early, opt for Gym later in the day. Some say an exercise routine that rigid can be harmful when left in between, which cannot be entirely dismissed. Hence, for relieving stress, gaining back your physical strengths, grant yourself peace and tranquility you’ve been looking for and rightfully deserve, and that too according to your own comfort, I have one word made up of four letters to suggest “Yoga”. Yoga or “Yog” as it is termed in Hindi, is an ancient form of exercise that revolves around a bunch of poses to help you gain every physical ability you could wish you. Traced back to ancient India, “Yog” has been well known and revered to eliminate several diseases like diabetes, asthma, etc. Though, I don’t deny starting doing Yoga can be a little confusing, even overwhelming. Deciding what do do, where to start, the time limit, etc. So I have put together a small list of Yoga poses for beginners, which can act as your guide, while you try to get your feet wet.
Yoga Poses For beginners
First attempt at yoga? Told your friends straight up that you’d meet them glowing the next time, but can’t seem to get anything right? Well, worry not, gather your mat, stretch yourselves because I’m going to tell you some do-at-home yoga poses for beginners, which can kick-start your health journey. 1) Tadasana (Tall As Your Favorite Mountain) While performing Tadasana, the aim is to make your pose as dignified as mountains. As it happens, usually this is the pose you will start doing your yoga with. You’ll see a great dip in your stress after you’re done with it, and a significant and visible improvement in your yoga, after a few days. It engages all the body parts, which makes it one of the best yoga poses for beginners. Like most of the standing asanas, it also commences with you standing straight, feet kept at a slight distance from each other. Lif up both of your arms, lock your fingers together while ensuring that your palm is facing up. Rollback your shoulders to have a straightening effect on the whole pose, breathing in and out all the while. 2) Vriksha Asana ( Tree-like And Kingly) One of the easiest yoga poses for beginners, the Vrikshaasan is the embodiment of impressive. The two qualities which are sort of pre-requisites for this pose are steadiness and unparalleled balance. Incidentally, it also focuses on improving that very balance. So to begin with, stand erect with your arms relaxed at your side. Now, slowly lift your right foot, plant it firmly at the starting of your left thigh. Remain balanced by focusing on elements ahead of you to keep yourself standing. Once you’re sure you won’t fall, lift up your arms and fold your hands together. Stand like that for some seconds, before leaving the pose. Now, don’t leave it all at once, rather, unclasp your knee first, then get your hands down, and stand straight like you were doing at the start. It makes your legs strong, gets rid of stress, and aids to concentrate better. 3) Bhujangaasan (Fliexible Like A Serpent) The pose gets its name from the cobra-like final position. It relinquishes a newfound strength to your back, arms profoundly help in getting your stomach in the right shape. Also, it has been recorded to cure asthma in some cases along with helping your blood circulation. This one, acclaimed to be one of the most beneficial yoga poses for beginners, starts with you lying straight on your stomach. Then steadily, start lifting your head, chest, and stomach from the ground up with support from your hands. Try to stretch to the extent of your comfort, even better if you are able to keep your elbows straight. Leave the pose, one body part at a time, keeping a check on your breathing. 4) Kursiaasan (Steady Like A Chair) As it can be deduced from the name of one of the most concentration-demanding yoga poses for beginners, it gets you in the position of a chair. Another name for the asana is utkatasana which translates to utmost intensity. For the pose, you’d have to summon all your resolve to stay in the role. Another standing pose, so that is what you do, along with planting your feet firmly into the ground. Spread both of your arms, parallel and in front of you. Bend the lower part of your body down. Keep bending until you are capable of sitting on the ground before you ease up. Naturally, it makes your leg, back, and spine stronger as they are the parts that get the most exercise, along with toning your thighs. 5) Adho Mukah Svanasan One of the most famous yoga poses for beginners, it positions the doer like a dog who is facing downwards. Again, we start by lying on your stomach on the flat ground. Keep both hands on the side of your face and slowly with the help of your hands and feet, lift yourself up, forming a four-legged table. Stretch yourself further, breathing out, widen the blades of your shoulder, take the form of an inverted alphabet “v”. Stay like that for a while, then leave the pose part-by-part. First by getting back to the table pose and then relaxing on the ground. It makes all the involved organs like arms, feet, legs stronger, improves the circulation of blood to the brain. Reduces headaches, stress and thus helps you in getting a deeper, uninterrupted sleep. 6) Virabhadrasana (Like A Warrior) This pose is perfect for the start of your morning yoga sesh. It stretches all the parts of your body, aiding to warm it all up. The most integral tip here is to get the alignment spot-on which can be difficult to do, especially for the beginners. For directions, stand firmly with your legs a little apart, then just shift your right foot outwards and the left one inwards, such that right’s heel should be aligned with the center of the left. Lift your both arms, with palms faced inwards, keeping them parallel with the ground you stand on. Then you arch your right knee, breathe out, then sprawl your arms while you looking to your right side. If you can sprawl your arms a little more, hold the position while breathing in and out. It is very advantageous for those who keep sitting for the whole day. Especially useful if you are obsessed with getting in shape and having toned arms, legs, and shoulders. Not to mention the peace of mind you experience after doing it. 7) Shavasana The Yogasana lookbook will be incomplete without the mention of this asana for you all. It is one of the simplest yet most straightforward ones. You might think, all you have to do is to lie down, but that is only partially true. To start the pose, lie down on your back. Keep your feet straight and your palms turned upwards. Take it like meditation but lying down. Now all you got to do is calm yourself down. Feel your pressures and tensions flying away from you. Additionally, you could think of a happy place or think of a happy memory. Calm down your ragged breathing after an intensive but much-beneficial yoga sesh. So naturally, it leaves you feeling happy, energized, and relaxed to enjoy the rest of your day. Recommended articles: Why Pulse Oximeter Is Necessary To Keep At Home?Gender-Specific Healthcare | Why Women’s Health Is Different Than Men’s?How To Increase Stamina Naturally With The 5 Best Ways & Foods8 Proven Health Benefits Of Green Tea Read the full article
#athomeexercise#exerciseathome#health#healthybody#healthymind#wellness#yoga#yogaathome#yogaexercises#yogaforhealth#yogaforweightloss#yogaposesforbeginners#yogsposes
0 notes
Text
7 Best Hair Straightener In India

We all are totally and undoubtedly obsessed with makeovers and Why not? I mean, After every while, we all tend to get bored with our unchanging and non-fussy looks. Don't we all love a little spice to the recipe of our lives? Getting a new look is like adding that not-so-little pinch of spice. There are a bunch of variants to choose from when it comes down to styling your hair. You could cut them short, the pixie cut is the hottest trend these days or you could add a dash of red to your mane, or you could go all out and blond it up!! But if it is all too OTT for you, you could keep it subtle yet stylish by straightening them. Good ol' straightening never goes out of fashion and could transform your countenance in no time. All you need is to get yourself the straightener to help you out with the process. It could prove out to be a daunting task to choose the best hair straightener as you don't want to use just anything on your hair. Worry not, I got you. But before we go on to choosing the best hair straightener to tame your mane, Let me share some secrets for a good straightening Sesh. Revealing Some Tried And Tested Do's To Straighten Like A Pro!! There is this thing about tips, the more of those you get, the better it is. So I'll tell you some of my favorites tricks which have made a world of difference for me and around them, you could plan your straightening sesh. 1) Ditch starting from the top It does not apply here. If you'd like your hair tangle-less, I suggest you start from the back of your head, partitioning your locks into small sections, eventually reaching the top. 2) Pick Your Weapon What I want to say is decide which straightener you'd think will do the bidding for you. The best hair straightener here can be ascertained according to your hair length. Thinner the hair texture, thinner has to be your straightening tool. 3) Swear By The Protectant Hair protectants can literally be lifesavers. It is never a good idea to keep your precious Lucious personality defining locks in a direct way of sweltering heat. Behold, hair protectants!! Out to save your hair. 4) Hair Spray All The Way!!!! I mean it. It is no rule to only apply the said spray after you're done with your handy work. In Fact, if you do spray it on, before beginning, it is likely to help you keep your locks like that for a long while. 5) Look After Your Hair I've kept the best for the last. It is the #1 textbook rule. If you want each lock to come out lustrously silky once you straighten them out, start a regime to keep them in good shape. Don't forget to oil, wash, and condition them, apply serum, mask, or whatever it takes. Because as they say "we're worth it".
Best Hair Straighteners In India
In our country, we've got different brands, trying to cash-in the much-loved hair makeover. I've enlisted the ones which I think would work for everyone whether you have curly, wavy, or frizzy hair. Go ahead, give 'em a try!! 1) Philips HP8302 Essential Selfie Straightener
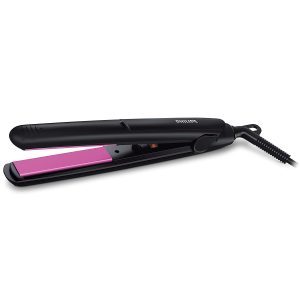
Image: Amazon Philips is not an unheard name when you're on a look out for hair products. How could it not have one of its products down for the best hair straightener position? The super elegant straightener by them definitely looks worthy of the title. The sleek black body and pink ceramic plates aimed at minimizing any sort of harm to your hair seem to seal the deal for me. Neither does it take forever to get heated. Just about a minute and it is ready to give you that salon-like makeover, without getting stuck in between accredited to the plates, and/or breaking the hair in anyway. 2) Nova NHS 860 Temperature Control Professional Hair Straightener
Image: Amazon The name has got " professional" in it and I am not surprised to confirm that it does live up to its name. The genius by Nova is equally well balanced between the skill of getting you "straight as a line" hair and the ease of handling. As it has the controls like temperature, on/off buttons on the handle itself. Also to save you from any blunders, it has got this feature where it is triggered off when it encounters a certain heat-level reached. A perfect example of modern makeover tools and a strong contender for the best hair straightener title. 3) Havells HS4101 Ceramic Plates Fast Heat up Hair Straightener
Image: Amazon First thing first, the device heats up in less than a minute, which is commendable, keeping the others in mind too. It has longer plates than the others too. Meaning? More hair covered in less time. Claimed to be the best hair straightener, it has got an indicator of whether the device is up and ready to work or not. An Apt device to curl your hair or set them in beachy waves around your shoulders. One device, so many uses! Splendid really! 4) VEGA Adore Hair Straightener (VHSH-18)
Image: Amazon Making an entrance to the list to be the best hair straightener, with a 1.8m wire is Vega's hair styling product. With all the components like coating to facilitate easy operation which is harmless and even hair-nourishing, quick heating up technology, and the highlight of being able to lock-up the device making it extremely portable. It is right up there on the top with G.O.A.T. 5) Kemei KM-329 Professional Hair Straightener
Image: Amazon Bringing you the hair makeover that you desire at a few movements of your wrists, at a steal deal, if you make haste. Definitely the best hair straightener you can procure at this prize. It lacks nothing, right from that "glide-away" layered coating, the apparently supple wire, all the ease-ensuring indicators, and everything in between. It is in every way an ideal product. 6) Philips BHS386 Kera Shine Straightener
Image: Amazon Without a doubt, the most pricey device on our catalog trying to reach a decision about which is the best hair straightener for you. But trust me on this, it is worth every single penny that you shell out. I can't single out one thing that stands out for me, that is how impressive it is. From the cutting edge technology in action that makes sure equal amounts of heat is spread through all section of hair, a bunch of temperatures, set for the device after proper observations and styling plates with keratin on it. All of these make for a beautifully put together hair-styling tool, apt for everyone, be it a frequent hair-changer or a wannabe stylist. 7) SYSKA HS6810 Hair Straightener
Image: Amazon The very first thing to capture your senses is the bright pink color it comes in. It comes bearing a gift, which is a 24 months guarantee on its head. Considering all that it has got to offer you, in less than 800 bucks on Amazon these days, then the feature that makes it switch off automatically eliminating any risk that can be caused by power fluctuations, the very powerful, effective plates and the incorporation of lightning-quick heating technology, all of that makes it a decent tool to possess. Recommended articles: Pump Up the Volume With These Blow Dry Hacks For All Hair TypesSay Goodbye To Frizz With These 10 Best Conditioner For Dry & Frizzy HairGive yourself a Beautiful Look with Hair Spa Treatment at Home Read the full article
#BestHairStraightener#curlyhairtipsandtricks#HairStraightener#hairtipsandtricks#haircare#Howtostraightenhair#Howtostraightenyourhair#straighthair#straighthairtips#tipsforHairStraightener
0 notes