
Don't wanna be here? Send us removal request.
Statistics
We looked inside some of the posts by charlesmwa and here's what we found interesting.
Average Info
Notes Per Post
11
Likes Per Post
11
Reblog Per Post
0
Reply Per Post
0
Time Between Posts
6 days
Number of Posts By Type
Text
17
Last Seen Tumblr Blogs


Fun Fact
Tumblr is used by 21% of adults online aged 18-29 years.
Text
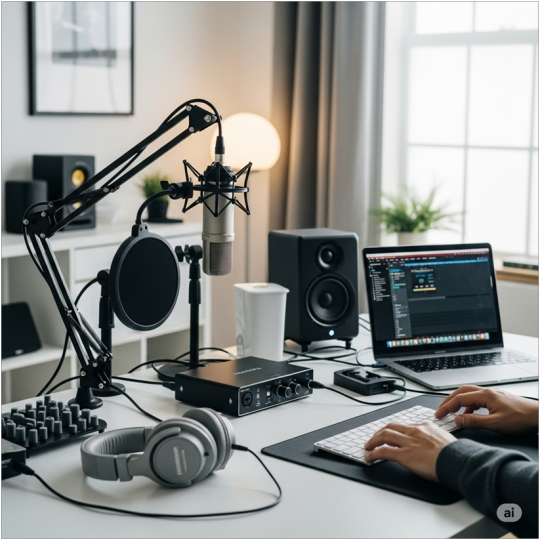
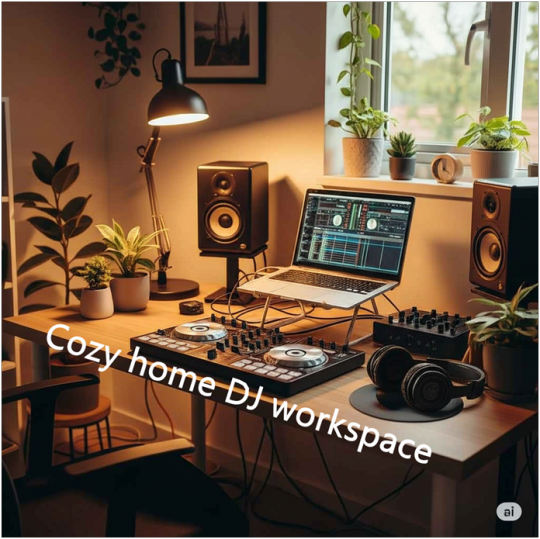
From Hobby to Hustle: Audio Gear That Helps You Go Pro
There’s a turning point in every creative journey when casual sessions start feeling serious—when late-night jam sessions evolve into consistent output, and what once was a passion project begins to carry real potential. That shift from hobby to hustle isn’t about chasing perfection; it’s about showing up, refining your workflow, and treating every session like it counts. The difference lies in mindset, discipline, and the willingness to build momentum, one intentional move at a time.
If you’re an aspiring musician, DJ & ready to take that next step, this guide will walk you through the gear that can help make it happen.Every piece of gear you bring in either helps you move forward or slows you down. As you start taking your sessions more seriously, it makes sense to get tools that match that energy. The good news? You don’t need a fancy studio to sound professional. A solid audio interface, decent monitors, and clean gain can take you a long way. It’s really about making choices that support your process—not overcomplicating it. Just like the hustle itself, it’s about progress, not perfection.

Interfaces: Where It All Begins
The audio interface is the intelligence of your operation. It takes analog signals—such as your voice or instrument—into digital audio your computer can process, and it returns playback audio back through your monitors or headphones.
When you begin, prioritize clean capture of the audio, minimal latency (so you don't have any delay), and quieting the preamps. A direct interface with a single input or two is sufficient for solo artists. As you build up—adding more instruments or mics—you can seek out one with multiple channels and improved output control.
Direct monitoring interfaces (enabling you to hear yourself in real-time) also reduce audio lag and ensure performance remains crisp. Spending on one that meets performance but minimizes complexity saves your money in the long run, particularly for content creators handling both audio and video.
Microphones: Voice Matters
Microphones are your initial point of contact with your audience, and not all microphones are equal. It's not so much about price, but rather selecting the right kind for your location and application.
•Dynamic mics are best used in noisy rooms. They capture less background and can tolerate more volume.
•USB condenser mics are plug-and-play and excellent for recording detailed vocals or instruments.
•XLR condenser mics, when used with an interface, deliver pro-quality sound with greater depth and clarity.
How and where you position your mic makes a difference as well. Position it at mouth height, between 6–12 inches away, and off-center to one side. A pop filter or foam cover minimizes hard pops and breathing sounds, and a shock mount prevents desk bumps or vibrations from entering the mic.
Monitoring: Understanding What You Hear
Monitoring is what distinguishes guesswork from insight. Plugging into basic earbuds or laptop speakers may do the trick initially—but in editing or mixing, they can't be relied on for accuracy.
Studio headphones are made for flat response, i.e., they don't boost bass or treble. You hear things as they are, not as consumer headphones color them. Opt for closed-back models to keep audio from spilling into recordings.
Later, when you're mastering a room or working on something that has to sound great on speakers, putting studio monitors in also makes a difference. They give you a different, more spatial feel for your sound. Even a couple of small monitors will show you things your headphones didn't catch.
And don't slack off on good cables. Bad wiring will make things buzz or hiss. Balanced cables—such as XLR or TRS—skirt interference and keep everything sounding clean.
Sound Is Strategy: Room and Setup
The greatest mic won't keep you from a room that sounds terrible. Walls reflect sound, hard surfaces bounce high frequencies, and corners emphasize low-end rumble. That's why room treatment is an essential element of sounding pro.
You don't have to break out panels—experiment with DIY solutions like draping heavy curtains, putting down a rug, or nailing foam to the back of your mic. Even moving furniture to decouple echo will help.
Also consider where you're sitting. Steer clear of corners, go for symmetry, and have reflective surfaces such as windows or mirrors out of your line of sound. A solid desk, tidy arrangement, and cable management not only enhance sound but maintain your workflow streamlined.
Light and Sound, the Live Link
If streaming, recording video, or live performance is part of your creative journey, lighting is equally crucial to sound. The audience stays longer when visuals are appealing and prominent.
Experiment with soft LED panels for a pleasing, even glow. Adjustable tone desk lamps can contribute mood or cover shadows. Coordinate lighting brightness with the background to prevent blown-out highlights or dark spots.
Even small installations can be synchronized with sound. You can cue a spot for dramatic impact or fade lights as music swells. It doesn't take high-end equipment—just an ear for how your space sounds and how users engage with it.
Upgrader's Mindset: Smarten Up
Evolution from passion to side hustle takes a tactical strategy for acquiring gear. Rather than doing it all at once, build in phases:
1. Entry-level interface + USB mic setup
2. Add studio headphones and pop filter
3. Upgrade to XLR mic + basic room treatment
4. Add studio monitors and good cables
5. Add lighting or stream-specific equipment
Only upgrade when something really hinders your workflow. If your recordings are noisy, perhaps it's time to get a better interface. If your vocals sound flat, a new mic or space treatment could be the solution. Let your headaches guide your purchases—not trends.
Why Buying from Pro Audio Shops Still Matters
It’s tempting to find deals online, but there’s real long-term value in buying from experienced audio shops. You’ll get guidance on compatibility, recommendations that match your workflow, and avoid the trap of mismatched gear that looks good but doesn’t play well together.
For new makers especially, talking to someone who understands gear can prevent hours of messing around and let you focus more on creating and less on mending.
Building a Portable System
Creatives working away from their home base—pop-up gigs, location interviews, or roaming content shoots, say—need something portable.

Here's what you need in a travel-ready setup:
• Compact mic in shock-resistant case
• Bus-powered, light, audio interface
• Fold-up headphones with protective pouch
• Collapsible ring or light
• Cable wraps, USB hubs, and backup adapters
By making your setup modular, you can replace pieces depending on the gig without compromising once on quality.

Maintenance = Longevity
As your setup gets bigger, so should your maintenance routine. Dust covers, softcases, and cable organizers mean life and death for your equipment. Back up session files and firmware updates on a regular basis to save against mid-recording shock.
Mark cables and ports, use the application of velcro strips to avoid tangling, and make a mini checklist for pre-stream or pre-gig setup. These little rituals eliminate stress and provide your gear with the best possibility of performing at its optimal levels.
Your Setup is a Tool, Not the Goal: Final Thoughts
Ultimately, gear is there to make the work easier—not control it. Streaming, mixing, podcasting, or producing—it's supposed to make your workflow easier, not an obstacle. Hobby to hustle isn't about perfection. It's about getting better, bit by bit—adding in what works for you, removing what doesn't, and always listening in always to what your sound is saying.
With intention, patience, and smart upgrades, you’re not just chasing the pro sound—you’re building it.
#music#homestudio#audiogear#musicianlife#sounddesign#gearsetup#streamingsetup#techsetup#djlifestyle#audiophilelife#recordinglife#creatortools#budgetstudio#streamgear#minimalsetup#modernstudio#technovibes#studioaesthetic#professional audio#dj gears#portable audio gears#hobby to hustle#pro audio shop
1 note
·
View note
Text
Budget Audio Gear That Still Sounds Premium in 2025
There is always that one point in a playlist session or nighttime editing session when sound quality turns messy or becomes flat-out magical. Whether you're recording a bedroom session, podcasting in a dorm room, or editing tracks for a Saturday night show—sound matters. Top-of-the-line, pro-studio gear isn't in everyone's budget, though. The good news? In 2025, it doesn't have to be.
Through mind-bending technology advances, some of the best-sounding equipment around is now firmly in the bargain bin. Manufacturers are bridging the gap between sound and cost and bringing some genuine premium-sounding, premium-feeling equipment at not-so-premium prices. The catch is to know where and what to search.
The following is a roundup of sound equipment that delivers amazing quality without forcing you to break the bank—from audio interfaces and mics to speakers and headphones.
Clean, capable, and creative—today’s budget audio gear blends into any modern workspace without compromise.
Clean, capable, and creative—today’s budget audio gear blends into any modern workspace without compromise.
1. Headphones That Won’t Let You Down
Excellent, affordable headphones are rarer than you think. In the flood of new models boasting “studio-quality sound,” it’s easy to fall for products that focus more on volume and appearance than actual audio clarity.
Classic-style wired headphones with a neutral profile and solid midrange presence are still strong choices in 2025. They're praised for their clean, uncolored sound—particularly on vocals and mids—and a durable design that suits casual listening, editing, or light mixing. Lightweight and no-nonsense, they’re the reliable choice for those who value accuracy.
For wireless fans, modern Bluetooth headphones now come equipped with features like adaptive noise cancellation and surprisingly well-tuned drivers. While they may not be professional-level, they're more than enough for everyday use and avoid that dreaded "cheap audio" experience.
2. Mics for Content, Not Just Comments
Regardless of your platform—streaming, podcasting, content creation, or virtual meetings—the right microphone instantly boosts your voice quality.
Some budget microphones offer both direct USB connectivity and traditional studio input options, an uncommon feature at low cost. They often do a great job of rejecting background noise and producing a warm, intimate vocal sound—perfect for shared or non-treated spaces.
Others lean into aesthetics, offering RGB accents and sleek designs, while still delivering crisp, clean voice capture. These are ideal for creators who want their gear to look as good as it sounds.
From recording sessions to spontaneous streams, budget audio gear now fits right into real-life creative spaces.
A solid mic boom arm and pop filter elevate budget microphones dramatically. Proper mic positioning and reduced vibrations can turn rough recordings into polished audio.

From recording sessions to spontaneous streams, budget audio gear now fits right into real-life creative spaces.
3. Future-Proof Portable Speakers
Portable speakers used to be all flash and no sound. That’s changed. Compact, rugged speakers today can deliver a rich, loud, and surprisingly full audio experience—perfect for casual listening at outdoor hangouts, small meetups, or private downtime. Despite their small size, they manage an impressive low-end presence and vocal clarity.
Larger models go even further, creating a wider soundstage and deeper, more balanced tones. They're ideal for those who want quality sound at home without investing in a full audio system. No, they won't replace studio monitors—but they are miles ahead of built-in laptop or phone speakers.
4. Audio Interfaces That Don’t Feel Budget
Audio interfaces are essential for connecting your mic or instruments to a computer. And while many high-end ones come with premium price tags, some compact models now offer clean, reliable signal transmission and solid preamps—without unnecessary complexity.
Basic models are great for solo producers, vocalists, or podcasters. They’re easy to use and deliver dependable sound quality with minimal fuss.
More refined options come with extra features like improved latency control and sleeker designs. These are perfect for digital audio workstation (DAW) users or multi-track layering projects.
Buying from a knowledgeable audio retailer can help avoid knockoffs and ensure your gear works with your setup.
5. Accessories That Complete the Installation
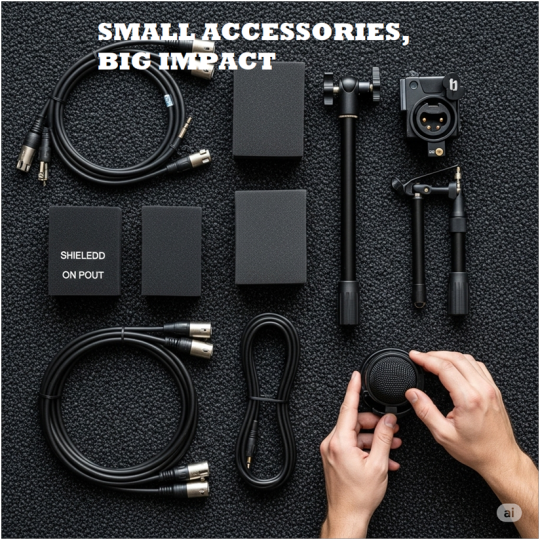
It’s the details that elevate your sound—accessories like isolation pads, cables, and mounts add polish to your performance.
It’s the details that elevate your sound—accessories like isolation pads, cables, and mounts add polish to your performance.
The headline gear is just the beginning. It’s the supporting accessories—cables, stands, mounts, and pads—that can make or break a setup.
•Isolation pads placed beneath speakers reduce vibrations and improve sound clarity.
•Shielded cables prevent interference, essential in electronics-heavy spaces.
•Sturdy mic stands and arms provide stability and make long recording sessions much more ergonomic.
Budget-friendly accessory makers now offer surprisingly high quality, making it affordable to build a professional-feeling setup at home.
Smart Shopping Tips for Budget Audio Gear
In a crowded market, wise choices are key. Keep the following in mind:
•Compatibility first: Make sure your gear works with your devices and software, especially for USB gear.
•See it in action: Look for videos of people using the gear in real-world setups. It’s more telling than the spec sheet.
•Skip the gimmicks: Ignore flashy extras that don’t actually improve sound.
•Trust the proven: Stick to established brands or newcomers with good reputations and reviews.
•Shop specialists: Music gear stores often provide better support and protect you from counterfeit products.
Final Thoughts
Budget sound gear in 2025 doesn’t mean cutting corners—it means making smarter choices. With thoughtful options now widely available, anyone can craft a system that delivers rich, immersive sound without financial strain.
It comes down to understanding your needs, skipping the hype, and investing in tools that align with your workflow and style. Whether it’s discovering new music, recording ideas, or just zoning out to an old favorite, sound still has the power to connect—and elevate—the experience.
#music#homestudio#podcast#audiogear#musicianlife#contentcreator#sounddesign#gearsetup#streamingsetup#techsetup#bedroomproducer#djlifestyle#producergear#homeproducer#audiophilelife#podcaststudio#recordinglife#creatortools#budgetstudio#streamgear#setupinspo#minimalsetup#workspacegoals#modernstudio#creativevibes#technovibes#studioaesthetic#dj#professional audio#audio gear
1 note
·
View note
Text
What Happens When You Overload Your PA System?
Imagine being at a live concert or a college festival. The crowd’s buzzing, the lights are on point, and the performer is ready to rock the stage. But just as the beat drops—crack, pop, silence. The sound cuts out. Awkward stares follow, and the moment is gone. The culprit? An overloaded PA system.
Overloading a PA (Public Address) system might seem like a small technical mishap, but it can have serious consequences—damaging equipment, affecting sound quality, and even disrupting events. Whether you're a budding DJ, a sound tech for college gigs, or just setting up audio for a local event, understanding what happens when you push your PA system beyond its limit is crucial.
Let’s break it down and understand why overloading your PA system is something you definitely want to avoid.

First, What Does “Overloading” Even Mean?
At its core, overloading a PA system means you're sending more power or signal through the components (like amplifiers, mixers, or speakers) than they’re designed to handle.
Think of it like filling a water balloon. A little more water makes it bigger and better—but too much, and it bursts. Same concept applies here.
This can happen in several ways:
Pushing the volume too high.
Running mismatched gear (e.g., pairing a low-watt speaker with a high-powered amplifier).
Overdriving your input signal without proper gain staging.
Ignoring system limitations and running everything at max for extended periods.
So What Actually Happens When You Overload?
Let’s go step by step through the chaos that can unfold:
1. Distorted Sound
The first and most obvious symptom? Cracked, fuzzy, or muddy sound. Overloading causes the signal to clip, which is basically when the audio waveform is chopped because it's too powerful. Clipping makes everything sound harsh—and it’s really unpleasant for listeners.
Even worse, if you’re dealing with vocals or instruments, that distortion can mess with the clarity, making lyrics unintelligible or instruments indistinguishable.
2. Speaker Damage
Here’s the real danger zone. Speakers aren’t indestructible. When pushed beyond their wattage limit, the internal components—like the voice coils—can heat up and eventually fail.
Sometimes, you’ll hear it immediately: a pop, hiss, or crackling noise. Other times, the speaker just quietly stops working, and you’re left wondering why the audio sounds “off.” Once the damage is done, repairs can be expensive, and in many cases, you’ll need a full replacement.
3. Amplifier Stress
It’s not just the speakers. Overloading affects the amplifier too. Amplifiers are designed to operate within a certain range. When they’re forced to output more than they can handle, they heat up fast.
This can trigger built-in safety shutdowns, or in the worst case, burn out internal components. Prolonged overheating also shortens their lifespan significantly.
4. Mixer Mayhem
Sometimes people crank up the mixer’s master output, thinking it’ll boost the sound, without realizing the signal is already too hot. This leads to more clipping and overdrives the next gear in the chain.
Not only does it degrade audio quality, but it also creates inconsistency across different channels, making it a nightmare to control live.
5. Audience Experience Takes a Hit
Even if you're not into the tech side of things, one thing’s for sure—people notice when the sound is bad. A distorted mix or sudden silence pulls everyone out of the moment. Whether it's a house party or a campus open mic night, audio issues can ruin the vibe instantly.
Inconsistent volume, ear-piercing feedback, or gear failure can also reflect poorly on the organizers or performers.

How to Prevent PA Overload
Now that we know what can go wrong, here’s how to avoid it:
Understand Your Gear's Limits
Always check the power ratings on your speakers and amps. Make sure they’re properly matched and that no component is underpowered or overpowered in the chain.
Use Proper Gain Staging
Don’t just crank up every knob. Instead, set input levels carefully from source to mixer to amp. This ensures a clean, strong signal without distortion.
Watch Your Levels
Many mixers and amps have LED meters or limiters. Keep an eye on those indicators—if they’re constantly peaking in the red, you're asking for trouble.
Take Breaks During Long Events
Heat is a common enemy in overloaded systems. During long performances or DJ sets, consider giving your system short breaks to cool down.
Consider External Processing
Using a compressor or limiter can help control sudden spikes in volume and protect your equipment from unexpected overloads.
Final Thoughts
Overloading your PA system isn’t just a rookie mistake—it can have real consequences. Beyond the immediate mess of bad sound, you risk permanent damage to expensive equipment and the reputation of your performance or event.
That’s why it’s always a good idea to invest in quality gear and get your equipment from professional audio shops. Not only do they guide you in picking the right components for your needs, but you’ll also have access to helpful support if anything goes wrong.Audio is a huge part of the experience, whether it’s a concert, a speech, or a party. So, treat your gear with respect, understand its limits, and don’t let a blown speaker be the thing people remember most. Because when the sound’s right, everything hits better.
1 note
·
View note
Text
5 Mistakes to Avoid When Buying DJ Equipment Online
Buying DJ equipment on the web, in comparison, may look like you would simply click a several fancy gadgets into your cart and check out— but everyone who’s done it before also knows that it is rarely as easy as that. Either you are just starting to mix tracks or upgrading your gear, online shopping ease can be transformed fast enough if you do not take warnings.
The plethora of instruments—controllers, mixers, speakers, software—is at your disposal, all the same, selecting the best setup is not as easy as going through reviews or checking the hottest deals. You may face a lot of problems in future due to seemingly unimportant factors such as using incompatibilities or mismatched components. When you are buying from a screen rather than from a sound booth it is also e.difficult to focus on important details.
The following are five common mistakes to avoid when buying DJ equipment on the internet –and how you can be wiser and more confident in your judgments.
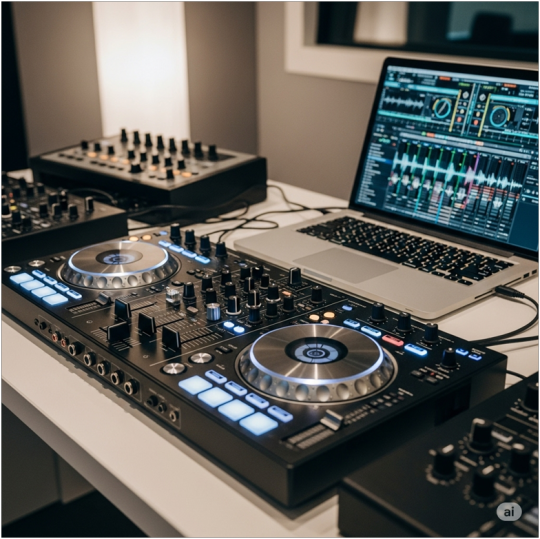
1. Not Knowing Your Setup Needs

Cleanly maps out gear progression from all-in-one controllers to pro-grade modular rigs.
Just because a DJ controller is more sophisticated doesn't necessarily mean you should go for it, especially when you might just need to use what the pros are using. However, as far as your laptop can’t run the software or you’re playing casual sets at house parties then that top-tier controller won’t be of much importance— and will be less useful to you than you think.
Before you buy anything, decide why you need it.
Do you play live? Make music at home? Just practise your skills?
Knowing the purpose of what you are looking for caters for all that is necessary and not necessarily just popular.
To beginners, it’s generally better advised to start with the all-in-one controller that embodies a pult, jog wheels and some basic effects. You do not have to go get the full gear straight away you can as well build your proficiency stage wise upgrade.
2. Ignoring Compatibility and Connectivity
It might seem an insignificant issue, however it is one of the most important: not all DJ equipment function properly with every laptop; software or operating system. You could stop your progress at a very early stage if you buy a controller which is incompatible with your dj software (e.g. Serato, Traktor or Rekordbox) – and returning gear due to technical mismatch is not an easy task nor cheap.
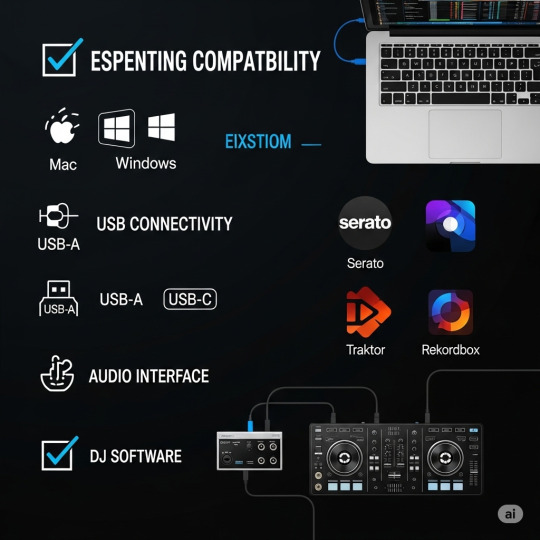
Don’t get caught in the mix—double-check these essential compatibility specs before buying any DJ gear online.
Always double-check:
• The operating system (Mac or Windows) your gear supports
• Required ports (USB-C, USB-A, audio outputs)
• Audio interface requirements (built-in or external)
In addition, you have to be sure that your computer is up to the minimum specs for using the software without any lags or crashes. It is not pleasant at all to prepare everything for a photoshoot only to see your systems freeze in the middle of a transition.
3. Underestimating the Significance of Audio Quality
It's tempting to become engrossed in the visual aspect of DJ equipment—RGB pads, smooth touchscreens, and large jog wheels—but if your audio output isn't sharp, your set won't impact as much as it should. A good audio interface, solid speakers, and good headphones are every bit as significant as your mixer or controller.
When buying online, search for gear with good reviews regarding sound quality, particularly frequency response and signal-to-noise ratio. Also, be cautious of equipment that is "too good to be true" at a price that's low. Many affordable speakers and headphones sacrifice immensely on clarity and longevity.
This is an area where purchasing from a quality audio store can actually pay dividends—they tend to offer superior quality control and assistance, particularly when dealing with sound-related equipment.

Looks cool in the ad... until it’s tangled in your living room. Shop smart, not shiny.
4. Getting Duped by Flashy Advertising (and Forgetting to Research)
It's one thing to be smitten with a product video. It's another to spend hundreds of dollars on it. The DJ equipment market is brimming with well-made ads, but production value does not necessarily translate to quality performance.
Most shoppers make impulse purchases over brand buzz, influencer endorsement, or flash sales without fact-checking. Real user feedback, comparison videos, and professional analysis are critical in getting an accurate view of how equipment handles across different conditions.
Sites such as DJ TechTools, Reddit's r/DJs, and YouTube critiques from live DJs give you raw opinions that you're not going to find on shiny product pages. Take a bit more time to read and view before buying—and be sure to review the return policy just in case.
5. Overlooking Workflow and Hands-On Feel
It's simple to get swept up in specs and spec sheet features, but the way gear feels under your fingertips is equally as crucial as what it can accomplish. DJing is a hands-on craft—how you transition between knobs, faders, jog wheels, and effects is more crucial than you might imagine. Some systems may be technically brilliant but feel clumsy or unintuitive in use.
When shopping online, look for in-depth product demos or tutorials that reveal how the gear is set up and performed on actual sets. A comfortable setup invites creativity and flow, while an awkward setup—one that may be powerful, but awkward nonetheless—can throw off your rhythm and restrict your expression.
Rather than look solely at features, try to picture the actual usage. Would that controller's design work in the middle of a performance? Can you naturally locate your filters, hot cues, or EQs without questioning?
Final Thoughts
Purchasing DJ gear online needn't be a risk—but it does take some consideration. Having an idea of what you require, researching your purchases, and being aware of technical details can avoid expensive mistakes and annoying setups.
And while online deals can be tempting, there’s real peace of mind in purchasing from professional audio retailers who know their gear and can help if something goes wrong. Sometimes, that kind of support and quality assurance makes all the difference—especially when you’re just starting out or upgrading with purpose.
Whether it's your first home setup or upgrading for live shows, investing the time to do it right will pay dividends in smoother performances, improved sound, and a heck of a lot more enjoyable DJ experience
1 note
·
View note
Text
Starting Out as a DJ: Must-Have Equipment for Your First Set
Okay, let's get real. Your first stint in the DJ booth is equal parts excitement and pure anticipation. You've spent dozens of hours honing your craft, your playlists are fire, and your transitions are smoother than a freshly poured macchiato. Then the invitation to play your first gig rolls in and all of a sudden you're like.
Do I have the appropriate equipment? Do I need turntables? Am I going to screw this up?
Take a deep breath. You don't require a giant club setup or a suitcase full of high-end equipment to begin. Whether it's a party at school or in your friend's yard, you just need the essentials. Let's cut down on what you actually need so you can make it through your first set without losing your mind.
Your DJ Controller: The Beat of Your Setup
Consider your DJ controller to be your home turf. It's really the simplest way to begin mixing without having to leap headfirst into vinyl turntables and separate mixers. A quality controller incorporates jog wheels (those round discs you manipulate to move and scratch records), EQ knobs, faders, cue buttons, and occasionally even performance pads for sampling or loops.
Most of them plug directly into your laptop using a USB cable and work well with DJ software. Vinyl setups look amazing, no doubt, but they’re heavy, expensive, and not necessary for your first few gigs. Controllers are compact, easy to carry, and beginner-friendly. Some even come with a built-in audio interface, which means fewer things to connect and less time spent on setup.
A Laptop That Won’t Freeze Up
Your controller is just as crucial as your laptop. It's the intelligence behind your setup, operating your DJ software and controlling all your tunes. If it freezes during your set, so are you. Game over.
You don’t need something super fancy, but try to get a machine with at least 8 gigabytes of RAM, a solid-state drive (for faster performance), and good battery life. Even though you’ll likely be plugged in during the gig, it’s always better to be safe. DJ programs like Serato, Rekordbox, or VirtualDJ can be demanding, especially when loading lots of tracks or analyzing songs on the fly.
Keep it clean and minimal. Shut down unnecessary apps ahead of your set, and never update software or drivers prior to a show unless you've rehearsed it weeks beforehand.
Headphones That Get the Job Done
Let's not be ignorant. Don't use your standard phone earbuds at a gig. You require proper headphones that block the sound so you can concentrate on the song you are cueing up and nail your timing.
Find closed-back, over-ear headphones. These muffle the crowd noise and the speakers so you can actually hear what you're doing. Ensure they're also comfortable. If they begin to pinch or slide after twenty minutes, that'll exhaust you quickly.
And bring a quarter-inch adapter. Much of DJ equipment won't plug into your phone's tiny headphone jacks.
Speakers or Studio Monitors for Practice
You likely won't require speakers to your first show. Most clubs, even tiny ones, will already have a sound system in place. But for home practice, quality speakers or studio monitors can make an incredible difference.
Studio monitors offer you a truer sound than standard speakers. They don't pump up the bass or compensate the highs. They simply play back the track as it stands, which is perfect for listening to where your mix could sound muddly and where things aren't transitioning quite correctly.
You don't need massive ones. A small but consistent pair can assist you in developing quickly.
Cables, Adapters, and Other Lifesavers
This section is usually forgotten. You might have incredible equipment, but without the proper cables, you're out of luck.

This is what you should bring with you at all times:
A controller USB cable.
RCA or XLR to hook up to the sound system.
A quarter-inch headphone adapter.
Your power cords, with backups if available.
A small power strip or extension cord, just in case the outlet is a distance away.
Smoosh all of that into a small bag and only bring it out when you're preparing for a gig. Make it your emergency DJ bag.
Optional: A Separate Mixer
If you aren't using a controller, or you're beginning to play around with more advanced configurations, then you'll need a separate mixer. That's the equipment which allows you to mix songs, manage EQ, and send audio to speakers and headphones.
But if you're just beginning, a controller will most likely do it all for you. Mixers come in handy later on when you need more control or want to head towards club-style setups.
Fast Forward Tips You'll Be Thankful to Have Known
Don't overcomplicate your equipment. You won't need professional equipment to play an amazing set. Your transitions and music are more important than brand names.
Organize your music prior to the show. Set it up by genre, energy level, or BPM so you don't fumble during your set.
Rehearse transitions. Don't just queue up your favorite songs. Practice how they lead into one another.
Record your rehearsals. It may seem strange at first, but hearing yourself back will be a big teacher. You'll pick up on things you didn't catch when you were playing live.
Where Should You Buy Your Equipment?
You can get gear everywhere on the internet, sure. But purchasing from professional audio shops can be a good idea. They test their equipment, usually provide better recommendations, and are there for you if something crashes and burns. It's just better when you're still getting the hang of it.
Final Thoughts
Beginning as a DJ is not all about equipment. It's about preparation, practice, and passion for music. You don't require an ideal setup or to be impeccable initially. You only need to be confident enough to arrive and hit the play button.
Keep it simple. Find yourself a good controller, a good laptop, some decent headphones, and a few monitors to practice with. Throw your cables in your bag, get your playlist ready, and go do the thing.
All DJs begin somewhere. The experts had their own messy sets and learning experiences. What's important is that you keep practicing and learning every time you do.
Your first gig doesn't need to be perfect. It's only the beginning.
1 note
·
View note
Text
Top Pro Audio Gear Every American DJ Needs This Summer
There’s something electric about summer—the festivals, rooftop parties, beachside gigs, and late-night warehouse sets. For DJs across the U.S., it’s not just the time to perform; it’s the time to shine. And let’s be honest, the right gear can make all the difference between a forgettable set and an unforgettable experience.
Whether you're spinning in a Miami club or throwing down in the desert, having the right pro audio gear is a must. But with so many options out there, it can get a little overwhelming. That’s why we’re breaking down what every DJ should consider adding to their setup this summer. Think of this as your seasonal checklist, designed to help you stay ahead, sound amazing, and look like a total pro.

Reliable Speakers That Can Handle the Heat
Summer DJing often means unpredictable environments—outdoors, hot venues, sudden rain. So, the first thing to lock down? Your speakers. Look for portable speakers with solid output and clarity across the lows, mids, and highs. More importantly, make sure they're built to withstand a little weather and movement. Portability and power should go hand in hand. You don’t want to compromise on sound just because your gig is under the sun or away from a wall outlet.
A Mixer That Offers More Than Just Volume Control
Let’s talk about mixers. They’re the command center of your performance. In summer gigs where crowd energy fluctuates fast, having a responsive mixer with smooth EQ controls, customizable filters, and dual mic inputs can save your set. Consider mixers that allow easy transitions, effects integration, and can sync effortlessly with your playback devices. You want something that feels intuitive under your fingers, especially in the heat of the moment.
DJ Controllers That Are Built for Versatility
If you’re performing at different types of venues—from backyards to big stages—you’ll need a DJ controller that adapts with you. Look for ones that are lightweight but not cheaply built, and ones that support both standalone use and software control. USB compatibility, onboard displays, touch-sensitive jog wheels, and customizable pads are a huge plus. In short, flexibility is key. A good controller helps you stay confident no matter the vibe of the venue.
High-Quality Headphones for Crisp Cueing
When you're cueing your next track, every detail matters. You need headphones that offer isolation, clarity, and comfort. Over-ear, closed-back headphones are ideal, especially in noisy summer environments. Durability is also critical—headphones get tossed into bags, wrapped in cords, and worn for hours on end. Prioritize models with swiveling earcups and adjustable bands so they fit your style of monitoring.

A Dependable Microphone for Crowd Engagement
Even if you’re not the talkative type, having a microphone on hand is always smart. Whether it’s for hyping up the crowd or making quick announcements, a clean, interference-free mic can add energy and professionalism to your set. Wireless models give you freedom to move, but make sure you test for signal reliability—especially outdoors, where interference can be tricky.
Lighting and Effects to Match Your Sound
This one’s a game-changer: lighting. Visuals are half the experience, and adding even a simple lighting setup can take your set from good to great. Consider compact LED lights, strobes, or fog machines that you can sync with your music. These can be especially impactful during sunset sets or late-night events, adding a professional edge to your vibe.
Sturdy Stands and Protective Cases
Summer gigs can be rough on your gear. That’s why investing in heavy-duty stands and padded cases is a no-brainer. Speaker stands should be height-adjustable and stable on uneven surfaces. DJ controller and mixer cases with foam interiors will keep your equipment safe from accidental drops or even just the occasional spilled drink. They may not be flashy, but they’re the unsung heroes of every setup.
Power Management Tools You Can Rely On
Nothing kills a party like a power outage. That’s why having proper surge protectors, power conditioners, and extension cords in your setup is essential. You might be playing on a beach, at a park, or in a venue with old wiring—plan ahead. Bring gear that distributes power safely and gives you peace of mind during those peak-hour drops.
Cables and Backups – Don’t Overlook the Basics
One of the most underrated parts of your gear is also the easiest to mess up: your cables. Always bring extras—power cables, RCA, XLR, USB, and whatever else your gear needs. Color-coding them can help you set up faster and troubleshoot on the fly. Summer humidity and outdoor dust can mess with connections, so having fresh spares is always smart.
Portable Recording Options for Your Set
Recording your set is a smart move. It’s not just about content creation it’s about improvement. A good portable recorder lets you capture your performance in high quality so you can review what worked, what didn’t, and build a portfolio of your sound. Many devices plug directly into your mixer or offer dual-channel recording for crowd and music capture.
Bonus Thought: Where You Buy Matters
While it's tempting to shop based on price alone, investing in gear from a professional audio shop offers peace of mind. You get access to knowledgeable staff, genuine warranties, proper testing, and the kind of customer support that’s worth every penny—especially when your next gig is just around the corner.
DJing in the summer is a unique experience. From packed festivals to impromptu block parties, every event is a chance to make your mark. And having the right gear—gear you trust—can make that happen. Take the time to build a setup that works for you, one piece at a time. Stay cool, stay prepared, and most importantly—keep the crowd dancing.
Because at the end of the day, it’s not just about playing music. It’s about creating moments. And the right pro audio setup is your ticket to doing just that.
#audio#audio gear#music#dj#professional audio#audio shop in brooklyn#brooklyn#dj gears#summer party#pro audio gears
2 notes
·
View notes
Text
Why Active vs. Passive Speakers Still Matters in 2025 – And Which One Sells Fast
It’s 2025, and yet one of the oldest audio debates is still alive and kicking: active vs. passive speakers. If you thought this conversation would’ve faded into the background by now, think again. Whether you're setting up a professional DJ booth, a live performance rig, or just trying to get your home studio dialed in, the difference between active and passive speakers still matters—a lot.
Understanding the difference isn’t just some outdated piece of technical trivia. It directly impacts your workflow, your sound quality, and yes, even your wallet. So, let’s break it down in the simplest way possible: what these speakers actually are, why the distinction is still important today, and which ones people are buying up the fastest.
Active vs. Passive Speakers – What’s the Difference?
If you're new to this, here's a quick definition:
Active speakers have built-in amplifiers. You just plug them into a power source and connect your audio signal—done.
Passive speakers need an external amplifier. The signal goes from your mixer or interface into the amp, and then into the speaker.
That’s it, technically. But what does this mean in practice?
Why the Difference Still Matters in 2025
Let’s be honest: the line between active and passive has blurred a bit in recent years. Tech has come a long way. Both types can deliver fantastic sound quality. Still, they each have their strengths and limitations, and those differences are more relevant now than ever—especially as more people take on audio projects from unconventional spaces.
1. Ease of Use
In 2025, convenience is king. Whether it's for content creators, mobile DJs, or small event organizers, people want gear that sets up fast and works immediately. That’s where active speakers dominate. You don’t need to worry about matching amps or dragging extra gear to your event. Plug in and go.
On the other hand, passive speakers give you more flexibility and customization. You can choose your own amplifier based on your preferences and the space you’re working in. This is ideal if you’re building a large, complex system or doing permanent installations where control is a top priority.
2. Portability
In terms of weight, passive speakers often win—at least on paper. Without built-in amps, they’re lighter and easier to carry. But you’ll also have to lug around a separate amp, which might cancel out the benefit. Active systems might be heavier individually, but they cut down the number of boxes you have to bring, which matters a lot when space or setup time is limited.
3. Sound Quality and Power Matching
One major advantage of active speakers is optimized power matching. Because the amp is built specifically for that speaker, it’s usually tuned for peak performance right out of the box. You don’t have to worry about blowing a speaker because you paired it with the wrong amp.
With passive systems, you have to know your gear. If you match your amp and speaker correctly, you can get amazing sound—and the flexibility to upgrade either component down the road. But if you get the math wrong, you could end up with poor performance or damaged equipment.
4. Cost Over Time
This one’s tricky. Passive speakers usually cost less up front, but don’t forget you’ll need an amplifier (or several). Active speakers have higher initial prices, but they save you from buying separate amps and often include useful features like EQ controls or wireless connectivity.
In the long run, it depends on your specific needs. If you’re constantly performing at different venues or doing mobile gigs, investing in active systems can save money on setup and maintenance. If you’re installing a system in a fixed space and want more control, passive might offer better long-term value.
Which Ones Are Selling Faster in 2025?
Active speakers are flying off the shelves—and it's easy to see why. People are drawn to simplicity. DJs, event planners, live streamers, and even fitness instructors are opting for compact systems they can carry, set up, and tear down quickly.
But that doesn’t mean passive speakers are outdated. In fact, a lot of audiophiles, touring engineers, and professional venues still prefer them. These buyers are looking for control, scalability, and the ability to swap components as needed.
The growing popularity of modular setups—where users mix and match components—has actually sparked a bit of a passive speaker comeback among certain pro users. So while active gear might dominate in numbers, passive systems still hold strong in specific niches.
A Balanced Look at Today’s Market
Here’s the real takeaway: the choice isn’t about which type is “better.” It’s about what works for you.
If you want a plug-and-play solution that’s ready to go right out of the box, active speakers are your best bet.
If you want custom control and expandability, and you’re comfortable doing a bit more homework, passive systems offer room to grow.

Another thing to remember? Quality makes a huge difference. Even with the right type of speaker for your needs, poorly designed gear can ruin your entire sound. That’s why it’s worth getting your equipment from a professional audio shop that understands the technology and can help you make the right choice based on your specific setup.
The active vs. passive speaker debate isn’t just surviving in 2025—it’s thriving. That’s because both options are evolving in their own ways. Active speakers are getting more intelligent, with built-in processing and wireless control. Passive systems are becoming more modular and adaptable to professional demands.
So, before jumping into your next gear purchase, take a moment to think about how you’ll actually use it. Are you playing weddings every weekend? Teaching dance classes? Building a studio? Setting up a theater? Your use case should drive your decision—not just trends or price tags.
At the end of the day, great sound isn’t about choosing sides. It’s about choosing what works best for your space, your goals, and your vibe. Whether active or passive, the right speakers will help your performance shine.
#audio#audio gear#music#dj#professional audio#audio shop in brooklyn#brooklyn#dj gears#active speakers#passive speaker
0 notes
Text
Interesting Facts About Subwoofers That Most Audio Techs Get Wrong
When we talk about deep, powerful sound—like the kind that makes movie explosions rumble in your chest or makes basslines in music hit just right—subwoofers are the heroes behind the scenes. They’re often seen as just “bass boxes,” but there’s a lot more going on inside these deceptively simple-looking pieces of gear. In fact, even experienced audio techs often misunderstand or overlook some pretty fascinating facts about how subwoofers actually work.
If you’re setting up a sound system—whether it’s for a home theater, a live concert, a DJ rig, or even just your own chill listening space—knowing the truth behind these myths can make a huge difference in the audio quality you experience.
So let’s unpack some of the most common misconceptions about subwoofers and uncover the real facts that even pros sometimes miss.

Subwoofers Don’t Just “Make Bass Louder”
One of the most common misunderstandings is that a subwoofer’s only job is to increase the volume of bass. While they do boost low-end frequencies, their real function is to reproduce low frequencies accurately—not just louder, but clearer and deeper.
The human ear can hear frequencies as low as 20 Hz, but most regular speakers can’t go that low with any clarity or power. Subwoofers are designed to handle these ultra-low tones with precision. Without one, you might not even realize what you’re missing. So, it’s not about being loud—it’s about being complete.
Placement Matters More Than You Think
A lot of audio techs assume they can just stick a subwoofer anywhere in a room and call it a day. In reality, placement plays a huge role in how your bass sounds. Unlike high and mid-range speakers, subwoofers interact with the room in complex ways due to the size and length of the sound waves they produce.
For example, putting a subwoofer in the corner might make it sound louder due to boundary reinforcement, but it can also lead to uneven frequency response and boomy, muddy bass. On the other hand, placing it in the center of the wall or experimenting with different positions using the “subwoofer crawl” method can help achieve more balanced, smoother bass.
Bigger Isn't Always Better
We tend to assume that the bigger the subwoofer, the better it performs. While it’s true that larger drivers can move more air (which often results in deeper bass), that doesn’t automatically mean better quality bass.
Smaller subwoofers, when designed well, can actually produce cleaner, tighter, and more responsive low-end. They can be ideal in smaller spaces where a massive subwoofer might overpower the room or cause distortion. It’s about matching the subwoofer to your space and system, not just chasing size.
Crossover Settings Are Often Misused
The crossover is the point where your main speakers hand off low-frequency responsibilities to the subwoofer. Many techs set this frequency without really understanding its impact. Too high, and the subwoofer starts reproducing sounds it wasn’t designed for, creating a muddy mix. Too low, and you leave a gap in the sound spectrum.
A general rule of thumb is to set the crossover about 10 Hz above the lower limit of your main speakers, but this isn’t a one-size-fits-all rule. Fine-tuning this setting through careful listening and calibration can significantly enhance clarity and cohesion in your audio setup.
You Might Need More Than One
This one surprises a lot of people. Using two subwoofers (or more) in a room can actually provide better, more even bass distribution than just one big sub. This is especially true in larger rooms or oddly shaped spaces where standing waves and phase cancellations create uneven bass response.
Multiple subs help smooth out these inconsistencies, making the bass sound fuller and more consistent no matter where you're sitting. This isn’t about shaking the walls—it's about creating a more immersive, accurate listening experience.
Low Frequencies Are Felt, Not Just Heard
Another fun fact: humans feel low frequencies more than they actually hear them. This is why subwoofers add such an emotional and physical layer to your audio experience. That “thump” in your chest during a movie explosion or bass drop? That’s not just volume—it’s the subwoofer doing its job by translating those frequencies into something your body can perceive.
Understanding this helps explain why simply turning up the volume doesn’t replicate what a good subwoofer can do. It’s a different kind of engagement with sound.
All Subwoofers Are Not Created Equal
Here’s where the details really matter. The quality of the internal components—like the voice coil, magnet structure, enclosure design, and even the amplifier—make a world of difference in subwoofer performance.
Some subwoofers are designed for accuracy, while others are tuned for loudness or impact. That’s why it’s important to understand your needs—are you going for cinematic rumble, musical precision, or live-performance punch? The right subwoofer, matched to the right setup, brings out the best in your audio.
And that’s also why it’s smart to purchase from a professional audio shop—these places typically carry well-tested products and often offer expert advice tailored to your needs, which helps avoid costly mistakes.

There’s Such a Thing as “Too Much Bass”
Believe it or not, more bass isn’t always better. Overpowering bass can mask midrange and treble frequencies, making music or dialogue sound muffled or unclear. In a live setting, it can even cause listener fatigue.
A well-balanced sound system allows all frequencies to breathe and be heard clearly. The best subwoofers know their role and play it well without stealing the show.
Subwoofers might seem like straightforward pieces of audio equipment—but as you’ve just seen, there’s a lot going on beneath the surface. Whether it’s getting the placement just right, setting crossovers correctly, or choosing the right size for your space, each detail adds up to create a richer, fuller sound experience.Understanding these facts can help you avoid common pitfalls and make smarter decisions when building your audio setup. Because at the end of the day, great sound isn’t just about being loud—it’s about being right.
#audio#audio gear#music#dj#professional audio#audio shop in brooklyn#brooklyn#musician#dj gears#subwoofer#subwoofers
0 notes
Text
What If Your Studio Monitors Are Lying to You? How to Know and Fix It
Let’s face it—there’s nothing more frustrating than spending hours mixing a track that sounds amazing in your studio, only to play it in your car or on your phone and realize it sounds completely different. The vocals are too harsh, the bass is muddy, and the overall balance is off. If this keeps happening, you might be dealing with a sneaky problem that many producers and audio engineers face: your studio monitors might be lying to you.
Yes, those trusted speakers you’ve relied on might not be telling you the full truth. But don’t worry—this blog will help you understand why it happens, how to spot it, and what you can do to fix it.
Are Your Monitors Really to Blame?
Before we jump to conclusions, it’s important to understand how studio monitors are supposed to work. Unlike consumer speakers, which often exaggerate certain frequencies to make music sound more exciting, studio monitors aim to reproduce sound as accurately and “flat” as possible. This flat response helps producers hear every detail in a mix—good or bad—so they can make balanced decisions.
But here’s the catch: no monitor is perfectly flat, and more importantly, your room plays a huge role in how you hear those monitors. Even the best speakers can lie to you if they’re placed poorly or used in an untreated space.

Signs That Your Studio Monitors Might Be Lying
So, how do you know if your monitors are being honest or not? Here are a few red flags:
1. Your Mixes Don’t Translate
This is the biggest sign. If your mix sounds good in your studio but terrible on other systems (car, headphones, phone), your monitors might be giving you a false sense of balance.
2. You’re Overcompensating
Do you find yourself constantly boosting or cutting certain frequencies—like always adding bass or removing harsh highs? This might mean your monitors are under-representing or exaggerating parts of the frequency spectrum.
3. You Rely Too Much on Visuals
If you're using spectrum analyzers or EQ visuals more than your ears, it could be because you're not fully trusting what you're hearing. That lack of trust often comes from inaccurate monitoring.
Why This Happens: The Three Main Culprits
Let’s break down the usual suspects behind misleading monitors:
1. Room Acoustics
Your room can shape the sound more than you think. Hard surfaces, corners, and small spaces can cause reflections, standing waves, and bass build-up. This can lead to uneven frequency responses where some tones sound louder or softer than they actually are.
2. Monitor Placement
Where and how you place your monitors matters. If they’re too close to a wall, unevenly spaced, or not angled properly, the stereo image and frequency response can suffer. And yes, putting them directly on your desk without isolation pads can introduce vibrations that muddy the sound.
3. Inaccurate Monitors
Let’s be honest—not all monitors are created equal. Entry-level or poorly designed monitors may color the sound, even if your room is treated well. They may lack detail in the highs or clarity in the mids, leading you to make mix decisions based on incomplete information.
So, How Do You Fix It?
Now that we’ve identified the problem, here’s how you can get your monitors to tell the truth again:
1. Treat Your Room
This is the most important step. Basic acoustic treatment—like bass traps, absorption panels, and diffusers—can drastically improve the accuracy of your monitoring environment. Even placing a rug on the floor or adding curtains can help reduce reflections.

2. Correct Monitor Placement
Follow the equilateral triangle rule: your head and both monitors should form an equal-sided triangle. Keep them at ear level, slightly angled inward, and avoid placing them too close to walls or corners.
Isolation pads or monitor stands can also reduce unwanted vibrations and improve clarity. Small adjustments in placement can lead to big differences in what you hear.
3. Use Reference Tracks
Having a few professionally mixed songs in your genre as reference tracks can keep your ears calibrated. If your mix sounds drastically different from these references on your monitors, you’ll know something’s off.
4. Check on Multiple Systems
Don’t rely on just one listening environment. Try your mix on headphones, in the car, through a phone speaker, or a small Bluetooth speaker. This will give you a better idea of how your mix will translate in the real world.
5. Consider Room Correction Tools
Some software and hardware solutions analyze your room’s acoustics and apply corrective EQ to balance what you hear. These tools can be especially useful in untreated or challenging spaces.
6. Upgrade Wisely
If you’ve done all the above and still feel like your monitors are lying, it might be time to upgrade. Look for monitors that are known for transparency and accuracy. And while you’re at it, make sure you’re buying from a trusted, professional audio shop where experts can guide you based on your setup and goals.
Trust, But Verify
At the end of the day, your ears are your most important tool. Monitors, rooms, and gear are just a means to help you hear the truth in your music. If you feel like your monitors are misleading you, it’s not the end of the world—it’s just a sign that you need to fine-tune your environment.
By making smart adjustments, training your ears, and learning to critically listen, you’ll eventually reach a point where your mixes sound just as good outside your studio as they do inside it. And that’s the ultimate goal, right?
So next time you sit down to mix and feel a little unsure, don’t panic. Ask yourself: is this really what my music sounds like, or are my monitors trying to play tricks on me?
#audio#audio gear#music#dj#professional audio#brooklyn#dj gears#studio monitors#studio monitor speaker
1 note
·
View note
Text
Interesting Facts About Wireless Mics That Every Performer Should Know
Wireless microphones have completely changed the game for performers. Whether you're a singer, public speaker, theater actor, or stand-up comic, the freedom of movement that wireless mics offer is hard to beat. But while they may seem like just another piece of gear, there's actually a lot going on under the hood. From their techy insides to how they handle interference, wireless mics are full of fascinating details that every performer should know.
Let’s dive into some lesser-known but super interesting facts about wireless microphones that might just help you understand them better—and use them more effectively.
They Don’t Actually Transmit “Sound”
This might sound weird at first, but wireless mics don’t really transmit sound like your voice itself. Instead, they convert the sound into a radio frequency (RF) signal. That signal gets sent to a receiver, which then converts it back into audio. Think of it like the walkie-talkie version of your voice, only more polished.
The key takeaway? Because your voice is being transmitted via RF waves, it’s subject to the same rules as other wireless devices. This includes things like signal interference and range limitations. Which leads us to the next point...
Frequency Matters – A Lot
Wireless microphones operate on specific frequencies that are regulated by government agencies (like the FCC in the U.S.). This means not all mics will work the same in every location. A mic that works perfectly in one city could suddenly have issues in another because of different frequency rules or local interference.
Performers who travel for gigs need to make sure their mics are set to legal and open frequencies in each region. Failing to do so can not only mess up your sound—but also get you fined.

Interference is Real, But Manageable
Have you ever watched a performance where the mic starts popping or cutting out mid-sentence? That’s usually interference. Wireless mics share the airwaves with tons of other devices—Wi-Fi routers, smartphones, even baby monitors.
To reduce the risk, many modern systems offer frequency agility, which means they can scan and select the best frequency automatically. But you can also reduce problems by keeping your mic system away from large metal objects, Wi-Fi routers, or any high-interference zones.
Line of Sight Affects Signal Strength
Here’s a fun fact: your body can block wireless signals. That’s because wireless mics rely on a clear line of sight between the transmitter (usually the mic or belt pack) and the receiver. If something big—or multiple things—are in the way, it can mess with the signal and cause dropouts.
That’s why you’ll often see receivers placed high up on stands or even above the stage. And it’s also a reason why turning your back to the receiver while performing can sometimes cause issues.
Latency Is a Thing (But Not Always Noticeable)
Wireless mics can introduce a tiny delay between when you speak or sing and when the sound comes out of the speakers. This delay is called latency. It’s usually just a few milliseconds, but in high-end live performance setups, even a small delay can throw off timing.
The good news? Most modern systems have incredibly low latency that’s barely noticeable, especially for vocal performances. But for musicians who need ultra-precise timing—like drummers or live loopers—it’s something to keep in mind.
Rechargeable Batteries Are Game-Changers
Older wireless mic systems relied heavily on disposable batteries, which could be wasteful and unreliable. Today, many systems come with rechargeable battery packs that last longer and offer real-time battery monitoring.
This not only helps the environment but also ensures you won’t get that dreaded dead-battery silence mid-performance. Always check battery levels before going on stage—it’s such a simple thing, but it can save your entire show.

Different Types for Different Needs
There are several types of wireless mics, and they’re not one-size-fits-all. The three main styles are:
Handheld wireless mics – Great for vocalists or presenters who want to hold the mic.
Lavalier (lapel) mics – Tiny mics clipped onto clothing, ideal for theater or public speaking.
Headset mics – Worn around the head or ear, perfect for fitness instructors or performers who need to move around a lot.
Choosing the right type can make a big difference in sound quality, freedom of movement, and overall performance comfort.
More Channels, More Mics – But It Gets Tricky
Planning a big stage production with multiple performers? Then you’ll need multiple wireless mics operating simultaneously. But using multiple systems together can be complicated.
Each mic needs its own frequency channel, and these need to be coordinated carefully to avoid cross-talk or interference. This process is called frequency coordination—and yes, it’s as technical as it sounds. Fortunately, many receivers can auto-scan and pair channels for you.
Range Can Surprise You
The range of wireless mics can vary dramatically depending on the environment. Indoors with lots of walls or electronics, your range might shrink. Outdoors or on large stages with line-of-sight? You could get up to 300 feet or more.
If you’re planning on moving around a lot during your performance, it's important to test the range before the actual event. Walk around the venue during soundcheck to spot any weak spots or dead zones.
Professional Shops Make a Big Difference
While online deals can be tempting, buying wireless mics from professional audio shops is always a safer bet. Not only do they offer guidance on which system suits your specific needs, but they can also help with setup, troubleshooting, and future upgrades. Plus, knowing you're using a legit, high-quality product can give you peace of mind on stage.
Wireless microphones offer performers an incredible sense of freedom and professionalism, but there’s more to them than just cutting the cord. From frequency coordination to battery life, understanding how they work can help you avoid technical hiccups and perform with confidence.
So the next time you pick up a wireless mic, you’ll not only appreciate the tech behind it—you’ll also know how to get the best out of it. And that’s the kind of backstage knowledge every performer should have.
#audio#audio gear#music#dj#professional audio#audio shop in brooklyn#brooklyn#musician#dj gears#wireless microphones#microphones#wireless microphone#dj gear#live event#live performance
0 notes
Text
Did You Know You’re Losing Sound Quality Without These Simple Accessories?
We often focus on the big-ticket items when setting up our audio systems—speakers, amplifiers, mixers—but overlook the smaller accessories that can significantly impact sound quality. These components, though seemingly minor, play crucial roles in ensuring optimal audio performance. Let's explore some essential accessories that could be the missing links in your setup.
High-Quality Audio Cables
Audio cables are the lifelines of your sound system, transmitting signals between components. Using subpar cables can introduce noise and degrade signal integrity. Opting for cables with proper shielding and durable connectors ensures cleaner sound transmission and reduces interference.

Power Conditioners and Voltage Regulators
Stable power supply is vital for consistent audio performance. Voltage fluctuations can introduce hums or even damage equipment. Power conditioners and voltage regulators help maintain a steady flow of electricity, protecting your gear and preserving sound quality.
Acoustic Treatment Materials
The acoustics of your room significantly affect how sound is perceived. Bare walls and hard surfaces can cause reflections and echoes. Incorporating acoustic panels, bass traps, and diffusers helps control these issues, leading to a more accurate and pleasant listening experience.
Isolation Pads and Stands
Vibrations from speakers can transfer to surfaces, causing unwanted resonances. Isolation pads and stands decouple your speakers from these surfaces, minimizing vibrations and allowing for clearer sound reproduction.
Digital-to-Analog Converters (DACs)
If you're using digital sources like computers or smartphones, a quality DAC can make a noticeable difference. Built-in DACs in consumer devices often lack the fidelity required for high-quality audio. An external DAC processes digital signals more accurately, resulting in improved clarity and detail.
Proper Connectors and Adapters
Ensuring compatibility between different components is essential. Using the correct connectors and adapters maintains signal integrity and prevents potential damage. It's important to choose reliable accessories that match your equipment's specifications.
Regular Maintenance Tools
Dust and grime can accumulate on connectors and components, affecting performance. Regular cleaning with appropriate tools helps maintain optimal conductivity and prolongs the life of your equipment.

Investing in these accessories not only enhances sound quality but also protects your equipment. Purchasing from reputable audio shops ensures you receive quality products and expert advice tailored to your specific needs.
By paying attention to these often-overlooked components, you can elevate your audio experience, ensuring that every note and nuance is heard as intended.
#audio#audio gear#music#dj#professional audio#audio shop in brooklyn#brooklyn#musician#dj gears#live sound#pro audio shop#pro audio gears#audio gears
1 note
·
View note
Text
Audio Setup Mistakes When Setting Up Professional Audio (And How to Avoid Them)
Setting up a professional audio system might sound straightforward—buy good equipment, plug it in, and press play. But in reality, it’s easy to overlook small details that have a huge impact on sound quality. Whether you’re prepping for a live event, DJ gig, studio recording, or even a public speaking setup, one misstep can lead to muddled sound, annoying feedback, or frustrated audiences.
Let’s break down some of the most common audio setup mistakes people make when building or using professional sound systems—and how you can avoid them.
Ignoring the Room Acoustics
One of the biggest and most common oversights is forgetting how much the room itself matters. You could have the most high-end audio gear, but if you're setting it up in a space with poor acoustics—like lots of bare walls, hard floors, or uneven surfaces—it’s not going to sound right.
How to avoid it: Think of your room as part of the audio system. Use rugs, curtains, acoustic panels, or even furniture placement to reduce echo and reflections. If you’re in a large hall or open space, consider how sound travels and bounces. Always do a test run before any actual event to see how your setup sounds in that particular room.
Poor Speaker Placement
Speaker placement can make or break your sound. Putting them too close to walls, too far from the audience, or not angled correctly can lead to uneven coverage, dead spots, or overpowering bass.
How to avoid it: Follow the basics of speaker positioning—keep them at ear level, angle them slightly toward the center of the room, and try to place them symmetrically. For large spaces or events, you may need delay speakers or line arrays to ensure even sound distribution. Also, make sure your subwoofers aren't clashing with walls, which can cause boomy or muddy bass.

Skipping Proper Gain Staging
Gain staging sounds like a fancy term, but it's simply making sure every piece of gear in your signal chain is set to the right input and output levels. If this isn’t done right, you can end up with distortion, noise, or very weak audio.
How to avoid it: Start at the source (like a microphone or instrument) and move down the line—mixer, processor, amplifier—making sure each stage isn’t too hot or too cold. Use meters and your ears. If something sounds off or clips, go back and adjust the gain levels properly.
Overloading the Mixer or Amplifier
Sometimes in an attempt to get more volume, people crank every knob to the max. This can overwork your amplifier or mixer, lead to distorted sound, and even damage your gear.
How to avoid it: Use powered speakers or amplifiers that match the power requirements of your setup. Don’t push your volume controls to the limit—use EQ, proper gain structure, and efficient speaker placement to achieve loudness naturally.
Relying Too Much on Auto Settings or Presets
Many modern mixers and processors come with built-in presets, auto-EQ, or "magic" buttons. While they can be useful, relying on them blindly is a mistake. Not all rooms, events, or sources are the same.
How to avoid it: Take time to learn the basics of EQ, compression, and audio routing. Use presets as a starting point, but make manual adjustments based on your environment and what your ears are telling you. Custom settings almost always outperform one-size-fits-all solutions.
Not Doing a Soundcheck
This one seems obvious, but you'd be surprised how many people skip the soundcheck or just test for five seconds and assume it’s good. Every space, crowd, and event is different.
How to avoid it: Always do a full soundcheck well before the event. Walk around the space and listen from different spots. Check all channels—vocals, instruments, microphones, playback devices—to ensure everything sounds clean and balanced. A good soundcheck can help you catch problems before they become disasters.
Using Low-Quality or Damaged Cables
Cables are often the most ignored part of a setup. Tangled, old, or cheap cables can cause signal loss, humming, or intermittent dropouts.
How to avoid it: Invest in decent cables and take care of them. Coil them properly, store them in a dry place, and label them if needed. Regularly check for wear, especially at the connectors. A tiny fault in a cable can ruin an entire performance or recording.

Forgetting Power Management
Plugging everything into one outlet or using poor-quality power strips can lead to buzzing, grounding issues, or even electrical hazards.
How to avoid it: Use surge protectors and power conditioners designed for audio gear. Make sure your power load is balanced, especially for larger events. And if you’re working outdoors or in temporary venues, ensure all connections are safe and weather-protected.
Not Matching Equipment Compatibility
Sometimes, people mix equipment that doesn’t work well together—like pairing a mixer that outputs line-level signals with a mic-level input device. This mismatch causes low volume, noise, or poor sound.
How to avoid it: Know your gear and understand the difference between mic, line, and instrument levels. Use DI boxes or converters if needed. When purchasing or renting equipment, it helps to consult someone who understands audio gear—or simply shop from professional audio stores that offer expert guidance.
Forgetting About the Audience Experience
The ultimate goal of your audio setup isn’t just clean sound at the console—it’s delivering that sound clearly to the audience. If they can't hear the vocals, the bass is overpowering, or the speech echoes, then your setup has failed.
How to avoid it: Always think from the listener’s perspective. Balance vocals and instruments, control feedback, and avoid overuse of effects like reverb or delay. And again—walk the room, listen, and make changes where needed.
A professional audio setup isn’t just about owning great gear. It’s about how you use it. Paying attention to the space, understanding your equipment, and setting it up with care makes all the difference between amateur sound and a pro-level experience. Many people find that consulting or purchasing from a professional audio shop helps them make better decisions with long-term value, thanks to the right advice and tested gear compatibility.
Avoiding these common mistakes doesn’t require a degree in audio engineering—just a bit of knowledge, patience, and attention to detail. Take the time to set it up right, and your audience (and your ears) will thank you.
#professional audio#dj#audio gear#audio#music#audio shop in brooklyn#brooklyn#musician#dj gears#pro audio gears
0 notes
Text
The Rise of Compact Line Arrays: Big Sound in Small Packages
If you’ve ever been to a live concert or outdoor festival, chances are you’ve stood in front of a towering wall of speakers that blasted sound straight into your chest. These are often part of what’s known as a line array system — a setup that’s been dominating large venues for years. But here’s the twist: in recent years, compact line arrays have been making serious waves, proving that size isn’t everything when it comes to sound.
Whether you’re a musician, a DJ, or someone setting up sound for a wedding or a small outdoor event, understanding the shift toward smaller yet powerful audio systems could be a game-changer. Let’s break down what line arrays are, why the compact versions are on the rise, and whether they’re the right fit for your next gig.
What Is a Line Array, Anyway?
At its core, a line array is a group of loudspeakers stacked vertically and designed to work together as a single unit. Unlike traditional speaker setups that disperse sound in all directions, line arrays focus their energy in a specific pattern — vertically narrow but horizontally wide. This focused sound reduces unwanted reflections and gives a clearer audio experience, especially over long distances.
Line arrays are common in large venues like arenas and stadiums because they can push sound consistently to the front, middle, and even the far back rows without getting muddy.

So, What’s the Deal With Compact Line Arrays?
Traditional line arrays are big, bulky, and often require cranes or lifts to install. Enter compact line arrays — the younger, more portable sibling in the family. These systems are designed to do a lot with a little. They’re physically smaller, lighter, and easier to transport, but still manage to deliver clear, powerful sound that fills a space impressively well.
Over the past few years, sound engineers and performers have started leaning into these systems for a few big reasons.
Why Compact Line Arrays Are Trending
1. Portability and Easy Setup
One of the biggest headaches for performers and sound crews is lugging around heavy gear and spending hours on setup. Compact line arrays reduce that stress. You can often fit them in smaller vehicles, carry them by hand, and get them up and running in a fraction of the time compared to traditional systems.

2. Smaller Spaces Still Need Great Sound
Not every event takes place in a stadium. There are weddings, conferences, community concerts, and smaller gigs where massive setups just don’t make sense. Compact arrays shine in these spaces, delivering balanced, punchy audio without overwhelming the venue or the audience.
3. Improved Technology
Advancements in speaker design, digital signal processing, and amplifier efficiency have made it possible for smaller speakers to compete with their larger counterparts. Today’s compact line arrays can handle high sound pressure levels (SPLs) and deliver even audio coverage that was once only achievable with much larger systems.
4. Cleaner Aesthetics
Looks aren’t everything, but when you’re setting up for a corporate event or a wedding, big stacks of speakers can be visually distracting. Compact line arrays blend into the background more easily, making them a favorite for events where appearance matters as much as sound.
Who Should Consider Using Them?
Compact line arrays aren’t just for big productions anymore. They’re becoming a favorite for:
Mobile DJs who need powerful sound but don’t want to haul giant rigs.
Live bands playing in mid-sized venues like clubs, gyms, or outdoor parks.
Churches and houses of worship looking for clarity and reach without cluttering the space.
Event planners who need scalable systems for different crowd sizes.
Even installers and audio rental companies are turning to these systems more often because they offer flexibility — you can add more units for bigger events or scale down for smaller spaces.
The Power of Sound Coverage
One thing to remember is that it’s not just about how loud a system can get — it’s about how well it covers the audience area. Compact line arrays are designed to control the vertical spread of sound, reducing how much bounces off ceilings and floors. That means less echo, less feedback, and more enjoyable sound for everyone, no matter where they’re standing.
And unlike traditional speakers that often need to be tilted or mounted at awkward angles, compact line arrays are engineered to do the hard work for you. Their natural design allows for consistent audio from front to back without blasting out the front row.
Things to Consider Before Buying
While compact line arrays come with a lot of benefits, they’re not one-size-fits-all. Here are a few things to keep in mind:
Venue size: For very large venues or outdoor spaces with thousands of attendees, a full-size line array or additional subwoofers may still be necessary.
Budget: Good audio gear isn’t cheap. But investing in the right system can save you money (and stress) in the long run.
Compatibility: Make sure your system works well with your existing gear — like mixers, mics, and power sources.
And while it might be tempting to buy equipment from just anywhere online, purchasing from a professional and reputable audio shop can ensure you get not only the right advice but also gear that’s been tested, supported, and backed with genuine knowledge.
The rise of compact line arrays isn’t just a trend — it’s a shift in how we think about portable, powerful sound. Whether you’re hosting a community event, performing live, or DJing a backyard party, these systems offer a smart balance of size, quality, and convenience.
They prove that you don’t need a massive rig to deliver a massive sound — just the right tools, a good understanding of your space, and maybe a little guidance from those who know audio best.
So, next time you’re planning a show or shopping for new gear, don’t overlook the little guys. Sometimes, the best things really do come in smaller packages.
#audio#audio gear#music#professional audio#audio shop in brooklyn#musician#brooklyn#dj gears#line array speaker#dj
0 notes
Text
DJ Equipment Trolley vs. Carrying Cases: Which One Suits You Best?
For DJs, transporting equipment from one gig to another is a crucial part of the job. Whether you're setting up in a club, a wedding venue, or an outdoor festival, getting your gear safely and efficiently to the right place can make or break your performance. That’s where DJ equipment trolleys and carrying cases come in. But which one is the better option for you? Let’s break it down and explore the pros and cons of each.
The DJ Equipment Trolley: Built for Convenience
A DJ equipment trolley is essentially a rolling cart designed to transport heavy gear with ease. It comes with wheels, handles, and sometimes compartments to help DJs move their equipment effortlessly.

Pros of a DJ Trolley:
Easy Transport: One of the biggest advantages of a trolley is that it reduces physical strain. Instead of carrying multiple bags and cases, you can load everything onto a wheeled cart and roll it smoothly from your vehicle to the venue.
Time-Saving: If you’re moving heavy equipment, a trolley significantly cuts down on the number of trips needed to transport your setup.
Less Risk of Injury: Carrying heavy gear can strain your back and shoulders, but a trolley eliminates the need for excessive lifting.
Better Protection for Gear: Many DJ trolleys come with padded sections or compartments, reducing the risk of accidental drops or bumps.
Ideal for Large Setups: If you use a lot of gear—mixers, speakers, controllers, and cables—a trolley helps keep everything organized in one place.
Cons of a DJ Trolley:
Takes Up More Space: A trolley can be bulky, making it harder to fit into smaller vehicles or storage spaces.
Not Always Ideal for Stairs or Rough Terrain: While most trolleys have sturdy wheels, navigating stairs or uneven ground can still be challenging.
Can Be Expensive: A high-quality trolley can be an investment, but it pays off in the long run by protecting your gear and saving you effort.
Carrying Cases: The Classic Choice
Carrying cases have been a staple for DJs for years. These cases are designed to store and protect individual pieces of equipment while making them easier to carry.

Pros of Carrying Cases:
Maximum Protection: A well-padded carrying case keeps your gear safe from shocks, dust, and other potential damage.
Compact and Easy to Store: Cases take up less space than a trolley and are easier to stack in a vehicle or backstage.
More Mobility in Tight Spaces: If you’re working in a venue with stairs or limited room, carrying cases offer more maneuverability.
Often More Affordable: While high-end cases can be pricey, they are generally more budget-friendly compared to trolleys.
Cons of Carrying Cases:
More Physical Effort Required: Carrying multiple cases by hand can be exhausting, especially for longer distances.
Takes More Time to Move Gear: Without wheels, you may need multiple trips to transport all your equipment.
Easier to Forget Items: Since gear is spread across different cases, there’s a higher chance of leaving something behind.
Which One Should You Choose?
The best choice depends on your needs as a DJ.
If you frequently perform at large events or carry heavy equipment, a DJ trolley is a smart investment. It saves time, reduces strain, and keeps everything organized.
If you play smaller gigs, travel light, or need to navigate stairs often, carrying cases might be a better option since they’re more compact and portable.
For many DJs, a combination of both works best—using a trolley for major equipment and carrying cases for smaller accessories. No matter what you choose, ensuring that you get high-quality gear from a reputable audio shop guarantees durability and reliability.
At the end of the day, your choice should match your workflow, gig locations, and the amount of equipment you use. The goal is to make setup and teardown as smooth as possible so you can focus on what really matters—delivering an unforgettable performance!
0 notes
Text
DJ Table & Stand Setup: Choosing the Right Gear for Stability and Comfort
If you’ve ever watched a DJ perform live, you know how important their setup is. A stable and well-organized DJ table and stand can make the difference between a smooth, stress-free performance and a chaotic mess of wobbly gear and tangled cables. Whether you’re an aspiring DJ setting up your first gig or a seasoned pro looking to upgrade your setup, choosing the right DJ table and stand is crucial for stability, comfort, and efficiency.

Why Your DJ Table and Stand Matter
At first glance, a DJ table might seem like just another piece of furniture. But in reality, it plays a significant role in how well you perform. A sturdy, well-positioned table ensures that your equipment remains stable, minimizing the risk of accidental falls or vibrations that can affect sound quality. Additionally, the right stand setup helps with organization, giving you quick access to your gear while maintaining an ergonomic posture to prevent strain during long performances.
Key Factors to Consider When Choosing a DJ Table & Stand
Not all tables and stands are created equal. Here’s what you need to consider before making a purchase:
1. Stability and Durability
A shaky table is a DJ’s worst nightmare. When choosing a table, look for one made of high-quality, durable materials like steel or reinforced aluminum. The table should have a solid frame that can support the weight of your mixer, turntables, laptop, and controllers without bending or wobbling. Adjustable feet or rubberized grips can also help keep the table steady on uneven surfaces.
2. Proper Height for Comfort
DJing often requires long hours of standing, so your table’s height is essential. An ideal DJ table should be at a comfortable height—typically between 36 and 42 inches—to prevent back strain. If you plan to use different venues with varying stage heights, consider a table with adjustable legs for maximum flexibility.
3. Portability and Ease of Setup
If you’re a mobile DJ, portability is a huge factor. Folding tables or lightweight, collapsible stands make transportation and setup much easier. Some stands even come with carrying cases, making them perfect for DJs who frequently travel between gigs.
4. Space and Equipment Compatibility
Your table should have enough surface area to fit your gear while leaving room for smooth movement. Consider your setup—will you be using a full DJ controller, turntables, or just a laptop and mixer? Make sure your table can accommodate everything while keeping cables organized and out of the way.
5. Cable Management
Messy cables can quickly turn your DJ station into a tangled disaster. Many DJ tables and stands now come with built-in cable management features, such as cutouts or dedicated trays to keep cords neatly organized. This not only looks professional but also reduces the risk of accidentally unplugging something mid-performance.
Types of DJ Tables & Stands
Depending on your needs, you might want to consider different types of DJ tables and stands:
Standard DJ Tables – Simple, sturdy tables designed specifically for DJing. They offer ample space and stability for most setups.
Adjustable Height DJ Stands – These allow you to customize the height to fit your preference, reducing strain during long performances.
Laptop Stands – If you rely on DJ software, a separate laptop stand can keep your computer at an optimal height while freeing up space on your main table.
Controller Stands – Ideal for DJs using a controller-based setup, these stands provide a secure and ergonomic position for mixing.
Folding or Portable Stands – Lightweight and easy to transport, these are perfect for mobile DJs or those working in different venues.

Setting Up Your DJ Table and Stand for Maximum Efficiency
Once you have the right table and stand, the next step is setting up your gear for optimal performance. Here are some tips:
1. Position Your Equipment Strategically
Arrange your gear in a way that makes mixing seamless. Your controller or mixer should be centrally positioned, with your laptop slightly elevated for easy viewing. Turntables or CDJs should be within reach, allowing quick access without unnecessary movement.
2. Maintain a Clean Setup
A cluttered workspace can be distracting. Use cable ties or Velcro straps to bundle cables neatly and avoid tripping hazards. Keeping your setup clean not only looks professional but also helps you focus on your performance.
3. Test for Stability Before Performing
Before every gig, do a quick test to ensure your table and stand are stable. Give it a slight shake—if it wobbles, make adjustments or use stabilizers to prevent movement.
4. Ensure Proper Lighting for Visibility
Many DJs perform in dimly lit environments, making it difficult to see controls and cables. Consider adding LED strip lights or small clip-on lights to illuminate your workspace without being distracting.
Investing in Quality DJ Equipment for Long-Term Performance
A well-thought-out DJ table and stand setup can significantly impact your comfort and performance. Investing in high-quality, durable equipment ensures you get the best out of your DJing experience while avoiding unnecessary stress or technical issues. Purchasing from a professional and reputable audio shop provides access to expert advice, reliable gear, and support when you need it.
Your DJ setup is more than just your music—it’s about creating an environment that supports smooth transitions, efficient mixing, and a professional appearance. Choosing the right DJ table and stand helps you stay organized, comfortable, and in control of your performance. Whether you’re spinning at a nightclub, wedding, or music festival, having a stable and well-structured setup will enhance your confidence and ability to deliver an unforgettable set. Take the time to assess your needs, invest in the right equipment, and set up your gear strategically. Your back, your gear, and your audience will thank you for it!
#audio#audio gear#music#dj#professional audio#audio shop in brooklyn#brooklyn#dj gears#dj tables & stand#dj equipments#pro audio shop#pro audio gears#dj stands#pro audio equipment#pro audio
1 note
·
View note
Text
Live Streaming Audio: How to Avoid Sound Sync Nightmares
Live streaming is an incredible way to connect with audiences in real-time, whether you’re hosting a podcast, a gaming session, a virtual event, or a music performance. But nothing ruins the experience faster than out-of-sync audio. Imagine a video where someone speaks, but their lips move out of time with their voice—it’s distracting, frustrating, and makes people leave the stream.
So, how can you avoid sound sync nightmares and ensure your live stream delivers a seamless, high-quality audio-visual experience? Let’s dive into the key factors, common causes of sync issues, and practical solutions to keep your audio perfectly in line.

Understanding Audio-Video Sync Issues
Audio sync problems occur when the sound doesn’t match the video in real-time. This issue can be either audio lagging behind the video or audio playing ahead of the video—both of which disrupt the viewer’s experience.
The human brain is incredibly sensitive to timing mismatches. A delay of just 100 milliseconds can make a stream feel “off.” Anything beyond 200 milliseconds is noticeable to most people and will likely drive your audience away.
Common Causes of Audio Sync Problems
Several factors contribute to audio-video sync issues in live streaming. Understanding these will help you diagnose and fix the problem effectively.
1. Network and Bandwidth Issues
A slow or unstable internet connection can cause lag in audio or video processing. High latency networks struggle to keep up with real-time transmission, leading to sync problems.
2. Encoding and Processing Delays
Streaming software and hardware encode audio and video separately, and sometimes, one process is slower than the other. Video encoding generally takes longer due to higher data processing needs, which can cause the audio to play ahead of the visuals.
3. Hardware Limitations
Your microphone, camera, and capture card all play a role in live streaming. If your capture device processes video slower than your audio interface, you might experience delays.
4. Software and Driver Issues
Outdated or misconfigured streaming software, drivers, or firmware can introduce sync problems. Incorrect settings in your streaming platform or software may also lead to desynchronized audio.
5. Buffering and Latency Settings
Live streaming platforms allow you to adjust buffering and latency settings, but incorrect configurations can create synchronization issues.
How to Fix and Prevent Audio Sync Issues
Now that we understand the root causes, let’s look at actionable ways to keep your live stream in sync.
1. Use a Reliable Internet Connection
Wired Ethernet is Best: A wired connection provides better stability than Wi-Fi, reducing the chances of audio delay.
Check Your Upload Speed: Ensure your internet speed meets the platform’s recommended upload rate. A minimum of 5-10 Mbps is ideal for HD streaming.
Limit Background Usage: Close other bandwidth-consuming apps to free up network resources for your live stream.
2. Synchronize Audio and Video in Software
Most streaming software like OBS Studio, Streamlabs, or vMix allows you to manually adjust sync settings.
Use Audio Delay Settings: If audio is ahead of the video, introduce a slight delay (measured in milliseconds) to align them.
Monitor in Real-Time: Always do test streams and monitor both audio and video before going live.
3. Optimize Your Hardware Setup
Match Audio and Video Processing Speeds: If using a separate microphone and camera, ensure both are connected to the same interface or system to avoid processing discrepancies.
Use a Capture Card: High-quality capture cards reduce video processing delays and help maintain sync.
Upgrade Your Equipment: Older microphones, cameras, or outdated processing units may cause latency issues. Investing in high-quality audio and video gear from a professional audio shop can significantly improve your streaming setup.

4. Adjust Buffering and Latency Settings
Reduce Buffering Delay: Some streaming platforms allow you to set ultra-low latency modes, reducing the delay between your broadcast and the audience.
Optimize Keyframe Interval: Set the keyframe interval to 2 seconds for smoother synchronization.
5. Keep Software and Drivers Updated
Regularly Update Streaming Software: Updates often fix latency issues and improve synchronization.
Check Audio Interface Drivers: Ensure your microphone and audio interface drivers are updated to avoid processing lags.
Restart Equipment Before Streaming: A fresh restart can clear any software glitches affecting sync.
Testing Before You Go Live
The best way to prevent audio sync nightmares is by testing everything before the live stream starts.
Conduct a Private Test Stream: Stream to a private channel to check for any lag or sync issues.
Record a Short Clip: Play it back to ensure audio and video are perfectly aligned.
Use Monitoring Headphones: Listening to your own stream can help catch issues in real-time.
Audio sync issues can make or break a live stream, but with proper setup, testing, and optimization, you can avoid sound sync nightmares. Whether you’re a content creator, musician, or business professional, ensuring high-quality synced audio enhances your audience’s experience and keeps them engaged. By investing in the right equipment and refining your setup, you’ll create smooth, professional live streams that keep viewers coming back for more.
#audio#audio gear#music#dj#professional audio#audio shop in brooklyn#brooklyn#dj gears#dj equipments#live performance#live music#live sound
1 note
·
View note
Text
How Fog and Haze Machines Enhance Lighting Effects in Events
Imagine stepping into a concert, a nightclub, or even a Halloween-themed party where the lighting feels almost magical. Beams of light cut through the air, creating an electrifying atmosphere that pulls you into the moment. But here’s a little secret—those stunning visuals aren’t just about the lights themselves. Fog and haze machines play a massive role in making those lighting effects truly stand out.
If you’ve ever wondered how professional events achieve that cinematic, immersive look, it’s time to understand how fog and haze machines work and why they’re essential for any event that relies on lighting.
The Science Behind Fog and Haze Machines
At their core, fog and haze machines are designed to introduce tiny airborne particles into the air, which scatter light and create visible beams. This is called the Tyndall effect—the same phenomenon that makes sun rays visible through tree branches on a misty morning.
Fog machines produce thick, dense clouds that create a dramatic, almost eerie atmosphere. The fog itself is more noticeable, making it perfect for spooky effects, stage performances, or high-energy dance floors.
Haze machines, on the other hand, generate a much finer mist that lingers in the air almost invisibly. Instead of creating thick clouds, haze subtly enhances lighting by giving beams a more defined and professional look.
Both machines add a whole new dimension to lighting, transforming an average setup into something visually compelling.

Why Are Fog and Haze Machines Essential for Lighting Effects?
1. Making Beams of Light Visible
Without fog or haze, lighting effects can look flat, especially in large venues. When these machines are used, light beams become clearly defined, creating a 3D-like effect that makes visuals pop. Whether it’s moving spotlights at a concert or laser lights in a nightclub, the difference is night and day when haze or fog is introduced.
2. Enhancing Stage and Dance Floor Ambience
Ever noticed how concerts and festivals feel larger than life? That’s because haze machines create an immersive, dreamlike atmosphere that amplifies lighting effects. This works exceptionally well for weddings, DJ performances, and theatrical productions, where you want lighting to be a key part of the experience without completely obstructing the view.
3. Adding Drama and Mystery
For events like Halloween parties, haunted houses, or even mystery-themed productions, fog machines are a must. The thick clouds of fog create an eerie, cinematic effect that adds to the suspense. Even in casual parties, a well-timed fog burst during a DJ drop or a theatrical reveal can make the moment unforgettable.
4. Creating Depth in Photography and Videography
Photographers and videographers love fog and haze because they add depth to shots. Without them, lighting can appear too harsh or one-dimensional in photos and videos. When used correctly, fog softens the background, adds depth to subjects, and makes light effects more dynamic, leading to stunning visuals.
5. Amplifying Special Effects
If an event features lasers, projections, or LED walls, fog and haze machines help amplify those effects. Laser beams become dramatically visible, while projection mapping looks far more striking when haze is in the air. Many big-budget productions, from music festivals to theme parks, rely on these machines to take their visuals to the next level.

Choosing the Right Machine for Your Event
Now that we know how crucial these machines are, the next step is choosing the right one for your needs. Here’s a quick breakdown:
Fog Machines: Ideal for dramatic effects, haunted houses, dance floors, and stage productions where a visible, dense cloud is required.
Haze Machines: Best for subtle lighting enhancements, concerts, weddings, and professional stage setups where you want to highlight light beams without overwhelming the audience.
Low-Lying Fog Machines: These create a ground-hugging fog effect, perfect for stage performances and first dances at weddings.
Each machine serves a different purpose, so selecting the right one depends on the type of atmosphere you want to create.
Tips for Using Fog and Haze Machines Effectively
Consider the venue size. Large spaces require more output, while smaller indoor events might need a controlled amount to avoid overwhelming the room.
Use proper ventilation. Fog and haze need good airflow to distribute evenly, but too much can disperse them too quickly.
Match the machine to your lighting setup. If you have intense moving lights or lasers, haze machines will make them shine without blocking the view.
Experiment before the event. Test different levels of fog and haze to find the right balance. Too much can reduce visibility, while too little won’t create the desired effect.
Purchase from a reputable audio and lighting shop to ensure high-quality machines that perform reliably and safely.
Fog and haze machines might seem like small additions, but they completely transform how lighting interacts with an event space. Whether you're setting the mood for a wedding, energizing a nightclub, or creating a breathtaking concert experience, these machines help bring lighting to life in a way that nothing else can.
By choosing the right type and using them strategically, you can ensure your event has that professional, visually stunning impact that keeps audiences captivated.So, next time you see mesmerizing beams of light at an event, you'll know the secret behind them—it’s not just the lights; it’s the atmosphere created by fog and haze.
#audio#audio gear#music#dj#professional audio#audio shop in brooklyn#brooklyn#dj gears#fog machine#haze machine#dj events#dj equipments#dj set up#musician#dj set
0 notes