
collegewriting2
College Writing II
This is the class blog for College Writing II, which we will use to archive our multimodal final projects.
English 21011
Kent State University - Trumbull
Instructor: Natasha Rodriguez-Carroll
55 posts
Don't wanna be here? Send us removal request.
Last Seen Blogs

askhaisesasaki
naani

nerdybelieverdream
Untitled

articmynet
A r t i c - M y n e t 悲

arceefoxgirl
LaraPoasting

funnyboy3000
Untitled
Text
Birthday Cake for a 2 year old Toddler
by Ms. R
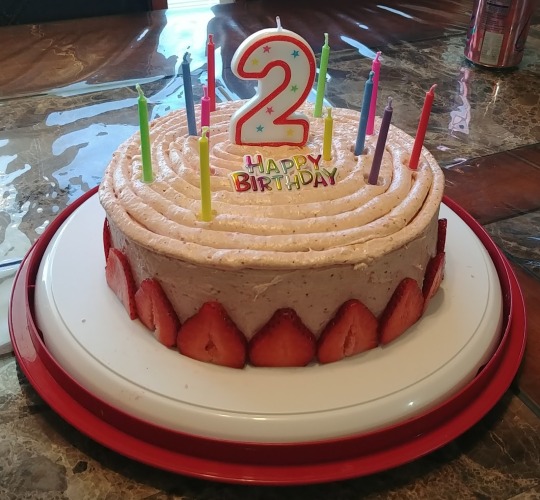
(Image of a pink birthday cake with strawberries at the base and unlit candles on top.)
Spring semesters are weird for me, because they are really less about following the syllabus and lesson plans and more about keeping my “real” life from barreling into my work life. They begin, as they always do, with my oldest daughter’s birthday [AN: she will henceforth be referred to as “Beans”], in January. In the middle is tax season, which is a stressful time for us tax widows (I refer you to the following humorous post, but forgive me if I don’t laugh). At the end, in April, right before finals week, is the baby’s birthday [AN: for the duration of this post I will call her “Noodle”]. Except she’s not really a baby anymore, she’s about to be 2. But if you’ve met me in real life you’ve heard me talk about her, so you know that Noodle is actually a demon I summoned via my uterus who found herself in the body of a chubby toddler and sometimes the hellfire and rage seeps out. Usually in the middle of grocery shopping.
I’m kidding. Noodle’s just a baby with a big personality and superhuman strength. And her second birthday is almost here, so I have to make her a cake.
I have a weird thing where I don’t like chocolate cake (I know, I know), so I like to avoid making them. Maybe next year Noodle will request a chocolate cake in perfect English and I will absolutely make one for her, but right now her speech is mostly two or three word phrases strung together with enthusiastic babble. So I get to pick the flavors! I especially love citrus, and since Beans wanted a lemon and lavender cake for her birthday earlier this year, I decided to make lemon the theme for 2019.
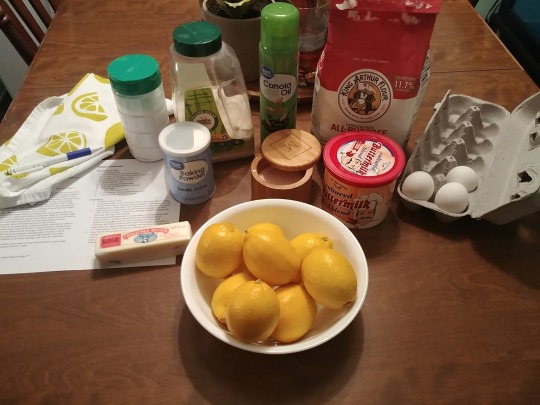
(Image of the ingredients for the cake sponge, clockwise from top left: baking soda, sugar, canola oil spray, flour, three eggs, buttermilk powder, a bowl of lemons, salt, a stick of butter, baking powder.)
Rather than go with an unusual combination, I wanted to stick with traditional flavors. Last year I did a strawberry and mascarpone layer cake for Noodle’s first birthday which was very tasty, but the frosting fell flat. Since the cake had to be transported to my in-laws’ house, I wanted to make sure I used a frosting that would hold up without refrigeration. Before I could even look for one, Serious Eats tweeted an article by Stella Parks about fruity whipped cream flavored with freeze dried fruit that remains stable and firm. At the end of the article was a link to another one from Parks that had suggestions on adding the freeze dried fruit to traditional frostings. Her recommendation is to use the fruit in a powder added to swiss meringue buttercream. Well, I was sold. A few years ago I made my husband a guava and coconut cake (Puertorrican flavors, hell yeah!), and I added powdered coconut milk to the swiss meringue buttercream frosting and it was AMAZING. It was my first time trying that frosting recipe, and it’s still the best one I’ve ever made.
I decided to use the same recipe from Natasha’s Kitchen for the frosting that I used before, with the addition of freeze dried strawberry powder (to tie into the cake from last year). Since I was already on the Serious Eats site, I looked for a lemon cake recipe and found an article about an adaptation of Nathan Coulon’s lemon cake that was featured in Cooking Light, but instead of frosting there was lemon curd. I love lemon curd, but this is neither the time nor the place. I opted for a version closer to the original from Me, Myself, and Pie.
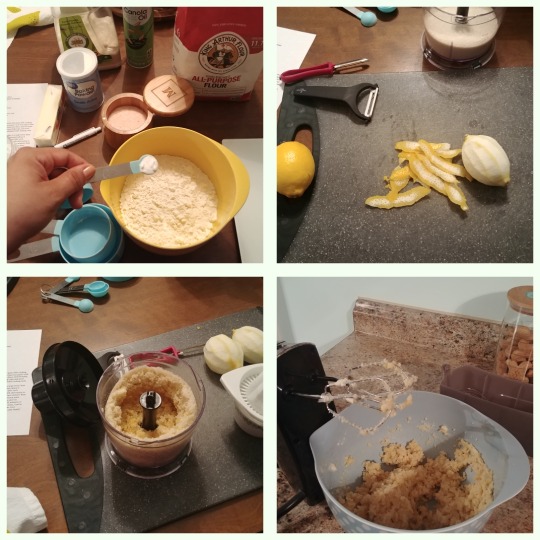
(Collage image, clockwise from top left: mixing bowl with measured dry ingredients, a rindless lemon next to a pile of rinds and a vegetable peeler, a mixing bowl with butter, sugar, and lemon rind creamed together, sugar and lemon rind in a small food processor.)
I followed the directions as closely as possible, since I am kind of bad at making cakes. The only change I made was to process the sugar and the lemon rind together in a food processor before creaming, since I find the process of grating citrus rind to be annoying and tedious. I’m sure I read about this shortcut somewhere, but I can’t remember where. In any case, it is an easy hack that leads to a stronger citrus flavor.
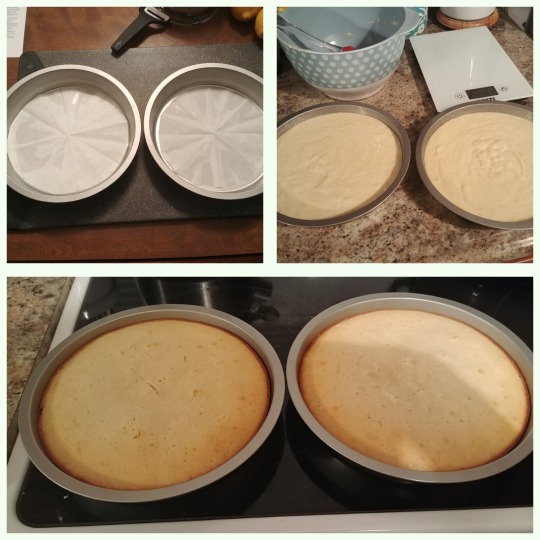
(Collage image, clockwise from top left: greased cake pans with circles of parchment on the base, cake pans filled with batter, baked cakes cooling in the pans.)
Nathan’s Lemon Cake
Link: http://me-myself-and-pie.blogspot.com/2010/05/lemon-cake.html
Ingredients for Cake
Cooking spray
2 tablespoons all-purpose flour
2 cups all-purpose flour (about 9 ounces)
1 teaspoon baking powder
½ teaspoon baking soda
½ teaspoon salt
1 ½ cups granulated sugar
½ cup unsalted butter, softened
3 large eggs
1 cup nonfat buttermilk
2 tablespoons finely grated lemon rind
2 tablespoons fresh lemon juice
Preparation
Preheat oven to 350°.
To prepare cake, coat 2 (8-inch) round cake pans with cooking spray; line bottoms of pans with wax paper. Coat wax paper with cooking spray. Dust pans with 2 tablespoons flour, and set aside.
Lightly spoon 2 cups flour into dry measuring cups, and level with a knife. Combine 2 cups flour, baking powder, baking soda, and salt, stirring with a whisk.
Place granulated sugar and ½ cup butter in a large bowl; beat with a mixer at medium speed until well blended (about 5 minutes). Add eggs, one at a time, beating well after each addition. Add flour mixture and nonfat buttermilk alternately to sugar mixture, beginning and ending with the flour mixture. Beat in 2 tablespoons lemon rind and 2 tablespoons lemon juice.
Pour batter into prepared pans; sharply tap pans once on counter to remove air bubbles. Bake at 350° for 32 minutes or until a wooden pick inserted in center comes out clean. Cool in pans 10 minutes on a wire rack; remove from pans. Cool completely on wire rack; remove wax paper from cake layers.
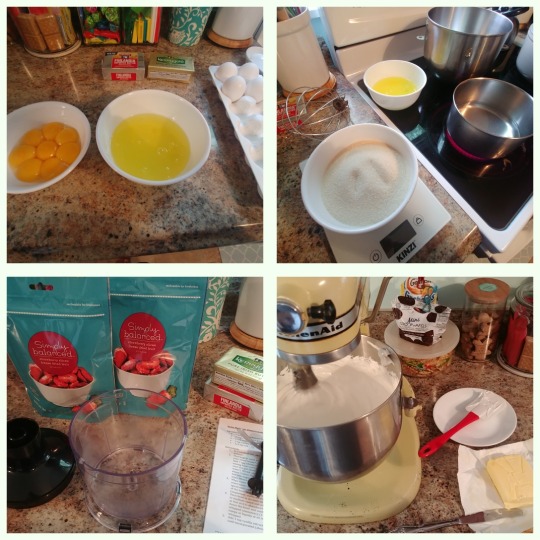
(Collage image, clockwise from top left: 8 eggs separated into yolks and whites, egg whites in a bowl next to a pan of heating water and a bowl of sugar on a scale, a stand mixer with the meringue mix next to a bar of butter and a spatula, freeze dried strawberries in a bag next to a small food processor.)
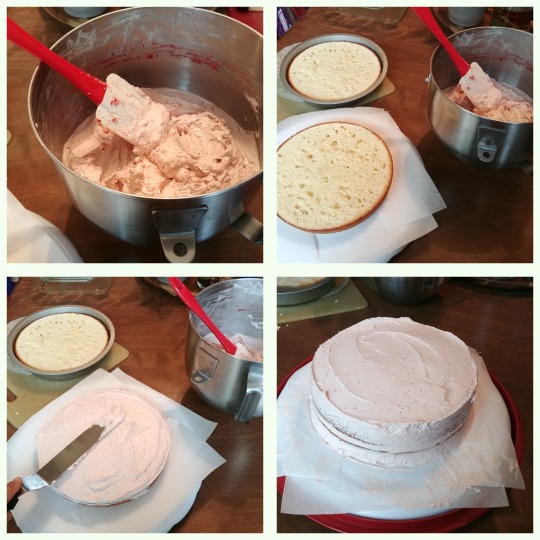
(College image, clockwise from top left: completed swiss meringue buttercream with strawberry powder mixed in, trimmed cake rounds next to a bowl of frosting, half-frosted cake, cake base frosted next to a bowl of frosting and a bare cake round.)
Swiss Meringue Buttercream Frosting
Link: https://natashaskitchen.com/swiss-meringue-buttercream-recipe/
Ingredients
7 large 210 grams or 7 oz egg whites
2 cups 400 grams granulated sugar
1 ½ cups 3 sticks or 340 grams unsalted butter, softened
2 tsp vanilla extract
¼ tsp salt
Instructions
In a medium pot, add at least 1-inch of water and bring to simmer.
Thoroughly wash and dry the stainless steel mixing bowl from your stand mixer* (you don’t want grease touching meringue). Add 7 egg whites and 2 cups sugar and whisk together. Place mixing bowl over pot of barely simmering water, creating a seal over the pot (bowl should be over the steam, not touching water). Whisk constantly until mixture reaches 160˚F (takes about 3 min). Sugar should be fully dissolved (you should not feel any sugar granules when rubbing mixture between finger tips). Mixture will feel hot to the touch.
Wipe water from bottom of mixing bowl and transfer bowl to stand mixer fitted with whisk attachment. Beat on medium-high speed until stiff glossy peaks form (about 15-20 min) and bottom of the bowl feels completely at room temp and not warm (important: warm meringue will melt the butter).
Once bowl is at room temp, switch to paddle attachment, reduce to medium speed and add butter 1 Tbsp at a time, adding it just as fast as it is absorbed by meringue. Once all butter is in, scrape down the bowl and continue beating until it reaches a thick whipped consistency (3 min on med-high speed). If it looks lumpy or liquidy at all, keep beating until smooth, thick and whipped.
Add 2 tsp vanilla extract and ¼ tsp salt and mix on med-high until incorporated (about 1 min).
**Ms. R’s additions to the recipe using recommendations from Stella Parks**
Measure out 2.5 ounces of freeze dried fruit (strawberries, in this case) and grind in a food processor until it becomes a fine powder.
Sift fruit powder before adding to buttercream, and mix thoroughly. Frosting can be used immediately, but setting it aside in the refrigerator leads to a stronger flavor and a smoother consistency.
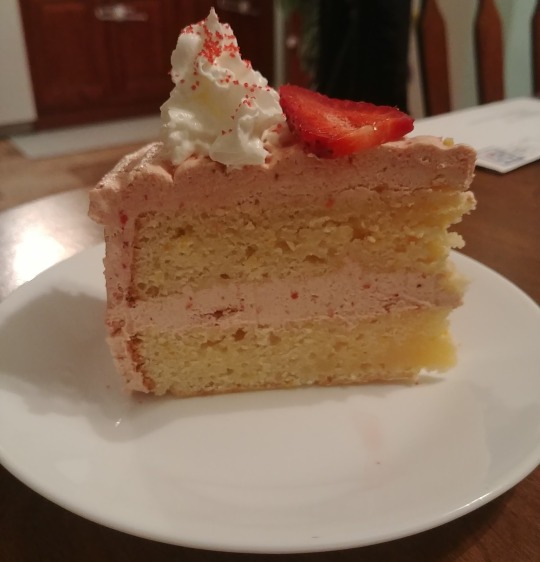
Overall, I feel like this birthday cake was a success even though I wasn’t very happy with the sponge (I think overmixed AGAIN). The frosting took a little longer to come together than I expected, probably due to the doubling of the recipe. Next time I double I will use 10 egg whites and keep the other ratios the same. Despite the issues, the cake and buttercream held up well and sliced nicely (as seen in the image below), and the flavors or strawberry and lemon were INTENSE.
10/10, would bake again.
#lemon cake#swiss meringue buttercream#bravetart#stella parks#birthday cake#toddler birthday#strawberry#fruity#homemade#submission
0 notes
Text
Homemade Spaghetti
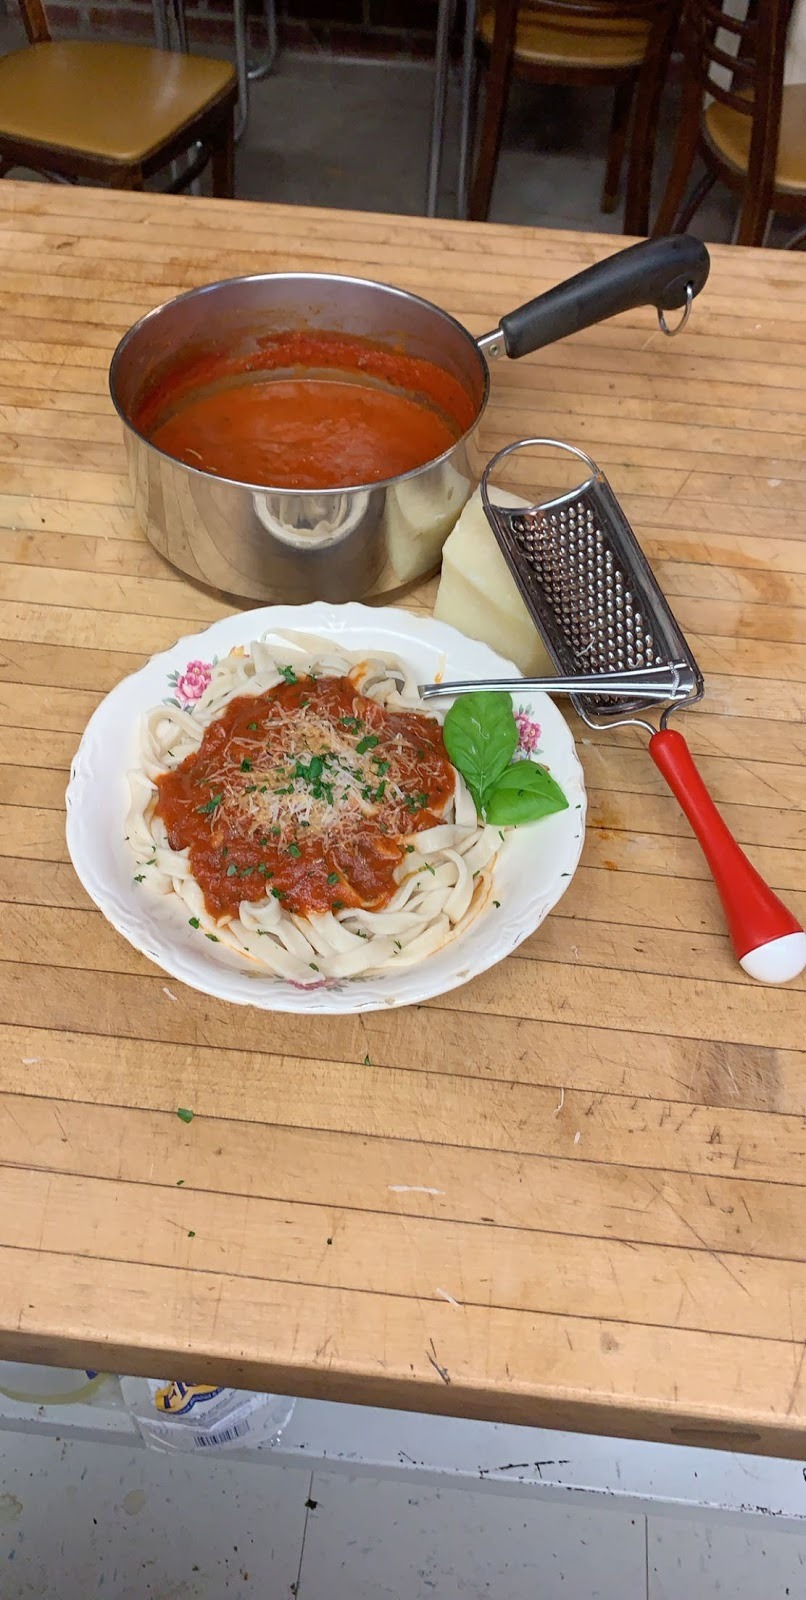
by Natalie D.
Recipe Ingredients
Dough
3 ½ cups all- purpose unbleached flour
4 large eggs
½ tsp of salt
2 tbsp of water
Sauce
2 cans store bought puree (or 2 jars of homemade)
1 small can of tomato paste
2 tbsp of oil
2 cloves of garlic (chopped fine)
2 tsp of oregano
2 tsp of basil
1 tsp of garlic powder
1 tsp of onion powder
Salt and pepper to taste
3-5 cups of water
Pinch of baking soda
Instructions
Dough
Mix eggs, water, flour, and salt in a mixer bowl.
Mix on speed 2 for 30-60 seconds, add more water if the dough is too dry in ½ tbsp increments.
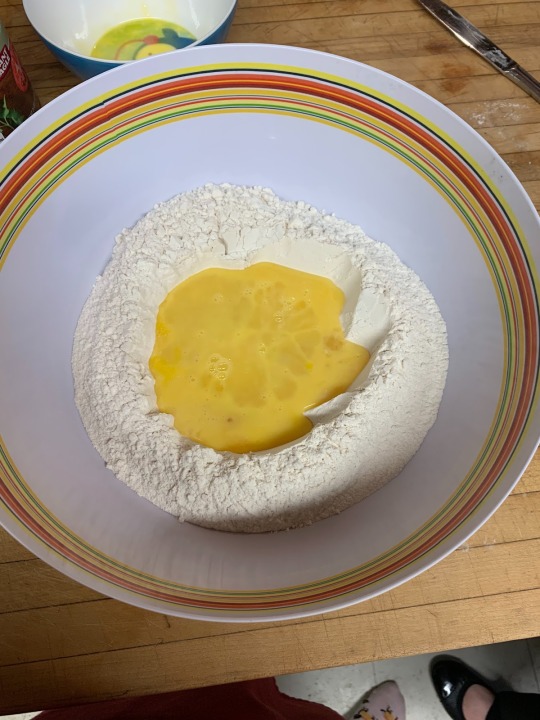
(Image of: ingredients in the mixing bowl.)
Remove the dough and knead by hand for 2 minutes. Let rest for 20-30 minutes.
Cut dough into 4 pieces, take one piece flatten into a rectangular shape adding flour to both sides.
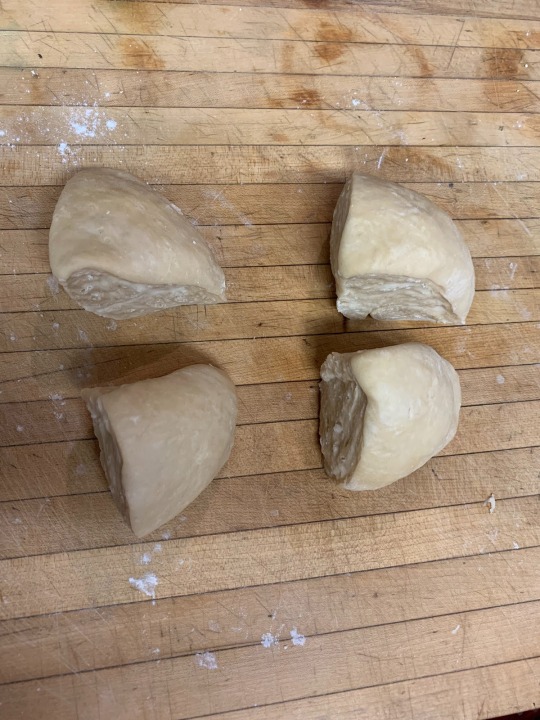
(Image of: Dough cut into smaller pieces then rolled out. This helps it go through the pasta maker easier and less times.)
Set up the pasta maker, roll dough through on first setting.
Roll through twice
Change setting to 2 and pass through the sheet roller
This should make a long pasta sheet.
Do the same for the 3 remaining pieces.
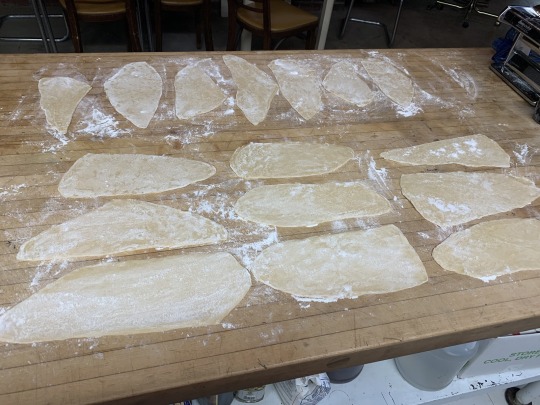
(Image of: All the pieces rolled out before being made into pasta.)
Change attachment on pasta machine to your liking
Run pasta through the cutter catching it on the other side.
If you don’t have a pasta machine roll out dough thin and cut strips with a knife.
Allow pasta to dry for a few minutes before boiling.
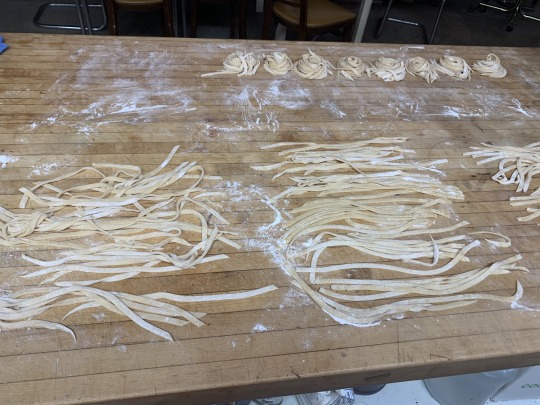
(Image of: Pasta drying out.)
Make sure you spread out the pasta to help dry it out, also wood surfaces help draw out the water better.
Only needs 3-7 minutes to boil.
After draining pasta top with sauce.
Sauce
In a 6 quart sauce pan, saute garlic in oil.
Add tomato paste to pan, fill paste can with water, pour in pot. Stir until paste liquifies.
Add puree, fill puree cans with water and add to pot.
Stir thoroughly.
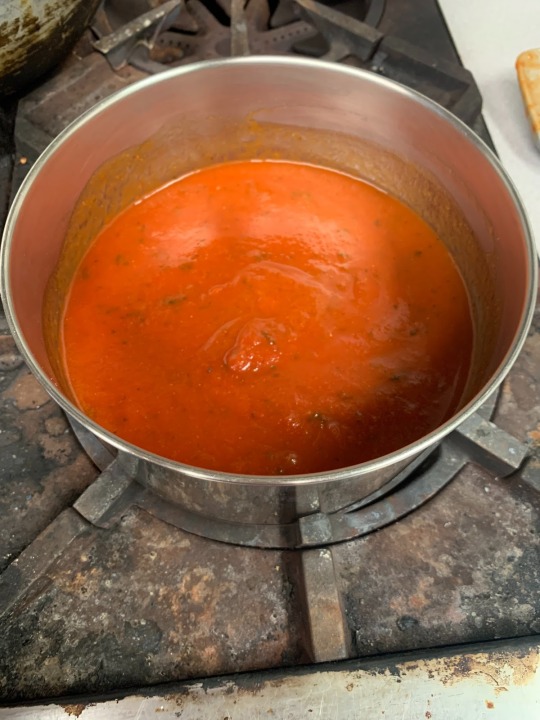
(Image of: All sauce ingredients in the pot cooking.)
Stir in seasonings
Add pinch of baking soda, Stir
Cook on stove top for 3-4 hours, stirring occasionally
(enough for 4 people)
* * *
I choose this recipe because it has been in my family for generations. My grandma moved here from Italy when she was a young girl. Even though she grew up in America my great grandparents still raised her like they were in Italy. They spoke italian and made all the same homemade italian food they made in Italy. One of the homemade meals they made every sunday was pasta. They always made some type of pasta on sundays after church. Once my grandparents had their kids they kept the tradition. They made homemade pasta on sundays. Since she had six children the process to make all the pasta didn’t take long. She also had to change the recipe to feed all eight of them so she doubled it, making more dough for the pasta. Since my father was the youngest of six by the time I was born and old enough to help my grandma was in a wheelchair so she had a hard time helping. My dad has always been a very good cook and he loves to make homemade food from scratch. Once I was old enough to help, my dad took it upon himself to teach me and my brothers everything we needed to know about cooking. We made homemade bread, sauce, pasta and pizza. We canned foods from our garden just like my grandma use to do. As we got older we started to lose interest in cooking so my brothers and I stopped but my dad still kept making homemade meals on sundays. After my grandma passed away we realized how much homemade meals meant to my dad so we started to help again. Now it is a tradition that whenever my brothers are home from school we make homemade bread, pizza, and pasta. We also make meatballs and salad to go with it. Since my dad grew up in a family of eight he still makes a lot of food so we end up eating it during the week and freezing the rest and sending it back to school with them. Making homemade food with my dad is one of the only things we bond over so I do it with him now and that is the main reason I chose homemade pasta. We will be making spaghetti but you can make other pastas from the same recipe. We start at noon on a sunday and by the time were done it’s dinner time. As we make the dough and the sauce my dad tells me stories of my grandpa since he passed away when I was three years old. He tells me what it was like for him growing up with five older siblings. We listen to classic rock or whatever my dad wants to listen to and sing and just have fun. A lot of times some of my aunts will come over and help. We make it fun and enjoyable instead of being stressed about getting it done or making mistakes. Wanting to make homemade pasta is more of a hobby for us then it is a chore. You have to want to do it to have fun. Since I come from a very italian family food is a big thing for us. My aunts and I are always baking and my uncle has a restaurant. By making all these homemade things I am keeping myself in touch with my family and it reminds me where I came from.
Hashtags: Homemade pasta, Italian, Spaghetti, Project, Good Food.
#homemadepasta#italian#spaghetti#project#good food#collegewritingtwo#kent state trumbull#Kent State University#collegewritingfood#homecooking#ksutrumbull#submission
0 notes
Text
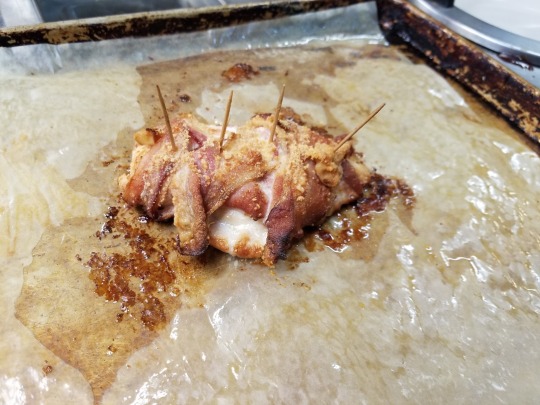
Bacon Wrapped Parmesan Chicken
by Steve W.
Ingredients:
4-5 strips of bacon
1 5-preferred or available oz chicken breast
2 tbsp of lemon pepper seasoning (optional)
½ cup of shredded Parmesan cheese
4-5 regular toothpicks
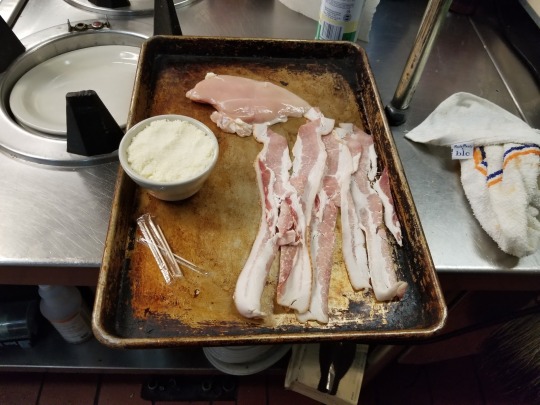
(This is everything you will need, now since I made this at work I we didn’t have any more lemon pepper seasoning, but this recipe is so good even without it.)
Instructions:
1. Preheat oven to 375 degrees.
2. Season chicken by spreading lemon pepper seasoning over all of chicken. (optional)
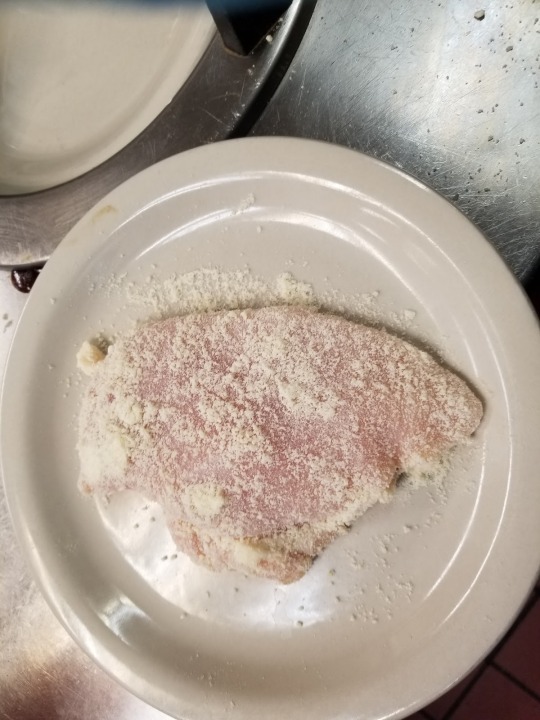
3. Rub about ¼ cup of parmesan cheese over the top and bottom of the chicken.
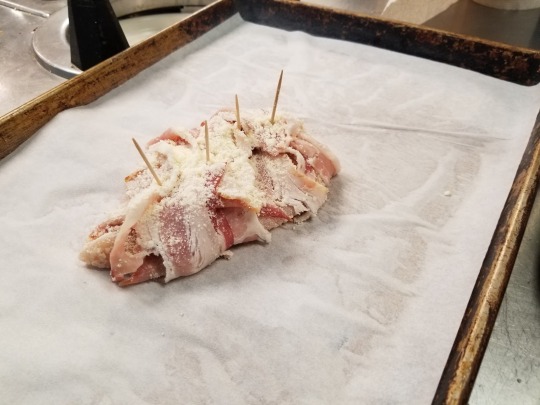
4. Wrap the 4-5 bacon strips around the whole chicken using toothpicks to hold bacon strips in place.
5. Sprinkle the rest of your cheese over top of the now bacon wrapped chicken .
6. Get a regular baking sheet and apply your preferred form of non-stick to said pan.
7. Bake in the oven at 375 for 15 minutes or until chicken temps to 165 degrees.
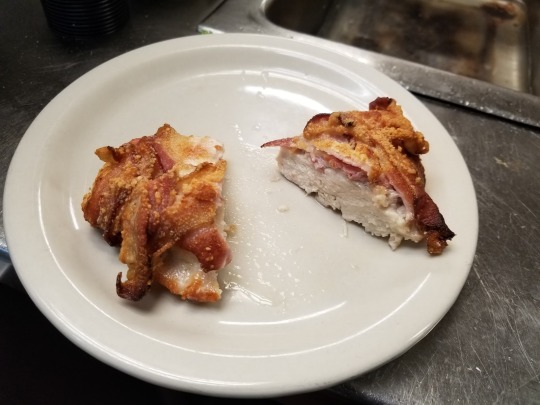
8. Remove from oven, let it cool, and enjoy your chicken made for the gods.
(You don’t need to cake your chicken in parmesan, you need just enough to lightly cover the outside of it)
I chose this recipe because I feel like it shows some of the creativity that comes around when you’re bored and hungry when working in a restaurant. Normally I would just snack on little things to get me through the day at work, but since I was on keto at the time and almost everything in the restaurant has carbs, this brilliant idea was born extinguish my hunger. Now we’re a steakhouse, so I tried looking into different cuts of steak I could try this with but none of those really cook as well as a chicken does in the oven, which is an essential thing since trying to cook this on a grill would cause you to lose all of your parmesan cheese.
The production of this recipe did not come easily. In the early stages I was trying different steaks, and eventually settled on using chicken. I had also experimented with lots of different spices and seasonings, and since I work in a restaurant it was a lot easier to just try this or that rather than going out and buying all sorts of things that would just go to waste. Originally the best part about this meal was not even included, it wasn’t until I was surfing online to find different chicken recipes that I found out you can wrap chicken in bacon. The worst part of creating this recipe though was finding the right cheese to use. Now I’m not a huge cheese fan, but I was willing to try anything to add to this perfect keto meal. American cheese just waxed out on top and took away from the overall flavor, and swiss in general just is not for me. Soon though I had found the perfect cheese for the job, which is grated parmesan. Unless you add too much, there is no way you can go wrong by using this cheese, it’s not overpowering in flavor, and it doesn’t wax or burn up while cooking, and with that I’d finally managed to create this godly food item.
(The bacon may not be super crispy as how it is when you fry it, but nevertheless it is still so so good, especially wrapped around chicken.)
It was perfect for keto, the cheese and bacon are high in fats, while the chicken is just a great protein for the diet and there are absolutely no carbs in this meal. And because I was doing keto at the time, this was perfect for me. I would make this chicken nearly once everyday because I honestly find it to be that good. It’s just a perfect, quick and easy keto friendly meal.
(A lot of Keto friendly foods can get old pretty quick, but this is one of the ones that will keep you coming back and making more for the entirety that you’re doing the diet.)
#ketofriendly#chicken#bacon#lowcarb#quickandeasy#collegewritingtwo#kent state trumbull#Kent State University#collegewritingfood#homecooking#ksutrumbull#submission
0 notes
Text
Homemade Apple Pie
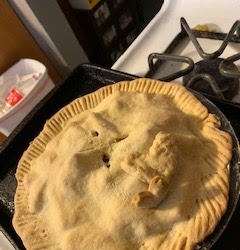
(Image of the Apple pie after it had been taken out of the oven and left to cool.)
by Jacinda C.
Apple pie is an American classic in all homes. It represents family, love and warmth all wrapped in a nice blanket of flaky pie crust to keep everything nice and snug. When I think about making apple pie I think about my mother and helping her in the kitchen when I was younger with my siblings. All of us huddled around our small yellow kitchen table flour spilling all over the floor as we make the dough for the pie crust. Of course our mother was not to happy about the mess she made because she knew she was going to be the one to clean it up. Our mother did the majority of the work but we tried to help where we could, except with peeling and cutting apples which was left exclusively to her because small kids with knives was never a good idea. Although she always put the apple skins in a little bowl for me because she knew how much I loved to eat them. We would usually make two pies at a time since we all loved apple pies the best and it would typically all be gone in a single day if we only made one of them. The best part about making the dough for the pie crust from scratch was being able to pick up pieces of the uncooked dough and both play with it and eat it (something that I would not recommend doing now that I am older). There is something about eating the uncooked batter of brownies or raw cookie and pie dough that just made it taste incredible to kids. There is a certain nostalgia to it, something our parents didn’t want us to do but we still did it anyways. We were so excited about the dessert that we couldn’t wait for it to be baked to try it.
Recipe

(Image of the ingredients used for the pie crust and filling.)
Ingredients:
Pie Crust
2 Cups Pillsbury All Purpose Flour
1 teaspoon salt
¾ cup Crisco All-Vegetable Shortening
4 to 8 Tablespoons ice cold water
Apple Pie Filling
6-8 Macintosh Apples
½ cup brown sugar
1 cup sugar
2 Tablespoon cinnamon
¾ stick butter
I think those moments were my favorite from my childhood just being in the kitchen baking pie and having a good time with my family. My hopes for recreating this family recipe is that I can get that same feeling again while baking a pie with my mother now that I am a lot older. Also having the ability to help out more with baking the pie because now I can safely use a knife to cut off my own apple skins. Being busy with school and work all the time has causes me to see little of my parents since I am hardly home so this is a perfect opportunity to spend time with my mother and bake something delicious. Also who doesn’t love a good apple pie on a nice Easter morning? The smell of sweet cinnamon and sugar being baked with butter and apples is the perfect scent to fill your house with. Why spend money on expensive air fresheners when you can simply just bake a pie and not only have something wonderful to eat but have a pleasant aroma filling your house. Also creating your own pie is so much more rewarding then just buying one from your local Walmart because you get the fresh pie taste aroma all in your own home.
Instructions:
Pie Crust
Blend flour and salt in a large bowl. Cut shortening into flour mixture using pastry blender or fork. Stir in just enough water with fork until dough holds together.
Shape dough into a ball for a single pie crust, Divide dough in two for double crust. Flatten ball(s) into ½ - inch thick round disk(s).
Roll dough (larger ball of dough for double crust pie) from center outward into a circle 2-inches wider than the pie plate on a lightly floured surface for the bottom crust. Transfer dough to pie plate.
For a single pie crust, trim edges of dough leaving a ¾ - inch overhang. Fold edge under. Flute dough as desired. Bake according to specific recipe directions.
For a double pie crust, roll disk for bottom crust, trimming edges for dough even with outer edge of pie plate. Fill unbaked pie crust according to recipe directions. Roll out remaining dough disk. Transfer dough carefully onto filled pie. Trim edges of dough leaving a ¾ - inch overhang. Fold top edge under bottom crust. Press edges together to seal and flute as desired. Cut slits in top crust or prick with fork to vent steam. Bake according to specific recipe directions.
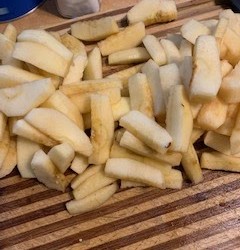
(Image of the apples after being peeled and cut into pieces.)
Apple Pie Fillings
Make pie crust. Roll bottom crust, place in pie pan. Poke holes in bottom of crust with fork.
Put half brown sugar, sugar, butter and cinnamon in bottom of pan.
Place peeled, cored, and sliced apples in pie.
Place remaining brown sugar, sugar, butter and cinnamon on top of apples.
Roll top crust. Place on top. Cut slits in top crust. (Feel free to get creative with the crust. Maybe lay strips of dough in a design or make some pretty pastry flowers to go on top. Or just leave it plain because who doesn’t love traditional apple pie.)
Bake for one hour in oven on 350 degrees.
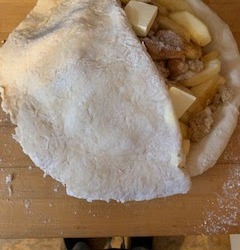
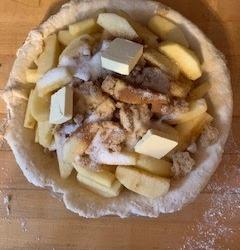
(The image on the right is what the pie fillings looks like before the top crust is added and the image on the left is what the pie dough looks like when it is being placed on top of the filling.)
I think that the best pairing with a freshly baked apple pie that is still hot from the oven would be some vanilla ice cream. The contrast between the warm and flaky crust of an apple pie with the cool and smooth texture of the ice cream makes for the perfect nostalgic dessert. To add to the calories of the dessert you could even put some whipped cream on top to seal in the pie aesthetic perfectly.
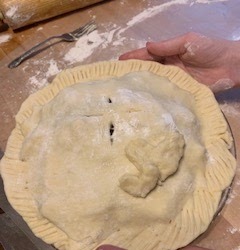
(Image of what the pie looks like before it is ready to be put in the oven and baked.)
#americanclassics#applepie#fresh#familycooking#familyrecipe#traditions#desserts#collegewritingtwo#kent state trumbull#Kent State University#collegewritingfood#homecooking#ksutrumbull#submission
0 notes
Text
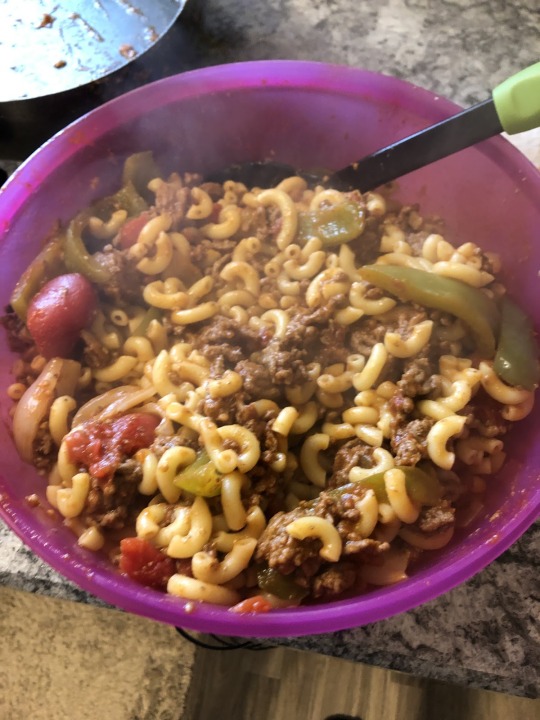
Goulash
by Natasha T.
Goulash
1 lb. ground beef
1 whole green pepper
1 medium sized onion
1 can of mushrooms
1 can of diced tomatoes
1 can of tomato sauce
½ tsp of minced garlic
½ lb. of macaroni
Average Prep Time: 20 Minutes
Instructions:
1.Cook 1 lb. of ground beef in skillet at medium heat until browned.
2. While beef is cooking, start cutting the green peppers and onion. Dice both in small pieces. 3.Once green pepper and onions are cut put into skillet on medium heat.
4. Add in canned tomatoes, tomato sauce, mushrooms, and garlic to the skillet with the green peppers and onion.
5. Let shimmer for 10 minutes.
6.While the ground beef is cooking and the vegetables are shimmering, bring water to a boil following the directions on the macaroni box.
7.Once water is boiling, mix in macaroni and cook for 9-11 minutes.
8. Once beef is browned, strain and mix the beef with the vegetables.
9.Once macaroni is cooked strain and mix in with vegetables and beef.
10. Stir. Serve.
* * *
This is not the traditional goulash recipe. This dish is originally from Hungary and is actually called Gulyás. Gulyás consisted of bell peppers, onions, carrots, tomatoes, potatoes, beef, pork lard, beef broth, and garlic. The goulash I am making is more Americanized. There are some similarities between the original and the Americanized version. Onions are present in both, so are peppers although the Hungarian version calls for red bell peppers it says to stay away from green peppers because they have a completely different flavor from the peppers originally from Hungary. We use ground beef as for the Hungarian version calls for beef, similar but not quite the same. The main differences between them is that Gulyás does not use macaroni or tomato sauce. Our version also do not include beef broth, potatoes, pork lard, or carrots. Gulyás is more of a soup type dish and goulash is a pasta type dish.
This simple recipe means more to me than just being an easy dinner. Growing up, I would go spend the nights at my grandparent’s as much as I was allowed to by my parents. I wasn’t allowed to very often because my parents and grandparents didn’t always get along. Although, my grandparents tried to keep their problems with my parents to my parents, it was always my dad who would prevent us from seeing them. However, when I did get the chance to go spend time with them I would always help my grandma cook. It was something we would bond over. She taught me how to make quite a few simple dishes. My favorite was goulash. It was also the dish we made the most, since it was my favorite. As I helped her make it more and more, I learned how to make it all on my own. I know this sounds like a simple thing to do, but I was really young when I learned how to make it all on my own so it was a huge accomplishment to me. My grandpa always loved when my grandma and I cooked for him. He always insisted I helped her cook even when I didn’t think I was good enough to help. Well now my grandpa is no longer with us, making goulash always brings back so many good memories. That’s why, even now, when I go visit my grandma we usually make this dish or a couple other of my grandpa’s favorites as if he was there sharing the meal with us.
Now, I am passing on this little tradition to my little sister. She is 8 and enjoys cooking even more than I did when I was younger. Although, she doesn’t remember our grandpa very well because she was too little when he passed, I pass on the memories to her while we are cooking.

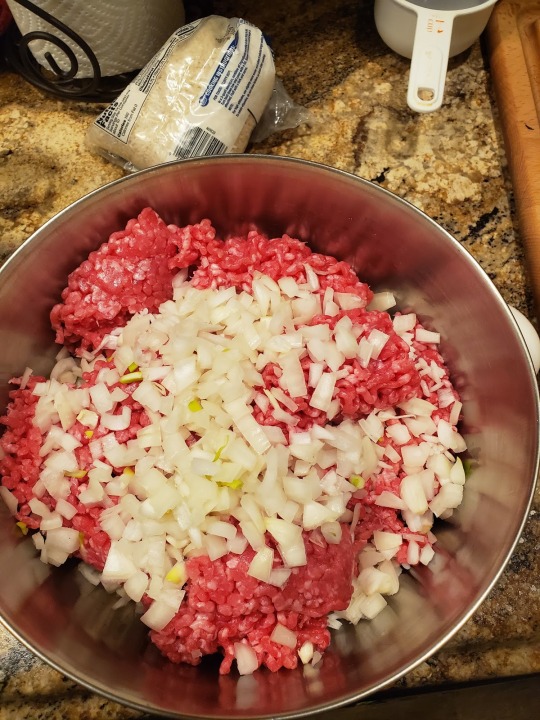
Once the meat is browned and after the green beans, onions, tomatoes, and mushrooms are all cut up mix them all together in a pot on medium heat.Add in garlic, salt, and pepper as well. As this step is completed, put water into pot for the macaroni.
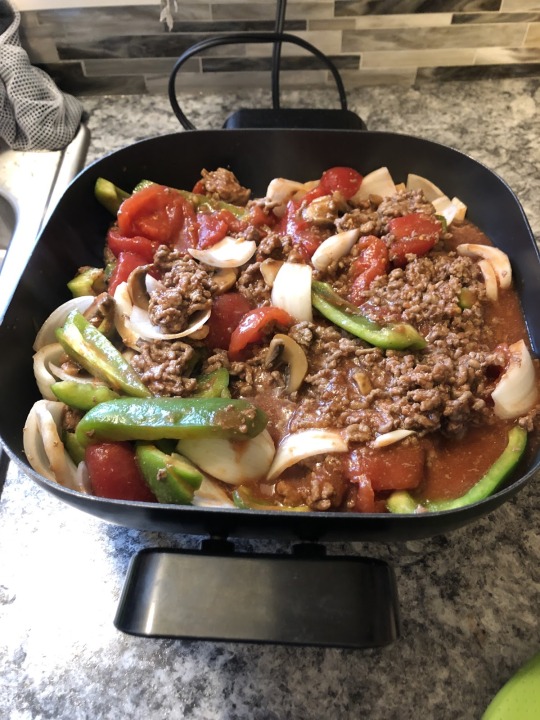
Don’t mind our switching of pot to electric skillet. We made too much for the pots so we had to find something bigger. I prefer the electric skillet over a pot anyways, I feel that it cooks more evenly when the lid is on that it would in a pot. Anyways, now add in the tomato sauce and put the lid on. Let this simmer for at least 5 minutes. The way I check to see if the vegetables are cooked all the way is I take a fork and poke it through a couple different vegetables to see how tough it was to poke through.

While the vegetables are cooking, the water should be boiling at this point. Dump in all the marconi noodles into the water and set a timer for 10 minutes. By the time the macaroni noodles are cooked make sure you turn off the heat on the vegetables so that they don’t over cook! Once the timer goes off on the noodles, test to see if the noodles are cooked all the way. There are a few different ways to test so. One way is to snag a noodle against the side of the pot and try to slice it in half. If it is too difficult, it is not ready. Another way is to pull a noodle out of the pot, and depending on how brave you are stick it right into your mouth to see if it is cooked all the way. The last way to test to see if the noodles are cooked is more traditional, throw that noodle against the wall and see if it sticks! I am kidding, do not do this unless you are cooking in your own kitchen and under your own discretion. I don’t want any anger mom’s emailing me as asking why I told their kids to throw noodles against the wall!
Once the noodles are drained and the pot of vegetables and ground beef are ready, mix it all together in a separate bowl! Make sure to mix it all together well.
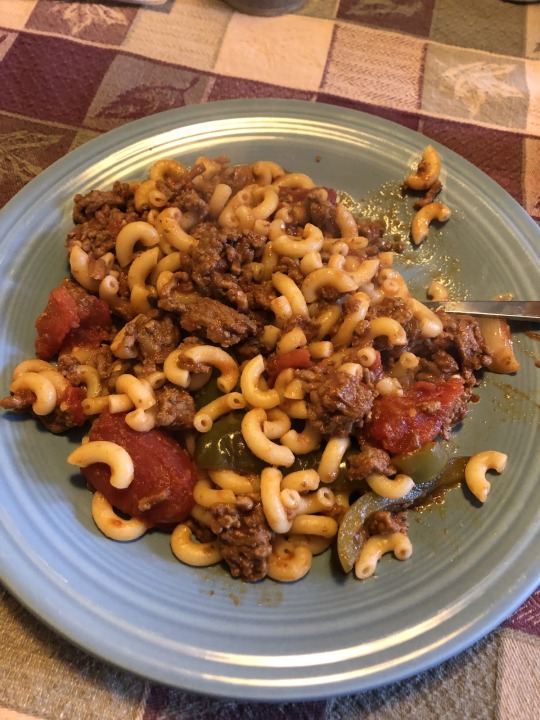
And there we have it! The final product. This recipe is simple and easy to follow. It serves as a quick meal that doesn’t take took long to cook! The only thing I would do differently the next time I cook is to think my pots out thoroughly first and add more tomato sauce.
#kentstateuniversity#goulash#gulyas#fastneasy#simple#tasty#collegewritingtwo#kent state trumbull#Kent State University#collegewritingfood#homecooking#ksutrumbull#submission
0 notes
Text
Mini Deep Dish Pizzas
by Heather H.
Let’s be real, I really hate preparing big meals for people, especially when I have loads of homework, stress, and whatever else college brings on (no one seems to understand how college is in my house). Making food in my house is always a challenge due to the fact that normally dinner consists of a couple meals. It annoys me greatly how picky my family is, especially my brother. He CAN NOT eat things unless it it to his perfection, hence the couple meals for dinner (which is kinda impossible since he finds something wrong with EVERYTHING. He literally would not eat spaghetti one night because “he did not like that type of noodle). Unfortunately, my mom is pretty much a slave to her workplace and by the time she arrives home, she is exhausted and does not want to cook dinner, which really gets my brother mad. Therefore, I can make this to make sure my mom relaxes, but pleasing my brother may be the real challenge of the project.
Ingredients:
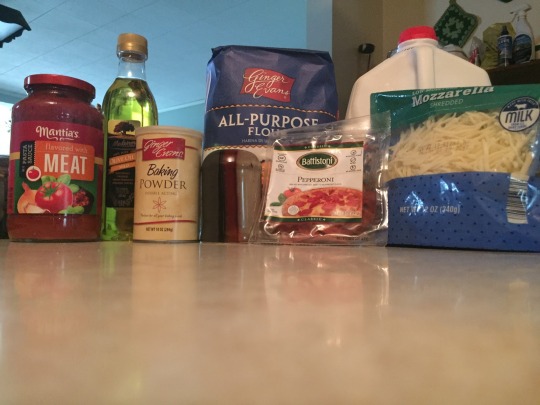
Ingredients from left to right: 1 jar of Mantia’s meat sauce, olive oil, baking powder, pepper, all-purpose flour, pepperoni, milk, and cheese
Pizza Dough:
1 ⅓ cups all-purpose flour
1 tsp. Baking powder
½ tsp. Salt
½ cup whole milk
2 Tbsp olive oil
Pizza:
Olive Oil (for pan)
½ pound of dough
½ cup (4 oz.) shredded mozzarella cheese
Pepperoni
Flour (for rolling out dough)
1 tsp. Salt
1 tsp. Pepper
1 jar of marinara sauce
To solve this, I thought to myself, “how can he not like pizza?!”. I know he enjoys pizza, he orders it almost EVERY NIGHT (must be nice). I normally make homemade pizza for my family while he is gone but I have never made deep dish. Pizza is also my favorite kind of food because it can be changed to fit my mood and it is one of the quickest yet most filling types of food around (unless there is pineapple, then you could FORGET IT!). Pizza and the sweet juice from the pineapple do not mix in my book. I do have some Italian heritage due to my father, so it is a possibility that pizza is the safest bet to ensure that EVERYONE is happy. This recipe is also inspired by my high school foods class. My teacher, Mrs. Fredricks (LOVE HER) would have the freshman classes make homemade pizzas for the seniors and the seniors would love to be the judges of them (especially my senior class since free food is a pretty great thing). I remember my freshman year, my group of three other girls made pizza with alfredo sauce and cheese. We placed second out of thirty groups. It was a very rewarding accomplishment because now I do love making homemade things.
Instructions
Pizza Dough:
In a mixing bowl, mix flour, baking powder, and salt in a large mixing bowl.
Stir in milk and olive oil until a soft dough forms.
Turn dough onto a lightly floured surface and knead 10 times.
Shape dough into a ball
Cover dough with an inverted bowl and let it sit for 10 minutes.
Separate dough and cut each piece into 6-inch pieces.
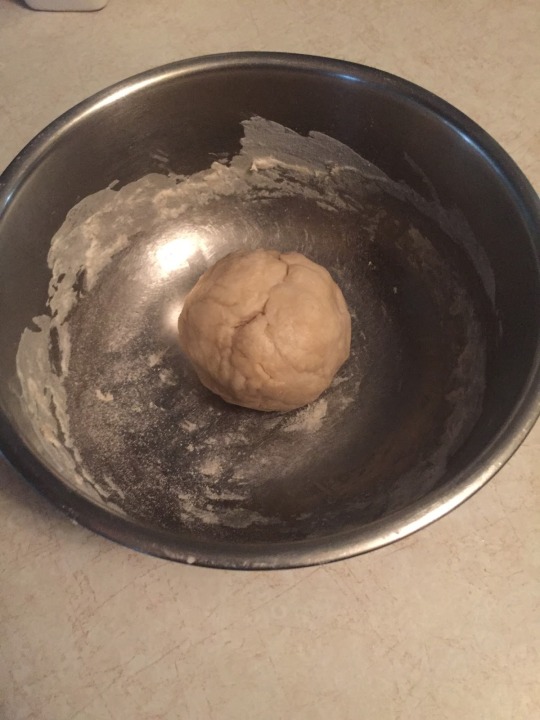
Image of: Prepped dough rolled into a ball
Pizza
Preheat the oven to 450 degrees.
Lightly brush each muffin cup with olive oil.
Fill each cup with one 6-inch piece of dough, gently pressing to the bottoms and sides.
Season with salt and pepper
Sprinkle each dough cup with 1 Tbsp. of cheese and sauce.
Cut each whole pieces of pepperoni into fours and add to each cup to to desired amount.
Bake until golden brown; 12 minutes
Let cool for 2 minutes before removing from pan,
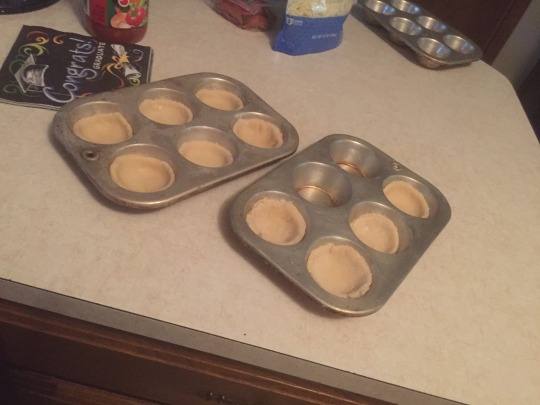
Image of: Dough cut and put into the pan to be filled with sauce, cheese and pepperoni
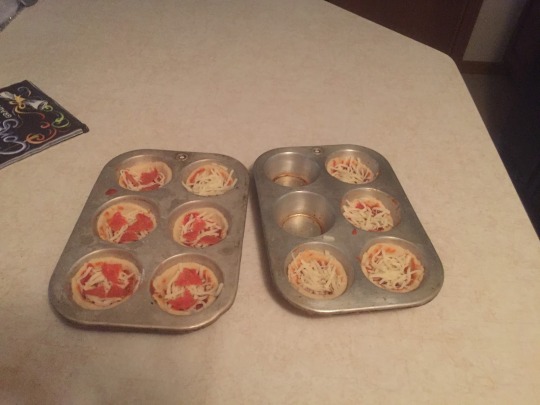
Image of: Pizzas made and ready to go into the oven!
Links to the recipes
Dough: https://www.allrecipes.com/recipe/244638/no-yeast-pizza-crust/
Pizza: https://www.marthastewart.com/315712/mini-deep-dish-pizzas
I am so excited to create this dish, I think the cupcake size pizzas will be adorable. I might get stuck making these often if my lovely brother (sarcasm) likes them enough or maybe I will teach him how to make them (which he will not enjoy learning from a nineteen year old).
I picked a Martha Stewart recipe because I have heard of her and I like some of her other recipes, like her chocolate chip cookies and macaroni and cheese. I chose Missy’s dough recipe because it seems quick, efficient, and cheap (Broke college student here). This is a little different that the dough I learned how to make in high school, but if you do not challenge yourself, what is the point?
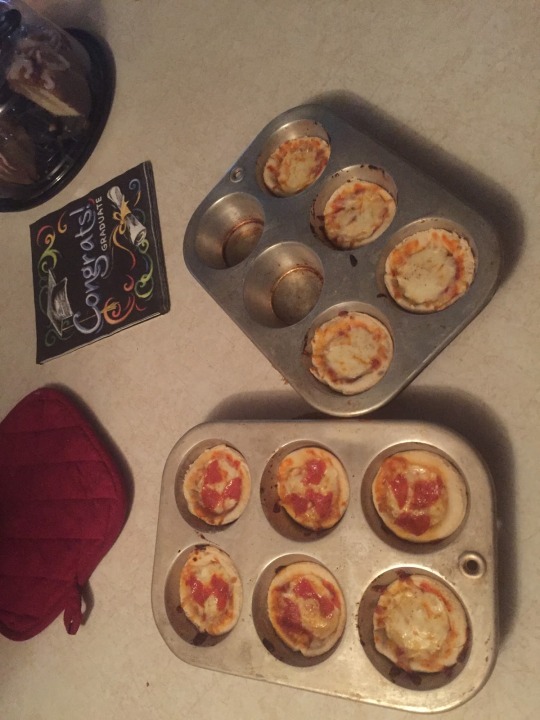
Image of: Pizzas fresh out of the oven (looks delicious)
Making these were a piece of cake, except I found that next time I will most likely double the dough recipe. I also think the cheese was way too much because it eventually melted into a mess but I do love a lot of cheese. I had to figure out how to cut the dough into circles for the pan, so I used the top of a cup that was about six inches in diameter. It worked perfectly. One of my major worries before putting them into the oven was that the dough would raise tremendously and it would end up caving in, luckily that was not the case. I also found out that I had to reduce the time in the oven because it did not take 12 minutes, it took about 6-8 minutes depending on how golden you want the crust. It was super easy to get them out of the pan once they cooled a little. Overall, I would make these again in a heartbeat.
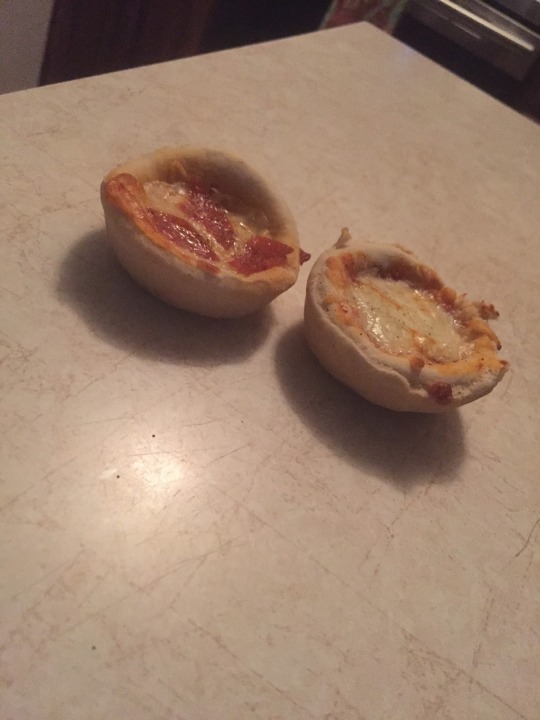
Image of: Little mini deep dish pizzas (2) out of pan
My family LOVED these. My brother demanded I make more, but I had to leave shortly after making them. My parents said it is a perfect appetizer or midnight snack. I could sit here and eat them all day. It had just the right amount of crunch because of the golden crust and the sauce was not dried out. When you bit into them, the cheese was gooey, what more could anyone want in a little pizza!
#marthastewartremake#deepdishpizza#simpleyetwonderful#italianremake#collegewritingtwo#kent state trumbull#Kent State University#collegewritingfood#homecooking#ksutrumbull#submission
0 notes
Text
Dutch Baby
by Eric J.

Recipe:
Ingredients
⅔ cup of milk
3 large eggs
½ cup all purpose flour (packed)
¼ tsp vanilla extract
¼ tsp salt
3 tbsp clarified butter (can be substituted with vegetable oil)
1 tbsp cinnamon (approximately)
¼ tsp nutmeg (approximately)
(Out of the Oven)
Instructions
Clarified butter
If you cannot buy this from a store, you will need to clarify your own butter.
First, cut about 5 tablespoons of butter up into a thick bottomed saucepan.
Melt the butter on low heat. This should take a little while.
Separate milk solids (white foam) on top of the clarified butter.
Let the butter cool to allow about 5 minutes. Then skim off any more solids and pour the clarified butter into a separate dish.
NOTE: The milk solids can be kept and served on the Dutch Baby, but also go good on other food, especially popcorn.
Dutch Baby
It is a good idea to stage your utensils before starting. You’ll need 1
8-10 inch cast iron skillet, either a blender or a simple protein
shaker, oven mitts, and measuring utensils.
First, preheat the oven to 425ºF
Blend milk, flour, eggs, vanilla, salt, cinnamon, and nutmeg until batter is smooth. If using the protein shaker, be sure to add milk before flour and that all of the flour has been incorporated.
Melt clarified butter into cast iron skillet on high heat until just bubbling.
Pour batter into center of skillet. Be careful for splattering butter.
Let cook on stove top for 20-30 seconds, then quickly transfer to oven.
Bake at 425ºF for 20- 25 minutes on the middle rack. Check after 20 minutes as cook time may vary
Once sufficiently risen (3-4 inches depending on skillet) and golden brown, remove and serve.
Eat quickly as the dish cools easily. Often served with some fresh lemon juice, powdered sugar, butter, or maple syrup
NOTE: Be sure that pictures are taken immediately after removing from oven. Also, season to taste. Amounts of spices are suggestions and experimenting with berries is encouraged. Basically, treat this as a glorified pancake both in altering and serving.
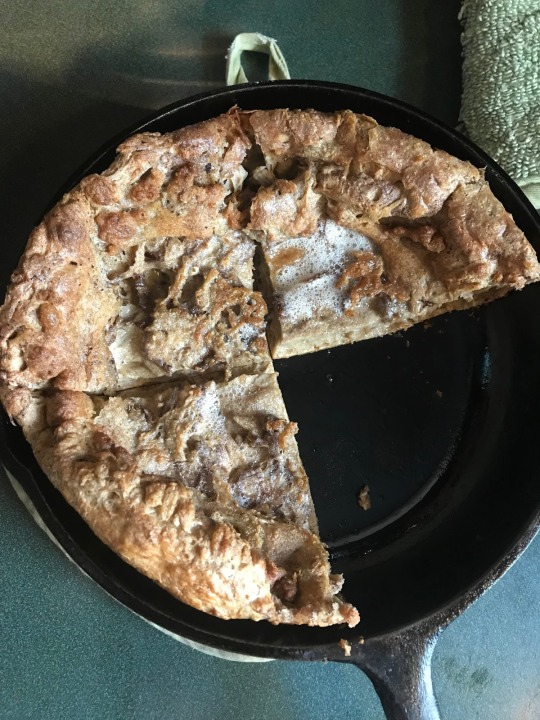
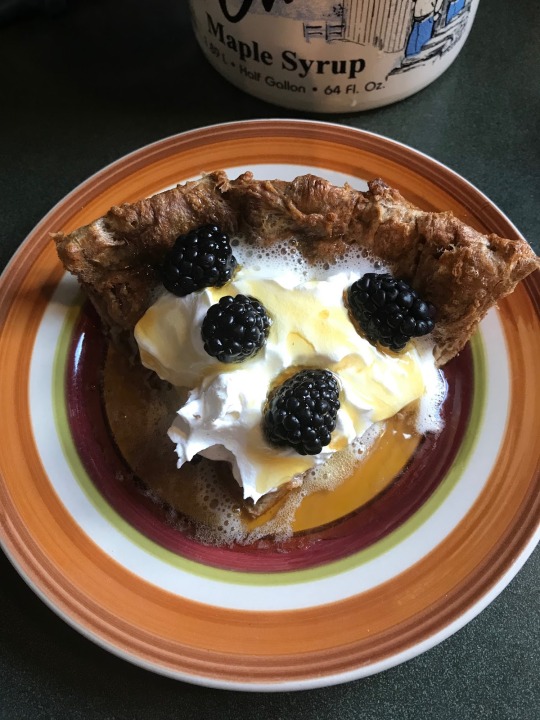
(Serving Images left to right: Cut and Served)
There are a lot of reasons for people to bake. Some people only will if they have to, others bake because they love it. I bake to eat. That means I’m not really concerned with presentation will absolutely avoid unnecessary messes. When I look for recipe I’m checking the time it takes to make before anything else. Don’t get me wrong, I do enjoy baking and I love when something turns out looking professional, but that’s not what I’m doing it for. I like to eat, and if I want something, nine out of ten times, I have to make it myself.
Being as inexperienced as I am, most of my recipes come from YouTube videos where I can see step-by-step what to do. I found out about Dutch Babies from a channel called FoodWishes. I decided to go ahead and try to make one after a little research into clarified butter (which I had never even heard of previously). After getting right and having to share with my family, making Dutch Babies became a regular thing for weekend breakfasts.
This recipe is one of the simplest, yet impressive looking dishes I’ve ever made. It take a few common ingredients, and about 10 minutes to prepare before you bake it. To make the cleanup easy on myself, I just use a protein shaker instead of a blender to mix the batter. The simplicity is my favorite part about Dutch Babies, well aside from the name. The look on people’s face when you tell them you ate a Dutch Baby for breakfast really is priceless.
Speaking of the name, you may be wondering as to why an overly fluffy pancake is called a Dutch Baby. Although it’s perfectly reasonable to think there is some connection to the German penchant for creating gruesome fables for children, this is actually an American dish. Based on a German dish, the Dutch Baby was actually created by a restaurant owner in Washington that claimed a trademark in 1942. The owner’s daughter is actually credited with naming the dish.
As I said, this is just a dish. When you’re eating with four people, Dutch Babies go fast. It’s always a good idea to have a few thing you can pair it with. The great thing about being a breakfast food, is that there are so many sides to serve with this dish. There’s always thick cut, hickory smoked bacon, or breakfast sausages (I prefer links), but it never hurts to experiment a little. Personally, I find a small assortment of fruits and berries does the trick. Whatever you may have on the side, I suggest staying away from eggs. The Dutch Baby already has three eggs in it and in the center you can really tell from how dense it is.

(Collage Image, left to right clockwise: melted butter, gentle boil, separated butter, clarified butter.)
So let’s talk a little about actually making this Franken-cake. First; the clarified butter. This is kind of extra to be honest, and just vegetable oil will do the trick, but clarified butter is the best thing to use. I clarified my own the night before, but you can buy this stuff at a much higher quality than what I made. Basically what happens is boiling separates the oils, salts, and fat solids in the butter. Then you just strain off the liquid oil to use. It takes time, can be messy, but definitely makes the process feel more authentic.

(Collage Image 2: left to right going down the columns: ready to mix, finished, cinnamon in, flour and salt, side view)
Second thing; mixing the batter. Like I said earlier, I just use a protein shaker. It’s fast, easy to clean, and perfect when you’re trying to be quiet cooking in the morning. If you try this recipe, please don’t make it harder than it has to be.
Now my favorite part every time is pouring the batter and watching this thing rise. You may want to make sure you use the middle rack, I’ve had it hit the top of the oven before! Something to keep in mind when heating the clarified butter is to coat the sides of the skillet and not to pour until it begins to bubble a little bit. Once you pour, wait thirty seconds to a minute and stick it in the oven to bake
.


(Final steps left to right: Pouring batter, out of the oven)
#collegecooking#dutchbaby#frankencake#collegewritingtwo#kent state trumbull#Kent State University#collegewritingfood#homecooking#ksutrumbull#submission
0 notes
Text
Grasshopper Brownies
by Alyssa Z.
INGREDIENTS
1 (18.4 oz.) package Chocolate Brownie Mix
Additional ingredients to prepare brownie mix per package instructions
½ cup butter, softened
3 ounces cream cheese, softened
2 ½ cups powdered sugar
1 teaspoon mint extract
2 to 4 drops green food color
1 cup semi-sweet chocolate chips
1/3 cup butter
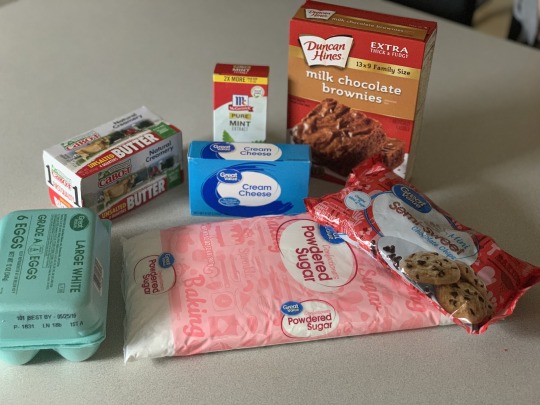
Picture description: image includes all of the ingredients; brownie mix, butter, cream cheese, mint extract, semi-sweet chocolate chips, eggs, and powdered sugar.
PREPARATION DIRECTIONS
STEP ONE:
Prepare brownie mix according to package directions using oil, water and eggs. Bake in 8x8-inch baking pan according to package directions. Cool completely.
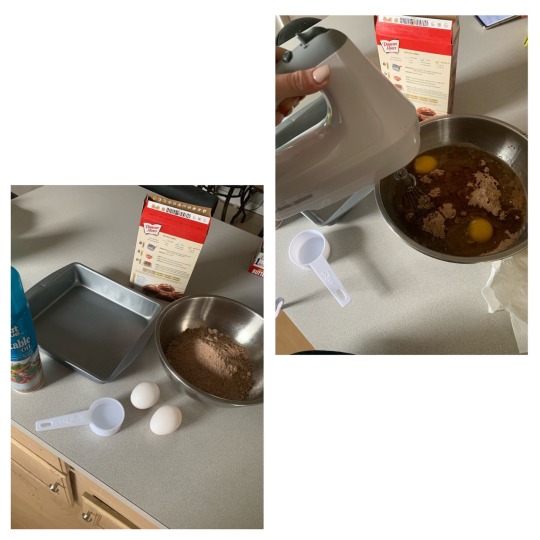
Images description: pictures of the ingredients; brownie mix, eggs, vegetable oil, and water, then being mixed together for the brownies.
STEP TWO:
Beat ½ cup butter and cream cheese in medium bowl until light and fluffy. Add powdered sugar, mint extract and food color. Beat until smooth. Spread evenly over cooled brownies.
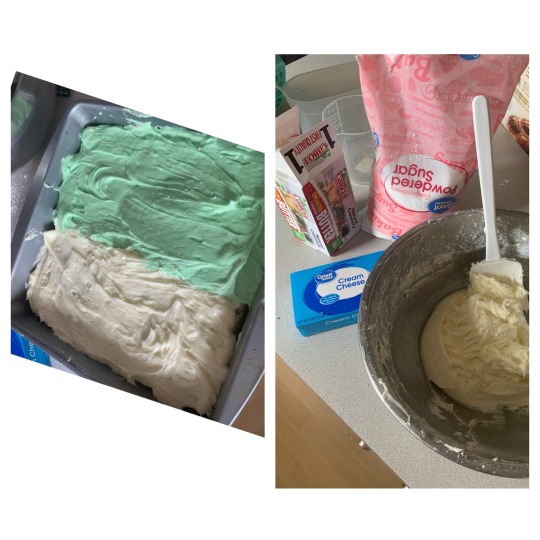
Images description: the creme filling ingredients; powdered sugar, butter, and cream cheese. Second picture, the creme spread onto the brownies.
STEP THREE:
Place chocolate chips and 1/3 cup butter in small microwave-safe bowl. Microwave on HIGH 30 to 45 seconds or until melted and smooth when stirred. Drizzle evenly over filling. Spread carefully to cover. Chill at least 1 hour before serving.
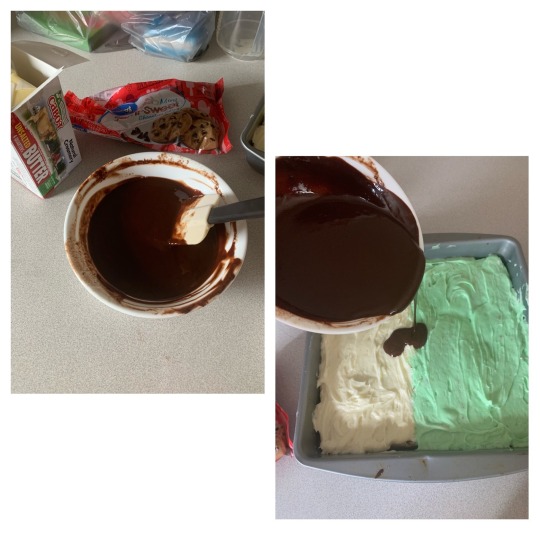
Image description: for the chocolate coating on top of the brownies, chocolate chips and butter mixed and melted in a bowl. As well as chocolate being poured on the brownies.
FINAL PRODUCT:
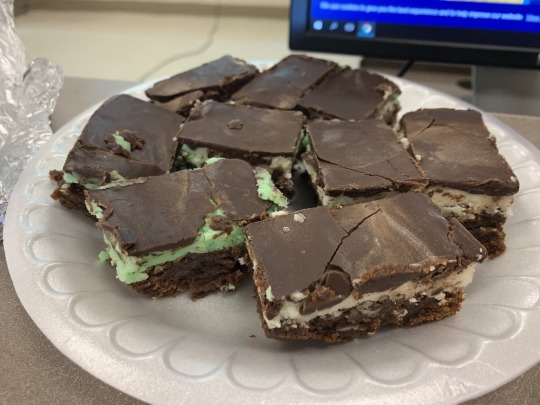
Image description: The final outcome of the brownies cut into pieces and on a plate.
recipe link: https://www.pillsburybaking.com/recipes/grasshopper-brownies-supreme-2282
* * *
I chose to make this recipe because I started making these grasshopper brownies when I was younger with my mother, it was mine and my older sisters favorite. We always thought of it as a luxury if she would make these for us, so usually for our birthdays or special holidays. This is a favorite in my whole family, everyone would love when my mom brought these to a family gathering. But specifically this made the biggest impact on me and my older sister, we could never get enough. When I told my mom I was using this recipe for a school project, she thought it was nice that I remembered it so fondly and that I was continuing to share the grasshopper brownie recipe. This recipe is a nice finishing desert mainly in the spring and summer. Since it is a cooler desert, it’ll hit the spot in the summertime heat! The grasshopper brownies definitely pack a lot of punch though, they can fill you up quickly. Which means there will be plenty to go around for everyone!
This is a recipe that will take a little bit of time out of your day, but the result will be well worth it! Since in the recipe you have to let things chill and set, this makes it take a little bit longer of your time. But if you are taking the time to do it, you will hopefully be satisfied afterwards. There are a few ingredients for this recipe including the following; chocolate, eggs, butter, powdered sugar, cream cheese, peppermint or mint extract, and a few other ingredients listed above. These ingredients are mixed strategically together for the ultimate best taste for your grasshopper brownies! There are a few different steps to this recipe, because there are several different steps you’ll have to follow. There are three overall parts you will have to make to get the overall result. The three parts are the brownie itself, then there is the buttery mint creme for the center. Then lastly to top it off, a coating of melted chocolate to cover the top and then it will harden up once cooled in the fridge.
The grasshopper brownies would be a perfect choice for any after dinner snack. If you are looking for a way to spice up your brownies, this is the recipe for you and especially if you are a fan of mint! There is a rich, smooth but thick creme in the middle with a powerful mint taste. It is a nice refreshing after meal snack! Since this recipe will make quite a big pan, depending on how large you like to cut your brownies, there should be plenty to go around! This would be a good time in the summer to make a cold pitcher of mint and lemon infused water or cold glass of milk, add the grasshopper brownie to mix and it’s and match made in heaven!
This is quite a sweet treat, but there is other ways you could spice up your brownie. You could switch your brownie mix, and maybe add nuts or chocolate chip brownies instead of plain. Also you could alter the mint cream, to be stronger or more tame depending on your liking. There’s lots of things you could switch up with this! If you wanted to be even more extra with these grasshopper brownies, you could top it with some cold ice cream. Some ice creams that would pair well would be chocolate vanilla, or even mint chocolate chip! But any way that you decide to dress it up and make it your own, you will be sure to love it!
Hashtags: #grasshopperbrownies #brownies #mintbrownies #mintchocolate #schoolproject #goodfood
#grasshopperbrownies#brownies#mintbrownies#mintchocolate#schoolproject#goodfood#collegewritingtwo#kent state trumbull#Kent State University#collegewritingfood#homecooking#ksutrumbull#submission
0 notes
Text
Alyssa's French Macroons
Macaroons
When I went to Spain I tried Macaroons for the very first time and I fell in love with them. When I came back to America I gave them to my family to try and they fell in love with them too. We looked for bakeries near us that make them but there are none, the closest one is an hour away. So my sister and I decided that we are going to make macarons. First I had to find a recipe that I liked and I found on popsugar.
Here is the link https://www.popsugar.com/food/Basic-French-Macaron-Recipe-21651110
Ingredients: French Macaron
2/3 cup almond meal or ground almonds
1 ½ cups powdered sugar
3 large egg whites, room temperature and preferably aged up to 3 days
5 tablespoons granulated sugar
1 teaspoon vanilla extract
Butter Cream Filling
7 tablespoons unsalted butter, softened
2 egg yolks
¼ cup granulated sugar
3 ½ tablespoons milk
1 teaspoon vanilla extract
Recipe:
1.Preheat the oven to 280ºF, and position 2 racks in the lower section of the oven. Line 2 rimmed baking sheets with parchment paper. If you have time, draw 1-inch circles on the back of each sheet, spacing the circles at least ½-inch apart.
2.Sift the almond meal-powdered sugar mixture twice through a mesh sieve.
3.Place egg whites in the bowl of a stand mixer (or use a hand mixer), and begin to beat on medium-high. When the eggs are frothy, gradually add granulated sugar 1 tablespoon at a time until fully incorporated. Continue to beat the egg white mixture until glossy and stiff peaks form when you lift the beaters. Gently stir in the vanilla extract. Be careful to not overbeat the meringue (e.g., the meringue takes on a clumpy texture)
4.Add half of the sifted almond mixture, and gently fold it into the meringue using a flexible silicone spatula. Lift from the bottom, up around the sides, and toward the middle, being careful to not overagitate the meringue and lose too much air. Once the almond mixture is predominantly incorporated, add the second half and repeat the folding motion.
5.When the almond mixture is just incorporated, you will need to transform the batter into the appropriate texture. Using the flat of the spatula, “punch” down into the center of the batter, then scrape more batter from the sides to the center, and punch again. You will need to repeat this 10-15 times (or more, depending on your arm strength and the beginning texture of your batter) until the batter slowly and continuously drips back into the bowl when you scoop it up with the spatula. Think of the consistency of molten lava. For the best results, punch the batter a few times, check the consistency, then punch a few more times, etc. Do not make the batter too runny or the macarons won’t rise as they should, and you could end up with oil stains on the surface.
6.Pour batter into a pastry bag fitted with a 0.4-inch tip. In a pinch, you can also use a gallon-size Ziploc bag: just snip a teeny bit from one of the bottom corners. Twist and clip the top of the bag to avoid overflow. On your prepared baking sheets, pipe out 1-inch rounds in the circles you drew (remember to draw the circles on the back side of your parchment to avoid ink or pencil stains on your macarons!).
7.Holding the baking sheet in both hands, rap each baking sheet firmly on the counter two or three times. This smooths out the tops and helps form the “pied” or frilly foot on the bottoms of the macarons. Allow the piped macarons to dry, uncovered, for at least 15 minutes. The macarons should form a very thin, smooth crust where, if you tap it lightly with your finger, the batter will not stick to your finger. If after 15 minutes, the batter is still sticky, let it dry longer. This may take up to an hour on humid days.
8.Place both baking sheets in the oven and bake for 15-18 minutes. After the first 2 minutes, open the oven to allow any excess humidity to escape. Halfway through, swap oven racks and rotate the sheets for even baking. The macarons are done when they are baked all the way through and the shells are just hard. Take care to not underbake (insides will still be mushy) or overbake (tops will begin to brown). Remove them from the oven, and cool on baking sheet placed on a wire rack.
9.When fully cooled, assemble the macarons with your choice of filling. The assembled macarons can be stored in an airtight container in the refrigerator for up to one week.
Butter cream filling
1.Cut butter into pieces, and mash with a spatula until the consistency resembles mayonnaise.
2.In a small bowl, whisk the egg yolks, then add the granulated sugar, and whisk until the mixture lightens to an off-white and you can no longer see the granules of sugar. Add the milk, and whisk to combine.
3.Pour the egg mixture into a small saucepan, and heat over low heat, whisking frequently to ensure that the mixture does not curdle or scorch. Cook until the mixture becomes thick and custardy, like pudding.
4.Pour the egg mixture back into its bowl, and whisk constantly until it returns to room temperature. Whisk in the butter in three batches, add the vanilla, and stir until smooth and all ingredients are fully combined. Pipe or spread onto one macaron half and sandwich between the other.
You will need almond meal, powdered sugar, 3 large egg whites, sugar, and vanilla extract to make the macaron. To make the filling you need 7 tablespoons of softened butter, 2 egg yolks, ¼ cup of granulated sugar, and 1 teaspoon of vanilla extract.
To start with you preheat the oven to 280ºF, you will need two trays. I recommend having the silicone trays made especially made for macaroons or using parchment paper. To actually start the process you will place the egg whites in a bowl and use a hand mixer and begin to beat it on medium-high.When the eggs are frothy, add the granulated sugar, 1 tablespoon at a time. Continue to beat it until you get glossy, stiff peaks. You will then add the vanilla extract, then you will add half of the almond meal mixture. Which is mixing the almond meal and powdered sugar, mi until they are not seperated.You will gently fold it. Folding it is lift from the bottom, up from the sides, toward the middle, once it is incorporated you will add in the other half and continue the process until it is all mixed together. I recommended folding the batter althoughter about 20 times to get the right consistency for the macarons to rise.
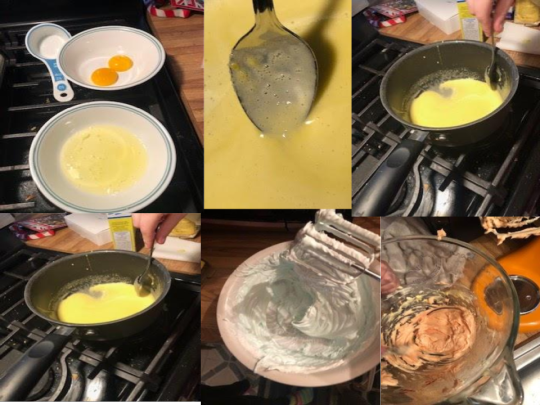
(Collage image, Left to right, then bottom, Egg whites seperated, egg mixture being mixed, egg mixture being heated, folding the batter, icing being scooped out into pastry bag.)
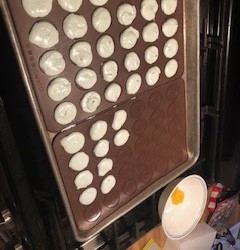
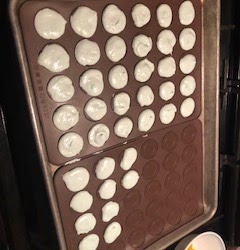
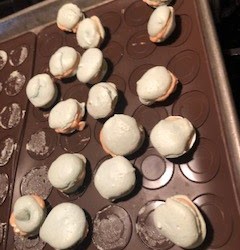
You will now need to pour it into a pastry bag, this was difficult so i recommend getting a tall cup, putting the pastry bag into the cup, and folding the edges over the cup, then it won’t fall, and won’t make a mess.You don’t need to use a tip for this we didn’t,we just cut the tip off of the bag.You will then pipe out to your proffered size macaroons, we did 1 inch ones as that was the size on our silicone macaron sheet. Fill to the amount you want for each sheet. Then tap you tray on a solid surface, i recommend tapping about 10-15 times to make sure it is even. We didn’t tap enough. You then allow the macarons to dry for about 15 minutes, touch to check to see if it is dry, you should not have anything on your finger. Then put it in for 15-18 minutes. Do not undercook it, it will be soft on the underneath, or overcook it where it begins to brown. Then let it cool. We made the icing while it cooled. Cut the butter into pieces and put into mier and smush it until it looks like mustard. In a small bowl whisk the egg yolks, then add the granulated sugar and whisk into mixture until you can’t see the granulated sugar and is an off colored white. Add milk to mixture and whisk. Pour into small saucepan and heat over low heat, whisk frequently to ensure it doesn’t burn. Cook until it becomes thick and pudding like consistency , pour back into a bowl, whisk until it becomes room temperatures, whisk it into butter. We added it all together because we used a kitchenaid mixer and didn't’ need multiple times to mi.Stir until smooth. Put into a piping bag and pipe onto one side of macaroon, then put another one on it. Your macaron is done. Over all I feel it was an okay attempt. My sister and I likes the macaroon but didn’t not like the filling, so next time we make macaroon we are going to using a different filling. It was not sweet enough for us.

#macaron#kentstate#trumbull#dessert#frenchcooking#pastries#collegewritingtwo#kent state trumbull#Kent State University#collegewritingfood#homecooking#ksutrumbull#submission
0 notes
Text
Cabbage Rolls
by Angela B.
PREP TIME 35 minutes
COOK TIME 1 hour 15 minutes
TOTAL TIME 1 hour 50 minutes
SERVINGS 6 servings
Ingredients:
1 head green cabbage
1 lb ground pork (or ground turkey)
½ lb ground beef
2 small onions, diced
3 cloves garlic, minced
½ teaspoon dill weed
3 tablespoons fresh parsley
1 can (14 oz) diced tomatoes
salt & pepper to taste
1 cup uncooked rice
1 egg
1 ½ cups + 1/3 cup tomato sauce or pasta sauce , divided
1 can tomato soup
Instructions:
1. Boil cabbage leaves about 2 minutes or until soft. (See note below for removing leaves). Set aside to cool.
2. Preheat oven to 350 degrees.
3. Cook rice according to package directions but reduce cooking time by 5 minutes so the rice is slightly underdone. Set aside.
4. Cook beef, pork (or turkey), onions, garlic & seasonings until no pink remains. Drain any fat. Add in rice, diced tomatoes, 1/3 cup of tomato/pasta sauce, salt & pepper. Stir in egg.
5. Mix tomato sauce and tomato soup in a bowl. Spread a very thin layer of the tomato sauce mixture in a 9x13 pan.
6. Remove or thin any thick stem on cabbage leaves. Lay the cabbage leaf flat and add 1/3 cup filling to the center of the leaf. Fold in the sides and roll the cabbage up. Place seam side down in the pan. (See note for small leaves). Repeat with remaining cabbage.
7. Pour sauce over the cabbage and cover tightly with foil. Bake 75-90 minutes. Let cool 15 minutes before serving.
Recipe Notes
To remove leaves from head of cabbage, cut approx. ¼" off the bottom of the head and place the whole head of cabbage in boiling water. Boil about 2 minutes. Peel off the softened leaves. Place remaining head back in the boiling water and repeat until all of the leaves are removed. Remove any tough stems from cooked leaves.
Note, if you have some smaller leaves and still have filling leftover just overlap the leaves as needed. The rolls will still cook up perfectly.
My After Notes
I forgot the tomato sauce at the store and by the time I realized it the store closest to me had already closed. I also do not like garlic so I intentionally didn’t add that.
Link to Recipe
https://www.spendwithpennies.com/easy-cabbage-rolls/#wprm-recipe-container-122147
* * *
I remember being a young girl visiting my grandmother’s house, sitting at the kitchen table while my mom and my grandma would be making Cabbage Rolls or Gołąbki as my grandmother would call it. When I was a young girl I use to be terrified of my grandma, she was always yelling at my other cousins, so I tried to always be on my best behavior. She was the type of lady that would smack your hand if you reached across the table without permission to get more, and she would swat your head if you wore a hat at her dinner table, along with intense yelling. I know where my mother learned her yelling skills from now. My grandma was Polish, and she would play Polka music while dancing to it in the kitchen. As I got older, I realized my grandma wasn’t such a scary, old, mean lady after all. When my grandma passed away, she was the last of my grandparents. Soon after she passed away, my mom and my younger sister had moved into my grandma’s house. I’m currently living back there now, sometimes I can still picture her dancing in our kitchen grabbing my hands and trying to get me to join her, I literally thought she was crazy, just out of her mind. Looking back, I now see that I was the crazy one for not dancing with her. If I could go back and change time I would, but who wouldn’t.
When I had told my mother, I was going to make this, she was shocked because it is the one Polish food she hasn’t made since my grandma passed away, over fourteen years ago. It was my first time making this, and I really enjoyed doing it. I absolutely love cabbage, I especially loved snacking on the cabbage as I cooked. It made me remember all those visits at my grandma’s house that I dreaded so much as a child, because I let my fear of her get in the way. The older I got the less scared I was of her but that’s also from me observing her through the years and learning what she didn’t like or allow in her house.
Making this dish somehow made me feel closer to her and closer to my roots, it’s important to me to know where it is I came from. There are so many children, teens or even adults that have never met their parents or family and have no clue of their background. I couldn’t imagine not knowing my roots, although I do understand that more often than not, it is for the better in certain situations. I just hope I made my grandma proud.
If I had to pick the most challenging part of preparing this dish I would hands down say that getting the core of the cabbage out was a tough job. Good thing I don’t mind a little challenge from time to time.
Some names of the Polish food my mom would make, would make me laugh as a kid because they just sounded made up, I often still laugh. I want to keep the Polish food in the family, for generations to come. If I ever get around to having children of my own, I hope to make food like this and tell them stories about my mom and my grandmother. Who knows maybe I’ll break out the Polka music and dance like my grandma did, if it’s not too late to learn the dances? I think I can live with my own kids thinking I’m a nut job, because maybe one day they will look back and get a good laugh, like I am now.
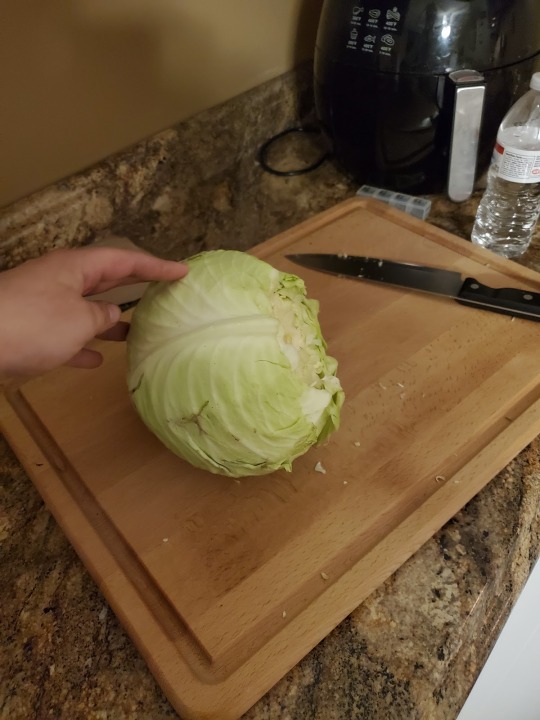
(Cutting out the core of the Cabbage)
This was the fun part I mentioned about cutting out the core of the cabbage. You want to cut the core out making it look like a cone on the inside. I can’t express how happy I was when this part was over.
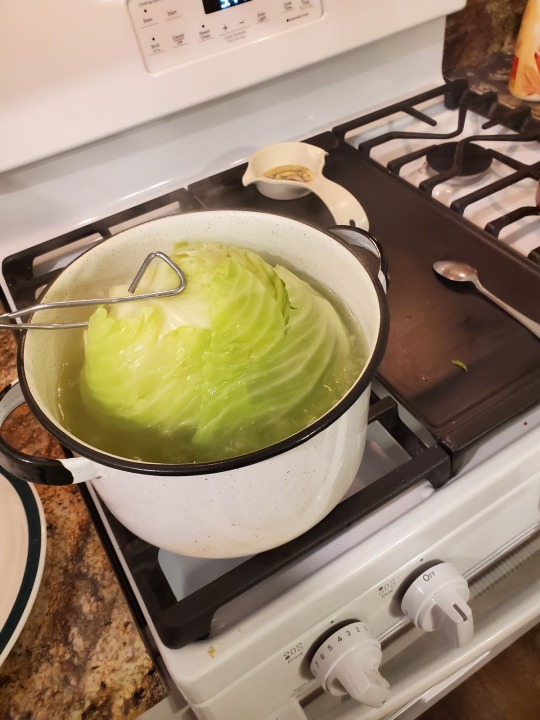
(Boiling the Cabbage)
In order to be able to roll the cabbage leaves, you have to soften them by boiling them in water. I recommend boiling them a lot longer then just 2 minutes as Holly recommended. As it boiled the outer leaves softened so I was peeled them off with prongs to help get to the inner leaves faster.
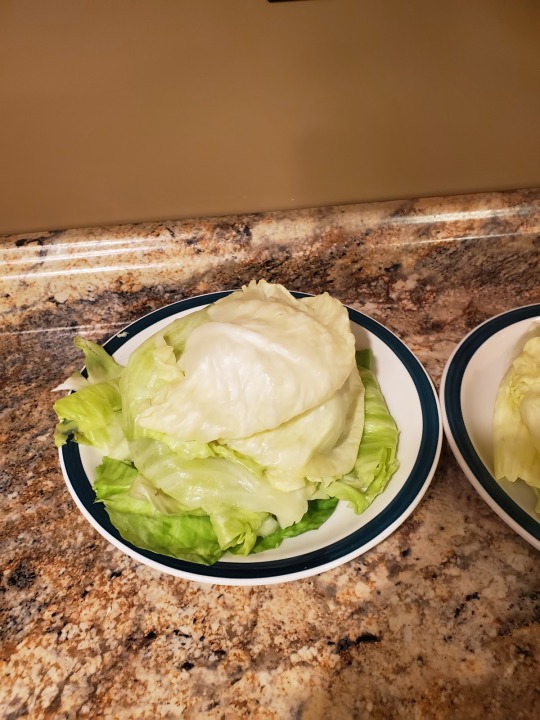
(The softened Cabbage leaves)
When I would peel off the leaves I would place them on this place to give them tip to cool while I prepped the rest of this dish.
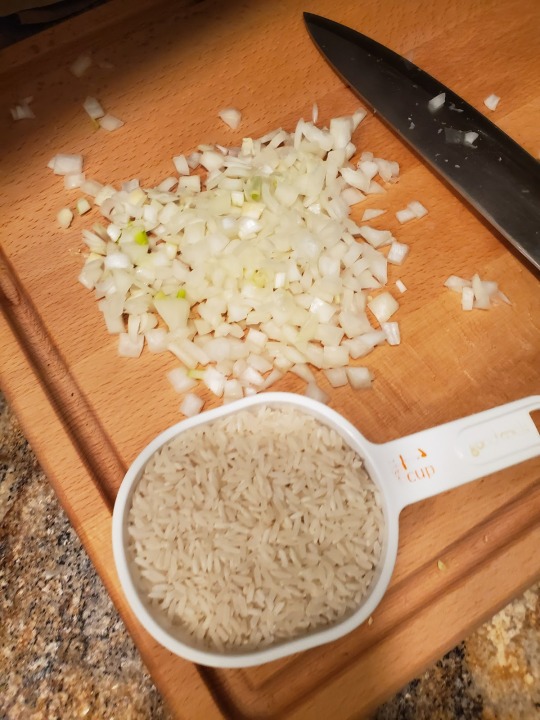
(My diced onions and rice.)
One change I did to the recipe was I did not add the 3 garlic cloves. Simply because I’m not a garlic fan. I had to small onions I had diced up, then I measured my one cup of rice before putting it in the boiling pot of water.

(This is the ground pork and ground beef.)
I had to weigh out ½lb of beef because that was all I needed. Clearly I didn’t need all 3 lbs of the beef.
(Mixing all the goodies together)
Make sure to wash your hands before and after this step, as usual, always cook with clean hands. I mixed the meats together, added the onions and the rice before cooking it. I remember my Grandma always yelling at my cousins and I to wash our hands after playing outside, you could say she was a germ freak. I see now where I get that from.
#cooking#cabbagerolls#yummy#collegewritingtwo#kent state trumbull#Kent State University#collegewritingfood#homecooking#ksutrumbull#submission
0 notes
Text
Pork Egg Rolls
Egg Roll Recipe
By: Skyler O.
Ingredients
1 pound ground pork
1 tablespoon grated ginger
1 clove minced garlic
1 teaspoon onion powder
¼ teaspoon Chinese five spice
1 tablespoon soy sauce
2 ½ cups chopped cabbage and carrots
12 egg roll wrappers
2 tablespoons all purpose flour
2 tablespoons water
1 quart canola oil
Instructions
cook pork, ginger, garlic, onion powder and Chinese 5 spice (if using) until no pink remains. Set aside.
Preheat oil to 375 degrees F.
Combine flour and water in a small bowl.
Lay out one egg roll wrapper with a corner pointed toward you. Place 2 tablespoons of the meat and 2 tablespoons of the coleslaw mixture in the center. Use your finger to spread a little bit of the flour mixture along the edge.
Fold two of the corners together to make a triangle, fold the sides in and then roll tightly. (Seal the edges with the flour mixture).
Fry egg rolls until lightly browned and crispy turning occasionally.
Serve with sesame sauce
Link to recipe - https://www.spendwithpennies.com/crispy-homemade-egg-rolls/
All my life my family has been obsessed with comfort food. There are plenty of comfort foods, which could include southern cooking, sweets, sugary, fatty food. Essentially, comfort food is what makes someone feel happy and good when they’re eating. However, my comfort food has always been Chinese food. Technically, what I grew up eating probably wasn’t true Chinese food, but it comforted me nonetheless.
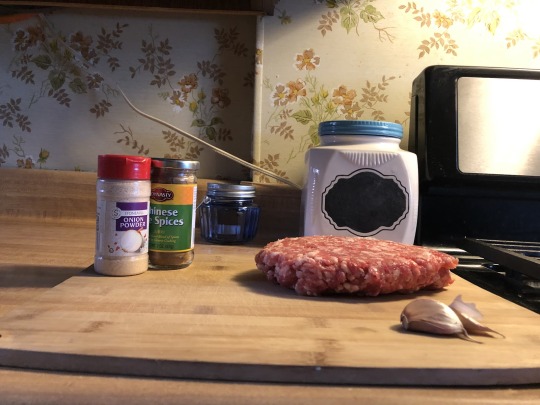
Ingredients include: pork, garlic, onion power, Chinese five spice, ginger (not shown)
I love the diversity of what you can get at a Chinese restaurant, there are so many flavors and the possibilities seem endless. I remember as a kid, before my parents were divorced, my parents took me and my brother to a Chinese restaurant. These were rare situations because my dad was gone most of the time. However, the few memories I have with both of my parents are pleasant and nice to look back on. Sitting with my parents and my brother was so fun and my mom asked us if we knew what we wanted to be when we grew up. My brother told us he wanted to be a scientist and my dad patted him on the back. Little girls might answer this question with princess, vet or model. However, when my mom asked me what I wanted to be I thought about it for a minute and said I wanted to help people. My mom asked me what I meant and I said I wanted to be a doctor.
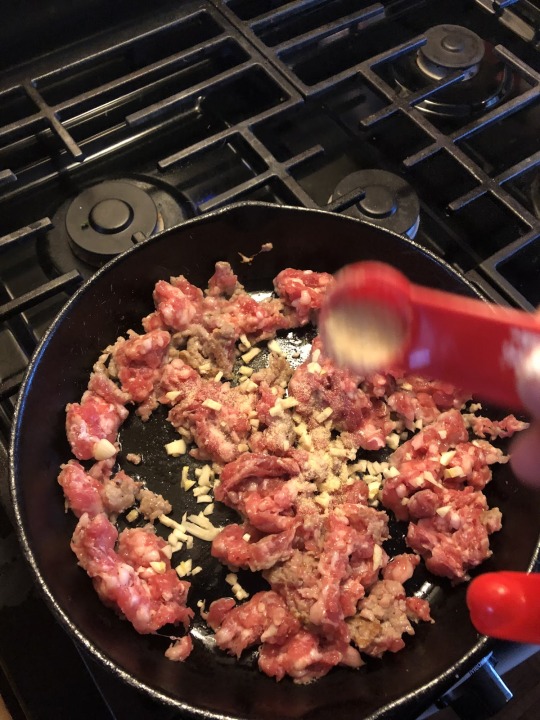
Browning pork and garlic and adding spices
My mom tells me this story a lot whenever i’m feeling down, however the next part I remember vividly. My dad looked me in the eye and told me that I couldn’t do that because not only would I not make it through school, I wouldn’t be able to take care of my family, because i’m a girl, and we can only do one thing at a time.
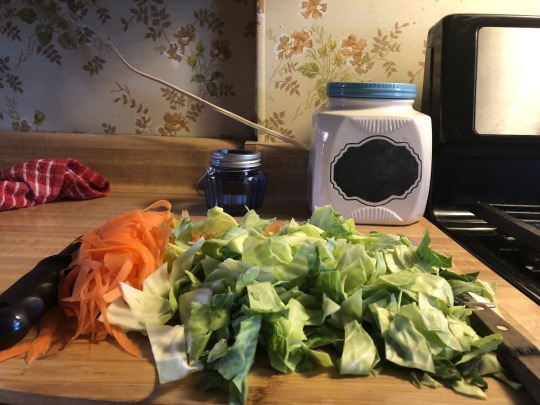
Cut up cabbage and shaved carrots
I spent a lot of my childhood taking comments similar to this one from my dad, but I just wrote it off as the fact that he isn’t a girl, and he doesn’t know what it’s like to be one. So when I grew up figuring out that maybe I don’t want kids and maybe I don’t want to be a wife, I was naturally really confused. Maybe this is where my angry feminism comes from, but i’m thankful he said this to me. My mom stayed silent, but while my dad was paying the bill my mom took me to the car. She turned around in her front seat and told me that I could be whatever I wanted to be, whether that was a princess, astronaut, chef, vet, model or even a doctor. If I wanted something bad enough and I worked hard enough I could do it.
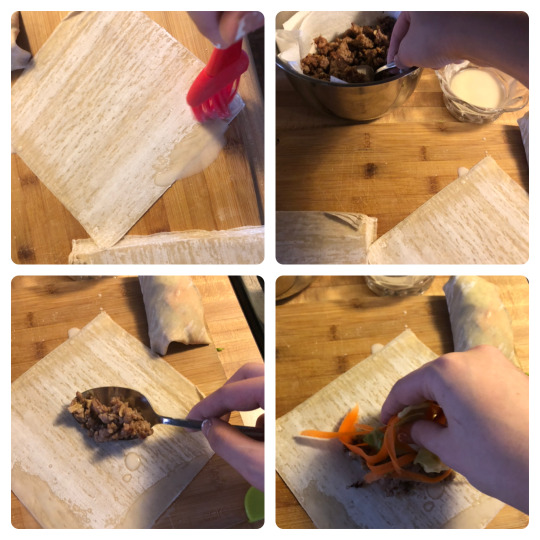
Filling the egg rolls
This trip to the Chinese restaurant up the street from my house started pretty awful. However, because this ended with the most important woman in my life telling me I could be whatever I wanted to be, it is one of my favorite memories. Eventually my mom stopped putting up with my dad putting her down and they divorced. But i’m grateful that they did, and that I didn’t grow up thinking I couldn’t do things because I’m a girl. I’m happy that a happy memory is associated with Chinese food because even as an adult I love Chinese. Now every time I eat Chinese food, or any kind of Asian food, I think about this memory with my mom, and i’m really thankful to have her. I decided to make egg rolls because of this specific memory.
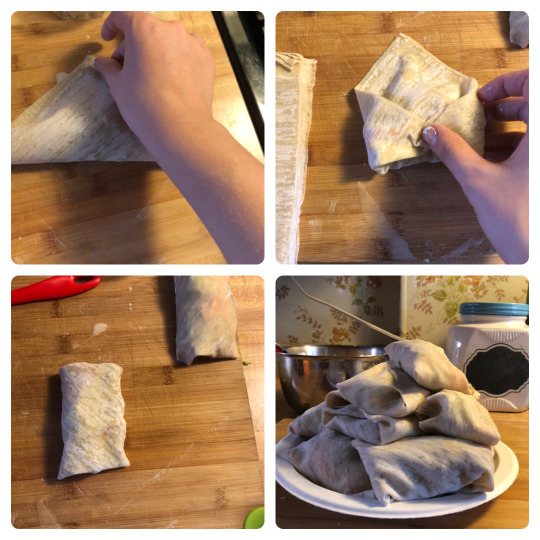
Folding the egg rolls
Actually making the egg rolls was a lot harder than I anticipated, not that it was hard it was just extremely tedious. It probably took me about 2 hours to make 14 egg rolls, which is probably just because I had no idea what I was doing. They didn’t exactly look like I wanted them to but I was pretty happy with how they turned out.
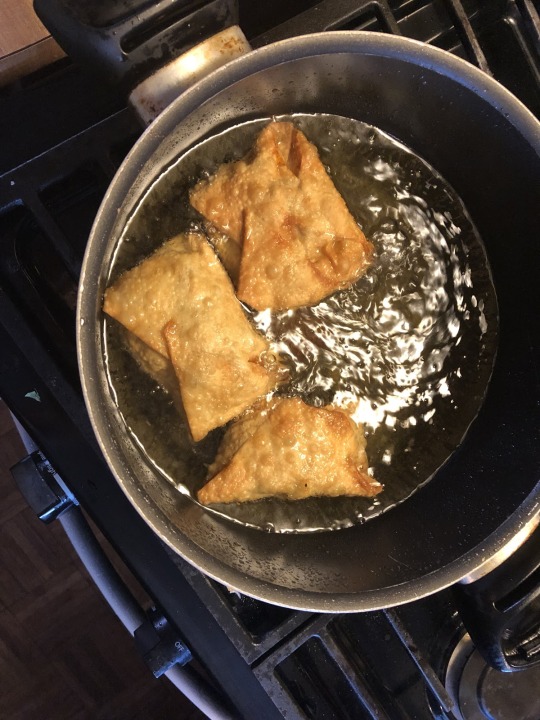
Frying the egg rolls in canola oil
Watching them fry was mouth watering and they turned out a beautiful golden brown and I can’t wait to make them again.
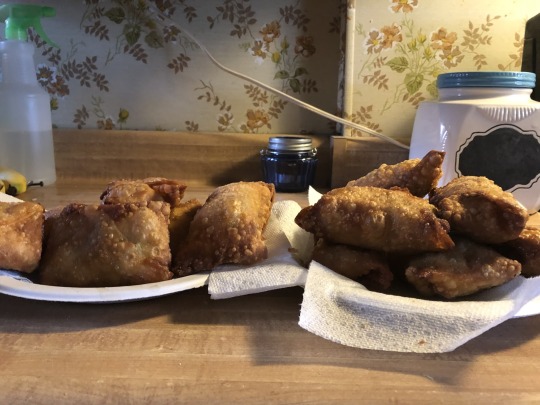
Finished egg rolls
#eggrolls #asianfood #friedfood #delicious #collegewritingfood
#eggrolls#asianfood#friedfood#delicious#kentstate#collegewriting2#collegewritingtwo#kent state trumbull#Kent State University#collegewritingfood#homecooking#ksutrumbull#submission
0 notes
Text
KoKo’s Cookies (pudding cookies)
by: Kortni C.
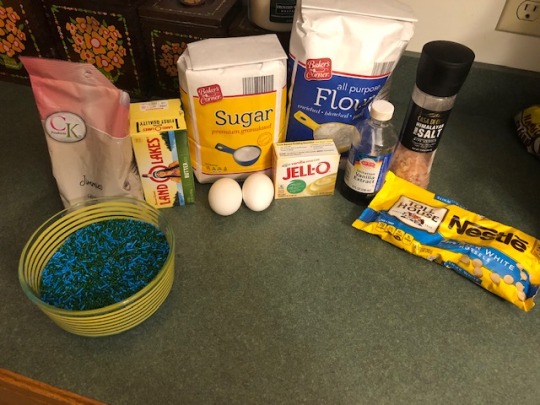
Image of ingredients, blue and green sprinkles, butter, 2 eggs, sugar, jell-o vanilla instant pudding box, nestle white morsels salt, flour and vanilla extract
Ingredients:
1 Cup Sugar
1 ½ Sticks Butter (room temp)
2 Eggs
1 tsp. Vanilla extract
1 pkg instant pudding (french vanilla)
2 ¼ Cups Flour
1 tsp salt
1 tsp baking soda
½ Cup Sprinkles
Instructions:
Set oven to 350
Cream together sugar, butter, eggs, pudding pack and extract (in Kitchenaid mixer, low)
In separate bowl, mix flour, salt and baking soda
Slowly blend in powder mixture to creamed mixture
Once dough is in ball form, mix in sprinkles and chips
Take dough out of bowl and hand roll into solid ball, place in refrigerator for fifteen to twenty minutes
Ball dough into palm sized balls and put on silicone lined baking sheet
Bake at 350 for 15-20 minutes, until edges and bottoms are browning. Cookies may cook faster depending on oven, the electric one I use at my parents usually cooks the cookies faster than our gas oven at home.

Slowly adding flour into Kitchenaid mixer which contains the creamed sugar, butter eggs, pudding and extract.
Almost five years ago my life changed in a very positive way. I had been struggling with depression and anxiety that was untreated and misunderstood since childhood and I was living in a personal hell that hopefully you do not understand. Coming out the other side of an opiate addiction lead me down a path of self discovery. I literally did not know who I was or what I enjoyed. Learning about myself included learning to take care of myself again, and I realized quickly that cooking was bringing me meditative peace and the ability to process emotions that I was seeking. It was comparable to a midnight drive down a back road blaring music and crying, or playing soccer and using my physical abilities to work off anger or sadness. Cooking meals was great, but the real golden ticket was in baking for me.
Baking is a way for me to bring others joy and relieve personal stress at the same time. Who doesn’t love cookies, cake and pie? I know I love them. During this time of growth I tried many recipes that I had found in a variety of places, Facebook, blogs and Pinterest being the most common. I stumbled across a recipe for “Fruity Pebbles” cookies that I thought was intriguing. My childhood favorite cereal, that Grandma and Grandpa never failed to have, in a cookie? That’s awesome! However, it was not. The cookies were actually rather disgusting. I was not a fan of them AT ALL. The cereal left the cookies feeling flaky, strangely crunchy and too brittle. The texture was too hard for me to overcome in order to enjoy the flavor. The flavor was okay, very sweet and fruity like the cereal. Though I consider that recipe a fail, this recipe did teach me a new strategy in cookie making. A new magic ingredient! PUDDING! Yes, pudding. Just a simple packet of pudding (the instant kind) unprepared, added to the batter is magic. Pudding changed the way my cookies were tasting and the way the dough was baking. The cookies are light and still have a softness to them that I had previously been unable to create.
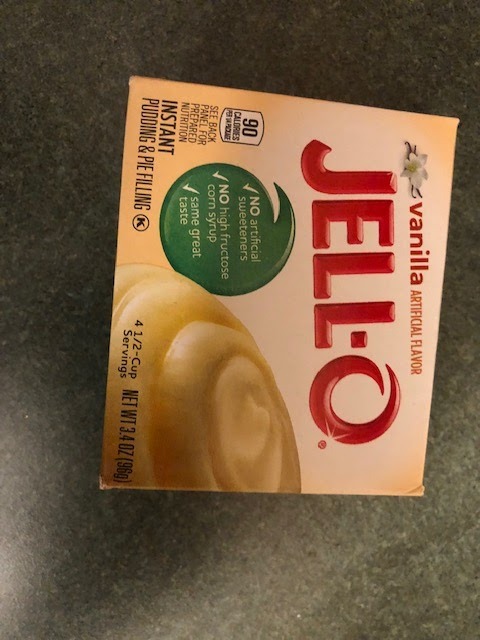
Jell-O instant pudding Vanilla, 3.4 oz box
This magical pudding realization started a great experiment! There are so many different flavors of pudding to play with, and there are an equal amount of extracts to pair. Some of the things I have created include pumpkin spice pudding with pumpkin extract and pumpkin chips or chocolate chips (this recipe was obviously around fall when all of these things are readily available). I have tried coconut pudding and extract with chocolate chips and shredded coconut. I have tried banana, strawberry, Oreo, lemon, pistachio and chocolate puddings with different combinations of sprinkles, ground nuts and chocolate chips. The chips have included white, dark, and milk chocolate and the wonderful pumpkin ones available in the fall and the Reese’s peanut butter chips that are pure gold. I recently found Andes mint chips that I am dying to try with chocolate flavored cookies.
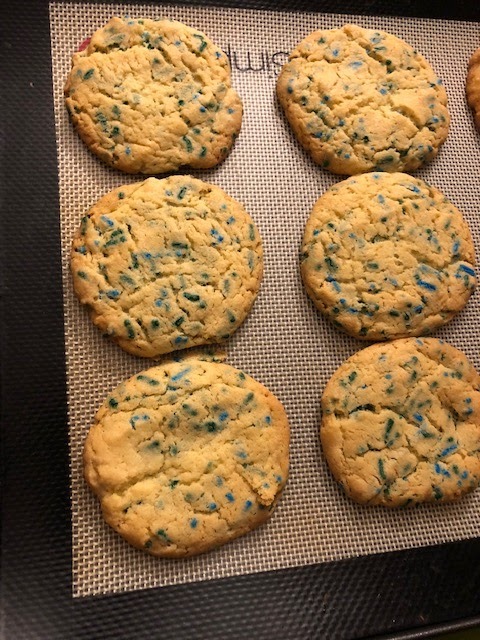
Cookies, fresh out of the oven, browned around the edges and on bottoms.
These cookie creations have all been a blast to make and I have come up with some really interesting and fun combinations. I have made them for many events and have even started freezing dough to bake for my upcoming nuptials. I have had to take baking hiatus for my fiance and I to “wedding diet” and it has been a struggle for me to maintain sanity. Thankfully there is still soccer and driving to counteract this lack of baking. Thus far, my favorite, and long time go to has been the sugar cookie recipe above. Simple, but tasty! The sprinkles I use are always of the “jimmy” variety, never the sugar crystals, they do not bake well in the recipe. This is the cookie that everyone asks me for and about. It is my ultimate favorite of the great pudding experiment. I hope that others can love it as much as I do! I also hope that others can experiment and create their own favorite concoctions the way that I have!
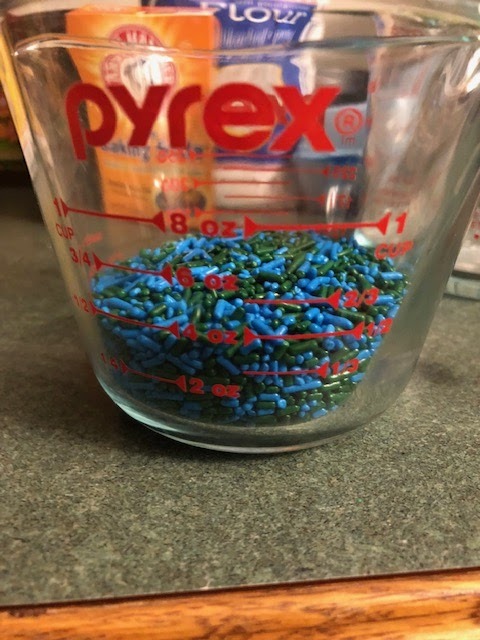
Pyrex measuring cup containing blue and green jimmies/sprinkles.
#collegewritingtwo#kent state trumbull#Kent State University#collegewritingfood#homecooking#ksutrumbull#submission
0 notes
Text
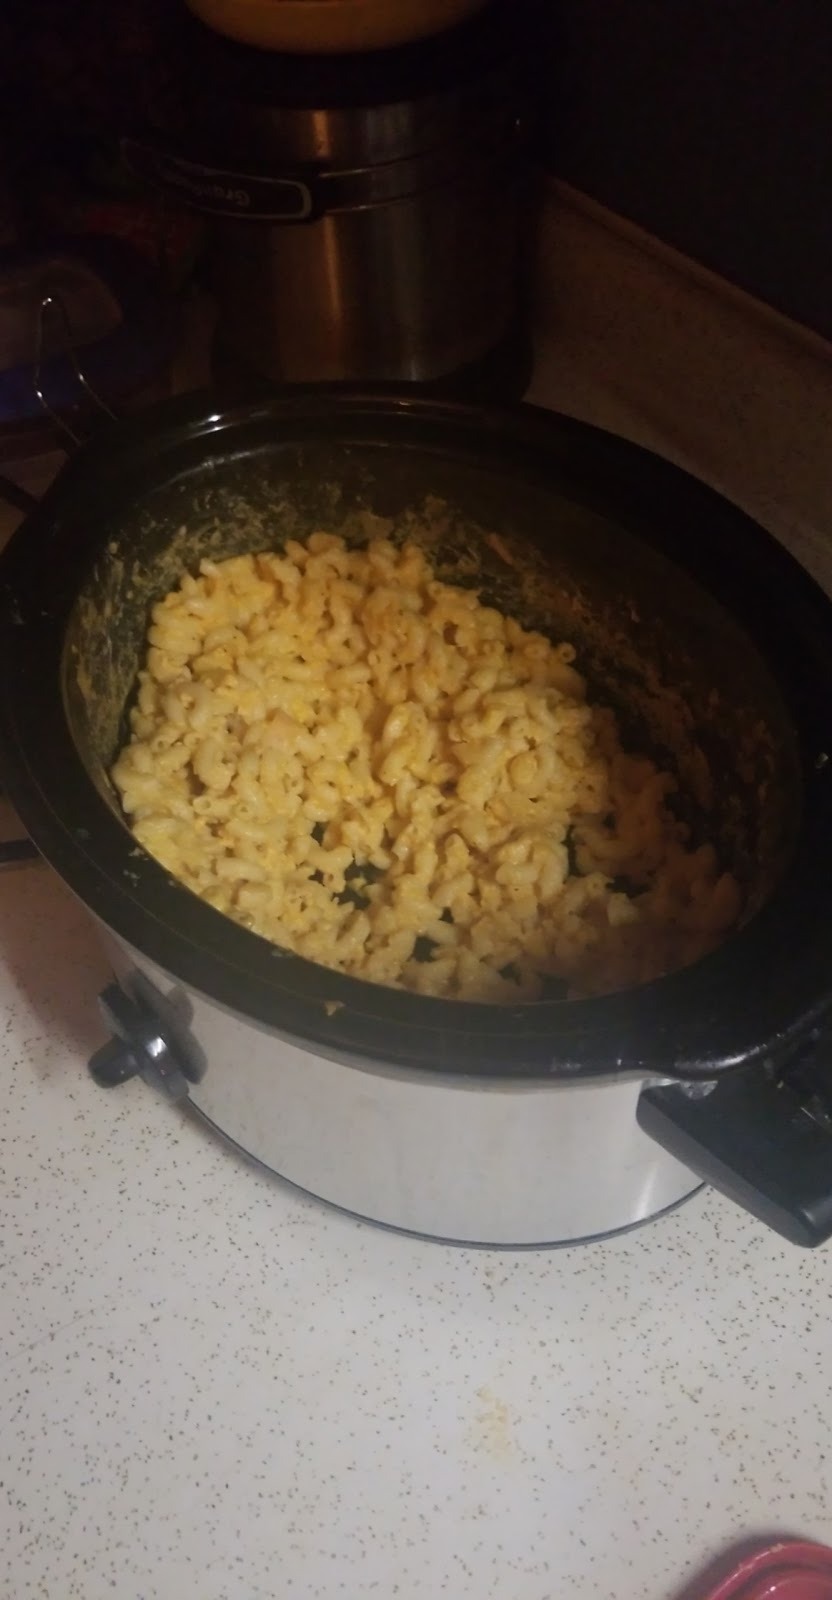
Homemade Macaroni and Cheese
by Justin S.
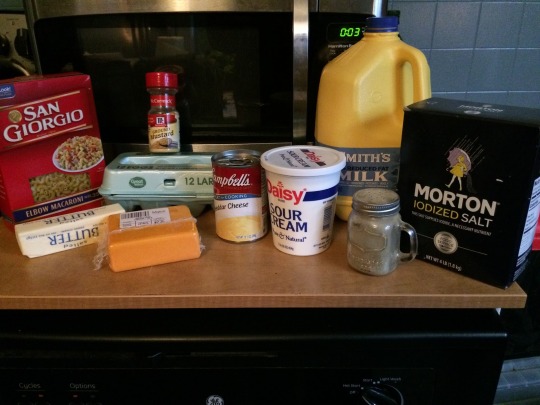
1 box elbow macaroni noodles
8 tblspns butter
4 cups grated sharp cheddar cheese
4 eggs
1 cup sour cream
10 ¾ oz can condensed cheddar cheese soup campbells
1 tsp salt
2 cup whole milk
1 tsp dry mustard
1 tsp black pepper
Instructions
1.Boil macaroni until soft
2.Drain
*3.In a saucepan mix butter + cheese
4.Stir until melted
5.Add beaten eggs, sour cream, soup, salt, milk, dry mustard, and pepper
*6.Stir
7.Place in crockpot pour cheese mixture over and stir

8.Cook on low for two and a half hours
**spray crockpot with cooking spray prior to standing.

I chose this recipe because it has been around my entire life and it is something my family knows my mother is “famous” for making. My mother has made her homemade macaroni and cheese for as long as I can remember. Any event the family is jumping at my mother’s throat to make sure that she is bringing the macaroni and cheese. A sense of that makes me proud to know that something my mother has experimented with has brought glory to my small immediate family and something that tastes so good. Now this may not seem like much but, my family contains a lot of grouhy older negative people who are never happy and tend to be bluntly honest which some people just can not handle but that holds true when they say nice things you can count on them to know they mean it. I chose this because not only do I think this has a glory to my mother but making it the exact way, maybe I can turn this recipe to a family tradition. Passing it on to my children and hope it goes farther down the tree. Now this project was perfect to be able to bring some light and some family gloating to a place outside my family, my class.
Typically, my family eats this as a meal itself but we have it at family gatherings as well. Thanksgiving, Christmas, basically any event that the family has an excuse to make my mom cook this meal. Now the recipe is easy to make especially when you have a day of work planned ahead because it can sit in the crock pot over a long period of time just on warm. This recipe is great for a lazier day and busy days. Cooking in the crockpot is my mom’s way to cook dinner but achieve work around the house. When she is away at work, this meal is a great way to provide food for my grandfather and grandmother who do not have teeth so chewing this is the best for them, and it tastes great too. Homemade macaroni and cheese is great when accompanied by grill foods, such as hamburgers, hotdogs and fish. The meal can be the main course but when it is we typically add some sort of a green such as, broccoli, asparagus, green beans, and brussel sprouts. This recipe to me is great for anything and anytime. Homemade macaroni and cheese has made an impact on my taste buds and I hope it does the same to yours to.
#collegewritingtwo#kent state trumbull#Kent State University#collegewritingfood#homecooking#ksutrumbull#submission
0 notes
Text
Not-Chicken Noodle Soup Recipe
by Erin C.
My mother has been using this recipe for six years, ever since I became a vegetarian and she had to find creative ways to cater to my diet, but also keep our traditional family meals simple and healthy. She usually makes two batches of soup, one with chicken and one just for me. According to her, mine usually turns out tasting better. The recipe comes from our family’s traditional caucasian chicken noodle soup recipe, complete with bland vegetables and no seasoning, but with a little extra something and no meat. The appeal of using the not-chicken broth cubes as opposed to vegetable broth is the added flavor. It’s packed with seasoning that gives you all the flavor that regular chicken broth would give. It has been a while, but I remember exactly what traditional chicken noodle soup tastes like. My version, while not quite as filling without that additional protein, has just as much flavor and all the same comfort as the traditional version. It is the best-tasting meal in the world to me because I never thought that I would be able to taste chicken noodle soup again, and my mom went out of her way to make sure I could enjoy it with the rest of the family. It’s the kind of meal that makes you feel super healthy while you’re eating it and warms you when it’s chilly outside, and I am glad I don’t get to miss out on that since I am not a fan of most other soups. Of course, the appeal to this kind of meal is the fullness it provides and the fact that it can stand alone as a meal. No sides are necessary, and I usually don’t even have a drink with dinner on nights like these. The beauty of it all is its simplicity, traditional comforts, and the fact that I have been able to enjoy it with my family for all these years even though my diet differs from theirs.
Ingredients:
1 Tbsp. extra virgin olive oil
2 tsp. minced garlic, (3 – 4 cloves)
4 stalks celery, sliced
4 carrots, sliced
64 oz. low sodium “Not-Chicken” broth cubes (or just vegetable broth)
2 cups fine egg noodles
¼ tsp. salt, or to taste
¼ tsp. black pepper, or to taste
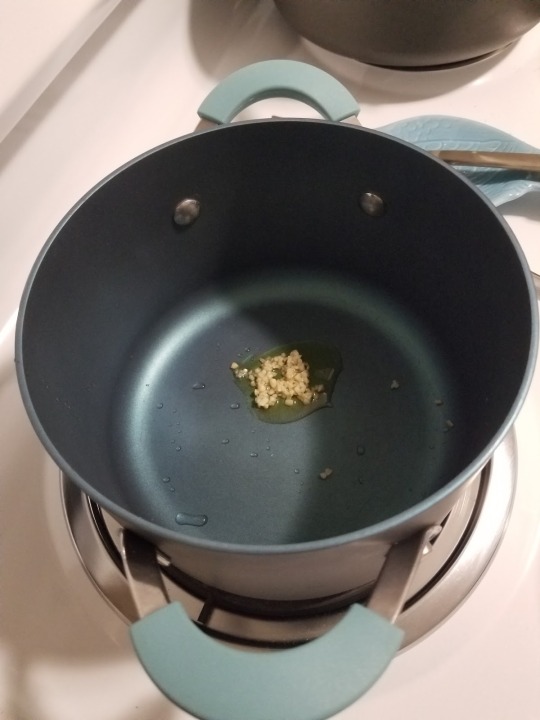
Wash, then chop, 4 stalks of celery and 4 carrots. Put a stockpot over medium heat. Add olive oil and minced garlic.
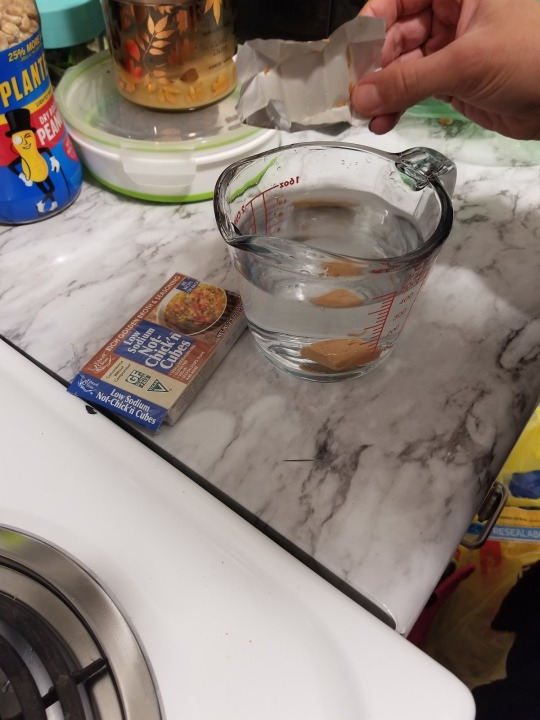
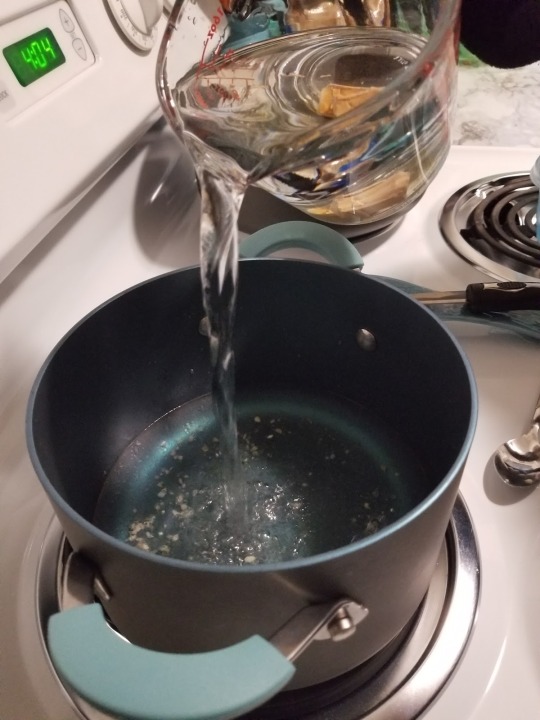
Add two cubes of “Not-Chicken” broth cubes to about 2 cups of water, or use vegetable broth, and add that to the stockpot.
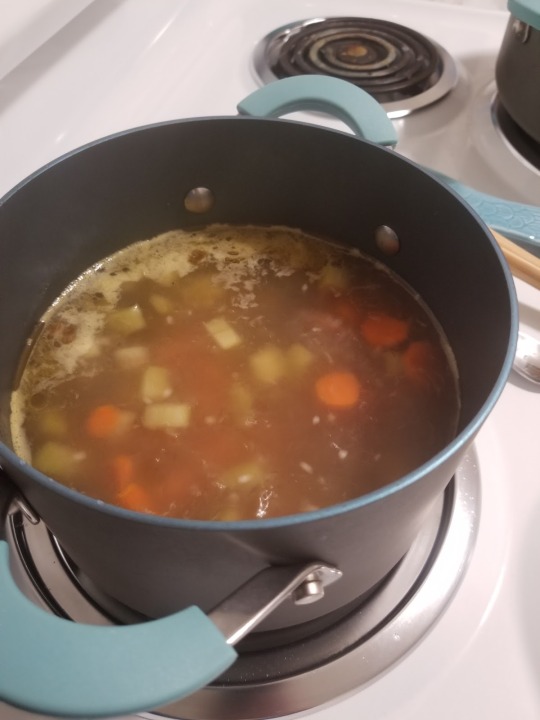
Stir, then add celery and carrots. Cover the pot and bring to a boil.
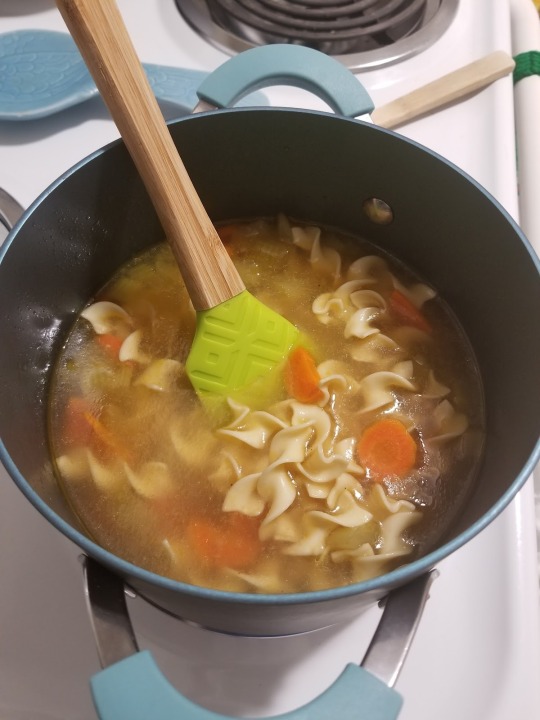
Add the egg noodles and cook them until they are tender, usually for about 4 minutes. Season with salt and pepper, and serve.
#collegewritingtwo#kent state trumbull#Kent State University#collegewritingfood#homecooking#ksutrumbull#submission
0 notes
Text
Raggmunk Pancakes
by Chase M.
Raggmunk (potato pancakes) with salted pork and lingonberries
Ingredients-
1 ¾ lb potatoes
¾ cup (all-purpose) flour
1 tsp salt
1 tsp freshly ground black pepper
1 egg
1 ¼ cup milk
3 tbsp butter
ANY amount of bacon/salted pork (if desired)
Lingonberries
Tips before cooking!
Do not grate potatoes until ready to fry. It will discolor the potatoes!
Spread batter out so it gets thicker towards the middle. Leaving a nice crisp edge with a more “chewy” inside to it.
(Optional) Fry bacon or salted pork in pan before pancakes to add flavor.
Do not use new potatoes as they do not contain enough starch.
Instructions-
Peel the potatoes, fill pot with water over potatoes.
Pour flour and salt in along with black pepper. Beat egg in and add milk slowly. Complete until lump free.
Put medium sized frying pan on high heat. While waiting for heat to come grate potatoes and add to batter in step 2.
Fry pancakes in butter and add bacon. Fry for at least one minute on each side until golden brown.
Repeat. This recipe should grant you at least a dozen or more pancakes for the whole family!
When I thought about what recipe I would choose for this assignment I could have chosen something my family makes. However, being in the kitchen with my mom or grandma has never been my thing. So, I figured if I must make something why not just look for a recipe on my own. In my online search I came across the recipe called Raggmunk which to me was interesting enough in its name alone. However, after seeing it is basically a combination of my two favorite things, potatoes and pancakes, this looked like a good recipe to try.
Raggmunk is the Swedish version for a potato pancake. Sounds easy enough to make and not many ingredients involved either. In America the potato pancake is usually thought of as a hash brown. Usually we eat our hash browns for breakfast, while in Sweden their hash brown, a.k.a raggmunk, is not served at breakfast but rather served during the later meals of the day. As I researched potato pancakes a bit more, I found out many countries have their own versions of this dish. The Irish version is called boxty and usually made with buttermilk and baking soda. Jewish cultures celebrate Hanukkah with a version of potato pancake called latke. A latke does not necessarily have to be made with potato. Any starchy vegetable could be used. The people of Germany enjoy their potato pancake as a side dish. They may add applesauce or blueberries to it for a sweet option. Many countries serve this simple dish at holiday festivals and fairs.
A country near Russia called Belarus has the potato pancake as its national dish. That got me to wondering what is America’s national dish? That is not a question easily answered as I found out. It appears there has not been one single dish defined as America’s national dish. You could ask 10 people and likely get 10 different answers. From Hamburg’s, hotdogs, pizza, mac n cheese, to apple pie would likely be some of the most common responses. That’s a whole different topic though, I was just curious myself so wanted to check into it, now back to my recipe.
Raggmunk got its name from a combination of two words. Ragg which means crispy and munk which is derived from the Swedish word munkpanna which translates to donutpan. There are two different versions of potato pancakes in Sweden. One is a lighter version called raraka, which is made by a more finely grating of the potatoes. Usually this version is served during the warmer months. While the version I am making, raggmunk, is a thicker, heartier version most often served during colder times of the year.
The key to a good raggmunk is to have a very starchy potato and use a lot of butter. The frying of the pancake in the butter is an important step as the crispier you can get the edges of your pancake the better it will taste. Shredded onion or spices of your choosing can also be added in. For my recipe though I am going to keep it basic and just add salt and black pepper.
Raggmunk is usually served with pork of some type. I prefer bacon so that is what I will go with. The thicker the bacon the better! Another item usually served with raggmunk is lingonberries. Not knowing what those were I did a little research and found out they are hard to find in the U.S. and likely may only be available online or in specialty European markets. The lingonberry is also a powerful antioxidant and helps to reduce inflammation. They are red in color with a bitter taste requiring sugar to transform into a jam for a more appetizing option. The cranberry and raspberry are both considered “distant cousins” to the lingonberry. Due to my inability to locate lingonberries locally I am going to serve my raggmunk with an option of raspberry flavored preserves instead.
Here are all the ingredients needed for the recipe. Most of these are common staples in households.
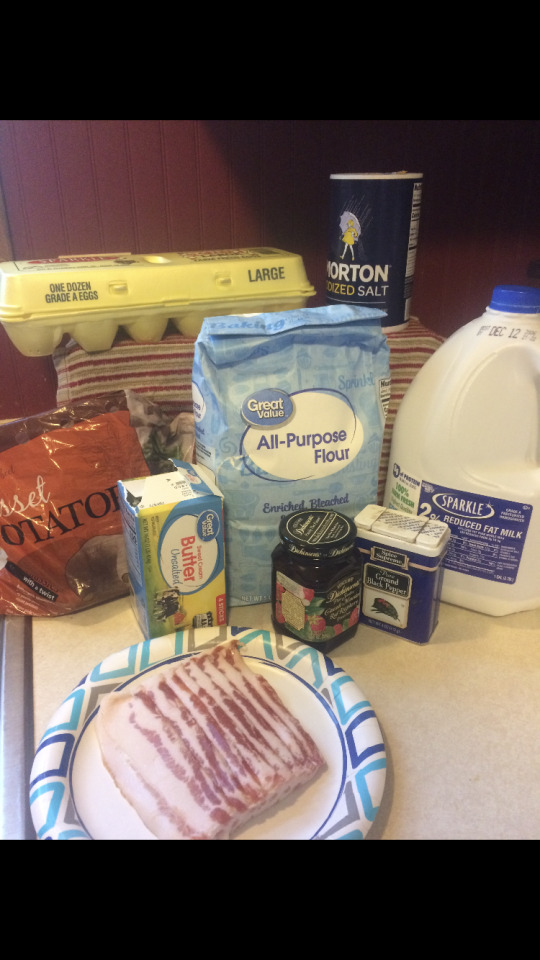
Peeling potatoes isn’t exactly fun. Put them in cold water after peeled so they dont turn brown since we are not ready to shred them yet.
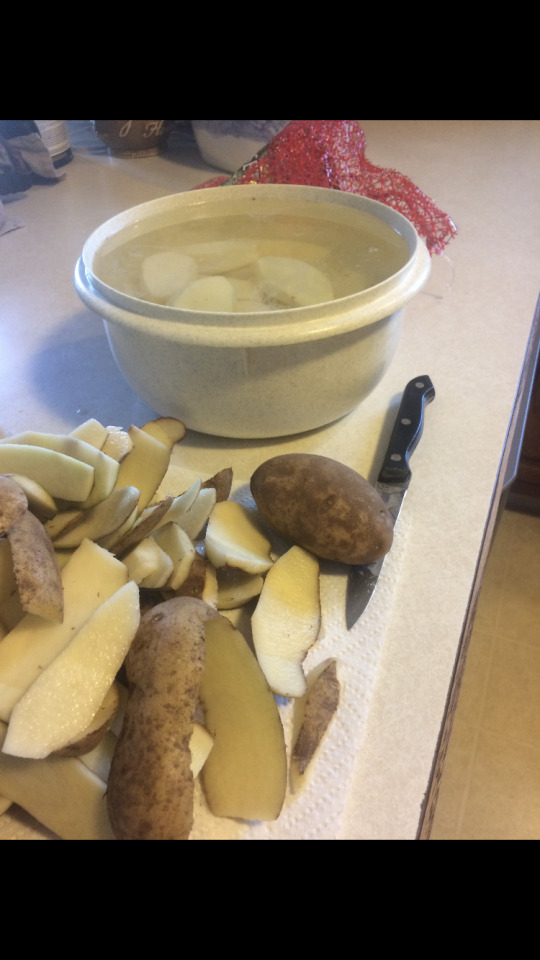
Nothing beats the smell of frying bacon.
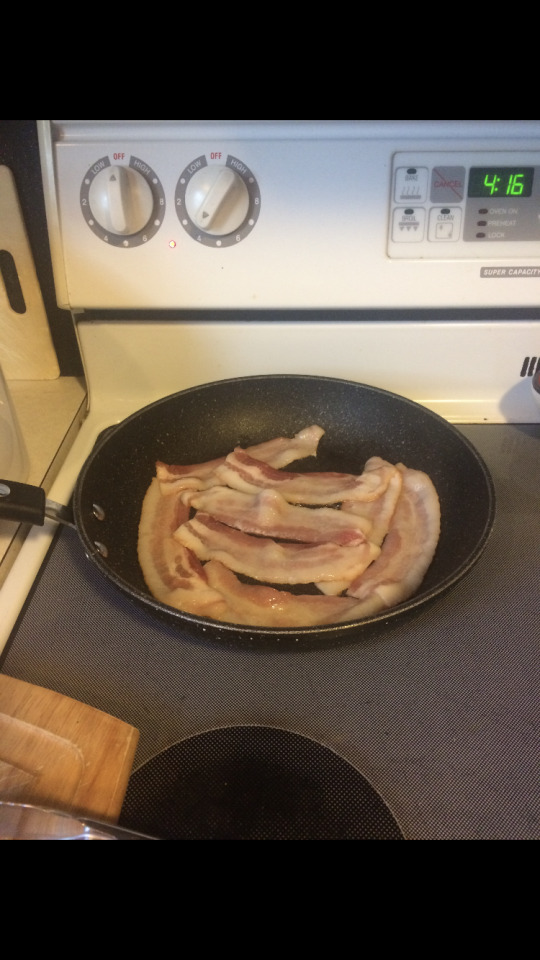
You next will begin making the batter. The batter consists of our flour salt pepper and egg all mixed. Slowly add in milk while stirring to create a pancake batter form. Do not be alarmed if the batter is a little thin, the shredded potatoes will thicken it up
Shred the potatoes. After removing from the cold water you can use a paper towl to dry them and hold better. Then add potatoes to batter.
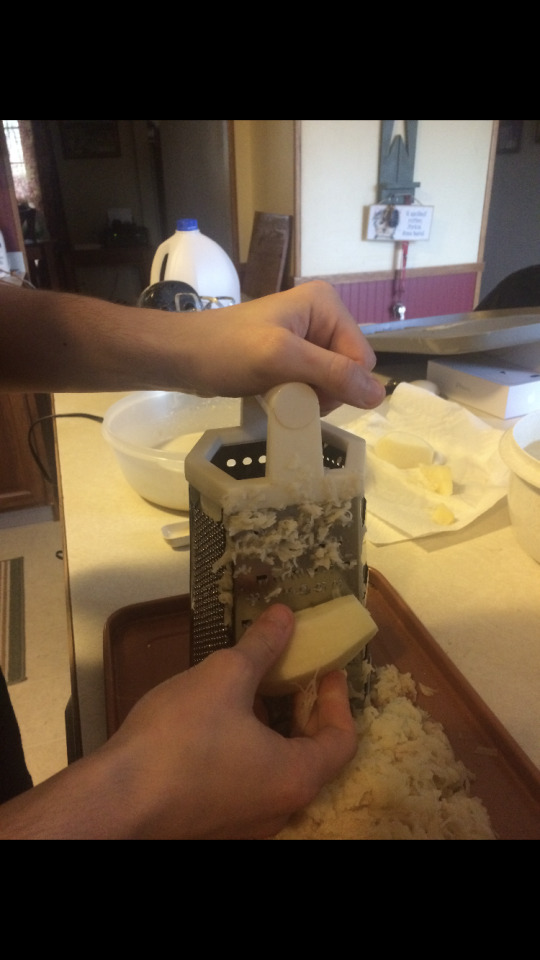
Fry like a pancake. Make sure the butter is hot to help cook the potatoes evenly.
Flip after 1-2 minutes. These come out fairly thin. So make sure they dont break apart on you.
Add your bacon and raspberry perserves to add the sweet and salty effect to the raggmunk and enjoy.
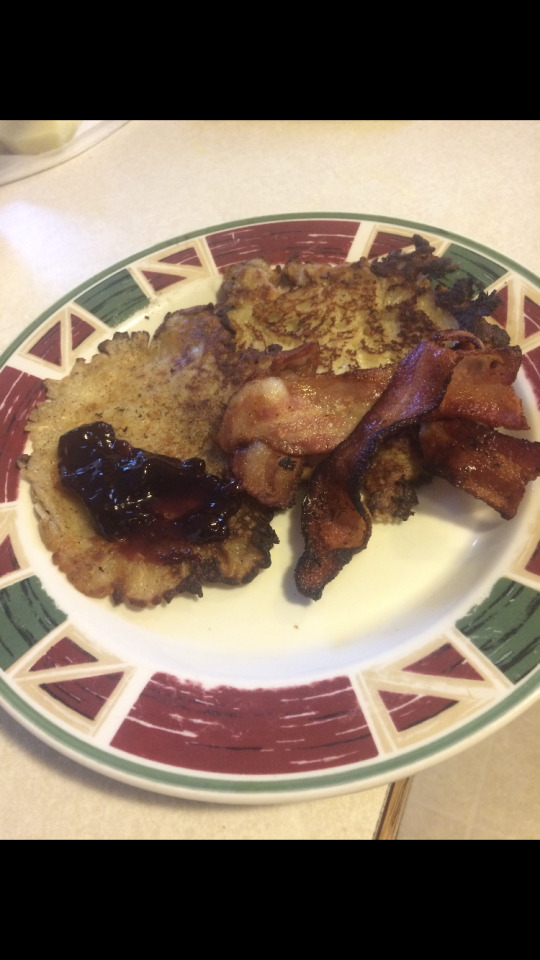
WEBSITE USED
Duxbury, John. “Potato Pancakes.” Potato Pancakes (Raggmunk), www.swedishfood.com/swedish-food-recipes-side-dishes/215-potato-pancakes.
#collegewritingtwo#kent state trumbull#Kent State University#collegewritingfood#homecooking#ksutrumbull#submission
0 notes
Text
Southern Banana Pudding
By Jailon P.
Banana pudding to me is something that is sacred in my family between both of my grandparents. It is at every single family event and every occasion and the closest thing to a tradition that I have inside of my family. Before it was simply a dish, that I looked forward too whenever I was visiting my grandmothers or a dish that I knew was going to be there for my birthday after we had family dinner. I never thought anything of it out side of being a delicious dessert. It was not till fairly recently that I figured out the significance behind the recipe, and that every piece of the dish is symbolic. It was my grandmother from my father’s side who explained why we eat banana pudding, it is not just a treat for family occasions but a remembrance of where and what we came from and how far we have prospered in the last 100 or so years.
Let me explain, not all the ingredients are vital in the quantity or quality, but it’s more about the presentation. The wafers, the bananas, and the custard, were the key ingredients and how they laid mattered in the dish and to my family. The wafers needed to go first once everything was laid, the symbolic meaning behind it was that the wafers represented determination as that was the things that kept my ancestors always going no matter what they faced in the eyes of diversity. The custard was spread across the wafers as they were symbolic of faith. Faith and determination was my great grandmothers backbone to life, my grandmother made it clear to me that these were things that were instilled into her as a young child and if she held to these things then she would ultimately attain the bananas/ The bananas represented freedom, my grandmother went on to explain that if you kept your faith, and you kept your determination, that we would eventually be free from the oppression that plagues the African american community daily.
She went into further details that freedom did not represent only the slaves but the freedom to know that the color of your skin does not make it so that I have a limited amount of usefulness in life. That the sky’s the limit and the reason that I need to have faith and determination to attain freedom is because I am going to need to struggle a little bit harder than everyone else no matter what I do. I am going to get discouraged, I am going to have to put in more effort and more time than my peers because even though I am not confined by bars, or working against my will even though I am same on the outside and the sad fact is that people will sometimes look at me differently for something completely out of my control and in some cases, think that it lessens my worth as an individual
. This is why bananas go on the top, because freedom will be a feeling in which I know I am worthy to make something out of myself, that there is not a thing in this world that can hold my back from the potential inside of me to make it in the America that my ancestors envisioned. Learning this gave me a new found sense of pride in my family and culture, that we have been through so much and are still able to maintain culture in a way that is not only down right delicious but so rich in history and meaning that I feel that if I also stick to these things that I will one day fully grasp what my grandparents did and what my parents feel. In short, I chose banana pudding not only for the fact that I love the taste and everything that comes with it, but also because it gave me a different way of looking at my heritage.
Ingredients
Instant pudding mix (Vanilla)
2 cups milk
1 box vanilla wafers approximately 45 wafers
5-6 bananas
1 can of condensed milk
1 teaspoon vanilla extract
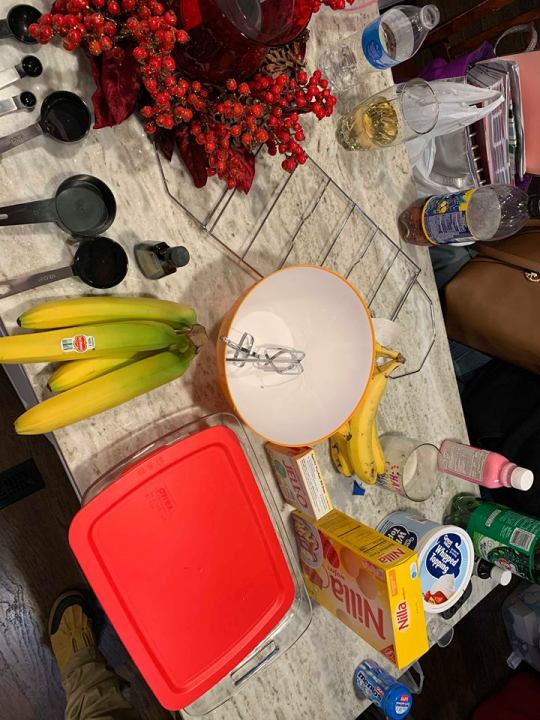
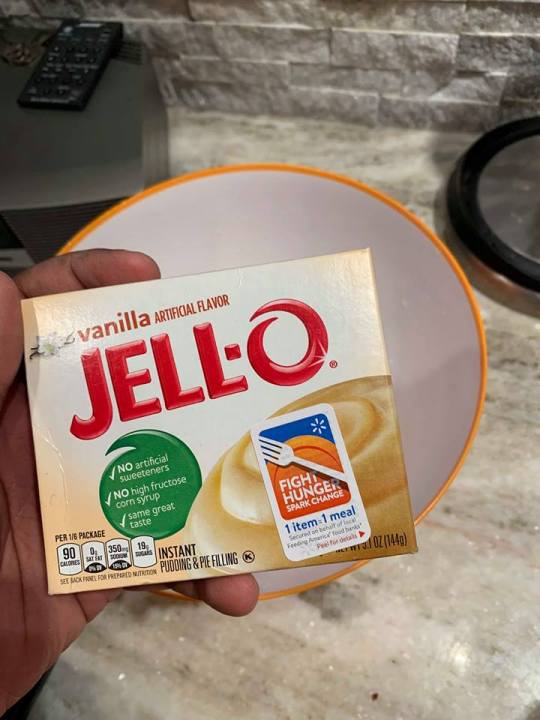
We start with the Vanilla pudding and throwing that into the bowl first. Usually my grandmother would be able to make it from scratch but she said this will do just fine.
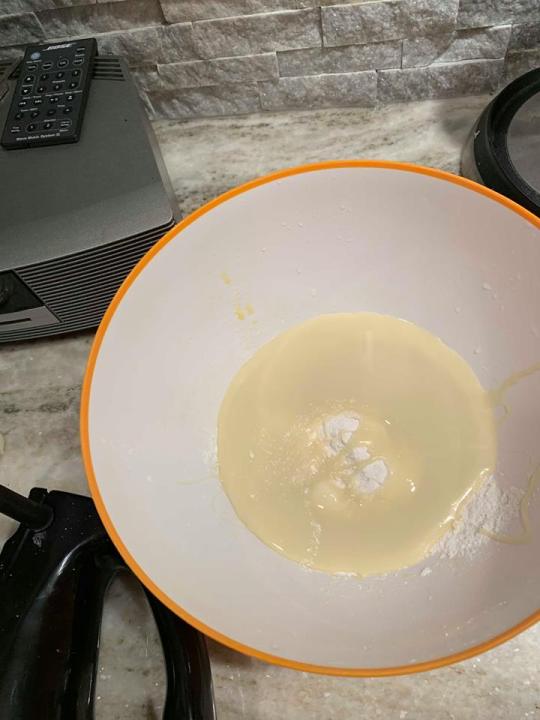
Add in the entire can of condensed milk. Add that after the pudding mix.
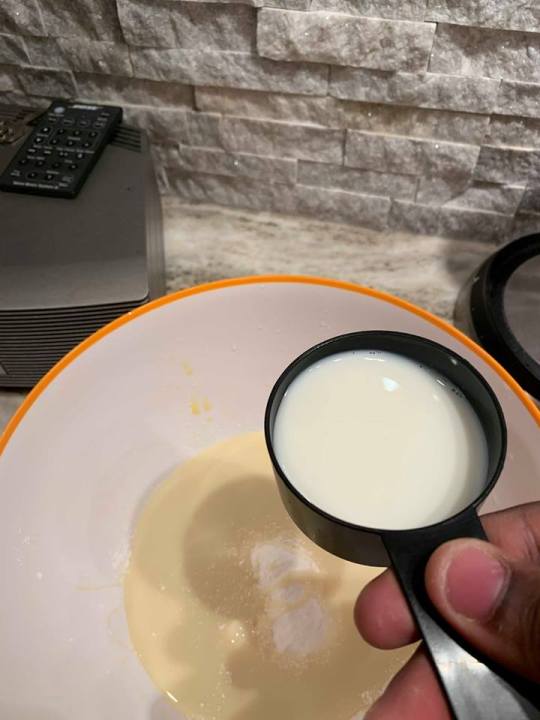
Add in 2 cups of milk, but don’t be like me and not fill the measuring cup to the brim otherwise you WILL get yelled at saying “What’s the point of the measuring cup if it isn’t full, Jailon!?”
Next add in a teaspoon of vanilla extract into the mix for flavor.
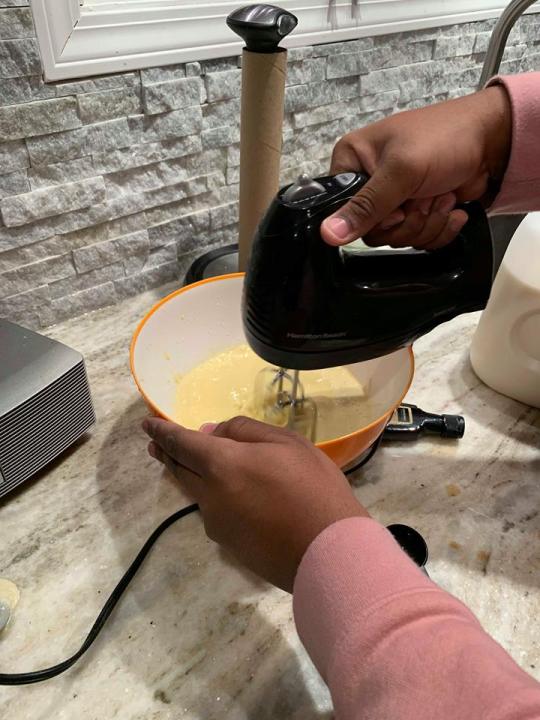
After all the ingredients are inside of the bowl, you want to mix it making circular motions in the bowl to make sure you get all the edges and minimal bubbles. You want to let that sit after stirring for about 5-10 minutes while it takes form and then you will have your custard.

After you are done with the custard let it sit while you start your layering. Start off by taking your vanilla wafers and keep putting them down till the bottom is filled. This will make the bottom of your pudding have a crust like feel to it.
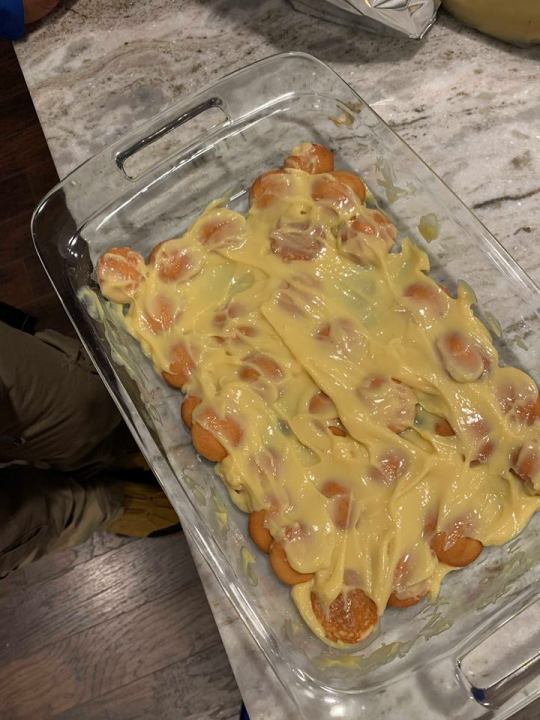
Then take your custard and smear it across the top of the wafers.
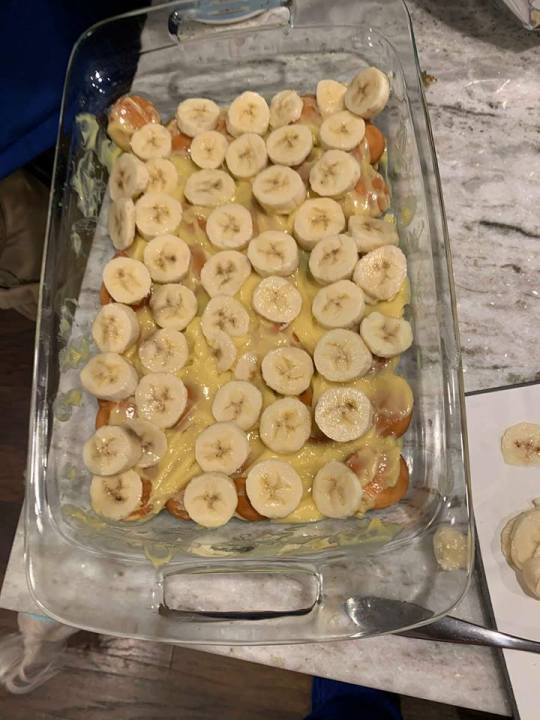
Then your bananas lay on top of the custard
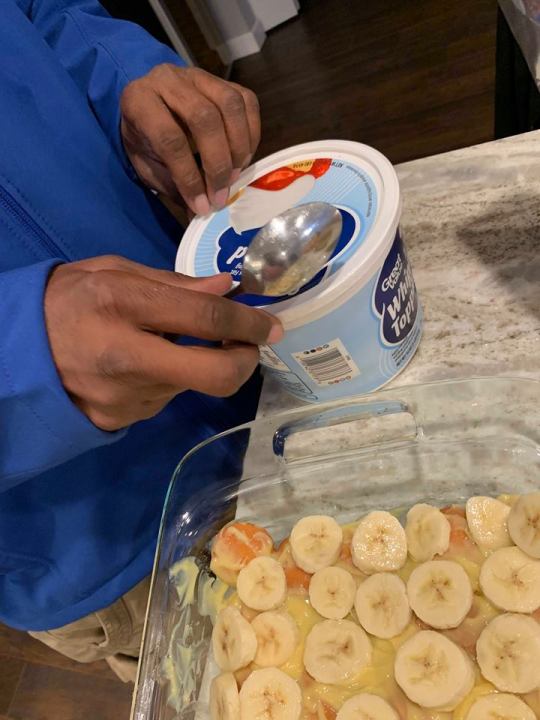
And finally your whipped cream.
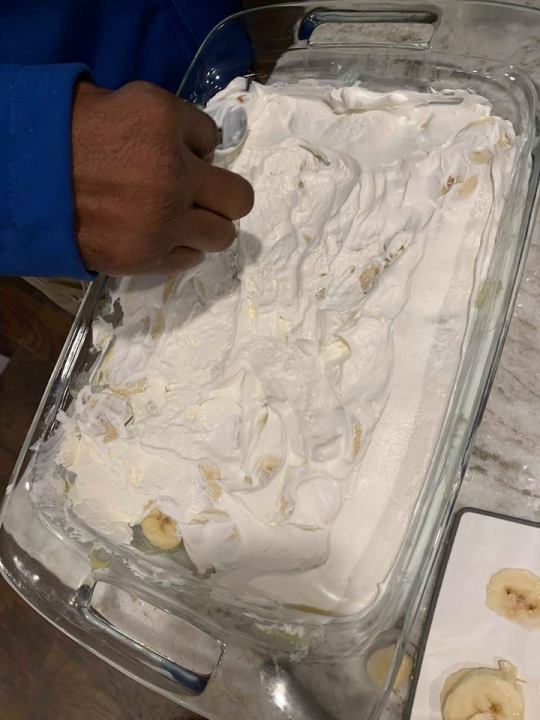
Keep repeating till your layers are to your satisfaction and just set in the refrigerator to cool for 30 minutes to an hour to really let those wafers sit and everything to solidify.
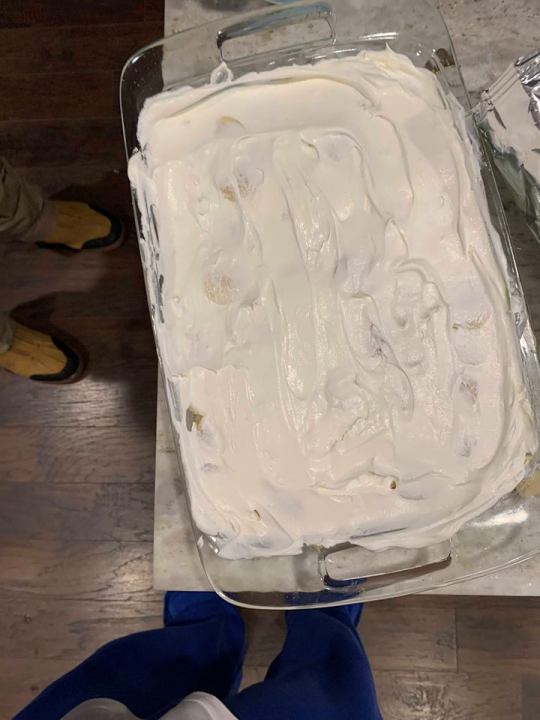
And Lastly! Enjoy!
#collegewritingtwo#kent state trumbull#Kent State University#collegewritingfood#homecooking#ksutrumbull#submission
0 notes
Text
Gluten Free Brownies
By: Casey S.
Ingredients
1 ½ cups sugar; Baker’s Special Sugar or superfine sugar, if you have it
½ cup unsalted butter
½ teaspoon salt
1 teaspoon gluten-free vanilla extract
¾ cup (2 ½ ounces) Dutch-process cocoa or baking cocoa; we prefer the flavor of Dutch-process (“European-style”)
3 large eggs
¾ cup King Arthur Gluten-Free Flour or almond flour
1 teaspoon baking powder
1 cup chocolate chips, optional
1 cup chopped nuts, optional
Making vegan brownies has always been a family tradition, on my dad’s side, for quite some time. I chose vegan brownies specifically because they are not only family oriented, they are extremely delicious as well. Most people jump to the conclusion that anything “vegan” is worse, but these brownies are unbelievably delicious, if made properly. Sometimes brownies are not cooked well and can come out either too burnt or undercooked, but if they are made right, nothing can compare. The recipe could take up to an hour or two with total preparations and baking time. I would have to say baking is definitely more intricate than cooking. Every measurement has to be precise or the end results will be disastrous. I remember the one year my cousin made these brownies when we rented a house at North Carolina’s Outer Banks. There was so many measuring cups, spoons, and ingredients out that there was no room on the counters, and there were so many counters. The problem was there was so much commotion in the kitchen that the flour fell on the floor and spilled everywhere. I am pretty sure to this day someone could find flour in the cracks of that house. An important lesson was learned that day. If you are baking, make sure everybody is out of the kitchen, and also that the flour is closed. Luckily, after cleaning for ages, we still had enough flour to make the brownies, and they turned out as good as ever. The downside to tasting such greatness is that an average brownie will never suffice. Well, not never, but it is just not the same. When I was younger, it seemed I only got to eat these brownies for special occasions, but mostly birthdays. We are not as close to the Cranston’s side of the family, but whenever we are together there is never any fighting or tension. Only good memories and good treats. Now that I am able to reach the counter and can be trusted to do things on my own, I can help out with the baking and also do it on my own, but it is never as fun by yourself. Being able to help bake really creates a relaxing and tranquil environment. My favorite memory of baking was being able to “lick the spoon” after everything is said and done. In my case, “licking the spoon” meant getting every drop I could scrape out of the bowl. This is one dish that does not last one night. By morning the pan is always empty. The one thing that did surprise me when I first found out about gluten free brownies was that eggs were still apart of the recipe; however, I found out later that eggs have nothing to do with gluten allergy and the real culprit was yeast and flours and other, non egg, ingredients. The list of foods and ingredients to avoid when someone is gluten free or has celiac disease, like my cousin, is fairly shorter than I imagined, but it still is a hassle to live that life. When I first heard that my cousin had celiac disease I was interested in learning more about it. It is an autoimmune disease and not an allergy, but sadly there is no known cure yet for the disease. After acquiring this knowledge I was excited that the food choices can still be delicious and gluten free at the same time. Cooking takes time but the experience is worth it. The best thing to do is to be patient. Even when the brownies eventually do come out of the oven, they need to cool down to their perfect handful of gooeyness. The main reason I wanted to do this dish was so people can learn that even though some things are gluten free, they can still be good and, in some cases, be better than regular food.
Gather all the ingredients and utensils. Preheat the oven to 350°F.
Place the sugar, butter, and salt in a microwave-safe bowl or saucepan. Heat and stir until the mixture is soft and light colored.
Place into a bigger, separate bowl.
Blend in the vanilla and cocoa, then add the eggs and mix until shiny.
Mixture should be creamy and chunk free.
Blend in the flour or flour blend and the baking powder. Stir in the chips and/or nuts, if you’re using them.
Stir again until mixture is creamy and a deep brown.
Pour the batter into a greased brownie pan and let sit.
Bake the brownies for 33 to 38 minutes, until the top is set; and a cake tester or toothpick inserted in the center comes out clean or nearly so, with perhaps a few wet crumbs, or a tiny touch of chocolate at the tip of the tester.
Once the brownies are done, take them out and enjoy.
#collegewritingtwo#kent state trumbull#Kent State University#collegewritingfood#homecooking#ksutrumbull#submission
0 notes