
dreamstate-portfolio
21 posts
Dreams breathe life into men, and can cage them in suffering. Men live and die by their dreams, but long after they've been abandoned, they still smolder deep in men's hearts. Some see nothing more than life and death. They are dead, for they have no dreams. //Page is still new, some tags may be empty. //
Don't wanna be here? Send us removal request.
Statistics
We looked inside some of the posts by dreamstate-portfolio and here's what we found interesting.
Average Info
Notes Per Post
6K
Likes Per Post
4K
Reblog Per Post
2K
Reply Per Post
3
Time Between Posts
11 hours
Number of Posts By Type
Text
17
Last Seen Tumblr Blogs


Fun Fact
Users from the US are the majority of Tumblr visitors.
Text

#a bitch to make export and upload#adobe hate#gif#photoshop#the more I look at it the more I dislike it#i feel like I spent so long looking at fake eyeballs I forgot what real ones looked like#the cornea bugs me like nobodies business#the original was amazing#but adobe being adobe it rendered completely garbage#I didn't feel like painting it#so we get this#something to save for next time.
0 notes
Text

Kate Moss by Ellen Von Unwerth (1995)
3K notes
·
View notes
Text

Kim2091 chaiNNer TTA Templates: A Rundown on Test-Time Adaptation and Averaged Outputs
SKIP TO THE MAIN EXPLANATION BY SCROLLING TO THE CHAIN PICTURES
TTA stands for Test-Time Adaptation, it is a method of putting an image through various transformations to produce more accurate output results (an averaged output). When you’re upscaling an image it’s making approximations to fill in the information it doesn’t have. There are many reasons why it has trouble with that information, lighting, artifacts and obscured objects being some primary ones.
Using the TTA method, it applys transformations like rotation, missing parts, exposure and transparency to the image and tests it against each other before combining it into a final result, that is (potentially) more accurate to the original. Many tests are showing that TTA methods could increase accuracy by up to 15%. It does however depend on on what you are upscaling and your model as well, don’t expect TTA to give you 15% better accuracy 100% of the time.
Within upscaling it became more popularized by being a setting in Waifu2x.

However it has been around before that and is seeing wider use as more industries add machine learning to their process, there is no one singular method to TTA but the ‘standard' for upscaling as seen in this chain preset and in the previously mentioned Waifu2x is 8 rotations of the base image. Although Kim has made lightweight TTA presets, that use less, I’ll be showing as well.

Note that if you have a slower or older computer TTA will be far more taxing on your system vs a more simple upscale process. Batch processing using TTA will be noticeably longer, no matter what kind of computer you have.
TTA is not something you need to use, if you’re happy with your upscaling results then it would be pointless to waste resources on it. It will typically be used when accuracy matters or when you are having issues getting the results you want the normal ways. For example many of the gifs I will be posting to this account soon will be featuring use of TTA since line and object accuracy matters more heavily when viewed in motion vs a still image. It would also be good for images with heavy artifacts.
When I first heard ‘TTA’ I had no idea what it meant, and couldn’t find much at first beyond ‘it rotates the image, and sometimes your image might look better because of it', even finding comparison images was scarce. This led me down a rabbit hole on TTA. I will not burden any of you with a sources and links list because you would be scrolling for awhile. Instead I will have it listed here https://trello.com/c/COHYy9u9 . It is quite an extensive list, I have tried to take it and summarize it for you (as I understand it) the best I can.
------------------------------------------------------------------------------
Kim2091 made these templates, I am just explaining their use and showing examples. The example chains are pretty simple, but I understand how they can seem overwhelming which is why I have made this. This is beginner to intermediate level, you should have foundational knowledge on chaiNNer and upscaling.
This is the second part of this series. The first is here Kim2091 chaiNNer Templates I also made a starter guide for chaiNNer you can check out chaiNNer (AI) Upscale Basics
All credit for these chains goes to Kim2091, these chains are linked on the chaiNNer github page as well. They're a great resource to use.
------------------------------------------------------------------------------
Some previews have the following edits in PS, find edges filter, b+w adjustment (max blk), and exposure adjustment with gamma turned turned down (0.25).
I have also broken down Kim’s preset a bit to better explain how everything is connecting together.
------------------------------------------------------------------------------
Similarly to the section in Pt 1 on comparison chains, I will be covering all three TTA chains in one go because they’re so similar it would be pointless to make three separate explanations. These chains are very plug and play, despite the scary number of nodes, you don’t actually have to mess with them at all if you don’t want to outside of Load Image/Model and Save Image which should be familiar already.

LITE

LITE DUAL (lite TTA chain using two models)

FULL
------------------------------------------------------------------------------
Now the basics of how the TTA portion of the chain itself works is that it is taking your base image, splitting it for the various transformations (while keeping one un-transformed copy for the base layer that the transformations will apply on top of), applying the transformations (the transformation is applied through the upscale image node and is reverted while keeping the information from the transformed upscale to compare against the upscaled base layer and other transformed upscales), reverting the transformations, merging/averaging the results together and then spitting out the final merged result.

These are the only actual nodes you need to change anything on, you’ll notice it’s just a basic upscale chain without the TTA additions.

The image is split and connected to the beginning transformation nodes of the TTA chain

The ‘base layer’ that is unaffected by transformations


The main transformations that are reverted further along the chain before the results are averaged together.

The results being merged together

The final output
I’m sorry this was so long compared to the simple chains post, I hope it has at least been informative. I wanted to attempt to break down TTA enough for anyone that wanted to experiment with making their own TTA chains, and provide enough background information that what I’m showing can be easily understood and applied to your own upscaling work.
------------------------------------------------------------------------------

Gifs are out of sync I'll fix them soon I swear.
Still image previews will be uploaded soon and linked here.
0 notes
Text

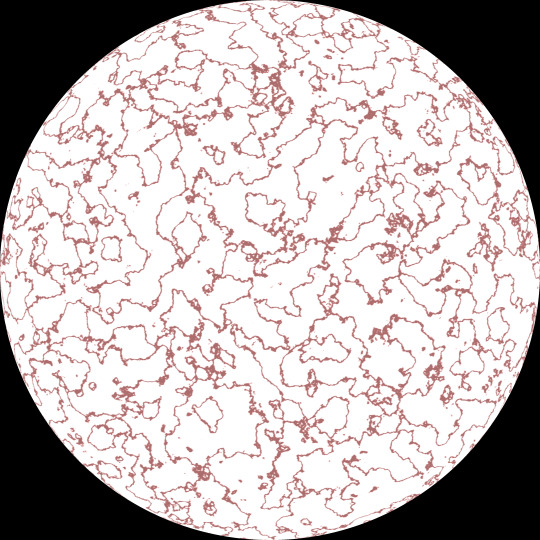


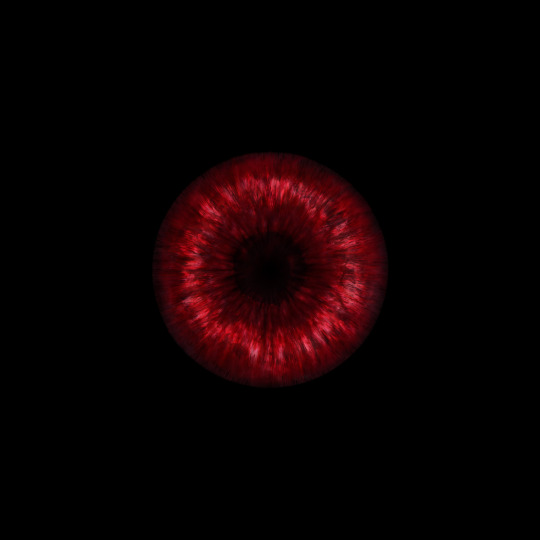

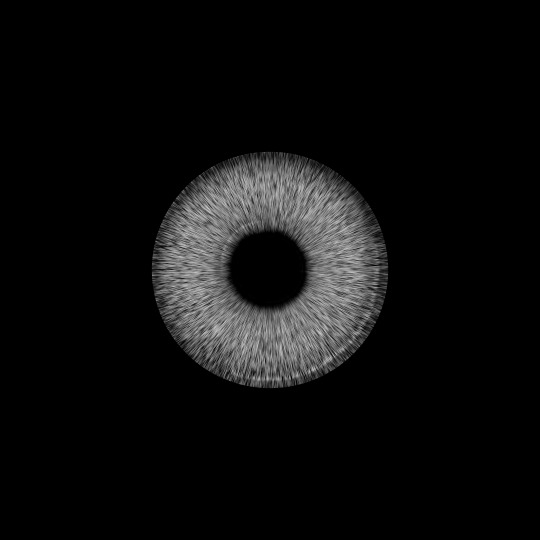

4k Eye Textures Practice - dreamstate - 2024
(+ .psd/textures)
It's been awhile since I made a game texture but I got inspired while scrolling XIVarchive.
I am releasing my files for this as a resource/asset, (download is at the bottom. t.o.u is in the download folder for modders) you can use this as a base for your own textures and change out the iris. The images you see above are all my original work and assets (minus the red iris and pupil which uses brushes from Obsidian Dawn for many of the layers).
The .psd's come in 3 separate files. The first is the Iris file, since it has so many layers and they can't be baked down easily, it's easier to export from here and into the main file. The gloss texture + catch-lights in the bottom row are in a separate file as well, these combined with everything else was causing insane lag. You can edit and export the texture in this file should you wish too, it has already been imported as a flat image into the main file. The last is the main file which has everything set up for you to import your iris and export as whatever you like, catch-light+sclera layers are also still separated in this file for convenience.
These are sized 4096x4096. Everything was made using Adobe Photoshop 2018.
CREDITS
Used for painting most of the Iris. If you use the iris for anything you must buy a license or give credit to Obsidian Dawn for her brushes in your description.
Used for a few GMs. I use these quite a bit in general, they're great for shadows/highlights. The base iris texture in row 2 uses one of these for example.
More GMs, I used one of these in the finished texture file as an overlay. These and the GM's above are the two sets of GM's I use most, both packs are extremely versatile.
DOWNLOAD LINK - dreamstate eye texture 1
#photoshop#psd#dds#assets#psassets#assets by others#textures#moddingtutorial#pstutorial#eye texture#eye mods
2 notes
·
View notes
Text
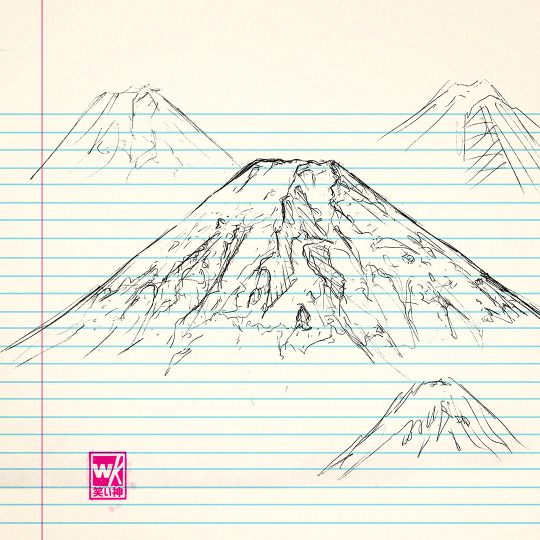

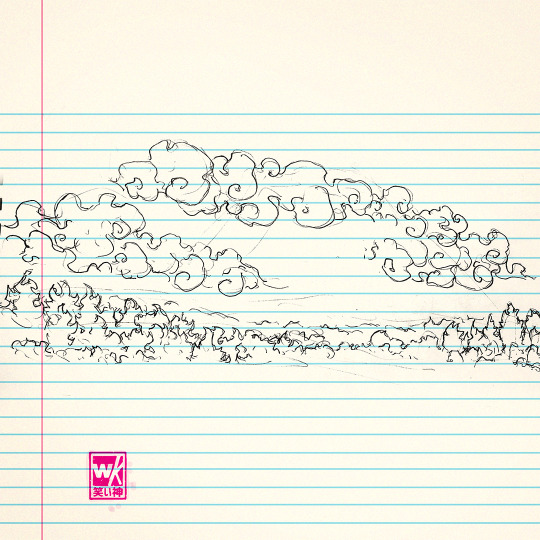

Some of my Oct 2023 sketchbook pages
710 notes
·
View notes
Text
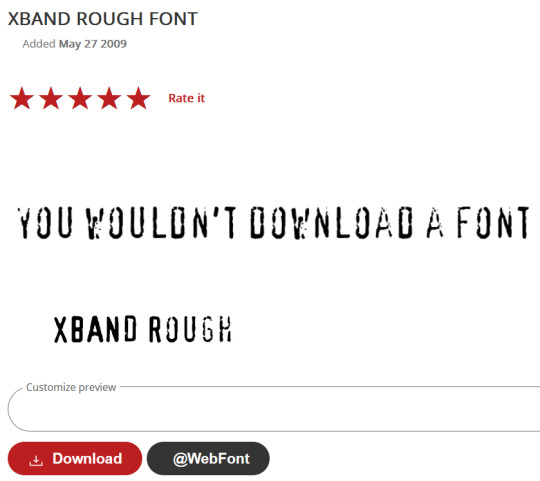
.psd / font 1 / font 2
Notes: These have sub folders for overlay textures. Sometimes you might mess up the clipping mask, just right click the layer that says ‘TEXTURE’ and select ‘Create Clipping Mask’ if you notice it’s not cut-out anymore.
These are not entirely plug and play, if you size the text up or down you’ll need to edit the Bevel and Emboss layer styles on each layer, edit the scale up or down and it should start to look normal again. It’s probably best to use these as learning resources so you can recreate them from scratch.
OTHER ASSETS USED: (used for background in demo)
t.o.u
0 notes
Text

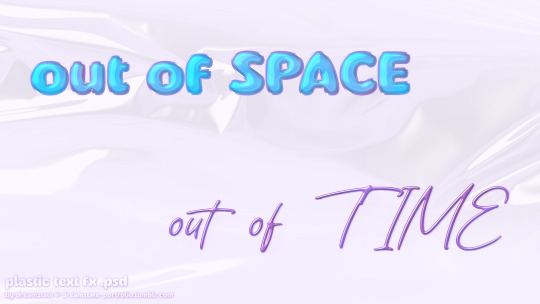
font / plastic texture psd. (used for bg)
I had a really hard time showing off the tortoiseshell text effect, just due to the background and trying to keep it easy to edit for the psd. So I made a proper picture/s to show it off better.

This is the one from the file with altered colors, a bigger outside stroke and different font. Not shiny -.-
#photoshop#fonts#assets by others#im going to try and make a psd of this#but idk if I can#there's... a lot of layers#i also had to rasterize the original text so maybe an action would work better
0 notes
Text

.psd / font 1 / font 2 / font 3 / font 4
You might have to change the colors of some effects, 1 uses a gradient map that controls the color (tuned down ver of the one below), 2 has colored glow layer styles. Change blend mode of the second layer on number 3 to remove transparency.
(This is the death haiku of Toyotomi Hideyoshi for those interested. I could not find a solid translation, I read about 30-40 and every single one was different I ended up going with the first I came across from this blog.)
0 notes
Text

.psd / font
0 notes
Text

Kim2091 chaiNNer Templates
Kim2091 made these templates, I am just explaining their use and showing examples. The example chains are pretty simple, but I understand how they can seem overwhelming which is why I have made this. You do require some basic knowledge on chaiNNer and upscaling to make use of these since I will only be going over the relevant nodes.
All credit goes to Kim2091
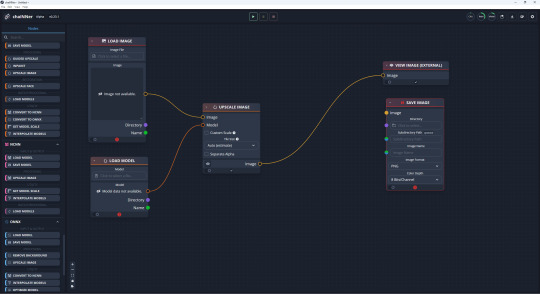
SIMPLE IMAGE UPSCALE


This should be familiar to you already. This is the basic upscale chain consisting of Load Image/Load Model/Upscale Image/Save Image nodes. These are the only nodes you actually need to run an upscale. View image and View Image External are nodes that let you preview your upscale before/after saving it. You can use the switch on the bottom left of a box to make it inactive during an upscale, allowing you to leave it connected.
SIMPLE FACE UPSCALE
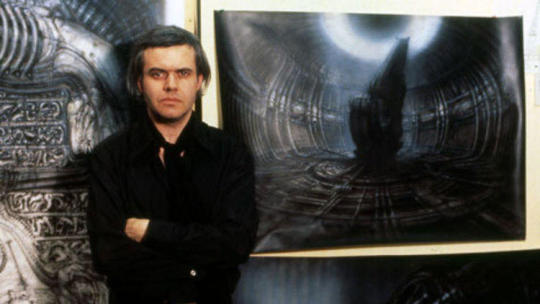
Original (Old picture of H.R. Giger)

Normal upscale

Upscale with added Upscale Face node and GFPGAN (lowered custom scale on upscale face node for size req)

The Upscale Face node is kind of a special node, it will only connect to models that are specifically for face restoration (FaceSR) I don’t believe you will find them in the normal database here is the link for GFPGAN which I am using here in the Load Model node connected to the Upscale Face node (the other model can be any model just the one connected directly has to be FaceSR).
I can't explain exactly how it works, I do know that GANs self-discriminate to produce much more accurate images than normal (in my experience using ESRGAN models which are also used in most of these examples) Here's a Google Doc that can better explain. The difference with a normal GAN model and GFPGAN, or similar FSR models, is that GFPGAN is specifically trained for head/face upscaling. Since it only affects the face, you still need a normal upscale model for the rest of the image. Here are the other two FSR models I know of RestoreFormer / CodeFormer.
If this interests you, search for more broad photography restoration, it’s a very technical/specific photo editing skillset and involves work beyond just this. I recommend starting with Rememorie they do some really awesome work, they also do make use of GFPGAN on occasion so I would look through their resources or reach out to them, they have a Reddit account and a personal website I know of in addition to YouTube.
SIMPLE SPLIT TRANSPARENCY

Original image (regular non-upscaled frame half ereased in PS with outer glow layer style)

Upscaled with normal chain

Upscaled with Split Transparency (ignore the banding, I’m not using a very good example for this)

This chain is used for upscaling images with transparency. It separates the alpha from the rest of the image with the Split Transparency node and upscales each independently before merging them with the Merge Transparency node. You would mostly be using this for textures, but it has a bunch of other uses as well.
Normal upscales only read rgb not rgba (which is why the middle picture is grey on the edge it’s not set up to read the alpha channel), you used to have to separate the image manually in something like GIMP and upscale each separately before going back to remerge, now we have chaiNNer.
SIMPLE VIDEO ITERATOR

Original GIF

Upscaled GIF
Upscaled to MP4 format
(note: custom scale was lowered to fit 10mb upload requirement on GIF, trust me it looked the same either way it does look a bit better if you expand it) Something that you won’t see very commonly used, but it’s there, is Video Iteration which is just upscaling videos (mkv, mov, gif, mp4, avi, webm). You will not get the same results as you will from upscaling frames. I don’t upscale videos using this method so there’s better people out there to explain it and better upscaling programs to do it in. This is just what this chain is and what it’s for.
SIMPLE IMAGE ITERATOR

This chain is a batch processing chain. I have some examples here of one's I typically use. The difference between this one and mine is this one is saving to the same folder and using the same image names but adding the model name to the end so there’s no need for a Math node. You do lose a bit of control going with this method.
SIMPLE BLENDED OUTPUT


I have used a x2 model against a x4 model to showcase what this chain does. It’s just two separate upscales overlaid on one another with a Blend Images node and an Opacity node to control the visibility of the overlay layer (upscaled image). If you are familiar with Photoshop, you will be very at home with the Blend Images node since it uses the same/similar blend modes as PS layers.
CAPTIONED COMPARISONS / TWO MODEL COMPARISONS / SIMPLE COMPARISON
CAPTIONED COMPARISON

This is how the chain looks for a basic comparison. This is what people use for their model previews, you’ll see this used a bunch in general. There’s basically three presets that kind of do the same thing so I’ll only be explaining it one time with the Captioned Comparisons preset and showing examples for the other two (Two Model and Simple.)
The node that matters most in this chain is the Stack Images node. This will stack our images either vertically or horizontally into one image. You can hit the button with the plus sign to add more images to your stack.
The Add Caption node will add the name of the model being used for the image as text either on top or at the bottom of the image. By connecting it to the name of the Load Model node, it will use that as the caption so it changes dynamically and you don’t have to type it out. note: the size of the text in the comparison is also determined by the size of the image see a better example below.
TWO MODEL COMPARISON


(since the third caption node is connected to the load image node it’s pulling from the image file name, break the green line and type in a custom caption or keep it in mind while naming your files.)
SIMPLE COMPARISON


No captions, no OG image, just a simple comparison of two models.
OTHER MODELS USED
#upscaling#chaiNNer#videoupscaling#tutorial#ai#chaiNNertutorial#kim2091#assetsbyothers#models#ai upscaling
0 notes
Text

chaiNNer (AI) Upscale Basics
This is covering the basics of the chaiNNer layout. This is not meant to be a comprehensive guide on how to use chaiNNer (like photoshop and blender it has many different uses, many of which we don’t use or need most of the time) this is meant to show you the layout, quick features and upscale chain. This will mostly be useful to people that have some experience (AI) upscaling already but have never used chaiNNer.
For an extensive guide check out Kartoffel’s video series/tutorials on video game upscaling. https://trello.com/c/myNZJEBQ

First step before you do anything is make sure you have a model(s) ready. I have mine in a folder under documents, it doesn’t have to be in a specific place you can load one straight from the downloads folder. Download models from the database here look for pytorch models primarily but you can play around with NCNN too I’ll explain the different step for using those later. I use pytorch models 99% of the time so I’ll be using pytorch for this.

chaiNNer link (chaiNNer git link with install section) is easy to install now, it’s fairly plug and play just download, run the installer and then download dependencies through the app.
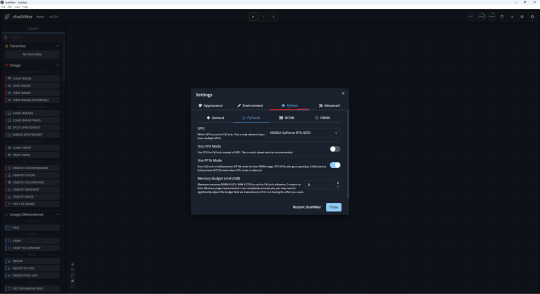
If you have multiple GPUs or want to use your CPU/memory limit. Those are all located under the settings gear icon (top right) and the Python tab. You can also enable system Python here, if you already have it installed, over downloading the integrated version (check github page for more info).
Onto the good stuff, these are the nodes you will be using most of the time. You can use the search bar on the top left or the scroll bar. You can also right click anywhere on the grid to bring up a mini version of the node panel, search bar included. The tabs we will be pulling from are Images and PyTorch.
You can drag and drop the nodes onto the grid, create links to connect nodes. Click on the lines to break them or drag and move them somewhere else. You can also start to create a link and drop it on the grid instead to bring up a list of other nodes it could connect to. (if you need to delete a node select it and use del key)
If you look to the left bar you’ll see tabs separating PyTorch/NCNN/ONNX these are what you use if you want to use an NCNN model for example over PyTorch in your upscale. The nodes that are orange in the pic below are the ones from the PyTorch tab (red is Images) you would just swap them to nodes from one of the other tabs mentioned.
The chain is centered around the Upscale Image node, the only other nodes we need are the ones that fulfill what it requires. Being an input model and image and specifications for an output image. Since you’ll be loading a PyTorch model, you need to grab the Load Model node for PyTorch. Since you need to load an image and preview it we grab the Load Image and View Image (External/ is not required but it pops it into a separate window which looks nicer imo) when you are satisfied with your upscale you would switch out the View Image for Save Image node and specify format/save location/name.
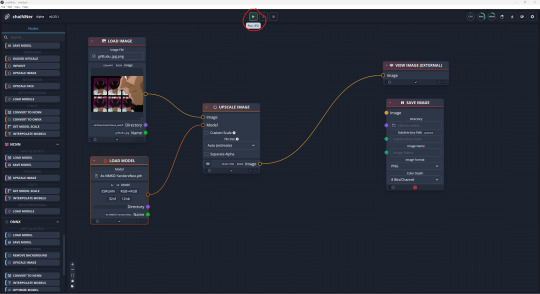
When you have your path/chain set up hit the green play (Run) button at the top (F5 key works too). Depending on your setup, and how large your upscale is (I get lag at 5k but used to get lag at 2k and up on my old laptop) it could be very quick or a longer wait, check the top right corner to see how much resources it’s consuming. That’s it that’s the basics on setting up a chain and running it to get your upscale.
There’s many extra nodes you can use to get the results you want with upscaling. There’s nodes for transparency, interpolating models, (pre/post upscale) resizing, batch upscales etc. It's important to remember that the nodes before the upscale image node are affecting the image before the upscale the ones after the node will be affecting the upscaled image.
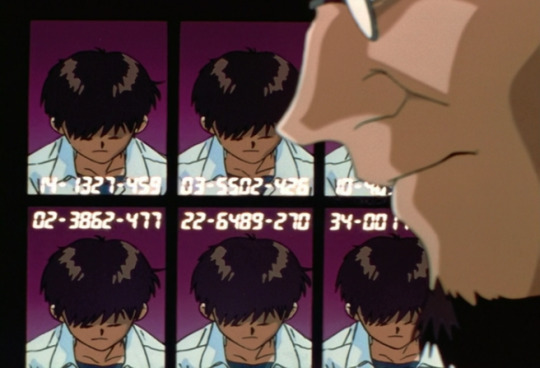
before (429KB / 656 x 447)

after (5.34MB / 2624 x 1788)
model used / NMKD YandereNeo 4x
I don't know where exactly the top image image was from, it has a bunch of different sources. I can tell you it's a frame from EP1 of NGE.
0 notes
Text
Font Identifiers
This is a quick guide on some tools I use to identify fonts (as well as kr/jp/ch fonts).
If you have a font already that you know is similar to what you’re looking for you can search for the font you have and it will bring up a list of other similar fonts, you can compare them and see exactly what’s different between them. I love this site
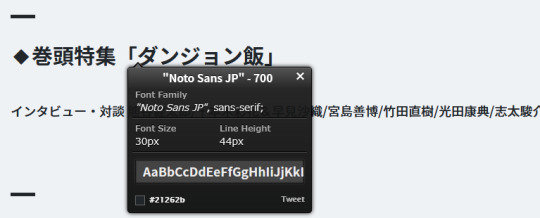
This tool is a browser extension, it’s kind of amazing, you run the extension from the extension menu, and then hover/+click to see the fonts on a webpage.

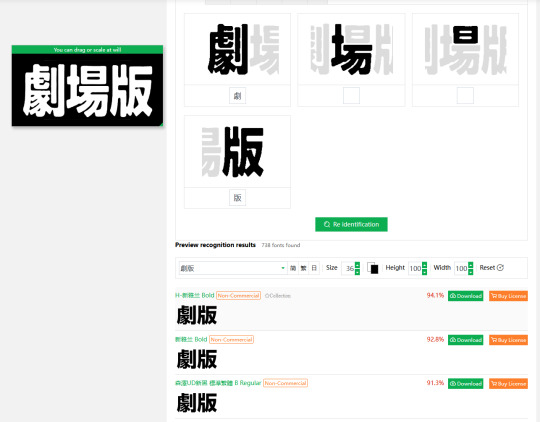
This is great for finding CH/KR/JP fonts, the first result you see was actually the font I was looking for in this example (font from magazine, edited in PS to be B+W, it was auto inverted by the website), it is pretty accurate imo. You should use a browser translator for the site, you also need to keep the actual line of text handy, in this case it was 劇場版 so you would put the correct characters into the spaces for the one’s it actually detected. It’s a bit tricky and you have to click around on the little box a few times.
(note: I’m not a fan of the website they link to for font downloads, so only use this to find the font and then search for a download separately.)
Not a font identifier, but this tool is how I pull JP text from images so I can use the other tools to match it’s font. I use the same method as above before I plug it into the site. It is also pretty accurate (I don’t know JP but I cross reference each character) and is one of the only translator tools I’ve found that lets you convert JP text on an image to JP text you can copy and paste.


(OG text / Adjusted for website / Translated and pasted back into picture done using PS18')
0 notes
Text

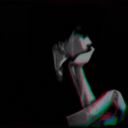
Artwork from zerochan (Newtype June 2012 issue)/ animation by me using PS18' / Harmonic Font by monkopus
0 notes
Text
Also using Un-blue Polls Fix by @glenthemes
ETA: For some reason on some NPF posts with both image and text (I think it's for posts with varying image sizes and text that's what triggered the issue most) it will cause the tags to overflow out of their bounds.
I did manage to find a solution to this using this stackflow post.

find the line .info a, .tags a, .tags span{ and then add
overflow: hidden; and change inline to inline-block


before/after.
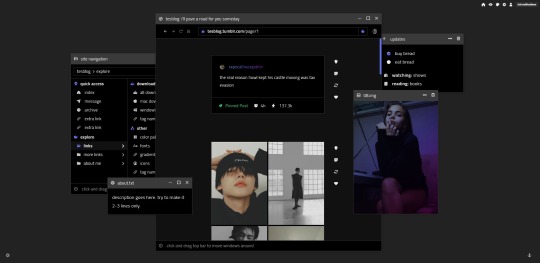
someday: windows-inspired blog theme by @taezs
includes:
400px posts
optional navigation box, sidebar image, and updates box
responsive to smaller screens and mobile devices
npf photoset fix courtesy of/by @glenthemes
draggable boxes
blend mode overlays over sidebar image & nav image - will change on dark mode
dark mode toggle
note: this is not overly color-customisable due to the dark mode toggle. you can choose for the default to be dark or light, and the three colours that make up the gradient accent, that's it.
preview / code
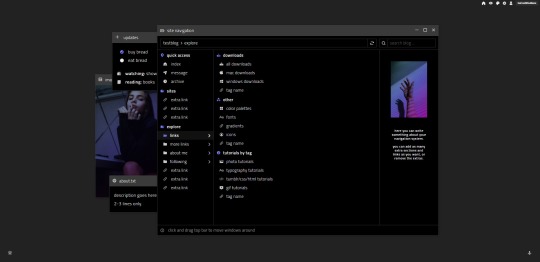
matching explore page
can be an all-in-one, can be a tags page - up to you. add/delete as many subfolders as you want. but! it may be a bit confusing so some html experience is recommended.
faq/ask section
blogroll
about me section
as many links sections as you want
two images - you can change them if you don't want them
updates tab/description same as index page. again, delete if you don't want.
preview / code
credits: post styling/defaults by @seyche, day/night mode by @eggdesign, css photosets by @eggdesign & @annasthms
2K notes
·
View notes
