
Cooking is a thing I try alot and get right a few times. This blog is about those few times
Don't wanna be here? Send us removal request.
Statistics
We looked inside some of the posts by howtakitchen and here's what we found interesting.
Average Info
Notes Per Post
5
Likes Per Post
3
Reblog Per Post
2
Reply Per Post
0
Time Between Posts
9 months
Number of Posts By Type
Text
8
Video
3
Link
1
Last Seen Tumblr Blogs


Fun Fact
Post activity is at the highest at 4:00 pm EDT; notes peak at 10:00 pm EDT.
Text
Orange Pork
A solid danish pork stew, and a family favourite
500g of Pork neck, 2cm cubes (nakkefillet på dansk, in Aus, just get a pork roast)
20g+20g purified coconut oil (Palmin here in Denmark, Copha in Aus)
1 onion
3 oranges (Or equivalent weight in mandarins)
1 cup fruit juice (apple, orange, etc)
50g flour
50g sugar
1/2 tsp black pepper
1/4 tsp nutmeg
1/2 tsp cinnamon
1tsp salt
Instructions:
This is a 1.5 pot recipe with a pressure cooker if you have one. We just do some prep and dump it all in the pressure cooker.
First off, we dice the onions and put them in the pan with the first 20g of oil and the zest of all the mandarins and/or oranges you're using. Cook on low till they're translucent and add them to the pot. Add in your sugar once cooked to dissolve. Once incorporated, add to the pressure cooker pot.
Once that's done, mix the flour, salt and spices together and dredge your pork in it. Fry this off in the remaining 20g of oil and add it into the pot.
Now peel off all the pith/skin from the oranges and mandarins, and put them into your pressure cooker. Add in your fruit juice and start cooking. I used 50kPa for 30 mins.
Serve with rice, creme fraiche or sour cream and a good helping of parsley :)
0 notes
Text
Danish Sable Christmas Cookies
Ingredients:
240g flour
3g salt
200g butter (Room temp)
100g sugar
2 egg yolks
5mL/1 tsp vanilla extract or 0.5g freshly grated nutmeg
~1/3 cup sanding sugar (Plain sugar with freshly grated nutmeg or cinnamon mixed in)
Instructions:
Cube the butter and cream the butter and sugar together till smooth and pale
Incorporate the egg yolks, one at a time
Add vanilla or nutmeg
Add in the flour mixture and mix minimally (rubber spatula) till the mixture just comes together
Roll the dough into a log. Wrap in grease-proof paper or plastic wrap, then chill it in the refrigerator for at least an hour.
Once the dough is chilled, sprinkle sanding sugar on a clean surface. Unwrap the dough and roll in the sanding sugar.
Use a sharp knife to cut dough into slices of even thickness. I usually go for ~5mm thick.
Optionally, you can also press the cut sides into the sugar
Place cookies 2-3 cm apart on a lined baking sheet and bake at 170C for 10-15 minutes or until the edge is just going brown.
Leave to cool for 5-10 mins to allow for cookies to harden.
0 notes
Text
A Very Simple Mud Cake - i Danmark
Ingredients
100g Chocolate - Rema1000 Dark chocolate
200g Butter (salted or unsalted)
1 ½ cups of 200g white sugar
250g milk
2 large or 120g of eggs
260g all purpose flour
¾ tsp or 3.5g of baking powder
⅛ or 1g tsp salt (add if no salt in butter)
2 tbsp or 20g cocoa powder
Baking instructions
Preheat the oven to 160º C. Butter the bottom and sides of an 20cm round cake pan or springform pan.
In a medium pot over low heat, combine the chopped chocolate, butter, and sugar. Stir occasionally until everything is melted and smooth. Remove the pot from the heat, stir in the milk and allow the mixture to cool for 10 minutes.
Pour the cooled chocolate mixture into a mixing bowl and beat in eggs
Gradually add in the all purpose flour, baking powder, salt and cocoa powder. Mix gently till combined
Pour the batter into the prepared pan. Bake for 70-80 minutes or until a toothpick inserted in the middle comes out with clean.
Allow the cake to cool in the pan for 30 minutes before serving
Thoughts and notes:
Baked this cake and was excellent with unflavoured or sweetened whipped cream Very dense cake, with mudcake crumb. Also works well with milk chocolate (Rema1000 too) Keeps well for many days in the fridge. Relatively dry cake so needs something moist along side like ice cream, cream, coffee, etc.
0 notes
Text
Badass Pastry Cream
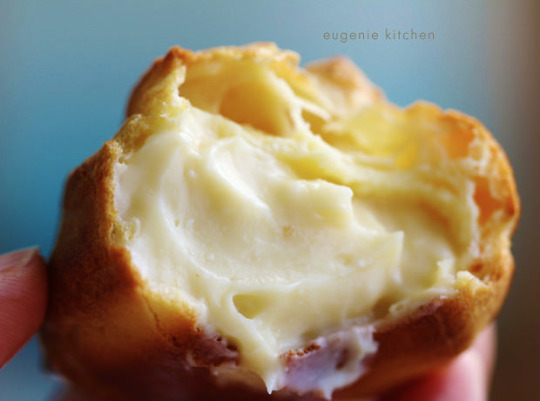
So, as my family knows, this is my go to custard recipe when someone asks for custard. It’s shiny, glossy, creamy and by all descriptions, a pretty delectable number when the flavour lines up well. There’s some small variations you can do with this recipe too. Instead of vanilla, a citrus rind can be used, which gives it a sicilian vibe, and makes this crema pasticciera (italian for pastry cream :p). Technically this is Creme Mouselline, (courtesy of the optional butter) but why go for anything less than perfection?
Ingredients:
2 cups milk (Full cream, please) (500ml)
4 egg yolks
1/3 cup (80g) castor sugar
¼ cup (30g) all-purpose flour
¼ cup (30g) cornstarch
2 tsp pure vanilla extract (yep, 2 teaspoons. Thank me later) (Option 1)
2 tsp citrus peel (option 2)
A pinch of salt
1/3 cup unsalted butter (75g)
1/3 cup unsalted butter, softened (75g) (optional)
So to begin:
Warm that milk and vanilla up in a pot. Is it necessary: no, but It helps get the flavours out of the vanilla, so do it. Warm it up to the point where it begins to bubble. Watch it, it will over boil, it always does :p Once it’s done, leave it to sit for as long as you can to let the flavouring do its work. 10 mins is heaps.
While the milk is doing its thing, dump the flours, eggs, salt and sugar into a stainless steel bowl and whisk it till it gets a little lighter in colour. Why? No idea, it’s just what my ancient Italian cook book says to do. Now that’s ready, and the milk has had its time to sit, pour in a few tablespoons of the milk to temper the egg mix so it doesn’t cook the egg, then add the rest of the milk. Keep it in the bowl and get a pot of water underneath it to start the double boiler treatment.
Why double boiler instead of a pot? Double boiler is easier to control the heat, even heat, good temp control, and if you’ve got a round bowl, you’ll never miss the corner. Winning all round.
Now that the bowl is on the double boiler, whisk, and don’t stop whisking till this beast thickens up, then keep going for a minute or two. It will suck, you will cry and probably beg someone else to take the whisk, but persevere. You’re putting the love in.
Now that your arms hurt and the tears are beginning to sting, time to take the bowl off the heat, and add the first bit of butter. Cold butter cools it down. Your first taste will be a religious experience. You can stop here for profiteroles or cannoli, but if you’re doing cake… Keep going. This is what makes it a mouselline.
Beat that soft butter till it’s nice and fluffy. Then once the mixture won’t melt the butter (i.e. room temp), stir it through. Then… its up to you. Stir in some cocoa, and make some chocolate custard, or sit there with a spoon and grin for a moment before you dig in. Up to you :p
For the cooking literate folk:
Scald milk with flavour (Rind, vanilla, etc). Allow to cool and filter prior to egg addition.
Whisk yolks, sugar, flour and salt till fluffy and pale.
Temper egg mix with milk, and combine it all.
Double boil the mixture, while stirring, Continue for 2 mins after thickening.
Add first portion of butter.
If extra creaminess required, cream butter and add when cooled to RT.
Good luck y’all!
0 notes
Text
Flourless Chocolate Cake

This is a seriously amazing recipe. Great texture, great flavour, just wow.
Ingredients: 450g (16oz) solid dark chocolate (The good stuff people!) 1 cup organic light brown sugar, packed 1/2 cup organic white cane sugar 3/4 cup very hot strong coffee (again, the good stuff is better) 225 unsalted butter, cut into pieces 2 tablespoons unsweetened organic cocoa powder 8 large organic free-range eggs, at room temperature 1 tablespoon vanilla extract- yes, a tablespoon! 2 tablespoons of bourbon (I used Maker's Mark)
Method: Pop the oven on at 180C or 350F, and line the bottom of a tin of a tin and butter the sides.
Put the chocolate, butter, sugar and coffee into a pot (a decent sized one). Melt them together on low/medium-low till they're a delicious liquid melt. Take it off the heat and let it cool. Once its cool enough to touch it, add your eggs in one at a time and beat them in with the bourbon, vanilla and cocoa.
Now just pour it in the tin and pop it in the middle of the oven. Leave it there for about an hour (check* after 45 mins). Once it done, take it out, and leave it for 15 mins to cool and deflate.
I served this with some orange marmalade on the top, spiked with some Maker's Mark. It was amazing. Like seriously.
*to check, pop a skewer in the centre of the cake and if it comes out clean, you're sweet.
0 notes
Text
Vegetarian Rice Pilaf (Epic Rice salad)

I made this for my mum to impress a friend and it worked! It's a really simple rice salad that describes every single rice salad you will ever make.
2 large carrots peeled and diced (1/2 cm cubes) 1 large parsnip peeled and diced (1/2 cm cubes) 1 Onion, peeled and diced (bet you can work out the size) 1 1/2 cups of cooked rice (any rice will do, I used brown) 1 1/2 tsp whole caraway seeds 1 tsp ground cumin 1 tbsp of sunflower oil
Garnish 1/4 cup each of chopped parsley and coriander (whatever leafy herbs you have will be fine, I just had these on hand. 1/2 cup in total though) 1/3 cup of pine nuts, lightly toasted.
To make: Put all your veg, oil and 2 tsp of salt in a fry pan together and saute in the pan until the veg is soft and sweet (try some, it should be delicious!). Once you're there, add your spices and heat them through for a minute or two. Pop that in your dish with your warm cooked rice and garnishes.
Notes: You can replace the parsnip with a handful of raisins and the spices with anything Morocany (cardamom, coriander, bit of chili) or Hungarian (smokey, sweet paprika, etc). This is an easy recipe and once you try it a few times, you can tweak it as much as you like
0 notes
Text
Ninja Shortbread!

To make these ninja shortbread, you need:
-125g Unsalted Butter -50g Castor Sugar -200g Plain flour -1/4 tsp salt (this is the most important ingredient!)
So to get some cookies happening, dump all the ingredients into a food processor and blitz it till it becomes a ball.* Get out a sheet of baking paper, and roll out your dough till its a 1/2 cm thick. You can cut out whatever shapes you like from here, and pop them on a tray of baking paper. Remember - the less you play with your cookie, the better it will be.
Once you're happy with your shapes, pop them in a preheated 170C oven for about 20-30 mins or until they start going a little brown around the edges.
When you take them out of the oven they will be soft but don't worry! Wait for them to cool, and they will be perfect ninja stars.
0 notes
Text
Subway Choc Chip Cookies

This is my go-to cookie recipe and has put a smile on many a face.
You'll need:
- 2 cups (250g) all-purpose flour - 1 teaspoon baking soda - 1 and 1/2 teaspoons cornstarch - 1/4 teaspoon salt - 3/4 cup (170g) unsalted butter, melted - 1 1/4 cups (250g) dark brown sugar (light brown is OK) - 1 large egg, room temperature - 1 teaspoon vanilla extract - choc chips and chopped walnuts to taste (I use 3/4 a cup of each)
Preheat the oven to 190C for crispy cookies, or 160C for really subway like cookies. Put the butter, sugar together in a medium bowl and mix. Add the egg and vanilla and mix through. Sift together the flour, baking soda, cornstarch, and salt together. Add the wet ingredients and dry ingredients together, and just bring it together into a soft cookie dough. Add the chocolate and nuts and mix to combine. Form into 2 tbsp sized balls and put on a lined cookie sheet (or baking tray) Pop into the fridge to rest for a few mins (20 mins is best for good results), and to wait for the oven to heat up because it took you no time to get these cookies together. Pop them in the oven for 10-12 mins, or until they're just getting golden on the sides. Leave them to cool and harden for a minute on the tray and enjoy, or let them cool a bit before you take a bite.
That's it! they're seriously amazing, and very addictive. Be sure to bring them to your next study session, they're sure to be a hit!
4 notes
·
View notes
Video
youtube
This is my super simple poached egg recipe. Its just egg and water. Nothing else to it.
The tricks are simple:
1. Freshest egg possible. 2. Use water that is just about to start boiling
That's it!
Now some cool stuff to know:
Egg whites are made up of 2 parts, the inner white and the outer white. The inner white is the white that stays close to the yolk, and the outer white is the watery white that encases the inner.
How much inner and outer white depends on the age of the egg. A fresh egg is almost all inner white, with a small amount of outer. But as eggs age, more outer white is formed and the inner white shrinks around the yolk.
When making egg recipes that call for whites to be cooked solid its best to use the freshest eggs because the inner white is much larger because it holds its shape, unlike the outer white.
But if you're looking for a fluffy dessert, old eggs are your best bet.
Old eggs can hold much more air than their fresh counterparts, because the outer white holds more air than inner. So next time you have some old eggs lying around, use them in a meringue!
1 note
·
View note
Video
youtube
How to make scrambled eggs!
This is going to be a short post because its a really short recipe!
This whole recipe consists of:
2 eggs 30g of butter salt and pepper to taste
The method is also pretty easy Break the eggs into a saucepan, just a small saucepan, and add the butter Then put your stove on low, break up the eggs with a wooden spoon or spatula, and keep mixing! You're looking to mix the eggs thoroughly, and get the mixture to slowly thicken.
The whites will start to clump together first, but if nothing has happened for a little while turn up the heat slightly and keep mixing. If its clumping up too fast, just take it off and give it a good stir before putting it back.
Its done when you're happy to eat it. I like my scrambled eggs fairly runny, but you're welcome to make it as done as you like
That's it! Hope you enjoy your beautifully silky scrambled eggs!
0 notes
Link
Welcome guys to my first recipe video! I was super nervous, so please forgive the slip ups.
The method is simple
From the fridge, pop your egg in a plastic container, Then put your kettle on. Now fill up your container, till its almost full, And let it sit till the kettle trills
Now empty out your plastic container, and add the boiling water hot, once its full, start the timer, and wait till 5 minutes are not.
Now the choice comes ahead, whether to have a soft or hard boiled egg, so pick 2 or 5 minutes for your lucky meal and replace the cool water with that from your kettle steel. And once those few short minutes are up tip your container, and let it drain over, deluge those creamy eggs with cool water, but wait a moment..... to start to peel
You now have your delicious eggs, cool and white, now take a bow, and take your first bite!
I hope you liked my little poem :) If anything didn't make sense, its also in plain English below.
The recipe
1. Put the egg in your plastic container. The container must be .5L for one egg, and .25L per extra egg. 2. Put 1.5L of water in the kettle and turn it on. 3. While the kettle is on, cover your eggs with hot water. 4. Once the kettle has finished boiling, pour out the water around your eggs, and cover them with the boiling water. Have at least 1cm of water on the top of the eggs otherwise they will not cook evenly. 5. Wait 5 minutes. 6. Take out the water and put in freshly boiling water. 7. Wait 2 mins for soft boiled, and 5 for hard. If you like your eggs harder boiled, then replace the water again and wait for another 2. 8. Once the timer is up, replace the water again with some cold water to cool them down. 9. Enjoy!
So this boiled egg recipe is pretty darn fool proof if you follow some simple rules.
1. Use a plastic container. This is because ceramic and steel take too much heat out of the water, and the eggs just don't cook.
2. Timing is everything. You really need to be on the dot with those times. 20 seconds either way will give you a completely different egg.
3. (Cause there is always a third one) This will work perfectly for eggs from the refrigerator. If they're warm, don't fret, just reduce the final cooking time by a minute, and you'll be fine.
For any variations, just comment and I'll get back to you
0 notes
Video
youtube
My first video!! There will be more like this and some corresponding blog posts, probably with a little more content than this one.
Anywho, if your interwebs is failing, and the world is caving down around you while you try to make the perfect crème brûlée do not fear! There will be recipes on here as well as on the YouTube comments. So whether you are lazy or "efficient" you will have all the info you need.
If you need more info, just send me a fb message, email me or if you're privileged enough, call me. All questions are good questions, even if you think they might be silly.
Please subscribe to my channel and blog! They will get good, I promise :p
Enjoy :)
0 notes