
Statistics
We looked inside some of the posts by karrieresources and here's what we found interesting.
Average Info
Notes Per Post
658K
Likes Per Post
372K
Reblog Per Post
286K
Reply Per Post
312
Time Between Posts
1 month
Number of Posts By Type
Text
10
Photo
5
Link
1
Note
1
Last Seen Tumblr Blogs


Fun Fact
Kazakhstan’s Minister of Communications and Informatics has blocked the Tumblr site because it contained 60 sites of terrorism, extremism, and pornography in 2015.
Text
Out of boredom, someone give me all your icon templates. I’ve been collecting some myself in case headmates wanna use them and I think it’s good to share that form of recourse for them.
I’ll go first.


1K notes
·
View notes
Text
Tutorial 1: Cutting Images

In this tutorial using Photoshop CS6 Extended for Mac, I will be using the Eraser Tool, Background Eraser Tool, Pen Tool, and Lasso Tool to remove the background of an image.
Keep reading
1K notes
·
View notes
Text

By clicking here you'll get 1 zip file containing 37 png images from The Eras Tour (all of the images above).
This pack is obviously free, but I'm broke rn so if you've got anything to spare, there's the 'pay what you want' option. Enjoy!
51 notes
·
View notes
Text
Oh my gosh. I just found this website that walks you though creating a believable society. It breaks each facet down into individual questions and makes it so simple! It seems really helpful for worldbuilding!
138K notes
·
View notes
Photo


taylor swift font pack by hawkinsgrocery
do not reupload or claim as yours;
these are not my fonts, copyright goes to their creators!
please like/reblog this post if you download!
629 notes
·
View notes
Photo
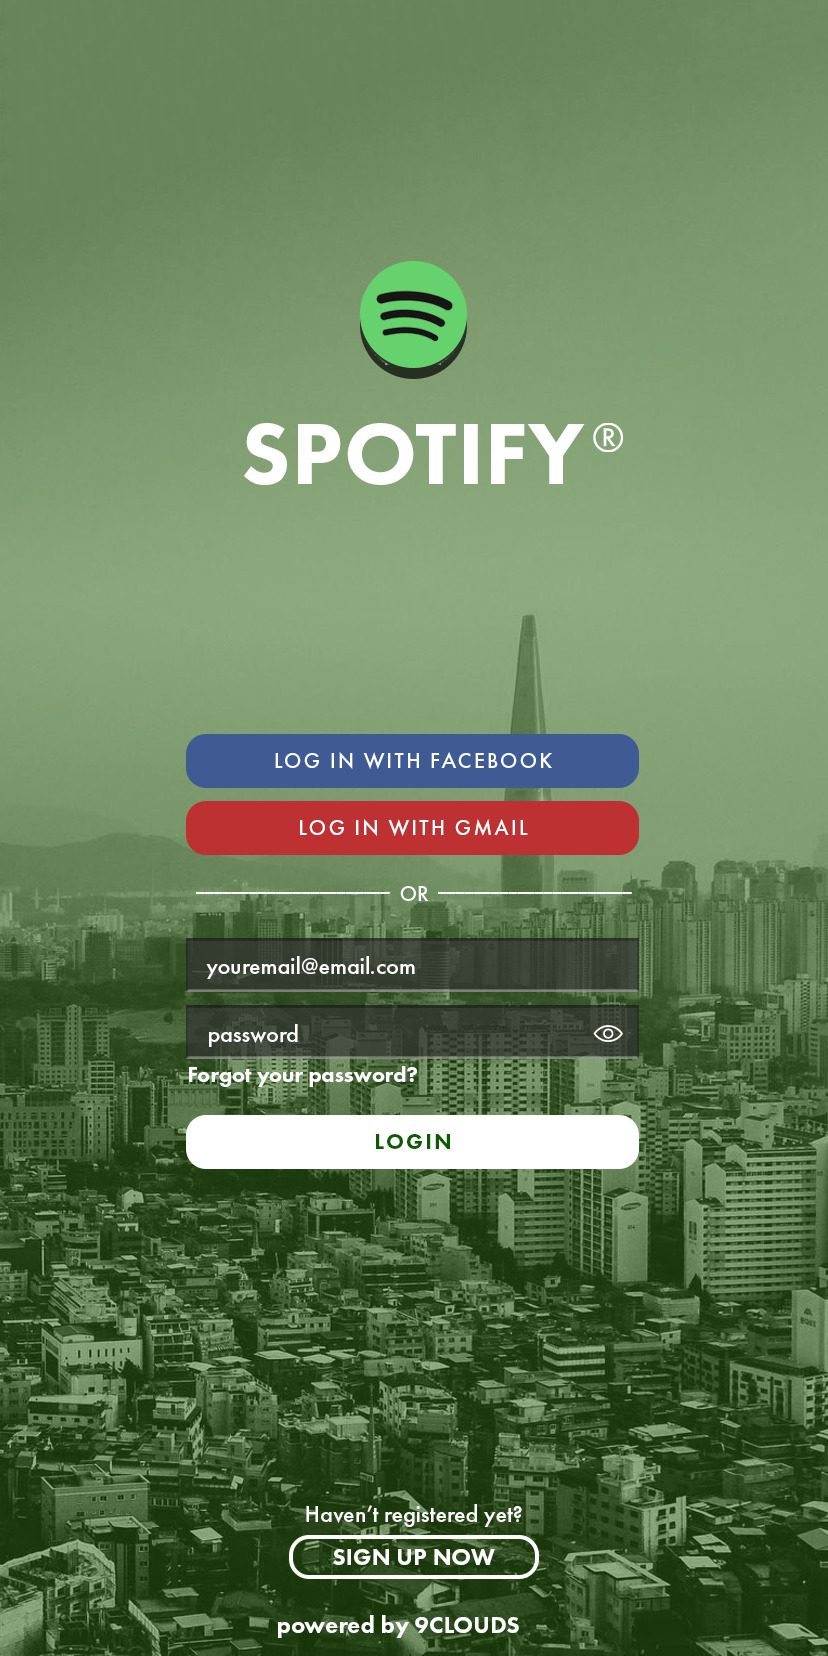
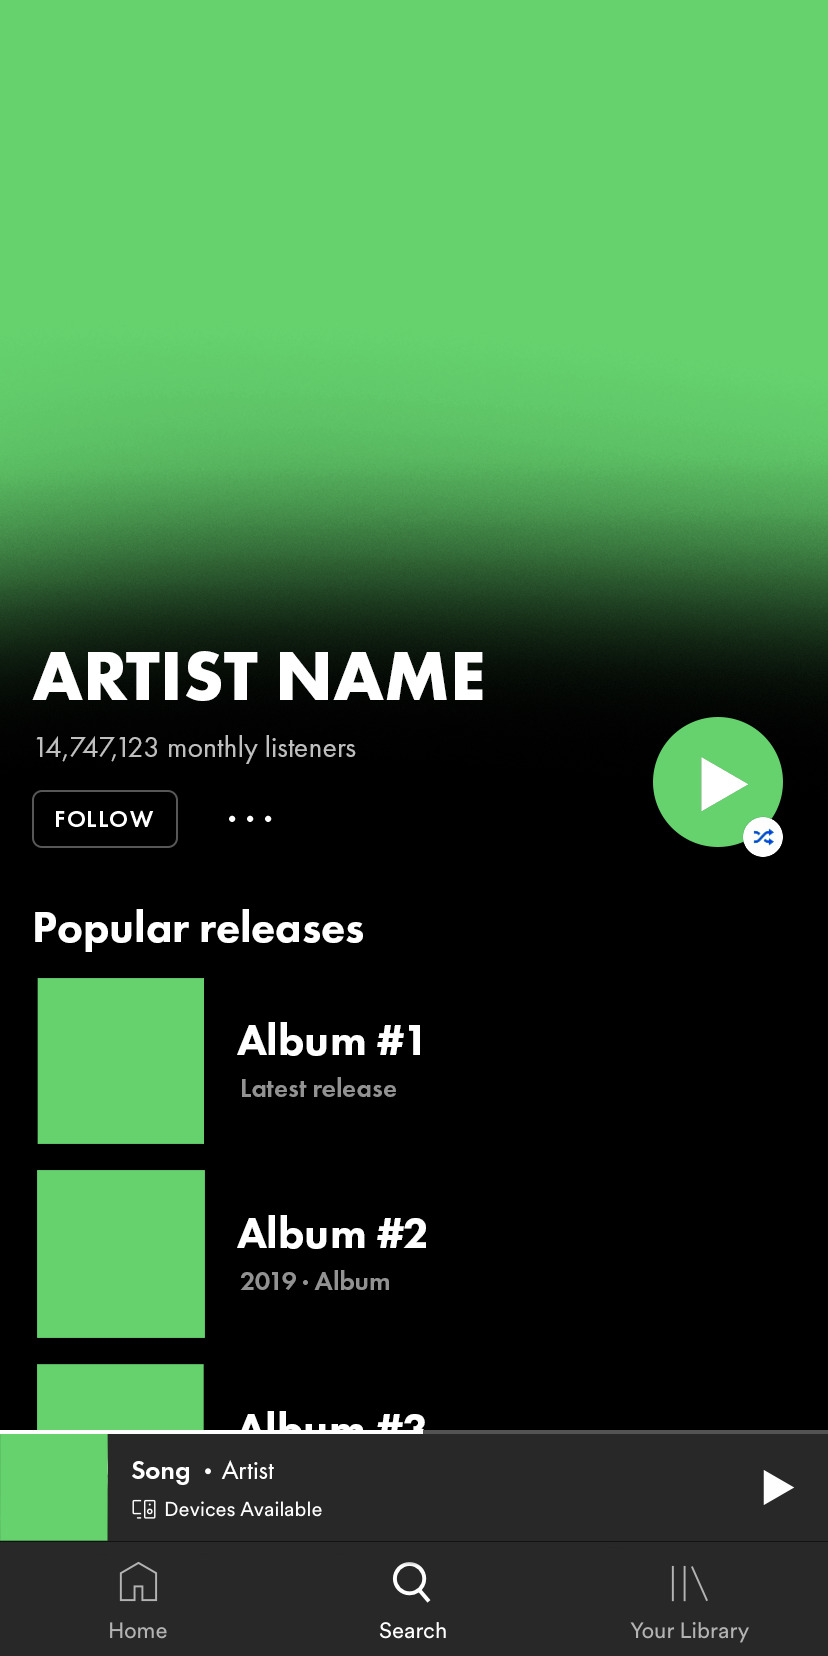


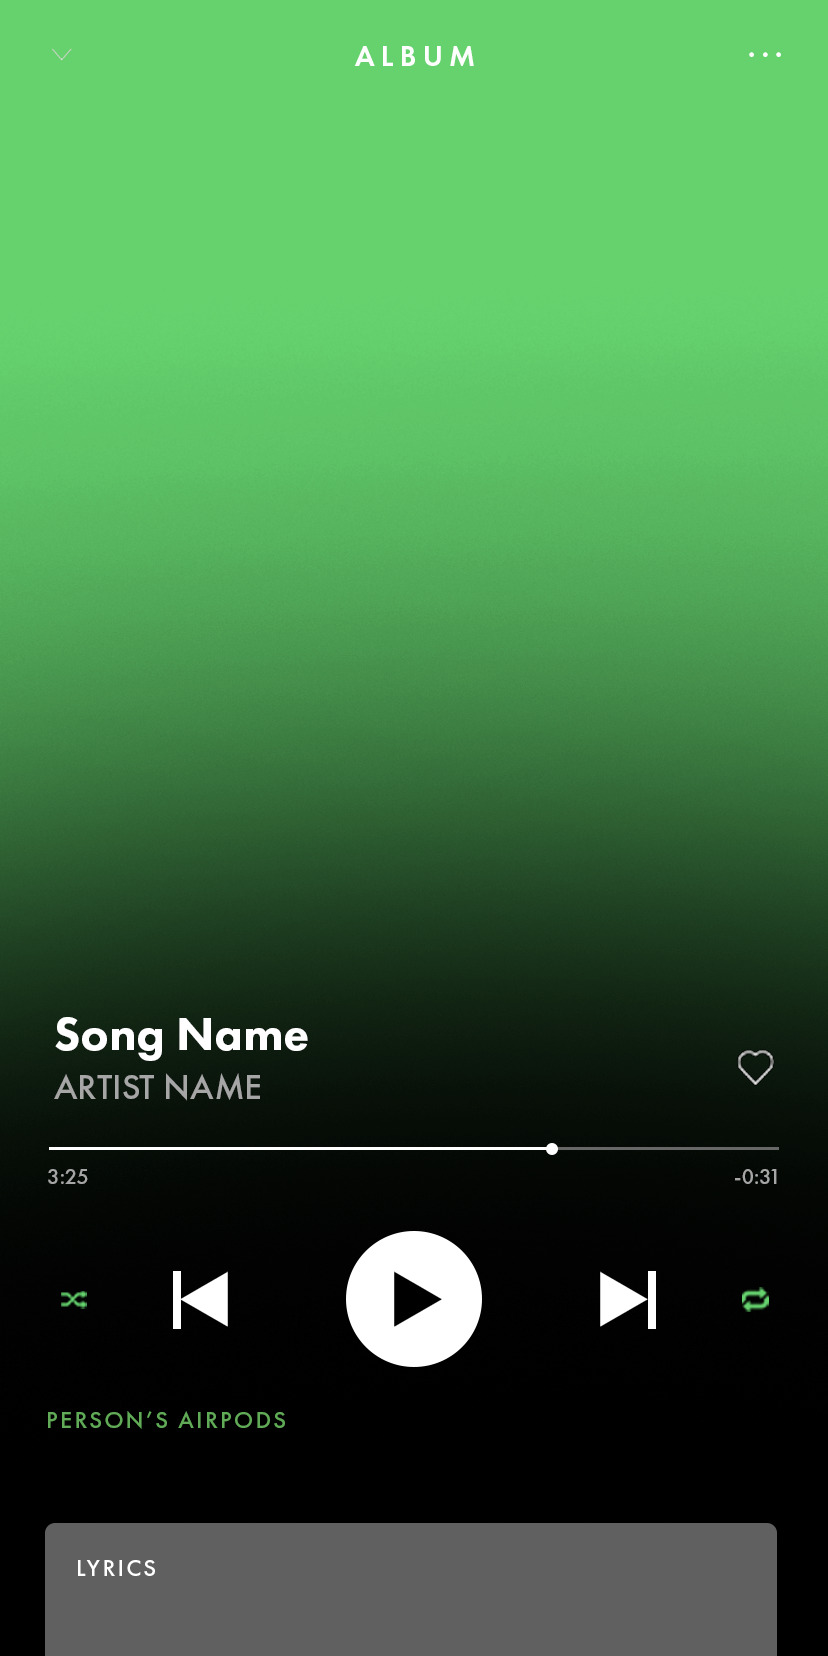

✧ SPOTIFY PSD — BY 9CLOUDS ✧
this spotify ps template is completely editable, but it may require some knowledge of photoshop (clipping masks especially). if you have any questions you can send me an ask here or on my main @sangyus
please reblog if you use it (or if you want to boost it).
includes the app’s log in screen, a complete artist profile and two player options: one for gifs and one for album covers.
the font used is Futura PT. you can get it here or here.
check out this edit sample.
download here
(although this is a free resource, if you feel so inclined you can buy me a ko-fi here ☕️)
5K notes
·
View notes
Photo


。・ template psd seventy, template pack thirty four by templatepsds ゜+.*
-`. info .’-
+ as promised, here is a dash icon pack to celebrate 10K followers! sorry for the long wait, but thank you everyone who has supported this blog and continues to inspire and motivate me when I lack motivation to do anything at all. I think my previous icon packs were my most popular posts, so I wanted to make more since you guys seem to like them. this time, I went for more shapes and different borders. I hope you like them and thank you for being patient while I tried to get my photoshop to work again!
+ each of them are separated into 3 packs of 10 icons, and you can refer to the previews above to know which one to download, or all if you want.
+ you can merge the icon with the border(s) if you want to put an image inside both of them.
+ the borders and extras are optional–you can remove them if you just want the shape.
+ to put an image inside it, drag your image to the document, place the layer right above the “put image in here” layer, right-click on your image layer, and select “create clipping mask.”
+ there are a total of 30 500x500 icons. you can resize them if you want, though. (image>image size> & enter new width/height).
+ i made examples here, if you want to see how they would look.
+ these were created with the help of shapes4free. they have many photoshop shapes you can download and use for free, and I wanted to be sure to credit them.
+ not for commercial use or anything like that! just for personal use/to have fun.
+ adjust as much as you want to suit your liking.
+ please like or reblog if you download.
+ message if you have any questions/difficulties!
-`. dl .’-
+ one
+ two
+ three
2K notes
·
View notes
Link
Independent bookstores around the country have a particularly clever lifeline, one perfectly suited to the unprecedented moment we find ourselves in. The strange part? It came into being just weeks before the World Health Organization declared the coronavirus outbreak a pandemic, and before the bookstores started closing up shop wondering if they’d reopen at all.
The lifeline in question is called Bookshop.
In simple terms, it’s a super clean, user-friendly online bookstore whose raison d’être is supporting independent bookstores — not simply with exposure or resources (though that’s certainly a factor), but with cold hard cash…
57K notes
·
View notes
Text
Ok but like. What the fuck is there to do on the internet anymore?
Idk when I was younger, you could just go and go and find exciting new websites full of whatever cool things you wanted to explore. An overabundance of ways to occupy your time online.
Now, it's just... Social media. That's it. Social media and news sites. And I'm tired of social media and I'm tired of the news.
Am I just like completely inept at finding new things or has the internet just fallen apart that much with the problems of SEO and web 3.0 turning everything into a same-site prison?
211K notes
·
View notes
Text
some sites for when you’re bored and looking for new music
spotalike creates a playlist based on a song
magicplaylist creates a playlist based on a song
dubolt creates a playlist based on an artist
boilthefrog creates a playlist between any two artists
predominant suggests you albums based on cover art color
music-map suggests similar artists
gnoosic suggests similar artists and songs
96K notes
·
View notes
Photo

Doodle brushes and textures
Like or reblog if you download
Flower (x) (x) (x) (x) (x) (x) (x) (x) (x) (x) (x) (x) (x) (x) (x) (x) (x) (x) (x) (x) (x) Space (x) (x) (x) (x) (x) (x) (x) (x) (x) (x) (x) (x) (x) (x) (x) (x) (x) Stars (x) (x) (x) (x) (x) (x) (x) (x) Hearts (x) (x) (x) (x) (x) (x) (x) Arrows (x) (x) (x) (x) (x) (x) (x) (x) (x) Lines (x) (x) (x) (x) (x) (x) (x) Texts (x) (x) (x) (x) (x) (x) (x) Geometric (x) (x) (x) (x) (x) (x) Diamonds and gems (x) (x) (x) Miscellaneous (x) (x) (x) (x) (x) (x) (x) (x) (x) (x) (x) (x) (x) (x) (x) (x) (x) (x) (x) (x) (x) (x) (x) (x) (x) (x) (x) (x) (x) (x) (x) (x) (x) (x) (x) (x) (x)
In preview I used coloring #70
4K notes
·
View notes
Note
hi alie! how are you? i was wondering if you could explain, or link a tutorial that does, how you did the first gif and the checkmarks on this (/post/713604672591659008/pscentral-event-14-your-url-insp) beautiful gifset please?
hello!! i'm good, thank youuuu ♡ and yeah, sure i can! i didn't follow any tutorial for this gifset, so i'm gonna try to explain my process as best as i can.
the first gif is fairly easy, it's just a bit time consuming. the second one for the animated checkmark uses some keyframes. i use photoshop cs5, which is rather old, so hopefully my directions still work for more recent ps versions!
tutorial for these two gifs under the cut:

gifs in text
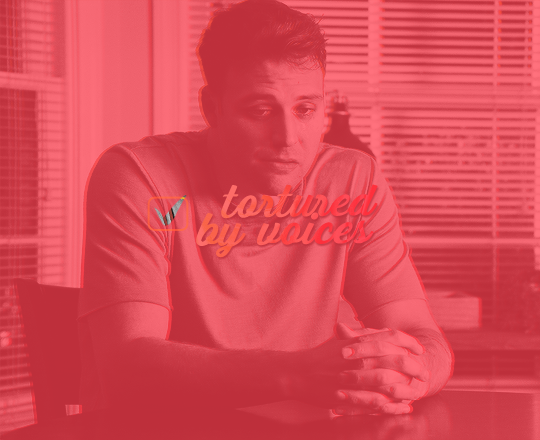
i'm gonna assume you already have basic gifmaking knowledge, so i'm gonna start from this base gif already colored:

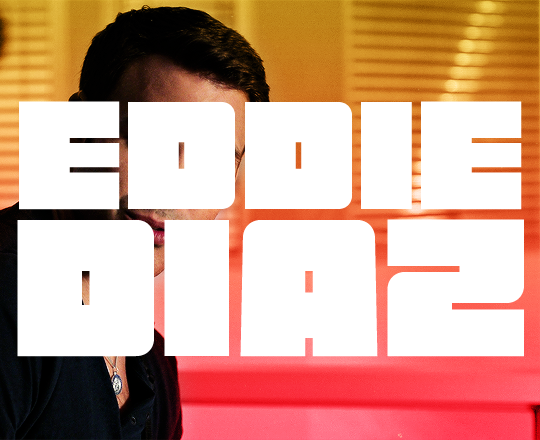
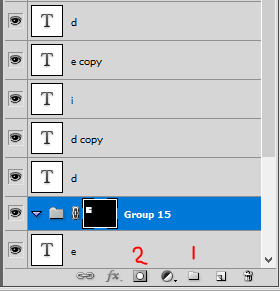
i started by finding a big and very thick font that i liked. for this gifset i used a font called barle. i placed my text the way i wanted it, but i used one text layer per letter, because i wanted one different gif per letter. once i had my 9 text layers placed, it looked like this:
then, you need to create a group with a layer mask for each letter. for this, i simply hold the ctrl/command key and click on the letter layer's thumbnail. it will create a selection of the letter.

with this selection on, i click on the folder button to create a new group, then on the add layer mask button. it will create a group with your letter where you can put anothet gif in.
then you just need to rinse and repeat for every letter.
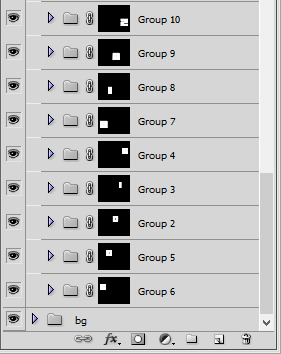
once you have all of your letter groups done, you can select all of the text layers and put them in another group. we'll use these layers again later.
then you just need to bring your second gif onto this canvas and put it in the right group/folder. i usually just bring a smart object gif onto my main canva, slide it in the right folder, then resize, sharpen, and color the second gif in there.
you can just drag this layer once it's inside the group to position it the way you need it. and also use ctrl+T to resize it (drag the corners while holding shift to keep the right propertions). once the gif is positioned, you can go ahead and disable the E text layer you used to create the mask (but don't delete it!). i kept the coloring very minimal since it's a black and white gif, and the layers should look like that:

and this is the gif so far with the first E done:

then you just need to do the same for all other letters, pretty straight forward! for the first D letter, i wanted eddie's face to show instead of using a different gif, so i simply put a black and white layer in that D group. my gif looks like that at this point:
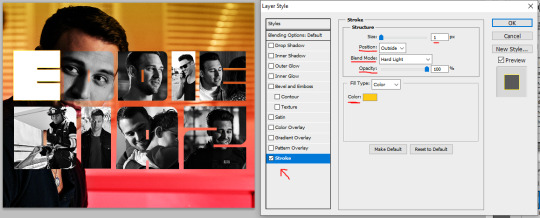
then what's missing is the outline, and it's pretty easy to make. go back to the text layers you created at the beginning. enable them all, and make sure they are on top of everything else. double click on that first text layer to bring in the layer style options, and add a 1px stroke with the color and blending mode you want. I went with yellow and the hard light blending mode. these are my settings:
back to the layers panel, keep the text layer's opacity at 100%, but bring the fill to 0%. this will make online the online show up on the gif.
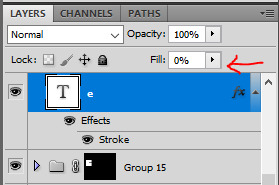
to apply this setting to other text layers, you can right click the first text layer and select "copy layer style". then select all of the other layers and right click one of them and go "paste layer style". once all the text layers have their outline it should look like that:

to move the outline a bit, make sure they are in a group and select this group (i renamed mine "outline"), then just nudge it by a few pixels with the arrows on your keyboard. i transformed the outline group by about 4px left and up on mine. i also duplicated the whole group because i wanted a deeper color for the outline.
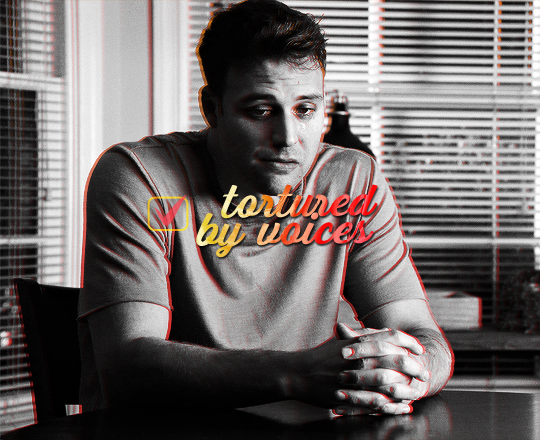
and this is my final result!

animated checkmark
starting with my base gif, i added some animated text and a little box for the checkmark to go in (drew a shape with the rectangle tool and gave it a stroke, the same way i did it for the previous gif):
for the actual checkmark, you can try to find a brush or shapes to download, but i didn't feel like looking it up lol, so i drew the shape myself with a regular brush that comes baked in with photoshop. the best way to draw a custom shape, in my opinion, is to draw the shape as a layer mask on a color fill layer. that way you can always change the color or add layer styles later (like i did).
so on my canvas, on top of everything, i created a color fill layer (layer > new fill layer > solid color) with whatever color i wanted (you can change this later if you need). you will get a new color fill layer, with a layer mask already attached to it. i put this layer at 75% opacity so i can see the gif under it and it's easier to draw the shape in the right spot:

i then selected the layer mask thumbnail and the brush i wanted to use, one of them (not sure i remember which one, sorry haha!):

with the black color selected, just go ahead and draw a checkmark where you want it on the canva. you can always use the brush in white to erase it and start over with the black color if you're not happy with it. but once you have a checkmark you like, it should look like this:
now you just gotta invert the mask so the checkmark is colored, to do this just click on the color fill layer mask you just drew on and hit ctrl/command + i. the mask will get inverted and it will look like this:
then you can add whatever layer style you'd like to the checkmark (and put the layer opacity back to 100% if you want). i added a gradient and a drop shadow to mine, and changed the blending mode from normal to difference to make it match with the text, so now it looks like that:
animation time! this is where you need to use a bit of keyframes, but i promise it's not complicated.
for this animation i wanted to mimick a checkmark being drawned. when you draw a checkmark, you usually do it in 3 steps right? your startung point, then a line down, and then another line up to the end point. it's what i tried to mimick here.
to animate it that way, you need to draw a shape that will hide the checkmark and then move it around to mimick the drawing animation. to do so, create a new group (i've named mine "checkmark") and add a layer mask to this group. you also need to unlink the mask by clicking on the little chain icon next to the mask thumbnail:

now the next steps are a bit of trial and error until you get what you want, i'm gonna try to explain it as best as i can (bear with me haha):
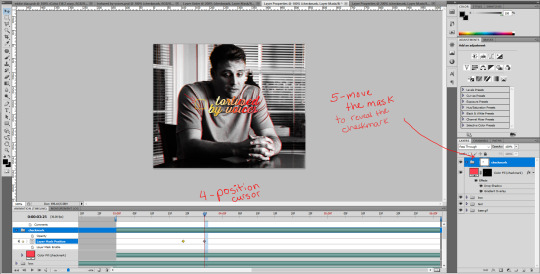
1- go to where you want the animation to start, aka where you want the checkmark to start appearing. for me it was a few frames after the start of the gif.
2- then, with a black brush that wasn't too big nor too soft, i brushed a bit over the checkmark to erase it for now (you may have to go back and edit this after the animation is done). no need to do a huge shape, just big enough to cover the checkmark. if you go back to the move tool and click on the mask thumbnail you have just created and click and drag in the canva, you should be able to move the mask around. this is what you want for steps 5 and 7. basically, on your mask thumbnail on the checkmark group, what is brushed in black will erase what's in the group, and the white part will reveal what's in the group. for now just make sure the shape you just drew is covering the checkmark.
3- once the checkmark is hidden, click on the stopwatch icon next to layer mask postion to start the animation. this will automatically create a keyframe where your cursor is on the timeline (the yellow diamond)

4- once your starting point is done, you want to go a bit further on the timeline with your cursor.
5- then move the mask shape so it reveals just the smallest part of the checkmark (make sure you click the checkmark group mask thumbnail first before moving the mask). once you move the mask with the move tool, a new keyframe will automatically appear where your cursor is on the timeline (another diamond). make sure you drag the shape down the checkmark to mimick it being drawn.
6- go a bit further again on the timeline, where you want the animation to end.
7- and move the shape again to reveal the checkmark (make sure you click the group mask thumbnail first before moving the shape). again, a third keyframe will be automatically created. i dragged the shape up from the bottom of the checkmark to mimick the drawing of the checkmark.
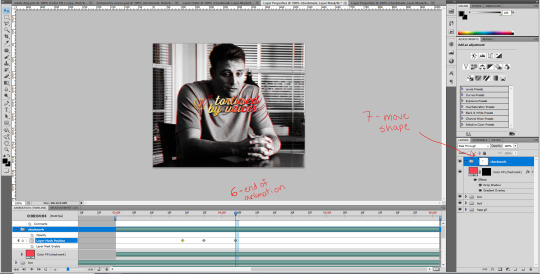
your animation should be done here after these 2 movements, so play it in a loop and see if you are satisfied with the animation you have created. if you don't like it you have options:
you can go back to the group layer mask and edit it with the black or white brush;
you can also go back to each keyframe by positiong your cursor over it and move the mask around in a different way;
and you can select the keyframes (yellow diamonds) and move them around on the timeline. if you push the keyframes closer together, the animation will be faster, and if you space them out more, the animation will take longer. it's up to you!
this animation thing is really just trial and error. you could probably do the same animation with a checkmark you find online, as long as the image file is in a group and the animated mask is applied to the group. and don't forget to unlink the mask before animating a movement or it won't work properly!
and this is what my animation looks like:

that's about it, i hope that was clear enough omg. never realized how hard it is to explain these things in english lol. let me know if you have any questions! ♡
308 notes
·
View notes
Text

STRWRS’ ICON-MAKING TUTORIAL
Hiiiii welcome to my icon-making tutorial!! I really enjoy making icons, and I thought I’d share how I do it <3
This tutorial is not for beginners!! I don’t explain every step in detail. However, if you have a question about any concept within this tutorial, please don’t hesitate to send me an ask or a dm!! I am happy to help <3 /gen
For this tutorial, we’re going to be making the icon you see in the header.
Let’s get to it!! :)
Keep reading
300 notes
·
View notes
Text
Little tips and tricks for improving descriptions
Full disclaimer that my advice is never gospel. These are just things that have helped me improve my descriptions and so I thought I'd share if other people want to as well. I also think these can be employed regardless of writing style.
Be intentional with your word choice. Know when you want to use red or scarlet or carmine and don't be afraid to use unconventional words if you think they fit. Sometimes saying "the blood is red" is all that's needed and perfectly acceptable. But carmine might provoke a clearer image. You can also use word choice to show off character and setting. One character might pay particular attention to the family crest on someone's cufflinks while another might gloss over such details.
Expand on your premise. If we're meant to be in an opulent manor then referencing the intricate iron balustrade on the grand staircase gives the house much more character than simply saying "the manor was opulent." You can do the latter but the former gives us something a little extra to chew on and, in my opinion, brings us much more into the scene.
If you don't know how to describe something, look it up. I do this often with clothes, objects, and architecture. For example, I search up "vases" on websites like 1stdibs and study the descriptions and word choices used and employ them in my own words to make sure I'm using the correct terminology. Also searching "anatomy of the...." is another good way to bridge the terminology gap. Obviously not everyone is going to know what ribbed vs embossed vs chased means but they can always look it up themselves and they might learn something new!
Study art and images for inspiration. If you're someone who has a lot of trouble visualising things yourself then using aids is perfectly fine. Try a trick of finding an image you like and placing it by your word doc or simply pasting it inside while you're typing so you have something to refer to. I like to call this "word tracing". If I want to conjure the image of a pretty garden then studying the image of a garden and seeing what makes it pretty helps. Perhaps there's an elegant copse of willow trees or tumbling garlands of wisteria, etc.
To avoid static descriptions, be dynamic. General rule of thumb is don't just write paragraphs and paragraphs of descriptions as it'll cause the eyes to gloss over. But try to make descriptions come alive as much as possible to bring people into a scene. If someone is taking a seat on the chair then how does the chair feel? Is it upholstered in silk or velvet or leather? Does it creak from age? Does it smell of varnish? Is there a notable pattern of the fabric or engraving on the wood?
Employ the five senses. I touch on this a little in the previous point but try not to just focus on what the characters are seeing but also what they're tasting, smelling, hearing and touching. If there's fire crackling in a hearth then they'll be able to feel the heat, they might be able to smell fragrant smoke. Do they like the smell or is it too pungent? Can they hear the embers spitting? These are things you can also weave through conversations between characters to keep these scenes from being too bare bones.
2K notes
·
View notes
Text
literally most things that people write off as just ‘textures’ to use in graphics are stolen & unsourced material created by artists or photographers NOT meant to be used as elements in projects without royalty payments. you can say ‘it’s just random tumblr posts they don’t care’ but you wouldn’t want someone to take your work and edit into their work so they can be praised for their beautiful style and creativity even if they just post it on social media w/o profit, would you?? so maybe if you browse pinterest or google images for pictures without finding the original source, you’re using images that you’re not allowed to use without realizing it.
you see it on here a lot especially in (i won’t link anything but i’m sure you know what i mean) those album track ‘aesthetics’ posts, au ‘aesthetic’ posts (you see these less in kpop, but where people use non-royalty free images to kinda craft a visual au), and even just rather typical graphics that have a lot of ‘texture’ elements. and texture packs too!! that’s often where the problem starts; people just collect images (often literal art), compile them in a folder w/o sources, then insist no one can repost those images w/o crediting the person who compiled them. what???
SO may i suggest some of my fave places you can get FREE, ROYALTY-FREE elements that are totally legal to use
creativemarket has 6 free high-quality resources (textures, brushes, fonts, etc), different every week! wow awesome i check it every week
search ‘freebie’ on behance. awesome stuff!!! lots of v nice templates textures and fonts
mockup zone freebies
unsplash: tons of very nice free photographs, not shitty stock photos
pexels: same idea. + they have an adobe plugin so you can get photos without closing your editor damn nice
pixelsquid is a super cool free program (again w a ps plugin that i love) with lottts of super cool hq 3d elements!
as to not make this too long: spoongraphics, lostandtaken (textures galore), pixeden, freebiesbug.
136K notes
·
View notes
Text
🍍 ⋯⠀ ⠀›⠀⠀GLOWING SHAPES ― dash icons !
under the cut , you will find 29 glowing shapes ( circle & heart shaped ) in various colors !you can use this as dash icons or pngs for your graphics . please LIKE & REBLOG if you plan on using it or just find it cute / helpful !

Keep reading
2K notes
·
View notes
Photo

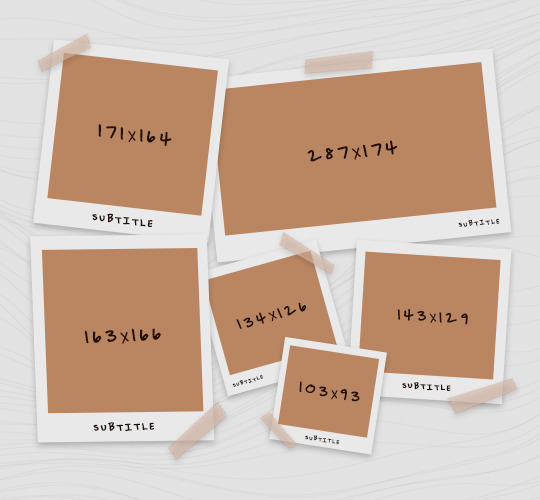
🍒 𝙿𝙾𝙻𝙰𝚁𝙾𝙸𝙳 𝚁𝙾𝙻𝙻 — a template by @gunshzt .
♡ ⠀this template was made entirely by me from scratch, so please, do not repost or claim as your own. it’s a completely editable template and i try to categorize each item into separate folders with distinct colors to make your work easier. background are included. the coloring psd used on the images is not included.
you’ll need to know the basic of photoshop editing to proceed. anyways, i’m always open to answer questions, so if you face any difficulties, come to my inbox! if you found this helpful, please like / reblog to support my work!
♡ ⠀download .
free psd .
click on the source link to download .
♡ ⠀fonts .
brown bag lunch .
2K notes
·
View notes