
Don't wanna be here? Send us removal request.
Statistics
We looked inside some of the posts by kevirite and here's what we found interesting.
Average Info
Notes Per Post
3
Likes Per Post
3
Reblog Per Post
0
Reply Per Post
0
Time Between Posts
2 days
Number of Posts By Type
Text
13
Last Seen Tumblr Blogs


Fun Fact
Tumblr.com is the 103rd most visited website in the world.
Text
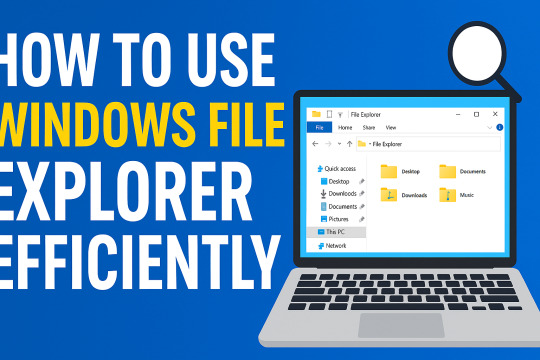
તમારા પીસીમાંથી Duplicate Files કેવી રીતે શોધી અને ડિલીટ કરશો? – સરળ ગુજરાતી માર્ગદર્શિકા

Duplicate files તમારા PC ની storage space ભરશે, system slow કરશે અને organization પણ ખરાબ બનાવશે. આ ફાઈલ્સ ફોટો, ડોક્યુમેન્ટ, વીડિયો કે અન્ય ફોર્મેટમાં હોઈ શકે છે. આજના ટ્યુટોરીયલમાં આપણે શીખીશું કે તમારા Windows પીસીમાંથી duplicate files કેવી રીતે શોધવા અને કાઢી નાખવા (delete) એ સરળ રીતે — ગુજરાતી ભાષામાં.👇
🔍 Step-by-Step: Duplicate Files શોધી કાઢવા અને ડિલીટ કરવા
✅ વિકલ્પ 1: Free Software નો ઉપયોગ (સરળ રીત) 1. Duplicate Cleaner Free - 👉 https://www.digitalvolcano.co.uk/dcdownloads.html - Install કરો અને ફોલ્ડર select કરો જ્યાં તમારે duplicate files સ્કેન કરવા છે - Result આવશે → તમારે select કરીને delete કરવી 2. CCleaner (Free version) - 👉 Tools > Duplicate Finder - Filters લાગુ કરો (ફાઇલ ટાઇપ, સાઇઝ, નામ વગેરે) - Duplicate files શોધીને delete કરો 3. Auslogics Duplicate File Finder - સરળ UI સાથે, beginners માટે perfect - Install કરો → Scan કરો → Duplicate પસંદ કરો → Delete ✅ વિકલ્પ 2: Windows File Explorer થી Manual રીતે સાવધાન: Manual પ્રક્રિયા સમય લે છે અને human error શક્ય છે. - Windows Explorer ઓપન કરો - Folder ખોલો જ્યાં duplicate files હોવાની શક્યતા છે (જેમ કે Downloads, Documents) - View > Sort by > Name or Size - ફોટા કે ફાઈલ્સ visually compare કરીને same હો એવી files delete કરો
⚠️ Duplicate Delete કરતાં પહેલાં...
- 🤞 હંમેશાં ફાઈલ્સ ચકાસો — બધું Same છે કે નહીં - 🗂️ મૂળ ફાઈલ backup રાખો (specially important documents/photos માટે) - 🚫 System files ક્યારેય manually delete ન કરો
🎁 Bonus Tip:
📁 Google Drive, OneDrive કે Dropbox જેવી cloud storage માં પણ duplicate checker tools છે તેથી cloud clean-up પણ કરી શકો છો! Read the full article
0 notes
Text
Easy and Effective Ways to Free Up Space on Your PC Hard Drive | Gujarati Guide
https://youtu.be/2iZldHIOxMQ
Introduction
Is your computer running slow? Are you getting "Low Disk Space" warnings again and again? If yes, then this guide is for you — especially if you are from Gujarat or are comfortable in Gujarati! In this blog, we will discuss simple and effective ways to clean your PC's hard drive and improve performance without spending a single rupee.
1️⃣ Use Disk Cleanup Tool
The easiest and fastest way! Windows has a built-in tool called Disk Cleanup. 👉 Steps: - Click on Start Menu and search "Disk Cleanup". - Select the drive (usually C:). - Tick options like Temporary Files, Recycle Bin, and Thumbnails. - Click on OK and let Windows do the cleaning. Gujarati Tip: "ડિસ્ક ક્લીનઅપથી એક ક્લિકમાં Temporary ફાઇલો દૂર કરો!"
2️⃣ Uninstall Unwanted Programs
Many times we install software and forget about it. Old games, expired antivirus, or heavy apps waste your precious space. 👉 Steps: - Go to Control Panel > Programs > Uninstall a Program. - Remove the programs you don’t use anymore. Gujarati Tip: "જેમ તમે જૂના કપડાં ફેંકો છો, તેમ જ અનાવશ્યક સોફ્ટવેર પણ દૂર કરો!"
3️⃣ Delete Temporary Files Manually
Apart from Disk Cleanup, you can manually delete temp files. 👉 Steps: - Press Windows + R to open the Run dialog box. - Type %temp% and press Enter. - Select all files (Ctrl+A) and press Delete. Gujarati Tip: "તમારા કમ્પ્યુટરના થેલાંમાંથી કચરો કાઢી નાખો અને જગ્યા બચાવો!"
4️⃣ Move Files to External Storage or Cloud
Photos, videos, and large files take maximum space. 👉 Solutions: - Use an External Hard Drive. - Upload important files to Google Drive, OneDrive, or Dropbox. Gujarati Tip: "તમારા સ્મરણો (Photos અને Videos)ને કલાઉડમાં સ્ટોર કરો અને કમ્પ્યુટરને હલકો બનાવો."
5️⃣ Empty the Recycle Bin Regularly
Deleting files is not enough! Until you empty the Recycle Bin, files still take up space. 👉 Steps: - Right-click Recycle Bin on Desktop. - Click on Empty Recycle Bin. Gujarati Tip: "કચરાપેટી સાફ કરો અને નવી જગ્યા મેળવો!"
Conclusion
Cleaning your PC hard drive is easy and doesn’t need any technical knowledge. Just follow these simple steps regularly, and you will see a huge difference in your computer’s speed and storage. Read the full article
0 notes
Text
Protect Your Identity from Hackers with a Free VPN

https://youtu.be/8tO-9rzstsw 🔐 How to Secure Your Identity from Hackers? Use a Free VPN! If you frequently use the internet — especially on public Wi-Fi or unsecured networks — your personal information is at higher risk of being hacked. These days, hacking, tracking, and data theft have become common. But a Free VPN (Virtual Private Network) can protect you! 🚀 🛡️ What Does a VPN Do? - Hides your IP address - Encrypts your internet traffic - Protects you from hackers and trackers - Keeps your online activity private ✅ Best Free VPN Options: - Proton VPN - Windscribe - TunnelBear - Hide.me 📲 How to Get Started? - Go to the official website of the VPN you choose - Sign up for the free plan - Download the application - Log in and connect to a server 🎯 Now you can browse anonymously and safely! 📢 For more tech tips, subscribe to our YouTube channel and learn how to keep your data safe! 🔐💡 👉🏼 Subscribe now and stay secure in the online world! Thank you! 🙌🏼 Read the full article
0 notes
Text
તમારા બાળકને ઍડલ્ટ વેબસાઇટ્સ જોવાથી કેવી રીતે બચાવશો – ફ્રી Chrome Extensions વડે
https://youtu.be/iNgz_7f_4Io આજના ડિજિટલ યુગમાં બાળકો ખૂબ જ ઓછી વયે ઇન્ટરનેટનો ઉપયોગ કરવા લાગે છે. ભલે તમે તેમને શીખવા માટે મોબાઇલ કે લેપટોપ આપો, પણ ઇન્ટરનેટ પર બધુંજ સુરક્ષિત નથી. ખાસ કરીને ઍડલ્ટ અથવા અસંસ્કારી વેબસાઇટ્સનો ખતરો બધાને ચિંતામાં મૂકે છે. સદનસીબે, હવે કેટલાક ફ્રી Chrome Extensionsના સહારે તમે આ સમસ્��ાનો સરળ ઉપાય મેળવી શકો છો. 1️⃣ Focus Guard Extension – શાંત મન અને સુરક્ષિત બ્રાઉઝિંગ માટે Focus Guard એક Chrome Extension છે જે ખાસ કરીને વિક્ષેપ અને અનચાહેલું કન્ટેન્ટ બ્લોક કરવા માટે બ��ાવાયું છે. 📌 કેવી રીતે ઉપયોગ કરવો: - તમારું Chrome Browser ખોલો - Google Chrome Web Store પર જઈને “Focus Guard” શોધો - 'Add to Chrome' પર ક્લિક કરો અને એક્સ્ટેંશન ઇન્સ્ટોલ કરો - Extension ওপન કરો અને 'Blocked Websites'માં તમે જે સાઇટ્સ બ્લોક કરવા માંગો તે લખો - ઇચ્છા હોય તો પાસવર્ડ પણ સેટ કરો – જેથી બાળક તેને હટાવી ન શકે 2️⃣ BlockSite Extension – તમારા નિયમો હવે Chrome પર BlockSite એક બીજું શક્તિશાળી Chrome Extension છે જે માત્ર ઍડલ્ટ સાઇટ્સ જ નહીં, પણ અન્ય સમય ખોરાક કરતી સાઇટ્સને પણ બ્લોક કરે છે. 📌 કેવી રીતે ઉપયોગ કરવો: - Chrome Web Store પરથી “BlockSite” ઇન્સ્ટોલ કરો - Extension ખોલીને '+' બટન પર ક્લિક કરો - અહીં તમે જે સાઇટ્સને બ્લોક કરવા માંગો તે URLs નાખી શકો - તમે સમયનું શેડ્યૂલ પણ બનાવી શકો – જેમ કે હોમવર્ક સમયે અથવા રાત્રે ઇન્ટરનેટ બંધ રાખવો - અને હા, પાસવર્ડ લૉક ફીચર પણ છે આજે બાળકોને ડિજિટલ વિશ્વમાં સુરક્ષિત રાખવું એ દરેક પેરેન્ટ માટે આવશ્યક છે. Focus Guard અને BlockSite જેવા Chrome Extensionsનો ઉપયોગ કરીને તમે તમારી પ્રાઇવસી અને બાળકોની સુરક્ષા બંને જાળવી શકો છો – બિલકુલ મફતમાં! જો તમને આ માહિતી ઉપયોગી લાગી હોય તો મિત્રો સાથે શેર કરો અને વધુ ટેક ટિપ્સ માટે જોડાયેલા રહો! Read the full article
0 notes
Text
What is a Chrome Extension and How is it Useful?

https://www.youtube.com/watch?v=273J1BIdSO0 To make your browsing smarter, faster, and more efficient, Chrome Extensions are powerful tools! 🚀 Today, we’ll learn what Chrome Extensions are, how they work, and how they can help in your daily tasks. 🟢 What is a Chrome Extension? A Chrome Extension is a small software program that installs into the Google Chrome browser and adds new features. 🧠💡 📌 Extensions typically change how your browser behaves – such as: - Blocking ads - Saving passwords - Enabling dark mode - Blocking websites - Making articles easier to read 🔧 How to Install a Chrome Extension? Step 1: Open Google Chrome and go to the Chrome Web Store: 🔗 https://chrome.google.com/webstore Step 2: Search for the extension you need in the search bar (e.g., Adblock, Grammarly, YouTube Enhancer) Step 3: Click on the extension you want. Step 4: Click the “Add to Chrome” button. Step 5: Click “Add Extension” in the popup. ✅ Done! The extension is now added to your Chrome browser. ⚡️ Top Chrome Extensions and Their Uses: Extension NameUseAdblock PlusBlocks unwanted ads and pop-ups.GrammarlyFixes grammar and spelling in writing.Dark ReaderAdds dark mode to any website.LastPassSecurely stores passwords.BlockSiteBlocks distracting or inappropriate websites.Google TranslateInstantly translates webpages. 🔒 Security Tips: - Always check ratings and reviews before installing unknown extensions. - Too many extensions can slow down your browser. - Disable or remove extensions you don’t use. 📱 Chrome Extensions on Mobile? 👉🏼 Chrome for mobile (Android/iPhone) doesn’t officially support extensions, but browsers like Kiwi Browser allow you to use Chrome Extensions on mobile. 🎯 How are Chrome Extensions Useful? ✅ Automate your tasks ✅ Save time ✅ Make browsing safer and smarter ✅ Customize the browser based on your needs 🎥 Learning technology just got easier! If you found this helpful, subscribe to our YouTube channel and keep learning more Chrome tips, extensions, and tech hacks! 🔔😊 👉🏼 Subscribe now and take your browsing to the next level! Thank you! 🙌🏼 https://youtu.be/273J1BIdSO0 Read the full article
0 notes
Text
Google Chrome માટે ઈન્ટરનેટ કેવી રીતે બ્લોક કરવું?
https://youtu.be/F_C8rQ1qG4w 🌐 Google Chrome માટે ઈન્ટરનેટ કેવી રીતે બ્લોક કરવું? જો તમે Google Chrome પર ઇન્ટરનેટ એક્સેસ બંધ કરવા માંગતા હો, તો તમે તે ખૂબ સરળતાથી કરી શકો છો. 📴 આ પ્રક્રિયા ખાસ કરીને બાળકો માટે પેરેન્ટલ કંટ્રોલ માટે અથવા વિશિષ્ટ વેબસાઇટ્સ બ્લોક કરવા માટે ઉપયોગી છે. 😎 🟢 Windows Firewall દ્વારા Chrome માટે ઈન્ટરનેટ બ્લોક કરવું સ્ટેપ 1: Start Menu માં Control Panel ઓપન કરો. સ્ટેપ 2: System and Security પર ક્લિક કરો. સ્ટેપ 3: Windows Defender Firewall સિલેક્ટ કરો. સ્ટેપ 4: ડાબી બાજુ Advanced Settings પર ક્લિક કરો. 🔥 Inbound/Outbound Rule બનાવવી સ્ટેપ 5: Outbound Rules પર જાઓ અને New Rule પર ક્લિક કરો. સ્ટેપ 6: Program સિલ���ક્ટ કરો અને Next કરો. સ્ટેપ 7: This Program Path પસંદ કરો અને નીચેનો પાથ નાખો: "C:Program FilesGoogleChromeApplicationchrome.exe" સ્ટેપ 8: Block the Connection પસંદ કરો અને Next કરો. સ્ટેપ 9: તમને Domain, Private, Public પ્રોફાઇલ્સ દેખાશે – બધા સિલેક્ટ કરો અને Next કરો. સ્ટેપ 10: Rule નું નામ Block Chrome રાખો અને Finish કરો. ✅ Done! હવે Google Chrome પર ઇન્ટરનેટ એક્સેસ બંધ થઈ ગયું છે. 🚫 સપષ્ટ કરો કે Chrome માટે બ્લોકિંગ ચાલુ છે કે નહીં સ્ટેપ 1: Command Prompt (CMD) ઓપન કરો. સ્ટેપ 2: આ કમાન્ડ ટાઇપ કરો: netsh advfirewall show allprofiles સ્ટેપ 3: ચેક કરો કે Firewall Rules સફળતાપૂર્વક લાગુ થઈ છે કે નહીં. ⚡️ વિશિષ્ટ વેબસાઇટ બ્લોક કરવા માટે Hosts File નો ઉપયોગ સ્ટેપ 1: C:WindowsSystem32driversetchosts ફાઇલ ઓપન કરો. સ્ટેપ 2: ફાઇલના અંતમાં આ લાઈન ઉમેરો: 127.0.0.1 www.facebook.com 127.0.0.1 www.youtube.com સ્ટેપ 3: Save કરો અને Chrome રીષ્ટાર્ટ કરો. ✅ Done! હવે આ વેબસાઇટ્સ Chrome પર ઓપન નહીં થાય. ❗️ ટ્રબલશૂટિંગ ટિપ્સ: - Firewall Rule ચાલુ છે કે નહીં એ ચેક કરો. - Chrome Path યોગ્ય છે તેની ખાતરી કરો. - Hosts File Save કરતા પહેલા Administrator Privileges ચેક કરો. 🎥 ટેક્નોલોજી શીખવી હવે થઈ ગઇ વધુ સરળ! જો તમને આ માહિતી ઉપયોગી લાગી હોય, તો અમારા YouTube ચેનલને સબ્સ્ક્રાઇબ કરો અને વધુ પેરેન્ટલ કંટ્રોલ અને સિક્યોરિટી ટિપ્સ શીખતા રહો! 🔔😊 👉🏼 સબ્સ્ક્રાઇબ કરો અને તમારું ડેટા સુરક્ષિત રાખો! આભાર! 🙌🏼 Read the full article
1 note
·
View note
Text
HTML માં ટેબલ કેવી રીતે બનાવવું?

https://youtu.be/Yrut0-802ZM 🖥️ HTML માં ટેબલ કેવી રીતે બનાવવું? જો તમે વેબપેજ પર ડેટા સ્વરૂપે ટેબલ બતાવવા માંગતા હો, તો HTML ટેબલ ખૂબ જ અસરકારક અને સરળ રીત છે. 📊 આજે આપણે જાણીશું HTML માં ટેબલ કેવી રીતે બનાવવું અને તેને કસ્ટમાઇઝ કેવી રીતે કરવું. 🚀 🟢 HTML ટેબલની બેઝિક સ્ટ્રક્ચર HTML Table Example
Simple HTML Table
Student Name Subject Marks Rahul Maths 85 Aisha Science 90 Krishna English 88 ✅ આ શું કરશે? - : ટેબલ બનાવે છે. - : ટેબલ રો (Row) બનાવે છે. - : ટેબલ હેડિંગ માટે. - : ટેબલ ડેટા સેલ માટે. 🎨 ટેબલને સ્ટાઇલિશ બનાવવી (CSS સાથે) ✅ આ શું કરશે? - ટેબલને સુંદર લુક આપશે. - Hover Effect અને Even Row Coloring ઉમેરશે. 🔥 ટેબલમાં colspan અને rowspan ઉમેરવું colspan: Combined Cell rowspan: Merged Row ✅ આ શું કરશે? - colspan: બે કે વધુ કોલમ્સને મર્જ કરવું. - rowspan: બે કે વધુ રોઝને મર્જ કરવું. ❗️ ટ્રબલશૂટિંગ ટિપ્સ: - Border Missing? border="1" નો ઉપયોગ કરો. - Spacing Issues? cellpadding અને cellspacing સેટ કરો. - Responsive Table? width: 100% CSS ઉમેરો. 🎥 ટેક્નોલોજી શીખવી હવે થઈ ગઇ વધુ સરળ! જો તમને આ માહિતી ઉપયોગી લાગી હોય, તો અમારા YouTube ચેનલને સબ્સ્ક્રાઇબ કરો અને વધુ HTML ટિપ્સ અને ટ્રિક્સ શીખતા રહો! 🔔😊 👉🏼 સબ્સ્ક્રાઇબ કરો અને વેબ ડેવલપમેન્ટમાં માસ્ટર બનો! આભાર! 🙌🏼 Read the full article
0 notes
Text
પીસી પરફોર્મન્સ વધારવા માટે સ્ટાર્ટઅપ પ્રોગ્રામ્સ કેવી રીતે બંધ કરવાં?

https://youtu.be/J4iaUEKnCkA ⚡️ પીસી પરફોર્મન્સ વધારવા માટે સ્ટાર્ટઅપ પ્રોગ્રામ્સ કેવી રીતે બંધ કરવાં? તમારું પીસી ધીમું ચાલે છે? 🖥️😩 ઘણા પ્રોગ્રામ્સ સ્ટાર્ટઅપમાં ઓટોમેટિક રીતે લોન્ચ થાય છે, જે પીસીની સ્પીડ ધીમી કરી શકે છે. આજે આપણે જાણીશું સ્ટાર્ટઅપ પ્રોગ્રામ્સ કેવી રીતે બંધ કરવાં અને પીસી પરફોર્મન્સ કેવી રીતે વધારવું. 🚀 🟢 Windows 10/11 માં સ્ટાર્ટઅપ પ્રોગ્રામ્સ કેવી રીતે બંધ કરવાં? Shortcut: Ctrl + Shift + Esc સ્ટેપ 1: Task Manager ખોલવા માટે Ctrl + Shift + Esc દબાવો. સ્ટેપ 2: Startup ટૅબ પર ક્લિક કરો. સ્ટેપ 3: તમે ત્યાં બધા Startup Programs ની લિસ્ટ જોઈ શકશો. સ્ટેપ 4: જે પ્રોગ્રામ્સ સ્ટાર્ટઅપમાં નાંખવા માંગતા નથી, તેને સિલેક્ટ કરો. સ્ટેપ 5: Disable પર ક્લિક કરો. ✅ Done! હવે સ્ટાર્ટઅપ પ્રોગ્રામ્સ બંધ થઈ જશે અને પીસી ઝડપથી શરૂ થશે. 👉🏼 ટિપ: - ફક્ત જરૂરી પ્રોગ્રામ્સને જ ચાલુ રાખો, બાકી બધા Disable કરો. - Antivirus અને System Tools ને Enable રાખો. ⚡️ System Settings દ્વારા Startup Programs બંધ કરવાં સ્ટેપ 1: Start Menu ખોલો અને Settings ઓપન કરો. સ્ટેપ 2: Apps પર ક્લિક કરો. સ્ટેપ 3: Startup ઓપ્શન સિલેક્ટ કરો. સ્ટેપ 4: તમારા ડિવાઇસ પર Startup Programs ની લિસ્ટ જોવા મળશે. સ્ટેપ 5: જે એપ્લિકેશન તમે સ્ટાર્ટઅપમાં નાંખવા માંગતા નથી, તેને Off કરો. ✅ Done! હવે ફક્ત જરૂરી એપ્સ જ પીસી ચાલુ થવા સાથે ઓપન થશે. 🔥 ટ્રબલશૂટિંગ ટિપ્સ: - જો સ્ટાર્ટઅપ પ્રોગ્રામ્સ ફરીથી શરૂ થાય તો Antivirus Scan કરો. - Task Manager માં Impact Level ચેક કરો અને હાઈ ઇમ્પેક્ટ એપ્લિકેશન Disable કરો. - Windows Update ઇન્સ્ટોલ કરીને પીસી અપડેટ રાખો. 🎥 ટેક્નોલોજી શીખવી હવે થઈ ગઇ વધુ સરળ! જો તમને આ માહિતી ઉપયોગી લાગી હોય, તો અમારા YouTube ચેનલને સબ્સ્ક્રાઇબ કરો અને વધુ પીસી ઓપ્ટિમાઇઝેશન ટિપ્સ શીખતા રહો! 🔔😊 👉🏼 સબ્સ્ક્રાઇબ કરો અને તમારું પીસી ફાસ્ટ બનાવો! આભાર! 🙌🏼 Read the full article
0 notes
Text
ઓન-સ્ક્રીન કીબોર્ડને કેવી રીતે ઍક્સેસ કરવું?
https://youtu.be/yez1nZtUrg8 ⌨️ ઓન-સ્ક્રીન કીબોર્ડને કેવી રીતે ઍક્સેસ કરવું? જો તમારું ફિઝિકલ કીબોર્ડ કામ ન કરે અથવા તમારે ટચસ્ક્રીન ડિવાઇસ પર કીબોર્ડની જરૂર હોય, તો ઓન-સ્ક્રીન કીબોર્ડ (OSK) એક સરળ ઉકેલ છે! 😊 આજે આપણે જાણીશું કે Windows અને Android માં ઓન-સ્ક્રીન કીબોર્ડ કેવી રીતે ઍક્સેસ કરવું. 🚀 🟢 Windows માં ઓન-સ્ક્રીન કીબોર્ડ કેવી રીતે ચાલુ કરવું? Shortcut: Windows + Ctrl + O અથવા સ્ટેપ 1: Start Menu ખોલો અને Settings પર ક્લિક કરો. સ્ટેપ 2: Ease of Access ઓપ્શન પસંદ કરો. સ્ટેપ 3: ડાબી બાજુ Keyboard સિલેક્ટ કરો. સ્ટેપ 4: Turn on On-Screen Keyboard સ્લાઇડર On કરો. ✅ Done! હવે તમારું On-Screen Keyboard સ્ક્રીન પર દેખાશે. 👉🏼 ટિપ: - તમે Run Command થી પણ ફટાફટ OSK ખોલી શકો છો. - Windows + R દબાવો અને osk ટાઇપ કરીને Enter દબાવો. 📱 Android ફોન/ટેબલેટમાં ઓન-સ્ક્રીન કીબોર્ડ ચાલુ કરવું સ્ટેપ 1: Settings ખોલો. સ્ટેપ 2: Language & Input અથવા System પર ક્લિક કરો. સ્ટેપ 3: On-Screen Keyboard અથવા Virtual Keyboard પસંદ કરો. સ્ટેપ 4: તમારું કીબોર્ડ સિલેક્ટ કરો અને Enable કરો. 👉🏼 ટિપ: - જો તમારું કીબોર્ડ દેખાતું નથી, તો Keyboard Settings ખોલીને Show Keyboard ઓપ્શન ચાલુ કરો. 💡 ટ્રબલશૂટિંગ ટિપ્સ: - જો OSK ઓપન ન થાય તો Windows Update ચેક કરો. - Ease of Access Settings ફરી તપાસો. - Touch Keyboard સેટિંગ્સમાં જઈને Docked Mode અથવા Floating Mode સિલેક્ટ કરો. 🎥 ટેક્નોલોજી શીખવી હવે થઈ ગઇ વધુ સરળ! જો તમને આ માહિતી ઉપયોગી લાગી હોય, તો અમારા YouTube ચેનલને સબ્સ્ક્રાઇબ કરો અને વધુ કમ્પ્યુટર અને ટેક્નોલોજી ટિપ્સ શીખતા રહો! 🔔😊 👉🏼 સબ્સ્ક્રાઇબ કરો અને સ્માર્ટ બનો! આભાર! 🙌🏼 Read the full article
0 notes
Text
3 કોમ્પ્યુટર શોર્ટકટ જે તમારે જરૂરથી જાણવા જોઈએ!

https://youtu.be/abGEiOCBWUk 💻 3 કોમ્પ્યુટર શોર્ટકટ જે તમારે જરૂરથી જાણવા જોઈએ! કમ્પ્યુટરની ઝડપ અને કાર્યક્ષમતા વધારવા માટે કીબોર્ડ શોર્ટકટ્સ શીખવા ખૂબ જ મહત્વપૂર્ણ છે. 😎 આજે આપણે 3 મહત્વના શોર્ટકટ્સ જાણીશું, જે તમારું કામ ઝડપી અને સરળ બનાવી શકે છે! 🚀 🟢 1. ટાસ્ક મેનેજર (Task Manager) ખોલવા માટે: Shortcut: Ctrl + Shift + Esc ઉપયોગ: - જો તમારું કમ્પ્યુટર હેંગ થઈ ગયું હોય અથવા કોઈ એપ રિસ્પોન્ડ નથી કરતી, તો ટાસ્ક મેનેજર દ્વારા તેને Force Stop કરી શકો છો. - રિયલ ટાઈમમાં CPU, Memory અને Disk Usage ચેક કરી શકો છો. 👉🏼 ટિપ: જો તમે સ્ટાર્ટ મેનુ પર જઇને રાઇટ ક્લિક કરો તો પણ Task Manager ઓપન કરી શકો છો. 📋 2. ક્લિપબોર્ડ કૉપિ (Clipboard Copy History): Shortcut: Windows + V ઉપયોગ: - આ શોર્ટકટથી તમે Clipboard History જોઈ શકો છો અને અગાઉ કૉપિ કરેલા ટેક્સ્ટ/ઇમેજ ફરી પેસ્ટ કરી શકો છો. - વારંવાર કૉપિ-પેસ્ટ કરતા લોકો માટે આ ફીચર સમય બચાવે છે. ✅ કેવી રીતે ચાલુ કરવું: - Settings > System > Clipboard - Clipboard History ને On કરો. 🖥️ 3. Win+D (Desktop Display): Shortcut: Windows + D ઉપયોગ: - આ શોર્ટકટ તમારા બધા ઓપન વિન્ડોઝને મિનિમાઇઝ કરીને ડેસ્કટોપ બતાવે છે. - ફરી Windows + D દબાવતા જ પાછા બધા વિન્ડોઝ રી-સ્ટોર થઈ જશે. 👉🏼 ટિપ: તમે ઘણી વિન્ડોઝ ખોલી હોય ત્યારે ફટાફટ ડેસ્કટોપ પર જવાની આ શ્રેષ્ઠ રીત છે! ⚡️ ટ્રિક્સ અને ટિપ્સ: - Alt + Tab: વિવિધ ઓપન પ્રોગ્રામ્સ વચ્ચે ઝડપથી સ્વિચ કરો. - Ctrl + Z: ભૂલથી કરેલી કાર્યવાહી માટે Undo કરો. - Ctrl + Y: Redo માટે આ શોર્ટકટનો ઉપયોગ કરો. 🎥 ટેક્નોલોજી શીખવી હવે થઈ ગઇ વધુ સરળ! જો તમને આ શોર્ટકટ્સ ઉપયોગી લાગ્યા હોય, તો અમારા YouTube ચેનલને સબ્સ્ક્રાઇબ કરો અને વધુ કમ્પ્યુટર ટિપ્સ અને ટ્રિક્સ શીખતા રહો! 🔔😊 👉🏼 સબ્સ્ક્રાઇબ કરો અને સ્માર્ટ બનો! આભાર! 🙌🏼 Read the full article
0 notes
Text
એન્ડ્રોઇડ ફોનમાં નોટિફિકેશન કેવી રીતે બંધ કરવું?

https://youtu.be/C7aUIAujH6A 📱 એન્ડ્રોઇડ ફોનમાં નોટિફિકેશન કેવી રીતે બંધ કરવું? અવારનવાર આવતા નોટિફિકેશન્સ નાં કારણે તમારું ધ્યાન ભંગ થાય છે? 😩 જો તમે તમારા એન્ડ્રોઇડ ફોનમાં અનાવશ્યક નોટિફિકેશન્સ બંધ કરવા માંગતા હો, તો આ સરળ સ્ટેપ્સ અનુસરો અને શાંતિથી તમારું કામ કરો! 😊 🔕 એપ સ્પેસિફિક નોટિફિકેશન કેવી રીતે બંધ કરવું? સ્ટેપ 1: તમારા Phone Settings ખોલો. સ્ટેપ 2: Apps & Notifications અથવા Manage Apps પર ક્લિક કરો. સ્ટેપ 3: App Notifications સિલેક્ટ કરો. સ્ટેપ 4: જે એપ માટે નોટિફિકેશન બંધ કરવું હોય, તે પસંદ કરો. સ્ટેપ 5: Notifications ઓપ્શન પર ક્લિક કરો અને Turn Off કરો. ✅ Done! હવે આ એપ તમને નોટિફિકેશન નહીં મોકલે. 🚫 બધા નોટિફિકેશન્સ એકસાથે કેમ બંધ કરવી? સ્ટેપ 1: Settings માં જઈને Sound & Notifications પર ક્લિક કરો. સ્ટેપ 2: Do Not Disturb ઓપ્શન સિલેક્ટ કરો. સ્ટેપ 3: Turn On કરો અને Total Silence અથવા Priority Only સિલેક્ટ કરો. સ્ટેપ 4: તમે સમય સેટ કરી શકો છો કે ક્યારે Do Not Disturb ચાલુ કરવું અને બંધ કરવું. 👉🏼 ટિપ: તમે Calls અને Messages માટે જરુરી કોન્ટેક્ટ્સ માટે Priority Allowances સેટ કરી શકો છો. ⚡️ Lock Screen Notification કેવી રીતે બંધ કરવી? સ્ટેપ 1: Settings માં જઈ Lock Screen ઓપ્શન ખોલો. સ્ટેપ 2: Notifications on Lock Screen પર ક્લિક કરો. સ્ટેપ 3: Don’t Show Notifications સિલેક્ટ કરો. ✅ Done! હવે તમારું લૉક સ્ક્રીન સાફ રહેશે. ❗️ ટ્રબલશૂટિંગ ટિપ્સ: - જો નોટિફિકેશન્સ બંધ કરવા છતાં પણ સુચનાઓ આવી રહી હોય તો App Cache Clear કરો. - Phone Restart કરીને ફરી તપાસો. - જો કોઈ એપ અનાવશ્યક નોટિફિકેશન મોકલે તો Uninstall કરી દો. 🎥 ટેક્નોલોજી શીખવી હવે થઈ ગઇ વધુ સરળ! જો તમને આ માહિતી ઉપયોગી લાગી હોય, તો અમારા YouTube ચેનલને સબ્સ્ક્રાઇબ કરો અને વધુ સરળ ટિપ્સ અને ટ્રિક્સ મેળવતા રહો! 🔔😊 👉🏼 સબ્સ્ક્રાઇબ કરો અને નવો કંટેન્ટ માણો! આભાર! 🙌🏼 Read the full article
0 notes
Text
Disk Cleanup નો ઉપયોગ કરી Temporary Files કેવી રીતે દૂર કરવી?

https://youtu.be/juVRYqa70iM Disk Cleanup નો ઉપયોગ કરી Temporary Files કેવી રીતે દૂર કરવી? 💻 "નમસ્કાર મિત્રો! જો તમારું પીસી ધીમું થઈ ગયું છે અને સ્પેસ પણ ભરાઈ ગયું છે, તો તમારે Disk Cleanup નો ઉપયોગ કરવો જોઈએ. Disk Cleanup એ Windows માંથી Temporary Files, Cache, અને System Files દૂર કરવા માટે એક શ્રેષ્ઠ ટૂલ છે, જેનાથી તમારું પીસી ઝડપી બની શકે. આ બ્લોગમાં આપણે સાવ સરળ સ્ટેપ્સ થી Temporary Files દૂર કરવાનું શીખીશું. તો ચાલો શરુ કરીએ!" 🧹 Step 1: Disk Cleanup ખોલો "સૌપ્રથમ, Windows Key દબાવો અને ‘Disk Cleanup’ લખીને એન્ટર કરો. અથવા, Start Menu માંથી Disk Cleanup શોધીને ઓપન કરો. તમે જોઈ શકશો કે એક નવું વિન્ડો ખુલશે, જ્યાં તમારે ડ્રાઇવ સિલેક્ટ કરવી પડશે." 🗂️ Step 2: Drive પસંદ કરો "હવે C: Drive અથવા જે પણ ડ્રાઇવ તમારે ક્લીન કરવી હોય તે પસંદ કરો. પછી OK દબાવો. Disk Cleanup થોડીવાર માટે ડ્રાઇવની સ્કેનિંગ કરશે અને જે ફાઇલ્સ તમે દૂર કરી શકો તે લિસ્ટ બતાવશે." 🗑️ Step 3: Temporary Files ને સિલેક્ટ કરો "હવે લિસ્ટમાંથી Temporary Files સિલેક્ટ કરો. તમે Recycle Bin, System Files, અને Thumbnails પણ સિલેક્ટ કરી શકો છો, જો તમારે વધુ સ્પેસ ખાલી કરવી હોય. એકવાર ફાઇલ્સ સિલેક્ટ થઈ જાય પછી, OK દબાવો અને Delete Files પર ક્લિક કરો. આ પ્રક્રિયા થોડીવારમાં તમારી Temporary Files દૂર કરી દેશે." ⚡ ફાયદા: ✅ PC ની ગતિમાં વધારો ✅ વધુ સ્ટોરેજ જગ્યા ખાલી ✅ સિસ્ટમ પર ઓછું લોડ 📢 ચેનલને Subscribe કરો: "મિત્રો, જો તમારે આવીજ Tech Tips, PC Optimization અને Cyber Security વિષયક માહિતી મેળવવી હોય, તો મારી YouTube ચેનલને Subscribe કરવાનું ના ભૂલતા! 🔔 Bell Icon દબાવી દો જેથી તમને તમામ નવા વિ��િયોની જાણકારી સમયસર મળે. આભાર! 😊" Read the full article
0 notes
Text
બ્લૂટૂથ કેવી રીતે કનેક્ટ કરવું?

https://youtu.be/cB4VR0JDcvw બ્લૂટૂથ કેવી રીતે કનેક્ટ કરવું? 🖥️📱 આજના ડિજિટલ યુગમાં, બ્લૂટૂથ કનેક્ટિવિટી જીવનને ખૂબ સરળ બનાવે છે. તમે મોબાઈલ, લેપટોપ, ટેબલેટ કે બ્લૂટૂથ ઈયરફોનને સરળતાથી કનેક્ટ કરી શકો છો. અહીં અમે તમને સ્ટેપ-બાય-સ્ટેપ બ્લૂટૂથ કનેક્ટ કરવાની સરળ રીત જણાવવા જઈ રહ્યા છીએ. 🟢 Windows માં બ્લૂટૂથ કેવી રીતે કનેક્ટ કરવું? સ્ટેપ 1: તમારા કમ્પ્યુટરમાં Start Menu ખોલો અને Settings પર ક્લિક કરો. સ્ટેપ 2: Devices પર ક્લિક કરો અને Bluetooth & other devices સિલેક્ટ કરો. સ્ટેપ 3: Bluetooth ચાલુ કરો (Turn On). સ્ટેપ 4: Add Bluetooth or other device પર ક્લિક કરો અને Bluetooth પસંદ કરો. સ્ટેપ 5: તમારું ડિવાઇસ લિસ્ટમાં દેખાશે, તેને પસંદ કરો અને Pair પર ક્લિક કરો. ✅ Done! તમારું ડિવાઇસ હવે કનેક્ટ થઈ ગયું છે. 📱 મોબાઈલમાં બ્લૂટૂથ કેવી રીતે કનેક્ટ કરવું? સ્ટેપ 1: મોબાઇલની Settings ખોલો. સ્ટેપ 2: Bluetooth ઓપ્શન સિલેક્ટ કરો. સ્ટેપ 3: Bluetooth ચાલુ કરો (Turn On). સ્ટેપ 4: તમારું ડિવાઇસ શોધો અને Pair પર ક્લિક કરો. 👉🏼 ટિપ: જો કનેક્શન ના થાય તો એકવાર Bluetooth બંધ કરીને ફરી ચાલુ કરો. 🎧 Bluetooth ઇયરફોન/સ્પીકર કનેક્ટ કરવાની રીત સ્ટેપ 1: ઇયરફોન/સ્પીકર Pairing Mode માં મૂકો (સામાન્યત: પાવર બટન દબાવી રાખવાથી પેરિંગ મોડે જાય છે). સ્ટેપ 2: મોબાઇલ કે લેપટોપમાં Bluetooth Settings માં જાઓ. સ્ટેપ 3: ડિવાઇસ લિસ્ટમાં તમારું ઇયરફોન/સ્પીકર સિલેક્ટ કરો અને Connect/Pair કરો. ❗️ ટ્રબલશૂટિંગ ટિપ્સ: - Bluetooth Off/On કરો અને ફરી પ્રયાસ કરો. - જો કનેક્ટ ના થાય તો Forget Device કરીને ફરી પેર કરો. - ડિવાઇસની બેટરી ચેક કરો. 🎥 હવે શીખવું થઈ ગયું વધુ સરળ! જો તમને આ માહિતી ઉપયોગી લાગી હોય, તો અમારા YouTube ચેનલને સબ્સ્ક્રાઇબ કરો અને વધુ ટેક્નોલોજી સંબંધિત સરળ ટિપ્સ અને ટ્રિક્સ શીખતા રહો! 🔔👍🏼 👉🏼 સબ્સ્ક્રાઇબ કરો અને અપડેટ રહો! આભાર! 😊 Read the full article
2 notes
·
View notes