mirai-no-yume
Smile. Sparkle. Shine.
~ 26~ she/Her~ Indian ~ ~Digital Artist ~ ~Naruto based blog~ ~Twin sister of @mugiwara-lucy~ INACTIVE~
4188 posts
Don't wanna be here? Send us removal request.
Last Seen Blogs

s0d4-main
there dead
kintypes-and-genders
genders and kintypes

imblackhesmexican
#IBHMPodcast

lux-wellness
LUX WELLNESS ✨
oscarm1962
Love Beauty
Text
‼️ BTS FANART GIVEAWAY ALERT ‼️
Donate a minimum of $7 USD to one or more of our fellow Palestinian ARMYs’ campaigns for a chance to win a fan art wall scroll! 🍉
Deadline- June 30th 12AM EST
Worldwide giveaway 🌎
Shipping Included 🚀
Click this link for campaign links & entry rules!
Please share!!


5 notes
·
View notes
Note
IM SO HAPPY TO HEAR FROM YOU AGAIN TOO
and yes I’m all ears to any new recs! 👂👂
Emily!!! How have you been? Its been wayyyyy too long!! But omg I just had to come on here and tell you that I started the one piece anime. Why you ask? LIVE ACTION. You are the first person I thought of when I started the anime!! So I wanted to send you this ask haha!
I wanna cry!!
I am SO HAPPY to see you again!!
Imma message you once I'm home from dinner!!
Although I know a show you'd like! It's none anime and it's called One Tree Hill @mirai-no-yume!!
HAPPY to hear from you again!! =D

6 notes
·
View notes
Text


Hey guys!
I finally started a drawing blog!
I am quite new at running BTS art blogs, so I dont have a good reach yet so I kindly ask that you please reblog and like this post!
Also please help an ARMY out by following my ig and twt!!
Twitter:
Instagram:
instagram
#ummm#i'm sorry#for not posting in forever#and springing bts on you all#but i guess things have changed#that being said i still love narusaku#i promise i will not spam this blog with bts and will return with more naruto content!
5 notes
·
View notes
Text
This is really random but can we stop calling forced marriages, arranged marriages? Because it puts (and has been putting for years and years) arranged marriages in a really negative light. I know some of you might be reading this thinking ‘well my cousin/friend/etc got into an arranged marriage and she’s very unhappy and was forced into it’. Well! There you have it!! That is not an arranged marriage and it has become a forced marriage.
The thing people don’t understand about arranged marriages is that you don’t put two people in a room and FORCE them to get married. No. Arranged marriages to the brown community are what setting two people up in the western community is when it comes to dating. You’re literally having two people meet to get to know each other with the end goal of marriage. Two people. With the same goal. If there is any PRESSURE on them and it starts to feel FORCED then it! Is! No! Longer! An! Arranged! Marriage!!!!!
In conclusion, arranged marriages and forced marriages are two completely different things and should not be used interchangeably. The end
3K notes
·
View notes
Photo

Another NaruSaku 🍥🌸
#This is so pretty#narusaku#to all of you guys wondering wtf happened to this blog#I haven't been posting because I've been so much into bts lately#I haven't gone around to making another blog for bts#I've just been doing away with this one#But I didn't want to reblog/post any bts onto this blog#So you probably weren't aware of this fact unless you have been looking through my liked posts#Anyway I'm still here if you wanna talk anytime :)
707 notes
·
View notes
Note
Thank you so much for the mention Emily!
I have been busy with other things, so it's been hard for me to manage stuff here on Tumblr, but I'm so glad to see messages like these from friends like you!
Thanks for making Tumblr amazing <3
💐🌷🌹🌺 send this to ten other bloggers you think are wonderful. Keep the game going!!! 🌺🌹🌷💐 💜💖❤️💖💜💖❤️💖
Aww, this is so sweet! Thank you so much
I’m tagging @gaymirajane @redxblueihateloveyou @mdelpin @gaysquaredwrites @zaltylaw @newgeht @wizardwithbrushandpen @fuckyeahfraxus @queerqueenoftears @oceanwaves-blog
36 notes
·
View notes
Text
Basic Colouring Tutorial
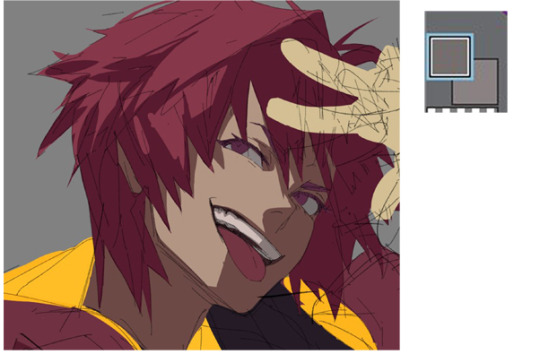
1) Choose a character to sketch
I chose a cool character by my friend daydreamkazooma at twitter. I kinda wanted to give him a flamboyant pose for some reason.

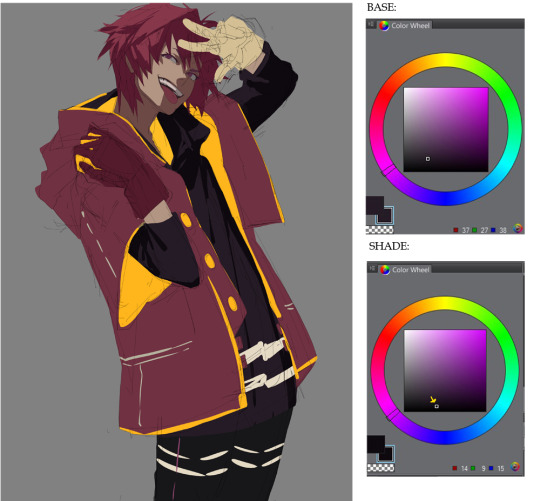
2) Let’s skip line art phase for now and add the base colours
Do not worry too much about what colours to use. Just fill in a general colour and use Hue/Saturation adjustment if you’re not happy.

Try to imagine what the final piece will look like in terms of how the colours will help direct the viewers eyes. In this example, the way the yellow attacks your
eyes immediately brings your view to his jacket.
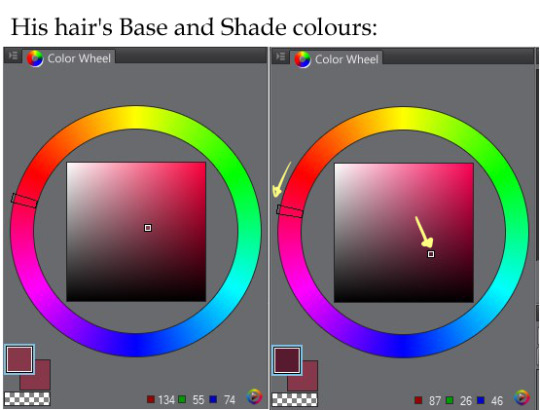
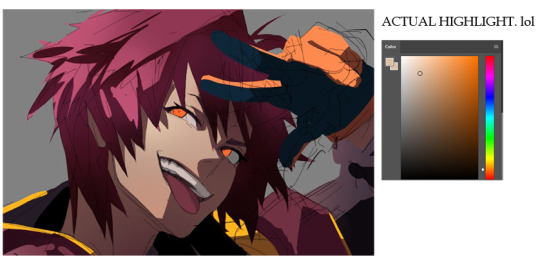
3) Picking a colour to use for the shading
Now for the shading. Imagine how the object looks in 3D so you can properly show off shapes. Also notice how I flick my pen to create some of the hair shapes.

To choose the colour for shading:
Use the eyedropper tool to select your base colour. (Pic on the top right)
Slide the adjuster on the colour wheel downwards, just a little bit. Then click a colour going towards the lower right on the “colour box” for that perf dark hue. (Pic on the bottom right)
4) Keep going with your shading, always keeping the shapes in mind
e.g.) spiky hair = spiky, triangular shades

The whites of his eyes are so bright its getting creepy, so let’s pick a darker value that’s more pleasant to the eyes and use it for shading the teeth too.
I also changed the colour of his tongue.
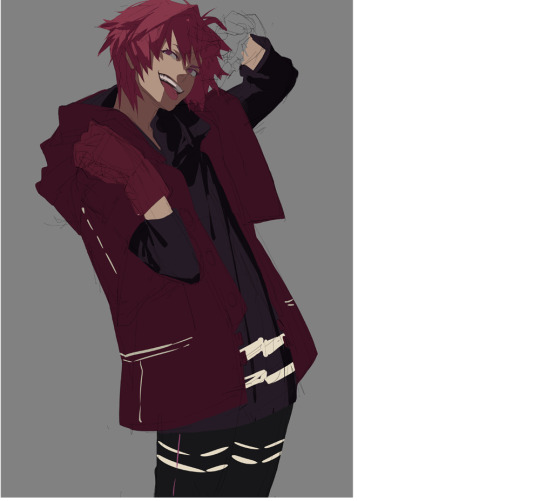
5) Follow the folds and shade accordingly
Take note of the type of fabric and the weight of the clothes. This is difficult to explain without going into too much detail, but in general, the thicker/heavier a fabric is, the less folds it has. Your jeans tend to have less folds compared to your cotton shirt.
The McDonald’s red and yellow is starting to bother me at this point so I hid the yellows, and used Ctrl + U (Hue/Saturation adjustment window) to find a darker redviolet for his jacket which I think is a good shading colour for red hues.
6) Lighting
Before that, I darkened the (too) bright yellows so it’s not jarring against his jacket.

Add the base colour on top of the shading. You do this by thinking of the LIGHTING instead. I personally do this method more; the other method being: painting with the SHADOWS/SHADING in mind.
Use a bright yellow to light his jacket’s lining.

Also, notice his red gloves are blending in too much against his dark jacket… so what do we do?
7) Contrast
A bright colour of course! Make those gloves pop.
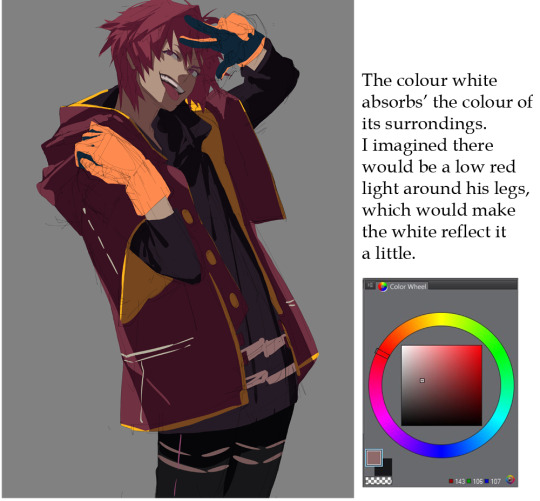
Extra details: The white pattern on his shirt and trousers.
8) Focal point
OK, let’s give him an eye colour that can “compete” with the eye catching yellows in his jacket. We want to bring attention to his face as well.

The viewer’s eyes are now focusing on his intense eyes before his stylish jacket. We successfully changed the focal point back to his face, don’t you think?
9) More shading
Let’s shade the gloves:
Notice how the shade colour I chose goes towards the left,
(towards desaturation)
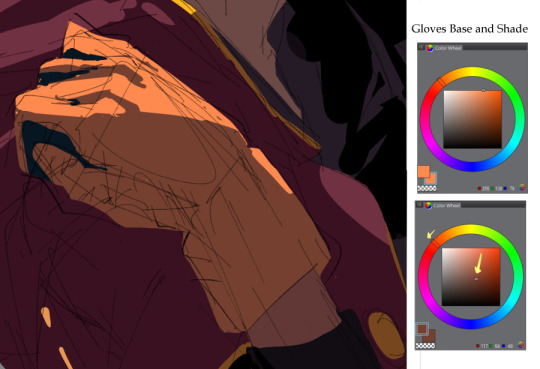
Unlike the previous shade choices which were towards the right (towards saturation) For example on his hair:
This is to sort of ‘balance’ the tones. Saturated hues are generally hard to handle so be careful with them. If you choose a saturated tone for shading when your base colour is also a bright tone like a saturated orange, it can end up looking like its been coloured in MS Paint, like so:

When I coloured the yellows on his jacket in a previous step, I did this too.
I switched to Photoshop so my colour wheel is now a… colour box.(?)
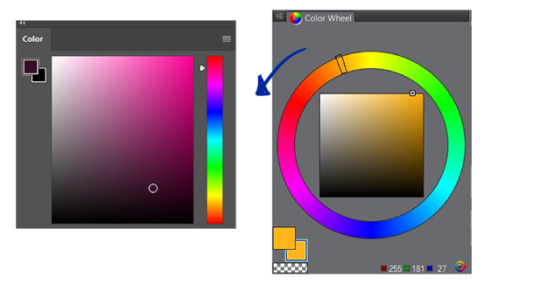
Towards-the-left on the colour wheel is Downwards on the colour box.
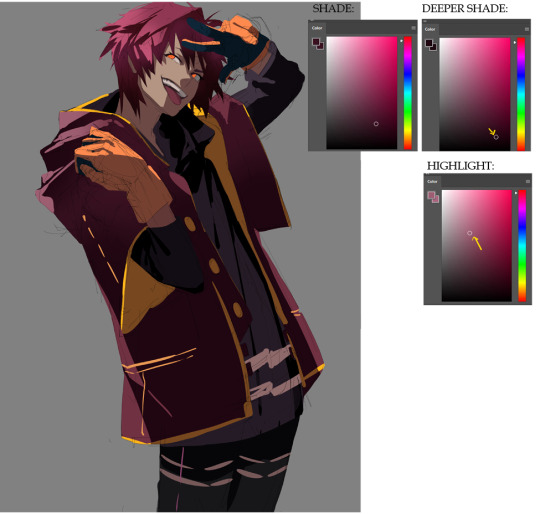
10) Now for the pre-rendering stage.
Select the shaded areas using the Magic Wand Tool. It’s OK if it feels messy.

Then, using the same method of choosing your shade colour, (again, choose downwards the “colour box”, towards the saturated hues) choose a shade darker than your Shade colour for a deeper shade colour.
Using a soft round brush with pen pressure turned off, carefully paint on the edges of his hair. Just the edges please, you don’t want to replace your original shading colour with the darker tone.
11) Highlight
Now Invert Selection in Select > Inverse and paint the area near the shadows with the Highlight tone so you make that nice contrast effect.
Highlights tend to go towards the desaturated areas (to the left)

Do the same for the jacket:
And the yellows:
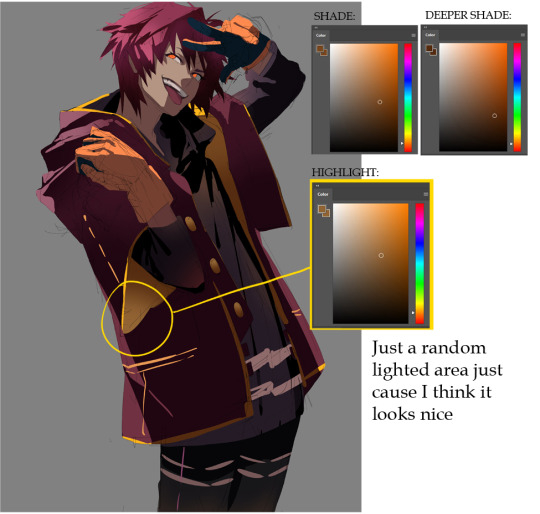
I dabbed this same yellow Highlight colour lightly on his black shirt serving as its
Highlights instead of choosing a lighter tone from the black base.
I find a saturated splash of colour on a black surface much more cool looking.
Do it again for the skin.

I said ‘Highlight’ on that pic on the right, but that’s not really the actual highlight colour. It’s a secondary colour to add hues to the skin so the character looks more alive, kinda like blush-on in makeup. The concept is, skin is translucent so you should tend to show the blood/haemoglobin underneath. For this character’s skin tone, I chose a more orange hue (slightly more saturated orange VS. the base orange) so it goes well with the rest of the colours.
12) Highlights on the face
Now for the real “highlight”. Just lightly dab with the soft round brush the side of the face where the most light hits. Add a little more orange hue if you want, to keep that gradation effect.
13) Finished establishing the colours!
Now just clean it up a little…

14) Lineart
…add lineart on the edges and you have a finished cel-shaded piece! Next step would be rendering it if you want to push further.

15) Rendering
Add textures.
Do the rest of the fucking owl.

=========================================================
Thanks for viewing! Kayl belongs to daydreamkazooma.
This is only a cel-shade tutorial but the tutorial to render the rest of the fucking owl is available in my patreon. Brushes used will also be available!
PATREON TWITTER DEVIANTART INSTAGRAM
3K notes
·
View notes
Text
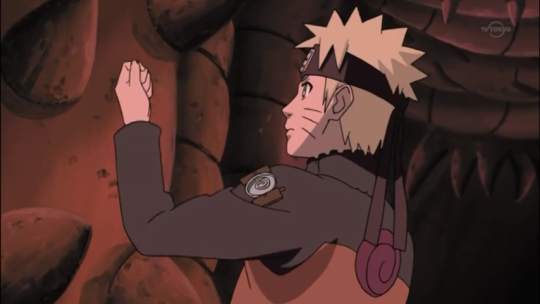
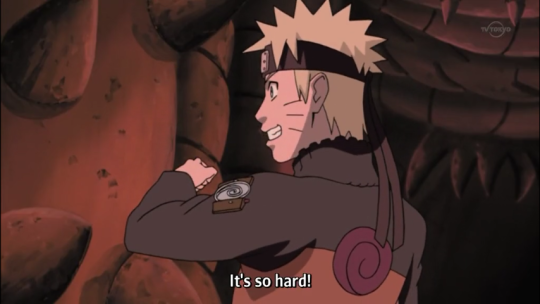
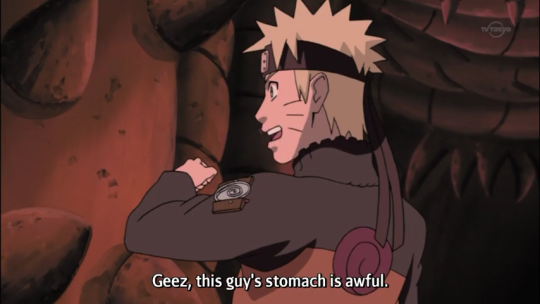
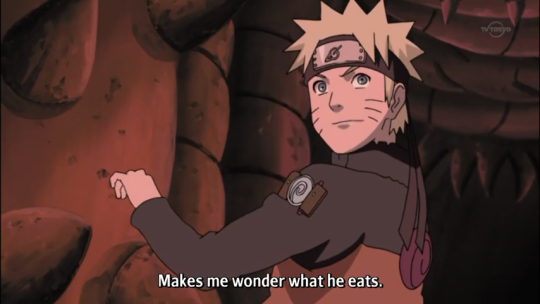
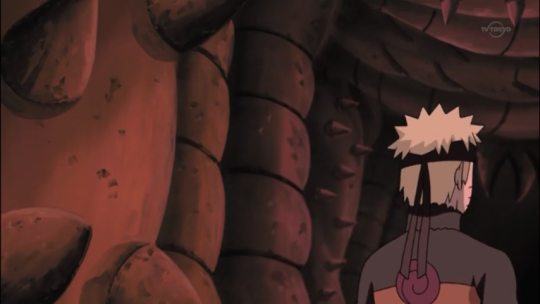
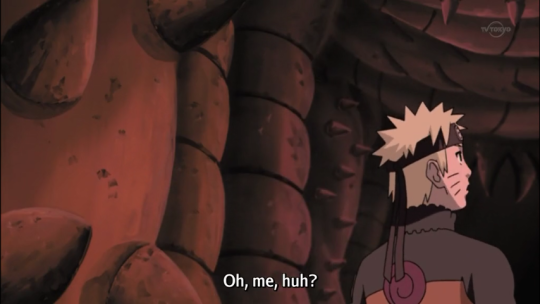
Naruto almost dying and Sakura desperately tying to save him, having flashbacks to the him talking about his ambitions in the chunin exams and a whole internal monologue about supporting his dream all the while keeping his heart beating with her bare hand…
that was some… poetic cinema
203 notes
·
View notes
Text
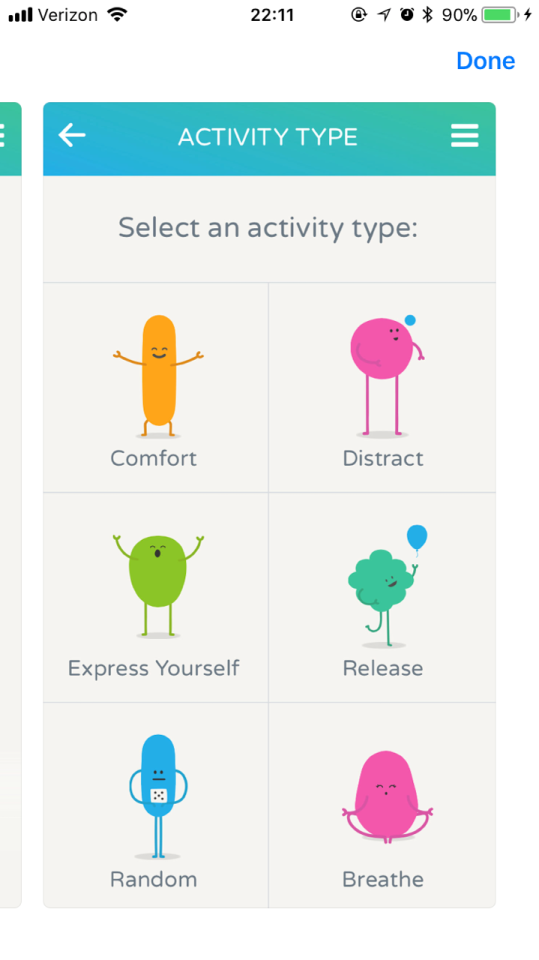
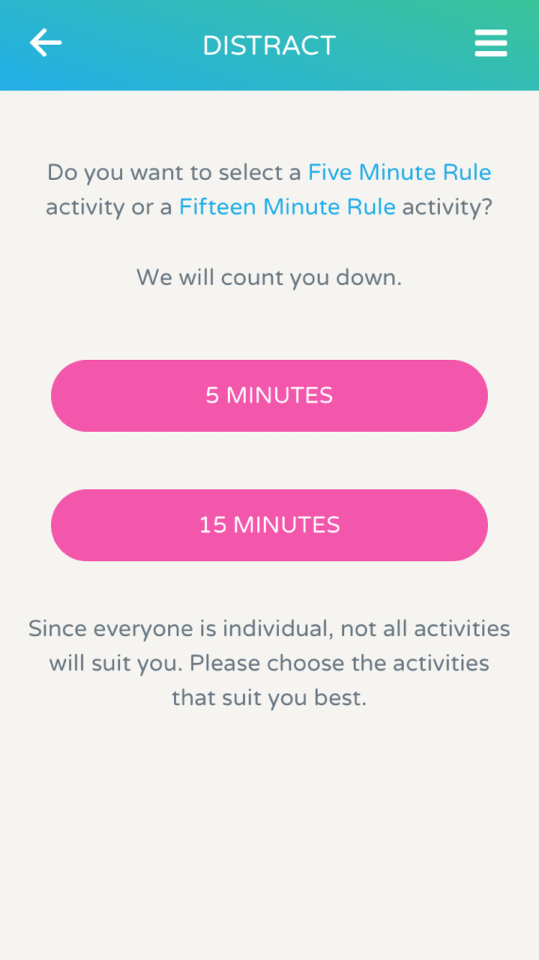
Listen up. There is literally an app that can help you avoid self harm and I don’t know why we aren’t talking about it.
Calm Harm can be tailored to your needs and will provide strategies to help you get past those crucial moments of wanting to harm.
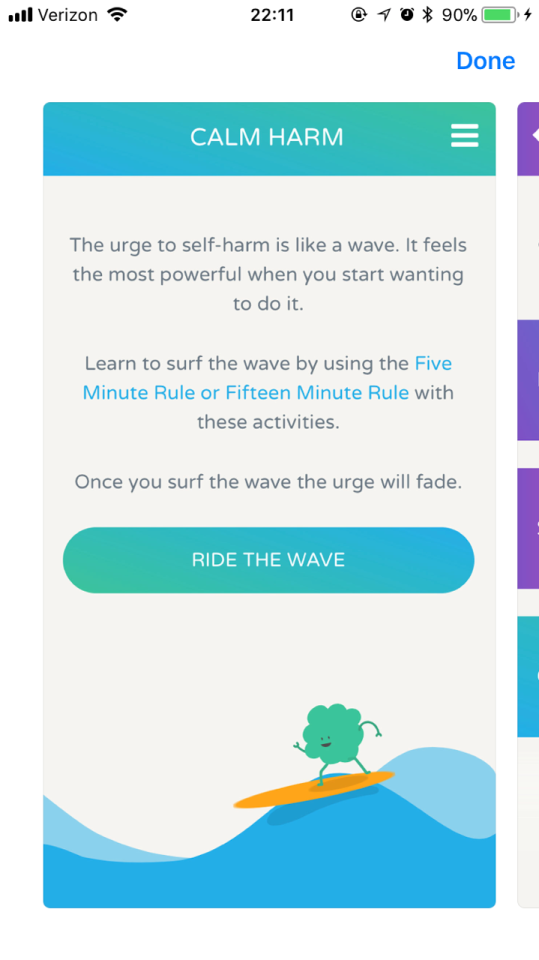


It’s also totally FREE.
once again, it’s called CALM HARM
497K notes
·
View notes
Photo

#narutoweek2017
↳ Day 2: favorite quote
“To keep enduring, no matter what, until things come to pass.
And for we who must endure, perhaps that’s what it means…to be a ninja.”
– Sasuke
4K notes
·
View notes
Text

such a poser
#he is beauty he is grace he will punch you in the face#seriously no kidding#my dog cannot contain his excitement when he sees someone new xd#personal#dogs#labrador
8 notes
·
View notes
Photo


HAPPY BIRTHDAY TAEHYUNG !!
3K notes
·
View notes
Photo

I started to see (right this time) Naruto recently so has fanart because I’m really enjoying it.
- www.instagram.com/deoxy_diamond
2K notes
·
View notes
Photo
This is so sweet!! Thank you Emily!! I'm so glad to have met someone like you here!! Thanks for making my Tumblr experience fascinating!!

#thank you emily!!#sorry for the late response#but i couldnt get online for a while#your message means so much to me!#so thanks again!!
147K notes
·
View notes
Photo

Rest in Peace Stan Lee
Thanks for all the great memories.
You did good kid.
215K notes
·
View notes
Text


oh my god you’re so dumb i love you
56K notes
·
View notes