Text
I Finally Achieved That! Push through the pain barrier & The Destroyer of Worlds (Final Horizon)
Push through the pain barrier

Trophy Description: Complete a Score challenge with a 4X score modifier
Trophy Requirements: To get the 4X score modifier all options (Enemy Health, Speed, and Spawn Rate) must read x2 before starting the mission.
How I Did It: I did this last trophy on Gamarus Prime 3, and it was still amazingly difficult. I had to do it about 3 times. Upon doing some research this is widely regarded as the easiest mission, so I don’t even want to imagine the other levels. Anyway, because things move so fast it was hard to keep track of what was going on. Therefore, check out a fantastic video walkthrough here. It might take a couple of attempts, but it does work. Just follow Yelayon’s lead. You’re refinery will take a lot of damage, and it will be close to exploding, but you should be fine if you follow the video.
The Destroyer of Worlds

Trophy Description: Unlock all the other trophies
Trophy Requirements: Earn all thirty-seven other trophies from the main game.
My Thoughts: I was ready for this to be one of two things: super quick, non-challenging game or an overly prolonged, rage-inducing suck-fest. I’m glad to say it is neither of those things.
Good: This game is a little on the easy side, but I kind of feel like it’s because the tutorials do such a good job teaching you. I never felt lost or without hope. I believe the training is where this game really shines. It also has a nice variety of towers and enemies. Granted, there aren’t a huge number, but there is enough to be satisfied with it. It also doesn’t feel like a lot of recycling which would have been an easy way to do it. There are a great number of combinations that can be used on both sides of the battle, and there was definite thought behind all of the scenarios. My favorite part, though, was the strategy aspect. I was not able to beat every level on the first shot so I had to go back and reevaluate. All defensive setups will work in this game, but it’s a matter of finding the best one and that’s what you have to strive for to get the platinum here. This is a very good game that is perfect to sit and binge or just pick up casually.
Bad: “Bad” might be a bit of an overstatement. While this game is in no way perfect I do feel like there isn’t anything that can be considered outright “bad”. I am not a huge fan of the music and sounds. They capture the tone and feel of the game well enough, but it’s not anything special. If I have to grind to get a trophy or defeat something I like to listen to the in-game music. With this game I loaded up Pandora on my phone and turned my Vita volume all the way down. I don’t feel like I missed anything. The graphics also can’t be touted as monumental, but I don’t put much importance on that. Whether they could be better, I don’t know. I didn’t see any kind of screen tearing or clipping, but I don’t recall seeing any evidence of impact from the hornets’ laser beams or dirt displacement when the Scarabs dug underground. No dust kicked up and nothing looked out of place. Those are small things, but they could have been added at some point. The last issue I have is the way the story is told. It is completely through text and it is sporadic. Unless you skip ahead it’s also extremely slow. I tried watching the prologue “dialogue” and just skipped it, because I had the most important bit of information. The Swarm hates you, kill them. At the very least I feel like they should have had a cutscene at the beginning with a military officer essentially telling you that, and then leave you to it. Or just take it out all together. I don’t think anyone would notice.
I would play this again, and I might download the DLC at some point, but for now I’m done. It was a lot of fun, and not nearly as “grindy” as I thought it was gonna be initially. I approve and recommend that you at least check it out.
#Push#through#pain#barrier#Destroyer#Worlds#Score#challenge#4X#modifier#Enemy#Health#Speed#Spawn#Rate#x2#Gamarus#Prime#Yelayon#Platinum#trophy#trophies#Vita
0 notes
Text
I Finally Achieved That! Player of Games & Take it to the next level (Final Horizon)


Trophy Description: Get a 15X bonus multiplier in a Score Challenge game & Complete a Score Challenge with a 2X score modifier
Trophy Requirements: The bonus multiplier is based off of your kill count and how fast you do it. So, that means you need to be quick AND deadly; The score modifier is determined by the pre-match options that you set up like Enemy Health, Speed, and Spawn Rate.
How I Did It: I will be going over how to get both of these at one time. For this the only modifier you need to change is the spawn rate which should be at “x2″. Select Acari 2 and change the spawn rate as described. When the mission starts keep all towers as they are. Add a second Thunderbolt to the empty station on the front lines. Next, add Power Generators to the two remaining stations in the back. Upgrade those to Healing Generators first, followed by upgrading the Thunderbolts, then the Icarus launcher, and, lastly, the Chainsaw IN THAT ORDER. You should be close to getting your killstreak and have somewhere close to a x7 bonus multiplier. I waited until I was at x10, and I saw a massive number of enemies at the top of the radar. Activate the Orbital Bombardment and the trophy should pop before it is finished. Once the killstreak has ceased you should have a minute or two left before you beat the level and acquire the second trophy. Now there is only one trophy left! The hardest one, apparently. Wish me luck.
#Player#Games#Take#next#level#Final#Horizon#15X#Score#Challenge#bonus#multiplier#2X#modifier#enemy#health#speed#spawn#rate#Acari#Thunderbolt#Power#Generator#Healing#Icarus#launcher#Chainsaw#Orbital#Bombardment#x7
0 notes
Text
I Finally Achieved That! Challenge yourself (Final Horizon)

Trophy Description: Complete a Score Challenge level
How I Did It: This may be the easiest trophy in the whole game. Once you unlock a Score Challenge level go to the main menu and select the new option. Choose an available Score Challenge (Nhandu 3 is pretty easy) and finish it. You now have this trophy.
0 notes
Text
I Finally Achieved That! Everybody’s dead, Dave (Final Horizon)

Trophy Description: Kill just one enemy with the Orbital Bombardment Killstreak
Trophy Requirements: This is easy to understand, so I just want to inform you that the first level this Killstreak is available on is Tibialis’ first mission.
How I Did It: This is really easy. Play Tibialis’ first mission like you normally would. Right after you get access to your killstreak a large group of enemies will spawn. Just defend with your towers, and do NOT use your killstreak yet. You will fight a small group of hornets, a wasp, and a spider tank on the left side of the map. After the hornets and wasp are gone switch the Icarus launcher to a Chainsaw (if this applies to you, that is) to destroy the spider tank that is either almost at your tower or is behind you at the refinery. There should be two enemy spider tanks left on the map. If there is only one sell all attack towers and wait for a few seconds to make sure there are no stragglers coming. Once you have confirmed that no other enemies exist use your killstreak on the final enemy for major overkill. If you DO have two enemies then make sure you kill ONLY ONE of them and then do as mentioned above. And with that, I am on to the final four trophies: score challenges. I will finish this by Monday morning, I guarantee that.
#Everybody's#dead#Dave#Final#Horizon#Orbital#Bombardment#Killstreak#Tibialis#hornet#wasp#spider#tank#Icarus#launcher#Chainsaw#Vita#trophy#trophies
0 notes
Text
I Finally Achieved That! Crushed like a bug in the ground & Pan-galactic gargle blaster (Final Horizon)


Trophy Descriptions: Kill 2500 Level 1 Spider Tanks & Get 250 Boost kills
Trophy Requirements: The Level 1 Spider Tanks are the first enemies you meet in the game. They are the yellow spider-esque enemies from the very first planet. You have to kill a total of 2500 of them, just like you had to do with the hornets. Keep in mind that does not include the larger Level 2 Spider Tanks which are accented in red. This is only for the original, yellow version.
Boost kills are a special ability that all fully upgraded offensive towers can activate and use. Once fully upgraded you can select the tower again and the boost option will be in place of where the upgrade option was originally. Each Boost activation will cost 50 energy to perform. You must get 250 kills while your tower is highlighted in yellow signifying it is in its Boost phase. It’s pretty easy, but that Boost ability does not last long, so use it wisely.
How I Did It: I am going to combine these since I got them back-to-back and they go hand-in-hand. After I finished with the hornet kills I left the final mission and came all the way back toward the beginning to Vega Delta’s seventh mission which happens to be a VR Simulation (aka, a tutorial). At the start of the mission upgrade the right-most tower and switch the middle one to a Power Generator. As soon as possible upgrade both Generators to the Healing variety. Not only will this keep your offensive towers’ health up, it will also give you forty energy per cycle instead of the standard twenty-five that comes with the original Power Generators. There are a total of forty-one spider tanks in this mission. If you finished all of the hornet kills on the final level like I did you should be within three to four hundred spider tank kills for the “Crushed” trophy. All you have to do is repeat the aforementioned mission. If you haven’t used Boost at all you really only need to play this mission about seven times, however, the chances are that you have used this ability sporadically. If that is the case you can probably get the remaining necessary boost kills in three or four playthroughs spamming the Boost ability. The seventh mission on Vega Delta is by far the best mission I have found to do these trophies in tandem. As with all trophies of this style there are many other places to attempt and achieve this trophy, but I can’t very well recommend them as I do not know how well they work. I am sure about this one, though. It’s a quick mission with a lot of enemies and there isn’t a whole lot of fluff to it. Repeatedly do this or any other mission you wish to do until either or both trophies pop and you’re all set. Only five more to go!
#Crushed#like#bug#ground#Pan-galactic#gargle#blaster#Spider#Tank#2500#250#Boost#Vega#Delta#VR#Simulation#tutorial#Power#Generator#Healing#Final#Horizon#Vita#trophy#trophies
0 notes
Text
I Finally Achieved That! Pest control (Final Horizon)

Trophy Description: Kill 2500 Hornets
Trophy Requirements: As mentioned in an earlier post, hornets are the small flying enemies that usually spawn in groups and fire continuous laser beams at their targets. You must kill 2500 for this trophy.
How I Did It: When I say I “finally achieved” this, I mean it. This trophy felt like it took forever, even though it wasn’t all that bad. I have continued using the final level on Acari which is the final mission in the story. If you choose to replay this mission continuously, you should get familiar with the pattern and strategy. Of course, if you follow the YouTube video I posted the other day it should be that much easier. I was able to confirm fifty hornet kills per run on this mission. The only real strategy for this trophy is to repeat a mission over and over again until the trophy pops. It’s a grinder, for sure. There are other places to attempt this many kills, of course, but I found the final battle the best mission for me. I have heard of a score challenge that may be better, but I cannot confirm or deny that. This was my method. It is just going to take some time and patience.
0 notes
Text
I Finally Achieved That! Beetlebug (Final Horizon)
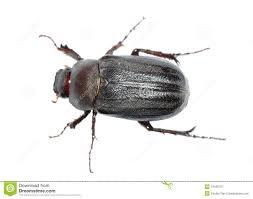
Trophy Description: Kill 100 Scarabs
Trophy Requirements: Scarabs are the dark red enemies that burrow under the ground and disable your towers. You have to kill 100 of these rare-ish, troublesome, mechanical insects.
How I Did It: I have been using the final level a lot in my attempt to kill as many hornets at one time as possible. Along with those kills, you will also kill about four Scarabs per run. After finishing the game originally I believe I had about thirty-four Scarab kills. You should be somewhere in the general area of that number, so seventeen battles should be all you need for this trophy. It really sounds worse than it is; trust me on this
I only have about eight more battles to go, and then I will be bringing you my focus from this entire walkthrough. I can’t wait to be done with grinding out trophies. It gets really frustrating after a while. Until next time, good luck!
0 notes
Text
I Finally Achieved That! Nuke them from orbit (Final Horizon)

Trophy Description: Get 5 kills with one Firestrike blast
Trophy Requirements: The Firestrike blast is the singular laser beam from space that you have control over, not the Orbital Bombardment that consists of multiple beams with no manual targeting system.
How I Did It: I am still trying to kill 2500 hornets, but now I have a new strategy. I am farming the final level due to the massive horde of enemies. In the last phase you take to the sky with you missiles and Firestrike blasts. Use the blasts wisely. When you see a group floating around together, fire. Your main target should be groups of hornets. Since they usually roam in groups of three or ore it shouldn’t take long to find a good cluster of enemies and destroy them. That’s all I did.It was mostly a complete accident!
0 notes
Text
I Finally Achieved That! Full of Venom (Final Horizon)

Trophy Description: Kill 100 Wasps
Trophy Requirements: The Wasp is the larger flying enemy with the red eye. You must kill a total of 100 throughout the game.
How I Did It: This is real simple. I kept replaying the second and fourth missions on Nhandu. In all actuality, I was trying to kill the 2500 hornets required for another trophy. You should be close by the end of the game, so I suggest combining this with other kill trophies. See? Told you it was simple.
0 notes
Text
I Finally Achieved That! Flawless Victory!, The only way to be sure, & The Final Horizon (Final Horizon)
Flawless Victory
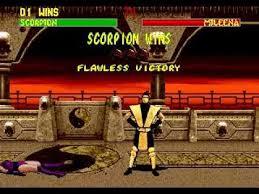
Trophy Description: Complete Acari 3 with no damage to the planetary drill
Trophy Requirements: This is actually the secondary objective for Acari’s third mission and is self-explanatory.
How I Did It: This is pretty difficult unless you know exactly what you’re doing. Luckily, you don’t have to go through it alone. YouTuber Q99100 has done it for you. I had to repeat this mission one time because a Hornet hit my drill. If you’re playing this on Vita I feel like you have it easier than those on the PS4. I recommend using the left stick to move around and your finger to select the towers. If at any time a health bar shows on the drill in the middle of the level, restart. The aforementioned video can be found here. (I do not own nor do I take credit for any content in the video)
The only way to be sure

Trophy Description: Destroy the Swarm home planet
Trophy Requirements: This is also self-explanatory AND story-related
How I Did It: Completing Acari’s third mission will unlock this trophy since it is story-related. There are no other requirements like completing secondary objectives, so you can watch the previously posted video or go it alone. Either way, finish the mission and this will pop on or after the final cutscene.
The Final Horizon

Trophy Description: Complete the story 100%
Trophy Requirements: This requires all secondary objectives be fulfilled throughout the entire game.
How I Did It: This isn’t too difficult, to be honest, but there will be some missions that you won’t be able to complete right away. While I can’t help you with all of them, I can help you with the ones that gave me trouble. Please note that I am leaving out any missions that I have discussed in depth prior to this post:
Scofra 2: Scofra was a difficult planet for me. For the second mission leave the Thunderbolt that you are given. All other open stations should have a Power Generator placed on them. When the front Power Generator is in critical health swap it out for a Chainsaw. Upgrade the Thunderbolt and Chainsaw as soon as possible. When the killstreak is ready swap the Power Generator in the back with a second Thunderbolt. Upgrade it if possible. Activate your killstreak and use the Boost ability on all attack towers that have it available. From here you should be able to finish it with no other issues.
Scofra 3: Again, leave the Thunderbolt in place. Place three Power Generators in open stations. Place a second Thunderbolt on the station closest to the enemies as soon as you can. Upgrade both Thunderbolt towers. Replace one Power Generator with a Chainsaw and upgrade it. It should be closer to the front lines unless you have an enemy break through. Activate your killstreak and use the Boost ability on any towers you can. From here, pray you get enough kills. In my opinion the Stasis Rift killstreak is the worst of all of them, and these two above missions require seven and eight killstreak kills (respectively) which is no easy feat. So, again, pray you get it. If you don’t, just repeat.
Kondoi 3: Place one Power Generator across from the refinery and one Chainsaw on the south side. Place a second Power Generator when possible. In the final open station put an Afterburner. Upgrade both Chainsaws and use your killstreak immediately. Again, pray. This is the Orbital Bombardment, but there aren’t that many enemies, so there’s a chance you’ll only have nine or less remaining.
Any missions not mentioned were either no problem for me or I made a stupid mistake that was easily remedied or, as mentioned, I have already discussed it at length in a previous post.
Now it’s on to grinding enemy kills. I’ll be back soon with this Platinum trophy. I actually have my reservations about getting this platinum as it will be my 40th. It almost seems like a waste to get it on this game. I’ll go in to more detail about that later though. Have Fun!!!
#Flawless#Victory#oly#way#sure#Final#Horizon#Acari#planetary#drill#Swarm#100%#Secondary#Objective#YouTube#Q99100#Hornet#Vita#PS4#Scofra#Kondoi#trophy#trophies#platinum
0 notes
Text
I Finally Achieved That! Alien Homeworld (Final Horizon)

Trophy Description: Complete both secondary objectives on Acari 2 at the same time
Trophy Requirements: To be honest, I”m not sure which two secondary objectives are being referred to here since there are actually three. For Acari’s second mission the Mining Base can sustain no damage, you must generate a total of 1500 energy, and get sixteen killstreak kills.
How I Did It: This was easier than I though it would be. Because there is so much going on I’ll break it down by objective:
No Damage to Mining Base: The biggest issue for any objective are the Scarabs. In my experiences the Thunderbolts are the best tower for these enemies. The most troublesome Scarab in this level usually takes a path to the right side. When he shows up and starts moving that way change the northern-most Power Generator or Healing Generator to the appropriate tower. I chose Thunderbolt, you may like Afterburner, go with what you like first. If that doesn’t work and he still makes it to the Mining Base, try my way. If neither of those work, try something else because I obviously don’t know what I”m talking about after that.
Get 1500 Energy: By far the easiest objective for me, I placed a Power Generator in all empty stations at the start of the battle like I almost always do. You will have to swap out one (as mentioned previously), but you should still have enough time to make the mark. Note, you do NOT have to have 1500 energy stored all at one time. You just have to accumulate that much throughout the entirety of the battle. If the enemy horde looks like it’s winding down and you still don’t have it save one offensive tower and turn the remaining stations in to Power Generators. This should give you the necessary boost you’re looking for.
Sixteen Killstreak Kills: This is pretty simple, as well. When the Orbital Bombardment is available do a quick survey of the battlefield and use your best judgment. If there are a good number of Hornets you shouldn’t have any issues. Use the boost ability on any towers that have that option available to increase the chances of additional kills.
Combine these Strategies and you shouldn’t have any problems. Again, it’s those dang Scarabs that make this particular level a challenge.
I have one mission left to do for trophy I’ve been attempting this entire time. In the span of the last few days I have gotten twenty three trophies by just playing the game. According to the tracker that puts me at 46% finished with the base game. I only have fifteen trophies to go (not including the Dark Galaxy DLC which I don’t intend to pay for), so it shouldn’t take too long. Most of the remaining trophies are kill related and it’s just something I’ll have to sit down an repeat over and over again. I go back to work on Monday, and I’m hoping to start a new game by then, if not before. Wish me luck!
#Alien#Homeworld#Final#Horizon#Acari#Mining#Base#Killstreak#1500#energy#16#sixteen#Thunderbolt#Scarab#Power#Generator#Healing#Afterburner#Orbital#Bombardment#Hornet#Dark#Galaxy#DLC#Vita#trophy#trophies
0 notes
Text
I Finally Achieved That! Philip J Fried (Final Horizon)

Trophy Description: Kill 20 Swarm with a single Killstreak
Trophy Requirements: This is another self-explanatory trophy, but I wanted to clarify something. It does not matter which killstreak you use to obtain this. Some are easier than others, sure, but there is no specific method.
How I Did It: During the first mission on the planet Acari you will face a lot of enemies. One of the Secondary Objectives happens to be getting twenty killstreak kills (lucky you). The killstreak is an Orbital Bombardment which I believe is the easiest killstreak to use for this trophy. There is no special strategy for this, really. Either count the number of enemies on screen quickly or estimate as well as you can. When your killstreak becomes available use it whenever possible.That’s all there is to it. You may have to try this more than once. It’s not automatic, unfortunately.
0 notes
Text
I Finally Achieved That! Sting in the tail (Final Horizon)

Trophy Description: Kill 120 Skorpions
How I Did It: This trophy should pop through natural progression before you finish the story. Skorpions are the large, slow moving, yellow enemies that launch the larger, tri-blade missiles. You meet them during the GroundQuake tutorial level. I killed my final Skorpion enemy on Ioxedes’ second mission. It does not matter how or where you kill them. If you don’t get this before finishing the story, Ioxedes is a good planet to visit as I found a lot of them on the first two levels. A secondary location would be Gamarus Prime level three. Both areas will help. Considering you should be close by the end of the game it won’t take long so it probably doesn’t matter which level you choose as long as it has the right enemy.
0 notes
Text
I Finally Achieved That! Per Ardua ad Astra (Final Horizon)
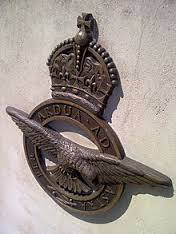
Trophy Description: Complete both secondary objectives on Kondoi 4 at the same time
Trophy Requirements: The two objectives you must complete for this trophy consist of not allowing your rocket to be damaged at all and to get twelve killstreak kills.
How I Did It: I had a tough time with this one. Specifically, with this level as I was not trying to get this trophy. To start I placed a Power Generator on the two remaining stations and upgraded the southern Chainsaw tower one time. The horde stated to thicken here so I switched out one of my middle Power Generators with an Icarus launcher. After upgrading the other Chainsaw I switched the Power Generator right beside it for an Afterburner. As soon as my killstreak became available I activated it in the hopes that it would kill all of the bigger enemies that were getting too close. It did as I wished and I was left with only one or two enemies afterward leaving me to coast through until the end screen showed up. The trophy popped as the “Continue” and “Restart” options appeared.
#Per#Ardua#ad#Astra#Final#Horizon#Kondoi#Power#Generator#Chainsaw#Icarus#launcher#Afterburner#trophy#trophies#Vita
0 notes
Text
I Finally Achieved That! Kill it with fire! (Final Horizon)

Trophy Description: Get 10 kills with a missile killstreak
Trophy Requirements: This is pretty self-explanatory; use the Firestrike Missile killstreak to get ten kills in one single use.
How I Did It: Take note that this is specifically for killstreak kills. Those few missions that have you firing from above for the entire mission do not count for this trophy. I was able to get this on Kondoi’s second mission. I really don’t think there is too much of a strategy aside from spamming the fire button until you succeed. It will take more than one missile per kill, so keep that in mind. That’s all I did, and I was able to do it twice in a row.
0 notes
Text
I Finally Achieved That! Virtual Insanity & The fog is lifted (Final Horizon)


Trophy Description: Complete all weapons training & Reveal every item from the main game in the Object Intel viewer
Trophy Requirements: Both trophies will require the completion of Kondoi’s first mission.
How I Did It: This is another set of trophies that will appear together. The VR training mission on Kondoi introduces you to the Chainsaw’s third level. Once the tutorial is complete you will have completed all weapons training which in turn means your Object Intel viewer will also be complete, hence your reception of both trophies. These are story related and you should have no problem getting this far whether you are attempting the secondary objectives or not. You really have nothing to worry about.
#Virtual#Insanity#fog#lifted#Final#Horizon#Vita#Object#Intel#weapons#training#Kondoi#Chainsaw#tutorial#trophy#trophies#secondary#objective
0 notes
Text
I Finally Achieved That! Frostbite (Final Horizon)

Trophy Description: Complete both secondary objectives on Ushtuk 3 at the same time
Trophy Requirements: The secondary objectives for this mission are to have no damage done to your rocket and to use no Thunderbolt towers.
How I Did It: Well, that was quick. I thought this would be difficult because I love using these towers for crowd control. I had to restart once, but I learned quickly where I made my mistake. I placed an Icarus launcher on the open station directly in front of the rocket and all remaining open stations received a Power Generator. From there I upgraded and healed my attack towers as necessary and pretty much coasted through the remainder of the mission. By the way, level three on the Icarus launcher is totally worth it.
#Frostbite#Final#Horizon#Ushtuk#secondary#objective#Thunderbolt#tower#Chainsaw#Power#Generator#Icarus#Launcher
0 notes