
From system software to application development, we’re the go-to partner for all embedded needs, enhancing the product experience for various business domains.
Don't wanna be here? Send us removal request.
Statistics
We looked inside some of the posts by siliconsignalsblog and here's what we found interesting.
Average Info
Notes Per Post
14
Likes Per Post
14
Reblog Per Post
0
Reply Per Post
0
Time Between Posts
3 days
Number of Posts By Type
Text
17
Last Seen Tumblr Blogs


Fun Fact
Kazakhstan’s Minister of Communications and Informatics has blocked the Tumblr site because it contained 60 sites of terrorism, extremism, and pornography in 2015.
Text
Safe OTA Firmware Updates in Embedded Systems Using A/B Partitioning
Delivering firmware updates over the air (OTA) is a fundamental requirement in embedded systems, particularly in connected automotive and industrial systems. Post-deployment bug fixes, security patches, and ongoing feature improvements necessitate a strong OTA mechanism that maintains system dependability even during crucial updates. OTA updates do, however, come with a number of risks. Device malfunction or even permanent failure may result from interruptions brought on by power outages, corrupted images, or failed reboots.

A/B partitioning is a well-known technique that allows for safe firmware rollouts by preserving a fallback image and lowering the chance of bricking the device. Many development teams use it to allay these worries.

Understanding A/B Partitioning
A/B Using a partitioning technique for over-the-air (OTA) firmware updates reduces the possibility of bricking devices during the update process and improves system reliability. With this approach, the system keeps two full firmware partition sets, usually called Slot A and Slot B. While the other slot is inactive and serves as the target for the subsequent update, one slot is always active and running the most recent firmware.

New firmware updates are deployed by writing them to the backup or inactive slot without interfering with the system that is currently operating. The device restarts in the updated slot following a successful update installation. The system keeps running from the new slot if the boot and runtime checks are successful. However, in the event that the update does not boot properly, the bootloader recognizes the issue and automatically switches back to the previously used and reliable slot, guaranteeing system availability.
In addition to the root filesystem (rootfs), each slot may also include the kernel image and device tree. The rollback indexes, boot success status, and active slot indicator are kept in a separate metadata region or control structure. By adding a layer of fault tolerance, this architecture increases the safety and resilience of OTA updates in production settings.
A/B Partitioning for MPUs and MCUs
Because MPU-based systems have more storage available, the A/B partitioning model is easier to implement. These systems typically run Linux or Android. Multiple rootfs partitions, distinct kernel images, and a shared data partition can all be supported by systems like the i.MX8, TI Sitara, or Qualcomm Snapdragon platforms. The most common bootloaders are U-Boot or GRUB, which can be set up to support A/B logic using boot scripts or environment variables.

For example, a typical memory layout on an MPU might look like this:
bash
CopyEdit
/dev/mmcblk0p1 -> uboot boot partition
/dev/mmcblk0p2 -> rootfs_A
/dev/mmcblk0p3 -> rootfs_B
/dev/mmcblk0p4 -> data
A simple boot command in U-Boot could look like this:
bash
CopyEdit
if test = A; then
setenv bootargs root=/dev/mmcblk0p2;
else
setenv bootargs root=/dev/mmcblk0p3;
fi
boot
Flash size and complexity restrictions will be more stringent for MCU-based systems. However, by keeping two firmware regions, usually in internal flash or external SPI NOR flash, the A/B principle can still be used. The bootloader, which is frequently custom-built, jumps to the appropriate firmware bank after checking a status flag.
For MCUs like STM32 or NXP Kinetis, a flash layout might be:
rust
CopyEdit
0x08000000 - 0x0801FFFF -> Bootloader
0x08020000 - 0x0805FFFF -> Firmware A
0x08060000 - 0x0809FFFF -> Firmware B
0x080A0000 - 0x080A0FFF -> Metadata
The bootloader reads a metadata structure stored in a reserved flash sector that tells it which slot to boot, and whether the last update was successful.
Implementing A/B OTA
Partition planning is the initial stage of putting an A/B OTA mechanism into practice. Each slot requires developers to set aside memory areas of the same size. This could entail changing the device tree's or GPT's partition table for MPUs. For example, in Android, the slot setup must be reflected in the BoardConfig.mk and partition configuration (e.g., super.img in dynamic partitioning).
The bootloader needs to be set up to choose the appropriate slot during startup after the partitions have been defined. Slot variables that are kept in environment memory or a specific partition can be evaluated by U-Boot scripts. A flash-resident metadata structure containing the active slot, rollback flags, and retry counters is read by the bootloader for MCUs.
The device writes the updated firmware to the inactive slot upon receiving an update. This procedure typically entails using cryptographic hashes or signatures to validate the image both before and after flashing. The bootloader metadata is updated to point to the new slot after the image has been written and validated. The system boots into the updated firmware upon reboot. A flag is set to indicate that the update was successful if the system boots up successfully and verifies functionality (for example, by using application-level heartbeat).
The bootloader recognizes the failure and goes back to the previous slot if the system fails during boot or if the application does not indicate readiness within a predetermined amount of time. The device won't be permanently disabled by an update thanks to this rollback mechanism.
Use Cases
This design is effective in many fields. A/B OTA lowers the chance of bricking in automotive ECUs like infotainment units, digital clusters, and gateways while field updates are being performed. It is possible to stage updates in the background while the car is not moving and switch them on during the subsequent boot cycle. Downtime can result in substantial financial loss in industrial IoT systems, such as those that regulate manufacturing machinery. These systems can be updated without being taken offline thanks to A/B partitioning, which also provides a built-in backup in case something goes wrong.
This model is also advantageous for consumer electronics like smart TVs, routers, and smart speakers. A failed update could result in expensive support costs because these devices are frequently updated over home networks without the user's involvement. Because rollback capability is frequently necessary to preserve clinical integrity, medical devices that are subject to stringent safety regulations also benefit.
Pros and Cons of A/B Partitioning
Pros The benefits of A/B OTA partitioning are obvious. It reduces downtime and increases the reliability of software updates. The system can recover and continue to function even if an update fails. This makes it possible for safe, automated updates, which increases user and consumer confidence and aids in adhering to safety and security regulations.
Cons However, there are also some disadvantages. To store two software copies, more flash memory is needed. Systems and products with limited storage may find this challenging. Additionally, the bootloader gets more complicated, particularly when rollback protection and secure boot are used. Additionally, an OEM must put in more work to test and maintain two software versions.
Conclusion
A/B partitioning has been an effective, fail-safe method for providing over-the-air (OTA) firmware updates, particularly in mission-critical embedded systems where uptime, reliability, and data integrity are paramount.
Though initial implementation might call for careful planning of bootloader logic, memory structure, and partition setup, the long-term benefit in system robustness and failure recovery far exceeds the initial complexity.
Explore how Silicon Signals enables robust OTA implementation in your industry
At Silicon Signals, we develop and implement scalable, secure, and adaptable OTA update solutions for embedded platforms—ranging from bare-metal MCUs to Linux-based MPUs for applications in automotive, industrial automation, consumer electronics, and IoT devices.
Our high-performance OTA stack supporting A/B partitioning out-of-the-box facilitates:
Smooth background updates
Auto-rollback on failure
Zero device downtime
Future-proof firmware deployment strategies
If you're looking to implement a reliable OTA strategy for your embedded device, Silicon Signals is your trusted partner in firmware delivery excellence.
Visit us at siliconsignals.io Mail us at: [email protected] Follow us on LinkedIn
#linux kernel#embeddedtechnology#embeddedsystems#embeddedsoftware#androidbsp#linuxdebugging#android#aosp#iot development services#iotsolutions
0 notes
Text
SELinux in AOSP: A Guide to Securing Embedded Android Systems
Introduction
Security-Enhanced Linux (SELinux) is a core security mechanism in the Android Open Source Project (AOSP) that enforces robust access control. Unlike traditional Discretionary Access Control (DAC), which relies on user-based permissions, SELinux uses Mandatory Access Control (MAC) to restrict system interactions based on predefined policies. Android integrated SELinux starting from version 4.3. It runs in either permissive mode, which logs violations, or enforcing mode, which blocks unauthorized actions.
Understanding SELinux policies, labels, and domains is essential for embedded developers working on middleware, HAL, and system daemons in order to secure Android devices. Sensitive system components are protected, unauthorized access is limited, and privilege escalation is avoided with proper SELinux configuration. This blog discusses best practices for creating security policies, how SELinux functions within AOSP, and a real-world example of using SELinux on a binderized HAL. Developers can strengthen embedded systems against exploits and security breaches by becoming proficient with SELinux.
What is SELinux?
With mandatory access control (MAC) policies that limit programs' capabilities beyond conventional discretionary access controls (DAC), SELinux is a security architecture built into the Linux kernel. It guarantees that an application's activities stay contained within predetermined bounds even in the event that it is compromised.
Core Concepts of SELinux
Labels: Every process and object (like files, directories, and ports) in the system is assigned a security label. A key component of SELinux's decision-making process is these labels.
Type Enforcement (TE): The main SELinux mechanism is Type Enforcement (TE), in which policies specify how types (labels) linked to objects and processes can communicate. A process named httpd_t (Apache), for example, can be made to only access files with the label httpd_sys_content_t.
Roles and Users: To manage permissions more precisely, SELinux defines roles and users. Nonetheless, type enforcement continues to be the main focus in many implementations.
SELinux in AOSP
SELinux integration with Android
Google strengthened Android's security by integrating SELinux into the platform starting with version 4.3. SELinux functions in two ways in AOSP:
Permissive Mode: Violators are recorded but not stopped; SELinux rules are not enforced.
Enforcing Mode: SELinux rules are put into effect, and infractions are recorded and prevented. For strong security, Android devices try to run in enforcing mode.
Advantages of SELinux in Android
Privilege escalation is mitigated: SELinux restricts an application's behavior even if it acquires unauthorized privileges, avoiding more widespread system compromises.
Protection Against Malware: By limiting applications' access to private information or system components, SELinux policies can lessen the possible impact of malware.
Enhanced Multi-User Security: SELinux makes sure that user data is kept separate and safe from other users and applications by implementing stringent access controls.
Implementing SELinux in AOSP
Configuring the Linux kernel for SELinux: Make sure the kernel is compiled with SELinux support. This entails turning on particular security module configuration options.
Filesystem Labeling: Give filesystem objects the proper security labels. This can be accomplished by setting default labels in filesystem images or by using tools such as restorecon.
Compilation of Policies: Using tools like checkpolicy, create SELinux policies that are specific to the needs of your system.
Policy Loading: Use tools like load_policy or incorporate the compiled policies into the system's initialization procedure to load them into the kernel.
Writing SELinux Policies
IVI (In-Vehicle Infotainment), ADAS (Advanced Driver Assistance Systems), and telematics are among the vital services that Android Automotive OS (AAOS) manages in automotive embedded systems. SELinux policies are necessary to enforce stringent access controls across all system components, especially middleware services, Binderized HALs, and system daemons, in order to ensure security in such a system. In order to make sure that only authorized system components can access and alter vehicle data, we'll map SELinux policy writing to a real-world automotive example below using a binderized HAL.
Determine Types and Domains
Consider a Vehicle HAL (VHAL) in an automotive system, which gives users access to information about the vehicle, including its speed, fuel level, engine status, and door lock condition. The telematics module, navigation app, and IVI system are among the system elements with which the Vehicle HAL service communicates.
The hal_vehicle_t domain is where the Vehicle HAL daemon operates.
vehicle_data_t is the label for vehicle data files.
The ivi_system_t domain is where the IVI system operates.
The telematics_t domain is where the Telematics service functions.
By defining these domains, unauthorized applications are prevented from accessing vital vehicle parameters and controlled access between various system components is ensured.
Tools and Resources
SELinux Notebook: An open-source resource that provides comprehensive insights into SELinux concepts and implementations. GitHub - SELinuxProject/selinux-notebook
NSA's SELinux Implementation Report: An in-depth report detailing the implementation of SELinux as a Linux Security Module. Implementing SELinux as a Linux Security Module
Conclusion
With SELinux included in AOSP, developers can implement strict access controls, isolate processes, and keep sensitive information safe.
Whether you're building embedded Android systems, HAL layers, or automotive and IoT device middleware, SELinux offers a secure framework to ensure system integrity.
For any solution related to SELinux implementation, HAL hardening, or embedded Android security, connect with Silicon Signals at www.siliconsignals.io or email us at [email protected]. 👉 Do follow us on LinkedIn to stay updated on embedded tech insights and innovations.
#linux kernel#androidbsp#linuxdebugging#android#aosp#embeddedtechnology#embeddedsoftware#embeddedsystems#iot development services#selinux#linuxsecurity#aospsecurity
0 notes
Text
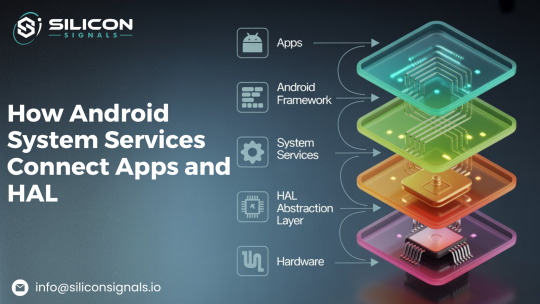
How Android System Services Connect Apps and HAL: A Deep Dive
Android is more than just a mobile operating system—it's a powerful middleware that seamlessly connects apps to the underlying hardware through a layered architecture of frameworks, services, and abstraction layers. The Android System Services, which control essential features like window handling, power management, telephony, and more, are at the core of this framework. By serving as a bridge, these services guarantee seamless communication between the hardware abstraction layer (HAL), the framework, and user applications.
The internal operations of Android System Services are examined in this blog, along with how they interact with HAL and apps.
Understanding Android System Services
Essential parts of AOSP, Android System Services oversee fundamental features like power, connectivity, phone, and security. Through Binder IPC, these services enable smooth communication between applications, the framework, and hardware while operating inside SystemServer. Because each service is registered in ServiceManager, it is available throughout the system, including ActivityManagerService, PowerManagerService, and TelephonyService. By serving as go-betweens, system services make sure that applications communicate with hardware through the Hardware Abstraction Layer (HAL) without requiring direct access.
Comprehending these services aids developers in extending AOSP functionalities, improving performance, and troubleshooting issues while preserving security and modularity within the Android ecosystem.

Key Components of Android System Services
SystemServer: The process in charge of launching and overseeing essential system functions.
ServiceManager: A central registry that maintains a record of every system service that is available.
Binder IPC: Applications, framework elements, and system services can interact thanks to the communication mechanism known as Binder IPC.
HAL (Hardware Abstraction Layer): System services can communicate with hardware through the Hardware Abstraction Layer (HAL), which offers a common interface for hardware-specific implementations.
System Service Types
System services can be divided into groups according to how they work:
Core Services: ActivityManagerService, WindowManagerService, and PackageManagerService
Hardware Services: SensorService, AudioService, and PowerManagerService
Connectivity Services: Bluetooth, WiFi, and Telephony Services
Security Services: SELinuxManagerService and KeystoreService
Each system service registers with ServiceManager for worldwide accessibility and operates as a distinct thread or process inside SystemServer.
How System Services Interact with Apps and HAL
To understand system service interactions, let’s break it down into three communication flows:
1. Applications to System Services (Interaction at the Framework Layer)
Through the Android Framework APIs, an application can interact with the appropriate system service to carry out system-level tasks (like adjusting brightness or connecting to WiFi).
For instance, determining the battery level:
The BatteryManager API's getBatteryPercentage() method is invoked by the application.
BatteryManagerService receives the request and retrieves the most recent battery status.
The data is returned to the application by BatteryManagerService.
Important Takeaway: The application never communicates with the kernel or HAL directly. It always passes via the system services and framework APIs.
2. HAL (Hardware Interaction) System Services
The HAL is necessary for system services to communicate with hardware. In order to guarantee that system services function independently of particular hardware implementations, HAL acts as an abstraction layer.
For instance, Changing the Screen's Brightness:
App Request: The user adjusts brightness through the user interface.
System Service Interaction: DisplayManagerService receives the request and notifies PowerManagerService.
HAL Communication: Power HAL, which has direct hardware control, is called by PowerManagerService via Binder IPC.
Hardware Execution: By interacting with the display driver, the Power HAL modifies the brightness.
Feedback Loop: The system service updates the user interface after the HAL verifies the brightness change.
Key Takeaway: Android is flexible and adaptable because HAL guarantees that system services can function across various hardware implementations.
3. From System Services to System Services – Inter-Service Exchange
Frequently, several services collaborate to complete a task. Android's system service interactions are smooth because services communicate via Binder IPC.
Example: Intent Processing for Launching a Camera App:
An intent is triggered when the user launches the camera app.
After processing the intent, ActivityManagerService makes a request to CameraService.
Permission Validation: CameraService uses PackageManagerService to verify app permissions.
HAL Interaction: Camera HAL sets up the hardware and communicates with CameraService.
Data Processing: MediaService processes the captured images before FileManagerService ensures storage.
Key Takeaway: To effectively handle a single request, several system services work together.
Practical Example: How a Phone Call Works in AOSP
A call is initiated by the user (app layer interaction) To start a call, the Dialer app asks TelecomManager to do so.
TelephonyService receives the request from TelecomManager.
RIL and TelephonyService Interact at the Hal Layer After processing the request, TelephonyService sends it to the Radio Interface Layer (RIL). As a component of HAL, RIL is in charge of interacting with modern hardware.
RIL Gives the Modem a Command The request is converted by RIL into AT commands that the modem can comprehend. A connection is made between the modem and the network.
The call status has been updated The modem notifies RIL of the call status. TelephonyService notifies the user interface by updating the CallState.
Audio Routing & Call Connection AudioService uses the speaker or earpiece to route audio. Signal quality and LTE/VoLTE switching are managed by NetworkService.
Call Terminations: Procedure for Cleaning TelephonyService notifies RIL to end the connection when the user hangs up. TelephonyService modifies the user interface while RIL tells the modem to end the call.
Important Takeaway: Without direct app-to-hardware communication, the entire process—which includes hardware control, HAL interactions, and multiple system services—operates without a hitch.
Debugging Techniques for AOSP
Debugging AOSP builds requires an understanding of these interactions. The following are some essential debugging techniques:
Using Service Status with Dumpsys To see a list of all active services, run: adb shell dumpsys activity services
Using logcat to check logs For service activity monitoring, use: adb logcat -s ActivityManager
Verifying the Service Registration To see if a particular service is operating, run: adb shell service list
Following HAL Strace calls To monitor system calls from a service to HAL, use: strace -p
Conclusion
The framework, hardware, and apps all work together seamlessly thanks to Android System Services. They oversee essential features like connectivity, power, and security, making sure the system runs smoothly. These services maximize performance while preserving modularity and security by utilizing Binder IPC. From resource management to facilitating seamless app experiences, Android's well-organized design enables it to effectively handle complicated tasks.
Knowing these interactions demonstrates how reliable Android's architecture is across a range of devices. As we learn more about AOSP, these services continue to be essential to preserving Android's adaptability, dependability, and scalability in the rapidly changing technological environment.
#embeddedtechnology#embeddedsoftware#AOSP#HAL#Android Framework#Binder IPC#Android Telephony Stack#Android System Service
0 notes
Text
AOSP Passthrough HAL: Architecture, Use Cases & Performance Guide
With over 3 billion Android devices in circulation and a growing need for optimized hardware-software integration, understanding the different types of Hardware Abstraction Layers (HALs) is crucial for modern developers. In our last blog, we explored the Binderized HAL—now the standard in most Android platforms due to its secure and modular design. But did you know that Passthrough HAL still plays a vital role in performance-critical applications and legacy hardware deployments?
Despite its aging architecture, Passthrough HAL remains relevant in scenarios where low-latency hardware access and minimal overhead are priorities. In this blog, we’ll break down how Passthrough HAL works, when it makes sense to use it, and why understanding both HAL types is essential for building efficient, scalable, and backward-compatible Android systems.
Understanding Passthrough HAL
Without the need for an IPC mechanism, Android framework components can communicate directly with hardware drivers through Passthrough HAL. Passthrough HAL reduces overhead and improves performance by operating in the same process as the calling application, in contrast to Binderized HAL, which runs as a separate process and communicates via Binder.
Key Characteristics
Direct Function Calls: Passthrough HAL reduces latency by enabling direct function calls, in contrast to Binderized HAL, which depends on Binder IPC. Same Process Execution: To avoid delays in inter-process communication, the framework and the HAL implementation operate inside the same process. Use cases that are critical to performance and legacy: utilized in situations where IPC overhead needs to be kept to a minimum or in older Android versions. Less Security Isolation: Due to the absence of a separate process boundary, Passthrough HAL carries higher security risks compared to Binderized HAL. Simpler Debugging: Compared to Binderized HAL implementations, debugging is simpler because IPC is not involved.
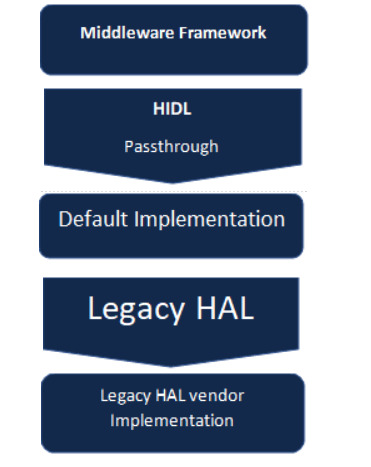
Passthrough HAL Architecture
Framework Layer: The Android system services and APIs that communicate with HAL are included in this. To access hardware functionality, the framework layer makes a call to the HAL interface. Hardware Interface Definition Language (HIDL): The HAL implementation's interface is defined by HIDL. The HIDL interface definition must be followed by the HAL regardless of whether it is binderized or passthrough. Passthrough HAL Implementation: At compile time, the implementation of Passthrough HAL is directly connected to the framework. The hw_get_module() API is used by the framework to dynamically load the HAL module. HAL Library and Hardware Driver: Passthrough System components that require communication with the hardware dynamically load HAL, which is compiled as a shared library (so file). The hardware driver and this library communicate directly.
Communication in Passthrough HAL
Compared to Binderized HAL, communication in Passthrough HAL takes a more straightforward route:
The framework exposes an API that is called by the application or system service.
The relevant HAL interface function is called by the framework.
The function call is executed directly within the HAL library, which interacts with the hardware driver without IPC.
After processing the request, the hardware driver sends the outcome back to the HAL.
The framework gives the result to the application after receiving it from the HAL implementation.
Understanding Passthrough HAL with a use case
Define the HIDL Interface The functions to turn the LED on and off are specified by the HIDL interface (ILedControl.hal). Implement the Passthrough HAL By gaining access to the driver, the HAL implementation (LedControl.cpp) directly controls the LED hardware. Compile as a Shared Library A shared object file called libledcontrol.so contains the implementation's compilation. Load the HAL in the Framework The Android framework uses hw_get_module() to load libledcontrol.so at runtime. Call the HAL from an Application When an application or system service makes a request to the LED control API, the HAL implementation handles it directly.
Advantages of Passthrough HAL
Lower Overhead and Latency :Performance is enhanced because function calls take place in the same process without IPC. Easier Implementation: Unlike Binderized HAL, which necessitates extra IPC mechanisms, Passthrough HAL is simple to implement. Efficient for Performance-Critical Applications: Passthrough HAL is useful for applications that need real-time processing, like audio and some sensor functions. Useful for Legacy Codebases: For hardware interaction, older Android devices that continue to use legacy HAL implementations depend on Passthrough HAL.
Conclusion While Binderized HAL dominates modern Android development for its modularity and security, Passthrough HAL still offers undeniable advantages in low-latency, performance-critical, or legacy applications. For AOSP developers, understanding both models is key to making hardware interactions faster, safer, and more efficient.
At Silicon Signals, we bring deep expertise in AOSP HAL implementations, whether you're building for the future or supporting legacy systems.
Need help with HAL architecture or AOSP customization? Reach out to us at [email protected] to collaborate with our embedded Android experts.
#embeddedtechnology#embeddedsoftware#embeddedsystems#androidbsp#linux kernel#android#linuxdebugging#aosp#iot development services#iotsolutions
1 note
·
View note
Text
What is the Role of Binderized HAL in AOSP?
In today’s rapidly evolving Android ecosystem, the AOSP Hardware Abstraction Layer (HAL) stands as a fundamental pillar, enabling seamless communication between hardware components and the Android framework. With over 3 billion active Android devices globally, ensuring robust hardware-software integration is more critical than ever.
Since Android 8.0 (Oreo), the binderized HAL model has become the industry standard—leveraging Binder IPC to run hardware interfaces in isolated processes. This approach enhances system stability, security, and modular updateability, aligning with Android’s long-term architectural goals.
This topic is especially timely in 2025, as we witness the continued expansion of Android Automotive OS, stricter security standards (e.g., SELinux, sandboxing, and verified boot), and broader adoption of modular system updates via VINTF (Vendor Interface). These developments demand a deeper understanding of binderized HALs for developers working on custom hardware, embedded platforms, and industrial Android deployments.
In this blog, we’ll break down how binderized HALs work, why they matter for scalable and secure Android systems, and what embedded developers need to be prepared for as Android continues its transformation beyond mobile.
Introduction to AOSP HAL and Binderized HAL
A standardized interface between the Android framework and hardware-specific drivers is provided by the Hardware Abstraction Layer in AOSP. Because of this abstraction, the Android system can function on a variety of devices with varying capabilities because it is not dependent on the hardware specifications. Passthrough HAL and binderized HAL are the two main models of HAL implementation in AOSP. Binderized HAL operates in a separate process and connects to the framework through Binder IPC, whereas passthrough HAL integrates directly into the system server process and makes direct hardware function calls. For contemporary Android devices, where security and robustness are crucial, this division is necessary. The binderized approach is a popular choice for many hardware integrations because it isolates hardware layer faults from impacting the entire system.


Understanding AOSP Binderized HAL
One way to implement HAL is through binderized HAL, in which the service operates independently of the Android system server. The Binder IPC mechanism, a key component of Android's inter-process communication, serves as the foundation for this design. The fundamental concept is straightforward but effective: by separating the HAL service into a separate process, any malfunctions or crashes in the hardware-specific implementation won't immediately bring down the system as a whole. Improving the overall security and dependability of the system depends on this process isolation. Among the essential traits are
Isolation of the Process Because each binderized HAL operates independently, any problems within the HAL won't impact the system server or other vital parts.
IPC Communication Binderized HAL enables structured and secure communication between the Android framework and the HAL service by utilizing Binder for IPC.
Modularity The service can be independently updated, tested, or replaced without posing serious risks to other system components because it is isolated.
Safety and Consistency Separate processes reduce the possible attack surface and make it less likely that a malfunctioning HAL will jeopardize the device's overall stability.
AOSP Binderized HAL Architecture
Service Process A stand-alone procedure is included with the binderized HAL. In addition to loading hardware-specific drivers and registering with the system's Binder driver, this process initializes its own environment. Interface Definition A language like HIDL (HAL Interface Definition Language) or, in older situations, AIDL (Android Interface Definition Language) is used to define the communication interface. By serving as a contract between the framework and the HAL, this definition makes sure that both parties follow the same communication protocol. Binder Driver The Binder driver is the central component of Android's IPC mechanism. It controls interprocessor communication, guaranteeing that calls from the framework to the HAL are properly marshalled, carried out, and the outcomes are returned without hiccups.
Binderized HAL Development for a Custom Sensor
Now let's look at a real-world example: putting in place a binderized HAL for a sensor service. Consider creating a sensor service that offers real-time gyroscope and accelerometer readings from a device. The difficulty here is making sure that sensor data is timely and accurate and that the system doesn't crash due to a sensor service failure.
Scenario Overview
In the event that a third party manufactures the sensor hardware and its drivers are only offered as proprietary libraries. We must standardize how we make these sensor capabilities available to the Android framework. Binderized HAL is used to build a service that
operates as a distinct process.
provides clear interfaces for retrieving sensor data.
uses Binder IPC to securely communicate with the Android framework.
Implementation Steps
Establish the Interface: Use HIDL to establish the sensor service interface. Functions like getAccelerometerData() and getGyroscopeData() are described in this interface. The main objective is to make sure that the contract between the framework and the sensor service is clear, even though we may write some basic interface definitions. Create the Service Procedure: As an independent procedure, package the sensor service. Incoming requests from the framework are handled by this service, which also loads the proprietary sensor drivers and establishes communication with the sensor hardware. If this service is run in a separate process, any unexpected errors or bugs in the logic used to handle the sensors will be contained within this process.
Register with the Binder Driver: The sensor service registers with the Binder driver at initialization. Because it enables the Android framework to find and interact with your service dynamically, this registration is essential. You can make sure that the Binder IPC mechanism is appropriately handling all framework calls by utilizing the binderized approach.
Handle IPC Requests: The binderized HAL receives an IPC call from the Android framework or any application that requires sensor data. This call is then routed to the sensor service process by the Binder driver. After processing the request and using its proprietary drivers to communicate with the hardware, the service sends the sensor data back to the framework. The main advantage of this procedure is that the execution context of the sensor service is separate from the rest of the system. Because a crash in the sensor service won't bring down the system server, this isolation not only increases stability but also improves security by limiting the exposure of hardware-specific operations.
Binder IPC and Communication
When working with binderized HAL, it is essential to comprehend Binder IPC. The core of Android's architecture is Binder IPC, which makes it possible for processes to communicate securely and effectively with one another. When a binderized HAL is used, Binder is used to:
Marshaling and Unmarshaling Binder IPC handles the conversion of method call arguments into a transmittable format and then back into usable data on the receiving end. Security By enforcing access controls and permissions, the Binder framework makes sure that only authorized parties can communicate with your HAL service.
Lifecycle Management Additionally, Binder keeps track of process lifecycles. The Binder framework alerts the Android system in the event that a binderized HAL process unexpectedly terminates, enabling the system to take corrective action or restart the service. The Binder IPC mechanism in the sensor service example above makes sure that the error is isolated even in the event that the sensor service has a problem. When a service is unavailable, the framework may be notified and able to gracefully handle the failure by trying a restart or reverting to its default behavior.
Top 4 Reasons Why Binderized HAL is the Future of Android Device Integration
Enhanced Stability Any errors or crashes in the hardware-specific code are contained by isolating the HAL in a separate process. For devices whose dependability and uptime are non-negotiable, this design keeps such faults from spreading to the entire system. Improved Security A distinct process boundary reduces the attack surface. Only authorized components can communicate with the HAL service thanks to the binderized model's ability to enforce stringent access controls and permissions through Binder IPC. Maintainability and Modularity It is possible to replace or update binderized HAL services on your own. System integrators and hardware vendors benefit from this modularity since it allows them to apply patches or updates to the HAL without interfering with the core Android framework.
Conclusion Binderized HAL is key to building secure, modular, and high-performance Android systems. By leveraging Binder IPC and process isolation, it ensures reliable hardware abstraction aligned with modern AOSP standards. Silicon Signals is specialize in AOSP customization and HAL development—empowering OEMs and embedded teams to build robust Android solutions tailored for their hardware.
Building your next-gen Android device? Let’s make it robust with our HAL & BSP expertise
1 note
·
View note
Text
Android HAL Development: AOSP Guide for Custom Hardware
Introduction The Hardware Abstraction Layer (HAL) in the Android Open Source Project (AOSP) plays a pivotal role in bridging hardware and software. For developers building custom hardware or embedded Android devices, mastering HAL architecture is essential for creating efficient, scalable, and secure drivers. This blog offers a comprehensive guide to the HAL system in AOSP, covering its types, development workflow, and future trends.


What is HAL in AOSP?
The HAL provides a standardized interface for hardware-software communication. It allows the Android framework to interact with different hardware components without depending on their specific implementations. This abstraction layer ensures modularity, easier updates, and better security.
Types of HAL Implementations in Android
Binderized HAL
Uses Android's Binder IPC mechanism for inter-process communication.
Runs as a separate service, improving security and process isolation.
Defined using HIDL in older versions; AIDL is preferred in newer Android releases.
Used for components like camera, GPS, and media.
Passthrough HAL
Runs in the same process as the caller, using direct method invocation.
Offers better performance but lacks IPC-level security.
Suitable for legacy or performance-critical implementations.
Also defined using HIDL.
Manifest HAL
Declared in manifest.xml to guarantee compatibility and proper versioning.
Ensures system updates don’t break vendor-specific HALs.
Typically used in combination with binderized HALs.
Key Responsibilities of HAL
Hardware Communication: Acts as the interface to kernel drivers.
Standardization: Uniform APIs across hardware platforms.
Encapsulation: Limits direct access to hardware for enhanced security.
Modularity: Enables hardware changes without modifying the entire Android framework.
HAL Architecture Layers in AOSP
Android Framework Layer
Interacts with applications and system services.
Communicates with HAL via HIDL or AIDL.
HAL Interface Layer
Defines APIs for hardware components.
Specifies data structures and method signatures using HIDL or AIDL.
HAL Implementation Layer
Vendor-specific logic that connects the interface to the actual hardware.
Written in C/C++.
Kernel Driver Layer
Lowest layer, responsible for interacting directly with hardware components.
Implemented as Linux kernel drivers or modules.
How to Develop a HAL in AOSP
Understand Hardware Requirements
Study hardware specs, protocols, and capabilities.
Identify the most suitable HAL type for your needs.
Choose Between HIDL and AIDL
Use HIDL for Android 8–10.
Use AIDL for Android 11 and above for simpler, more efficient implementations.
Define the HAL Interface
Create interface definition files (.hal or .aidl).
Specify methods, data types, and service behaviors.
Implement the HAL
Write native C/C++ code for the vendor-specific implementation.
Ensure safe memory handling and efficient concurrency management.
Integrate with Android Framework
Register the HAL in manifest.xml and init.rc.
Configure service startup and permissions.
Test and Debug the HAL
Use adb for real-time debugging.
Perform unit testing on the HAL interface.
Validate using CTS/VTS to ensure Android compatibility.
Challenges in HAL Development
Device-Specific Customization: Each hardware module might need a unique HAL implementation.
Performance Optimization: HALs must be lightweight and efficient for mobile platforms.
Security Concerns: Misconfigured HALs may expose vulnerabilities.
Version Compatibility: Must work across Android releases to avoid future maintenance headaches.
Future of HAL in Android
Migration to AIDL: Easier implementation and maintenance.
Project Treble Compatibility: Enhanced modularity and faster OS updates.
Virtualization Support: Isolated testing and faster deployment.
Security Enhancements: Reduced attack surface via tighter framework-vendor separation.
Conclusion
The HAL in AOSP is foundational for building robust, secure, and modular Android-based systems. Whether you're developing a custom Android device or working on a specific hardware module, understanding and correctly implementing HAL is key to success. By adhering to AOSP best practices, choosing the right interface language (AIDL or HIDL), and testing rigorously, developers can ensure seamless hardware-software integration.
Need Help with Android HAL Development?
At Silicon Signals, we specialize in Android BSP customization, HAL development, and AOSP integration for embedded systems and custom hardware. Whether you need help with HIDL-to-AIDL migration, creating new HALs, or integrating them into Android frameworks, our expert team can help you accelerate development and ensure compatibility.
Contact us today to discuss your project and see how we can help you bring your Android-based product to life!
1 note
·
View note
Text
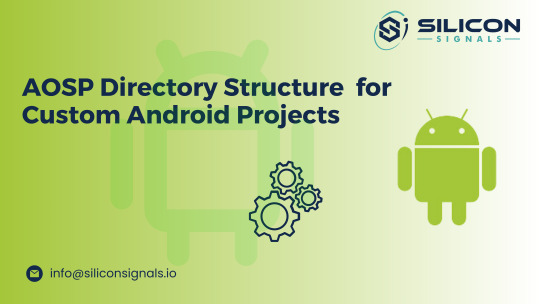
AOSP Directory Structure for Custom Android Projects
Introduction The Android Open Source Project (AOSP) is meticulously organized to separate each layer and module of the operating system. From hardware drivers to application frameworks, Its folder structure is built for scalability, modularity, and maintainability. For developers looking to build, customize, or optimize Android, understanding this structure is essential
This blog explores the core directories within AOSP and what role each plays in the Android ecosystem.

📂 Key Folders in AOSP Root Directory
These directories represent the core components that make Android run seamlessly across various devices.
frameworks/
hardware/
kernel/
system/
packages/
build/
device/
vendor/
Each folder contributes uniquely to the architecture of Android. Let’s explore their purpose.
🧠 frameworks/ – The Brain of Android
This directory holds the Android framework — the primary layer that applications interact with.
Noteworthy sections:
base/: Houses core services like Activity Manager and Content Providers. These are fundamental for how apps run and interact.
opt/: Contains optional frameworks that may be added for features like Bluetooth or advanced networking.
native/: Includes native services, written in C/C++, such as SurfaceFlinger, which handles rendering and display.
av/: Manages media playback, audio, and video functionalities.
Use Case: If you’re modifying Android UI, application lifecycles, or system services like media or notifications, this is your go-to folder.
🧩 hardware/ – Connecting Android to the Physical World
This directory handles the interaction between Android and the device's physical hardware.
Highlights:
interfaces/: Defines HAL (Hardware Abstraction Layer) interfaces for hardware components like cameras and audio.
libhardware/: Offers the actual implementations of those interfaces.
vendor-specific directories: You may find folders like ti/ or qcom/, which are dedicated to particular hardware vendors.
Use Case: Ideal for those working on integrating custom hardware or new hardware features into Android.
⚙️ kernel/ – Powering the Core
This folder contains configuration and build files necessary to align the Linux kernel with Android requirements. It’s where kernel fragments and configuration metadata are stored, ensuring Android-specific features run correctly.
Use Case: You’ll work here when integrating low-level Linux kernel functionalities or adapting configurations for new hardware.
🧱 system/ – Foundation of Core Services
The system/ folder contains libraries and utilities that form the backbone of Android’s runtime environment.
Key subfolders:
core/: Contains essential runtime components and libraries like libc and the Android init system.
bt/: Implements the Bluetooth stack.
netd/: Manages network-related functionalities like IP configuration and routing.
Use Case: Best suited for enhancing low-level system operations, Bluetooth services, or network connectivity.
📦 packages/ – Apps and Services
This folder holds the source code for system apps and background services that ship with Android.
Major sections:
apps/: Includes stock apps like Settings, Contacts, and Launcher.
services/: Hosts background services for telephony, accounts, etc.
input/: Manages input devices like touchscreens and keyboards.
Use Case: You’ll navigate here when customizing default apps or creating new system apps for your Android ROM.
🏗️ build/ – The Construction Blueprint
Everything related to building AOSP resides in this directory. It contains configuration files, environment setups, and Android’s build systems like Soong.
Use Case: Crucial for developers adjusting how Android is compiled, managing dependencies, or integrating custom modules.
📱 device/ – Customizing for Specific Devices
The device/ directory includes configuration files and data specific to particular Android devices.
Details: Each supported device has its own folder here, containing its hardware configurations, board files, and kernel settings.
Use Case: When porting Android to new hardware or making device-specific tweaks, this is your primary workspace.
🏢 vendor/ – Proprietary & Third-Party Code
This directory stores proprietary binaries, drivers, HALs, and customizations from hardware vendors.
Structure: Each vendor gets its own subfolder containing their specialized code needed for Android to run on their hardware.
Use Case: You’ll work here when integrating closed-source components or adapting Android to support proprietary features.
✅ Conclusion
Navigating the AOSP folder structure is a fundamental skill for Android platform development. From tweaking system libraries in system/ to adding new apps in packages/ or managing device-specific builds in device/, each folder serves a targeted purpose.
By mastering these directories, developers gain greater control over Android customization — enabling innovation across smartphones, tablets, wearables, and IoT devices.
🚀 Ready to Customize AOSP for Your Device? At Silicon Signals, we specialize in tailoring Android OS for a variety of platforms. Whether you need BSP development, HAL integration, or full-stack AOSP customization, our team can accelerate your product journey.
👉 Let Silicon Signals help bring your Android-based innovation to life.
#embeddedtechnology#embeddedsoftware#embeddedsystems#linux kernel#androidbsp#linuxdebugging#android#aosp#iot development services#iotsolutions#bspdevelopment
1 note
·
View note
Text
AOSP Architecture Explained: A Practical Guide for Android Developers
In this blog, we delve into the architecture of the Android Open Source Project (AOSP), breaking down each layer of the software stack. From the Linux Kernel to Applications, we explore the functionalities and responsibilities of each component. Whether you're customizing ROMs or developing hardware-specific solutions, understanding the AOSP architecture is crucial.
The Android Open Source Project (AOSP) serves as the foundation for the Android operating system, offering a comprehensive software stack that enables developers to create a consistent user experience across various devices. Understanding the AOSP architecture is essential for developers aiming to build custom Android builds or integrate deeply with system components.
Overview of the AOSP Software Stack
The AOSP software stack is organized into several layers, each responsible for specific functionalities:
Linux Kernel: At the base, the Linux Kernel manages core system services such as process management, memory management, and hardware drivers. It acts as an abstraction layer between the hardware and the rest of the software stack.
Hardware Abstraction Layer (HAL): HAL provides standard interfaces that expose device hardware capabilities to the higher-level Java API framework. This allows Android to be agnostic about lower-level driver implementations.
System Services and Daemons: These are background processes that provide core system functionalities like power management, telephony, and media playback. They facilitate communication between the HAL and the Android Runtime.
Android Runtime (ART): ART is the managed runtime used by applications and some system services. It includes a set of core libraries and handles tasks like memory management, garbage collection, and bytecode execution.
System APIs: These APIs provide the necessary interfaces for applications to interact with the underlying hardware and system services, enabling functionalities like location services, telephony, and sensor management.
Android Framework: The framework offers a rich set of APIs that developers use to build applications. It includes components like Activity Manager, Window Manager, and Content Providers, which manage the user interface and application resources.
Applications: At the top layer, applications include both native apps provided by the device manufacturer and third-party apps installed by users. These apps interact with the Android Framework to perform their functions.
Importance for Developers
Understanding the AOSP architecture is vital for several reasons:
Customization: For developers building custom ROMs or tailoring Android for specific hardware, knowledge of each layer allows for effective customization and optimization.
Performance Optimization: Identifying and addressing performance bottlenecks requires a deep understanding of how different layers interact and where potential issues may arise.
Scalability: Proper utilization of the Android Framework and System APIs ensures that applications are scalable and maintain compatibility across various devices and Android versions.
Security: Awareness of the interactions between privileged and system-level components is crucial for developing secure applications and protecting user data.
Conclusion
The AOSP software stack is a meticulously designed architecture that harmonizes hardware and software components to deliver a seamless user experience. For developers, mastering this architecture is key to unlocking the full potential of Android, whether it's for application development, system customization, or hardware integration.
If you're looking to leverage AOSP for your projects, consider partnering with industry leaders like Silicon Signals. Recognized among the top 10 BSP and AOSP service companies, Silicon Signals offers expert services in Android BSP development, custom Android solutions, and more. Their team excels in delivering tailored solutions that meet the evolving demands of the industry. Silicon Signals
Ready to bring your Android project to life? Reach out to Silicon Signals at [email protected] for a free consultation.
#embeddedtechnology#embeddedsoftware#embeddedsystems#linux kernel#androidbsp#linuxdebugging#android#aosp#androidopensource
1 note
·
View note
Text
Getting Started with AOSP: Build Custom Android Solutions
Want to see what it takes to build your own Android-based system? Regardless of whether you want to use custom hardware or embedded software, AOSP delivers a complete and adaptable resource. We’ll go over AOSP, its benefits, drawbacks and why it is slowly being adopted by smartphones, IoT devices and automotive platforms.

What is AOSP (Android Open Source Project)?
The Android Open Source Project is a repository of source code and documentation used to build the core Android operating system. It's open-source, meaning developers, OEMs, and businesses can freely access, modify, and build upon the platform to create custom Android distributions.
While AOSP contains the base OS, it does not include Google’s proprietary apps and services (like Gmail, Google Play, and Maps)—those are part of Google Mobile Services (GMS), which requires a license. AOSP represents the raw and adaptable side of Android, giving developers control over features, UI, and performance.
Why Developers and OEMs Choose AOSP
High Customizability
One of the biggest benefits of AOSP is its deep customization capabilities. Developers can tweak system behavior, design new UIs, and tailor Android for specific hardware or use cases, such as kiosks, tablets, or IoT devices.
No Licensing Costs
Since AOSP is free, it’s ideal for companies aiming to build custom Android-based products without relying on Google’s ecosystem. This is especially helpful for industries like healthcare, education, or defense, where Google services might not be required or allowed.
Hardware Flexibility
AOSP allows adaptation across a wide range of hardware—from smartphones and tablets to embedded systems, automotive solutions, wearables, and industrial IoT devices. This makes it a top choice for OEMs and BSP providers.
Strong Developer Community
With thousands of contributors, documentation, forums, and GitHub repos, AOSP offers rich community support. This collective innovation drives constant improvement and makes troubleshooting and development smoother.
Key Challenges of AOSP
Despite its strengths, AOSP comes with its own set of challenges:
No Native Google Apps
Devices using AOSP without GMS won’t have access to the Google Play Store or essential apps like YouTube, Gmail, and Google Maps. Licensing GMS is necessary for these features, unlike in closed ecosystems like iOS, where services are pre-integrated.
Hardware Compatibility
When building custom Android BSPs, developers often need to work on hardware abstraction layers (HALs), drivers, and kernels to ensure full compatibility with chipsets and peripherals—something that requires deep embedded expertise.
OS Fragmentation
Since anyone can fork AOSP, there’s significant fragmentation across Android devices, which can complicate update cycles and security patching. Closed-source systems like iOS maintain consistency but sacrifice flexibility.
Comparing AOSP to Other Platforms
iOS
Pros: Controlled environment, seamless hardware-software integration.
Cons: Limited developer freedom; closed source prevents OS-level customizations.
Other Linux-Based OSs (e.g., Tizen, KaiOS)
Pros: Designed for specific devices like feature phones or smart TVs.
Cons: Limited community support, fewer apps, and low flexibility compared to AOSP.
Market Forecast: Why AOSP is the Future
Dominance in Emerging Markets
Android, powered by AOSP, leads in affordability and reach. Custom builds allow for cost-effective smartphones tailored for budget-conscious regions like Southeast Asia, Africa, and Latin America.
Rise of Android Automotive & Embedded Systems
With AOSP at its core, Android Automotive is gaining traction in vehicles. Similarly, embedded devices, kiosks, and industrial IoT systems benefit from lightweight, modular AOSP deployments.
Tailored Enterprise & Industry Solutions
Companies are creating Android-based devices for education, healthcare, logistics, and retail. These devices are powered by custom Android BSPs built on AOSP, offering greater control, security, and reliability.
IoT & Wearables Growth
From smartwatches to home hubs, AOSP’s flexibility makes it the go-to OS for IoT. Although Google shifted focus from Android Things, developers still rely on AOSP for headless devices and custom builds in the IoT space.
Getting Started with AOSP
To explore AOSP, start by visiting Google’s official repositories and AOSP documentation. Participate in forums like XDA Developers, Reddit, and GitHub discussions to find solutions and engage with the broader developer ecosystem.
Looking for an experienced team to help you build, port, or customize AOSP for your embedded product?
At Silicon Signals, we specialize in Android BSP development, AOSP customization, driver integration, and OS porting for a wide range of hardware platforms. From Android 14 BSPs to fully tailored Android stacks for industrial and commercial devices—we’ve got you covered.
Ready to launch your custom Android solution? Contact Our Engineers for a free consultation
Connect us on [email protected]
#embeddedtechnology#embeddedsoftware#embeddedsystems#linux kernel#androidbsp#linuxdebugging#iotsolutions#android#aosp#iot development services#Android BSP provider#Android BSP development#AOSP customization services#Embedded Android solutions#Android OS for IoT
1 note
·
View note
Text
Top GUI Frameworks and Display Protocols for Embedded Product Development in 2025
In today’s embedded systems, GUIs aren’t just screens — they’re the core of user interaction. Whether you're developing a wearable, an industrial controller, or a smart appliance, creating a seamless graphical user interface (GUI) is critical. This blog explores how to select the right type of LCD touch display, communication protocols, and GUI design tools that align with your product needs.

As a leading board bring-up company, Silicon Signals provides end-to-end board bringup services, with specialization in GUI porting and development using platforms like Qt, LVGL, EmWin, and GTK. Let’s dive into the key components to consider.

Types of LCD Touch Displays
Capacitive Touch Screens
Projected capacitive displays are widely used in consumer electronics like smartphones and tablets. They offer a smooth, responsive multi-touch experience, supporting gestures like pinch-to-zoom and swipe. These displays detect the conductivity of your fingers and perform exceptionally well in dry, clean environments.
Key Benefits:
Multi-touch support
High durability and sleek design
Fast response time
Limitations:
Not ideal for environments where gloves or non-conductive materials are used
Resistive Touch Screens
Resistive displays consist of two layers (plastic and glass) separated by a gap. When pressure is applied, the layers touch, registering the input.
Ideal for: Industrial and rugged environments where gloves or styluses are often used.
Advantages:
Can be operated with any object
Lower cost
Reliable in harsh environments
Drawback:
Requires more pressure, offers less responsiveness than capacitive touch
Display Communication Protocols
Choosing the right communication interface between your display and the processor is crucial for performance and system optimization.
SPI (Serial Peripheral Interface)
SPI is a widely-used protocol in embedded systems, especially when working with lower-resolution screens. It’s simple to implement and works well with basic touch GUIs.
Best suited for: Small displays (~480x360 resolution)
Benefits: Low resource requirements, easy integration on MCUs
Limitation: Not ideal for high-speed or high-res displays
DSI (Digital Serial Interface)
Developed by the MIPI Alliance, DSI is ideal for high-resolution and high-refresh-rate displays with fewer I/O pins required.
Best suited for: Mid-to-high-end embedded systems
Benefits: Power-efficient, scalable, and compatible with modern display controllers
Limitation: Licensing fees due to proprietary technology
HDMI
Used primarily in embedded Linux or high-performance products, HDMI offers the highest quality in terms of audio-visual integration.
Best suited for: Advanced GUIs in medical, aerospace, or industrial systems
Benefits: Combines audio and video, HDCP for secure content, supports large resolutions
Limitation: Requires a more powerful processor and consumes more power
GUI Development Tools & Libraries
Once you've selected your hardware, it’s time to choose a software tool that helps you design and port the GUI effectively. As a board bringup service provider, we at Silicon Signals have deep expertise in GUI porting using Qt, LVGL, EmWin, GTK, and Crank Storyboard.
1. Qt Framework
Qt is a professional-grade development platform used extensively in automotive, medical, and industrial applications.
Language: C++ and QML
Features: Cross-platform, hardware acceleration, built-in protocol support (HTTP, FTP, etc.)
Ideal for: Performance-sensitive, scalable GUIs
Note: Commercial license required for product deployment
We offer advanced Qt porting services for embedded Linux, Yocto-based boards, and RTOS platforms.
2. Crank Storyboard
Storyboard simplifies GUI development with drag-and-drop features, Photoshop imports, and support for animations and 3D elements.
Benefits: Designer-friendly, OS and platform agnostic, embedded engine optimization
Best for: Teams with both design and embedded development backgrounds
Limitation: Requires a license for commercial products
3. LVGL (Light and Versatile Graphics Library)
LVGL is ideal for resource-constrained microcontrollers, with footprint requirements as low as 64kB flash and 8kB RAM.
Languages: C and MicroPython
Platforms: STM32, ESP32, Raspberry Pi, PIC, etc.
GUI Builder: Beta version available
Strengths: Free, open-source, portable
Limitations: Limited for complex UIs or animations
Our team excels in integrating LVGL on custom MCUs and porting it for FreeRTOS and bare-metal systems.
4. EmWin by SEGGER
EmWin is a highly efficient, commercial-grade GUI library optimized for MCUs.
Developed by: SEGGER Microcontroller
Best for: Medical and industrial applications where reliability is non-negotiable
Strength: Real-time performance, minimal resource usage, certified for safety-critical applications
Limitation: Licensing and complexity
We provide EmWin integration services for NXP, STM32, and Renesas-based boards.
5. GTK (GIMP Toolkit)
GTK is a popular GUI library often used in Linux systems and is open-source.
Language: C (bindings available for Python, C++, etc.)
Best for: Embedded Linux systems where scalability and flexibility matter
Drawback: Not suitable for MCUs with limited RAM and Flash
Our engineers can port GTK-based UIs on embedded Linux devices, optimizing for performance and footprint.

Why Silicon Signals?
As a leading board bring-up company, Silicon Signals provides a one-stop solution for embedded product development. From hardware validation and board bringup services to GUI design and porting on popular frameworks like Qt, LVGL, TouchGFX, GTK, and EmWin — we ensure your product is market-ready with a seamless user experience.
Whether you need to develop a medical device UI, a rugged industrial HMI, or a sleek consumer interface, our engineers can help you choose the right display, protocol, and GUI framework.
Ready to design a powerful GUI for your embedded product? Reach out to our engineering team at [email protected] for a free consultation.
#embeddedtechnology#embeddedsoftware#embeddedsystems#linux kernel#androidbsp#linuxdebugging#android#aosp#iot development services#iotsolutions#embeddedgui#guidevelopment#guitools
1 note
·
View note
Text
How to Build STQC-Ready Camera Devices Without Delays
Building embedded camera systems for government or identity-driven applications like Smart Surveillance? Then you already know: STQC certification isn't optional — it's critical.
Yet, most teams treat it as a final checkbox — and end up in a cycle of rejections, delays, and costly redesigns. Without STQC built into your product from Day 1, your launch timeline can collapse, your budget can spiral, and your hardware may never reach market.

For most OEMs, STQC becomes a roadblock — unless compliance is designed in from day one

⚠️ The Hidden Cost of Ignoring STQC Early
Many OEMs and product startups treat STQC like an afterthought — a final checkbox before launch — instead of a core engineering requirement. This misstep frequently leads to:
❌ Sensor misalignment
❌ Delays due to non-conforming illumination or liveness detection requirements
❌ Broken firmware pipelines with improper image compression
❌ Integration failures with UIDAI-certified SDKs and APIs
Each of these issues introduces costly reworks, failed certification attempts, and months of delay, pushing your launch further away.
Silicon Signals: Your Partner in STQC-Focused Product Design
At Silicon Signals, we bring compliance-first thinking to embedded camera design. Our approach is to build STQC-compliant camera products from the ground up — so you’re always ready for certification, not scrambling for it.
Here’s how we help accelerate your STQC journey:
🔹 Hardware Selection with Certification in Mind
We assist with choosing the right camera sensor and lens combination that meets STQC clarity, brightness, and resolution benchmarks.
🔹 Image Processing Pipeline Optimization
Our teams engineer STQC-compliant image paths, including white balance, exposure control, and JPEG compression formats suitable for Aadhaar systems.
🔹 Liveness Detection Integration
We support both on-device (edge) and cloud-assisted liveness detection, ensuring your product passes anti-spoofing tests.
🔹 Secure Embedded Firmware Design
From kernel-level tamper protection to data encryption, we ensure your system meets MeitY’s security guidelines for UIDAI-linked hardware.
🔹 Aadhaar API & SDK Integration
We help interface your camera hardware with UIDAI APIs, enabling smooth communication for real-time biometric matching.
🤝 Certification Guidance Without the Guesswork
We collaborate with STQC test labs and certification partners, helping you:
Avoid misinterpretation of specs
Prepare correct documentation
Handle pre-certification and regression testing
Streamline submission and approval cycles
What You Can Expect Working with Us
40–60% Faster STQC Certification
️End-to-End Support — from PoC to Lab Submission
Compliance-Ready Firmware & Image Pipelines
Reduced Rework = Lower Development Costs
Let’s Simplify STQC Together
Whether you’re just starting or already have a prototype, Silicon Signals can help you build a STQC-ready embedded camera product with minimal friction. Our team of experts knows how to de-risk the certification journey — and we’re ready to do it for you.
📅 Ready to build a STQC-ready camera — the smart way? Let’s fast-track your path to STQC-approved camera hardware.
#embeddedtechnology#embeddedsoftware#embeddedsystems#linux kernel#androidbsp#linuxdebugging#android#aosp#iot development services#iotsolutions#stqc#stqc camera#stqc certification#embedded camera#stqc certified camera
1 note
·
View note
Text
Why STQC Certification Is Crucial for Embedded Camera Devices in India?
As India accelerates toward a digital-first future, particularly in areas like biometric authentication, identity verification, and government surveillance, the importance of STQC certification has become undeniable. For any embedded product company working on camera-enabled devices — be it for Aadhaar, eKYC, or smart city surveillance — STQC compliance isn't just a checkbox. It's a gateway to product acceptance, government contracts, and public trust.

What Is STQC — And Why Is It Crucial for Embedded Camera Systems?
STQC (Standardization Testing and Quality Certification) is a government initiative under the Ministry of Electronics and IT (MeitY), designed to validate the quality, reliability, and security of electronic devices in India.
For embedded camera devices, especially those used in surveillance, aadhaar authentication, or eKYC solutions, STQC defines clear standards on:
📸 Image quality, resolution, and compression
🧠 Liveness detection and anti-spoofing capabilities
🔐 Tamper-proof architecture to protect user data
📶 Seamless interoperability with UIDAI systems
Failure to meet these specifications can mean product rejection, project delays, or loss of market opportunities, especially in government-led initiatives.

🛠️ How Silicon Signals Helps You Build STQC-Ready Camera Systems
At Silicon Signals, we specialize in embedded camera design services tailored for STQC and UIDAI compliance. We don’t just build cameras — we co-create solutions that are certification-ready from day one.
Here’s how we help you fast-track development:
✅ STQC-Compliant Hardware Design We design and prototype biometric cameras, Surveillance cameras and more. All aligned UIDAI and STQC hardware benchmarks, including sensor quality, lens calibration, and secure enclosures.
✅ Software & ML Integration Our team brings deep expertise in on-device AI, liveness detection, and anti-spoofing algorithms — all optimized for edge performance.
✅ Certification Support From documentation to field-testing and certification audits, we guide you through the entire STQC approval process.
✅ Government-Ready Solutions Whether it’s a camera module , CCTV camera’s an eKYC kiosk, or a biometric access system, we help ensure your solution ticks every box for government deployment.
🎯 Who Needs This?
Our services are ideal for companies building:
Biometric scanners for multi-purpose authentication
eKYC terminals for fintech or telecom
Surveillance systems for smart cities or government use
Access control systems for public infrastructure
If your business goal includes government projects in India or UIDAI-certified hardware, then STQC readiness is non-negotiable — and Silicon Signals is your trusted partner.
📞 Ready to Go from Prototype to STQC Certified?
Let’s build smarter, secure, and STQC-certified embedded camera systems — together Partner with Silicon Signals to create STQC-certified, UIDAI-ready embedded camera solutions that meet the most demanding compliance needs in India.
#embeddedtechnology#embeddedsoftware#embeddedsystems#linux kernel#androidbsp#linuxdebugging#android#aosp#iot development services#iotsolutions#STQC certification#Embedded camera design
1 note
·
View note
Text
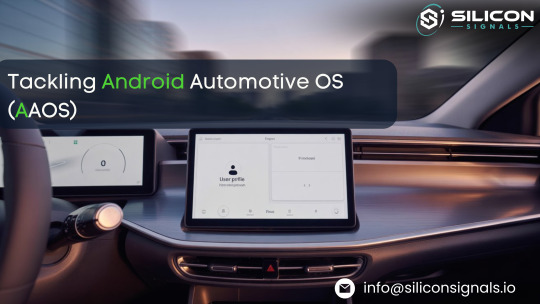
Tackling Android Automotive OS (AAOS): A Deep-Dive into Real-World App Integration by Silicon Signals
Recently, our Android team at Silicon Signals took on the challenge of integrating one of our legacy Android applications with Android Automotive OS (AAOS). While Google offers an integration guide for media apps, we faced a unique set of architectural and modular challenges that demanded custom solutions beyond the standard documentation.
Legacy Code Meets Modern Requirements
Platform Core (AAP): A modular structure with minimal interdependency, housing player integration, networking, and persistent storage logic.
App Core (AAL): A tightly coupled structure responsible for the app’s front-end, business logic, and APK generation across multiple app stores.
Most new features lived in AAL, which was deeply dependent on AAP. As we evaluated the AAOS requirements, we realized a naive approach—building AAOS as a feature module on top of the existing base—would bloat the app size, introduce unnecessary dependencies, and increase the risk of breaking functionality due to updates meant for mobile or tablet versions.
Engineering the Right Solution
Rather than layering AAOS on top of our legacy architecture, we rethought the structure:
Extracted our MediaBrowserServiceCompat implementation into a new standalone module called mediabrowser.
mediabrowser was designed to depend only on what AAOS needed—like playback, library access, and media session handling.
Created a new top-level module, automotiveos, which handles AAOS-specific UI, settings, and authentication.
Reconfigured Dagger dependency injection to support this new architecture.
This refactor allowed us to decouple AAOS from the legacy mobile architecture, reduce app size, and future-proof the codebase.
The Real Work: Migration and Refactoring
Moving MediaBrowserServiceCompat out of the core base module revealed deep legacy dependencies. The refactor touched over 140 files. But the modular outcome was worth it.
Then came the Dagger challenge. Our new automotiveos module lacked over 150 bindings previously handled by other modules. We tackled this by:
Creating custom or stub implementations where needed.
Moving reusable logic to common modules.
Abstracting app-specific logic into the appropriate module.
We categorized dependencies smartly and rebuilt the graph with minimal disruption.
Lessons Learned
Creating an abstract MediaBrowserServiceCompat layer helped isolate AAOS and mobile behaviors.
Testing across multiple AAOS devices is essential due to platform inconsistencies.
Clear internal documentation and nomenclature (AAOS ≠ Android Auto) avoided confusion.
🚗 Building Android Automotive Solutions with Silicon Signals
At Silicon Signals, we don’t just follow the guide — we re-architect for performance, maintainability, and scale. Whether you’re modernizing a legacy Android app or launching your first AAOS product, we bring deep expertise in modular architecture, embedded systems, and real-time media integration.
📩 Ready to bring your AAOS product to life? Let's talk! 📧 [email protected] 🌐 www.siliconsignals.io
#embeddedtechnology#embeddedsoftware#embeddedsystems#linux kernel#androidbsp#linuxdebugging#android#aosp#iot development services#iotsolutions#aaos#androidauto
1 note
·
View note
Text
Getting Started with Audio Design in Embedded Systems
Adding audio capabilities to embedded systems can make a big difference in the user experience, whether you are creating home automation, wearable, or industrial devices. Even just simple sound prompts or alerts can improve user interaction considerably.

This article takes you through the ways embedded devices process, store, and play back audio—without getting too involved in the subjective realm of "sound quality."
Audio Begins as Analog
In the real world, sound is analog. That is to say, any audio we wish to record and play back must first be converted from analog to digital—because embedded systems process digital data.
This conversion to digital involves two important parameters: sampling rate and bit depth.
Sampling rate is the number of times the sound signal is recorded per second. The Nyquist-Shannon Sampling Theorem states that your sampling rate needs to be a minimum of twice the highest frequency sound you'll be recording.
Bit depth is the degree of precision with which each of those sound samples is recorded—more bits = more detail, but also more memory consumption.
A real-world example: Telephone audio uses just 400–3400 Hz bandwidth, far lower than the full range of human hearing (20 Hz to 20 kHz), yet it’s good enough to understand speech and even recognize a person’s voice.
Choosing the Right Bit Depth
Bit depth specifies how much volume each audio sample can represent. For instance, an 8-bit sample can have 256 levels, and a 16-bit sample can have 65,536.
In embedded systems, ADCs (Analog-to-Digital Converters) accomplish this task. But the usable resolution in practice is usually a bit less than what's on the datasheet because of such imperfections as noise and signal distortion. A useful rule of thumb: deduct 2 bits from the advertised bit depth to arrive at a realistic expectation (e.g., use a 12-bit ADC as if it were really 10-bit).
Storing and Compressing Audio
Most embedded systems keep audio in PCM (Pulse Code Modulation) or WAV format. Both are straightforward and convenient but tend to use a lot of memory space. For example, CD-quality audio at 44.1 kHz with 16 bits of depth can occupy more than 700 KB for a single second of mono sound.
To conserve space, programmers usually:
Compact audio using MP3 (although this needs more processing power).
Pre-process the sound to restrict bandwidth and dynamic range through software such as Audacity.
Lower the sampling rate and bit depth to accommodate the hardware's capabilities better.
In the event of a limited processing power, external decoders can decode MP3 files in order to remove the workload from the primary processor.
Playing the Audio
Once the audio is ready, it has to be converted back to analog for playback. This is where DACs (Digital-to-Analog Converters) come in. PCM data goes directly to a DAC, while compressed formats need to be decoded first.
You’ll also need a low-pass filter after the DAC to remove high-frequency noise caused by sampling. If your system handles stereo output, you’ll need two DACs and filters.
Alternatively, many microcontrollers use I2S (Inter-IC Sound)—a digital audio protocol designed for efficient transmission of stereo sound using just three wires. I2S is flexible with sampling rates and bit depths, making it ideal for embedded applications.
Amplifying the Sound
Whether using DAC or I2S, the output signal is too weak to drive a speaker directly. That’s where audio amplifiers come in.
There are three main types:
Class-A: Great quality, but inefficient—rarely used in embedded systems.
Class-AB: More efficient, commonly used in chip form.
Class-D: Highly efficient, compact, and perfect for embedded devices.
Class-D amplifiers work by converting the signal to PWM (Pulse Width Modulation), then driving a transistor (like a MOSFET) on and off rapidly. This approach saves energy and reduces heat.
Just like with DACs, a low-pass filter is needed to clean up the output before it reaches the speaker.
Speaker Output
The sound is produced by converting the electrical signal into motion, and that motion is used to drive a coil that's suspended from a diaphragm. Depending on your application, you might require different kinds of speakers, such as woofers for low frequencies or tweeters for high frequencies. High-fidelity systems tend to use both for improved sound quality.
In Summary
Audio design in embedded systems involves a series of careful trade-offs—balancing storage, processing power, and playback quality. Whether you’re building simple voice alerts or adding rich audio playback, understanding how digital audio works from input to output is key to making smart design choices.
Ready to Add Audio to Your Embedded Product?
At Silicon Signals, we specialize in integrating high-performance audio solutions into embedded systems—whether it’s playback via I2S, class-D amplification, or optimizing audio storage for your platform.
🔊 Let’s build the future of sound, together. 📩 Reach out today at www.siliconsignals.io or connect with us directly to explore our custom audio design services.
#embeddedtechnology#embeddedsoftware#embeddedsystems#linux kernel#androidbsp#linuxdebugging#android#aosp#iot development services#iotsolutions
1 note
·
View note
Text
How Camera Technology is Shaping the Smart Service Robots of Tomorrow
Service robots are no longer just a futuristic concept; they are already transforming industries such as hospitality, healthcare, construction, retail, and even our homes. As these robots evolve to carry out more complex and human-like tasks, embedded camera technology is proving to be one of the most critical enablers in their success.
At Silicon Signals, we explore how embedded vision is reshaping the landscape of service robotics, making machines smarter, safer, and more autonomous than ever before.
What Are Service Robots and Where Are They Used?
According to ISO standards, a service robot is defined as "a robot that performs useful tasks for humans or equipment excluding industrial automation applications." These robots are widely used in non-industrial settings such as:
Hotels and Restaurants
Office Buildings
Hospitals and Clinics
Retail Stores
Construction Sites
Households
Unlike traditional industrial robots, service robots are built to interact with people and perform tasks that require a combination of mobility, perception, and decision-making.
The Role of Embedded Cameras in Smart Decision Making
Embedded cameras act as the eyes of the robot. Whether it's navigating tight spaces or recognizing faces, the intelligence of service robots depends largely on the quality and integration of their camera systems.
Here’s how cameras are enabling smarter robots across various sectors:
1. Hotels and Restaurants
Robots here perform tasks like guiding guests, delivering food, providing information, and enabling telepresence. Cameras help them by:
Using 3D depth cameras for path planning and navigation
Detecting obstacles with 2D vision sensors
Performing optical character recognition (OCR) to read door signs or labels
2. Office Buildings
Service robots in office spaces offer navigation, material delivery, and even social interaction. Embedded vision enables:
Object detection and face recognition
People counting using AI-powered image analysis
Collecting environmental data for reporting
3. Hospitals and Clinics
Medical service robots are now part of everyday operations—from disinfection to delivering medicine. Vision technology helps them by:
Mapping hospital layouts in real-time
Planning routes with SLAM (Simultaneous Localization and Mapping)
Detecting humans or objects in critical zones
4. Retail Stores
Retail robots assist customers, track inventory, and even personalize shopping experiences. Embedded cameras enable them to:
Identify and locate products
Guide shoppers to specific aisles
Avoid collisions in crowded spaces
5. Construction Sites
In rugged and dynamic environments, service robots take on tasks like inspection, maintenance, and material transport. Cameras help with:
Measuring distances to objects and walls
Spotting defects or anomalies
Capturing real-time footage for safety audits
6. Households
From cleaning robots to food-serving assistants, service robots are entering our homes. Embedded vision supports them in:
Avoiding pets or furniture
Performing gardening tasks
Ensuring safety while handling objects
Why Choose Silicon Signals for Camera Integration?
At Silicon Signals, we specialize in integrating robust, reliable, and customized embedded vision solutions for service robots. Our offerings include:
High-Performance Global & Rolling Shutter Cameras for accurate imaging
3D Depth Cameras for precision depth sensing
Low Light & NIR Cameras for performance in dark environments
End-to-End Customization including optics, firmware, interfaces, and form factors
We understand that every robot has a unique use case. That’s why we work closely with our clients to deliver tailored camera solutions that perfectly align with the robot’s application and environment.
Powering the Future of Robotics
As the demand for intelligent service robots increases, embedded vision will be at the forefront of innovation. With expertise in embedded hardware and software design, Silicon Signals is committed to empowering next-gen robotics through custom camera solutions that are efficient, scalable, and future-ready.
If you're building the next groundbreaking service robot and need help with camera integration, reach out to our experts at [email protected].
Let’s create a smarter future, together.
#embeddedtechnology#embeddedsoftware#embeddedsystems#linuxdebugging#cameradesign#camera#embeddedcamerasystems#cctv
1 note
·
View note
Text
From Cars to Wearables: The Stealthy Power of Embedded Systems
Embedded systems are the invisible backbone of modern technology. These compact, task-specific computing units are embedded into larger systems to perform dedicated functions. From your car's braking system to the smartwatch on your wrist, embedded systems quietly power our daily lives. At Silicon Signals, we bring these innovations to life through expert embedded systems development services.

What Are Embedded Systems?
Embedded systems blend hardware and software, designed for a specific application within a broader system. Unlike general-purpose computers, they prioritize efficiency, speed, and reliability. For example, an anti-lock braking system (ABS) in vehicles prevents wheel lock-up during sudden stops—this is a primary embedded system. Meanwhile, a mobile dashboard app showing vehicle diagnostics can be seen as a secondary embedded system.
Real-World Applications of Embedded Systems
1. Automotive: Driving the Future
Cars today are filled with embedded systems. These systems manage engine performance, fuel economy, safety features, and even autonomous driving.
Engine Control Units (ECUs): Ensure optimal engine performance and emission control.
ADAS (Advanced Driver Assistance Systems): Handle functions like adaptive cruise control, lane assistance, and collision avoidance.
Example: Tesla's Autopilot is powered by sophisticated embedded systems that combine real-time processing, AI, and sensor fusion.
2. Wearables: Technology You Can Wear
Wearables like smartwatches and fitness bands use embedded systems to provide health monitoring and real-time feedback.
Example: The Apple Watch uses embedded software for ECG monitoring, heart rate tracking, and fitness tracking—demonstrating how embedded systems enable personal health management.
3. Smart Homes and Consumer Electronics
From smart refrigerators to voice-activated assistants, embedded systems enhance user experience and functionality in consumer devices.
Smart TVs: Enable AI-driven content recommendations, app integrations, and voice control.
Home Automation: Devices like Amazon Alexa and Google Nest rely on embedded systems to manage everything from lighting to security.
Example: Samsung SmartThings platform unifies home automation by integrating multiple embedded systems into a single control hub.
The Role of Embedded Systems Development Services
At Silicon Signals, our embedded development services help businesses innovate efficiently. Our offerings include:
Hardware Design & Optimization: Creating compact, reliable, and power-efficient solutions.
Firmware Development: Building responsive, scalable software for embedded hardware.
Testing & Validation: Ensuring compliance and safety through rigorous testing.
IoT & Edge Integration: Enabling real-time, low-latency data processing and connectivity.
Whether you're in automotive, healthcare, industrial automation, or consumer tech, we provide tailor-made solutions to meet your embedded system needs.
Leading Tools in Embedded Systems Development
1. MATLAB & Simulink
Used extensively for modeling, simulation, and testing, particularly in automotive and aerospace industries.
Ideal for hardware-in-the-loop (HIL) testing
Rich libraries for control and signal processing
Example: Aerospace developers simulate flight control systems using Simulink to reduce development time and ensure safety.
2. Keil µVision
A go-to IDE for ARM microcontrollers, commonly used in medical and industrial devices.
Offers intuitive debugging and RTOS support
Example: Used in the development of precision medical devices like insulin pumps for safe and reliable dosage control.
Key Development Tips
Clear Design Objectives: Align your embedded system with operational goals and constraints.
Rigorous Testing: Ensure functionality and reliability at every stage.
Modular Design: Build scalable, easy-to-update components.
Security First: Implement encryption, secure boot, and regular firmware updates.
Emerging Trends in Embedded Systems
AI Integration: Smart systems for predictive analytics and automation.
Low-Power Design: Energy-efficient systems to support sustainability.
Edge Computing: Real-time local processing for applications like autonomous vehicles.
Overcoming Development Challenges
Scalability: Design systems that evolve with tech advances.
Integration: Ensure seamless operation with existing systems.
Security: Combat cyber threats with robust protections.
Speed-to-Market: Maintain innovation without sacrificing quality.
Conclusion: Embedded Systems at the Heart of Innovation
Embedded systems are revolutionizing how we live and work. From self-driving cars to smart homes and wearable health monitors, their presence is growing—and so is their impact. Companies that embrace embedded development will shape the future of connected technology.
Partner with Silicon Signals to develop next-gen embedded systems that are efficient, secure, and scalable.
Ready to turn your idea into reality? Let's build smarter systems together.
Contact Silicon Signals today for embedded development solutions that power innovation.
Mail us on: [email protected]
1 note
·
View note
Text
Top 3 Tips to Balance Performance & Power Consumption in Embedded Application Development
In embedded systems development, achieving the right balance between performance and power efficiency is an ongoing challenge—especially when working with microcontrollers (MCUs) and low-resource hardware. The right software design decisions can dramatically extend battery life without compromising responsiveness or reliability.

Here are three actionable strategies every embedded engineer should consider to get the best of both worlds.
1. Build Smarter Software with Efficient Code
The foundation of energy-efficient embedded development begins with how your software is structured and optimized.
Here’s what helps:
Choose better algorithms: Replacing inefficient logic (like O(n²)) with more optimized versions (O(n log n)) reduces CPU cycles and energy use.
Go event-driven, not polling: Event-based logic allows your system to enter sleep modes rather than constantly checking for changes.
Cut down on memory operations: Repetitive dynamic memory allocation increases power draw. Keep it lean and predictable.
Use hardware accelerators: Leverage MCU features like DSPs or crypto engines to offload work and reduce CPU load.
Pro Tip: Use compiler flags like -Os for size and power optimization. Tools like EnergyTrace or ARM's Power Debugger can help you find energy-heavy hotspots in your code.
2. Leverage OS and Middleware Power-Saving Features
Your choice of OS and middleware isn’t just a performance decision—it’s an energy one too.
Here’s how to optimize it:
Pick a power-aware RTOS: Systems like Zephyr and FreeRTOS come with built-in low-power features.
Use MCU low-power modes: Utilize deep sleep, stop, or standby modes to lower consumption during idle times.
Optimize peripheral management: Disable or scale down unused modules like timers, ADCs, or communication interfaces.
Reduce wake-up frequency: Combine tasks and delay non-critical activities to avoid excessive interruptions.
Scale clock speeds dynamically: Lowering clock rates during low workload periods helps reduce energy consumption.
Pro Tip: Use vendor-specific tools like the ST Power Calculator or Nordic’s Power Profiler to fine-tune system settings based on actual workloads.
3. Profile, Analyze, and Keep Optimizing
Even perfectly written code can consume more power than expected without proper testing and profiling.
Here’s your checklist:
Continuously monitor energy usage: Real-time power monitoring highlights inefficiencies across code paths.
Test in real-world conditions: Optimize based on typical usage patterns, not just lab simulations or edge cases.
Refine iteratively: Small updates—like fine-tuning interrupts or reducing wake-ups—can lead to major gains.
Slow down (intelligently): Your application doesn’t need to run at max speed—just fast enough. Slower = more efficient, when done wisely.
Pro Tip: Use simulation tools like Renesas e² Studio Power Profiler to preview energy impacts of code changes before testing on physical hardware.
Final Thoughts
In embedded development, managing the trade-off between performance and energy consumption is critical. But with the right software architecture, OS features, and continuous optimization, it's absolutely achievable.
By making informed engineering decisions, you can build high-performance, power-efficient embedded applications that last longer, run cooler, and deliver better user experiences.
👉 At Silicon Signals, we help companies build power-conscious embedded solutions using best-in-class design practices, real-time OS integration, and performance profiling techniques. 📩 Let’s connect to optimize your next embedded product — from prototype to production.
1 note
·
View note