
Don't wanna be here? Send us removal request.
Statistics
We looked inside some of the posts by so2collection and here's what we found interesting.
Average Info
Notes Per Post
75
Likes Per Post
53
Reblog Per Post
18
Reply Per Post
4
Time Between Posts
2 months
Number of Posts By Type
Text
11
Link
2
Last Seen Tumblr Blogs


Fun Fact
In February 2021, Tumblr had 518.6 million blog accounts.
Text
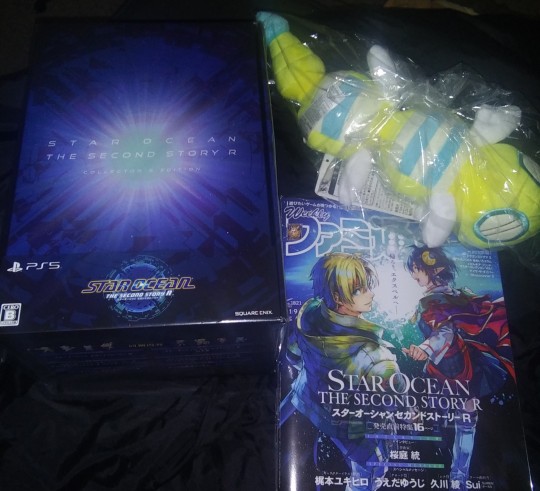
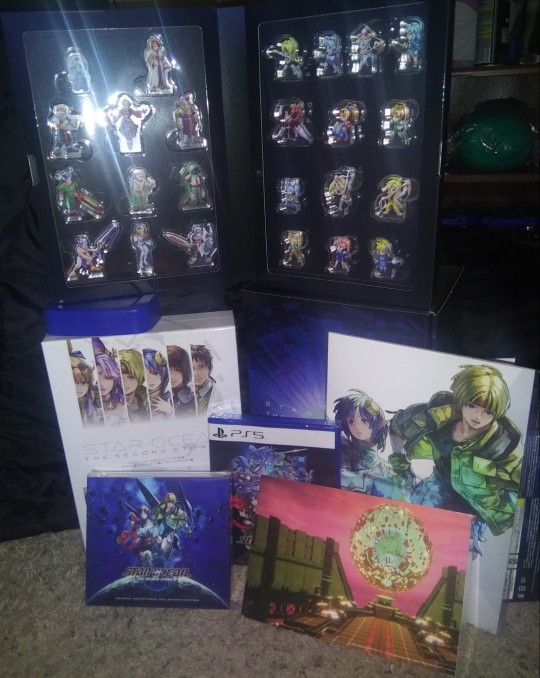
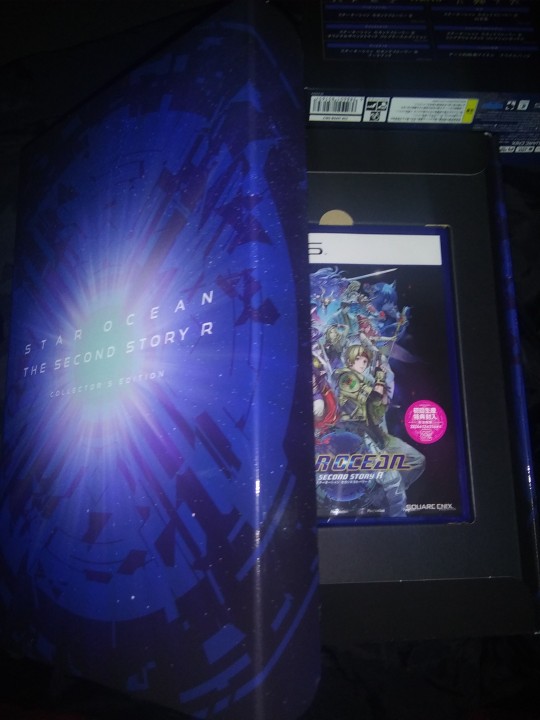
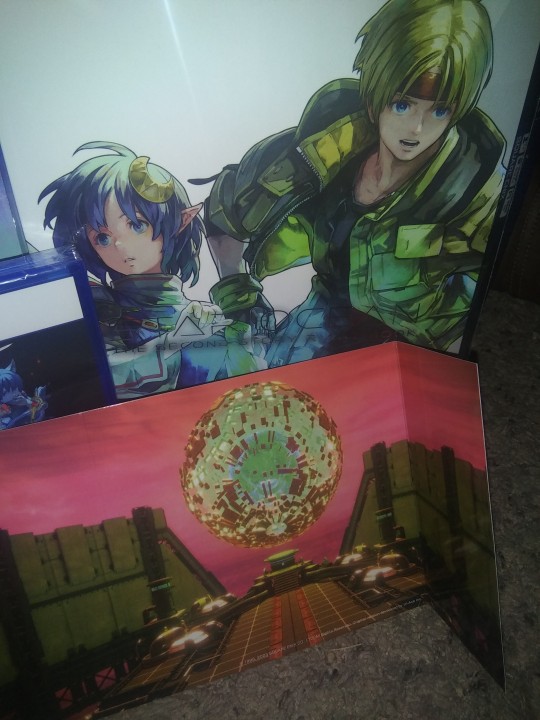
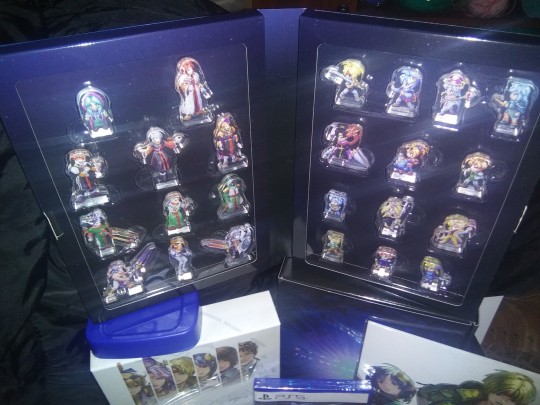
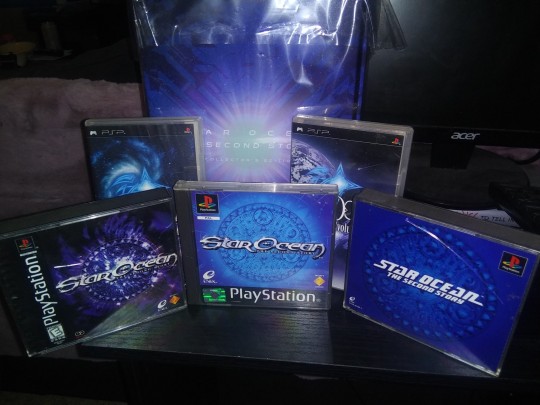
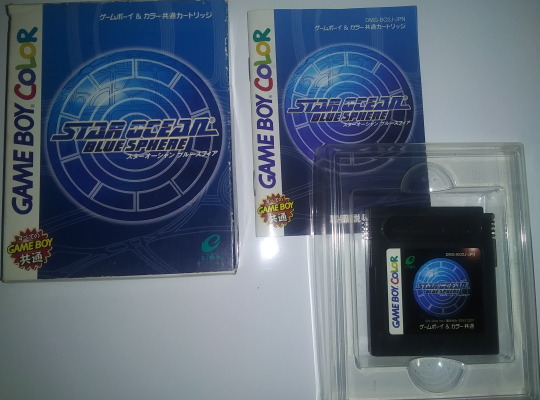
My CE arrived 😍 This has been my favorite game since 1999 and it was worth the wait. Includes outer box, obi, all character stands with box and Fienal display, OST w CE exclusive sleeve, art book, exclusive to Japan PA script books, and the game! 🎉

I love this game so much
5 notes
·
View notes
Text
I think this sums up my feelings for the remake lol gotta love my wife who made this after one of my rambles

4 notes
·
View notes
Text
Ive been sick this last week. I did get my copies from Square and my proxy has my CE which will ship this week.
I haven't gotten too far in the game though. This strain is kicking me down energy wise. I'm on the recovery end though.
I also have quite a bit of merch coming. Some from a good collector friend, some with a proxy, and a lot of the cafe merch is on Amiami but doesnt come out until February.
I will be posting a very thorough review once I've completed the game for the first time. As someone who has logged 10000+ hours on the PS1 version, I'm gonna be a bit biased, but I can say currently that I would recommend it.
0 notes
Text
New update!
Spell animations that are longer can be quick skipped with a single button press.
Possesed Ashton is now Creepy Ashton or Weepy Ashton.
Link:
Why is no one talking about the Star Ocean Second Story R demo from Gamescom?
I haven't seen any US Youtube channels or twitter channels talk about this, so I wanted to make a quick summary of some features we've learned through recent announcements and the demo preview!
Here are the new features we found out about so far:
3 hit basic attack combos (from the PSP version) stayed. We knew this from previous trailers, but I'm noting it again.
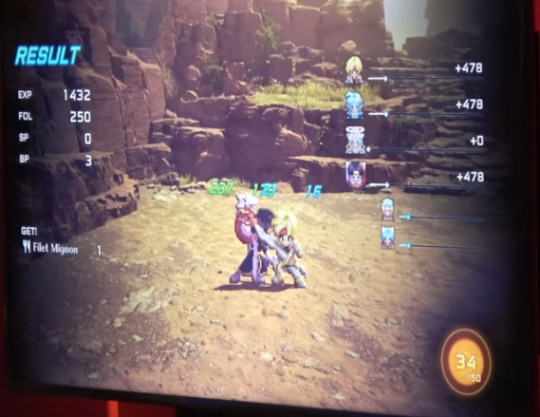
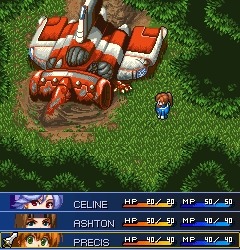
Assist Characters get EXP (From what we can tell this doesn't apply to Reserve members, which can prevent overleveling / SP waste, which I'm happy about) You can see this below the party's EXP increases. This is also a good look at the Battle Results menu
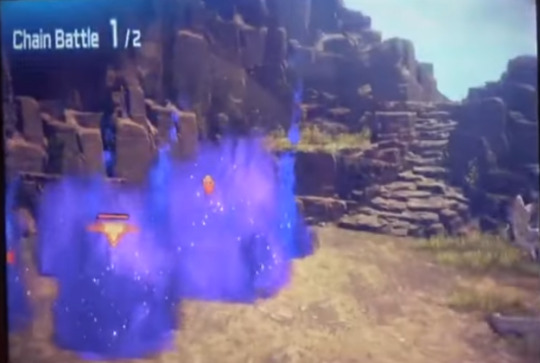
Bonus gauge returns from 3/4, although we don't know a lot about it. This includes Chain Battles! (I hope we get EXP or Fol bonus returning but not the horrible, easy-to-break system 3 had.)
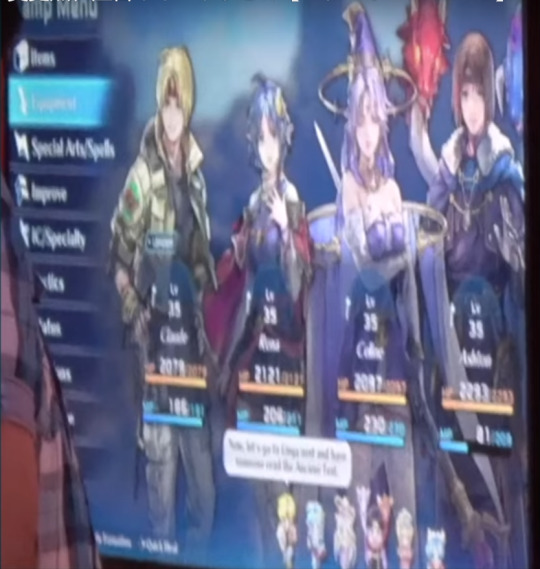
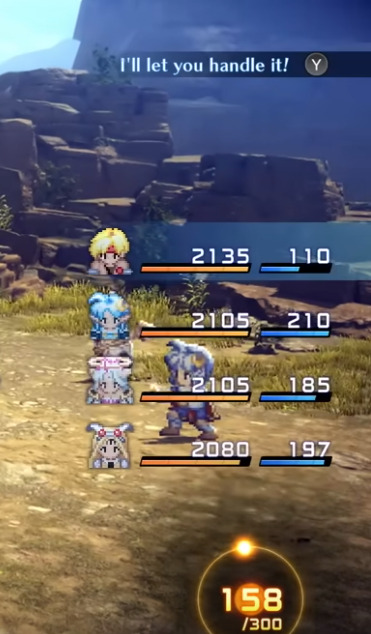
Our first look at the Field Menu! Includes full portraits, a reorganized menu, and some party banter
Party banter is present on the menu AND in the field
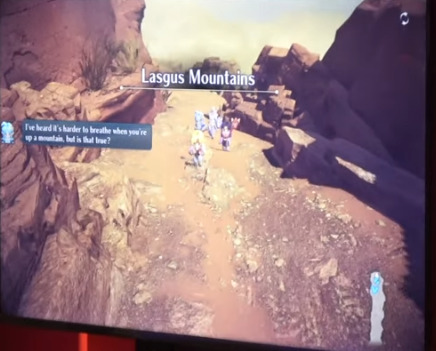
We also see a mini-map in the field, which has been previously shown but is a new addition
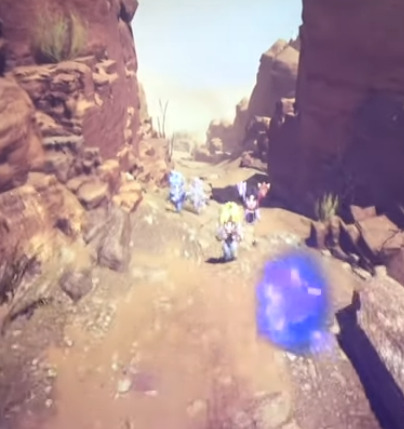
Battles are no longer random / visible enemies

The player can now gain battle initiative / back strikes, resulting in enemies being stunned at the start of battle (this isn't present in the original versions of SO2)
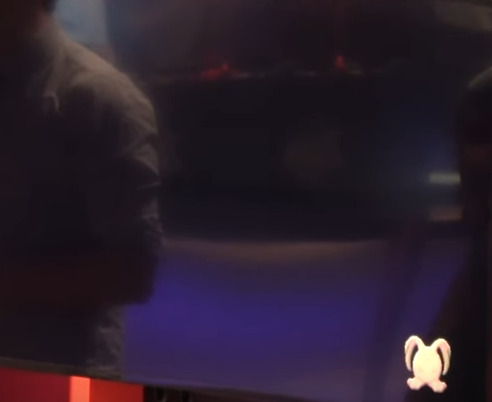
First look at the loading screen! (Come on, Bunny!)
That's all the new changes I've found so far. If there's any I missed, let me know!
View the original video where this information was obtained here.
#star ocean second story r#video game news#jrpg news#so2r#star ocean the second story#ashton anchors#so2#pax west
15 notes
·
View notes
Text
Why is no one talking about the Star Ocean Second Story R demo from Gamescom?
I haven't seen any US Youtube channels or twitter channels talk about this, so I wanted to make a quick summary of some features we've learned through recent announcements and the demo preview!
Here are the new features we found out about so far:
3 hit basic attack combos (from the PSP version) stayed. We knew this from previous trailers, but I'm noting it again.
Assist Characters get EXP (From what we can tell this doesn't apply to Reserve members, which can prevent overleveling / SP waste, which I'm happy about) You can see this below the party's EXP increases. This is also a good look at the Battle Results menu
Bonus gauge returns from 3/4, although we don't know a lot about it. This includes Chain Battles! (I hope we get EXP or Fol bonus returning but not the horrible, easy-to-break system 3 had.)
Our first look at the Field Menu! Includes full portraits, a reorganized menu, and some party banter
Party banter is present on the menu AND in the field
We also see a mini-map in the field, which has been previously shown but is a new addition
Battles are no longer random / visible enemies
The player can now gain battle initiative / back strikes, resulting in enemies being stunned at the start of battle (this isn't present in the original versions of SO2)
First look at the loading screen! (Come on, Bunny!)
That's all the new changes I've found so far. If there's any I missed, let me know!
View the original video where this information was obtained here.
15 notes
·
View notes
Text
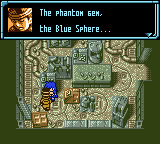
Star Ocean: Blue Sphere ~ A Review

Disclaimer: This is a subjective review. I think if you're good at skill based things like fighting games, party games, ect. you will enjoy this title more on a technical level.
Initial Thoughts I have always wanted to play Blue Sphere, as I'm sure many english speakers have always wanted to. I owned an original copy for years.
We waited two decades for a translation, and although this one was hastily made and even stolen, I think we were all happy to finally play it.
The game did get a remake for mobile phones in Japan, but it's considered lost media, so that wasn't an option, either. It's never been ported (as of writing this, it remains the only title to not have a modern port).
I even purchased two copies when FishyFaceGames printed them. Sadly, my open copy doesn't save (which seems to be a common problem). If you want to play this physical, get a different repro as I haven't heard them having any problems. Otherwise, the ROM is widely availible and I used GBA Emulator for my playthrough. I highly recommend using an emulator, do due to how much save scumming you'll want to do, especially for Item Creation and distributing SP. Having said all that, my biggest concerns going in were if this game could be completed by someone who did not have the skills to learn new battle skills through combos, as this seems necessary (it isn't, although it makes the game more difficult). My largest goal when making my guide was to provide a little more clarification on SP distribution, learning things like Lost Magic, Item Creation tips, and how to get the fabeled Blue Sphere… I think I accomplished that, so please enjoy the tips in the guide here. So, now that I've completed the game, what do I think of it, as a fan who has put 1000+ hours into SO2 on PS1 and 40 hours into my playthrough of Blue Sphere (not counting resets)?
Gameplay / Dungeons I'm going to start here. This game has so many issues. According to interviews, this game was meant to be a holdover for Star Ocean 3, therefore it was made for the Gameboy Color. The devs found making the systems simple = boring, so they did everything they could to make this a challenging (and frustrating) experience.
Firstly, learning new skills in battle. Everyone shares the fact that you must level the tree "correctly" to get the best skills. In some cases, like Celine, you must choose between high magic or her best spell; you cannot learn both. Learning skills has to be done in a secret order based on the character you're training; the only way to do this is to experiment, replay, or save scum. Even with saving, though, you can't know until you max out two entire trees, which takes the entire game. This takes away control away from the player right off the bat and can lead to paralyzing anxiety of making mistakes. You will. Dungeons are typical old school fair, but even Japanese players said they had trouble with the ones in this game. Particularly, Gravis Forest, Leviabor Ruins, and Grand Knott are troublesome and almost impossible without maps.
This can be exacerbated if you're playing on a Gameboy Pocket or a Super Gameboy, because of the limited to no color palette. A lot of dungeons also require specific Field Actions to explore, which are mostly limited to specific characters (especially Precis, the HM Slave, early on). It is nice that every character can be leveled whenever as long as you grind SP, which isn't hard to do, just time consuming. You can also go back to your ship to switch characters very often. However, late game, if you've not been leveling a side character at all, this can be time-consuming. One saving grace is the character does not have to be in the active party. I think, if they had the power at the time, being able to switch characters on the fly [in a dungeon] would have made this game's dungeon crawling SO much more fun and enjoyable. I found that treasure often was NOT worth going out of the way for. Usually towns provide enough updated equipment to keep you going and the dungeons tend to provide useless or redundant rewards. There are a few exceptions late game, though, which made exploring a bit more worth it (and you're more likely to have a character in your team to use).

Enemies are on the screen, however, they often can't be avoided, even with Dias' dash. Only a few characters can gain an initiative / surprise with their FAs, like Celine's Magic Shot. This isn't necessary but it does help and you can hit an enemy first with anyone, but it's trickier without the long range FA.

I found that running from battle did work more like 70% of the time. Running also removes the enemy from the field, which is nice. The balancing is not great, if you can't combo with a fighter. Some enemies will absolutely trash your mages at the start, making battles insufferable. Again, the only reason the mages die is because you can't freely raise their HP without messing up their skill tree. Armor only helps so much. The dungeon designs themselves aren't bad and are beautiful to look at, but there are a few times I almost dropped the game entirely if I hadn't had the Japanese guides I was referencing.
Item Creation (IC) / Misc. Mechanics So, remember I said the devs love taking control away from the players? I'm sure there are some that do not enjoy Star Ocean's random IC, but it was better implemented in SO2. Here, you must score a specific amount of points or some other specific action by completing mini-games that only use the D-Pad, which is clunky by today's standards. I can partially forgive this, but some of the games really are almost impossible, even with the support item and max level that "makes it easier". I never enjoyed this mechanic, except on the Art game. Even then, that one has a random element of which color you get to play. Limiting the Ultimate Battle Skills to the Blue Sphere item, I understand, but making it impossible to obtain sucks. I know they intended the Connect feature to be used, but this is ultimately a single player experience and the Alchemy game is too difficult to get them even somewhat consistently! I'm talking 1/50 attempts would be fine for something so rare, but I never got one. You get one free one in the entire game, but you have to be playing on a specific model Gameboy to obtain it! There are other treasure that use this mechanic, rewarding those that play on the black and white screen with better stuff, but for something designed for the GB Color, you think we'd have an option as well. Luckily, on an emulator, you can change your model, but if you're playing physical you may be out of luck. I could ramble about all the IC mini-games, as they are skill based and so your opinion may be very different, even positive, if you're good at these kind of games, but I didn't enjoy it and the lack of control to the player once again makes this an awful experience. From what I gather also, gaining a fighter's ultimate battle skill is linked to possibly sacrificing their ultimate main-game weapon. Who would decide something like that?! Sparking magic is something I haven't discussed. Honestly, it was one of the better mechanics in the game… if you knew what you needed. Often spells require: you control the character, you use the right spell (random chance to unlock), and the required stat is high enough. This is a lot of variables with no indicator. I can see this being frustrating for players.
NPCs are there and some PAs do fill out the world a bit more, but for the most part you will be screaming at them to move or ignoring them entirely. Weapons/Equiptment/Acessories are something run of the mill for the most part. You can buy them (enemies don't drop money) or make them (IC) or find them in treasure chests. The Ultimate Weapons are either obtained through Private Actions or using the Blue Sphere item I discussed previously. Making money is a problem early on. Fine. Learn Cooking and play an okay mini-game and make some. Sell stuff you don't use. This isn't the worst problem in the game, but nothing tells you how to make any money and if you mess up a skill tree teaching one of your main three Cooking, then you're out of fucking luck. Inherently, you would have 3 main party members for battle and the rest saved for IC, but I would have to bring up the problem of switching characters on the fly remotely again. Sometimes going back to the ship when you're halfway through a dungeon is just not feasible. There really aren't any sidequests to speak of outside Private Actions and Ruddle. Standard Star Ocean fair which I'll go into more below. There is a lengthy post-game that was a given for this era of Tri-Ace, including the infamous Cave of Trials (I didn't confirm this, but I bet you can save anywhere which is a relief). You have to collect the God Rings all over the game and then tackle the dungeon. I didn't do this personally as there isn't any story to be gained, but completionists and diehards will love to see it return.
Graphics / Music


I can safely say there are not many complaints here. The graphics are gorgeous, as expected from this era of Enix and Tri-Ace. Motoi Sakuraba did the best he could given the hardware and a lot of tracks sound redundant, but I never found it particularly irritating. If anything the music fades into the background. The battle theme is a banger, though!
Story / Private Actions The story isn't too in-depth. That's okay, given the space they had for the catridge. I don't think it means to take itself too seriously. Tri-Ace has never had master level writing chops, so don't go in expecting a grand adventure for the story. There's just enough to get you from point A to point B and the last 5 hours of the game contain most of the plot, explaining the world and the final boss' motivations. There's nothing bad or great about it.


Private Actions are great as always. They really kept the spirit of the cast from 2 here. In fact, they wanted to add more, but there just wasn't enough space to do so. We only get a measly 25ish PAs in this game, compared to the 100 or so in 2, but that's okay. Some of them are really fun! Most of them aren't missable, although they can't all be seen in one playthrough (there's a few you must pick between). PAs really are a highlight in this game, especially if you're a fan of 2. I recommend doing as many as you can. Some have good rewards, too.

Conclusion
I would give this game a 6/10
As a fan of the series. The frustrating elements make me score it lower. The game shines with its graphics, music, and Private Actions, but ultimately leaves a somewhat lackluster experience.
Do I regret my time spent with Blue Sphere? Not really. I think it was alright. I think if you love SO2, you should give it a shot. The game is only 35-45 hours for the main story and technical skill isn't required to complete, but it does make it easier. The frustrating elements can be weathered through (I took a one week break and a weekend break at seperate points of frustration…) I think if you love the characters, seek out the PAs. If you love the story, you may consider watching on YT instead as there really isn't a lot of meat there and the ending is very "we saved the world, let's go on another adventure!" and not the most satisfying. There aren't multiple endings here, either. Replayability is very dependent on how you play personally. I think you could get all you need from this game if you played very carefully and planned everything in advance. A replay might be worth it if you want to challenge yourself with other characters in your main team; I would find this unbearable. All in all, I would recommend it to someone who loves skill-based titles, dungeon crawlers, or Star Ocean 2. I think the game has too many issues to make it enjoyable to play or replay, but this is a very decisive title running on dated hardware with a shoddy translation. I hope this review provided some insight and if it wasn't enough, you can view my walkthrough here to see if it is something more suited to you.
1 note
·
View note
Text
Star Ocean: Blue Sphere - Ending / Final Thoughts
View previous post here.
View the ending info under the cut...
The scene shifts to Claude and Rena on a cliff.

Claude discusses that he isn't sure we did the right thing (namely, we aren't natives to the planet and therefore had no say, but… like? The planet was controlled by an alien PC Claude!!) Rena reassures him, that now the people can decide what they want.

Noel says goodbye to the Edifians :)

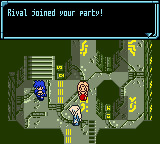
Opera comments about Rival's wish being granted, standing near Knott with Ernest. They lament but also feel Rival's death was for the best.

Bowman, in a forest, wonders if the people of the planet have lost their curiousity and says a life like that isn't any fun.

Dias (and Chisato :o) are in a forest talking. Chisato asks Dias if what Rival did was stupid. Dias, in irony, laments that Rival did everything alone and that she may not have had to die if she worked together with someone.


Celine and Leon are in the ship, discussing repairs; Celine is bored. They reflect on their journey on Edifice and Leon wonders what happens when humanity can no longer evolve? Leon tells Celine to stop bothering him and she gets mad lol

Precis is waiting outside the ship, since repairs are done. She also mentions using the Palantir Stone to fix Ernest's ship. Ashton shows up and asks what Precis thinks and she rambles about how it's been great having everyone together, since they haven't been altogether as a group since defeating Gabriel/Indalecio.

Ashton begins to worry about everyone splitting up when Precis suggests they take another adventure and everyone agrees! Leon doesn't want to go anywhere chaotic, Opera says she has a place in mind, and Celine says hot springs! Then, the game ends with them all agreeing for more adventure before going home. :)


Credits play.
Wow, I can finally check this one off the list!!! (Now, the only game in the entire franchise, including Anamnesis, that I haven't beaten is 3… lol No, not making a guide or anything for that)
I'd like to provide an in-depth review in the future, which I'll link soon!
If you'd like to attempt the Cave of Trials, don't forget the God Rings… These dungeons usually require complete mastery, so I won't be attempting it for now.
Thanks for joining me, post if you have any questions, and I hope this helped yall out! :) Star Ocean Forever!
#star ocean blue sphere#tips and tricks#strategy guide#SOBS#beginner's guide#star ocean series#fan translated#video game review#spoilers#ending#final thoughts
2 notes
·
View notes
Text
Star Ocean: Blue Sphere Mini Guide and Tips - Final Section
First half you can view by clicking here.
Leviabor Ruins (Part 2)
Private Action - Leviabor Ruins (Floor 320 / Right Side; Before clearing Leviabor Ruins) - Rena IN - Use Rena's Rebirth to revive some guy killed by a monster. He gives you an item based on the GB model you're playing on. GB/Super Gameboy 1 has the best prize. Note: I didn't do this, because the guide I used gave me the wrong requirements and I passed it. GBA gets an Orichalcum, so it wasn't really worth it anyway.
We can now unlock all floors. Talk to the man on the right and he'll automatically unlock all the floors on both elevators. Don't forget to check both. Make sure you get the Guiding fragments before looking for the Seal.
Go to Ava City (or, if you don't wanna look around, just teleport right to the Leviabor Ruins). Some of the shops are still there, but the buildings aren't… Lord Ava is nowhere to be found (and you still can't take his treasure darn it). 3rd door from the top of Ava's palace is the way back to Leviabor. If you check the inn where you can sleep at the bed for free, you'll also see that is where Lord Ava has taken refuge.
We already have the Fire seal from early game, so that's 1 down, 9 to go…
Water Seal - Start at the 103rd Floor. Defeat the enemies in the rooms going right, right, and up. A treasure appears with a Guiding Water fragment. Return to the beginning of the 103 Floor and go to the left, upper left this time. Defeat the Froggy to get a Blue keycard, then go up. There's a treasure with the Water Seal. Go back to the upper right side and we have to fight Titan. (Huh, he didn't appear for me… maybe I fought him earlier, I can't remember…)
Wind Seal (Rena is required for this floor.) - 114th Floor. Break the box (right, right, up) on the lower right to get the Guiding Wind fragment. Hit the switch ahead. Head up to fight a Titan. Two of Rena's Ray spells took him out easily. Press on until you see a broken floor switch. Use Rena's Rebirth on it. Before hitting this switch, go up and hit the lower right breakable box and reveal another switch. Hit that. Go left and defeat the two titans to get the Wind Seal. Go back using the teleporter on the right.
Earth Seal (Rena is required for this floor if you want the full set of Jeanne armor. Since I'm using Dias/Celine/Rena, it's useless. You should have someone with Push/Pull to avoid near soft-locking.) - 30th Floor. Match up the boxes to the spaces on the floor like you've done many times by now (you can just use Push, you don't need Pull) Go left and match up some more blocks in the upper and lower screens to open a door. Go left and break open the upper left box to get the Guiding Earth fragment. Return to the elevator room and go right this time. Keep going right, use Rena's Rebirth on the center to revive the block and finish the puzzle to get some Jeanne Armor (great for characters like Chisato). Go back to the room left of the boxes and down through the door the Guiding Earth opened up. Fight the Cooper and continue down. Go right and when you get to the room with two blocks, move them off of their spots on the floor to close the previous door and open the bottom one. Get the drive from the treasure chest (you'll need a lot of these, like 5 or 10 or something, you should have 1 so this should make 2).
So I soft-locked myself because I didn't have Pull :/ I had to Teleport out to the ship and go all the way back. To get Pull on Dias or Rena, they need Perseverance at 7. Safe to say, I could get it for Rena, but it just seemed easier to backtrack.
From the room where you moved the two blocks to make 4 match on the floor (lower/center), move them all OFF of the marks so you can go left instead. Grab the treasure for the Earth Seal.
Void Seal - Go to floor 227. First defeat the Carlas and hit the switch on the right. This is timed: Go left, go down, right, and down for a fight. Get the Gold Key and the Fairy Ring. (You don't know how happy I am for a Fairy Ring for Celine; I can spam her spells way more now!) Return to where you flipped the switch and go right. If you don't have hover, you'll have to fall into the pit and go back up. If you go right, there's some useless items. Go back to the elevator area. Go down and left, defeat the Carla, and hit the hidden switch in the block. Go down, hit both switches and return to the elevator again. Go left twice. Defeat the Carlas and get another Blue Key from a ? chest, then hit the switch and go down the lower right path. Go down and in the lower left corner in the Guiding Void. Go right, save, then go down for the boss. Go down and the Void Seal is in the chest. If you come back to large, open room where you got the Guiding Void, with Room Analysis FA, you can get Bunny Shoes. Just nab Ernest and come back.
Star Seal - Go to 216th Floor. Go left, down, left, left, down (use Gold Key you should have 227 Floor). Defeat all enemies in a room to get Blue Keycards. The Guiding Star is in a chest. Return to the elevator and go right and up to get the Star Seal.
Darkness Seal - Go to 115th Floor. Go left, get the treasure, then go back and hit the switch. Go right from here and hit another switch. Go back to the far left and up for the Guided Darkness fragment. Turn off the switch near the elevator and the one to the right, then go down for the Darkness Seal. Go right for a transport down.
Light Seal - Go to the 1st Floor. Go left for one of those Drives and then go back to the elevator area and go to the upper right for the Guided Light fragment. Take the teleporter down and return to the 1st floor. Go right, down, and right to find the switch puzzle room. It's confusing to explain, so I won't list the answer here. Took me about ten minutes to figure out. Go down, right, and fight the boss. Take the Light Seal and Fairy Source and go back down with the teleporter.
We're almost done… I stopped here to use the 2k SP I amassed on Celine and finally maxed out her TECH (I didn't get Lezard Techno, though, which sucked. Too many points in the opposite branch, I think.)
Bolt Seal - B12th Floor. Go down and move the block. Go right and get a Copper Key. Go left, left, up, right and open the door with the key. Go straight up and move the block. Go down and right a let the floodgates open. Swim down and get the chest you couldn't reach before for the Guided Bolt fragment. Go left and left and the fragment will open the door on the lower left of the map. Go through. The Bolt Seal is in the chest. Go to the elevator and switch floors then return to B12. Move the block thats downward near where the Seal was, then activate the water. Go grab the drive from the seal room. Finally, go and come back again, this time just let the water go first thing so it goes to B13.
Minus Seal - B13th Floor. Put all the blocks in the spaces and grab the drive from the center and all the stones in the other chests. Go down and swim to the two blue chests, one has a Platinum Key. Go back to the top side and right, you'll see the area in the screenshot, put the drives you've collected there.

This drains the water. Use the Platinum Key on the lower left door. Go to the far right and put the green block on the green glowing space, then swim back to where we started. If you go up and all the way right, there's a blue chest with the Guiding Minus fragment. Go back to the Platinum Key door and go down until you're in a submerged room with platforms. You can swim, but it doesn't lead anywhere. You can jump, but it is a major pain in the ass. I went and nabbed Precis (switched for Rena) to use Hover to get through this section. Hover to the far left for a boss fight. He went down with 2 Thunderbolts and a Thunderstorm for me. Grab the chest for the Minus Seal. Use a bomb on the back wall and you'll need Pull to move the block (you can then grab 2 stones, nothing great so dont worry if you miss this) and then return to the boss room and go through the transport.
The Final Floor! - 320th Floor -
Put all the Seals in place and face the Chimera boss that Rival sics on you. 6 Thunderbolts took him out. When Celine gets fatigued, switch to Rena to keep Dias alive. Once Chimera is dead, this opens Grand Knott (finally). Go up to enter it, save.
We'll be getting some really good armor soon, so don't waste too many resources just yet. Heal up/restock and let's tackle the lower level of Grand Knott…
Grand Knott (lower layer) Go up and Rival says she'll be waiting on the fourth floor. (The number 4 is associated with death in Japan, so we all know what she means by that…)
Make sure you've saved/healed (Grand Knott is added to the transporter) and go face the boss, El Dorado. Just use a few Thunderbolts and keep your distance. Bless on Dias helps as well. This annoying gold BlackDragonFiendWannabe will be a common enemy soon... :(
Now, to get the treasure we need someone with Room Analysis, so we may have to lose Rena for a bit and bring Ernest. To the right is a Mithril. The left room has a whip for Ernest and I think you can get through it with his Whip ability, but I grabbed Precis to see what the item was (you need both, because you need Room Analysis for the treasure). After this go grab Celine and Rena again (you'll need either Precis or Rena for some items coming up).
Go up from the entrance past the boss room and go left, up, and right to reach a room with some treasure (very useful curatives), then go left and left again (you may have to clear a room of enemies to open a door) to get back to the central area. Go right, up, and left for more treasure (a weapon for Precis.. fun). Now go right, down, right, down, up and you'll see stairs. Go to Floor 2.
Floor 2 - Ignore the panel, go up, left a bit, and up. Grab the treasure (the Mithril Dress isn't better than anything you currently should have so you can skip this step if you want) and then go back to the panel and click it. Go straight up to the 3rd Floor.
Floor 3 - Push the brick onto the circle and the top area will open. Go up, defeat the Golds (do not let them get initiative; Celine's Magic Shot is great for this) and grab the Purple Keycard. Go back to the entrance, move the block off the circle, and go right and up (left is a dead end). On the left side of blocks, break the top right block for the treasure (weapon for Ashton). There are more El Dorados in some of the blocks, so be careful.
Spell - Rena sparked Light Cross from using Ray. :)
Go down and right and down and use Rena's Rebirth on the bridge. Put the block on the space and grab the treasure (Leon weapon) from the right room.
NOTE: There's Seraphic armor in the top hall, so be sure to explore there too. You do not want to pass on this armor. If you've played SO2, you know how powerful it is. Put the Seraphic Guard and Garb on Dias, since he's our meat-shield.
Go back to the bridge and down. It's hard to tell but there's a room with a glowing panel on the upper right. Flip the switch (change the arrow). You'll arrive on the fourth floor. Remember, this is where Rival said she's waiting for us, but we need the Prism Key from the 5th Floor…
Welcome to dungeon maze Hell. Best part is, this is gonna show up in the top half of Grand Knott, too.
Spell - During a battle, using Starlight, Celine sparked Lost Mental (Mind Absorber). Using Ray, Celine sparked Southern Cross (finally~)

I wandered around for 3 hours trying to get elevators to where I needed them. Familiarize yourself with the layout before you do anything.

Fuck this room and everything it represents. What a horrible fucking place to just punish you for learning the game. These little jerks respawn constantly.
There's a series of rooms and the elevators move between the floors. Just follow this guide: Top - A, Right/Middle - B, Right/Bottom - C, Left - D <-- these are the elevators Ride D up. Ride B down. Ride A up. Ride D down. Go right and down for a green dragon enemy. He gives 99 SP per fight and can be one shot killed by Celine's Southern Cross. Go left and take the elevator to Floor 3, then save and go up.
You're truly on the 4th Floor now. Rival lays await in the room ahead. Get the Prism Key from the left side and a Robe of Ishtar for Rena on the left (and Elven Boots too, if you want them). You shouldn't need help with these puzzles, considering they put them on the back of cereal boxes and restaurant playmats… You may even consider grinding that green dragon for SP. When ready go save before going through the door.

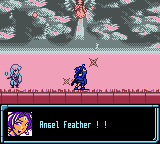
Rival is gonna give a whopping 600 SP, so use an Extension Card at the start of the battle! For the fight itself, remember this isn't the final battle… So, don't go ham on using your best stuff yet. Besides, two blasts from Celine's Southern Cross decimated her. I even had time to prep with Anti and Bless, because I went in expecting the worst. :p In fact, using Bless, I sparked Angel Feather!! Even better!

Nice to have some easy levels/fights after that fucking slog that was Grand Knott's lower layer… Rival shows up for real and reveals we defeated a clone. She tries to kill us, but the Edifians intefere and teleport us out.

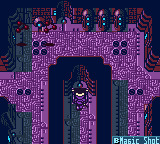
Aqua City Revisited The Edifian leaders say Rival went to the orbital elevator, Ex Trokia. It's some form of a structure that exists on the planet underwater and can communicate with space (where Rival piloted Grand Knott). The Edifians take you there.


Heal. Restock. Grind a bit in Grand Knott if you want. Make sure you save/have some Extension Cards for the boss battles ahead (make them with Art). When you're ready take the upper left door in Aqua City (the one that previously and can be changed back to Nusa Beach, if you want)
Looks straight out of Alien, huh?
Ex Trokia Trade Rena out for Precis. Floor 2 - You start on 2F. On the left, go left again for treasure. On the right, go right for treasure. Once done, go drop Precis for Rena (the best item was the Shield Earrings, put those on a mage if you need to take less damage) and come back, go back to the right and this time go up (you can jump the 2 gaps). You'll find a ladder to F1. Go down and right and blow up the lower right wall with a bomb. Toss the Mithril Helm on Dias and go back where you blew up the wall and head up.
Floor 1 - On the left, light up the 6 switches before the lights go out. Study duration and use Dias' Dash to get them all. On the right side press the blocks in this order or you'll get attacked: low right, upper left, upper right, lower left. In the center/up room, align the blocks in a cross/plus shape.
Floor 3 - Go up to Floor 3. Go left and flip the lever and go up and activate the console. Return to the beginning of the floor and go right and up for the stairs. If you hit the switches in the room, they open doors. The only item is a Mithril, so go up and right to the 6th Floor. Don't bother with the elevator path on the left; it's a dead end with no items.
Floor 6 - From the stairs go: up, up, up, left, save, and through the door. All the items are just common junk, so don't bother. There's a boss fight coming so heal up and launch the Linear Shuttle to the Metro.
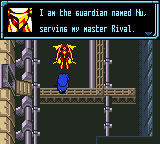
Nu, one of Rival's flunkies, attacks. I used Angel Feather on Dias, then kept my distance as much/often as possible to give time to cast Southern Cross. His first form goes down in 4-5 casts. The second form will take double that. Your biggest issue for the second form is avoiding stamina fatigue and keeping everyone alive. Switch who you're controlling if you need to. Be patient and you'll win quickly. He gives 440 SP, so it's worth using an Extension Card (I forgot)…
Now we're in some kind of colony. They don't register to the teleporter… There's a tricky jump on the upper right. Save, then stand on the metal bar on the right and leap up. Go left, up, grab the ? treasure, and continue right and up. Go to the next shuttle and the next colony (Norn colony).
Go up and right. Defeat the dragon guys to open the doors again. Go up (right is nothing and the enemies do respawn). Go to the next shuttle / Metro colony. Go up for a place to heal for free. To the right of the beds is a wall to bomb. You get one of each Check (Stone ect) and some Talismans. Go back to the main area and go right.
There's a series of rooms here with blue crests on the floor. Kill the enemies WITHOUT destroying the boxes. When you put them over the crests the block in the center becomes a treasure (usually its the best weapon in the game outside Blue Sphere crafting or Cave of Trials, so they are well worth it!) I think if you mess up you can go back to your ship, but you can't go to the colonies, so you'd have to backtrack… Save carefully (I missed Precis' weapon) If you go up you'll find an elevator that takes you to the final city, Cosmo City, so there may be hope yet to complete the colony…
Of course, we have to go through a little road to the city. Go left to heal/save. Go up through the enemies to face a boss, Rival's other flunky, Diablo.


Use an Extension Card first thing in the fight. Use Celine's Southern Cross and Rena's Light Cross to take him out fairly quickly (he also doesn't have a second form and he isn't as aggressive as the other guy was).
Cosmo City Enter Cosmo City. There's a blue Froggy enemy, but he isn't hostile. All the little robots are talking about their Master away on a trip and are obscessed with cleaning. It's kinda sad :( Make sure you upgrade your main trios weapons (I guess the upgrades in the dungeon weren't as good? Or the same?) Anyway, they're pretty pricey. If you go to the Item Shop they have higher-grade food ingredients, so you could cook with those or use anything you have. Personally, I sold gold bars and all the Bunny statues and got just enough Fol for weapons, a Duel Helm for Dias, some accessories, and restocked my usual consumables.
Go back to the ship to heal for free and feel free to pick some herbs in Cosmo with Bowman if you want. Also, make sure to switch out Dias and talk to him for his ultimate weapon. (Private Action) Fun fact, he says he got it from Gamgee! Nice!
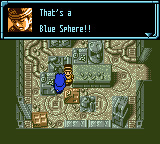
Speaking of… How do we get the Blue Spheres for the Ultimate Weapons?!
Item Creation - Alchemy / Blue Sphere Make sure skill is maxed Make sure you have the Lezard Flask This works for everyone except Dias, Chisato, and one other (I need to look this up again) who obtain through Psychometry and NOT Blue Sphere. Make Blue Sphere, have the ultimate weapon, and bring it to the man in Knott…
You need to make connections between the elements. Blue Sphere needs: Earth (4), Water (6), Fire (4), and Wind (4 Minimum, 6 Max). Connections are when the gems connect, like this: o-o-o = 2 connections o-o-o-o =3 connections
My wife and I tried for a long time… it's basically impossible. On the bright side, iron is cheap and using alchemy can be a great way to make money for late-game. The only other way to get Blue Spheres is to play the Connect feature, which isn't usable for English. :( My only idea is to load up my save in a GB and go grab that supposed free one, so let's try that…

Go to the door behind Rival's old base in Knott and find the tower with the breakable wall (remember, the wall is only breakable in Mobile version, which is lost media… So the GB version (Black and White) makes a hole you can pass through)
Thank. God. Using my emulator to change the settings worked (make sure it's set to Gameboy, Black and White) or the door won't appear. So, we have 1 free Blue Sphere. Let's take it to the man in Knott…
Okay, I can confirm there is none for Dias, Ashton, or Chisato, so don't bother. We may as well make Celine hers. So choose 'Rod' from the list. You'll get the Volcanic Mage Rod. Now, you may notice it's like the other ultimate weapons (which, btw, Dias, Ashton, and Chisato give through their Private Actions). All the stats are 0. That's not quite the case!
How do the Ultimate Weapons work?
Here is how they work: ATK = Stat Base + STR divided by 2, Stat Base + HIT = Dexterity divided by 4, Stat base + MAG = INT divided by 2
So, Celine's base INT right now in my file is 304, giving this weapon an +INT of 152, bringing the total MAG/INT to a powerful 456! You can see the stat change in the Status Menu.
In comparison, though, there are the Cave of Trials weapons. Celine's best CoT weapon is the Forbidden Maze (not sure of the ROM translation, this is from the guide) which only has an INT of 100… There is also that early dungeon weapon based on total playtime, but it seems a pain to calculate. If you wanna go grab that and give it a shot, go for it! (I mentioned it early on in the guide.)
Don't get confused by the 0 change to Dias' STR, his ATK power goes way up! :)
In conclusion, the Blue Sphere is worth it.
Skills - More Tips A character is maxed/can't learn anymore skills when the skill level reaches 350. You REALLY need to not level the opposite branch at all. I did this for Dias and he learned Awakening, but Celine had too many points in Battle and did not learn Lezard Techno or Lost Magic.
Item Creation - Psychometry From what I gather, if Dias learned Awakening, then he just needs Radio Waves (Sense Lv 1 Skill) and Religious Studies (Theology) (Int level 1 skill) also to unlock Psychometry.
I'm not going to touch on it too heavily, but the object of the game will let you use up the ultimate weapon to unlock the ultimate skill (SAVE before). I think if you succeed / luck you can keep the weapon AND learn the skill. Theology seems to be a late INT skill, and I haven't maxed Battle yet… I will update if I manage to train enough, as having another skill would be great, but not at the loss of the weapon…
Late-Game Levelling (before Cave of Trials) I want to make more Extend Cards and go fight those green dragons that give 99 SP each, since they would give 198 SP each fight and they go down in one hit of Celine's Thunderstorm…
Item Creation - Art (Extend Card) First, we need Extend Cards, so we need Art. Celine should have it near max. Buy Magical Canvas from Mile Ruins' Shop. Save. To get Extend Card, you need red paint in the center of the image (each different item requires different colors/placements). If you have trouble affording the Magical Canvas, sell any paintings or cards you don't want, food, or stones made with Alchemy.
If you don't get red paint, don't worry. Just stay nearest to the center as you can and you can still get an Extend Card. If you have another color but already have red in the center, you can hold the brush off of the canvas as well. My advice is to just keep all paint towards the center by lightly tapping opposite the direction the paint brush moves.
Once you have 15, go to Ex Trokia (3F) and fight the green dragon enemies. I know you can use Rena's Rebirth to revive monsters, too, but an easier way is to get to the 4F stairs and go back down to respawn the dragons in the rooms. Once you enter a room, wait a second and use Celine's Magic Shot FA for initiative. Get some distance in the fight, have Rena use the Extend Card, and then cast Southern Cross for easy one-hit wins.
Also, while leveling Dias, I learned the skill he needed for Pull, which is Mental at level 7 (it's a Battle Skill). Also, once he got the Level 4 Skill Combination the AI was doing 4 hit combos and taking down the dragons itself.
I am hoping to max Dias, but I don't wanna go forever training. I'm already at 40 hours playtime. Heal/stock/save, maybe try to make some more armor if you want, then let's go complete this game!
Grand Knott (upper layer) The transporters in the first area with the escalators all lead to the bottom. Bring a few bombs.
Go up the right escalator 4 times, then take the left path for a treasure. Keep going up from there.

There's a bomb wall on the right. I put the Mirage Robe on Celine for the extra evasion, since she's middle spot. Don't bother with the escalators for now (left ones are an enemy filled dead end, right leads up). Go left and then go through the door with the guard.
Here's the damn elevator puzzle again. Go up twice, take the elevator. Go right, down, down, left, down / out the door, down the escalator, left and through the door again. Go left and ride the elevator. Go right, down / out the door, up the escalator, and through the door. On the right there is a dead end with a weapon for Precis. From the entrance go left and up. If you want Sylvan armors (not useful for Dias/Cel/Rena), ride the elevator. Grab the treasure (be careful of the red dragon, we're back to OKO enemies boys… I just ran) and go back down the elevator. Go right, up, left, up, right, up, left. Solve the maze to get to the upper/right side, go up the stairs and get one of the God Rings for the CoT.
Go back down to the maze and solve to go up. Rival greets us and welcomes us to the Grand Knott Core.
Grand Knott (Core) Use Jump to grab the Philosopher's Stone from the chest, then teleport back to your ship real quick.

Private Action - OUT: Celine - Spaceship - Gain Field Action / FA Teleport by speaking with her outside the ship.
Prepare now. By the end of the dungeon, I did learn Psychometry (leveled Sense and Battle to full, then learned Knowledge until I got Theology!)
You'll need Teleport or Hover to get through easiest. The main enemy here is that red dragon, so it's not going to be a cakewalk… There's a little bit of dungeon to explore (best items are Wizard's Mesh on the far bottom right and the Oberon Knife (towards the top left, you'll need Teleport or Whip to reach it), but I'll provide the most direct path to Rival / Final Boss: Right, up, (Repair the bridge with Rena's FA Rebirth), up, left, up, up, up, right, right, right, across the gap with the poles (use Teleport or Ernest Whip), go all the way left, up, right, and you should see an opening going up. Save!!! The final boss is on the other side!!!
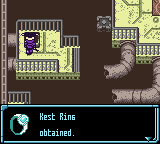
SAVE
I equipped Dias with the Tri-Emblem. Celine removed Star Necklace for a Resist Ring.
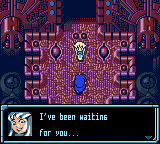
Final Boss Rival
She shifts between four forms. You must defeat a form in 30 seconds to kill it. If you only damage it and she shifts, the form fully heals.
The mecha goes down pretty quick between Dias' attacks and Celine's Southern Cross. The demon only takes three Southern Cross to kill. The wizard takes a long time casting, so using spells/attacks it should go down quickly. Make sure if you're controlling Dias to stay up on her, she likes to back up. Lenneth form is the worst one, mostly vunerable to physical attacks; if you can hit her. Use Angel Feather and any support items (Mental Pot on Celine, a Speed increase for Dias). After I did this Dias finally took her out fairly quickly. The normal form of Rival is cake and goes down super quick. You should see it briefly at the beginning of the fight and again at the end.
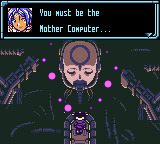
Rival, defeated, explains she is a human created by Edifice, a master computer from another world (Mother Brain?) It's goal is to never let humanity evolve too far and erase it every time it advances. Rival also explains that she wanted to defeat Edifice, but isn't able to, so she summoned the SO2 group to do so.
Rival gives her goodbyes and you go on to face Edifice. Don't worry about the fight; Dias took it out in like 3 hits.
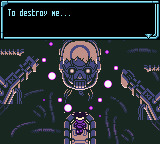
Looks like a FNAF endoskeleton D:
Mother Brain explodes and you escape. Congrats to us all, for finally completing the main story of Blue Sphere! :)
ENDING - SPOILERS (Note: There are not multiple endings, but there is a post game.)
Okay, shitty new Tumblr only allows 30 images per post, so PLEASE CLICK HERE FOR THE ENDING / FINAL THOUGHTS POST. (This is ridiculous.)
#star ocean blue sphere#tips and tricks#strategy guide#SOBS#beginner's guide#star ocean series#fan translated#video game review
3 notes
·
View notes
Text
Star Ocean: Blue Sphere Beginner’s Guide
Introduction: I've been on a bit of a Star Ocean kick lately, and thought I'd take my hand at writing a Blue Sphere "Tips for Beginners!" type guide (based on the English ROM translation)... With Second Story R coming out soon, I figure that more people will be interested in Blue Sphere, too.
I hope my experience and the tips here help you on your adventure!
I played the game once before, but the save data was on an old computer... I want to add it to a list of titles I've completed!
Read more advice/tips under the cut! I’ll provide general tips on how to learn things, what characters to use, Private Actions, and other things! :)
Which characters to use? To start, you can pick your roster out of a few characters. Generally, Dias and Chisato are the best fighters. Precis excels at Item Creation. You'll want Celine if you plan to play late/post-game content.
However, for the first section I recommend taking Ashton. He is also a good fighter and I hear he's easy to combo with. If you've read interviews with the devs, they recommend Ashton and Precis as the game was originally made around them and one other character (they forgot) but eventually added everyone due to popularity. :)
Anyway, I recommend Ashton because he learns Cooking the fastest of anyone, according to seiju-info, a website I will have to reference often due to the lack of English resources. I'll also reference GameFAQs. You'll want cooking early on and you can buy a frying pan in the first town. Fol is very difficult to get in this game as you only earn SP from battles, no cash. I'll explain this more in depth later.
For a dungeon walkthrough, I found this GameFAQs guide useful
If you can, also use the maps on GameFAQs or purchase your own copy of the Star Ocean: Blue Sphere Final Guide. It has full-color maps, but is fully in Japanese. Still, I found it useful, especially in the dungeons. According to the devs, the dungeons got a lot of 'feedback' from fans... and for good reason. They're kind of long and annoying lol but if you're a Star Ocean fan, especially of 2, I think you should give this title a shot. It was made to bridge the wait for Star Ocean 3, but I'm using it as a bridge between my playthrough of Second Story I recently finished again and the remake... :)
I’m not learning new moves / spells?
If you're wondering why certain characters aren't gaining new moves, it's probably one of the following: you aren't making combos, you're levelling the wrong Skill section, for mages you aren't using a variety of spells, or you haven't created their moves through Machinery. These are specific to each character. For my party of Dias, Precis, and Celine... (Dias: combos, Precis: machinery, Celine: the right skill tree / learning the lost magic skill).
I can say at the beginning of this, I don't understand how the skill trees work at all. Just level the 2 the character is good at (Dias is Sense and Battle for example). This is important because if you leveled Dias in Knowledge, it would block off Battle if you raise Sense too high.
Technology VS Sense and Battle VS Knowledge
So, for Dias, we would level Sense (so you get Psychometry to get his ultimate skills with combos), Battle, then put any points into one of the others.
Celine needs to have certain stats met and use a spell x number of times to "spark" the next spell. For her ultimate spells, she needs to level Knowledge for Lost Magic. However, if you want her to have the highest INT and forego her final spell (which isn’t worth the increase from Boost) look at Technical instead.
Mages won't learn new magic using spells on their own, you must control them / spam specific spells, so it's good to use low level enemies to learn new spells.
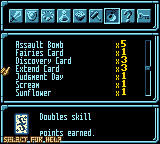
Item Creation tips
That's why it's good to have some reserve characters for Item Creation, such as Ashton for Cooking. Why Ashton? Well, he learns it the quickest. There really aren't any charts availible for this, but each character unlocks different skills as you level them; it is not like the original game where you get to choose. He learns the 3 skills required the fastest by unlocking them the earliest.
Think of it this way: pick 3-4 of the characters to use in battle and use the rest for only Item Creation! Because of the teleport function, it’s easy to switch them out.
Each Item Creation skill has a mini-game involved. It only uses the directional buttons and you can master the quickest/best way to do them easily. Cooking, with the Frying Pan for example, is right (short time), left (short time), right (long time) as you “flip” the ingredients. You don’t want them to burn or spill. I’ll go more in-depth with these as I unlock them myself.
Celine is one of the best characters to learn Alchemy. We will need it towards the end to make the elusive Blue Sphere for ultimate weapons.
Private Actions - How To?
Private Actions are few in this game and require very specific character conditions! If a PA says “OUT” that character must NOT be in the active party. If it says IN, they must be in the active party.
They also can happen pretty much anywhere: in towns, dungeons, ect.
How to play? General strategy?
To switch characters in battle, use Select.
To use items in battle, press Start.
To defend in battle, press the down arrow.
Break objects (tables, chairs, some plants) to sometimes find items.
If an enemy is too tough or blocking a path (that isn't a boss) you can attempt to run by moving to the far right of the screen. If you fail, your character runs out of their hidden stamina stat for awhile. If you win, the enemy disappears and you can snag any treasure / move on with ease.
PA's don't have any indicator. It's like talking to your comrades around a town and everything, but it feels more like an NPC interaction than a traditional Star Ocean PA. Because of the character IN/OUT (of active party) requirements, they can be easy to miss.
Forest / Crash Site
Bowman is also useful until you get to the Scout Village (Herb Gathering on the candy cane striped plants). To gather some herbs and to view Bowman's PA, exit Scout village and cut down the bush to the left. There will be a path where you can see the long-leaf stripey plants that Bowman can harvest. If he's not in the party, talk to him and initiate the PA.
Private Action - Forest / Crash Site - Bowman (OUT) - Bowman gives you herbs.
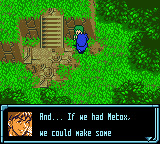
Bowman references the Metox, saying it's a very powerful herb :p
Scout Village
Private Action - Scout Village - Precis (OUT) - Precis is looking for parts to repair the ship.
Sometime during the Mile Ruins (maybe before?), if you have an herb, one will randomly be selected if you talk to the boy near the entrance of Scout Village. You will get a Kitchen Knife (used for Cooking) in exchange.
Fuck this NPC in particular. Get the Hell out of the way, bro!!
Mile Ruins
Finish the Mile Ruins. Don't forget to use the bomb on the crack in the wall to turn the elevators back on, especially to visit the 6th floor for some good items like earrings for Celine. There are other areas that require the Pull Field Skill and Precis' Hover, so you'll have to come back later on for the other items.
Vending Machine 1st Floor - Give it a lighter touch to get a useless but one-of-a-kind ??? Jam you can’t get anywhere else.
Check drawers for items and fol!
When you get out, go to the shops in the back of town. The left shop should have a discount, so buy some blueberries and a Frying Pan. Also buy Meat. Level up Ashton in Knowledge, Sense, and Tech until he learns the 3 skills for Cooking (Good Eye, Recipe, and he should start with Kitchen Knife) (If you're having trouble selling items, remember to scroll right to sell from other item categories; took me a little time to figure out. For the mini-game, gently move left to right and try to aim for the flipping food, because if you drop it it takes time which lowers your overall score. Try to aim for over 100.) If you can't afford meat to make steak, I highly recommend using the vegetables (which she usually has one sale, too!) to make Twice Cooked Pork and Amazing Vegetable Stir Fry, which also sells for a lot of Fol.
The shop on the left has Bombs if you need them (you'll need at least 1 to clear the path on the lower right of town). He will also give you the Bunny Comm.
There's a PA we can do. Ashton IN, Dias OUT. Kick out Dias and grab Precis and we can use her Pull ability to get some of the items we missed.
Private Action - Mile Ruins - Ashton (IN) / Dias (OUT) - The two reflect on their swordsmanship. Particularly, that weakness comes with aging. This also opens up another PA later in the game.
If you also teach Precis Machinery, you can learn Hover by making a Nuclear Jet. I think Machinery needs to be at level 5 to learn it. Don't bother learning it now, though, as we can't buy any soldering irons...
Rupart Jungle
Before you descend into the jungle you can trigger a fight with a Baboon. He's a little difficult but he gives a whopping 20 SP per fight and is a good spot to grind up characters if you need to. Just heal for free at the ship or the old man with the kid's house and save before fighting it each time. I did this 3-4 times just to have some extra SP handy (and it should be enough to teach Precis Machinery Lv 5, but again, no soldering iron yet...) You may want to invest it in Dias Sense skills instead. I've been leveling Celine's Knowledge, since that's what she needs to max out first. In one fight Dias and Precis were dead and I used Firebolt, which sparked Celine's Starlight spell! She also has Bless and I don't think she started with it, but I'm not sure when I learned it.
Spell - Starlight - Celine - Requires: Monstrology Learned, Use Firebolt in battle
A lot of enemies in Rupart Jungle are difficult, but save often and you'll manage. Once you talk to the guys about the permit for the two ruins, continue to Ava City. We can finally buy a soldering iron here, so you can have Precis learn Machinery lv 5 and then score around 200 points and create the item (save scumming is recommended...). Make sure to restock any items you need. Do some cooking and upgrade your equipment, too.
Garp Ruins
In the Garp ruins I used Dias, Ashton *required for his Fire Breath field action, and Noel. Some of the enemies are tough. You'll also want to bring a few bombs, mostly for the room behind the boss.
After the ruins I leveled Precis' Machinery to 6... It makes the soldering iron faster in the mini-game, the higher the level... but after two hours I still can't manage to get Hover (I barely score 110 points most of the time, because the iron is so wobbly...) On the bright side I made some money and got a lot of Opera's KMs, so that will be nice when I get her.
Note: I did give it one last shot, and wouldn't you know, I got the Hover ability... I didn't even score that high of points, so I'm confused? I did learn that the farther away a node is / more diagonal it is, the more points you earn, so perhaps it's advantageous to wait for further/diagonal nodes? I wish you luck obtaining the Nuclear Jet for Hover! I'll make a short trip back to the Mile Ruins and Garp Ruins and get items I missed, then go return to Ava City and talk to the Jabba the Hut Man again lol
We finally see a little plot in this game...!
Leviabor Ruins (First Trip)
The Leviabor Ruins sucked. I think everyone knows that lol I used Dias, Precis, and Celine but I highly recommend bringing Noel instead. Celine learned Energy Arrows, though, which helped a bit! I only did the required floors for the time being and I've been focusing on maxing out each characters main skill branch for now.
I sold a bunch of Gold ingots for like 8k Fol... IDK if I'll need any later (I'm sure they can be made with Alchemy) but I didn't feel like putting athritis-hands through the riggamaroll of Cooking.
Spell - Wind Blade - Celine - Requires: INT 12, Use Firebolt in battle Spell - Energy Arrows - Celine - Requires: MP 160+ / Resistance learned, Use Starlight in battle
Speaking of, I haven't learned any new KMs for Dias. I can't combo at all. I couldn't even combo with Ashton, who is supposedly the easiest... so yeah, late game is gonna be rough.
Ava City (After free from prison)
Remember the girl you saved and got sent to Leviabor prison for? If you talk to her boyfriend, he gives you an item based o what console you are playing on (Gameboy gives a Might Chain... Gameboy Color gives a ???. I'm using Gameboy Advance emulator, so I got a Lunar Talisman)
Yay, Ernest! I guess... I probably won't use him...
I kind of forgot about PAs, so here's some I did to take a break before the Gravis Forest. I remember my last playthrough I did this forest on the Super Gameboy and yeah... you thought it was bad in color. It's ten times worse when its limited to like, 2 colors... a monotone mess. If I didn't have the strategy guides I'd never get through it.
Private Action - Ava City - Bowman (IN) / Celine (OUT) - Bowman has a daughter! And her name is Erys! :o Notes: If done before recruiting Opera, you get this PA. If after, an Opera PA occurs instead. You can't get both according to the guide I'm looking at. Apparently this PA leads to more rare items late game as it unlocks a PA later.
Private Action - Ava City - Chisato (IN) / Celine (OUT) - Chisato helps the girl on the west side of town find a job to support the girl’s brothers. Unlocks a hidden shop. The secret weapon shop (below) has decent upgrades!
Go through Gravis Forest until you find the hideout, then talk to the soldier on the west side and show him the permit you got in Ava.
Gravis Forest Part 1
Follow the beetles
Look for the old man
Use a map
If you can combo, this place might be pretty easy. I can't get past 2 hits, so I focused on my mages and spamming Dias' basic attack to keep the apes in the second section from decimating my party...
Celine learned Curse during my time in the forest. Spell - Curse - Celine - Requires Fairyology - Spark with Firebolt
Spell - Bless - Celine- Start (I had her spark this, I swear... but the guide says she starts with it...)
Also, I don't really use Noel, but he learned a ton of spells including Dispel, which is very handy when you get confused by the beetles.
Spell - Dispel - Noel - Start (Oh, I didn’t notice...) Spell - Silence - Noel - Start (Really? I guess I was looking under Magic and not Technique...)
Apparently he starts with Bless, too? IDK
Hideout
In the hideout, it will be registered to your teleporter, so if you want to switch some characters around, go for it. There's an inn and a shop in the hideout as well, so restock and move on through part 2.
Gravis Forest Part 2
For the gorilla boss, Dias had HP around 450+ and I let him take hits because I can't combo to stop the arm spin. Try to use the Up+B combo to "kill" the arms first, if you can. When you're back at the hideout again, talk to the guy out front to heal and then save. The boss, Atlas, died with one shot of Celine's Thunderbolt... sure is nice to see anything do damage in this game. You'll be healed and sent to he Slave Village. Save again and prepare for another boss... Three of Celine's Thunderbolts took it out. :)
Slave Village
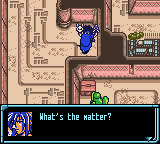
Private Action - Slave Village - Precis (OUT) That PA in Slave City with Precis should be open. Noel asks Precis what's the matter and offers her one of Chisato's snacks to cheer her up :) When that doesn't work, Noel starts calling a doctor (Bowman) for her. Precis finally spills her worries, about a friend named Latry (Razzly maybe?) who might forget... to record Precis' soap opera... Noel is not amused.
After the events on your second trip to Slave Village, you open a new path to Nusa Beach. On the far left you can flip some switches to make a shortcut back to the ship... for some reason, I guess.
We have some optional dungeons to do for now, so return to the ship/restock/ect.
Remember those soldiers outside Ava City blocking that dungeon? We can go now.
Ralph Ruins - Optional
Be careful where you step, it's similar to Gravis and that you can fall easily.
The wires on the lower levels seem impassable; all you need is someone with the Jump field action.
I recommend bringing Precis with Hover so you can reach some treasure and also not fall as often. This is especially useful for the conveyor belts just like in Leviabor. All I can say is just gather as many batteries as you can and on the basement level, look for a generator near a red snake in the bottom left of the overall map that says something like "activates elevator movement". Head as high as you can on the elevators and then all the way left you'll see the crab boss. You have to live long enough, but 3 Thunderbolts takes him out easily. *update note about Precis in conveyors in Leviabor.
Behind the boss is a treasure with the first of 10 Rings we need for the Cave of Trials. Although I'm not planning to do them... but we did miss one in Garvis forest. If you want, go back and get it now (look for unusual, square hole right of the entrance to the forest). If I have time, I’ll add a guide at the end for the rings and how to open the last dungeon (as well as Celine’s Telelport).
Crane Ruins - Optional
BRING A FULL STOCK OF BOMBS, you'll need them!
I highly recommend anytime you need to restock go to Scout village, because they often have sales on Blueberries and food ingredients. Plus, the bomb shop is right next to the item shop.
Crane Ruins are located south of Ava City (if you hit Slave Village you went too far, you need to go south, slightly east, south, and east again). Unfortunetly you need Precis (and a guide I saw recommended Ashton) for this dungeon, so you'll probably go with Dias, Ashton, and Precis... You could manage with Dias, Precis, and Noel, too. Celine is helpful for the machines and crabs, so if you don't need a healer, take her instead.
If you did that PA back in Mile Ruins, there's another with Ashton and Dias on the generator floor of the Crane Ruins. It's a shame you need Dias out, because you'll likely have to complete the dungeon and then return without him to see it. Luckily, it isn't too much of a feat.
Most of the enemies are easy here, except for the big rats. Try to avoid them and if you can't, use KMs if you have them or run.
The upper floors have blocks you have to move onto buttons. Make < style arrows with them in the direction of doors you want open on that floor. When you get Floor 2 and 3, you can combine them to move say, > right and ^ up, but there's just some treasure here. Your goal is B1. You'll need Swim/Dive and Hover makes it easier. Collect the treasure by hovering to all the platforms and then take it section by section and dive for treasure. If you activate the generators on the bottom floor, you can also open up stairs to a boss. I tried a few times but Dias wasn't even scratching him, so I gave up for now. I'll come back to that ugly green bastard later.
Ocean Cave (Nusa Beach) - Optional
The final optional dungeon (Ocean Cave) is in Nusa Beach (go South as far as you can, if you got to Vanis city you didn't go far enough; look for the barnacles) and you need Swim/Dive to complete that, so chances are you'll be taking Precis then. I did check and other characters can learn it, but not as easy (well, Dias at least) but I'll just drag Precis along... I'm gonna gripe about it in my review, but it really sucks how you're forced to carry around Precis as an HM slave, since she sucks so much in battle. 99% of the time she's just dead in fights because it isn't worth the 5 blueberries to heal her. I think if they ever remake this game, there should be some sort of machine to carry around the abilities instead, so you don't waste a slot. Or, even better, a way to switch characters from the ship to your active party in dungeons... It would increase your options and this game is all about not giving you any options. For example, combos being the only way to give fighters more KMs is bad design. Not that they would have MP to use them anyway, because the ideal way to level them gives no MP increases... Just... bad design.
This is how an average fight is going for me. Fun! :(
I'm ranting a lot at this point because this Ocean Cave was my third dungeon that day and I was just burnt out and exhausted of enemies that take 5 minutes to kill, keep respawning, ect. Even with a map, knowing what to do is confusing. I went and found a lever I couldn't flip and a door that needs the lever to open? But then I read in the guide you need a keycard.... So this morning, that's where I'm at. Bored, tired, and I just want the game to give me a break.
The Ocean Cave is added into the teleporter, so feel free to leave/return for supplies if you need to. I decided to go back, use some SP, and experiment with Smithing. Longsword + Meteorite (50 Point Score) should make a stronger sword, but we don't have Meteorite. *sigh* So my thought process was, well, I'm taking damage, so maybe I'll make better armor.
Enchantment Use the chart on this site to determine the Armor latent value.
How it works: Armor + Source = Better Armor. Each Armor has a set amount of points needed to make it based on the formula below. I'll use the example the guide provided me. Formula: Armor Latent Points + Score Divided by 2 = Total Score (The Total Score determines what you get) Magic Resist Armor (35 latent points) + Score of 27 or higher Divided by 2 = 31 Total Score = Resist Armor possible.
I want to make a Duel Suit, as it's one of the best armors... So I used: Resist Armor (25) + Score of 125 or more = 150 Divided by 2 = 75 Total Score in theory should get a Duel Suit... (Note: I couldn’t get the score high enough, so no... I think I need Titania Source and max level for Enchantment...)
I'm not entirely clear how Sources play into the calculation, but they seem to provide some sort of bonus when scoring points? So, save scum and use rare Sources to easily create high level armor. (High level sources: Elf, Dark Elf, Titania)
I tried for a little while, but the two just kept swapping between Resist/Magic armor. I think I need Celine's Enchantment level higher (it's only 4) to make the mini-game easier, so we may as well get back to the dungeon and get some SP for that.
Back at the Ocean Cave... The keycard we need is on the third floor. Try to hang left for most of the time and you should reach it across a tiny water section. I went to where the guide said the card was and was back at the lever, which I could magically pull now. I have no idea what's going on (perhaps you have to examine the door on the lower level first, which is bullshit) but we should be able to move forward now. At the statue room, pull all the levers except the reset, go down the stairs, hop down, pull the green blocks, and drop down. You can unlock the door for later (you have to return with Teleport to get the treasure... ughhhh) and go fight the boss who is easier than almost every enemy in the damn cave. Grab the chest behind it and leave so we can go do the story again.
I will say, it is nice we get to see an Edifian as a reward for this bonus dungeon... So there's that.
Vanis City
Don't waste money on the Elf Sources; you'll be able to buy the good ones soon.
I've been wondering where Opera is too. :( She's my favorite character, so imagine how sad I was that you can't use her for half of this game. Speaking of, this is almost the half way point. Not including resets and deaths, I've logged about fifteen hours playtime, so seems about right. The shops don't offer any better weapons, but there is some better armor for your mages. Get that when you can.
Private Action - Ashton OUT Noel IN - Ashton's feeling a little hopeless and Noel tries to cheer him up.
Private Action - Leon OR Opera IN, Ernest OUT - (I used Leon) They discuss how strange the planet feels (as if man-made) and how Edifice compares to Expel.
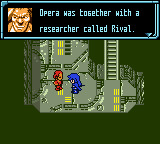
Private Action - Chisato OUT - Chisato has one line that just says Vanice City is kinda peaceful.Talk to the guy in the bar and we learn Opera is researching with another scientist in the City of Knott. Head South of town once you're ready.
Road to Knott

Bring a few bombs. Most of the enemies are easy.
Don’t walk forward on the beautiful screen above... you take damage lol
Ah, the infamous
Ruddle sidequest
begins. If you explore thoroughly, you'll find him on the way.
Please use CTR F to find my updated guide later (See: Scream), because I made an error here.
Spell - Noel - Cure Light - Requirements: INT 40+ stats, spark with Heal Spell - Noel - Fairy Heal - Requirements; INT 70+ stats, spark with Cure Light
Noel knows this game is gonna ramp up, huh?
Knott
The Blue Sphere, huh? I’ll be back for you, sir.
Oh my god we finally get new boots and a new weapon for Dias. There's also Rune Bucklers, if you haven't gathered enough from dungeons for your mages. You can also buy the Dark Elf Sources now, so level up someone in Enchantment (Celine is difficult because you need to max her Tech first... so you can't level it to max, but you can get it high level) and try to craft some better armor.
Speaking of, Dias and Celine have 2-3 of their skills maxed in their primary category. I have been avoiding battles on the Road to Knott, so I may go back and train. The plants are fairly easy and they give around 35 SP each.
Enchantment, attempt 2
It took me about 10 resets to get a Magic Armor and a Dark Elf Source to become a Magic Resist Armor. I had to score 50 to get it. The trick is finding the 3rd checkpoint (when the cane glows white) before the timer runs out. When I tried again with the Magic Resist and a Dark Elf Source, after only 1 checkpoint I somehow got the Nexus Armor... I don't get it, either, you guys... Ideally I want another Nexus Armor and something stronger for Celine. I created a Mithril Coat for Celine and it seems if you get checkpoints in the center, it scores higher. Part of this may just be luck. I wish I understood it better...
I’m on my way! Woosh~
Knott Secret Ruins
Once you're ready head into the laboratory of Knott (top right of city) through the 2nd room on the right, at the back. I can't help much with the dungeon, so please follow a guide.
Opera and Dias are my favorite characters... I feel re energized, even if I can’t use her in battle right now... (You CAN use her, but there isn’t any reason to over Dias, sadly.)
After you run into Opera, go down another floor, move the switch to the left in the first room (I used Noel with Pull because I wasn’t taking Precis again if I didn’t have to) and then head down a few times and you'll be at the boss. When you get to the room with the two big long-nosed blue guys (Carlas???) use Celine's Thunderbolt to take them out and save before going through the bottom right door.
In a random battle I accidentily used Bless instead of Thunderbolt. Celine got Anti.
Spell - Anti - Celine - Requires: RES 50+ stats, spark with Bless
Spell - Magnum Tornado - Noel - Requires INT 45+ - Spark with Wind Blade
I love how Rival casually is like "let's look for the LOTR stone!" and we just go with it.
I think I have trauma from the “join event” text from Star Ocean: the Second Story Ending 86 Guide I made... ;__;
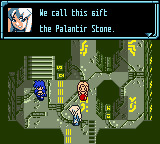
The boss isn't too bad. Celine's Thunderbolt takes out a few parts. Finish him off with Dias forward stab regular attack and you should be good. I did have to heal a few times with Noel. After the fight, grab the Palantir and teleport back to the ship, restock, and then go find Rival in Knott.
Knott (again) lol Meet with Rival. She explains that she met Opera while looking for new discoveries. Rival is trying to find some ancient spaceship and asks everyone to go explore ruins. (For real, we should have just taken parts from Knott and fixed our ship and GTFO lol we have to help her because Opera helped her... oh, wait, no, we said Rival helped Opera after she crash landed... sure lol Opera only saved Rival from some rando rolly polly. Whatever. We have to go meet a guy at the bar in Vanis City.
Vanis City (return) Leave Knott and teleport to the ship and then to Vanis. Go to the bar and talk to the green guy, Simon, to learn about some ruins. The Ocean Cave, to be exact... which we already did. Upon leaving the bar someone shows up and says go to Knott! So back we go.
Knott (AGAIN) You'll be forced to fight red beetles, like the ones in Gravis. They should be cake now if you've levelled Dias a bit. They took a few forward slash basic attacks each. Same strategy with the 3 grey beetles. Once you save Rival, you find out that they unleashed some awful monsters from Gravis forest's underground. When you're ready, go to the door at the back of Rival's room that you couldn't go to before.
Gravis' Forest Path
I took Dias, Celine, Noel. Make sure you're fully stocked, this area isn't on the ship teleporter.
Bring a bomb if you're playing on a Gameboy/Super Gameboy 1 (Note: must be original, not a Color or Advance) and when you come upon a tower, you can use a hidden door on the right to enter or blow up the crack with a bomb (Mobile port only). I'm really kinda ticked because if you choose the item on the right you get a Blue Sphere just handed to you. This plus that Might Chain from earlier makes playing on a Gameboy or Super Gameboy 1 almost worth it... So, sadly I didn't get this item. I remember in my old playthrough this was around where I put the game down because the angel inside looks like Lenneth. Her sprite gets reused a lot in this game... I really thought it was Lenneth, though! :p Apparently her name is Maria--maybe an allusion to Star Ocean Til the End of Time (this title was a holdover until 3 released, so...)
Continue forward along the path until you reach the cave. Along the way are more of the red beetles. For the boss fight ahead, if you're using Celine, you may want to aquire Ray or Southern Cross. Here's how: Use Starlight (have MP 100+, INT 40+) to gain Ray and then use Ray (260 MP+, 80+ INT, know Herbology) to spark it. It's highly likely you won't have her Tech maxed out yet to learn Herbology for Southern Cross, but Ray should work in a pinch. It only took me four battles to spark Ray.
Gravis Forest II / Gravis Forest Cave
The red beetles seem to go down quicker with Starlight, but also Dias should be taking them out in 1-3 hits on average. I also had a red beetle drop a Mithril Mesh once I reached the forest, which is an upgrade to the Nexus Armor.
There are many hidden paths that lead to treasure, ect. so make sure you have a map handy. Go right and just keep going right and you'll stumble upon the Brown Card. After this, explore as thoroughly as possible to get everything. Most of the enemies are really easy, especially if you get initiative.
There is one room on the center/right side that has a large enemy called the Dragon Warrior. Luckily, you'll need Teleport so you'll have to come back later for this. If you beat him 5 times you get one of the rings for the bonus dungeon. If you have Ashton, you'll also get some cool dialogue between Gyoro and Ururun.
When you come across the room with two levers in the center, move the left one and continue exploring a bit. You'll need to get to Floor 2 to finish the puzzle. Along the way you'll probably see two chests, one in the top left and one lower/right from that. Once again, you'll need Teleport for them. I don't know what dev expects me to backtrack for this crap, because I don't plan to. Go across the bridge you lowered to Floor 2, flip the switch. Falling here does nothing, so don't worry about it. Go back across and you'll see some yellowish stairs. Use Jump to get back to the double lever room and swap the order from before, which lowers the stairs completely. Save before going to the boss room.
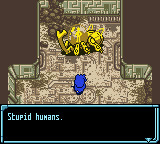
Apsaras (hey, I recognize you from Megaten!)... not how I expected you to look. Anyway, I tried the Japanese website guide of using Ray, but... it did fucking nothing. The Official guide only recommends raising STR as high as possible and says even specials do very little here. Basically, this battle is gonna be a slog. Use items to your advantage.
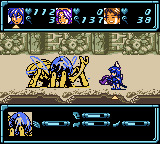
Seriously, this boss sucks. I almost put the game down.
My strategy was to control Dias and do a sort of attack a bit, back off/heal as needed, attack some more. Be careful, if you take out it's legs, it just insta-kills everyone after a few attacks... I'm seriously debating using cheats for this fight, because it's that hard. I KNOW the game wants me to combo to prevent it from attacking, but when you suck at stupid fighting game ass skills, it's useless. There really needs to be any kind of work around...
Okay, so I was reading up and the JP website says Dias just needs MP and to attack based on range for some of the lower level killer moves. Go figure, he only just now started getting an MP boost. I still can't combo for shit (got a 6 somehow in the boss fight) but I did put some points into Awakening. However, I don't think that's what helped... So I equipped this random ass ring I had because I think it gives you Strong Blow? Anyway, this boss went down in like 20 seconds once I had it on Dias! I DON'T KNOW WHAT THIS GAME IS ANYMORE. For information on where I got the ring, it was on B1 Floor of the Ocean Cave! It's called the Eclipse Ring and the Official guide translates the ability added as "Strike". I don't know what this ability is exactly but it seems to have saved my ass here. I got flashback to the Protection Rings / Barker fight in Star Ocean the Second Story... Ironically, that boss fight was what kind of gave me the idea to look at accessories. Nice to see something stayed from 2 that was actually worthwhile.
Return to the ship, restock, return to Knott and go to the lab and talk to Rival. She explains that the Edifians were destroyed by a flood/tidal wave and that someone may have caused it. To learn more, she asks us to take her to Scream (and Lung). These names, bro... Anyway, we gotta go back to the road to Knott and find a new pathway.
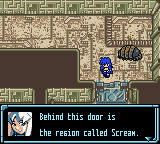
Road to Knott 2 If you remember where we saw Ruddle, with those plant octopus guys, go back there. Rival opens the previously locked door and we're at Scream.
Scream You will need Precis' Hover if you want all the items, but they should be gemstones and armor you saw like four dungeons ago. What you really want are the Sharp Edge and Sorceress Knuckles, if SO2 taught me anything. I was pretty boggled considering those are potentially strong / really strong weapons for Claude and Rena in SO2... You just need Push for those, so Noel should be fine. (Note: I later learned Rena uses knives, so... I guess the knuckles are good for Noel.)
Star Ocean has this thing where it really ramps up it’s environments late game and I’m feeling it! Scream has great graphics and atmosphere. (I forgot to get a picture, though...)
Once you get the weapon upgrades, go through the right door in that same area where Rival is waiting. There's a teleport pad but you can set it to specific places. Going to Nusa Beach or Mile Shop don't have a way back, so don't bother. Select Scream Floor 2 and keep trudging along. Don't go through the upper door. There's a PA with Rena later and if you go now, you lose the chance to complete it.
Your goal is to get the entire tower to line up. Once you get to 4th Floor, save, because the boss is on Floor 5 and he's a bastard. First, I controlled Dias and charged the Minotaur to get some distance between it and the mages. Anything this dude uses KO's mages on impact. I mostly used Celine (with a fire boost and a ring that decreases cast time) with Ray. I wish I had Southern Cross, as it would do more damage... :( It was a big fucking struggle. I used like 4 revives, quite a few MP items, and a all party heal item. Somehow I won. If you get one part of him destroyed he should go down pretty quick after, even if it doesn't look that way. I also had to use a save state about halfway through the battle to save time. It's like 30% luck and 50% cursing, but you'll whittle him down somehow. Just don't let your mages anywhere near him whatsoever and revive immediately. If you wait too long to revive and they're behind the Minotaur, they are good as perma-dead, because he'll attack before you get to even move them out of the way. This entire boss was BS, almost as much as the last one. It's a trend in this game that needs to die.
City of Lung
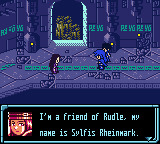
Ruddle Sidequest Okay, in my last section I wasn't sure about the Ruddle quest. Unfortunetly, I chose the wrong direction and it lead to a dead end (the guide I was following was incorrect, so when I checked the Official Guide... yeah...), so this quest is over for me now that I've reached Lung. For the correct path, use the slapped together, Google translated pics I posted above. (I wanted to add the photo here, but Tumblr would NOT save it for some reason)
So much for my Fairy Ring :( I'm pretty peeved as it's so far back and I'm not doing those boss fights again. However, to make a Fairy Ring (halves MP cost, just like SO2), you can use Rune Metal and score between 270-319 with Jewelry Making (this is how the ROM translates it). I didn't have any Rune Metal, so I might try later.
Private Action *This PA has a small window, do it immediately - IN: Precis - Ship - Rival admires the ship and gives you a Tri-Emblem (increase all stats). I'm unsure if it breaks or something, so I'll save it for the end... This won't be availible if you talk to the Priest in Lung, so do this PA immediately.
Proceed down the path in Lung and you'll be escorted to the Priest, who is promptly killed by Rival. She also forces Claude and Rena to crash on Edifice, just like she did you.
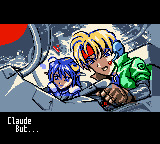
She is the planet's "devil". She leaves and a remaining priest takes you to the top floor to meet an Edifian named Rose.

Rose explains Rival killed the Priest to get access to the Grand Knott, a weapon. Rose sacrifices a literal lung (I guess that's why the city is named that? lol) so you can breathe underwater when you go investigate the Comsat / Komsa Ruins.
Comsat Ruins - Bring a few bombs. - Equip Stone Checks
With the Aqualung, Dias can now use Swim/Dive, so we don't necessarily need to bring Precis. The dungeon is fairly straightforward. If a room doesn't loop back, look for a Microchip; this unlocks more floors on the elevator. There is also an item here we'll need to get Claude (yeah, he has a shitty sidequest; luckily this is the only item you’ll need for it), so make sure you nab the Minsidia by going 80% the way left on the continental shelf, then down to get the chest near the bottom. You'll have to backtrack, so be prepared. Once you backtrack once, teleport to the ship. This way you can just quickly return to the shelf by going to the ship/beginning of the dungeon. Anytime I got back to the starting floor, I went to heal/restock since it makes life easier. I avoided a lot of the enemies here as well, like the rhino-dino looking guys, because they just OKO'd my party all the time.
After getting the Minsidia, go back to the beginning of the continental shelf and retrace your steps across, but go all the way left and all the way down. You may want to grab Precis first because the two treasures here require Hover (a weapon for her and for Ernest--not worth trading out your healer, IMO). You'll now be in the seabed. You might be able to hover if you go left for a shortcut, IDK, but the path around is clockwise. If you want some treasure, go to the first door you see, but if you want to move onto the boss, just keep going clockwise towards the center.
I've had to do a lot of resets just because enemies KO Celine instantly :/ I've been using her Magic Shot field action to get the jump on some enemies and start battle controlling her. A Thunderbolt takes out the Saber Fins in one shot. The Nautilus' take a lot of damage from Thunderbolt too, but to preserve MP, try to finish them off with Dias. They cause poison, so have Noel w/Dispel or cure poisons handy.
If you can get Celine's MP 200+ and INT 60+, you may have a good chance of sparking Thunderstorm, which may be an option we can use going further since Southern Cross isn't obtainable yet...
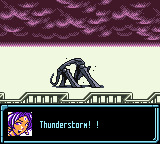
The red shark is a sub-boss and if you got Thunderstorm, he goes out in 1-3 casts of that. When it attacks again, you wake up in Aqua City and are greeted by an Edifian. Is that what we're doing here? Talking to them? It's so strange we go through this dungeon instead of searching for Claude/Rena immediately... just sayin'. Go around and talk to the Edifians for the first plot in awhile. You'll learn they fought Rival 200 years ago and failed when she flooded the planet. We also learn Claude and Rena crashed near Nusa Beach.
When you go to talk to the leader, they go on some typical Tri-Ace writing about the Aqualung being able to carry Rose's thoughts and that's how they know who you are and that the Priest wanted you to fight Rival. The leader goes onto say we need two more Edifian's help and must go to Ax and Azul and pass their trials. It's pretty similar to SO2 and the Four Fields. Head right from the leader's room and there are two warps.
Return to the ship and restock as needed. It's time to finally get Rena and Claude. Go to Nusa Beach (Use the shortcut in the Crash Forest or go through Slave Village passage [I also realized the upper left exit of Aqua City is a shortcut, later on... oops]) and get Rena, because you can't get Claude without her. One thing the website guide notes is they are completely optional. There is some text where Claude laments if you fail to recruit them, but since Rena is useful and we want the team reunited... let's go get them and level Rena up!
Nusa Beach Revisisted (Rena) Go to the location shown above (near one of the cities, I think? Before the Sea Cave) and you'll find Rena!
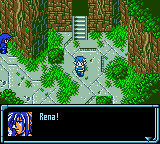
I hope you've been saving Knife weapons... apparently Rena uses them in this one. It feels like a reference to her og PS1 art, where she had a short sword / dagger. She also uses mage armors, so you may need to go purchase some of the better stuff in Knott/Lung. We have to "level" her anyway, so use any spare SP on her and go train somewhere if need be. Go to Lung to upgrade first, then go to Knott since that's our destination. Claude has a disease that a scientist named Rush there can cure.
Also, while you're at Lung, you may want to invest in some Titania Sources and upgrade some things, especially since Rena probably won't have an Isis Tiara, we may want to make her one or something better.
Raising Rena
*Note, she will not learn Gravity Press with this method, BUT Celestial Arrow is better anyway.
Sense - Physical Sensation, Danger Sense, Radio Waves(Transmission)
Battle - Parry, Quigong (I didn't learn these, because I didn't see them come up quickly...)
The above are optional but learn one set before the other.
After learning Sense skills, learn all TECH skills through Lezard Techno.
After learning all the above, raise INT until you get Lost Magic.
I levelled her at the base of the seabed. Use Celine's Thunderbolt to take out the Balloon Fish in a few hits. Enter the cave door and go back out to respawn. He gives 60 SP a go. I just refilled MP with Blackberries until I ran out, rinse/repeat. The cost of the Blackberries can suck, but don't forget that Scout often has them on sale. Also, depending on your playstyle, you may find an easier enemy that gives high SP, just do what works for you. In one "trip" I got Rena to a 67 Skill Level. Everyone else is around 100~ so I figured, close enough. I also raised Taijitsu a little for Celine and Rena so their HP was around 100 each.
Knott Revisisted (Claude) Go to the first door on the left of the science building where all those dungeons were to find Rush. He needs the Minsidia, which we already have. He makes the medicine and so we go to Vanis City.
Vanis City Revisited (Claude) You'll see a big guy right when you teleport there. Talk to him. Claude will be waiting at the ship if you want to use him.
Now we can return to Aqua City. We'll take on Ax first, since it's a bit easier.
Ax - Right
Go the upper left door of the area and climb the shell. You'll face the Lord of the Sea who gives you hints on how to progress. These change each new playthrough, but for my own notes, here's what they were in my playthrough: Go through the door of bubbles. He also gives us something, but I have no clue what it was. (Okay, I'm dumb. Realized this on door 2... grab the item bag that appears behind the guy you fought! There's an item in it.)
Next aim for the door right, right again, and down. There's a door where you repeat steps. There's the King of the Sea who says (in my playthrough) go through the bubble door two times.
Next go up and right through the door and repeat the process a final time. Now is the Master of the Sea. His clue for my playthrough was: You have to go through the doors four times in total.
Lovely. At this point I was running low on blackberries, so I left to restock. I also wanted to see if I could get Rena and spells since we've amassed some SP. To learn Fairy Heal, we need Fairyology. I think because INT is NOT opposite TECH, it's alright to raise and we won't lose points, since we will level it after INT anyway. So I went and spammed Cure Light to learn Fairy Heal. In about 3 fights on the road to Knott, I got Fairy Heal AND Fairy Light in the same battle by spamming Cure Light and using Fairy Heal for the first time... We FINALLY have a full party cure! If we spam Fairy Heal, we have a chance to learn Raise Dead, too...
Item Creation: Jewelry Making
I really kind of want a Fairy Ring for Rena, but I can't get the points higher than 130-150, when I need 200+... I did get an extra Star Necklace (reduces cast time) using 1 of my Rune Metals, though. You'll need to buy the Magical Rasp from Lung and try to make a Circle or Cross shape for the highest points. The highest I got was 180 making circles... :( I think I need the level higher, but it conflicts with Celine's learning path...
I screwed around with Compounding, since Rena had it at level 6 after I trained her up earlier. If you mix Thyme and Rosemary, they make the basic Resurrect item if you score 150ish. Nice to get revives. I know Athelas makes resurrection items and some MP items in SO2, but I don't think they exist here. The best item, the Metox, is obtained through connect battles, so that's out.
Item Creation: Compounding
Thyme and Thyme with a low score can make Mixed or Fruit Syrup (HP/MP small and medium restore) and seem like an easy/good combo to make for the dungeon treks. To get Thyme, you can hunt Hippos in Garp. There's 3 right at the entrance and they go down super fast now that we're so late in the game. Bonus, it can be an easy but grindy way to amass some SP (19 SP each I think), so it's a win-win if you got a TV show to binge and wanna grind a bit. Just remember you can only carry 15 of an item, but doesn't hurt to have a full stack and extra so you don't have to leave dungeons as often. Another alternative is to grab Bowman and go to Scout Village, exit, go left and explore the first two screens for herbs, walk back to the village real quick, and repeat. You should have a plethora of herbs at your disposal after.
Another good herb combo:
Lavendar and Lavendar (Score: Auto / 150+) = Resurrection Mist (Revives one 100% HP.) If you score around 80, you can get a Mixed Syrup, too.
Lavendar and Rosemary (150+) make a Cure Stone.
Lavendar and Thyme (150+) can make Cure Paralysis.
Rosemary and Rosemary (170+) can make a Mental Pot (increases Symbology in fights)
Now, to get back to the game for a bit... I returned to the bottom/center door near the crab because apparently there's one more guy to fight. He is the Demon of the Abyss, just a giant crab. His hint for my file was: There's a tricky room in the center of the tower, you won't be able to leave it just walking normally. After the door of bubbles, you must go through the door of waves.
Once done, go back to the second door we went through (the one that was right, right, down, next to 2 crabs); this will lead to the central tower that just seemed to loop endlessly if you visited before. On either side there are two doors. The left is the wave door and the right is the bubble door. There are two gaps that must be hovered/jumped over. Based on our clues, we need to: Go through the door of bubbles two times. We have to go through the doors four times altogether. After the door of bubbles, we have to go through the door of waves. My first guess wasn't right, so I'm not sure I understand the riddle... You'll know if you failed because you auto-fall into one of the gaps. My solution was: Bubble, Wave, Bubble. I have no idea why. Go up the central tower, Raum, one of the Edifians, is waiting at the top right.
After speaking with Raum, we see a scene of Rival raising the Grand Knott (tower/weapon thing, kinda reminds me of Vane from Lunar). You'll be teleported back to the teleporters, where we can now take on Azul.
If there's any PA's you want to do in Ava City, do them now. I'm not sure if they become unavailible after the events of the second tower / talking to the leader after completing both towers...
Azul - Left Start by heading left and down through a hidden path. Step into the pool/teleporter. Grab the treasure and go up. This is where the official guide said to go first, but we need an orb first to open the door. Go back to the entrance, go down and right, right, down and you'll get a Devil Egg in the treasure box. Go back to the entrance and go all the way left and down to get the Devil Fruit. Go back to the entrance a third time, go right through the pool and up, up, then right. You'll see a hole. Put the Devil Fruit there. Do the same thing in the next room with the Devil Egg, then move the two blocks to the lit up areas in their rooms to unlock a pool teleport back near the red shark.

Love the Tria reference lol These guys were so immersion breaking / over the top I loved it
Go through, grab the Blue Orb, and go back. If you go down, left, up there is another block to move (it doesnt change anything yet). Return to the entrance and go all the way left and get on the teleporter. Defeat the two fish to open the doors. Make your way upward until you see another block to move. This time it changes something. Go down and right through the pool teleporter. Grab the item and go back, go up to another pool teleporter. You can skip the first one, but the second teleporter has a Star Cloak you'll really want for a mage. Go back to where you moved the block on the same floor (left, up) and go left through the hidden passage. Go back to the entrance after grabbing the Green Orb. You may want to leave/restock and come back because the boss is soon. There's one orb left. From the entrance go left, down, through the teleporter, then up through the door we can now open. Toss the cap on one of the mages and get the Red Orb. Now we can open the boss door, so prepare/save and head up to put the orbs into the door with the red hinges (similar to the Green orb door we just busted up). You gotta defeat all the enemies. A few Thunderbolts take out the crab. I just ran from the dragon guys since they waste so much MP. A few Thunderstorms took out the boss really quick!
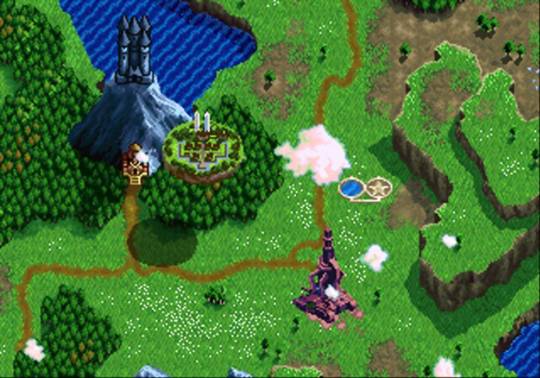
Yeah, this is a lot like Vane’s destruction but in reverse lol
After you go back to Aqua and watch Rival and Ava City duke it out. We learn Rival powered Grand Knott with the Palantir Stone. The Edifians confirm Ava City is destroyed.
Remember those damn elevator ruins from early game? Yeah... :/ Rival has nestled Grand Knott into it and is waiting for us to stop her. They explain the Leviabor Ruins have powers of the ancient race and it's needed to power Grand Knott, which is docked and free to enter. Except for a barrier, which they can get rid of, so who cares. Anyway, I'd prep by trying to make better weapons, armor, and items. Make food, curatives, ect. Then when you're ready, go to Ava City and the Leviabor Ruins. This isn't the final dungeon, by the way. For some reason the game is gonna continue quite awhile. Luckily there is a final city soon that has a ton of good stuff, so you can probably trudge through the 10 Seals and Leviabor fairly easily. We'll see...
Let’s take a detour with...
Private Action Palooza! (aka A lot of PAs...)
There aren't many PAs in this game, but I wanted to go see any still left. There's a few more late game that get you some ultimate weapons, apparently, so I don't want to miss them and I'll include them in this guide. I'll note if there's any that were missed based on time (since some may have closed after the events at Ax/Azul)
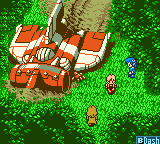
Okay, it’s wierd controlling Claude again... :p
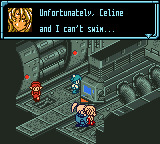
Opera, is this necessary??
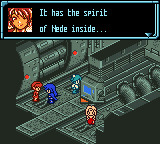
Spaceship - Chisato OUT - Speak to Chisato to gain her ultimate weapon, the Mirage. (A SO2 reference maybe?)
Ultimate Weapons
You'll notice they have 0 stats. It's because you need a Blue Sphere (Alchemy) and to take them to the guy in... Knott, I think? I'll have to double check.
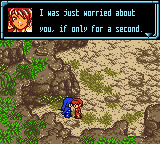
Road to Knott (Go to Vanis City south exit, down, right, right, down) - Chisato IN, Dias OUT - DiasxChisato shippers will love this PA--Chisato tells Dias it's dangerous to be out in the wild alone and that first impressons are important. She basically says his aloof and succinct words make it hard for the party to understand where he's coming from and everyone worries.)
Ava City - Opera IN, Celine OUT - After completing Ax/Azul / Before Ava is destroyed / Bowman daughter PA can't have been seen (?) - Obviously I couldn't do this one for multiple reasons...
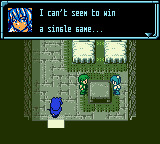
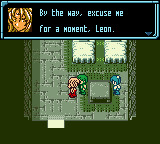
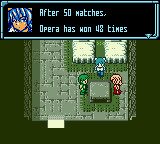
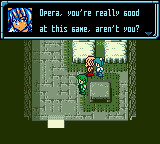
Slave Village (upper right house) - Opera, Dias IN, Leon, Bowman OUT - Leon and Bowman are playing a card game. Bowman lectures Leon on thinking too much about the game, which is causing Leon's losing streak. Dias lectures them for being nonchalant when the world needs saving, but agrees breaks are good, so Bowman offers to play. Opera taught them the game (from Earth - Hanafuda).
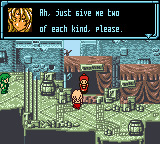
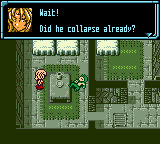
Vanice City (go right twice from entrance) - Bowman IN, Opera, Ernest OUT - Bowman sees Opera buying a ton of alcohol. Opera offers Bowman some (apparently the alcohol is better than Earth) and I agreed to let Bowman live it up. They go back to the inn to drink. Eventually, Bowman passes out and Opera keeps drinking. It wouldn't be Star Ocean without someone getting shitfaced, you know? Opera leaves to buy more when she runs out and Ernest brings Bowman back to the ship, telling him not to attempt to keep up with Opera again... lol
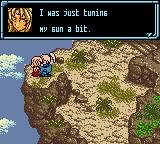
Road to Knott (Exit Knott) - Precis IN, Opera OUT - Opera's gun is veering left, so Opera asks if Precis can fix it. Opera's good with machines, but not computer parts... I agreed for Precis to look at it. Opera declines though, scared Precis will return it over-designed. I asked Opera after the PA, too, and Precis gets all mad because Opera won't let her within 10 feet of the gun in fear Precis will make it into an automaton...
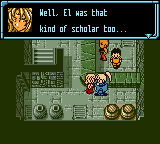
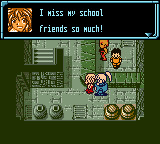
Knott (second floor item shop) - Opera IN, Precis OUT - Precis comments on Knott's dark atmosphere, compared to her school. Opera mentions El was a scholar... I think this is a mistranslation as she probably said "Ern", meaning Ernest.
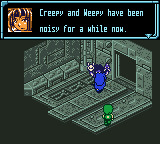
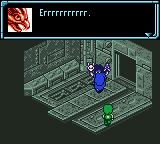
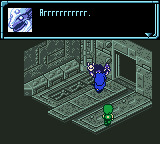
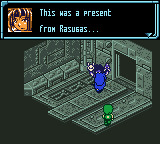
Spaceship - Ashton OUT - Ashton gives you his ultimate weapon 83 Inn's Claw (ROM) / Gine's Claw (Japanese website translation--I think this might be XINE?! Did XINE hand over a talon?!). Ashton says that Gyoro and Ururun want him to use the weapon, but Ashton says it was a gift from (Rasugas)? Does he mean Lasguss (mountains)? Perhaps from his home town that was scrapped in SO2? He says it has the spirit of a djinn inside. I swear I read in an interview Ashton's hometown had something to do with a djinn...
Note before these two PAs, bring Ashton and Claude with you. Dias should be able to handle any enemies. Do NOT bring Precis or Opera.
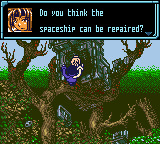
Gravis Forest (Summit, where the boss was) - Ashton IN, Precis OUT - Ashton asks Precis if she can repair the ship soon. Precis says that means she'll go back to Earth and Ashton to Expel. Since they're supposed to be canonical in a way, I stated 'We'll be seperated again'. Precis tells Ashton he hasn't changed in two years, because he's sad about being seperated again. Precis says it's a good thing he hasn't changed, giggles, and runs off.
Ah, if I'd known about this... I'd brought Claude, too... If you do take my advice, try going down one screen and returning to see if the PA triggers, otherwise you may have to backtrack like I did. If you're lost, just keep heading up from the Hideout as best you can. It doesn't take too long as the enemies that remain go down really quick.
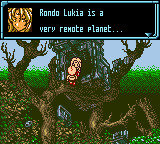
Gravis Forest (Summit) - Claude IN, Opera OUT - Claude snaps Opera out of reading a book. She's exploring the wreckage of her ship and gathering things she might want to keep. I was curious so I asked 'What were you reading?' The Armoured Death and the Knight of Fire are what Claude notices. He says they're very military, even noting Opera's jacket. However, Opera hates war, she just likes good stories that are fiction and finds her jacket comfortable. When Opera mentions a far off planet, Claude reminds Opera that he's part of the Pangalactic Federation (she forgot!)
Nusa Beach (use the Crash Forest entrance) - Rena IN, Chisato OUT - Chisato is worried about the universe constantly at war, saying the Nedians were a peaceful people. I told her 'There's hope in the future' basically. If you talk to Chisato after, she says because of the events two years ago, she became a Battle Reporter, specifically. :)
Road to Gravis (Had to look up where this was... It's the area with the tower where Maria was, so go to Knott and use the back door where Rival used to hang out. Travel down the ladder, through the little tunnel, and you'll see Celine when you exit.) - Rena IN, Celine OUT - Rena finds Celine looking pale. I said 'I'm more worried'. Celine says a bug fell on her (reminds me of the trope they used in the EX anime) If you talk to Celine after, Rena says bugs don't bother her much.
Scream (2F of Serpent Ruins, teleport to Serpent Ruins, leave, head right, then head for the top right of the dungeon) - Rena IN - Defeat the bird. The lady with the bento will die. Use Rena's Rebirth to revive them. This ability seems to be finicky? I guess use it in front of the "block" of floor where the lady died, and it should revive her. If you go to the back there's now a jam shop. Let me tell you, I was so mad lol I was hoping it would have the Aloe Jam that was so useful in SO2... NONE of the jams restore MP... FML. Buy the Blueberry Jam (20% HP restore) at least for dungeon crawling, otherwise this was pointless for the effort involved...
Lung (item shop) - Requires Bowman's daughter PA to have been done - Celine IN, Bowman OUT - Bowman needs help deciding what to get, a dress for Nineh or a toy for Erys. Yeah, the toy seems the better choice, but it's trash compared to the Marvel Dress you get otherwise. (Marvel from SO1? Interesting lol) Move the Star Cloak to Rena and give Celine the massive boost from the Marvel Cloak.
That's all for now! :o We've only got a few PAs left for later... Where were we? Right, Leviabor Ruins...
Due to issues with Tumblr, please be patient. I’m tired of editing/saving 3x just to make updates to this post. It is very exhausting. Fix your shit Tumblr.
FINAL PART OF GUIDE, CLICK HERE
#star ocean blue sphere#tips and tricks#strategy guide#SOBS#beginner's guide#star ocean series#fan translated#video game review
18 notes
·
View notes
Text
Star Ocean: the Second Story Secret Ending / Group Ending / Composite Ending / Ending 86 Strategy Guide & Walkthrough ! Happy 25th Anniversary Star Ocean 2!
I wanted to do something sort of special before Star Ocean: the Second Story R releases in November. After playing this game since release you sort of run out of things to do. Although I started off pulling my hair out, I am developing a strategy to get the special, final ending, also known as #86 / Secret / Group ending.

When a guide takes 3 guides, 2 copies of the game, a new controller, a new composite cable, 3 websites, and 4 days... I’m prepared!
I started off by developing a chart after deciding on the party I want to attempt this with. I immediately got rid of Dias, because in the PS1 he has no PAs and therefore his relationship requirements would be more strict. I am playing the PS1 version mostly for personal preference but also because I have no easy way to play the PSP version. If you want to play that one, this guide might be applicable, especially with Welch and the new PAs all around that were added (including Dias). Another thing to keep in mind is that the grouping doesn’t really matter for the ending, you just need 8 characters.
After looking on a debug thread and 2 Japanese sites, I finally remembered I have the Japanese “Final Guide” and looked at that (with Google Translate, but still).
For my first attempt, I am focusing on a Claude playthrough. According to the Final Guide, you can play as Claude or Rena for the ending.
Here is the party I decided on: Claude, Rena, Celine, Ashton, Precis, Leon. According to the Final Guide you only need 6 or more to get the ending (in fact, it recommends that 6 be used for easier aquisition). These characters tend to have PAs with one another or a lot of PAs. Noel and Chisato are added to round the group to 8. Opera and Ernest were skipped because I feel Ernest has few PAs. Opera without Ernest is very difficult to override RP.
Further down the line I will post my chart which includes the boss events, joining events, and PAs that effect levels. Most of this information I gathered from GameFAQs thanks to a debugger, but they stopped around Disc 2 and even then the information is questionable except for what he could confirm with accessing FP/RP debugging.
The 100 battles = 1 point is a myth as far as I’m aware. I think how this myth came about is when party members die enough and you revive them or enough items are used (ie: Blueberry, Blackberry), I feel there is something there that may increase levels... This is speculation, though.
For information on pickpocket and reverse side, please click here and read the thread notes. I didn’t level for the Bandit’s Gloves, steal from Philia, or steal from the old man in Mars, since stealing comes with a huge risk in this sort of playthrough. I may risk the Bunny Shoes, though...
Claude and Rena won’t be included as they almost always have “30″ (game maxes at 15/16, but there is opportunity twice over for them) FP/RP by the end of the game. I didn’t need an extra tally to take care of. Just avoid PAs that reduce their relationships.
I am playing on PS2 hardware (partially due to the credits glitch on PS3). Therefore I have no way to check the levels 100%. Someone is welcome to try on emulator with debug using this guide (but please link it once I update this page). I will back up this post and add additional notes in my own text file, just in case. The only relations I can check 100% are Claude w/other members during Fun City.
The ending requires all characters 8 RP and FP for one another or higher (Final Guide). I will be shooting for 11, to make sure it triggers.
When I researched Blue Sphere, I stumbled upon a Japanese site that had a lot of information. I decided to check it out for this case as well. Along the way, I did find a calculation on the Star Ocean Wiki that says:
Affinity Points = RP x 2 + FP
The Japanese website also says (according to Google translate):
The conditions are that the party has 6 or more people, and that everyone has 8 or more affection value* and friendship value for each other .
*affection value in this translation is romance points
This confirms what the Final Guide says. 6 or more characters and equal FP/RP between all of them. I’m pretty sure reaching the end and using all books on each other doesn’t work (namely, because the 4 characters in the final fight get points, therefore, making them higher than the others... it seems the ultimate strategy would be to use books on everyone at the end except the characters you plan to use for the final battle, who would need an exact FP/RP of 7 respectively according to gender... I may try this in another attempt. Perhaps it would be possible to have a save before the Fields’ bosses and get everyone to 9... but raising the opposite values that aren’t raised by bosses becomes a problem.)
Please read my experience / walkthrough under the cut. Well, let’s start this guide! (I can confirm, somehow or another, it worked for me! If you’re after the ending, give it a shot! Let me know your results too!)
I started from a previous save that had Claude (with Dexterity, although I won’t be needing it yet), Rena, and Celine (start of Cross Cave).
Claude/Rena: N/A
Claude/Celine: 5 RP, 5 FP
Rena/Claude: N/A
Rena/Celine: 5 FP, 5 RP
Celine/Claude: 5 RP, 5 FP
Celine/Rena: 5 FP, 5 RP
I played through the cave including the bat bosses. Celine joins.
Note: Character join events Recruited Character Gender gains FP, Opposite gender gains RP. For example:
Ashton would give +1 FP to all relationships involving him and a male. +1 RP to all relationships and him involving a female. Relationships like Claude/Rena are not affected.
Note: Starting FP/RP levels are confirmed for everyone in the US and JP Official Guides.
Values should be:
Claude/Rena: N/A
Claude/Celine: 6 RP, 5 FP
Rena/Claude: N/A
Rena/Celine: 6 FP, 5 RP
Celine/Claude: 6 RP, 5 FP
Celine/Rena: 6 FP, 5 RP
Next I will play until Ashton.
Note: If you want Michief or to fight Unlimited Indalecio, don’t forget the PA in Clik. I do NOT recommend doing ANY stealing outside the 1 pair of bunny shoes later because the effect is so random. (See my notes/link above about Pickpocketing.) The values will be the following to start:
Claude/Rena: N/A
Claude/Celine: 6 RP, 5 FP
Claude/Ashton: 5 FP, 4 RP
Rena/Claude: N/A
Rena/Celine: 6 FP, 5 RP
Rena/Ashton: 5 RP, 5 FP
Celine/Claude: 6 RP, 5 FP
Celine/Rena: 6 FP, 5 RP
Celine/Ashton: 4 RP, 5 FP
Ashton/Claude: 4 FP, 4 RP
Ashton/Rena: 4 RP, 5 FP
Ashton/Celine: 4 RP, 4 FP
To gain some levels, we will play through Ashton’s event until XINE. We will wait to complete Ashton’s event until recruiting Precis for an extra boost to her (Note: I haven’t tested this... I waited until I had Leon in my party and could go to Cross after the ruins and his join event DOES NOT activate... You MUST do it before the Hoffman Ruins like the official guides say. I had to go back before the ruins and complete this, because otherwise you miss an Ashton PA that boosts FP for all in addition to his join event!)
The next section will involve playing until Precis joins, PAs, and our first boss fight to increase affinity. Note: Specific boss fights listed in this guide are confirmed to increase relationship. How so wasn’t listed officially, but the Final Guide does confirm the bosses. The debugger says that it works like join events and +1 FP to same gender, +1 RP to opposite gender.
Claude/Rena: N/A
Claude/Celine: 6 RP, 5 FP
Claude/Ashton: 5 FP, 4 RP
Claude/Precis: 5 RP, 5 FP
Rena/Claude: N/A
Rena/Celine: 6 FP, 5 RP
Rena/Ashton: 5 RP, 5 FP
Rena/Precis: 5 FP, 4 RP
Celine/Claude: 6 RP, 5 FP
Celine/Rena: 6 FP, 5 RP
Celine/Ashton: 4 RP, 5 FP
Celine/Precis: 4 FP, 3 RP
Ashton/Claude: 4 FP, 4 RP
Ashton/Rena: 4 RP, 5 FP
Ashton/Celine: 4 RP, 4 FP
Ashton/Precis: 7 RP, 5 FP
Travel to Lacour, visit Linga, perform PA to recruit Precis. All FP +1 (same gender) and RP +1 (opposite gender) are added.
Precis joins (PA):
Claude/Rena: N/A
Claude/Celine: 6 RP, 5 FP
Claude/Ashton: 5 FP, 4 RP
Claude/Precis: 6 RP, 5 FP
Rena/Claude: N/A
Rena/Celine: 6 FP, 5 RP
Rena/Ashton: 5 RP, 5 FP
Rena/Precis: 6 FP, 4 RP
Celine/Claude: 6 RP, 5 FP
Celine/Rena: 6 FP, 5 RP
Celine/Ashton: 4 RP, 5 FP
Celine/Precis: 5 FP, 3 RP
Ashton/Claude: 4 FP, 4 RP
Ashton/Rena: 4 RP, 5 FP
Ashton/Celine: 4 RP, 4 FP
Ashton/Precis: 8 RP, 5 FP
Precis/Claude: 6 RP, 7 FP (Start) should change to 7 RP, 7 FP
Precis/Rena: 7 FP, 6 RP (Start) should change to 8 FP, 6 RP
Precis/Celine: 6 FP, 5 RP (Start) should change to 7 FP, 5 RP
Precis/Ashton: 5 RP, 5 FP (Start) should change to 6 RP, 5 FP
Since we’ve reached Lacour, you may want to consider learning Publishing. This is why we are keeping track of values, because RP and FP books reset the values to 8, no matter how high/low they are to begin. I purchased the skill set with Writing and Machinery in Hilton. You should already have maxed out Preserverance, so this shouldn’t be difficult if you saved all your SP from Ashton’s quest. We can learn Orchestra but it is unusable until Disc 2 / Part 2, because of the lack of instruments to purchase... We can wait and increase other needed skills for now. While you can make the romance books, I don’t recommend it without Orchestra, and since we can’t use that, it’s going to have to wait. So, for now, we will only increase F values with the common books for each character. Make 5 of each (remember, Leon) and if you want, make an extra totalling 6 of each book so you can publish them ASAP on disc 2 (this is a great way to get cash).
Also it would figure since I haven’t turned on my PS2 in three years that everything starts breaking down. Over the years of downsizing, I had only 1 composite cable and controller... controller has left stick drift and w/vibration on it randomly cuts out the analog ;___; Now my composite cable is giving flashy feedback and has corosion... Hopefully I get that fixed by the evening (thank God for Game XChange).
By the way, if you’re having trouble on funds, spend some time leveling in the Sanctuary. If you started the quest for the herb, just don’t venture too far back. You may also not want to over level for Leon. It couldn’t hurt to learn the Identify All! super specialty (Identify + Metalwork) to help ease the Fol cost at shops, either.
Precis joins (PA):
Claude/Rena: N/A
Claude/Celine: 6 RP, 5 FP
Claude/Ashton: 5 FP, 4 RP
Claude/Precis: 6 RP, 5 FP
Rena/Claude: N/A
Rena/Celine: 6 FP, 5 RP
Rena/Ashton: 5 RP, 5 FP
Rena/Precis: 6 FP, 4 RP
Celine/Claude: 6 RP, 5 FP
Celine/Rena: 6 FP, 5 RP
Celine/Ashton: 4 RP, 5 FP
Celine/Precis: 5 FP, 3 RP
Ashton/Claude: 4 FP, 4 RP
Ashton/Rena: 4 RP, 5 FP
Ashton/Celine: 4 RP, 4 FP
Ashton/Precis: 8 RP, 5 FP
Precis/Claude: 7 RP, 7 FP
Precis/Rena: 8 FP, 6 RP
Precis/Celine: 7 FP, 5 RP
Precis/Ashton: 6 RP, 5 FP
After all Friends books are used:
Claude/Rena: N/A
Claude/Celine: 6 RP, 8 FP
Claude/Ashton: 8 FP, 4 RP
Claude/Precis: 6 RP, 8 FP
Rena/Claude: N/A
Rena/Celine: 8 FP, 5 RP
Rena/Ashton: 5 RP, 8 FP
Rena/Precis: 8 FP, 4 RP
Celine/Claude: 6 RP, 8 FP
Celine/Rena: 8 FP, 5 RP
Celine/Ashton: 4 RP, 8 FP
Celine/Precis: 8 FP, 3 RP
Ashton/Claude: 8 FP, 4 RP
Ashton/Rena: 4 RP, 8 FP
Ashton/Celine: 4 RP, 8 FP
Ashton/Precis: 8 RP, 8 FP
Precis/Claude: 7 RP, 8 FP
Precis/Rena: 8 FP, 6 RP *do not need to use Rena’s book on Precis
Precis/Celine: 8 FP, 5 RP
Precis/Ashton: 6 RP, 8 FP
After an hour I got 1 romance book (Precis) and 5 of each friend book. This included learning Identify All and some small grinding for cash.
Everyone’s values should be 8 now at for Friendship!
Complete PAs before the tournament. Some of them are unavailable after the tournament is done and you can’t leave during the tournament. The tournament must be completed before starting the quest for the herb in Linga. Here are a list of the ones I managed / chose to do. It is possible I missed a few. The original US guide doesn’t list the FP/RP changes, so I have to match and go with the PSP version’s guide.
Private Actions: Linga: Unable to trigger any PAs except the salesman.
Herlie and Hilton: No relevant PAs.
Location: Mars Character: Precis Info: Choose Choice 1 gives Precis/Claude +1 FP and open up a PA in Giveaway later. Updated value: Precis/Claude: 7 RP, 9 FP
Location: Mars Character: Ashton Info: Choice 3 gives Claude/Ashton Ashton/Claude +1 FP each Updated values: Claude/Ashton: 9 FP, 4 RP Ashton/Claude: 9 FP, 4 RP
Location: Mars Character: Rena and Ashton Info: Choice 3 Rena/Ashton +1 FP, +2 RP; Claude/Ashton -1 FP Updated values: Rena/Ashton: 7 RP, 9 FP Claude/Ashton: 8 FP, 4 RP
Location: Mars Character: Rena Info: Choice 2, no change
Location: Mars Character: Precis Info: Unable to trigger (going to try after the Tournament)
Location: Cross Character: Ashton and Precis Info: Requires 100 Fol. Choice 1 Ashton/Precis -1 FP, +4 RP; Claude/Ashton -1 FP Updated values: Claude/Ashton: 7 FP, 4 RP Ashton/Precis: 12 RP, 7 FP *RP SET Note: Should have waited to use Ashton's book on Claude... Oops.
Location: Cross Character: Precis Choice 1, then Choice 2 Claude/Precis +1 RP Precis/Claude +2 RP Updated values: Claude/Precis: 7 RP, 8 FP Precis/Claude: 8 RP, 9 FP
Salva: There are 2 PAs (Celine/Jam Shop and Young Girl PAs) that you should wait to trigger for a party wide boost in points. We also will be coming back later for a PA with Ashton anyway. I wasn't able to trigger any PA except Celine's which I avoided activating.
Arlia: I did the PA with Rena in her room (no change) and wasn't able to trigger any other PAs.
Note: If for some reason you plan to do the bonus dungeon, don’t forget to do Ruddle’s quest now.
Total with updated values: Claude/Rena: N/A
Claude/Celine: 6 RP, 8 FP
Claude/Ashton: 7 FP, 4 RP
Claude/Precis: 7 RP, 8 FP
Rena/Claude: N/A
Rena/Celine: 8 FP, 5 RP
Rena/Ashton: 7 RP, 9 FP
Rena/Precis: 8 FP, 4 RP
Celine/Claude: 6 RP, 8 FP
Celine/Rena: 8 FP, 5 RP
Celine/Ashton: 4 RP, 8 FP
Celine/Precis: 8 FP, 3 RP
Ashton/Claude: 9 FP, 4 RP
Ashton/Rena: 4 RP, 8 FP
Ashton/Celine: 4 RP, 8 FP
Ashton/Precis: 12 RP, 7 FP *RP SET
Precis/Claude: 8 RP, 9 FP
Precis/Rena: 8 FP, 6 RP
Precis/Celine: 8 FP, 5 RP
Precis/Ashton: 6 RP, 8 FP
Note: I’ll use SET for when a level reaches 11 or above.
- Tournament of Arms / Claude “wins” (must complete ALL 3 FIGHTS before Dias first try, then lose to Dias) will give the usual increase of +1 RP/FP to everyone. This was found via debugging.
Note: Don’t forget to grab the Sharp Edge (Claude’s story) from Gamgee so you can make the Eternal Sphere sword later. This must be done before leaving Lacour whatsoever.
Claude/Rena: N/A
Claude/Celine: 7 RP, 8 FP
Claude/Ashton: 8 FP, 4 RP
Claude/Precis: 8 RP, 8 FP
Rena/Claude: N/A
Rena/Celine: 9 FP, 5 RP
Rena/Ashton: 8 RP, 9 FP
Rena/Precis: 9 FP, 4 RP
Celine/Claude: 7 RP, 8 FP
Celine/Rena: 9 FP, 5 RP
Celine/Ashton: 5 RP, 8 FP
Celine/Precis: 9 FP, 3 RP
Ashton/Claude: 10 FP, 4 RP
Ashton/Rena: 5 RP, 8 FP
Ashton/Celine: 5 RP, 8 FP
Ashton/Precis: 13 RP, 7 FP *RP SET
Precis/Claude: 9 RP, 9 FP
Precis/Rena: 9 FP, 6 RP
Precis/Celine: 9 FP, 5 RP
Precis/Ashton: 7 RP, 8 FP
I checked again for that PA with Precis in Mars and I couldn’t sail during the tournament. However, *after* the tournament the PA triggered for me, so I’ll update those values now:
Private Actions
Location: Mars Characters: Precis Info: Choice 3 Claude/Precis +1 RP Precis/Claude +2 RP Notes: I checked a few guides out of laziness and both of them had conflicting reports of what this PA does. I took these points from the official Second Evolution US guide.
Updated values:
Claude/Rena: N/A
Claude/Celine: 7 RP, 8 FP
Claude/Ashton: 8 FP, 4 RP
Claude/Precis: 9 RP, 8 FP
Rena/Claude: N/A
Rena/Celine: 9 FP, 5 RP
Rena/Ashton: 8 RP, 9 FP
Rena/Precis: 9 FP, 4 RP
Celine/Claude: 7 RP, 8 FP
Celine/Rena: 9 FP, 5 RP
Celine/Ashton: 5 RP, 8 FP
Celine/Precis: 9 FP, 3 RP
Ashton/Claude: 10 FP, 4 RP
Ashton/Rena: 5 RP, 8 FP
Ashton/Celine: 5 RP, 8 FP
Ashton/Precis: 13 RP, 7 FP *RP SET
Precis/Claude: 11 RP, 9 FP *RP SET
Precis/Rena: 9 FP, 6 RP
Precis/Celine: 9 FP, 5 RP
Precis/Ashton: 7 RP, 8 FP
Once you move onto the Sanctuary of Linga the boss ( Visseyer, this one is optional) increases the same as join events except for participating battlers only. This must be calculated carefully. We can choose between Claude, Rena, Celine, Ashton, or Precis. Consider which characters have a lot of PAs to increase points, like Ashton and Precis or already have high points including Claude and Rena. If you’re playing as Rena, you may consider forgoing her for another since she will have other PAs with characters and more opportunity to raise affection than someone else.
I decided on: Claude, Ashton, Celine, Rena (Claude and Ashton’s friendship was slightly damaged and Ashton/Celine Celine/Ashton Ashton/Rena values are low.) After this boss we are close to getting most characters at 10 or higher!
Updated values:
Claude/Rena: N/A
Claude/Celine: 8 RP, 8 FP
Claude/Ashton: 9 FP, 4 RP
Claude/Precis: 9 RP, 8 FP
Rena/Claude: N/A
Rena/Celine: 10 FP, 5 RP
Rena/Ashton: 9 RP, 9 FP
Rena/Precis: 9 FP, 4 RP
Celine/Claude: 8 RP, 8 FP
Celine/Rena: 10 FP, 5 RP
Celine/Ashton: 6 RP, 8 FP
Celine/Precis: 9 FP, 3 RP
Ashton/Claude: 11 FP, 4 RP *FP SET
Ashton/Rena: 6 RP, 8 FP
Ashton/Celine: 6 RP, 8 FP
Ashton/Precis: 13 RP, 7 FP *RP SET
Precis/Claude: 11 RP, 9 FP *RP SET
Precis/Rena: 9 FP, 6 RP
Precis/Celine: 9 FP, 5 RP
Precis/Ashton: 7 RP, 8 FP
Now is a good time to complete Ashton’s join event. Leon can’t benefit from it and it and another PA are inaccessible after the ruins so go do it now before you miss two chances to increase some FP.
Ashton’s join event updated values:
Claude/Rena: N/A
Claude/Celine: 9 RP, 8 FP
Claude/Ashton: 10 FP, 4 RP
Claude/Precis: 10 RP, 8 FP
Rena/Claude: N/A
Rena/Celine: 11 FP, 5 RP *FP SET
Rena/Ashton: 10 RP, 9 FP
Rena/Precis: 10 FP, 4 RP
Celine/Claude: 9 RP, 8 FP
Celine/Rena: 11 FP, 5 RP *FP SET
Celine/Ashton: 7 RP, 8 FP
Celine/Precis: 10 FP, 3 RP
Ashton/Claude: 12 FP, 4 RP *FP SET
Ashton/Rena: 7 RP, 8 FP
Ashton/Celine: 7 RP, 8 FP
Ashton/Precis: 14 RP, 7 FP *RP SET
Precis/Claude: 12 RP, 9 FP *RP SET
Precis/Rena: 10 FP, 6 RP
Precis/Celine: 10 FP, 5 RP
Precis/Ashton: 8 RP, 8 FP
I highly recommend you teach someone with Love for Animals the Survival skill and buy a full stock of pet food (purchase in Linga) from now on. I don’t know how but I got through the dungeon with 3 revives and like... 10 blackberries, including the boss on my first save in making this guide. I taught Precis the specialty but sadly I forgot Pet Food... This skill is invaluable going forward so make sure to have someone learn it ASAP. (Luckily when I had to redo the ruins I went in extra stocked... see details below.)
You may also want to get Aloe Jam (Linga, restores MP), Root Beer (Hilton, restores MP). These will be useful going forward as you’ll be flying through MP more often. I also got Leon some Suede Boots, a Reference Book, and an Amber Robe from Hilton and Linga. In general, if you have been ignoring weapons/armor you could upgrade now (especially if you struggle in the ruins).
Leon joins us at Lacour Castle’s lab, so he cannot benefit from books with his join bonus. He is included in the bonus, so let’s see what the values are now. (Leon’s values include his starting FP/RP +1)
Updated values:
Claude/Rena: N/A
Claude/Celine: 10 RP, 8 FP
Claude/Ashton: 11 FP, 4 RP *FP SET
Claude/Precis: 11 RP, 8 FP *RP SET
Claude/Leon: 6 FP, 4 RP
Rena/Claude: N/A
Rena/Celine: 12 FP, 5 RP *FP SET
Rena/Ashton: 11 RP, 9 FP *RP SET
Rena/Precis: 11 FP, 4 RP *FP SET
Rena/Leon: 6 RP, 5 FP
Celine/Claude: 10 RP, 8 FP
Celine/Rena: 12 FP, 5 RP *FP SET
Celine/Ashton: 8 RP, 8 FP
Celine/Precis: 11 FP, 3 RP *FP SET
Celine/Leon: 5 RP, 5 FP
Ashton/Claude: 13 FP, 4 RP *FP SET
Ashton/Rena: 8 RP, 8 FP
Ashton/Celine: 8 RP, 8 FP
Ashton/Precis: 15 RP, 7 FP *RP MAX
Ashton/Leon: 6 FP, 5 RP
Precis/Claude: 13 RP, 9 FP *RP SET
Precis/Rena: 11 FP, 6 RP *FP SET
Precis/Celine: 11 FP, 5 RP *FP SET
Precis/Ashton: 9 RP, 8 FP
Precis/Leon: 6 RP, 6 FP
Leon/Claude: 7 FP, 5 RP
Leon/Rena: 6 RP, 5 FP
Leon/Celine: 6 RP, 5 FP
Leon/Ashton: 6 FP, 4 RP
Leon/Precis: 6 RP, 6 FP
Note: Black screen of death in Linga and now Hoffman ruins... Man, I never had it happen this often on PS3. I did get a new controller, so that’s some problems fixed. I will try one of my two other extra copies of the disc just to see if that somehow helps but I’m probably just having bad luck!
Note: After reloading to a previous save for Ashton’s quest... got black screen’d in the Salva Drift. -.-; I’m starting to wonder if it’s an issue with the PS2 Slim / PS2′s age that’s making it occur more often...
Don’t forget to max out Leon’s Perseverance before anything else. You should also take a little time to make 5 FP books and use the remaining FP books from the others on him to bring his values up (I forgot... and I can’t be bothered to go through the Ruins a third time, so I will use them later.)
Hoffman Ruins ( Harfainx/Phalanx) Bonus. Again this must be considered carefully. This fight is easier with Celine’s Thunderstorm, so she may be a given. Two fighters is recommended so we really can’t use Leon (this is subjective, if you want to). Asthon, Precis, Celine, Rena seem the way to go. If you aren’t using Claude often, you may change him out for one of the other characters, although this gives Ashton/Celine and Precis/Celine time to bond.
I raised Celine to level 31 so she had Thunderstorm for the boss (Leon joins at level 30 so I switched him out for the random battles). You might want to consider Flare Rings/Ruby/Star Rubies for random battles and Crystals for the boss fight as accessories to protect against the Salamanders and Phalanx’s respectively.
I want to say the values seem to be tracking... Before I had to reload my save, Celine died in a random battle and Claude cried her name. I’ll try to make note of any of these occuring, but I think on Disc 2 they will be pretty numerous. I haven’t had any deaths in the boss fights and I know in SO1 that would cancel out the bonus for the dead character, so avoid letting anyone die in the special boss fights. If you’ve had this happen, you may want to adjust your numbers just in case.
Updated values:
Claude/Rena: N/A
Claude/Celine: 10 RP, 8 FP
Claude/Ashton: 11 FP, 4 RP *FP SET
Claude/Precis: 11 RP, 8 FP *RP SET
Claude/Leon: 6 FP, 4 RP
Rena/Claude: N/A
Rena/Celine: 13 FP, 5 RP *FP SET
Rena/Ashton: 12 RP, 9 FP *RP SET
Rena/Precis: 12 FP, 4 RP *FP SET
Rena/Leon: 6 RP, 5 FP
Celine/Claude: 10 RP, 8 FP
Celine/Rena: 13 FP, 5 RP *FP SET
Celine/Ashton: 9 RP, 8 FP
Celine/Precis: 12 FP, 3 RP *FP SET
Celine/Leon: 5 RP, 5 FP
Ashton/Claude: 13 FP, 4 RP *FP SET
Ashton/Rena: 9 RP, 8 FP
Ashton/Celine: 9 RP, 8 FP
Ashton/Precis: 15 RP, 7 FP *RP MAX
Ashton/Leon: 6 FP, 5 RP
Precis/Claude: 13 RP, 9 FP *RP SET
Precis/Rena: 12 FP, 6 RP *FP SET
Precis/Celine: 12 FP, 5 RP *FP SET
Precis/Ashton: 10 RP, 8 FP
Precis/Leon: 6 RP, 6 FP
Leon/Claude: 7 FP, 5 RP
Leon/Rena: 6 RP, 5 FP
Leon/Celine: 6 RP, 5 FP
Leon/Ashton: 6 FP, 4 RP
Leon/Precis: 6 RP, 6 FP
Note: Once you arrive in Hilton, talk to the guy on the left (not the soldier) and you can go to Cross.
Complete PAs before returning to Lacour:
Private Actions
Note: If I didn’t list a PA I either missed it or there weren’t any relevant/good outcomes.
Location: Salva Character: Celine Info: Choose Choice 1 and Choice 1 again gives Celine/Claude +2 FP and All/Claude +1 FP
Location: Salva Character: Young Girl Info: Choice 1: All/Claude +1 FP
Location: Salva Character: Ashton Info: No choices availible. Claude/Ashton +2 FP, +1 RP; Ashton/All +1 FP
Location: Arlia Character: Rena and Precis Info: Choice 1: Precis/Claude +1 RP
Location: Arlia Character: Ashton Info: Need at least 1000 Fol. Event takes 80% of Fol from you. Ashton/Claude(or Rena if you’re playing her) +1 FP Note: I skipped this PA because I had 77k Fol... Hoping it might be there in VR Expel later...
Location: Linga Character: Precis Info: Need previous PA in Salva. Decline the offer for tea: Precis/Claude +2 RP Note: The SE guide says choice 1... but the choices are flipped from the PS1. Whatever version, just decline the offer for tea for the best result.
Updated values:
Claude/Rena: N/A
Claude/Celine: 10 RP, 8 FP
Claude/Ashton: 13 FP, 5 RP *FP SET
Claude/Precis: 11 RP, 8 FP *RP SET
Claude/Leon: 6 FP, 4 RP
Rena/Claude: N/A
Rena/Celine: 13 FP, 5 RP *FP SET
Rena/Ashton: 12 RP, 9 FP *RP SET
Rena/Precis: 12 FP, 4 RP *FP SET
Rena/Leon: 6 RP, 5 FP
Celine/Claude: 10 RP, 12 FP *FP SET
Celine/Rena: 13 FP, 5 RP *FP SET
Celine/Ashton: 9 RP, 8 FP
Celine/Precis: 12 FP, 3 RP *FP SET
Celine/Leon: 5 RP, 5 FP
Ashton/Claude: 15 FP, 4 RP *FP MAX
Ashton/Rena: 9 RP, 9 FP
Ashton/Celine: 9 RP, 9 FP
Ashton/Precis: 15 RP, 8 FP *RP MAX
Ashton/Leon: 7 FP, 5 RP
Precis/Claude: 15 RP, 11 FP *RP MAX, FP SET
Precis/Rena: 12 FP, 6 RP *FP SET
Precis/Celine: 12 FP, 5 RP *FP SET
Precis/Ashton: 10 RP, 8 FP
Precis/Leon: 6 RP, 6 FP
Leon/Claude: 9 FP, 5 RP
Leon/Rena: 6 RP, 5 FP
Leon/Celine: 6 RP, 5 FP
Leon/Ashton: 6 FP, 4 RP
Leon/Precis: 6 RP, 6 FP
Once you move forward, Expel won’t be accessible for some time. Make sure you got / did everything you needed to do, especially any PAs that become blocked later, or if you’re like me, use any books you forgot to use (ugh, Leon’s books... I’m so dumb). There are also 2 important relationship boss fights coming up shortly, so recheck your values after PAs carefully. Leon leaves temporarily in Claude’s story, so if he has any accessories you wanna use in the interim, remove them before returning to Lacour. When he does permanently join, we will get another bonus.
Because I forgot, here are my updated values for Leon’s Affection levels after using his books and other’s FP books:
Claude/Rena: N/A
Claude/Celine: 10 RP, 8 FP
Claude/Ashton: 13 FP, 5 RP *FP SET
Claude/Precis: 11 RP, 8 FP *RP SET
Claude/Leon: 8 FP, 4 RP
Rena/Claude: N/A
Rena/Celine: 13 FP, 5 RP *FP SET
Rena/Ashton: 12 RP, 9 FP *RP SET
Rena/Precis: 12 FP, 4 RP *FP SET
Rena/Leon: 6 RP, 8 FP
Celine/Claude: 10 RP, 12 FP *FP SET
Celine/Rena: 13 FP, 5 RP *FP SET
Celine/Ashton: 9 RP, 8 FP
Celine/Precis: 12 FP, 3 RP *FP SET
Celine/Leon: 5 RP, 8 FP
Ashton/Claude: 15 FP, 4 RP *FP MAX
Ashton/Rena: 9 RP, 9 FP
Ashton/Celine: 9 RP, 9 FP
Ashton/Precis: 15 RP, 8 FP *RP MAX
Ashton/Leon: 8 FP, 5 RP
Precis/Claude: 15 RP, 11 FP *RP MAX, FP SET
Precis/Rena: 12 FP, 6 RP *FP SET
Precis/Celine: 12 FP, 5 RP *FP SET
Precis/Ashton: 10 RP, 8 FP
Precis/Leon: 6 RP, 8 FP
Leon/Claude: 9 FP, 5 RP *did not use Claude’s book as it would decrease level
Leon/Rena: 6 RP, 8 FP
Leon/Celine: 6 RP, 8 FP
Leon/Ashton: 8 FP, 4 RP
Leon/Precis: 6 RP, 8 FP
Play through the game until you reach Eluria Tower and defeat Shin. At the top of the tower you’ll meet the 10 Wise Men and fight Berle. This fight, like the first Shin fight, is one of survival. Make sure no one dies and outlast the hidden timer! This effects values and if my previous suspicions are right, don’t risk anyone being dead at the end of the fight. I set my fighters and mage to avoid and usually control one of them to keep Berle distracted. Have Rena still set to heal. Because I actually had to consider values, I picked these characters for the battle: Ashton, Precis, Leon, Rena.
Updated values:
Claude/Rena: N/A
Claude/Celine: 10 RP, 8 FP
Claude/Ashton: 13 FP, 5 RP *FP SET
Claude/Precis: 11 RP, 8 FP *RP SET
Claude/Leon: 8 FP, 4 RP
Rena/Claude: N/A
Rena/Celine: 13 FP, 5 RP *FP SET
Rena/Ashton: 13 RP, 9 FP *RP SET
Rena/Precis: 13 FP, 4 RP *FP SET
Rena/Leon: 7 RP, 8 FP
Celine/Claude: 10 RP, 12 FP *FP SET
Celine/Rena: 13 FP, 5 RP *FP SET
Celine/Ashton: 9 RP, 8 FP
Celine/Precis: 12 FP, 3 RP *FP SET
Celine/Leon: 5 RP, 8 FP
Ashton/Claude: 15 FP, 4 RP *FP MAX
Ashton/Rena: 10 RP, 9 FP
Ashton/Celine: 9 RP, 9 FP
Ashton/Precis: 15 RP, 8 FP *RP MAX
Ashton/Leon: 9 FP, 5 RP
Precis/Claude: 15 RP, 11 FP *RP MAX, FP SET
Precis/Rena: 13 FP, 6 RP *FP SET
Precis/Celine: 12 FP, 5 RP *FP SET
Precis/Ashton: 11 RP, 8 FP
Precis/Leon: 7 RP, 8 FP
Leon/Claude: 9 FP, 5 RP
Leon/Rena: 7 RP, 8 FP
Leon/Celine: 6 RP, 8 FP
Leon/Ashton: 9 FP, 4 RP
Leon/Precis: 7 RP, 8 FP
DISC 2 / PART 2 / ENERGY NEDE
I want to reiterate this as you will soon be learning Orchestra to help with item creation. This is particularly helpful if you plan this ending with Noel (you can use books on him before he’s recruited and go back to the city for supplies from his house via the teleporter if you need to). Also purchasing a Beret and having the character you’re using to make books equip it will help. Try to have Orchestra at least around Level 8. Finally, move the current character to the top of your roster for slightly quicker crafting. Make sure to save frequently and use Identify All to lessen the cost. You may want to gain some levels around North/Central City and put the skills into Music and Writing. If you can afford to or make them, get the support accessories (like the Writing Software you should have obtained in Eluria Tower).
Note: When you do learn Orchestra DO NOT max everyone’s Music Talent (especially Claude!!) if you plan to do any post-game or extra stuff, as the Music level of a character, must be lower level.
Book value changes after Orchestra/Romance Books:
Note: Bold indicates a change.
Books used (RP): Claude/Ashton Claude/Leon Rena/Celine Rena/Precis Rena/Leon Celine/Rena Celine/Precis Celine/Leon Ashton/Claude Ashton/Leon Precis/Rena Leon/Claude Leon/Rena Leon/Celine Leon/Ashton Leon/Precis
Claude/Rena: N/A
Claude/Celine: 10 RP, 8 FP
Claude/Ashton: 13 FP, 8 RP *FP SET
Claude/Precis: 11 RP, 8 FP *RP SET
Claude/Leon: 8 FP, 8 RP
Rena/Claude: N/A
Rena/Celine: 13 FP, 8 RP *FP SET
Rena/Ashton: 13 RP, 9 FP *RP SET
Rena/Precis: 13 FP, 8 RP *FP SET
Rena/Leon: 8 RP, 8 FP
Celine/Claude: 10 RP, 12 FP *FP SET
Celine/Rena: 13 FP, 8 RP *FP SET
Celine/Ashton: 9 RP, 8 FP
Celine/Precis: 12 FP, 8 RP *FP SET
Celine/Leon: 8 RP, 8 FP
Ashton/Claude: 15 FP, 8 RP *FP MAX
Ashton/Rena: 10 RP, 9 FP
Ashton/Celine: 9 RP, 9 FP
Ashton/Precis: 15 RP, 8 FP *RP MAX
Ashton/Leon: 9 FP, 8 RP
Precis/Claude: 15 RP, 11 FP *RP MAX, FP SET
Precis/Rena: 13 FP, 8 RP *FP SET
Precis/Celine: 12 FP, 8 RP *FP SET
Precis/Ashton: 11 RP, 8 FP
Precis/Leon: 8 RP, 8 FP
Leon/Claude: 9 FP, 8 RP
Leon/Rena: 8 RP, 8 FP
Leon/Celine: 8 RP, 8 FP
Leon/Ashton: 9 FP, 8 RP
Leon/Precis: 8 RP, 8 FP
Sell any extra books (I had 20 of each FP book, so I sold 15 of them in case I want to lower values later) to the Central City Publishing House. I think I made something like 130k before royalities (we will go back before the Field of Power and nab that sweet Fol for late-game weapons/armor)
(If you’re using Chisato, don’t forget her recruitment requirements before proceeding.) Defeat the Psynard (no bonus points), other bosses, ect. and continue with the story up until the Field of Courage or Power. You may want to check any PAs that open/close during the time (IIRC, many are open pretty much indefinitely or only open after late game story events).
I’ve been sort of tallying the points, estimating what they would get participating in boss fights, and well... A lot of characters will still only have an FP/RP of 8 by the end, just because there aren’t PAs for them. My strategy going forward will be to use them in all the outside battles and hope something there raises it. Perhaps the ending requires 10 + same-gender points and 8 opposite gender points? I’ll try my best to figure it out, as I see no way to raise certain characters’ missing values (For example, Rena/Precis and Precis/Rena will be stuck at 8 RP... there is no way to raise it other than books at this point...) There are a few Second Evolution PAs that raise some characters further (like Ashton/Leon), but alas these are additions only to that version... I will most likely use a party of Ashton, Precis, Leon, and Rena going forward for random battles in some attempt to raise them...
I used Precis, Ashton, Leon, and Rena for the Cavern of Red Crystal.

My friends and I called the Psynard the Psnaef (Puh-snay ff) ! We call the ones in Last Hope the Prehistoric Psnaefs. :) I had to take a picture for my bff, because we named a Minecraft ‘Sniffer’ after it...
Before starting the Four Fields, I did this Private Action in North City with Celine:
Location: North City Character: Celine Info: Choice 2, Choice 3: Celine/Claude Claude/Celine +4 FP, +2 RP Notes: Cannot do this PA after Fields are cleared
Updated values:
Claude/Rena: N/A
Claude/Celine: 12 RP, 12 FP *RP SET, FP SET
Claude/Ashton: 13 FP, 8 RP *FP SET
Claude/Precis: 11 RP, 8 FP *RP SET
Claude/Leon: 8 FP, 8 RP
Rena/Claude: N/A
Rena/Celine: 13 FP, 8 RP *FP SET
Rena/Ashton: 13 RP, 9 FP *RP SET
Rena/Precis: 13 FP, 8 RP *FP SET
Rena/Leon: 8 RP, 8 FP
Celine/Claude: 12 RP, 15 FP *RP SET, FP MAX
Celine/Rena: 13 FP, 8 RP *FP SET
Celine/Ashton: 9 RP, 8 FP
Celine/Precis: 12 FP, 8 RP *FP SET
Celine/Leon: 8 RP, 8 FP
Ashton/Claude: 15 FP, 8 RP *FP MAX
Ashton/Rena: 10 RP, 9 FP
Ashton/Celine: 9 RP, 9 FP
Ashton/Precis: 15 RP, 8 FP *RP MAX
Ashton/Leon: 9 FP, 8 RP
Precis/Claude: 15 RP, 11 FP *RP MAX, FP SET
Precis/Rena: 13 FP, 8 RP *FP SET
Precis/Celine: 12 FP, 8 RP *FP SET
Precis/Ashton: 11 RP, 8 FP *RP SET
Precis/Leon: 8 RP, 8 FP
Leon/Claude: 9 FP, 8 RP
Leon/Rena: 8 RP, 8 FP
Leon/Celine: 8 RP, 8 FP
Leon/Ashton: 9 FP, 8 RP
Leon/Precis: 8 RP, 8 FP
While tackling the Field of Intelligence, I used Ashton, Celine, Leon, and Rena. There aren’t any changes but figured I would list it for anyone curious.
Field of Courage Guardian value changes:
Note: I used Ashton, Precis, Leon, Rena.
Claude/Rena: N/A
Claude/Celine: 12 RP, 12 FP *RP SET, FP SET
Claude/Ashton: 13 FP, 8 RP *FP SET
Claude/Precis: 11 RP, 8 FP *RP SET
Claude/Leon: 8 FP, 8 RP
Rena/Claude: N/A
Rena/Celine: 13 FP, 8 RP *FP SET
Rena/Ashton: 14 RP, 9 FP *RP SET
Rena/Precis: 14 FP, 8 RP *FP SET
Rena/Leon: 9 RP, 8 FP
Celine/Claude: 12 RP, 15 FP *RP SET, FP MAX
Celine/Rena: 13 FP, 8 RP *FP SET
Celine/Ashton: 9 RP, 8 FP
Celine/Precis: 12 FP, 8 RP *FP SET
Celine/Leon: 8 RP, 8 FP
Ashton/Claude: 15 FP, 8 RP *FP MAX
Ashton/Rena: 11 RP, 9 FP *RP SET
Ashton/Celine: 9 RP, 9 FP
Ashton/Precis: 15 RP, 8 FP *RP MAX
Ashton/Leon: 10 FP, 8 RP
Precis/Claude: 15 RP, 11 FP *RP MAX, FP SET
Precis/Rena: 14 FP, 8 RP *FP SET
Precis/Celine: 12 FP, 8 RP *FP SET
Precis/Ashton: 12 RP, 8 FP *RP SET
Precis/Leon: 9 RP, 8 FP
Leon/Claude: 9 FP, 8 RP
Leon/Rena: 8 RP, 8 FP
Leon/Celine: 8 RP, 8 FP
Leon/Ashton: 9 FP, 8 RP
Leon/Precis: 8 RP, 8 FP
The jump in difficulty grows here, so now is a good time to make the best weapons and armor you can. I hope you’ve been putting SP into Blacksmith, Alchemy, and Customize. I won’t list the details here, but make sure everyone has the best weapons/armor (remember to use Sharp Edge and make the Eternal Sphere) and good accessories like Fairy Rings, Star Guards, ect. before moving on. I usually train in the Field of Power. If you have Practice, even better. Save frequently and gain some levels and skills before moving on.

Ronixis, you’re ancient! (It’s okay, just makes me love you more.)

Star Ocean 2 mentions the Lezonian’s/Rezonian’s a lot... Having just platinumed First Departure R, I was suprised to see them talked about. That third party can’t give Ronixis a break...!
I trained with alternating characters. Claude, Precis, Leon, and Rena were who I used on the mountain itself.
I decided to go with Claude, Precis, Leon, and Rena, since Leon needs at least one more point with everyone.
Field of Power Guardian value changes:
Claude/Rena: N/A
Claude/Celine: 12 RP, 12 FP *RP SET, FP SET
Claude/Ashton: 13 FP, 8 RP *FP SET
Claude/Precis: 12 RP, 8 FP *RP SET
Claude/Leon: 9 FP, 8 RP
Rena/Claude: N/A
Rena/Celine: 13 FP, 8 RP *FP SET
Rena/Ashton: 14 RP, 9 FP *RP SET
Rena/Precis: 15 FP, 8 RP *FP MAX
Rena/Leon: 10 RP, 8 FP *RP SET
Celine/Claude: 12 RP, 15 FP *RP SET, FP MAX
Celine/Rena: 13 FP, 8 RP *FP SET
Celine/Ashton: 9 RP, 8 FP
Celine/Precis: 12 FP, 8 RP *FP SET
Celine/Leon: 8 RP, 8 FP
Ashton/Claude: 15 FP, 8 RP *FP MAX
Ashton/Rena: 11 RP, 9 FP *RP SET
Ashton/Celine: 9 RP, 9 FP
Ashton/Precis: 15 RP, 8 FP *RP MAX
Ashton/Leon: 10 FP, 8 RP
Precis/Claude: 15 RP, 11 FP *RP MAX, FP SET
Precis/Rena: 15 FP, 8 RP *FP MAX
Precis/Celine: 12 FP, 8 RP *FP SET
Precis/Ashton: 12 RP, 8 FP *RP SET
Precis/Leon: 10 RP, 8 FP *RP SET
Leon/Claude: 10 FP, 8 RP *FP SET
Leon/Rena: 9 RP, 8 FP
Leon/Celine: 8 RP, 8 FP
Leon/Ashton: 9 FP, 8 RP
Leon/Precis: 9 RP, 8 FP
For the final field, although no points are given, it does give you some indication (similar to L’Aqua) of who your protagonist ends up with. I used Precis, Ashton, Leon, and Rena for the fight. Precis was my hostage (I couldn’t find any info, even in the guides on this; it seems random. I’ve heard its lowest affection level, which sort of tracks. It could have been either Precis or Ashton according to my numbers so far. However, what I didn’t expect was Celine to be chosen for the scene after the fight. This is more-than-likely-but-not-confirmed to be your highest affection character... I was really shocked it wasn’t Rena and I’m kind of worried I wasn’t keeping track of their points lol... This also explains why when I had Celine die during training that Claude was enraged lol I haven’t noticed too many other cries (I get Ashton/Precis a lot... ugh) but I HAVE had more “rare calls” than any other playthrough... I wonder if affection levels increase the chance of these. For example, Rena’s call for Fairy Heal is just Fairy Heal, but in rare instances she gets annoyed and calls “Please!” (as if saying, will you bastards stop getting hit?! lol)
Technically during writing this section it is 7.30.23 and I am kinda bummed I missed the anniversary by one day, but I had to visit my mother and help her paint her living room... In Texas and summer, that’s a feat. Forgive me, Star Ocean gods, I had other duties ;__;
Just making a quick note I can’t fit anywhere, but if you’re struggling with the Barker, use Metalwork with a Star Ruby to make Protection Rings. Yes, they have a chance of breaking, but they can really turn this battle around when in effect by taking no damage/healing from Lost Patience... I didn’t record who I used for the fight, but it was likely Claude, Ashton, Leon, and Rena.
I performed the Private Action for Precis to learn Holo-Hologram for the first time. Very strange! There are no affection changes I’m aware of...
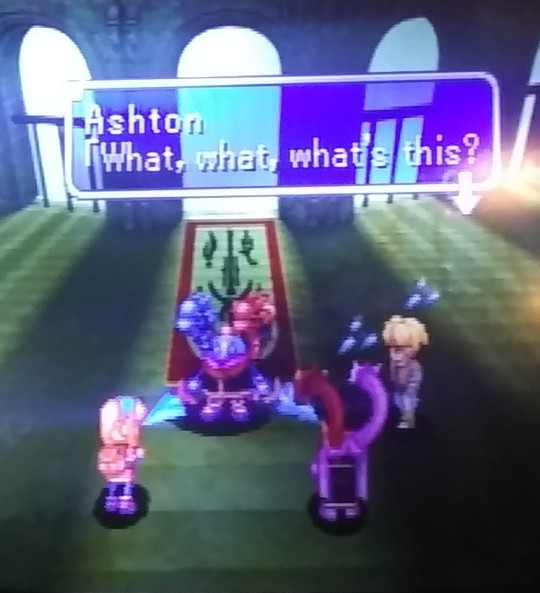
So, this playthrough has gone from ‘obtain the secret ending’ to ‘this is truly a commerative playthrough for the anniversary’. My bad RNG continued. After 3 hours and almost 60 Bunny Race tickets, I only got one set of Bunny Shoes, 50k Fol, and 3 Fairy Rings. (I highly rec getting the 50k Fol if you’re going for a full set as it easily covers the cost. Otherwise, you can wait until the Cave of Trials opens...) But wait, that’s not all!
I will go back and add some tidbits of screenshots I took and my wife had to get video of the following, but during the Marsillo fight, I had a wierd glitchy screen beforehand and during battle, without Leon in my active party, Precis had Leon’s voice lines when being hit or using her KMs... Specifically his Ouch!, Word of Death, and Ice Needles. Very strange, as in the fight with Shigeo, it was all normal...
Video here
Unless you want to use two mages in the last fight, this is your best bet to get Celine and Leon’s levels up in the same fight. I used Precis, Celine, Leon, and Rena. Leon and Celine’s levels are still low, but we can fix that with a PA in Fun City soon.
Berle (Armlock) value changes:
Claude/Rena: N/A
Claude/Celine: 12 RP, 12 FP *RP SET, FP SET
Claude/Ashton: 13 FP, 8 RP *FP SET
Claude/Precis: 12 RP, 8 FP *RP SET
Claude/Leon: 9 FP, 8 RP
Rena/Claude: N/A
Rena/Celine: 14 FP, 8 RP *FP SET
Rena/Ashton: 14 RP, 9 FP *RP SET
Rena/Precis: 15 FP, 8 RP *FP MAX
Rena/Leon: 11 RP, 8 FP *RP SET
Celine/Claude: 12 RP, 15 FP *RP SET, FP MAX
Celine/Rena: 14 FP, 8 RP *FP SET
Celine/Ashton: 9 RP, 8 FP
Celine/Precis: 13 FP, 8 RP *FP SET
Celine/Leon: 9 RP, 8 FP
Ashton/Claude: 15 FP, 8 RP *FP MAX
Ashton/Rena: 11 RP, 9 FP *RP SET
Ashton/Celine: 9 RP, 9 FP
Ashton/Precis: 15 RP, 8 FP *RP MAX
Ashton/Leon: 10 FP, 8 RP
Precis/Claude: 15 RP, 11 FP *RP MAX, FP SET
Precis/Rena: 15 FP, 8 RP *FP MAX
Precis/Celine: 13 FP, 8 RP *FP SET
Precis/Ashton: 12 RP, 8 FP *RP SET
Precis/Leon: 11 RP, 8 FP *RP SET
Leon/Claude: 10 FP, 8 RP *FP SET
Leon/Rena: 10 RP, 8 FP
Leon/Celine: 9 RP, 8 FP
Leon/Ashton: 9 FP, 8 RP
Leon/Precis: 9 RP, 8 FP
There are two PAs in Armlock we can do, one with Ashton and one with Leon. There is also a PA in Fun City you can use to increase Leon’s romance with any of the girls (I’m gonna pick Celine for this experiment) The other PAs availible are either unneeded or can only be triggered later. As I said before, there’s even more PAs if you’re playing Second Evolution.
Private Actions
Location: Armlock Character: Ashton Info: Choice 3, Choice 3 (Choose: Heartthrob drink) Claude/Ashton and Ashton/Claude RP +1
Location: Armlock Character: Leon Info: Choice 1 Claude/Leon FP +3, RP +1; Leon/Claude FP +3
Value changes:
Claude/Rena: N/A
Claude/Celine: 12 RP, 12 FP *RP SET, FP SET
Claude/Ashton: 13 FP, 9 RP *FP SET
Claude/Precis: 12 RP, 8 FP *RP SET
Claude/Leon: 12 FP, 9 RP *FP SET
Rena/Claude: N/A
Rena/Celine: 14 FP, 8 RP *FP SET
Rena/Ashton: 14 RP, 9 FP *RP SET
Rena/Precis: 15 FP, 8 RP *FP MAX
Rena/Leon: 11 RP, 8 FP *RP SET
Celine/Claude: 12 RP, 15 FP *RP SET, FP MAX
Celine/Rena: 14 FP, 8 RP *FP SET
Celine/Ashton: 9 RP, 8 FP
Celine/Precis: 13 FP, 8 RP *FP SET
Celine/Leon: 9 RP, 8 FP
Ashton/Claude: 15 FP, 9 RP *FP MAX
Ashton/Rena: 11 RP, 9 FP *RP SET
Ashton/Celine: 9 RP, 9 FP
Ashton/Precis: 15 RP, 8 FP *RP MAX
Ashton/Leon: 10 FP, 8 RP
Precis/Claude: 15 RP, 11 FP *RP MAX, FP SET
Precis/Rena: 15 FP, 8 RP *FP MAX
Precis/Celine: 13 FP, 8 RP *FP SET
Precis/Ashton: 12 RP, 8 FP *RP SET
Precis/Leon: 11 RP, 8 FP *RP SET
Leon/Claude: 13 FP, 8 RP *FP SET
Leon/Rena: 10 RP, 8 FP
Leon/Celine: 9 RP, 8 FP
Leon/Ashton: 9 FP, 8 RP
Leon/Precis: 9 RP, 8 FP
I couldn’t trigger the PA with Leon because it wanted me to trigger the one with Rena in the fortune teller’s room (yes, I did the cooking competition)... I didn’t want to raise affection anymore at the time between them or risk lowering it (there is no nuetral option), so I avoided both and hoped for the best.
From here, we go to the L’Aqua scene. This only shows who Claude’s highest value is with and most likely it will be Rena, so in aiming for an equal value playthrough, it’s pretty useless. Suprise, suprise, after the Space Time Lab, they had the highest affection and spoiler, I got their ending. That scene seems to add a lot of points...
For reference, I used the following to climb the tower: Claude, Ashton, Celine, and Rena. I used them for the first fight with the 3 Wisemen, then switched Celine out for Leon for Vesper / Decus.
Cyril: I think I used Ashton, Precis, Leon, and Rena...
Notes: Nothing else really notable, especially because I have the dungeon path memorized, I didn’t have to battle often. I got more rare voice clips, though!
Only thing left to do at this point is reach Indalecio and battle him. This increases the values as shown below. I used Ashton, Precis, Celine, and Rena.
Claude/Rena: N/A
Claude/Celine: 12 RP, 12 FP *RP SET, FP SET
Claude/Ashton: 13 FP, 8 RP *FP SET
Claude/Precis: 12 RP, 8 FP *RP SET
Claude/Leon: 9 FP, 8 RP
Rena/Claude: N/A
Rena/Celine: 15 FP, 8 RP *FP MAX
Rena/Ashton: 15 RP, 9 FP *RP MAX
Rena/Precis: 15 FP, 8 RP *FP MAX
Rena/Leon: 11 RP, 8 FP *RP SET
Celine/Claude: 12 RP, 15 FP *RP SET, FP MAX
Celine/Rena: 15 FP, 8 RP *FP MAX
Celine/Ashton: 10 RP, 8 FP
Celine/Precis: 14 FP, 8 RP *FP SET
Celine/Leon: 9 RP, 8 FP
Ashton/Claude: 15 FP, 8 RP *FP MAX
Ashton/Rena: 12 RP, 9 FP *RP SET
Ashton/Celine: 10 RP, 9 FP *RP SET
Ashton/Precis: 15 RP, 8 FP *RP MAX
Ashton/Leon: 10 FP, 8 RP
Precis/Claude: 15 RP, 11 FP *RP MAX, FP SET
Precis/Rena: 15 FP, 8 RP *FP MAX
Precis/Celine: 14 FP, 8 RP *FP SET
Precis/Ashton: 13 RP, 8 FP *RP SET
Precis/Leon: 11 RP, 8 FP *RP SET
Leon/Claude: 10 FP, 8 RP *FP SET
Leon/Rena: 10 RP, 8 FP
Leon/Celine: 9 RP, 8 FP
Leon/Ashton: 9 FP, 8 RP
Leon/Precis: 9 RP, 8 FP
Ending Results:
The basic endings were... Leon alone, Celine alone, Precis/Ashton (Ashton is at Precis’ house trying to run away from her for trying to remove the dragons) and Claude/Rena (Rena is going to have a baby ending)
I was so nervous... but I waited until after the beautiful credits and I got the Composite Ending!
Conclusion/Final Thoughts:
When I started this blog of my adventure, I didn’t intend to succeed or celebrate on the same day as the 25th anniversary... but I did!
I was in tears when the secret ending popped up...! Also, it was the first time I have seen the ending CGI in a long time, which also brought tears to my eyes... The melancholy of wondering what it must be like for the characters after their journey and what it must be like seeing the ending for the first time...! I really felt I got to experience that again! My bff was anxiously waiting for me to complete the game again and my wife cheered me on the whole way! <3
I got to hear so many rare voice clips, experience wierd glitches, and I had the worst RNG I’ve ever experienced playing this; all in this playthrough! I feel like Tria was testing me! (Or perhaps, for a veteran like me who has logged 1000+ hours of my life into the game, they really wanted this to be unique!)
In anticipation of the release of Star Ocean: the Second Story R, I am glad to say I finally got to accomplish my dream of obtaining this ending, playing on original hardware, and experiencing new things even two decades later... that’s part of what makes this game the greatest of all time and why it is my favorite and will always be special to me. I often imagine I’ll be playing this, the original game, when I am 80 years old and senile... because I can’t stop going back and looking for new things, experiencing the adventure again, enjoying the exhilirating battles and beautiful melodies. This game really is a treasure!
Future Notes (that I don’t want to forget as I play) / useful for other characters:
The official guide confirms the following bosses increase same gender FP and opposite gender RP:
Visseyer (Sanctuary of Linga, and this one is optional)
Harfainx/Phalanx (Hoffman Ruins)
Berle/Metatron (both fights, Eluria Tower and Armlock)
Guardian (Field of Power)
Guardian (Field of Courage)
Indalecio/Gabriel (I don't think it matters whether he has his Limiter or not)
Rena and Claude get a boost before they both join one another after Salva. Not sure the extent of this (please see the same thread as the Pickpocket thread as it’s debug info).
Rena and Dias gain a RP for each other during the tournament of Arms while you're helping Dias recover his sword
The Final Guide says when pairing your MC with another, the scene at L’Aqua before Fienal is a good indicator of which couple you get (however, this can change thanks to the final boss, PAs, ect.)
And unlike when most characters join, Dias gained no FP/RP with the other characters when he joined, and no one seems to gain anything with him.
Claude and Rena get +2 at the laboratory / tree scene.
An easy way to tell if your MC has affection high enough for another party member (no way to check between party members):
Note: Also taken from the GameFAQs thread:
It seems that your friendship with him is going all right, and romance too... Wait, that's hard to tell. Sort of... more than friends but less than lovers... you know? Romance does not look probable. He is more like that classmate you used to have long talks with.
My, you are getting along well, aren't you. You can easily hope for things to develop romantically. But don't take things for granted. If you care for him, think of his perspective in everything you do. One mistake could wreck the relationship. But there's no chance of that is there?
My, you are getting along well, aren't you. And the romance seems to be developing well. But don't take things for granted. If you care for her, think of her perspective in everything you do. One mistake could wreck the relationship. But there's no need to worry.
Hmm. Both of you seem to be beginners in love. I'm not saying that you are lovers yet, things still seem Platonic. But you must both learn about each other, understand each other, and by making up for each other's shortcomings it may be possible to arrive at your first, true love. There is still a chance. But if you miss it, then it will be difficult.
Your friendship seems to be going quite well, and she would be fine as a woman friend to hang out with. But there is little hope of developing a romance. But don't give up. There may be a chance. She's like that childhood friend and classmate you had long talks with.
Your friendship is going very well, and he will probably be a life-long friend. And this friend is turning into a lover now. You can look forward to that.
Numbers 1, 4, and 5 are easy to understand. #1 means FP and RP are both under 10. #4 means RP is 10 or greater (enough for an ending) but FP is below 10. #5 means FP is 10 or greater, RP is below 10.
No idea how to interpret numbers 2 and 3. My best guess on #6 means FP is maxed out, and RP is at least enough for an ending together, but not maxed out.
Chisato adds +2 FP/RP (dependent) when she joins instead of 1. You can’t use her books before she joins, unlike Noel.
#Star Ocean The Second Story#Star Ocean 2#SO2#Secret Ending#Ending 86#strategy guide#walkthrough#complete#SO2R#Second Evolution#Composite Ending#Group Ending#Rare Ending
7 notes
·
View notes
Text
Star Ocean 2: Do I need to play other games in the series? / What version should I play?
I’ve seen this pop up so often with the recent announcement of Star Ocean: the Second Story R on the horizon, so I thought I’d write a post about it. Before going into the details, this is all subjective. As a western fan who has put 1000+ hours into the PS1 version, just something to keep in mind.
Do I need to play other games in the Star Ocean series before The Second Story / 2?
Short answer: No. This title is stand-alone.
Long answer: Depends. There are a few moments in the game, particularly in Claude’s story, that have a greater impact if you play First Departure. There is also a bonus scene in the Sanctuary of Linga that lightly, LIGHTLY references some plot points from First Departure. The game can be enjoyed without this prior knowledge, though.
What version should I play?
I will list a lot of pros and cons here (again, subjective and based on the US versions) and I think the best answer is: it depends what is a priority for you. Please make a decision based on the information.
The PSP version, Second Evolution changed the following (from the PS1 release):
A new translation with cringy names for towns and Ashton’s dragons. A lot of items, spells, Killer Moves, skills, ect. were renamed. This is opposed to a very literal and charming translation (albiet this can be a bit ‘strange’ in places, or even considered dated) that existed in the original. One change that I didn’t really mind was the Ten Wise Men getting their official names.
Voices (most view the originals as cheesy, graining, and charming). The new cast is servicable, but the battle voices when using KMs and spells had awful voice direction resulting in awkward pauses in the middle of calling out names. In addition, you could unlock death cries when characters had high romantic relationship points in the original. This was removed in the PSP version for unknown reasons (and, this is a huge reason for replay-ability in the original). Also basic event scenes were mostly voiced in the PSP version where the original only included battle voices and a few in some cutscenes.
Voice Collection was removed (Let me clarify: it is unlocked by character in the PSP once you complete the game w/them in your overall party. In the original a picture unlocked over time on the main screen as you played and collected voices. Some voices were unobtainable despite having a slot (Leon and Dias death cries for example, exist but are not obtainable without cheats or using the slide to trick to hear them (slide trick doesn’t unlock them))
Chisato’s favorite food is easier to obtain; the Star Guard was moved to the accessory slot (which can change some strategies) Other minor tweaks to some items, equipment, and Killer Moves were made.
Attacks were changed from 1 to 3 combos, making the game easier but also leaving you open to attacks more. (I personally felt the 3 hit combo slows down everything.)
The black screen of death (game freeze) was removed! A positive change!
[When playing PS1 discs on PS3] Ending cutscene doesn’t show/play; this doesn’t exist in the PSP version. In fact, I think the entire ending cutscene was replaced but I’d have to check.
Opening Cutscene replaced with an anime cutscene and a vocal track; some cutscenes were changed to animated counterparts (mostly good, although the opening and credits being missing is a huge blow) Part of the original opening is present in Claude's story but only a clip. Claude's intro had minor changes to reflect First Departure continuity.
Dias flashback was removed completely in the US version only.
Certain spells like Cure-All and Raise Dead were censored for no reason; spell animations in general were shortened / remade (Note: Fairy Light was censored in the PS1 and PSP versions. Indalecio’s tranformation with Philia also removed a crucifixion in both as far as I’m aware.) Teas were also alcoholic drinks in the original JP version. This was censored in both the US versions. I also read that an upskirt shot when Rena uses Tractor Beam was “censored” from PS1->PSP but I never even knew this existed in the first place.
Combination spells were removed entirely
Menus were changed slightly (very bad for people like me with muscle memory of the original but this is a nitpick)
Item Creation was changed from a cool 3-D model to a blinding flash of light with a static image. :(
New Private Actions were added, specifically for Dias who had NONE in the original.
Welch is retroactively added as a recruitable character.
New artwork in a 2000s style (generally frowned upon, especially Rena’s)
I hope this has been an informative post. If there’s anything I’m missing, please let me know and I’ll adjust the list! Once Star Ocean Second Story R is released, I’ll make a list for it as well.
#star ocean second story#star ocean 2#star ocean the second story#star ocean second evolution#ps1#psx#psp#differences#comparison#should i play other games in the series first?#is it a sequel?#star ocean second story r
4 notes
·
View notes
Link
This is where I’m hosting my new Star Ocean collection / wishlist site.
I’m also working on archiving things like trailers, translations, scans, ect. so if anyone wants to contribute, please let me know!
0 notes
Link
This is where I’m currently updating my collection! Please take a look when you have the time.
I’m planning to make a more comprehensive site in the future with better photos and details. So please check back!
If you have any Star Ocean 2 related questions, feel free to send me an ask!
#so2#star ocean#star ocean 2#star ocean the second story#star ocean ex#star ocean manga#star ocean merch#my collection
1 note
·
View note