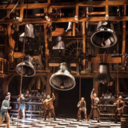
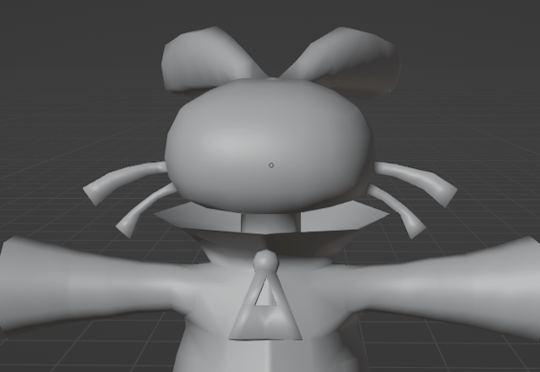
#3D MOdelling
Text
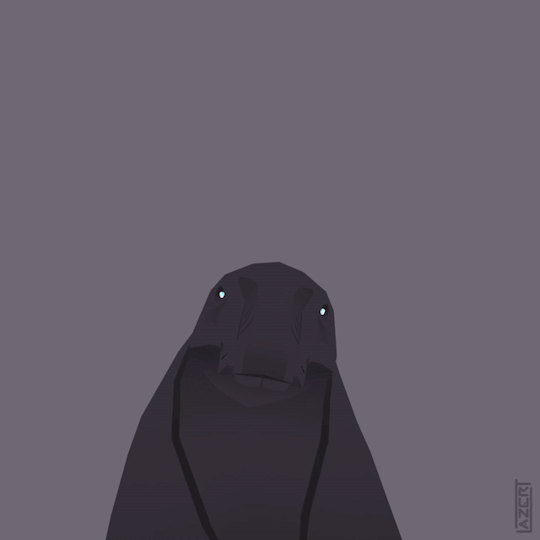
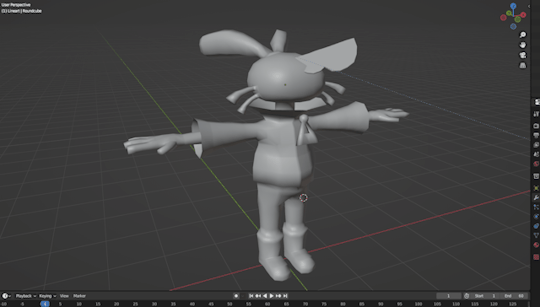
3D Animation Commission
Character belongs to @wanderingwastelands
#leave a comment if this made you yawn lol#i must have yawned at least 100 times working on it#art#my art#digital#digital art#3d#3d modelling#3d model#blender#blender 3d#blender3d#npr 3d#blender npr#stylized#animation#3d animation#animated#gif#animated gif#loop#looping animation#yawn#alien#creature#exothropean#wanderingwastelands#commission#commissioned work#lazert
23K notes
·
View notes
Text
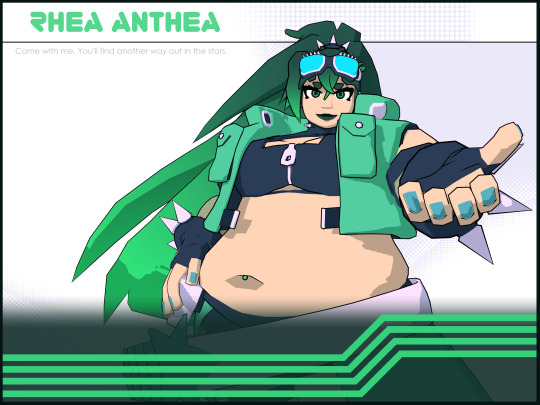
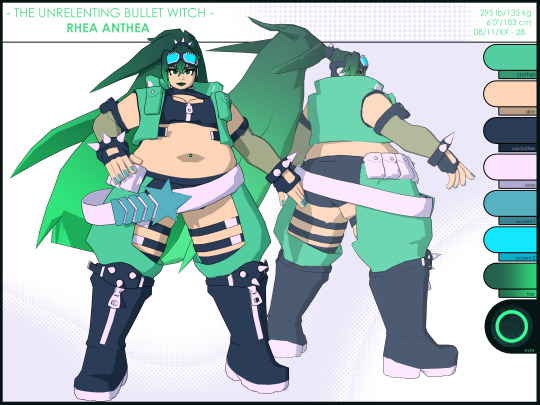

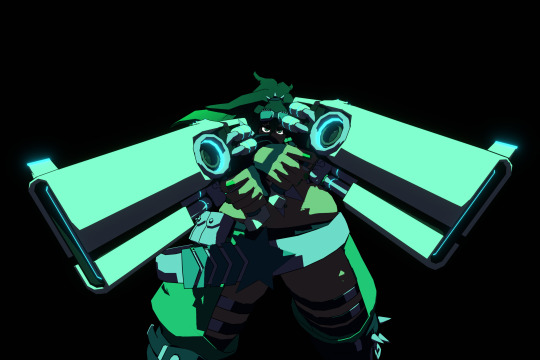
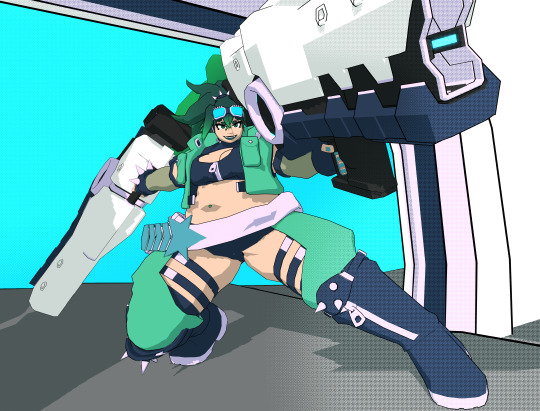

🟊 THE UNRELENTING BULLET WITCH 🟊
Finally ported over! My girl Rhea in her updated gunslinger design. Happy 2 year anniversary to the green girl of all time~
5K notes
·
View notes
Text

A while back I became hyperfocused on learning how to use Blockbench, and then proceeded to make a silly P03 model for no real reason lol
I have no purpose for this, nor have I opened it since the second i finished it, he just exists for the funny.
But i think it's neat :]
#digital art#my art#fanart#inscryption fanart#inscryption#p03 inscryption#inscryption p03#p03#3d model#3d art#blockbench#3d modelling
408 notes
·
View notes
Text

put them in the microwave

(Repost because I accidentally deleted my account)
383 notes
·
View notes
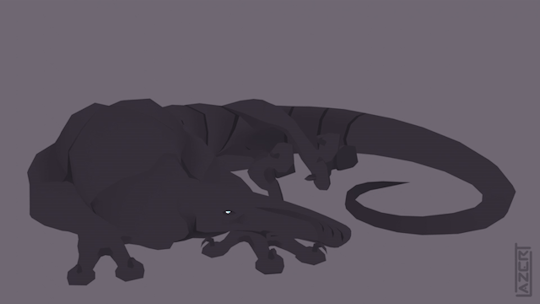
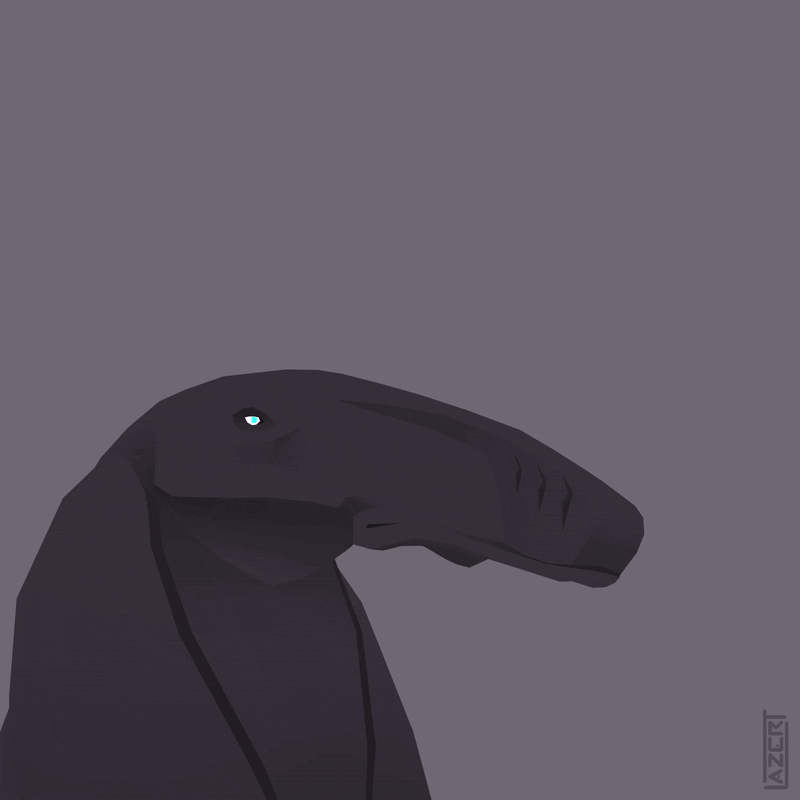
Text
something very different aka a semi-realistic ningguang sculpt on nomad, rendered on blender. never meant to take it this far i just wanted to practice sculpting her face LMAO. yes ive been doing 3d sculpting but i never posted it and idk i might do shenhe next
bad quality is bc of my attempt at glazing the vid
anyway here are some image renders


#art#fanart#genshinimpact#genshinimpactfanart#digital art#lilliangst art#ningguang#ningguang fanart#ningguang genshin impact#genshin ningguang#3d#blender#3d art#3d sculpting#digital sculpture#nomad sculpt#nomad#blender 3d#blender sculpt#3d model#3d modelling
292 notes
·
View notes
Text


Here it is folks, the rat gun, recreated in 3D for uni.
People keep stopping by, squinting at it and asking "what the hell is that" and everytime I get to answer "No Idea! :D"
Credits to @hellenhighwater for owning the real thing and gracing me with it's existence.
#texture in#substance painter#modelled and UV'ed in#maya 3d#built in#unreal engine#3d art#3d modelling#game art#low poly#mytextpost#myartpost
772 notes
·
View notes
Text


Hey people! this time a new Lancer commission! this time is a very custom Enkidu from Harrison armory. This time i add some new features to this commission, i add a custom skybox and also the snow vfx for a more interesting final render, hope you enjoy this one!
Commissions are OPEN for low poly models send me a DM for more info!
Also you can follow me HERE and i'm currently working on my first game so if you want to support you can go to my Ko-fi page! all shares are also welcome!
#lancer#lancer rpg#lancer ttrpg#lancerposting#harrison armory#enkidu#3d#3d animation#3d art#3d artist#3d artwork#3d model#3d render#3dartist#blender#artists on tumblr#anime#mecha#art#blender3d#giant robot#ps1#ps1 aesthetic#ps1 graphics#psx aesthetic#low poly#low poly art#3d modelling#retrocore
305 notes
·
View notes
Text
❄️🧊^_^🧊❄️
1K notes
·
View notes
Text


Shinx gifset!!
shinx gif >:3 inspired by this @dailyshinximage !! follow them... their art is so cute pls
#dw guys I didnt forget the eeveelutions! next one is gonna be vaporeon#shinx#picocad#low poly#retro gaming#my gifs#early internet#web graphics#retro aesthetic#pokeblr#aseprite#pixel art#3d modelling#old web graphics#webcore#old web#pokemon#pkmn#pokemon shinx#shiny pokémon art#shiny shinx#y2kcore#early 2000s#retro graphics#gifset#internetcore#internet#pico 8
325 notes
·
View notes
Text

For when you're driving through Louisiana and see a sign for a house of wax
Modelled the road sign in blender to test out the Gscatter add-on for a larger project in the future and I think I understand it now!
#house of wax#blender#vincent sinclair#bo sinclair#lester sinclair#house of wax 2005#3d model#3d modelling#my art#slashers
269 notes
·
View notes
Text
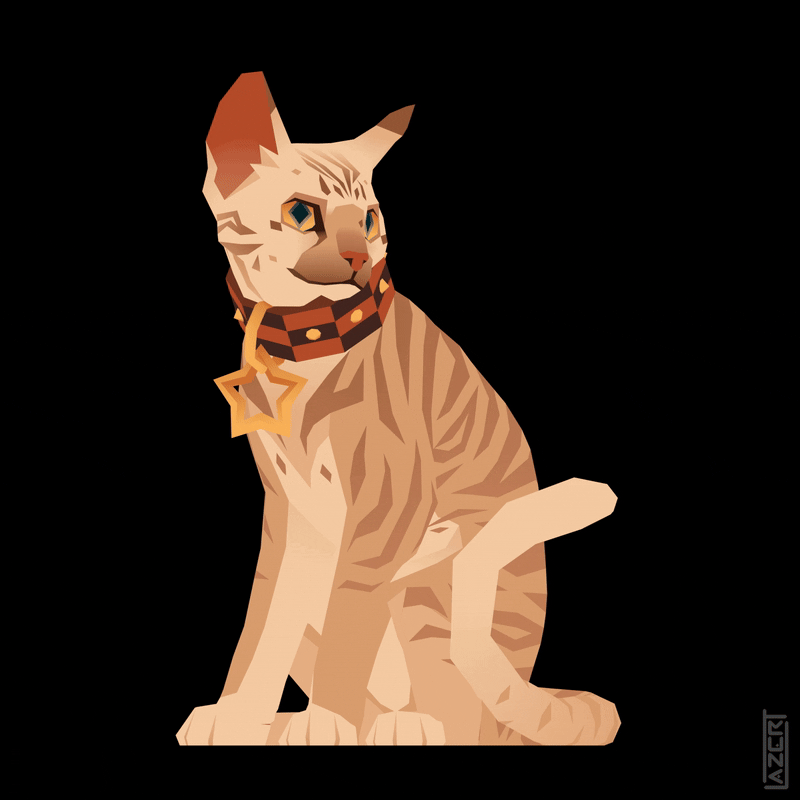
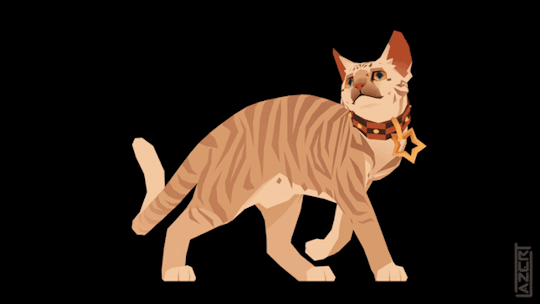

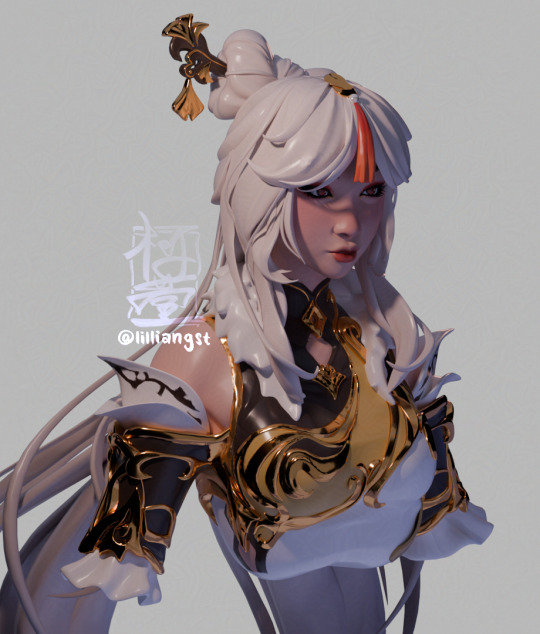
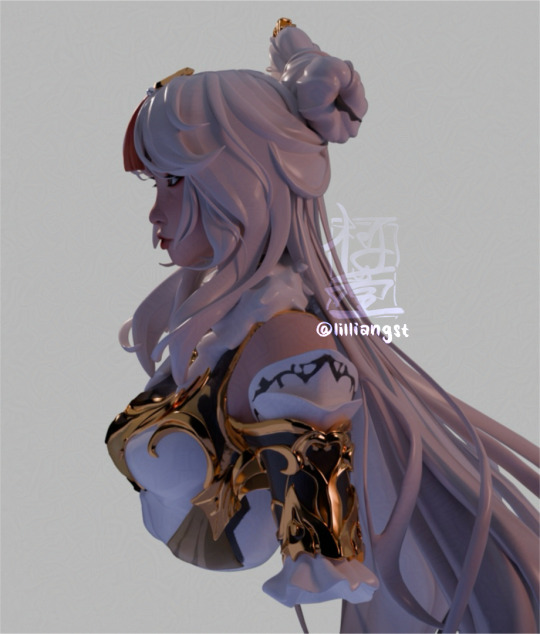
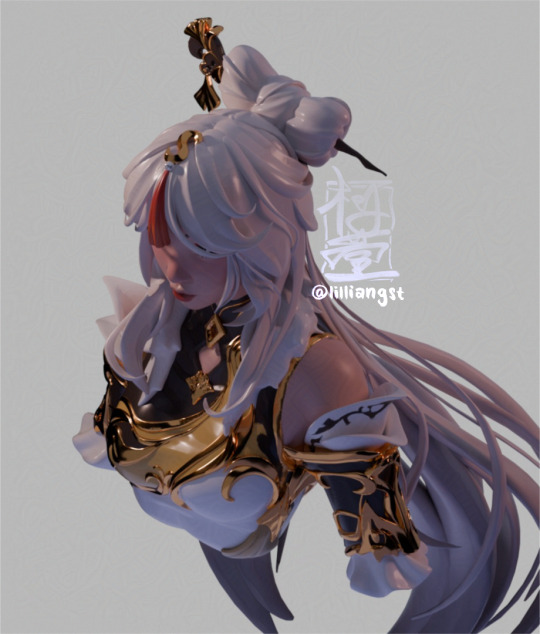
3D Model Commission
Character belongs to @skyeruu
#art#my art#digital#digital art#3d#3d model#3d modelling#blender#blender 3d#blender3d#blender npr#npr 3d#cat#house cat#feline#render#3d render#3d turnaround#3d turntable#gif#animated gif#skyeruu#lazert#lazer-t#commission#commissioned work
7K notes
·
View notes
Text


I'm finally sculpting my own 3D characters!
Behold, three dimensional Veralyn!
179 notes
·
View notes
Text
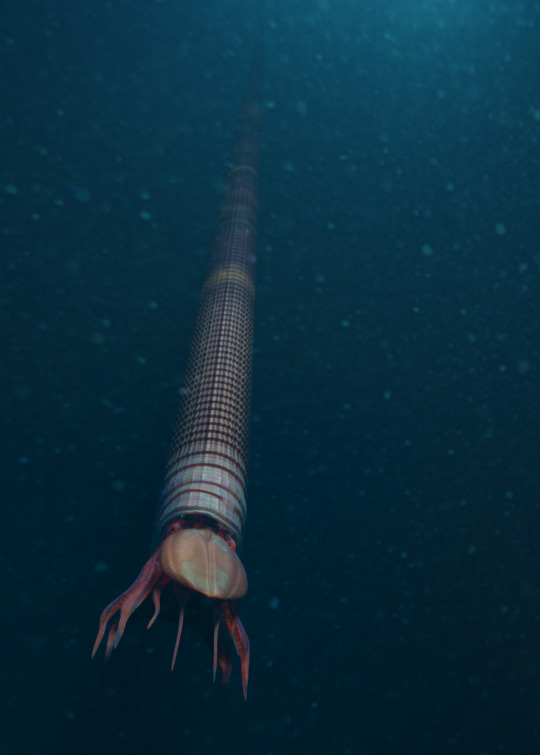
Dawsonoceras is another cephalopod that swam the waters of Sillurian Gotland. They are an orthoceratid straight-shelled nautilid that floated in a vertical position on the water collumn.
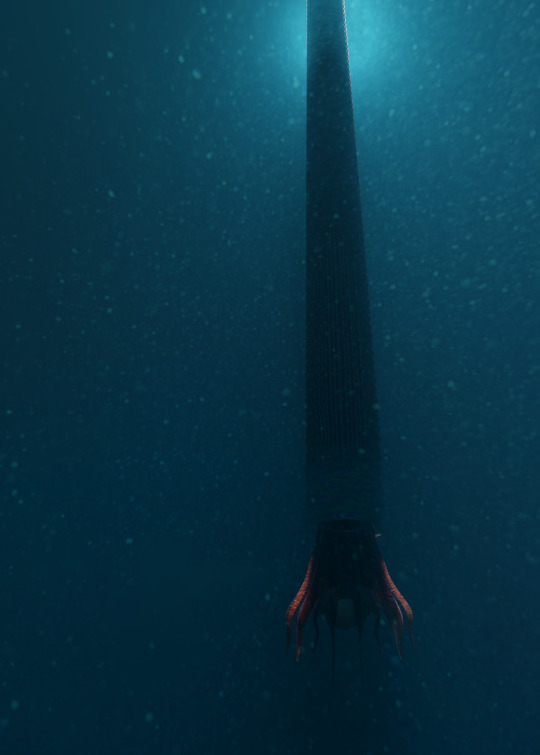
Although they are far smaller than some of the other orthocones and endoceratids that reached lengths of up to 5 meters, their shell is just as beautiful to behold.
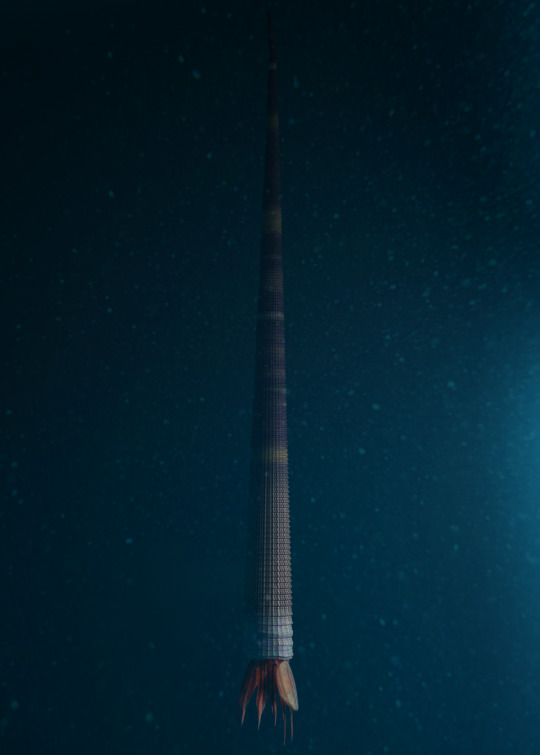
Kröger, B. (2013). The cephalopods of the Boda Limestone, Late Ordovician, of Dalarna, Sweden. European Journal of Taxonomy, (41).
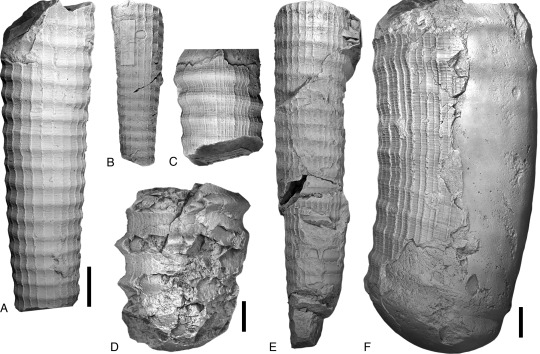
Above specimens A,B, & E are dawsonoceratids, Scale bars: 10 mm.
From what I can gather, their adult shell diameter reaches 2.5 cm wide and it's hard to guess the total length because a lot of the shells are fragmentary. There seems to be one complete specimen online that was described to be 7.1" inches long
And another here that's 40 cm long, although it's an ID-guess from the blog poster
#paleoart#palaeoblr#paleontology#cephalopod#blender#blender3d#3d model#3d art#3d modelling#3d#orthocone#dawsonoceras#silurian#gotland
552 notes
·
View notes
Text

Have an Edgar

(Repost because I accidentally deleted my account)
276 notes
·
View notes
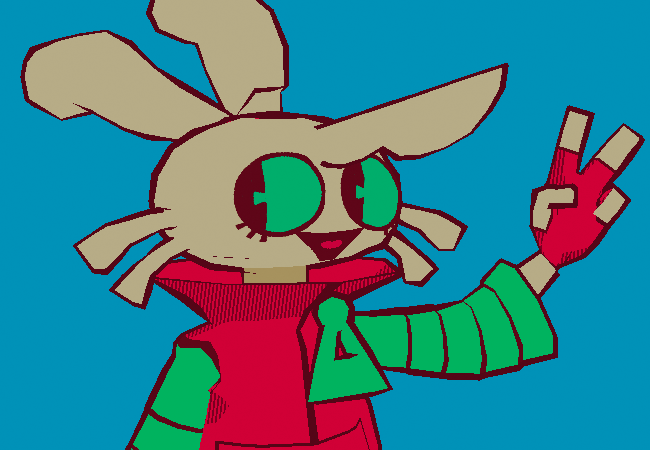
Note
i love the style of that 3d render of your character! may i ask how you animated the outline and made the whole thing pixel-y? :0
Very glad you asked!
There isn't many tutorials on how to make this kind of stuff so I am totally glad to be the first one.
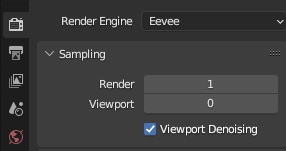
BLENDER 2.5D TUTORIAL
First of all

Get your model ready and steady, that part is what I ain't explaing, however if you want it to have these colors, you will have to put this nodes in your texture shader
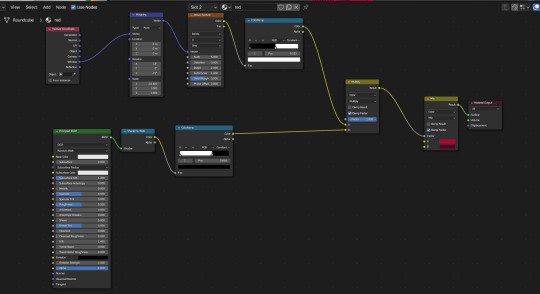
`[ This is for her red jacket, the lower nodes is for her primary colour and the upper nodes are for her shadows, which also has some extra nodes to give it a comic texture. ]
Quick reminder to give the model some lineart yourself to the parts that don't form its sihlouette, for example her shoes.
Now for the lineart, first of all make sure you have created a black Emissive material and that it has Backface Culling activated

After that go to the Modifier Properties and add a Solidify modifier

Make sure to Flip the Normals, set the Material Offset to where the Lineart material is, and adjust a little bit the Thickness of the mesh, then you will get some natural good-looking lineart like hers.

Now, you could easily be satisfied like this, but now we are going to make it feel like each frame is a new drawing by making her model lineart jiggly
First of all create a Displacement Modifier and give it a cloud texture

Make sure to lower the strenght and midlevel, otherwise it will look like this


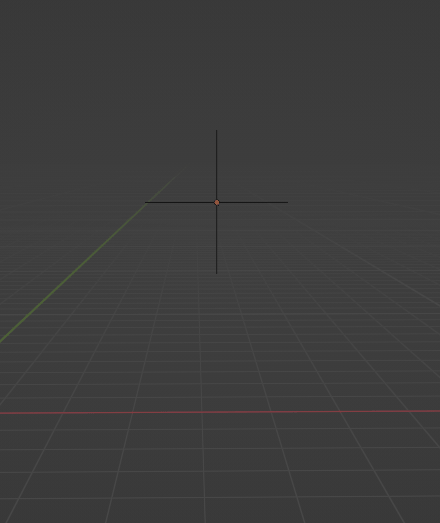
Now, create an Empty Plain Axes and go to the Displace modifier, change the coordinates from Local to Object and focus the object on the Empty


And thanks to this adjustments, if you move the empty around, it will create a slight jiggle
Now what we want is for this empty to automatically move around without you having to do anything
Create a new screen and go to the Graph Editor section
In here we will be making the empty move with a modifier
Select the empty and press "I" of Italy and select Location, this will create a keyframe for the empty that we will be able to manipulate

Go to the Editor and ONLY SELECT THE Z POSITION, and then go to the Modifiers tab and add a Noise modifier
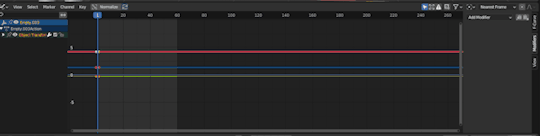
Make sure to adjust the Scale and the Strength so that it looks more proper for the jiggle effect, make it look like a rollercoaster!

And now, if you did everything right, your empty will be moving up and down and all around by its own
WHICH also means, the model displacement will follow the path of the empty to create that jiggly effect we crave so so much
However...

The model is indeed jiggling, but it's doing it the wrong way, we are trying to make it look like a cartoon not a gosh darnit gelatin
So to make it jiggle the right way we are going to make its noise feel more STEPPED
Go back to the modifiers of the Graph Editor and add a Stepped Interpolation, and make sure it has a Step Size of 5
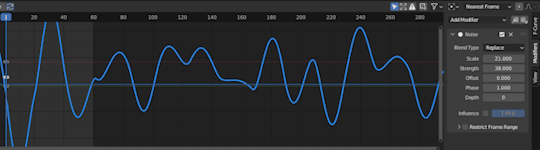
And now we finally get the choppy jiggle effect!!
Now you can play around the Displace and the Noise to make it more or less jiggly
But nonetheless, if you followed the tutorial right, you will be gifted with the perfect looking 2.5D effect!!!

Now you can go ahead and try to fool everyone into thinking a 3D animation is 2D
And before we wrap up, one more extra for the one who asked how this is made,
We are going to make the render feel pixel-y!
Go to Render Properties, make sure you are using Eevee, and in Sampling put the Render on 1 and the Viewport on 0
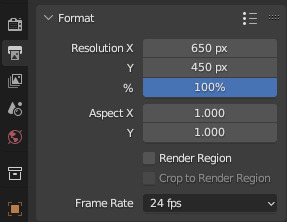
Then go to Output Properties and you can do two things:
1) Change the X n Y to a size lower than 1000 px
2) Change the Resolution % to these numbers (8, 16, 32, 64) This way if you wanna do pixel art you are more accurate
For this render I used the 1st option
And last but not least, in the Output Properties make sure you save your files in the right way with these settings

THen render animation, make an image sequence with all the pngs, and TA-DAH
You get a pixel-y 2.5D animation!!!
Thank you so much for checking, I hope this is useful for anyone who wants to do this stuff, if anyone has any questions don't be afraid to ask, I may have explained some stuff badly.
Anyways have a very jolly day
Tsuyo OUT
#blender#blender 3d#blender tutorial#tutorial#3d modelling#3d tutorial#art#model#3d model#my art#tsuyo art
1K notes
·
View notes
Text

My first ever 3D model, I just now gotta figure out how to make it move and shit lol
#artwork#concept art#digital art#fan art#3d model#stardew krobus#krobus#stardew farmer#stardew valley#stardew fanart#3d modelling
131 notes
·
View notes
Last Seen Blogs