#API 2500 Bus Compressor
Explore tagged Tumblr posts
Visit Tumblr Blog
Explore Tumblr blogs with no restrictions, modern design and the best experience.
Last Seen Tumblr Blogs


Fun Fact
Tumblr Inc. is funded by 13 investors.
Text
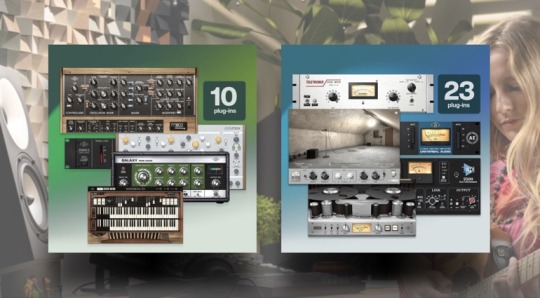
Universal Audio Plugin Bundles at Unbeatable Prices - Up to 60% Off!
Universal Audio Plugin Bundles at Unbeatable Prices. Experience the revolution in audio production with Universal Audio Plugins, now fully compatible and natively running on both Mac and Windows platforms. This significant advancement has made these premium plugins more accessible than ever, eliminating the need for specific UAD hardware. Embrace this change and dive into the world of superior…
View On WordPress
#176 Classic Limiter Collection#60% Off#API 2500 Bus Compressor#Brigade Chorus#DAW#deal#Digital Audio Workstation#Download#effects#Free#Galaxy Tape Echo#Hammond B3#Home Studio#instruments#Lexicon 224 Digital Reverb#LUNA#MAc#Minimoog#Native#Opal Morphing Synth#PC#Plugins#PolyMAX#Pure Plate Reverb#Ravel Grand Piano#Sale#studio#Studio D Chorus#Thomann#UAD
0 notes
Text
Universal Audioの「API 2500 Bus Compressor」は、プロのエンジニアとプロデューサーに愛される定番のバスコンプレッサーです。
その特徴や使用方法、他のコンプレッサーとの違いについて詳しく解説し、音楽制作における活用法を紹介します。
0 notes
Text
「UAD API 2500 Bus Compressor」APIコンソールのバスコンプを再現
「UAD API 2500 Bus Compressor」 昔から使われてきた定番のコンプレッサー! API 2500 Bus Compressorのプラグイン版! 元の設定価格が高いためセール時を狙っていきましょう。 API Vision Channel Stripの特徴 API Vision Channel Stripは、API (Automated Processes, Inc.) というプロオーディオ機器メーカーによって製造されるハードウェアのエミュレーションプラグインです。このチャンネルストリップは、プロの音楽制作エンジニアによって高く評価されているヴィンテージアナログコンソールのサウンドと特性をエミュレートしています。以下は、API Vision Channel Stripの主要な特徴です。 アナログサウンドの再現: API Vision Channel…

View On WordPress
0 notes
Photo

ILL COMMUNICATION: “ Compressor Families and their Digital Counterparts” - BY ILL POETIC
It took me a long time to wrap my head around what I should be hearing a compressor do. Even now, I’m still learning, both intellectually and aurally, how to hear compression as well as how to more effectively utilize it. This piece below offers a brief summary into my understanding of analog compressors and their digital counterparts with additional resources available for further learning.
Four years ago I officially made the plunge back into the world of higher education. I’d been majoring in Digital Music Technology, which covered everything from sound-designing synths to recording and mixing in a large-scale studio setting. I’ve been inside a lot of larger studios but never had a full grasp on what all the hardware was really doing. Finally, I’d been given that opportunity.
During a summer break, I came across a podcast that sent me into a small wormhole on compressors. This podcast led me to an additional article (info below) that gave me a deeper insight on how to ultimately view analog compressors as well as how to translate that understanding into digital compressor emulators (plug-ins).
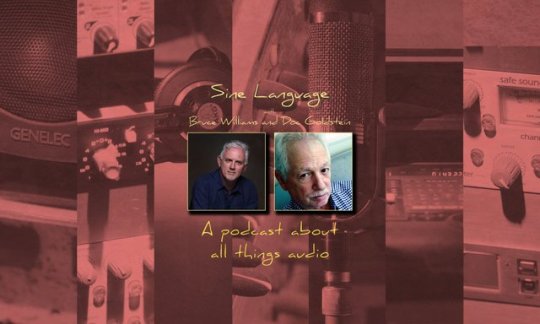
Sine Language Podcast
Before I dive into the specifics of compressors, I’d like to highlight the podcast that brought me here. The Sine Language Podcast dives deep into numerous aspects of audio engineering. From gain staging and EQs to recording wind ensembles, stereo miking and compressors, this is a great podcast to ride around listening to (it’s only available on iTunes as of now).
Compressor Functions
Before receiving a more formal education in audio engineering, I’d always struggled to grasp the true process of compression and how to truly use it effectively. I’d like to give a brief summary as to the basic functions you will see in most compressors, as it will give more meaning to the upcoming analysis of compressor families and their digital counterparts. By no means am I an expert at this. If you’re a novice to compressors as well, this may be to your benefit, as I’m not that much further beyond your scope of knowledge and in many ways may be less so.
I’ve heard compression explained a million different ways, which would always just confuse me more. Not to mention, every compressor seems to look different. It initially feels very overwhelming. And though some compressors may offer different layouts (all of which serve important purposes), understanding basic functions will make these different layouts far less intimidating.
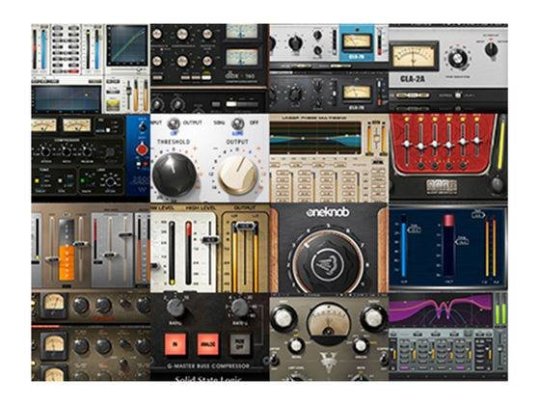
Above is a picture of 5 compressors (all from the Waves Plug-in collection). Each looks radically different but perform the same function: reducing the dynamics of an audio recording. Here’s why: if a vocalist started singing in a whisper and ended scream-singing into the mic, you as the listener would have to turn the music down to save your hearing. Compression boosts that whisper up and squashes that scream-singing down to a much slimmer dynamic range. You as the listener still hear the whisper and the scream-singing and recognize the shift in dynamics but you don’t have to physically turn the volume up and down each time the singer shifts intensity.
So let’s single out one of these compressors and offer a quick definition as to what’s doing that:
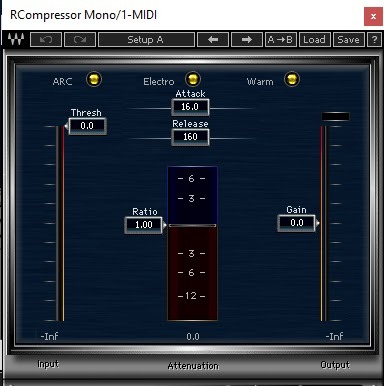
Above is an image of the RCompressor from Waves-Plugins and here’s a quick rundown on what’s happening:
Gain - Think of gain as your final volume control. Once you’ve made all your adjustments in ratio, threshold, etc., you will boost or lower your gain to finalize your final level for audio output. Again, I’d think of this primarily as a final volume control, accompanied by a meter that will let you know when you are peaking.
Threshold - Think of threshold as the ceiling for your audio. If a singer is belting out a loud note, lowering that threshold will lower the ceiling on just how loud that note will sound. For example, if you lower a threshold to -5db, you’re telling the compressor that every part of an audio clip that exceeds this level will be squashed down to -5db. Nothing can move past that ceiling. I recommend applying this to an audio file you know well and bringing the threshold as far down as you can to get an exaggerated understanding of what’s happening. Before you do though, you’ll want to understand ratio.
Ratio - Ratio accompanies threshold. Ratio will often be shown as 2:1 or 6:1 or 24:1, etc., though in the example above you can pull the ratio down to any exact number you’d like. Ratio says that for every 2 (or 6 or 24, etc) decibels that you lower the threshold, only 1 decibel will be allowed out. So if you choose a ratio of 6:1 for a vocalist singing a loud run, the compressor will squash 6 decibels of vocal dynamics into 1 decibel. If you were to choose 24:1, you’d be squashing nearly the entire dynamic range of the vocalist into 1 single decibel. I recommend trying this just to get an idea of what’s actually happening.
Attack - Once the compressor detects a sudden rise in audio, you can determine just how quickly it will react (or attack) to that shift in dynamics. For instance, you may want an extremely fast attack if you’re compressing drums since they are primarily sharp transients (the sudden impact of a kick or snare hit). If you set the attack to slow, you’ll miss the initial impact of the kick or snare that you may be trying to compress. Conversely, you may want a slower attack for vocalists and softer instruments to keep a smooth flow of sound.
Release - If the attack focuses on how the compressor starts to compress, the release focuses on how it lets go of what it’s compressing. A longer release means the compressor won’t just stop suddenly once a piece of audio (vocalist, drums, etc) falls back below the threshold, rather it will smoothly release until it’s activated again.
There are plenty of other functions in compressors but I feel these are the 5 base functions to get a true understanding and application of before moving on.
Compressor Families
The Sine Language Podcast has a great 2-part spread on compression. Both are definitely worth listening to, but it was their episode titled “Compressor Design Topologies” that really stuck with me. In this episode, they interview Christopher Dion of Quantum Music Mastering who breaks down his process for grouping compressors into families. Understanding what’s happening inside of each family of compressor really helped me begin choosing which compressors to use for which instruments or vocals and how they were truly functioning behind the knobs. Compressors can be broken down into four families: VCA, Opto, Variable Mu (Veri-Mu) and FET.

VCA
VCA stands for “Voltage Controlled Amplifier” and they are the most common compressors used as they are electrically stable and relatively cheap to replicate. Most plug-ins are based on VCA compressors. Two key features of a VCA compressor include:
Transparency - There is no limit to attack time in a VCA compressor which means you can compress the quickest dynamic shift (such as transients from a kick or snare drum) instantly. This can work fantastic when it’s your sole purpose for compressing, but can feel sterile and lack character for other compression needs, such as long-term
PEAK hard knee - VCA Compressors attend to the PEAK of an audio as opposed to RMS (root mean square). This means they hone in on the highest peak of audio file’s amplitude (say, an abnormally loud snare drum in an audio take) rather than RMS, which takes a more averaged out level of the entire audio clip. Hard knee refers the response curve. Hard knee would be linear, therefore more abrasive in it’s compression vs. soft-knee which has slight curve and softness to the compression.
When to use: For transients notably out of the dynamic range of the rest of the song.
When not to use: Attempt to adjust the overall volume and compression of a song or audio file.
Advantages: Gives a punch and aggressiveness
Disadvantages: Sounds thin and sterile.
Physical Examples: SSL, Neve and API mix bus compressors, Focusrite RED, DBX 160, Alan Smart C1.
Digital (Plug-In) Equivalents:
SSL 4000 Bus Compressor- SSL Duende Native SSL Bus Compressor, Waves SSL 4000 SSL G-Master Buss Compressor, Native Instruments Solid Bus Comp, T-RackS CS Bus Compressor, FXpansion "DCAM Dynamics" BusComp, URS 1980, Sonalksis SV-315, Cytomic The Glue (SSL XLogic G-Series), Stillwell Audio Bombardier
SSL 4000 E/G Channel Compressor: Waves SSL 4000 SSL E/G Channel, SSL Duende Native SSL Channel, T-RackS CS British/White Channel, Eareckon ANALOG87 series, Native Instruments Solid Dynamics, OverTone DSP DYN4000
Neve 2254 - Waves V-Comp, Lindell Audio (Plugin Alliance) Lindell 254E, URS 1970 Classic Console Compressor, Nomad Factory MCL-2269, McDSP CompressorBank
Neve 33609: IK Multimedia T-RackS CS Precision Comp/Limiter, McDSP 6030 Ultimate Compressor
Neve 8014 console (-esque): Sonimus Britson, Slate Digital “Virtual Buss Compressors” FG-8014 (see also Focusrite RED)
Neve VXS Console Comp: Brainworx bx_console
Rupert Neve Design Portico 5043 Compressor: Steinberg Rupert Neve Design Portico Compressor
Rupert Neve Design Portico 5015 Compressor (-esque): Slate Digital “Virtual Buss Compressors” FG-4014
API 2500: Waves API 2500
API 525: LSR audio VLB525, URS CCS Pro 1967
Focusrite Red - Focusrite Red Plug-In Suite, Slate Digital “Virtual Buss Compressors” FG-8014 (see also Neve 8014 console)
DBX160 - Native Instruments VC160, Waves dbx-160, Sknote C165a, Yamaha Vintage Channel Strip "Compressor 260", URS 1975, URS VCA60 (CCS Pro), Slate Digital Virtual Mix Rack, Stillwell Audio Major Tom, McDSP 6030 Ultimate Compressor, McDSP CompressorBank

Opto
In explaining what an Opto compressor does, I’m going to pull a quote directly from the Quantum Music Mastering article that gives a thorough explanation:
“Opto (compressor) uses photocells as a detector and a light bulb to determine the gain reduction. As the signal passes through the light bulb, it will make the light bulb glow more or less depending on the intensity of the signal. Since the intensity of the light is function of the temperature of the filament, the light intensity will vary as a smoother version of the signal. In other words, if the detector in the VCA design sees the exact signal, the opto one will see an averaged over time version of it.This makes the opto compression much less sensitive to transients, peaks and sudden spikes. For this reason, much higher ratios can be used.”
If a VCA focuses on PEAK compression (the loudest moments in an audio clip), Opto focuses on RMS, the overall amplitude of an audio file. The Opto moves slower than a VCA which makes it less ideal for transients (percussion) but more ideal for an overall smooth compression with noticeable character. Because of this, there’s not real need for an attack or release time.
When to use: Opto will even out the overall dynamics of a song. If a song has peaks and valleys, Opto does a good job of leveling them out as much as you’d like. It’s fantastic for tightening a final mix without destroying the integrity and punch of the transients.
When not to use: Again, not to be used with sudden transients, of which it will pass right over.
Advantages: extremely transparent. Tightens up a mix without flattening transients.
Disadvantages: Not built for fast transients. Also, due to to how frequencies of bass vs higher end frequencies work, opto’s traditionally do not work well with low-end frequency content. This causes a pumping effect in low-end frequencies, which can be solved by side-chaining a high pass filter to the compressor (around the 150-250hz range). This side-chain filter can actually be fantastic in a mastering chain.
Physical Examples: LA-3A, JLM Mac Opto Comp, LA-2A, TubeTech CL1B.
Digital (Plug-In) Equivalents:
LA-2A/3A - Waves CLA-2A/3A, IK Multimedia T-RackS CS White 2A, URS Opto2a/3a (CCS Pro), Cakewalk CA-2A, Native Instruments VC2A, Black Rooster Audio VLA-3, Bomb Factory BF2A/3A, U-he Presswerk, PSP Audioware oldTimer, PSP Audioware MixPressor2, McDSP 6030 Ultimate Compressor, McDSP CompressorBank, Antress Modern The Lost Angel
TubeTech CL1B - Softube Tube-Tech CL-1B, URS Tube T (CCS Pro)
Variable Mu (Tube Compressor) (aka Vari Mu)
One of the earliest compressor designs, the Vari Mu is still very popular for high-end audio, specifically in the field of mastering. What makes the Vari Mu special is in it’s relationship between gain and ratio. Vari Mu compressors increase the ratio as the gain reduces. At a technical level this results in a non-linear transfer curve. What this creates for our ears is a smooth compression in which the louder transients are automatically compressed at a higher ratio.
The Vari Mu also does not respond as reflexively as the VCA or FET compressor. Because it’s a tube compressor, it takes more time which means it will never overreact to a transient. This is why it’s often used at the mastering stage, as it really helps glue a mix together. Below is an example of the inner-workings of a Vari Mu compressor, if you want to get deeper into the mechanics of how these compressors and side-chain filters work, I recommend reading this article on compressor topologies:
When to use: When you’ve leveled the dynamics of a song, running the song through this tube compressor will tighten it up and smooth it out. It will glue the elements of the song together.
When not to use: For punch, aggressiveness or solving compression issues within the mix.
Advantages: Warmth, richness, texture and definition that cannot be replicated by plug-ins.
Disadvantages: Not punchy, operating with no side chain filter can be an issue for bass.
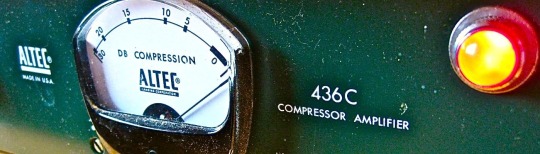
Physical Examples: Fairchild 670, Altec 436C, Manley Variable Mu, HLC Varis
Digital (Plug-In) Equivalents:
Fairchild 660/670 - IK Multimedia T-RackS CS Vintage Compressor Model 670, Slate Digital “Virtual Buss Compressors” FG-MU, Waves JJP PuigChild 660/670, Overtone FC70, U-he Presswerk, Nomad Factory LM-662, Nomad Factory FA770, Bomb Factory Fairchild 660/670, McDSP 6030 Ultimate Compressor, McDSP CompressorBank, URS Child (CCS Pro), Antress Modern The Fire Chainer
Manley Variable Mu - Native Instruments Vari Comp, McDSP 6030 Ultimate Compressor
FET (Field Effect Transistor)
A FET Compressor combines the best of the compressors listed above. It provides the smoothness and warmth of Vari Mu and Opto Compressors with the quick attack time and punchiness of the VCA compressor. This is an extremely popular compressor, primarily the 1176 and is noted for its versatility on every type of track: percussion, instruments and vocals.
When to use: for bite, aggressiveness and punchiness on drums, bass, or vocals. Great for warm and rich distortion as well. Also great for use in a mix bus or mastering chain with the compression turned off, just to add color and warmth to the final track.
When not to use: On a master or mix bus with the compressor on
Advantages: adds a punch that cannot be replicated by plug-ins, as with the Vari Mu.
Disadvantages: Most don’t have options for side-chain filtering.
Physical Examples: 1176
Digital (Plug-In) Equivalents:
Urei 1176LN - Softube FET Compressor, Waves CLA-76, Bomb Factory BF76, IK Multimedia T-RackS CS Black 76, Native Instruments VC76, U-he Presswerk, FXpansion "DCAM Dynamics" ChanComp, Slate Digital Virtual Mix Rack, Lindell Audio 7X-500, McDSP 6030 Ultimate Compressor, McDSP CompressorBank, URS Fet (CCS Pro), Yamaha Vintage Channel Strip "Compressor 276", Stillwell Audio The Rocket, Antress Modern The Seventh Sign
Final Notes
A couple final thoughts to include with the information above:
I’d recommend keeping this link of digital plug-in emulators in your bookmarks. Though I pulled some compressors off of here to group them in their proper families, there are a TON of other digital emulators on this link that can help with EQs, reverbs, synthesizers and much more.
None of these compressors are stand-alone. I’m currently getting deeper into applying various compressors to certain tracks in a mix at incremental levels to help shape the specifics of that sound. I have a long way to go still, but the more I understand these compressor families and apply the knowledge, the more I see compressors as just another set of paint brushes to color and shape sound with.
For more information on me, you can visit my portfolio at www.soundrzn.com
Sources: Sine Language Podcast, Christopher Dion of Quantum Music Mastering, Joe Kucera - San Diego City College
0 notes
Photo

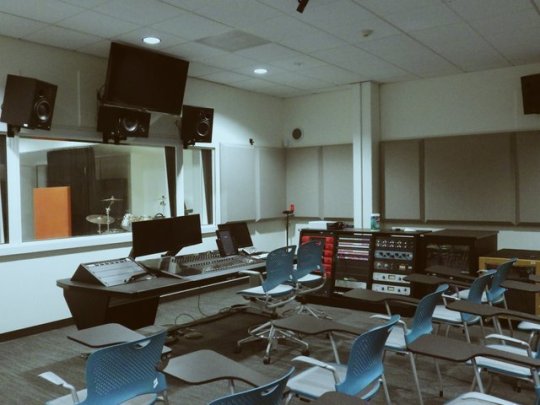
The first mix to be carried out was the software mixdown, considering that this is the original method of sequencing and arrangement of the song. The track was mixed using many software emulations of vintage hardware processors such as the API 2500 compressor and API 550 EQ seen here on the drum bus. This was to ensure there was a fair competition between the quality of the software and hardware mix. Software emulations of analogue hardware seem to yield more authentic results compared to many stock effects that come with DAWs (Elmosnino, 2018). Elmosnino, S. (2018). Audio Production Principles. Oxford: Oxford University Press.
0 notes
Video
tumblr
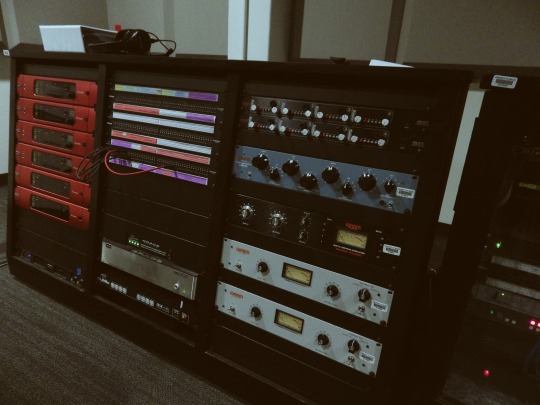
Gang of Four - Korupt
Came back for stemming sessions for Gang of Four
Patching all outboard in, dialing in settings from recall notes, and exporting in real time through hardware
Here I’m running the drum bus through the API 2500 stereo compressor, couple of dB of GR for punchiness
0 notes
Note
Oh, I know some shit you (question asker) can learn on your own that'll help you be competetive in getting an internship.
1. Soldering. It's a skill that not as many new engineers have and it'll set you apart and make your labor more valuable.
1a. Buy a soldering iron. Doesnt need to be a nice one. Also buy some solder.
1b. Learn how to solder cables and quarter inches. Its very easy and theres plenty of tutorials on YouTube.
1c. Build your own effects pedal. http://buildyourownclone.com is a great resource for buying all the parts you need. And once you've built it, you can sell it and make a profit!
1d. Solder your own preamp! Now this is where it starts to get tough. Check out http://capi-gear.com/catalog/index.php because it's pretty much the only place that has the parts you need. I'd start with this http://capi-gear.com/catalog/product_info.php?cPath=22_117_55_56&products_id=480 it's tougher and expensive to make, but you can sell it for a pretty huge profit once youre done.
2. Buy a DAW. DAWs like pro-tools, logic, and ableton are going to be where you spend most of your time as a sound engineer. Pick one and buy it. Most higher-end studios use pro-tools but learning a DAW is like learning a Romance language and it gets easier to learn after you know 1.
3. Learn plug-ins
3a. Go into whatever DAW you are using and become familiar with the generic EQ, compressor, reverb, delay, chorus, and pitch-correction plug-ins.
3b. Pirate plug-ins. Pirate as many plug-ins as you can find and become familiar with their interfaces and how they work. I'd say the most important to learn are Melodyne, Autotune, beat detective, elastic audio, iZotope RX 2, any parametric EQ, any graphic EQ, and any kind of modeling of an LA-2A, an 1176, or other classic compressors. You don't need to learn these all at once and interning at a studio, theyre bound to teach you some of these.
3c. As an addendum, it's also important to learn how to use hardware, but internships and schools are the only realistic way to do that. Heres some gear you can do a bit of research on so that you might know what youre looking at in a studio: Massive Passive EQ, API 2500 bus compressor, Distressor compressor, API 3124 pre-amp, UA 1176, and UA LA2A.
4. Learn your microphones
4a. Learn the difference between dynamic, condenser, and ribbon mics.
4b. Learn the commonly used mics in studio and live settings. Learn how to set them up and how to position them.
4c. Buy some nicer but cheap mics and an audio interface to have on hand so that you can record things when you need to and start building a portfolio of mixes. I'd go with a Scarlett 2i2, some sm57's and a condenser mic around the 200$ price range.
5. NETWORK! Make friends with the kinds of people you want to work with and the kinds of people who would be willing to pay you for your work. If you know some famous artist or engineer, that won't help you. What will help you is knowing the people in your league with similar experience in a similar place in their lives who are more likely to work with you and work for you.
This is not exhaustive but it's realistic and relatively inexpensive. If you dont have money, keep making and selling pedals and pre-amps until you can save up for the other things.
Hey I was just wondering if you had any advice for a girl who wants to get started in sound engineering/sound tech? I have very little experience with music technology and I want to learn but I have no idea where to start.
Honestly, I dont really know. Ive always just been sort of a self-taught studio loner and had all my own gear
16 notes
·
View notes
Text
Mixing Like A Fool (Jemma Freese)
originally completely mixed on the desk, only using outboard gear for compression, EQ both desk and hardware, and reverb and delay effects used in the box (Oxford reverb and Tape delay). After getting the mix as close as I wanted it I then printed all the stems of the track and took it into the box for automation changes, slight corrections on EQ and compression and final panning.
Created a master fader in the box and applied mix bus compressor: API 2500 and some small EQ to tame bottom end.

Drum Bus: compressed to bring the drums together and make them sound tighter and as one instrument, before levels of the kit where jumping out a little too much and it became distracting.

Snare drum needed some more punch: 1176 compressor and boost on EQ around 220hz


Overheads needed more presence, the room tone was not clear enough and the room mics where too dirty sounding, so pushed the compression with a DBX 160 to bring those tones out and also push the cymbals out a bit more in the mix.

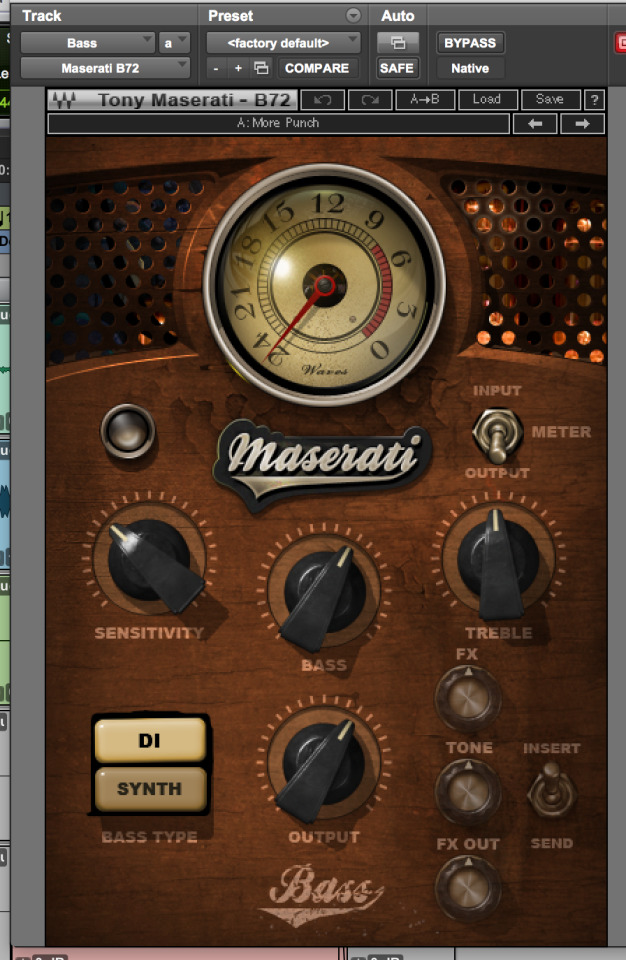
Bass: was flat sounding, bit muddy and not characterful enough, so used Maserati Plug in that gave a warm, clean sounding bass, with controlled low end and reduced low mid range that caused the clarity issue.
Reverb used on vocals to give it some separation from the rest of the mix was the Abbey Road Plates.

Gave rich, warm vocal reverb sound.
Tape delay was used and EQ’d to try emulate the likes of the space echo, this helps add some character to the vocal and also help blend everything together better.
0 notes