#Add Vector image in PDF
Explore tagged Tumblr posts
Visit Tumblr Blog
Explore Tumblr blogs with no restrictions, modern design and the best experience.
Last Seen Tumblr Blogs


Fun Fact
Tumblr has 16.74 million mobile monthly users in the US.
Text
Exploring the Symbolism of the Anonymous Face: The New "Anonymous Face CyberProcessor" Vector Design
The face of Anonymous, with its iconic Guy Fawkes mask, has become a global symbol of resistance and anonymity. Originating from the film V for Vendetta and later adopted by the hacktivist collective Anonymous, this symbol represents a challenge to authority and a demand for transparency. As a powerful emblem of rebellion, it continues to inspire and provoke. In this article, we’ll delve into the symbolism behind the Anonymous face and introduce the "Anonymous Face CyberProcessor" Vector Design, a modern take on this iconic image.
Understanding the Anonymous Face Symbolism
The Guy Fawkes mask, originally worn by the English revolutionary Guy Fawkes, has transcended its historical context to become a symbol of defiance and anonymity. The mask’s white face, with its stylized mustache and enigmatic smile, represents a resistance to oppressive systems and a desire for personal freedom. Adopted by the hacktivist group Anonymous, the mask has come to signify a collective fight against censorship and control, embodying the spirit of online activism and civil liberties.
Introducing the "Anonymous Face CyberProcessor" Vector Design
Our "Anonymous Face CyberProcessor" Vector Design offers a contemporary reinterpretation of this iconic symbol. Combining the familiar elements of the Guy Fawkes mask with a sleek, cyber-inspired aesthetic, this design breathes new life into the classic image. Here’s why this vector pack is an essential addition to your creative toolkit:
Features of the Design:
Contemporary Cyber Twist: The design modernizes the traditional Anonymous face by integrating futuristic and cyber elements. This fresh approach adds a dynamic, high-tech flair to the well-known symbol.
High-Quality File Formats: The vector pack includes SVG, AI, EPS, PNG, JPEG, and PDF files, all optimized for various design applications. This ensures you can seamlessly incorporate the design into any project, from digital graphics to physical merchandise.
Versatile Uses: Ideal for a broad range of applications, including t-shirts, wall art, mugs, stickers, and banners. The design’s adaptability makes it suitable for personal projects, commercial products, and promotional materials.
Commercial Rights Included: With your purchase, you receive a license to create and sell derivative works, providing you with the freedom to use the design in your commercial endeavors.
Usage Guidelines: Redistribution of the original files or unchanged graphics is not allowed. Keep your payment receipt as proof of your commercial use rights.
Applications and Benefits
The "Anonymous Face CyberProcessor" Vector Design is perfect for those looking to add a modern, edgy touch to their designs. Whether you’re creating custom apparel, eye-catching posters, or unique decor items, this vector design offers versatility and style. Its updated look ensures that your projects stand out while still honoring the powerful symbolism of the Anonymous face.
The Anonymous face remains a compelling symbol of resistance and anonymity. Our "Anonymous Face CyberProcessor" Vector Design revitalizes this iconic image with a contemporary cyber twist, making it an excellent choice for diverse creative projects. Embrace the power of this modern design to enhance your work and make a bold statement.
Get your vector pack today and start integrating this modernized symbol into your designs!
#AnonymousFaceDesign#AnonymousMaskArt#AnonymousIcon#AnonymousGraphics#AnonymousFaceVector#AnonymousFace#CyberProcessorDesign#VectorGraphics#GuyFawkesMask#ModernDesign#IconicSymbols#CreativeVectorArt#CommercialDesigns#DigitalArtwork#FuturisticGraphics
2 notes
·
View notes
Text
I get why PDFs are so popular. They can be read basically anywhere, they allow form fills, the can be loaded with image and text layers, a mix of rasterized and vectorized data, they can support search, in document links, ect. Unrelated, but they are a nightmare complication of XML so unabashedly unloved that there are only two main PHP libraries for navigating them.
But it's also really maddening the number of comic book houses that put out PDF copies of their work that are just image files in a pdf wrapper.
It's really obvious when you're someone ridiculous enough to convert them into an image archive format and notice that a poorly made PDF is often 1/10th the size as a CBZ, but a well made PDF is 10x the size as a CBZ.
That's kind of how rasterizing vector formats is supposed to work out. Bigger files with less ability to zoom. If I can minimize the file with a combination of PNG and ZIP compression, you've done something very wrong.
But to add to this, is that a PDF full of PNG or other lossless format comic panels SHOULD compress super well, it's a waste of the format, but it should. But if you then shove it full of low quality jpegs, then the PNG can't really compress the color data and you get a ballooned file.
It's just a whole thing. Basically, you can't predict how big a CBZ of a PDF is going to be. If it's a relative small pdf full of layers and text, it will probably be big. If it's a comic who knows!
2 notes
·
View notes
Text
Cybersecurity Advisory: Hackers Exploit CAPTCHA Trick on Webflow to Deliver Phishing Attacks

In the ever-evolving landscape of cyber threats, attackers constantly devise new ways to bypass security measures and trick unsuspecting users. A recent and particularly insidious campaign has come to light, revealing hackers are exploiting a clever CAPTCHA trick, often leveraging legitimate platforms like Webflow's Content Delivery Network (CDN), to deliver sophisticated phishing attacks and malware.
This advisory details how this exploit works and, more importantly, what you can do to protect yourself and your organization.
The Deceptive CAPTCHA Trick
Traditionally, CAPTCHAs (Completely Automated Public Turing test to tell Computers and Humans Apart) are designed to differentiate between human users and automated bots, acting as a crucial security layer to prevent spam and abuse. However, in this new wave of attacks, hackers are turning this defense mechanism into an attack vector.
Here's how the exploit typically unfolds:
SEO Poisoning & Malicious PDFs: Attackers use search engine optimization (SEO) techniques to push malicious PDF files high up in search results. These PDFs are often hosted on legitimate, trusted platforms like Webflow's CDN, GoDaddy, or Strikingly, making them appear harmless. Users searching for documents, book titles, or charts might stumble upon these booby-trapped PDFs.
The Fake CAPTCHA Lure: When a victim opens one of these malicious PDFs, they are presented with an image that mimics a CAPTCHA challenge. This fake CAPTCHA often includes a checkbox or a button, prompting the user to "verify they are human" or "download the document."
Redirection to Phishing Pages: Clicking on this fake CAPTCHA image or button redirects the user to a malicious website. To add a layer of legitimacy, this phishing page might even present a real CAPTCHA (like Cloudflare Turnstile), further convincing the victim that they are on a legitimate site undergoing a security check.
Malware Delivery (Lumma Stealer): Once the user completes the genuine CAPTCHA, they are often prompted to "download" the supposed document. However, this action triggers a malicious PowerShell command, silently executing and deploying information-stealing malware, such as Lumma Stealer, onto the victim's system. In some cases, the attack directly aims to harvest credit card details or other sensitive personal information.
Information Exfiltration: The Lumma Stealer malware then proceeds to search for and exfiltrate sensitive data, including passwords, cryptocurrency wallet credentials, browser information, and other critical files.
Why is This So Effective?
This attack vector is particularly dangerous due to several factors:
Leveraging Trusted Domains: Hosting malicious PDFs on reputable CDNs like Webflow's helps bypass common security checks that flag suspicious or newly registered domains.
Social Engineering Sophistication: The use of CAPTCHAs, even fake ones, adds a veneer of legitimacy, making users less suspicious. The multi-stage nature of the attack, sometimes including a real CAPTCHA, further enhances its deceptive power.
Human Tendency to Trust: Users are accustomed to seeing CAPTCHAs and interacting with PDFs, making them more likely to fall victim to these well-crafted schemes.
Fileless Attack Techniques: The use of PowerShell scripts and other fileless methods can help the malware evade traditional antivirus detection.
How to Protect Yourself and Your Organization
Given the stealthy nature of these attacks, a multi-layered defense strategy is crucial:
Extreme Caution with Downloads and Links:
Verify Sources: Always be suspicious of unexpected PDF files or documents, especially if they are from unknown sources or appear in unusual search results.
Hover Before You Click: Before clicking any link or button within a document or on a webpage, hover over it to see the actual URL. Look for discrepancies or suspicious domains.
Direct Navigation: If you're looking for a specific document, go directly to the official website of the source rather than clicking on links from search results or emails.
Enhanced Email and Web Security:
Advanced Email Filtering: Implement robust email security solutions that can detect and block sophisticated phishing attempts, including those with malicious attachments or links.
Web Content Filtering: Deploy web filters that can identify and block access to known malicious websites, even if they are hosted on legitimate CDNs.
Endpoint Detection and Response (EDR):
Proactive Monitoring: EDR solutions can monitor endpoint activity for suspicious behaviors, such as unusual PowerShell script execution or attempts to exfiltrate data, even if the initial infection vector was subtle.
User Education and Awareness:
Regular Training: Conduct frequent cybersecurity awareness training for all employees, focusing on recognizing phishing tactics, social engineering, and the dangers of interacting with suspicious content.
"Think Before You Click": Reinforce the importance of pausing and scrutinizing any unexpected requests or prompts, especially those involving downloads or credential entry.
Keep Software Updated:
Patch Regularly: Ensure your operating systems, web browsers, PDF readers, and all other software are kept up-to-date with the latest security patches.
Implement Strong Authentication:
Multi-Factor Authentication (MFA): Enable MFA on all accounts, especially for critical services. This adds a crucial layer of security, even if credentials are stolen.
The Bottom Line
The exploitation of CAPTCHA tricks on platforms like Webflow's CDN highlights the evolving sophistication of cybercriminals. While these attacks are designed to be deceptive, a combination of user vigilance, robust security tools, and continuous education can significantly reduce your risk. Stay informed, stay cautious, and prioritize cybersecurity in your daily digital interactions.
0 notes
Text
How to Save Money When Ordering from a Print Shop on the Gold Coast?
When looking for professional printing services, a print shop on the Gold Coast can offer high-quality prints for businesses, events, and personal needs. However, without proper planning, printing costs can add up quickly. Whether ordering business cards, flyers, banners, or promotional materials, there are several ways to reduce expenses without compromising quality.

1. Choose Bulk Printing for Cost Savings
One of the most effective ways to save money is by ordering in bulk. Many printing services offer discounts for larger quantities, making it more affordable per unit. Instead of printing in small batches, consider ordering more to maximize savings.
Benefits of Bulk Printing:
Lower cost per item
Reduced setup fees
Fewer reorders, saving time and money
2. Optimize Design and Formatting
Before submitting a design to a print shop on the Gold Coast, ensure it is formatted correctly. Errors in formatting can lead to additional charges for adjustments and reprints. Using the right file type, resolution, and bleed margins can prevent unexpected costs.
Tips for Proper File Preparation:
Use vector files (PDF, AI, or EPS) for logos and designs
Ensure images have a resolution of at least 300 DPI
Convert text to outlines to avoid font issues
3. Select Standard Sizes and Materials
Custom sizes and specialty materials can significantly increase printing costs. Sticking to standard sizes and common paper types can help keep expenses low while still maintaining a professional look.
Cost-Effective Printing Choices:
Use standard paper sizes (A4, A5, DL, etc.)
Opt for economy-grade materials when possible
Avoid unnecessary finishes like embossing or foil stamping unless required
4. Compare Quotes from Multiple Print Shops
Prices vary between providers, so requesting quotes from different print shops on the Gold Coast allows for better price comparison. While the cheapest option is not always the best, finding a balance between quality and affordability is key.
Factors to Compare:
Printing turnaround time
Material quality
Additional service fees
5. Utilize Digital Printing for Small Orders
For small print runs, digital printing is a cost-effective alternative to offset printing. Digital printing eliminates the need for expensive setup costs, making it ideal for low-quantity orders.
Advantages of Digital Printing:
No minimum order requirement
Faster production time
Lower setup costs
6. Look for Seasonal Promotions and Discounts
Many printing services offer seasonal promotions, loyalty discounts, or referral programs. Keeping an eye out for special deals can help reduce overall expenses.
Ways to Find Discounts:
Subscribe to newsletters from local print shops
Follow printing businesses on social media for exclusive offers
Check for bundle deals when ordering multiple products
7. Reduce Unnecessary Printing Features
Eliminating non-essential printing options can result in significant savings. Consider whether additional features such as lamination, die-cutting, or special coatings are necessary for your project.
Cost-Effective Printing Alternatives:
Use matte instead of glossy finishes
Choose single-sided printing when applicable
Opt for black-and-white printing instead of full color if suitable
8. Plan Ahead to Avoid Rush Fees
Last-minute orders often incur extra charges for expedited services. By planning print projects well in advance, additional rush fees can be avoided.
How to Prevent Rush Costs:
Set a timeline for printing projects
Place orders early to allow for standard turnaround times
Review and approve designs quickly to prevent delays
Final Thoughts
A print shop on the Gold Coast provides essential printing services for businesses and individuals. By applying these cost-saving strategies, printing expenses can be minimized while maintaining high-quality results. From bulk ordering to choosing standard sizes, taking a strategic approach to printing can lead to significant financial savings.
For the best results, always compare prices, optimize designs, and take advantage of available discounts to ensure an affordable and efficient printing experience.
0 notes
Text
How to Make a Digital Design: A Step-by-Step Guide

Digital design is an essential skill in today’s digital world, whether you’re creating graphics for social media, websites, branding, or digital art. Whether you’re a beginner or an aspiring professional, understanding the process can help you create visually appealing and functional designs. In this guide, we’ll break down the steps to making a digital design from start to finish.
Step 1: Define Your Purpose and Audience
Before you start designing, determine the goal of your design and your target audience. Ask yourself:
Is it for a website, social media, advertisement, or personal project?
Who will see this design? What are their preferences?
What emotions or actions do you want to evoke?
Having clarity on these points will help guide your design choices.
Step 2: Choose the Right Software
There are many digital design tools available, and selecting the right one depends on your project needs:
Adobe Photoshop – Best for photo editing and raster graphics.
Adobe Illustrator – Ideal for vector graphics and logo design.
Canva – User-friendly for beginners, great for social media and presentations.
Figma – Excellent for UI/UX design and collaboration.
Procreate – Perfect for digital painting and illustrations.
Step 3: Gather Inspiration and Plan Your Design
Before starting, gather inspiration from online sources such as Pinterest, Behance, or Dribbble. Create a mood board to organize color schemes, typography, and layout ideas.
Sketch your ideas on paper or use wireframing tools to map out the structure of your design before you dive into software.
Step 4: Set Up Your Canvas
Open your chosen software and set the appropriate dimensions for your design. Consider:
Resolution: Use 72 DPI for digital designs and 300 DPI for print designs.
Color Mode: RGB for screens, CMYK for print.
Aspect Ratio: Make sure it suits the platform where it will be displayed (e.g., Instagram post vs. website banner).
Step 5: Create a Strong Composition
A well-balanced layout improves readability and visual appeal. Follow design principles such as:
Rule of Thirds: Place key elements along grid lines for balance.
Alignment and Spacing: Keep elements aligned and maintain consistent spacing.
Hierarchy: Emphasize important elements through size, contrast, and placement.
Step 6: Choose Colors and Typography
Colors: Use a color palette that complements your design's theme. Tools like Adobe Color or Coolors can help.
Fonts: Select readable and appropriate fonts. Use font pairings that work well together (e.g., bold headings with simple body text).
Contrast: Ensure good contrast between text and background for readability.
Step 7: Add Graphics and Visual Elements
Enhance your design with:
Icons and illustrations
High-quality images
Shapes and lines to guide the viewer’s eye Make sure these elements blend well with the overall design.
Step 8: Use Layers and Effects Wisely
Most design software allows working with layers. Organize your layers and name them for easier editing. Use effects like:
Shadows and gradients for depth
Transparency and overlays for a modern look
Blending modes to merge images creatively
Step 9: Review and Refine
Take a step back and analyze your design. Check for:
Spacing and alignment issues
Color consistency
Readability of text Ask for feedback from peers and make necessary adjustments.
Step 10: Export in the Right Format
Save your design in the appropriate format:
PNG – High quality, supports transparency.
JPEG – Smaller file size, good for web use.
SVG – Scalable vector format, ideal for logos and icons.
PDF – Best for print and document sharing.
Conclusion
Creating a digital design involves planning, creativity, and technical skills. By following these steps, you can improve your design process and produce stunning visuals for any purpose. Keep practicing, stay updated with design trends, and experiment with new techniques to refine your skills. Happy designing!
1 note
·
View note
Text
Affinity Designer 2—Weaknesses and strengths.
I think the higher end of Affinity Designer is pretty good. It's fairly easy to draw things, but it needs some work on the basics of drawing to smooth out workflow that even Inkscape has.
Strengths:
I like the greyed out text to show what one has not labeled yet.
The ability to join by drag and drop is super cool. However, I still want to be able to join without doing that and being able to press a keyboard shortcut.
gradient and brush support is excellent. The styles panel is actually useful.
The pattern tool is cool, though I wish it did patterns with vector instead.
In no particular order:
deleting an anchor is unbelievably hard. You have to use *both* hands to achieve this task, when it should be with a keyboard assist with one hand, or one click. or better both options available. placing a wrong anchor is a frequent task. The default isn't good. I changed it to delete and cued it up on my tablet.
Reflect is near to impossible. Even the hacks are imperfect.
The anchors on the gradient tool need to be changed so the ends of the anchors are replaceable by other colors without having to go into other panels. (The colors at zero and 100 should be able to be dragged off and replaced)
I wish the Illustrator import was stronger. On one of the things I created, it failed to import the sub folders from Illustrator.
I wish it could import strokes *with* the interior of the image with the stroke width from AI instead of creating a whole separate stroke for each shape. That information should be embedded in the file.
Import from illustrator file often forgets or misses layers, even when importing from an EPS, SVG or PDF file. This is painful because it doesn't remember layers even if that information is encoded from illustrator and Inkscape has that architecture.
Reflect, and merging tools should be separate from the Move tool, so it can be accessed in the Node tool. It's one less click. Make them their own panels. Even the OG tools had that.
Easier color select and style system with the eyedropper.
Intuitive percentage scale Especially for multiple objects in a scene and unlink from the move tool.
Vectors for custom patterns and pattern Vector Brushes. If not that symbols. All three have been on early versions of illustrator.
Basically, Affinity designer is good for bells and whistles, but needs to check out and make sure the basics of making shapes and workflow are better. When the basic functions work and have a steady workflow, that's when you start to add the shiny bits.
I think Affinity designer should work on the core and make sure those are solid before it gets to the shiny bits. If Inkscape is doing it better for free, then it's time to really think about also making sure that Affinity designer can at least match Inkscape in core functionality.
And in case anyone is wondering... Yes, I did do UX, and yes... I've fed suggestions to companies and done whole write ups for bugs. I'm breaking a bit here, 'cause I HATE Gen AI a lot. Like a super ton, but at the same time Affinity designer can't get the basics right which is driving me up the wall. I made all of those layers and folders to do the animation part.

For example, it failed to import all these layers from the PDF, which Inkscape could read and get the colors correctly.
I carefully labeled and named all of the layers. So I don't understand why Affinity designer skipped them just because it felt like it, and the importation of the EPS file was miserable since the colors turned all to black.
1 note
·
View note
Text
Unforgettable Repella Fella Adventure: A Unique Australian Gaming Experience

Repella Fella adventure for the interactive point and click game is re-released on Linux, Steam Deck, Mac, and Windows PC. Thanks to the creative minds at Misadventurous for bringing it all to life. Available on both Steam and GOG with its 97% Very Positive reviews. MicroProse, the classic devs we know and like for all those unforgettable simulation games, are back at it again. This time they’re teaming up with Misadventurous to bring us the Repella Fella re-released adventure. If you’re ready for a fresh twist on the post-apocalyptic genre, this is it. Since it all take place in a wild, futuristic Australia, and it’s full of choices. Along with, wild exploits, and a lot of unique Australian vibes. So, what's the game all about? Repella Fella follows three main characters, each with their own story in this adventure. Since each one’s trying to make it in a world that's been totally flipped upside down. Survival isn’t just about fighting or hiding — it’s also about making the right calls. And, with over 120 different choices to mess with, you can expect a ton of different ways the story can go. That means multiple endings, so if you’re into replaying games to unlock every possible path, this one’s definitely made for you.
Key Features:
Here’s a quick rundown of what the Repella Fella adventure brings to the table:
Choices That Matter: Your decisions are gonna steer the story and impact each character. With 120+ choices, you’re in control of how the adventure unfolds, giving you multiple endings to uncover.
6+ Hours of Cinematic Fun: Think of it as an interactive movie with more than 540 unique scenes. The animation is a high-res vector style, giving it a crisp, eye-catching look.
Voices to Remember: The adventure game boasts a cast of over 90 voice actors, bringing the gritty, yet quirky world of Repella Fella to life with genuine Australian accents.
Full Aussie Vibes: This isn’t just any post-apocalyptic setting. It's all about Australia, complete with authentic accents, outback references, and that classic “down under” vibe.
Repella Fella point and click adventure - Publishing Announcement
youtube
Designed for Replay Value
If you’re the type to dive back in and replay games, Repella Fella has you covered. Each time you play, you’ll discover new ways to approach situations, hidden content, and fresh outcomes based on the choices you make. No two runs have to be the same, which just adds to the fun.
Updates for a Smoother Experience
Now, Repella Fella also has some big updates for a more polished adventure experience:
New Engine Upgrade: The game’s now running on Construct r397 for smoother play.
Streamlined Credits: Credits are now at 30 FPS to avoid lag issues, and you can skip them if you want. Plus, they’ve added some dev footage to make it a little more interesting.
Extras Galore: They added a Bomb Dodger’s Bible PDF, three versions of the game’s theme song (including two never before released tracks), and about 200 images from the development process.
Save Game Fixes: Two bugs causing black screens during saves are squashed.
Hacking Game for All: The hacking minigame now has color indicators for order, making it more accessible for colorblind players.
Music Updates: They’ve ditched the “streamer mode” as the original music’s safe to stream. And the so-called “safe” music was getting flagged anyway.
Ready to Dive In?
If you’re down for a point and click adventure that’s full of unique characters, meaningful choices, and loads of Aussie charm, Repella Fella is available. Now re-released on both Steam and GOG.
#repella fella#point and click#adventure#re-release#linux#gaming news#misadventurous#ubuntu#steam deck#mac#windows#pc#construct 3#Youtube
0 notes
Text
Dagger and Roses Old-School art
The Timeless Appeal of Old School Tattoo Art: Dagger and Roses Symbolism
Old school tattoo art, with its bold lines and vivid imagery, has become a symbol of timeless rebellion and personal expression. One of the most iconic motifs in this style is the dagger and rose, a design that beautifully blends the contrasting elements of strength and beauty. In this article, we'll explore the significance of this enduring symbol and its artistic representation in the “Dagger and Roses” vector art bundle.
The Power Behind the Dagger and Rose Symbol
The Strength of the Dagger
In tattoo culture, the dagger represents power, survival, and resilience. It’s a symbol of protection and a reminder of the hardships one faces in life. The sharp edge of the dagger reflects determination and the readiness to cut through obstacles.
The Beauty of the Rose
In contrast, the rose has long been associated with love, beauty, and passion. It adds a delicate touch to the otherwise sharp image of the dagger. However, the thorns of the rose remind us that even beauty comes with its own challenges, making the design a perfect balance of elegance and toughness.
When combined, the dagger and rose represent the dual nature of life: the constant battle between harsh realities and the beauty that surrounds us. The “Dagger and Roses: Strength & Elegance” vector art pack captures this dynamic with a striking old school design, perfect for a wide range of creative projects.
A Versatile Design for Any Project
The “Dagger and Roses” vector art bundle is more than just a tattoo-inspired design. This pack includes files in SVG, AI, EPS, PNG, JPEG, and PDF, offering flexibility and versatility for various applications. Whether you're a designer, a tattoo artist, or simply a creative enthusiast, this artwork can be used for:
Clothing designs: Perfect for t-shirts, jackets, or accessories, giving a bold statement of style.
Wall art and murals: Add a dramatic flair to interiors with this classic old school design.
Stickers and decals: Ideal for small-scale products or promotional materials.
Custom tattoos: The perfect design for those seeking a meaningful and powerful tattoo.
Old school tattoo art continues to captivate with its timeless charm, and the dagger and rose motif is no exception. It symbolizes the delicate balance of strength and beauty, making it a popular choice for tattoo lovers and artists alike. The “Dagger and Roses” vector art bundle brings this iconic design to life with high-quality, versatile files perfect for any project. Whether you’re creating apparel, murals, or custom tattoos, this bundle will inspire creativity and leave a lasting impression.
#OldSchoolTattoo#DaggerAndRose#TattooSymbolism#ClassicTattooArt#VectorTattooDesign#BoldLineArt#TraditionalTattoo#TattooIllustration#VintageTattooStyle#TimelessTattooArt
1 note
·
View note
Text
Know the Power of Adobe Creative Cloud

In the dynamic world of digital creation, Adobe Creative Cloud stands as an indispensable platform, empowering artists, designers, photographers, and filmmakers to bring their visions to life. From industry-standard software to cutting-edge collaboration tools, Adobe Creative Cloud offers a comprehensive suite of applications and services tailored to meet the diverse needs of creative professionals. Let's delve into the myriad features and benefits that make Adobe Creative Cloud the go-to solution for unleashing creativity.
What is Adobe Creative Cloud?
Adobe Creative Cloud is a subscription-based service provided by Adobe Inc. that grants users access to a wide range of creative tools, software applications, and services. Unlike traditional software licenses, Creative Cloud offers a flexible subscription model, providing continuous updates and access to the latest features across all its applications.
Key Features and Applications:
Adobe Photoshop: Widely regarded as the gold standard for image editing and manipulation, Photoshop offers an extensive array of tools and features for retouching photos, creating digital artwork, and designing captivating graphics.
Adobe Illustrator: Ideal for vector-based design, Illustrator enables users to create logos, icons, illustrations, and intricate artworks with precision and scalability.
Adobe InDesign: Tailored for layout design and publishing, InDesign facilitates the creation of stunning print and digital documents, including magazines, brochures, eBooks, and interactive PDFs.
Adobe Premiere Pro: A powerhouse for video editing and production, Premiere Pro allows users to craft professional-quality videos, from simple vlogs to Hollywood-level productions, with advanced editing tools and seamless integration with other Adobe applications.
Adobe After Effects: Renowned for its motion graphics and visual effects capabilities, After Effects empowers users to add dynamic animations, special effects, and cinematic flair to their videos and motion graphics projects.
Adobe XD: Designed for user experience (UX) and user interface (UI) design, XD enables designers to prototype, design, and share interactive experiences for websites, mobile apps, and more.
Adobe Lightroom: Tailored for photographers, Lightroom offers powerful photo editing and organization tools, allowing users to enhance their images, manage their photo libraries, and showcase their work with ease.
Collaboration and Cloud Storage: Beyond individual applications, Adobe Creative Cloud facilitates seamless collaboration and file sharing among team members through Adobe Creative Cloud Libraries, Adobe Stock integration, and cloud storage solutions. With features like shared libraries, version control, and real-time collaboration, Creative Cloud streamlines the creative workflow and fosters teamwork across projects.
Accessibility and Flexibility: One of the standout features of Adobe Creative Cloud is its accessibility and flexibility. Subscribers can access their Creative Cloud applications and files from any device, anywhere, thanks to cloud-based syncing and storage. Whether you're working on a desktop computer, a laptop, or a mobile device, Creative Cloud ensures that your creative assets are always within reach.
Conclusion: In a world where creativity knows no bounds, Adobe Creative Cloud serves as a catalyst for innovation, empowering creators to push the boundaries of their imagination and turn their ideas into reality. With its comprehensive suite of applications, collaborative features, and cloud-based infrastructure, Creative Cloud continues to be the ultimate toolkit for unleashing creativity across disciplines and industries. Whether you're a seasoned professional or an aspiring artist, Adobe Creative Cloud offers the tools and resources you need to bring your vision to life and make your mark on the world of digital creation.
1 note
·
View note
Text
Choosing the Right File Format for Packaging Designs in Canva
Packaging Designs in Canva: Q & A Tutorial
1. What file formats does Canva offer for exporting packaging designs, and how do these formats impact printing quality?
Canva offers several file formats for exporting packaging designs, including PDF, PNG, and JPG. PDFs are best for printing due to their high quality and ability to preserve vector graphics. PNGs provide a transparent background but may not be ideal for print resolution. JPGs are suitable for digital use but can lose quality if compressed. Choose based on your specific printing needs.
2. How can Canva's collaboration tools enhance teamwork when designing packaging for products?
Canva's collaboration tools enhance teamwork by allowing multiple users to work on designs simultaneously, leave comments, and provide feedback in real time. Team members can share templates, access brand assets, and manage permissions easily. This streamlines the design process, fosters creativity, and ensures everyone is aligned, ultimately leading to more cohesive and effective packaging designs.
3. How can users customize packaging templates in Canva to align with their brand identity?
Users can customize packaging templates in Canvas by selecting a template and using the editing tools to change colors, fonts, and images. They can upload their own logos, adjust the layout, and add brand-specific elements to ensure the design reflects their brand identity. Saving the customized template allows for easy future use and consistency across products.
4. What are the key features of Canva that make it suitable for creating packaging designs?
Canva offers user-friendly drag-and-drop functionality, a vast library of templates, and customizable design elements, making it easy for users to create packaging designs. It provides access to various fonts, images, and graphics, along with collaboration tools for team projects. Additionally, Canva supports exporting designs in different formats, ensuring compatibility with printing requirements.
5. What are some best practices for selecting colors and fonts in packaging designs using Canva?
When selecting colors and fonts in Canva for packaging designs, choose a color palette that reflects your brand identity and evokes the desired emotions. Stick to 2-3 complementary colors for a cohesive look. For fonts, use no more than two styles—one for headings and another for body text. Ensure readability and maintain consistency across all packaging elements.
Visit: VS Website See: VS Portfolio
0 notes
Text
EbookStudio Review - Create Stunning Ebooks & Flipbooks In any Language With Beautiful Covers, Mockups & Designs!
What is EbookStudio?
Welcome to my EbookStudio Review. EBookStudio is your all-in-one content & designing platform that helps you create captivating EBooks & FlipBooks so that you can CRUSH it online to get a constant supply of views, clicks, leads, & sales.
An A.I.-powered software that helps you…
SMART TECH – 1-Click app creates your FlipBooks & EBooks for you, hands-free
AUTOMATED CONTENT – Built-In Article & Content Creator generates ALL the content for you
GO INTERNATIONAL – Create EBooks & FlipBooks in ANY International Language to engage audiences all over the world
INCREASE TRAFFIC – Watch as your FlipBooks & EBooks send tons of traffic to your business
GENERATE MORE LEADS – Use as a Lead Magnet to add more subscribers & build a list
SELL YOUR FLIPBOOKS/EBOOKS – On your own website or on platforms like Fiverr & UpWork
Get Ready To DUMP Boring PDFs, Cheat-Sheets, etc. That No One Wants To Read… & Switch To Engaging, Interactive & Fun To Read EBooks & FlipBooks In Just 60 Seconds! No need to write anything and/or design anything. Everything is automated.
How it works?
Step#1 - SELECT: Select from 80+ Hot DFY Templates in 20+ Niches to create EBooks & Flipbooks
Step#2 - EDIT/DESIGN: Use our built-in EBook Editor to EDIT content & Design Your EBook
Step#3 - USE/SELL: EBookStudio instantly creates a full-blown EBook/FlipBook in Seconds. Download & use them for your own or sell them for the top dollar.
Features:
Professional & Fully Cloud-Based Platform
User-Friendly eBook Creator Software
100+ High-Quality Ready To Use Templates Generator
60-second eBook Creation
Inbuilt Cover Creator Feature
100+ Super High-Quality Premade Layouts & eBook Covers
Millions of eBooks With PLR License
Millions Of Articles With PLR License
Multiple Niche Premade eBooks
Inbuilt Content & Article Generator Feature
COMMERCIAL LICENSE Included
No Limitations - Completely Free
No Special Skills or Experience Required
Sell Unlimited eBooks & Earn Like The Big Boys
Unlimited One-Click Download
Step by Step Training
This will position YOU as the #1 EXPERT in your niche overnight… & help you GROW your business
World’s FASTEST EBook & FlipBook Creator
All-in-one content & designing platform
Create captivating EBooks & FlipBooks in SECONDS
Get a constant supply of views, clicks, leads, & sales
Exclusive & limited chance to avail EBookStudio at the lowest one-time cost
Generate NEW Leads And Grow Your Sales & Profit In ANY Niche
No need to create lead magnets like videos, toolkits, cheat sheets, case studies, quizzes/surveys
No need to hire freelancers/agencies/employees to create campaigns for you that simply DO NOT work
No need to buy a list that is full of fake, non-existent & useless leads that don’t are not looking to buy anything
No need to cold call people & face rejection because they are just NOT interested in your products/services
No need to pay Gurus & Mentors who charge you a bomb to give you tips, hacks & suggestions that a good Neil Patel article would have given you for FREE
Built-in DFY Content & Article Creator, Cover Designer, Social Media Images, Mockups, etc.
Save time and effort by 100%, publishing and adding content on autopilot.
Your EBooks & Flipbooks are completely customizable giving you full freedom to be as creative as you want to be
Select from a 2M+ Built-In Library of Searchable Stock Images, Videos & Vectors Library
True AI-Powered App AUTO Creates Stunning Ebooks & Flipbooks In ANY International Language
Create EBooks & FlipBooks with beautiful Covers, Mockups & Designs
Get 30,000+ DFY eBooks with a Whitelabel License.
AI-Powered Software creates your EBooks & FlipBooks In ANY International Language with just a KEYWORD
No need to WRITE anything and/or DESIGN anything. EVERYTHING is automated
Turn Any PDF, Text, or Image into a FlipBook in a flash
Get Started immediately with 30,000 EBooks in the hottest niches pre-loaded
Built-In Editing & Design tools + a Library with Millions of Images, Videos & Vectors
All EBooks & FlipBooks are 100% Customizable - Change Name, Description, Color, Logo, Background, etc. in just 1-click
100% Hosted On Reliable Cloud Server & Optimized For Seamless Mobile Usage
FREE Commercial License. Sell Ebooks & FlipBooks (even the pre-loaded ones) & keep 100% profit
Create Stunning EBooks & FlipBooks In A Flash… That Get You TONS Of Leads & Sales
No writing and/or designing skills required.
100% hosted on our super fast servers.
No domain or hosting required. No EXTRA expenses needed.
Click-crazy UI & UX o capture your audience EVERYWHERE for FREE traffic.
>> Visit Official website Here!
0 notes
Text
Creative Fabrica Studio: A Powerful Online Design Tool for Everyone
Creative Fabrica Studio: A Powerful Online Design Tool for Everyone
Are you looking for a way to create stunning and professional designs without any hassle? Do you want to access millions of fonts, graphics, crafts and more for your personal or commercial projects? If yes, then you should check out Creative Fabrica Studio, a platform that offers various online design and edit features to help you unleash your creativity.
What is Creative Fabrica Studio?
Creative Fabrica Studio is a part of Creative Fabrica, a platform where you can find and create your own designs with millions of fonts, graphics, crafts and more. Creative Fabrica Studio is a free online tool that allows you to design whatever you want, from logos and flyers to SVG files and mockups. You can use it for any purpose, whether it is for fun, hobby, or business.
What can you do with Creative Fabrica Studio?
Creative Fabrica Studio has a lot of features that you can use to create unique and professional designs. Some of the features are:

• Background Remover: This feature allows you to remove the background of any image with just one click. You can also adjust the edges and download the transparent image in PNG format.
• SVG File Converter: This feature allows you to convert any image into a scalable vector graphic (SVG) file. You can also edit the SVG file with the built-in editor and download it in SVG or PNG format.
• PNG to SVG Converter: This feature allows you to convert any PNG image into a SVG file. You can also edit the SVG file with the built-in editor and download it in SVG or PNG format.
• JPEG to SVG Converter: This feature allows you to convert any JPEG image into a SVG file. You can also edit the SVG file with the built-in editor and download it in SVG or PNG format.
• Rotate Image: This feature allows you to rotate any image by 90 degrees clockwise or counterclockwise. You can also flip the image horizontally or vertically and download it in the original format.
• Crop Image: This feature allows you to crop any image by selecting the area you want to keep. You can also choose from predefined aspect ratios or enter your own custom dimensions and download the cropped image in the original format.
• Transparent Background Maker: This feature allows you to make the background of any image transparent. You can also adjust the transparency level and download the image in PNG format.
• Mirror Image: This feature allows you to create a mirror image of any image. You can also choose the direction of the mirror effect (horizontal or vertical) and download the mirrored image in the original format.
• JPG to PDF Converter: This feature allows you to convert any JPG image into a PDF file. You can also choose the page size and orientation and download the PDF file.
• JPG to PNG Converter: This feature allows you to convert any JPG image into a PNG file. You can also choose the compression level and download the PNG file.
• Change Color of Image: This feature allows you to change the color of any image. You can also adjust the hue, saturation, and brightness and download the image in the original format.
• Black and White Filter: This feature allows you to apply a black and white filter to any image. You can also adjust the contrast and download the image in the original format.
• Change Photo Background Color: This feature allows you to change the background color of any image. You can also choose from a color palette or enter a hex code and download the image in the original format.
• Add Text On Image: This feature allows you to add text on any image. You can also choose from hundreds of fonts, colors, sizes, and styles and download the image in the original format.
• Add Emoji to Photo: This feature allows you to add emoji to any photo. You can also choose from hundreds of emoji, resize, rotate, and move them and download the photo in the original format.
• PNG to JPG Converter: This feature allows you to convert any PNG image into a JPG file. You can also choose the quality level and download the JPG file.
• Circle Crop: This feature allows you to crop any image into a circle shape. You can also adjust the size and position of the circle and download the image in PNG format.
• Overlay Images: This feature allows you to overlay two images on top of each other. You can also adjust the opacity and position of the overlay image and download the image in the original format.
• Remove Background from Logo: This feature allows you to remove the background from any logo. You can also refine the edges and download the logo in PNG format.
• Resize Photo for Instagram: This feature allows you to resize any photo for Instagram. You can also choose from different aspect ratios and download the photo in the original format.
• AI Inpainting Tool: This feature allows you to use artificial intelligence to fill in the missing parts of any image. You can also adjust the brush size and download the image in the original format.
• Animate Pictures: This feature allows you to animate any picture with different effects. You can also adjust the speed and duration of the animation and download the picture in GIF format.
• Blur Background: This feature allows you to blur the background of any image. You can also adjust the blur intensity and download the image in the original format.
• Blur Image: This feature allows you to blur any image. You can also adjust the blur intensity and download the image in the original format.
• Crop JPG: This feature allows you to crop any JPG image by selecting the area you want to keep. You can also choose from predefined aspect ratios or enter your own custom dimensions and download the cropped image in JPG format.
• Crop PNG: This feature allows you to crop any PNG image by selecting the area you want to keep. You can also choose from predefined aspect ratios or enter your own custom dimensions and download the cropped image in PNG format.
• Darken Image: This feature allows you to darken any image. You can also adjust the darkness level and download the image in the original format.
• Edit PDF Image: This feature allows you to edit any PDF image. You can also add text, shapes, images, and more and download the edited PDF file.
• Image Enhancer: This feature allows you to enhance any image. You can also adjust the brightness, contrast, saturation, and sharpness and download the image in the original format.
• Photo Filter Effects: This feature allows you to apply different filter effects to any photo. You can also choose from dozens of filters and download the photo in the original format.
• Resize icon: This feature allows you to resize any icon. You can also choose from different sizes and download the icon in PNG format.
• Resize JPEG: This feature allows you to resize any JPEG image. You can also choose from different sizes and download the image in JPEG format.
• Resize PNG: This feature allows you to resize any PNG image. You can also choose from different sizes and download the image in PNG format.
• Sharpen Image: This feature allows you to sharpen any image. You can also adjust the sharpness level and download the image in the original format.
• Unblur Image: This feature allows you to unblur any image. You can also adjust the unblur level and download the image in the original format.
• Watermark to Photos: This feature allows you to add a watermark to any photo. You can also choose from different fonts, colors, sizes, and positions and download the photo in the original format.
How to use Creative Fabrica Studio?
Using Creative Fabrica Studio is very easy and intuitive. You just need to follow these simple steps:
• Go to Creative Fabrica Studio https://www.creativefabrica.com/studio/ref/181983/and choose the feature you want to use.
• Upload your image or choose from the gallery of images provided by Creative Fabrica.
• Edit your image with the feature you selected and preview the result.
• Download your image in the desired format and use it for your project.
Why choose Creative Fabrica Studio?
Creative Fabrica Studio is a great online design tool for everyone, whether you are a beginner or a professional. Here are some of the benefits of using Creative Fabrica Studio:
• It is free and unlimited. You can use it as much as you want without any restrictions or fees.
• It is fast and easy. You can create amazing designs in minutes with just a few clicks.
• It is versatile and flexible. You can use it for any purpose and any project, from personal to commercial.
• It is compatible and accessible. You can use it on any device and any browser, without any installation or registration.
• It is integrated and connected. You can access millions of fonts, graphics, crafts and more from Creative Fabrica and use them for your designs.
1 note
·
View note
Text
W1D1 fundies: 1 (software/pūmanawa)
We started to learn more about the differences in-between vector and raster. Vector is drawn lines that form a illustration (usually on PS), these type of illustrations don't lose quality if you zoom in. Raster are pixelated illustrations (usually on Ai) and if you zoom in loses its clean lines and is obviously pixelated, so it is not the best way of making a logo or illustration for a large image. Raster is better suited for images with lots of colours that aren't going to be enlarged (better suited for photos).


We then set up our tumblr accounts, which we will be using to post what we learn every class.
folder stytem:
Hannah Hemi:
project name:
PRJ= project files
IMG= image files (image files: photos, sketches, reference pics etc.)
DOC= documents (any format: cleint brief. vcleint feeback, docment data files, asset lists etc.)
OUT= output folder (pdfs for projects drafts and final pdf go in this folder)
command N for folders = new finder window
save first file in project file with 00 before hand (in renaming), then next one can be 01 and it will make ur files be in chronological order.
illustrator commands
z = zoom (or command+) (drag right or left on z to zoom in or out)
space = pan
/ = clear fill/stroke (stroke is the border, fill is the inside)
x = toggle (swap) fill/stroke
p = pen (get out of pen without closin shape is COMMAND click)
v = selection tool (full arrow = full shape - select all)
A = direct selection tool (hollow arrow = one part - a peice of the shape) (or hold command click)
move, rotate and scale are known as transform
using skills learnt in session:

the illustrator version.
for the first shape i just used pen tool and tried to make sure all the lines stayed all in a line and that the triangle were symmetrical to each other. since the shape wasn't a closed shape i used A tool to click out of using pen tool.
for he diamond i tire to use the guides illustrator has when using the pen tool to make it symmetrical.
for the third shape i drew the shape without the gap first and then used a tool to add anchors in the path allowed me to remove part of the line.
for the fourth shape i used pen tool (P) and then shift to make sure my lines stayed straight and then i tried to make the spacing accurate to the drawings we were given.
for the fifth shape i drew a symmetrical triangle and again used A to make anchors so i could remove part of the path and then i drew the inside spiral part of the triangle, trying to stay symmetrical to the outer triangle shape.
the last shape i created one line with the pen tool and then copied the line so all the lines wee the same length and then i used object - transform - rotate and rotated the lines so they were all on the right angle.
It was fun to try make the shapes and pretty easy to do with all the tools we learnt today
1 note
·
View note
Text
Best 6 Vector Converters Alternative Online Free
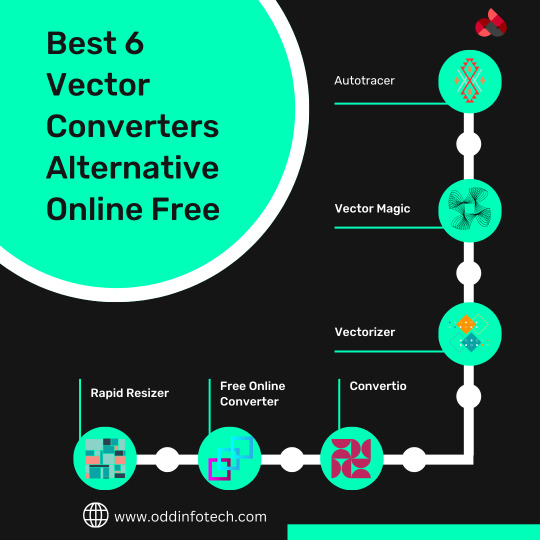
1. Autotracer Using this online tool, you can convert JPG, GIF, and PNG image files to an array of vector formats like EPS, AI, PDF, and SVG. The program is free to use and requires no registration or installation. 2. Vector Magic This a free to use browser-based tool that facilitates converting raster images to an array of vector formats. The files can be browsed and added or can be simply dragged and dropped to the program interface. 3. Vectorizer This online tool allows converting your PNG, BMP, and JPEG files to vector formats. Up to 3 images can be uploaded, and 3 images can be downloaded using the program per hour. 4. Convertio A maximum of 100MB file from your system, URL, Google Drive, and Dropbox account can be added to this online program for conversion to a vector image. 5. Free Online Converter Converting raster images is simple and quick using this online tool that is free to use and needs no installation or registration. Up to 50 files can be processed using the program, and the converted image is black and white. 6. Rapid Resizer This free online vector converter works best when you have black and white images. You need to add the file to the program, and after it gets uploaded, you can select from Outline or Centerline option to trace the file.
0 notes
Text
Week 4: Project #3 - Flowering Typography
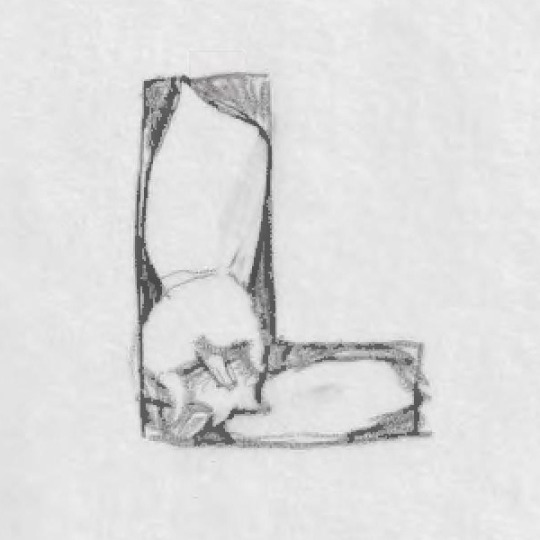


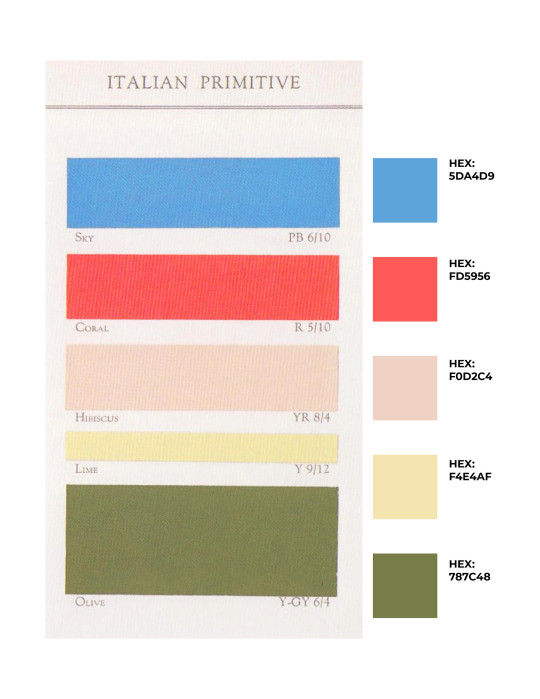


During Week 4, I spent my time working on Project #3. Our class was introduced to the concept of Flowering Typography in the previous week, where each student was assigned a different letter to create a unique flower design. We used the Monsterrat Black typeface and a color palette known as Italian primitive. These guidelines were created to help students choose their flower designs and consider the colors they could use in the final product. After reviewing several flower options, I selected the Lily of the Valley - a white, bell-shaped flower that grows in the hills and mountains of North Carolina during the spring. I specifically chose this flower for its whimsical and free-flowing shape, which aligns with the style I wanted to achieve through this project.
To create my design, I first selected one of the 16 sketches I had created on tracing paper using a light table and a mechanical pencil. Then, I scanned my final sketch using a Canon flatbed scanner and Adobe Acrobat software. I imported the PDF of the sketch into a new Illustrator file with a 5" x 5" artboard. After adjusting the placement of the shape, I created a new layer and meticulously traced the form using the pen and Pathfinder tools. After tracing all the shapes from my original sketch, I went back in with the pen tool and removed any floating or unnecessary anchor points. This process helped me to clean up the shapes and smooth out the lines, resulting in clean curves. To add line details in the middle of the shape, I clicked on "Object" and selected "Compound Path" from the dropdown menu and then clicked "Make" to remove the middle elements of my shape.
To complete the vectorized letter, I used the Pathfinder tool to merge all the individual shapes together and form a unified shape for the letter. After this, I filled in the color by entering the specific color code in the fill option of the color picker. For my final design, I picked the olive color from the class color palette to incorporate into the letter. During the design process, I tried out various color options (as you can see in the images above). However, in the end, I decided to go with olive color, as it resembled the stem of a lily of the valley flower and stood out from my classmates' choices. I made sure that all the shapes were perfectly aligned and that the file had the correct dpi (300 dpi). Finally, I saved the file in two formats - an active illustrator file and a jpeg - and submitted both versions of the file on Basecamp before the final due date.
After reviewing the critique of my flowering-type design, I have come to the conclusion that it wasn't entirely successful, especially when viewed from a distance. Comparing my letter with the other designs in the class flowering alphabet, I noticed multiple mistakes that weakened the overall execution of my design. Firstly, the swirls on the leaves were too large and distracting, which was probably due to the excessive amount of white space between the swirl and the leaf. Though the swirl was a stylistic choice, it proved too distracting, drawing the viewer's attention away from the flower itself. The design could be improved by either removing the swirls or making them smaller to avoid competing with the other elements. Balance is key! The flower itself doesn't stand out enough because the outline around the shapes is too thin and inconsistent. This makes it difficult to distinguish the negative space between the flower and other shapes from a distance, causing the design to look cluttered. It's also hard to identify the type of flower being added to the letter. Although the overall design is whimsical, the errors and inconsistencies make it look too simple. To improve the design, the outline of the flower should be made thicker and cleaner. Additionally, the flower should have been incorporated more effectively into the design, with greater emphasis on it rather than on the leaves. This would have made the flower the focal point of the design. Instead of simply placing the flower on top of the letter, the final product should have been integrated more fully into the letter itself. This could have been accomplished by either inverting the flower to create more white space or by using an illustrative style similar to that found in botanical or herbal illustration studies.
Main takeaway: scaling can make a huge difference. Something that looks great up close can look poorly when viewed from a distance. It is important to test if the design is legible up close and far away. Are the details neat and clear, or do they become lost?
In continuing the experimentation with letters, Project #4 aims to challenge designers to create new concepts for the potential 27th letter of the alphabet. The goal is to encourage the incorporation of the 27th letter into the English alphabet. This project serves as an introduction to serifs and sans serifs in text, providing a better understanding of the basics of typography. In referencing the textbook "Thinking with Type," "the purpose of typography is to help readers avoid reading…Pictures can be read, analyzed, decoded, and taken apart. Words can be seen, perceived as icons, forms, and patterns." Typography is not just a tool to make text more readable or practical. It's an art form that fosters creativity and creation. While there are rules to follow, these should be seen as opportunities to create interesting patterns and art on a page. Project #4 is an effort to find a creative solution for a potential 27th letter in the English alphabet. This project aims to explore what this letter would look like, and how it can blend in with the rest of the alphabet while also changing its look.
Lupton, Ellen. “TEXT.” Thinking with Type: A Critical Guide for Designers, Writers, Editors, & Students, Princeton Architectural Press, New York, 2010, pp. 87–147.
0 notes
Text
Vectrorization Design and The Role Of Testwin Technologies
Testwin Technologies Pvt Ltd stands as a prominent organization in the field of graphic design, renowned for their team of highly skilled and experienced designers. With their deep knowledge and expertise, they have established themselves as leaders in the industry.

In graphics design one of the major design category is vectorization design. Vectorization is the process of converting raster (pixel-based) images into vector (mathematically defined) graphics by using some design application software like Adobe illustrator, Corel Draw etc. It is often used to recreate or refine logo designs, flyer, banner, illustrations, and other any other formation of artwork.
Below are a step-by-step process to follow for creating a vectorization design:
Obtain the Original Image: Start by trying to collect as much as possible a high-quality version of the design you want to vectorize. This could be a scanned image, a photograph, or an existing digital file.
Choose Vector Design Software: Select a vector design software such as Adobe Illustrator, CorelDRAW, or Inkscape or any other application software where you are master. These programs offer powerful tools and features specifically designed for creating and editing vector graphics.
Import the Image: Open the software and import the original image into the program. This process is different for depending upon application software depending upon the Depending on the software, you can typically do this by selecting "File" and then "Import" or by dragging and dropping the image into the workspace.
Create a New Layer: Before you begin vectorizing, create a new layer in the software. This will allow you to work on the vectorization separately from the original image and make it easier to make changes and adjustments.
Start Tracing: Begin tracing the outlines of the design using the Pen Tool or similar drawing tools available in the software. Follow the shapes and contours of the design, creating paths and curves as needed.

Use Basic Shapes: For simpler designs, you can also use basic shapes like rectangles, circles, and polygons to recreate the design. Combine and manipulate these shapes to match the original design.
Refine the Paths: Once you have traced the main outlines, go back and refine the paths to ensure smooth curves and clean lines. Adjust the anchor points, handles, and curves as necessary to match the original design accurately.
Add Colors and Fills: After you have recreated the basic shapes and outlines, add colors and fills to the vector design. Use the appropriate color palette and apply gradients or patterns if needed.
Consider Typography: If your design includes text or typography, recreate it using the software's text tools. Match the font, size, and style of the original design, and make any necessary adjustments for legibility and aesthetics.
Organize and Group Elements: As you work on the vectorization, keep your design organized by grouping related elements and layers. This will make it easier to make changes later on and maintain a clean and structured design file.
Save and Export: Once you are satisfied with the vectorized design, save your work and export it in the desired file format. Common vector file formats include AI, EPS, PDF, and SVG. Additionally, you may also want to export raster formats like PNG or JPG for specific use cases.
Sample work of Vectorization work

Please Note, vectorization requires attention to detail and may take time, especially for complex designs. Practice patience and refer back to the original design as needed to ensure accuracy. With experience, you'll become more proficient in vectorizing designs and maintaining the integrity of the original artwork.
The designers at Testwin Technologies possess a keen eye for aesthetics and a flair for creativity. They have a remarkable ability to transform low quality scalar design to a high quality vector design. Their innovative approach sets them apart and ensures that each design they create is unique and impactful.
Staying abreast of the latest trends and industry practices is crucial in graphic design. Testwin Technologies' designers are well-versed in current design trends, color theories, typography, and visual communication techniques. This deep understanding allows them to create designs that are not only visually appealing but also align with the client's brand identity and target audience.
Testwin Technologies Pvt. Ltd.
Contact Person: Subal Chandra Roy (Director)
Fiverr Profile:
www.fiverr.com/bibbiswa
www.fiverr.com/creativity18
www.fiverr.com/suman_palta
Address: Saha Market, Palta, Kolkata: 743122 West Bengal
Mobile: 9899911874
#Silhouette Logo Design Service#Minimalist Logo Design Service#Mascot/Cartoon Logo Design Service#Vector Logo Design Service#Testwin Technologies Pvt. Ltd.
1 note
·
View note