#Cannot log in to WordPress Admin Dashboard
Explore tagged Tumblr posts
Visit Tumblr Blog
Explore Tumblr blogs with no restrictions, modern design and the best experience.
Last Seen Tumblr Blogs


Fun Fact
The Tumblr office adopted Tommy, an 11-year-old Pomeranian.
Text
Mastering the WordPress Admin: The Definitive Guide

The WordPress admin panel, often referred to as the "WP admin" or "wp-admin", is the backbone of any WordPress website. It's where you can access all the settings, tools, and features to build, manage, and customize your site. But for many users, especially beginners, the WordPress admin area can seem overwhelming and confusing to navigate. That's why in this definitive guide, we'll walk you through everything you need to master the WordPress admin dashboard like a pro. You'll learn: - What the WP admin is and how to access it - How to log in to your WordPress admin panel - Key features and functionalities within the wp-admin dashboard - Tips for customizing and optimizing the WP admin experience - Troubleshooting common access issues with wp-admin So, if you're looking to level up your WordPress admin skills, you're in the right place. Let's dive in! What is the WordPress Admin Panel? The WordPress admin panel, also known as the “wp-admin” or “WP dashboard”, is the backend interface where you can access all the site management tools to build, customize, and run your WordPress site. It’s different from the front-end of your site that your visitors see. The wp-admin is only accessible to you (the admin) and any other users you give backend access to. Within the WordPress admin dashboard, you can: - Create and manage all your website content like posts, pages, media etc. - Install plugins and themes to add functionality and design your site - Update WordPress core files and plugins - Configure site settings - Manage user accounts and roles - Access analytics - and much more! The wp-admin comes built-in with every WordPress installation. So whenever you setup a new WordPress site, the powerful WordPress admin area is ready for you to use. How to Access the WordPress Admin Panel To access your WordPress admin dashboard: - Go to yoursite.com/wp-admin - Enter your WordPress username and password - Click the "Log In" button And that's it! You'll then be directed to your WordPress admin dashboard. The default login URL is www.yoursite.com/**wp-admin**. This wp-admin login page is different from your website frontend. It's a special backend login area just for accessing the WordPress admin panel. What's the Default WordPress Login URL? The default login URL for the WordPress admin is: yoursite.com/wp-admin So, for example, if your site is www.example.com, your WordPress login URL would be: www.example.com/wp-admin This standard wp-admin URL comes built-in with WordPress. Some key things to know: - The /wp-admin part of the URL is what's important. This tells WordPress you want to access the admin side. - You don't need to include the http:// or https:// part in the login URL. Just the domain name followed by /wp-admin. - You can also use the IP address instead of a domain if needed (e.g., 123.456.789.123/wp-admin). So, in summary, the universal format for the WordPress admin login URL is: yoursite.com/wp-admin 👉 Where yoursite.com is replaced by your actual domain name or IP address. This grants you access to your dashboard. Granting Access to the WordPress Admin Area As the admin, you can grant other users access to log in to your WordPress admin panel. To give another user wp-admin access: - Go to Users > All Users - Edit the user account you want to grant access to - Change their role to Administrator, Editor, Author, Contributor, or any other role - Click Update Profile Here's a quick overview of the main WordPress user roles and their admin access: - Administrator - Full access to the WordPress dashboard and all features. - Editor - Editing access to all content but limited access to admin settings. - Author - Can write and manage their own posts but not publish others' posts. Minimal admin access. - Contributor - Can write and edit their own posts but cannot publish them. Very limited admin access. So, choose the appropriate role based on the level of wp-admin access you want to grant. You can create as many user accounts as needed this way to allow others to log in to your site's backend. Managing your WordPress Admin Login URL By default, the WordPress login URL is wp-admin. But in some cases, you may want to customize or change your admin URL for security or branding purposes. Here are three tips for managing your wp-admin login URL: 1. Change the default admin URL Using a plugin like iThemes Security or Rename wp-login you can change your default /wp-admin URL to something more secure like yoursite.com/secure-login. 2. Remove wp-admin from URL Plugins like WPS Hide Login allow you to completely remove /wp-admin from your login URL and replace it with your own slug. 3. Disable directory browsing Disabling directory browsing prevents users from accessing wp-admin by guessing common admin URLs. This adds an extra layer of login security. Changing your standard wp-admin URL can prevent hackers from exploiting this common pathway. But make sure any new URL you create isn't easy to guess either. Logging in to the WordPress Dashboard Once you know the URL, logging in to your WordPress admin dashboard takes just a few simple steps: - Go to your admin login URL Navigate to yoursite.com/wp-admin or whatever your customized login URL is. - Enter your credentials Type in the username and password for your admin account. - Click Log In This will log you in and direct you to your main WordPress dashboard. That's all there is to it! Enter the right login details at the wp-admin URL, hit log in, and you'll have full access to manage your site. Troubleshooting WordPress Admin Login Issues In a recent survey, 62% of WordPress users reported experiencing downtime or performance issues due to WordPress errors. Outages can seriously impact revenue and site traffic. Source: MelaPress Sometimes you may encounter issues accessing your WordPress admin panel. Here are some common wp-admin login errors and how to fix them: - You're redirected to homepage - This is often caused by an incorrect login URL or plugin conflicts. Try hard refreshing the browser cache or disabling plugins. - 404 Page Not Found - Verify you have the right admin URL and there are no typos. The standard URL is yoursite.com/wp-admin. - Incorrect username/password - Double check you're using the right admin username and password. If needed, reset your password via email. - Can't access /wp-admin after migration - Update the site URL in Settings > General to match your new domain. - Login URL blocked by .htaccess file - Some security plugins add rules to block the standard admin URL. You may need to modify .htaccess to allow access again. - WP admin says "Forbidden" - Make sure directory browsing hasn't been disabled on your server. Check with your hosting provider. Fixing admin login issues usually involves using the correct URL, verifying your credentials, and troubleshooting potential server restrictions or plugin conflicts. Key Features and Functionalities in the WordPress Dashboard Once you're logged in, let's explore some of the key features and functionalities within the WordPress admin dashboard: Dashboard This is the main screen that you see when you first log in to wp-admin. It displays an overview of your site activity, post stats, comments, traffic, and other analytics. Posts This menu is for creating and managing all your blog posts and other article content. You can create new posts, edit drafts, categorize, add metadata, and manage post revisions here. Media The media library stores all your images, videos, documents, and other media files uploaded to your site. You can manage, edit, organize, and insert these files from the media menu. Pages Similar to posts, you can build and manage all your site's pages like About Us, Contact, etc from the Pages menu. Pages are for more static content. Comments You can view, edit, approve, reply to, mark as spam or trash any comments from this section. Comment management is key for any blog. Appearance This menu lets you customize the visual design of your site by installing themes, managing widgets, menus, and other key elements of your site's appearance. Plugins Extend your site's functionality by installing plugins here. There are thousands of free and paid plugins available from the WordPress repository. Users The user's menu allows you to add, delete, and edit user accounts and roles. You can manage permissions for all users here. Settings Configure your general site settings like title, URL, default time zone, date format, and more from the Settings menu. There are also settings for writing, reading, media, permalinks, privacy, and additional site-wide configurations. Tools Import or export your site content, manage databases, and clear caches all from the Tools menu. There are also handy built-in tools for search engine optimization, generating sitemaps, and importing data. Customizing Your WordPress Admin Experience The WordPress admin panel is highly customizable to suit your preferences and improve your workflow. Here are some tips for customizing and optimizing wp-admin: - Install an admin theme like reDesign for a visual overhaul of the backend - Use a plugin like CodePress Admin Columns for more control over post listings - Remove unnecessary dashboard widgets to simplify the main screen - Customize your user profile screen with custom fields and options - Add custom links, buttons, or shortcuts to the admin bar for quick access - Organize plugins into their own submenu pages to reduce clutter - Adjust the text size, color scheme, and other display settings in your user profile Taking the time to tailor wp-admin to your needs can greatly improve your admin experience. Start with small tweaks to remove WordPress clutter or optimize your views. Then explore plugins and themes to completely redesign the backend. Final Verdict: Master WordPress Admin Workflows In closing, learning to comfortably navigate in the WordPress admin area is a must for site owners, bloggers, and agency clients alike. As we've covered, the wp-admin dashboard is extremely powerful but can seem overwhelming at first glance. Focus on mastering key workflows like creating content, managing users, installing plugins and themes, and configuring settings. Learn where to access the tools you need on a regular basis and customize the backend to suit your needs. Keep our troubleshooting tips in mind in case you run into login or access issues. With a little practice over time, you'll know the ins and outs of the WordPress admin for smooth site management. So, roll up your sleeves and start mastering WordPress admin today! Key Takeaways - The WordPress admin panel (wp-admin) houses all the backend tools for managing your site. - Access it by going to yoursite.com/wp-admin and logging in. - Grant backend access to other users by assigning them roles. - Customize your login URL and admin experience for better security and workflows. - Key features include content management, plugins, themes, users, and site settings. - Fix common access issues by verifying login details and troubleshooting restrictions. - Master WordPress admin by practicing core workflows regularly. Read the full article
0 notes
Link
#Fix WordPress Admin Dashboard#WP-Admin Access Failure Error#Cannot log in to WordPress Admin Dashboard#Fix WordPress login issues#How to Fix WordPress login issues#how to fix error establishing a database connection#how to fix error establishing a database connection in wordpress#how to fix wordpress database error#how to solve error establishing a database connection#WordPress development company#Wordpres developers
0 notes
Text
How To Make A Website Using WordPress
How To Make A Website Using WordPress
In my last article, I’ve explained the reasons for using WordPress for our website. If you haven’t read that article click here
Why Choose WordPress For Your Website?
In this article, I’ll explain How To Make A Website Using WordPress: Step by Step for beginners.Before going further into it we need to take a look at our previous article on
How To Buy Web Hosting.
I’ve already discussed WordPress installation in it. But for convenience, we will start from there.Let’s take a glimpse of it.Once you are logged in the Hostgator CPanel will look like this.
Over on the left side menu click on website essentials and then you’ll click the on Site Builder and CMS. You will see website builder, WordPress, and One-Click Installs.
If you want to use Hostgator’s website builder click on the website builder to continue creating your site. But we’re going to use WordPress, click the WordPress option.
After this install the WordPress by Clicking on the install button.
Manual Install: For Those Who Don’t Use Hostgator or Any Similar HostIf for some odd reason (some hosting companies don’t provide one-click-install for WordPress) you don’t have the option to install WordPress automatically, look this manual guide here:
Installing WordPress Manually
Designing the Website
The visual appearance of your WordPress site is controlled by a WordPress theme.WordPress themes are professionally designed templates that you can install on your website to change their appearance.
By default, each WordPress site comes with a basic theme. If you visit your website, then it will look something like this:
This is not very appealing for most users.But don’t worry, there are thousands of
free and paid WordPress themes
that you can install on your site.You can change your theme from the WordPress admin dashboard. Visit Appearance » Themes page and then click on the ‘Add New’ button.
On the next screen, you will able to search from 4,492 free WordPress themes that are available in the official WordPress.org themes directory. You can sort them by popular, latest, featured, as well as other feature filters (i.e industry, layout, etc).
Need help choosing a theme? Check out our list of these awesome
free WordPress business themes
.You may also want to take a look at our guide on how to
select the perfect WordPress theme
for your website.
For the sake of this guide, we’ll be using
Bento
. It is a popular multi-purpose free WordPress theme with flexible design options for all kinds of websites.If you know the name of the free theme you want to install, then you can look for it by entering its name in the search field.WordPress will show you the theme in search results. You will need to take your mouse over to the theme and then click on the Install button.
Once you have installed your theme, you can customize it by clicking on the Customize link under the Appearance menu.
This will launch the theme customizer where you will be able to change your theme settings with a live preview of your website.
You don’t need to finalize all theme settings right away. You will be able to customize it much better once you have some content on your website.
Let’s see how to add content to your WordPress site.
Adding Content To Our WordPress Website
With your theme installed, you’re ready to start creating content. Let’s quickly run through some of the basics:
Adding and Editing Pages
Want a “Services” page, or an “About Me” page (like we have on our menu at the top of the site)?1. Look along the sidebar in the WordPress Dashboard for “Pages” -> “Add New”.
2. You’ll find a screen that looks a lot like what you’ve maybe seen in Microsoft Word. Add text, images and more to build the page you want, then save it when you’re done.
Adding Pages to the Menu
If you want your new page to be linked to your navigation bar,1. Save any changes you’ve made to the page by clicking “Update”
2. Click “Appearance” -> “Menus” in the sidebar of the WordPress Dashboard3. Find the page you created and add it to the list by clicking the checkbox next to it and then “Add to Menu”.
Adding and Editing Posts
If you have a blog on your website, “Posts” will be where you turn to next. You can use different categories to group similar posts.
If you want to add a blog to your website, you can use different categories and posts. Let’s say you want to create a category named “Blog”. Simply add it to your menu and start making posts.
Here’s what you need to do: a. Create a new category by going to “Posts -> Categories”
ORb. Create a blog post by going to “Posts -> Add New”. Once you’ve finished writing your blog post, you need to add the right category for it.
Once you’ve created your category, simply add it to the menu, and you’re are ready to go.
Hopefully, you’ve learned about How To Make A Website Using WordPress.WordPress is an Ocean in itself it cannot be covered in a few blogs. But there are a few more basic things about WordPress which I’ll cover in my next blog.
Thanks for reading this article if you have any queries related to the topic let me know in the comments below.
My Digital Tomorrow- Blog
www.mydigitaltomorrow.com
1 note
·
View note
Text
5 Easy Steps to Secure Your WordPress Website

In this article we will see 5 Easy Steps to Secure Your WordPress Website, Don't let your website be ruined by hackers. Follow these steps to secure your website if you are using WordPress as a CMS. Therefore, for your website you choose to use WordPress. Here's how you can secure your WordPress website Good decision! - Good choice! More than a third of all internet sites are now authorized by WordPress. It's a popular option for a large number of webmasters because of its minimal rookie entry barrier and almost unlimited pro user’s extensibility. WordPress also attracts several hackers and security risks with this popularity. However, if you take a few easy precautions, there are no grounds for alarm. They're here: Step 1: Use Secure Log-In Information to secure your WordPress website

Using unique log-in details may appear to be a very simple and obvious tactic. However, it is frequently overlooked. According to a TeamPassword report, “123456” and “password” were two of the most commonly stolen passwords in 2019. These are simple for humans to guess, but much more difficult for bots, which can generate multiple combinations of numbers and letters in seconds in a brute force attack. When you set up your website, make sure to create a unique and complex password to improve WordPress security. Furthermore, while it may appear to be convenient, you should avoid using the same password across multiple platforms. Instead, use a different password for each account you have on the internet. If you are concerned about forgetting your passwords, you can use a tool like KeePass to store them on your computer in an encrypted database. Alternatively, you can use tools like 1Password or LastPass to save your passwords to the cloud. Password security is only one aspect of login security. Because usernames are equally vulnerable to brute force attacks, using a secure username is equally important. WordPress's default username is "admin." You can change this while creating a new website, but once your WordPress website is installed, you won't be able to change it directly. You can get around this by adding a new admin user profile to your site and giving it a unique name. After that, you can go back and delete the original "admin" profile. Step 2: Modify Your Login Path to secure your WordPress website

By default, the URL you use to log in to your WordPress site's dashboard is domainname.com/wp-admin. Every hacker is aware of this, which is part of what makes WordPress websites so vulnerable. You can change this in a few simple steps by changing your login URL path to something unique. You can do this manually, but using a plugin is the simplest option. You only need to download and install a plugin like WPS Hide Login. With these tools, you can quickly change the default URL to something more unique and difficult to guess. While you can change your login URL without using plugins, it is not recommended. This is due to the fact that whenever you update WordPress, the default login page is recreated, requiring you to change your login path all over again. Attempting to manually change the login URL may also result in errors in your logout screen and may interfere with other critical WordPress functions. Step 3: Maintain the most recent versions of all themes and plugins to secure your WordPress website.

One of the simplest ways to keep your website secure is to keep everything up to date. In general, updates contain fixes for issues discovered by developers in previous versions of themes, plugins, or the WordPress core. Security flaws, for example, can be exploited once hackers discover them. Aside from keeping your themes and plugins up to date, you should avoid using poorly coded or nulled themes or plugins, which can leave your website vulnerable to hackers. Along with the plugins and themes you install, you must keep the WordPress core itself up to date. If you are concerned that an update will cause damage to your site, make a backup that you can easily restore if something goes wrong. Step 4: Make use of two-factor authentication secure your WordPress website.

Two-factor authentication is an excellent way to ensure that hackers cannot access your website even if your login information is compromised. When using two-factor authentication, you will be required to provide additional information – away from your website – when logging in. This could be an additional, randomly generated access code sent to your mobile phone or email address, for example. The simplest way to enable two-factor authentication on your website is to use the Two Factor Authentication plugin. Step 5: Hide the Name of Your Theme to secure your WordPress website

The names of most WordPress themes can be found in the footers, code, and various folders of the websites on which they are used. While this is generally for harmless advertisement purposes, it may help hackers identify your website's vulnerabilities. This is especially true if the theme you're using has a known vulnerability. Hiding your website's theme is thus a powerful way to improve your site's security, and it's simple to do with a plugin like WP Hide & Security Enhancer. This plugin filters WordPress and rewrites URLs with minimal input to make the changes you want without affecting your files and directory. You can also manually hide your theme's name. However, this is a somewhat risky venture that necessitates a significant amount of coding knowledge. Take Charge of Your Website's Security Although there is much more to WordPress security, simply following these five steps will put you ahead of the majority of WordPress-specific security threats. The most important things to remember are to use secure login details and to change the default WordPress login URL to something unique. Don't forget to keep all of your WordPress installation's components up to date, and you can improve these security measures even more by making it difficult for hackers to figure out what theme you're using. Take the time to implement these simple strategies on your website, and it will become a near-impenetrable fortress. As you may have noticed, WordPress security may necessitate the use of a number of different plugins. Read the full article
0 notes
Text

We will explain the basics of name-server mixing, web hosting company switching and how to align your Godaddy domain with bluehost in a simple
The first thing that needs to happen is that you need to point your domain name to Bluehost. Next, log into your namecheap account and click Manage if you want it to point to Blue host. Enter your existing domain name, as you use it at GoDaddy, and enter the name of your Blue Host domain. Click the Assign - Domain button to add Blue Hosting nameservers to the Godaddy Namesers section and select the appropriate option.
After you have managed your domain on Bluehost and assigned it to a subdirectory in your hosting account, you can continue to create a new website for it.
If you already have a GoDaddy domain, you will need to link it to your web hosting account, but your domain will still be Godaddy. To set up your Go Daddy domain in the store, you will need to change the DNS settings of your GoDaddy account and enter the domain name in the Ecwid admin panel. In the last step required when setting up a domain on both Go daddy and Bluehost, you need to click on "Assign domain to cPanel account." Once you have linked your domains to the web hosting account, you can install WordPress to start your website or blog.
At the end of the day, your website should stay on GoDaddy, but you can still install the website with Bluehost hosting. Once the dissemination is complete, you should be able to use your web hosting account and your Go Daddy domain name.
I hope you enjoyed this tutorial on how to point your Godaddy domain to Bluehost hosting. If you have problems while referencing your GoDaddy domain to Blue Hosting, please let us know in the comments section below.
When you move your website to a new hosting company, you will need to change the name server information for your domain name. To start the process, you need to buy the domain names from your domain name provider (in this case GoDaddy). After you have purchased your domain name, you will need to change the server settings to point to the web hosting provider from which you purchased the host. If you host the site on a service like Go Daddy, HostGator or BlueHost, you can change your name servers in the same way.
To edit the name server in the GoDaddy DNS Manager, you can read this article about changing the GoDaddy DNS server.
Enter your Godaddy domain name in the field below and click the radio button on the helplessness to use the domain that is not already associated with your account.

Next, you need to point the domain name server to Bluehost and then it is time to add the added domain. Change your domain name server to bluehost, log into your Godaddy account in the product area and you will find that you have a domain! Once you assign the domains to the Blue host account, click Domains and log into the cPanel of Blue host. After you have assigned your domains to your Blue Hosts account, log out of Blue Hosting and right-click on Add Domain and select "Add."
Go to the Domains page in the Bluehost dashboard and click the Manage button if you want to add a CNAME entry. Set the main domain, set the subdomains and then right - click the Manage button again to get to it, select "Add" and set it to "Main domain. Go to this "Domains" page in your Blue Host Dashboard, click "Manage" again, and select "Name" for the CName entry you want to add.
In the next step you need to add the Bluehost name server to your Godaddy domain and then the names of all subdomains.
To link your GoDaddy domain to Bluehost, you simply log into your GoDaddy account, select the domain you want to update, and click the Change button next to the name server. Now click on "Use Custom NS Change" and then replace the Go Daddy nameservers with the Blue Hosting nameserver. Log into your GoDaddy dashboard, go to the Product Panel and select all the domains you want to reference for your hosting account. This will now open the DNS management page where you can change the name servers of your Godaddy domain to point to bluehost.

To complete the assignment of your domain to GoDaddy Bluehost, you must click "Assign Domain" in your cPanel account.
There is a possibility that you cannot add your added domain to the Bluehost Webhosting Control Panel, but that is up to you.
You need to log in to your GoDaddy account and then enter your BlueHost name server in the designated area. If Bluehost chooses you as a hosting company, you will also need a custom update to the default Go Daddy nameservers. If you want to log in to Godaddy to update the Go daddy Namestervers to Blue Host Namesers as listed above. You will need to replace the names you receive in your email when you sign up for a Blue Hosting host with the name servers you have set for Blue Host.
good luck.
0 notes
Text
How to use W P Multibyte Patch plugin in wordpress
Great News! You have WordPress installed on your new hosted domain name: now what? See below our top 10 tips of what to check for on WordPress to get your website World Wide Web ready!
Step 1:
The first thing you should do is install a new plugin which will create a holding page, or coming soon page. This is to cover or mask your WordPress development: Two of our favourites are ‘Ultimate Coming Soon Page’ and ‘Coming Soon Page & Maintenance Mode by SeedProd’. Install these plugins as you would normally do, activate it and configure it with the message you want to display. It is also good practice to check the plugins are always tested for your version of wordpress and have plenty of users and good ratings.
Step 2:
Remove the standard WordPress installation post. Select posts from the dashboard menu and you should see only 1 entry, Hello World. Move it to trash, then permanently delete it. This one post tells spammers and hackers that you are operating on WordPress, and not removing it, shows your inexperience in dealing with WordPress.
Step 3:
Remove the standard WordPress installation page. Select pages from the dashboard menu and you should see only 1 entry, Sample Page. Move it to trash, then permanently delete it. Again, this one page shows spammers and hackers that you are operating on WordPress.
Step 4:
Remove the unnecessary bundled plugins and themes that WordPress gives you. Hello Dolly and WP Multibyte Patch are 2 plugins that, most likely, you will never need. The constant updating that is part of the course with WordPress is easier when you do not have too many unnecessary plugins and themes. You can also remove unwanted themes by clicking on appearance from the dashboard menu: click theme details, then look for the delete on the bottom right of your screen. At his point, WordPress is about as clean as it is ever going to get, so if you want to set backups or clones of your site, now is a good time to do it. Lastly, before we talk about configuring your new site, check to see if there are any updates needed before we move on.
Step 5:
If you are planning to blog a bit, or already have an idea for categories, it is a good time to change the default category name from ‘uncategorized’ to ‘Latest News’ or similar. In this case, renaming the existing category will also change the default post category, so it takes care of 2 items in one go. Select Posts, then Categories from the dashboard menu to edit category names and add new ones.
Step 6:
Rename your user admin display name, by creating a nickname. Hackers use any trace evidence available to attempt to take control, so if they see a username in the posts meta data, this gives them 2 of the 3 identity logins they need to access your site. Select Users – All Users from the dashboard and edit your profile to add a nickname. Choose something in the nickname box, and then you will be able to switch the display name away from your admin username. Click update profile at the bottom of the page to complete the process.
Step 7:
This one is very important not to get it wrong. While it is simple, it is critical not to mess it up, as your dashboard screen will turn white, your website will turn white, and you cannot undo this action like most things in WordPress.
O.k., so what we are doing here is adding 3 w’s in 2 places. Sounds easy, right? Don’t say I didn’t warn you! Now, select Settings – General. Look for 2 boxes WordPress Address (URL) Site Address (URL) (box 3 and 4 from the top, box 1 is Site Title and box 2 is Tagline). You should see in both boxes https://ift.tt/3kMav7S in both cases you are looking to add www. in between the http:// and your domain name. In the following example https://ift.tt/309wn57 becomes https://ift.tt/3j6cymW you update both urls, scroll to the bottom and select update.
As this is preforming critical WordPress changes, it will log you out, not remember your access details and it is required that you log in again. When you do, your site url structure has now been changed to be a part of the World Wide Web. Congratulations! This small and simple procedure will make marketing and backlinking more powerful in the future, and as it is risky in terms of doing it wrong and loosing your website in it’s entirety, but I definitely recommend doing this sooner rather than later.
Step 8:
Next Step: Change the permalink settings. It is crucial for good SEO, and simple to do. Select Settings – Permalinks from the dashboard menu. Change the common settings from ‘Plain’ to ‘Post name’ and hit save changes. Done!
Step 9:
Simply create 2 new pages. One called ‘Home’ and another called ‘Blog’. You do not need to add any details or content to the pages at this stage. That can all come later. When the new pages are added, go to Settings – Reading. Check from ‘Your Latest Posts’ to ‘A Static Page’ and use the drop down to change Front page to Home, and Posts page to Blog. This step tells WordPress that your route domain is to show the content on the home page, and to post your blog posts to a page called Blog.
Step 10:
Create a Menu bar by clicking Appearance – Menus from the dashboard menu. As there are no menus yet, options here are blanked out, so the only option is to select the ‘create a new menu link’. Call it Primary, add the homepage and blog page from the left side of the screen by checking the boxes and clicking ‘add to menu’. Click the box for the Primary Menu under Theme locations, and the blue ‘Save Menu’ button to make the changes. You have now completed 10 steps in making your new WordPress website ready for your content!
The post How to use W P Multibyte Patch plugin in wordpress appeared first on The Coding Bus.
from WordPress https://ift.tt/33Y6wOM via IFTTT
0 notes
Text
How To Install WordPress Plugin Manually Without FTP (Easy Guide)

Working on Wordpress is an amazing experience. The first of many things that I had to do to run my website was to install WordPress plugin. And believe me, learning how to do so made my work easy and interactive. WordPress plugins are explicitly developed to streamline your work and help you in adding an image gallery or optimizing the content and even add a Google Map and more. Exciting isn’t it? Well, let’s get started then and learn how to install a WordPress plugin.
Difference between WordPress.org and WordPress.com
Yes, there is a difference between the two, and it may affect your work if you do not have a basic understanding of both, WordPress.com and WordPress.org. To begin with, WordPress.org does not come free. It is a paid CMS which involves a monthly expense.

On the contrary, WordPress.com has two options. You can use it for free (up to 3GB storage space) and can also buy a premium plan. Because Wordpress.com has both the versions, there are certain limitations to it. For instance, if you are looking to install a WordPress plugin in the free version manually, you cannot do that. WordPress.com does not support it.
Nor can you monetize with ads, gain full theme support or even leverage from analytics. Moreover, you cannot create your e-commerce store through WordPress.com even if you are using the paid version. For that, you have to switch to WordPress.org. I would say that if you are looking for a long term engagement with your website go for WordPress.org. The reason is that down the line you need to conduct manual WordPress hosting so it is better to start early and learn the process.

Installing a Free WordPress Plugin
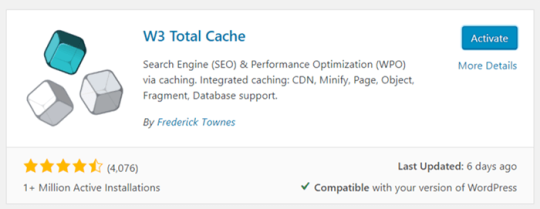
You may have come across different methods to install WordPress plugin for your website hosting. In total, there are three methods ( Free, Premium, with FTP), and I will walk you through two of these methods which require purchasing a plugin first. So let’s first begin with installing a WordPress plugin which is available free of cost on your dashboard. Step 1: Go to the Dashboard: After logging in to your domain, ‘open the Plugins’ page. Here you will find a lot of free plugins that are available to install. We will take the example of the W3 Total Cache Plugin for WordPress.

Step 2: Search and Install: There is a “Search Bar” located on the top of the dashboard. Enter here W3 Total Cache plugin and hit enter. In the results, you will see the plugin, Click install now and this is by far one of the best cache WordPress plugins.

It plays a significant role in boosting the speed of your website as it minifies the files such as CSS (style sheet) HTML and java. Step 3: Activate The last step in installing a WordPress plugin (free version) is to just click on Activate post-installation. Click on Activate, and you will be able to use the plugin. After this, you need to configure the plugin according to the website.
Installing WordPress Plugin (Premium Version):
The paid plugin installation method requires you first to acquire the needed plugin files. Worry not. This would be a .zip file. Step 1 Acquire the Plugin from a Third Party Source There are three best sources for adding plugins to WordPress. The most common one is Code Canyon. This source has a huge collection of different WordPress plugins. The other two sources are PickPlugins and Mojo Marketplace.

Step 2 Login to your WordPress Dashboard Post-downloading the plugin, you will obtain a ZIP file. Now, the trick is to get this ZIP file on your WordPress directory so that you can manually install the WordPress plugin. For this, log in to your WordPress dashboard (domain name.com/wp-admin). Step 3 Access the Plugin Directory On the left-hand side of the WordPress dashboard, you will see a few tabs. Navigate to the “Plugins” tab.

This will take you to the WordPress plugins directory. Now, if you were to install a free plugin, then you need simply search it in the “Floating Social Bar”. But as we are installing a premium plugin this is not the right course of action. Step 4 Upload Plugin Go to “Add New” and you will reach the plugin installation page. The top of this page has an option “Upload Pugin”. Click on it and on the subsequent “Add Plugins” dialogue box, select “Add File”. Upload the ZIP file that you had recently downloaded.

Step 5 Installation and Activation After selecting the file, click on “Install Now”. This will add the required WordPress plugin to your website. When you see successfully installed message, then click on “Activate Plugin” to use it.
How to Rollback or Disable a Plugin?
It may happen sometimes that a plugin you had earlier installed is not working properly or causing a disruption. For this, you need to disable the plugin and then resolve the issue. Here too, there are two popular methods and I will discuss both of them. #Method 1: Deactivate the Plugin This first method is fairly simple and straightforward. All you need to do is go the Plugins page, select the plugin and click on “Deactivate”. Lock Stock and Two Smoking Barrels, it is done. I don’t why I used that but it seems to fit here ^^

#Method 2: Rollback the Plugin Upgrade Sometimes an upgrade to one of your existing plugins may cause a disruption in the website. In instances like these, you can also rollback the plugin upgrade instead of removing or disabling it completely. Updating WordPress plugin is an important exercise, but it costs you more than the benefit when the upgrade backfires. This may lead some not to install the new upgrades at all. But for such incidents, there is an additional plugin available namely “Wp Rollback”. You need to install this plugin first.

Step 1: Select Rollback Post-installation, if you want to revert back to an older version of your plugin, just go the plugin that you want to roll back. You will see the “Rollback” option below the Plugin name.
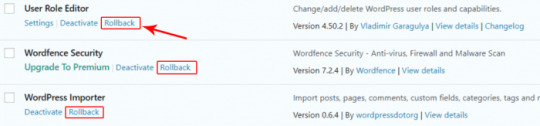
Step 2: Select an Older Version After choosing rollback, you will be given an option to choose the previous version. Select the one you would like (preferably the last one as it was working just fine). In the next dialogue box, click on “Rollback” once again. Your last plugin version will install automatically. Activate it and you are on your way to using your website again seamlessly.

In Conclusion:
This Install WordPress Plugin informative guide takes you through an easy process of adding a plugin. You have also learned how to add WordPress plugins manually from a third party source without using FTP. Along with it there are instructions to conduct a rollback. WordPress is the most utilized CMS today. It gives you many options to develop an excellent website. Learning to use it efficiently is a useful and fun exercise. Stay tuned for more such informative guides.

Read the full article
0 notes
Link
If you are a theme and plugin developer and looking for a tool that will enhance your workflow, then you are in the right place.
WP Reset plugin is all you need to reset the database of your site to default without affecting any files. You can delete all the customizations, moderation and content in few clicks. The multiple fail-safe mechanisms will help you to secure your data from accidental loss. Wp reset will fasten up the testing and debugging process by implementing a quick way to reset the settings to default and re-examine the code. The plugin is specially made for the ease of developers.

Before downloading and testing this plugin, We would suggest you have a piece of detailed information about the functions of WP Reset plugin; we have explained every function in details so scroll down and see what WP Reset can do.
What would resetting delete?
Resetting option will perform the following changes on your site.
All of the posts, pages, custom post types, viewers comments, media entries will be deleted
The default WP tables will also be deleted.
The custom database table having similar table prefix as the same in wp-config.php will be deleted.
These changes will take place once you hit the reset button and confirm submission. Please remember the changes performed after resetting cannot be undone. Now let us see what will remain untouched. You can know more about this on wphtacess.com
What will resetting do not delete and modify?
The media files will remain in the wp-uploads folder but will be removed from the media in admin listing.
The plugins, themes and other media will not be deleted and remains in their space.
Site title, WordPress address, the site’s address, language and visibility on search engines will not be affected.
The current user will be restored with the current username and password.
So, by now you must know what will reset do to your site, but do you know what happens when you click the reset button?
What happens when you click the reset button?
you will have to confirm the action one more time because there is NO UNDO Wp reset will ask you to confirm your action before performing any changes to your site as there is no undo option.
Every detail related to the site like the site title, WordPress address, site address, the language of the site, search engine visibility and the current user will be restored.
You will be logged out after the reset and redirected to the dashboard after automatic login.
WP Reset plugin will be reactivated if the post reactivate option is checked.
Features of Wp reset plugin
WP-CLI SUPPORT
WP reset supports WP-CLI. You can take help if you are stuck up via wp help reset. You need to confirm the commands by default but you can skip confirmation using –yes option. The first user in the database will be logged after the restoration is complete. You need to be careful while using WP reset with WP-CLI as there’s no undo.
DATABASE SNAPSHOTS
A database snapshot is a duplicate copy of every wp database table, custom or standard both, and is saved in the currently used database as instructed by the wp-config.php.
A database snapshot is mainly used as a development tool and can also be used as a backup tool, but the developers at WP reset suggest to use a different tool for live site backup. You can use snapshots to find out the changes a plugin made to your database and site. It hardly takes 2 seconds to create a database snapshot.
MULTISITE (WP-MU) SUPPORT
Wp reset can also perform a multisite reset, but it still has to be tested completely. You need to be extra careful while using wp reset with the multisite feature enabled. You can try using this feature on sub-sites.
PARTIAL RESET TOOLS
• Delete every transient related database entry. • Remove the uploads in the /uploads folder. • Remove/delete every plugin except the wp reset plugin. • Reset theme option that resets every option for the themes that uses WP theme mods API. • Delete themes – this feature will delete your theme collection • Empty or delete custom tables – deletes every custom table. • Delete .htaccess file – eliminates the .htaccess file.
Conclusion
Thank you for being such a kind reader, do let us know if we have missed out on anything via comments/email.
0 notes
Text
How to Reset a WordPress Install

Are You Looking for a Way to Reset Your WordPress Website? Perhaps You Wish to Start from Scratch? While There Isn’t an In-Built WordPress ‘Reset’ Button, Admin are able to Reset their Website Either Manually or Through the Use of a Plugin.
In this tutorial we’ll take a look at how a WordPress install can be reset to it’s original settings. Resetting a WordPress website means all data will be lost so it’s important to back up your site if there is any information worth saving. Effectively, resetting a WP installs means that all data bases and files are returned to their original state or commonly referred to as their factory settings.
Resetting a WordPress install can be completed by following the instructions below, or watching our video tutorials. Using the WP Reset plugin is an efficient way of resetting for those without developer knowledge, while using cPanel is generally the preferred way by WordPress enthusiasts.
Why do WordPress Users Choose to Reset their Website?
Resetting a WordPress website means returning all the files and databases to their original state. While this is ideal for those wishing to start fresh, it also means that all content that was previously on the website will no longer be accessible.
You may have created a number of test posts or pages and now wish to start with a clean slate for a live website. Completing a full website reset can be an efficient way of ‘cleaning up’ to start building your live site after testing is complete.
While not every WordPress user will want to reset their website, for those landing on this page, they have most likely found themselves in one of the situations below.
There are a number of reasons why someone would want to reset their WordPress website:
The website is to be used for a different project
The site was used for staging or demonstrating
Wish to use the same domain for a new business adventure
The owner wishes to restore the site from a previous backup
The owner is seeing many errors on a recently new website and feels the best way to overcome these errors is a complete reset
The WordPress website cannot be accessed due to a failure and admin has previously saved a backup
What is Entailed in a Website Reset?
Depending on how you reset your WordPress will dictate if it will be a complete reset meaning all settings and files are lost or a partial reset. For example, using the ‘WP Reset‘ plugin, you can dictate whether or not your plugins are reactivated after a reset or not.
If you wish to use any data that was previously stored on your site (in the database tables) now is the time to complete a backup of your website.
How to Reset a WordPress Install
The instructions below can be completed to reset a WordPress website. Please note that by completing a reset you will not be able to retrieve information that may have been previously saved on your site. It is important prior to resetting your WordPress website that you back up any information you wish to use in the future.
Method 1) Resetting My WordPress Install with a Plugin
Video Tutorial: Using a Plugin to Reset My WordPress
youtube
Written Tutorial: Using a Plugin to Reset My WordPress
This is the best way to reset WordPress for those who aren’t that WordPress savvy. Using a plugin to reset your WordPress can be hassle free and means you will never need to leave your WordPress dashboard. While this way is effective, it means that you will still need to have access to your WordPress site.
Step 1) From your WordPress dashboard, click on the Plugins menu and then on ‘add new‘. Search for the following plugin: WP Reset. Step 2) ‘Install‘ and ‘Activate‘ the WP Reset Plugin (Please note: This is not a TTHQ plugin).

Step 3) Now click on the ‘Tools‘ menu in your WordPress Dashboard. Step 4)Under ‘Tools‘ click on the sub-menu; WP Reset. Step 5) Read the text to ensure you wish to reset your WordPress. If you are happy to go ahead and reset, type the word ‘Reset‘ in the field towards the bottom. Also specify any ‘Post-reset Actions‘ that you wish to occur. Step 6) Click the ‘Reset WordPress‘ button. Step 7) Click the ‘Reset WordPress‘ button again to confirm a full reset.
You have now completed a reset of your WordPress website.

Further WordPress Database Reset Plugins
While our procedure above outlines how to use the WP Reset Plugin to achieve a WordPress Reset, there are a number of other plugins that can also do the trick. If you find WP Reset is not working on your website, checkout some of the following WordPress.Org Reset Plugins:
Advanced WordPress Reset
Reset WP
WordPress Reset
Method 2) Resetting WordPress Install without the Use of a Plugin
To reset your WordPress install without the use of a plugin you will need to have access to your website’s cPanel (or similar). The details needed to access your WordPress database can be obtained from your hosting provider.
This method is said to be the harder method of the two, although by following the instructions below even someone without developer knowledge should be able to reset their WordPress account.
Using cPanel to Reset a WordPress Website
Step 1) Log in to your ‘cPanel‘ account for the WordPress install that you wish to reset. Step 2) Once you have logged into cPanel, click on the ‘MySQL Databases‘ button located under the ‘Databases‘ section.

Step 3) Find the name of the database in question and ensure you copy and paste the name of it into a notepad. You’ll need this later. Step 4) From the actions column, click the ‘Delete‘ button for the database you wish to reset. This will delete that WordPress database so ensure if you wished to save any of that data, you did that prior to clicking delete.

Step 5) Now you will not be able to access your WordPress website until the following steps are completed. Step 6) At the top of that same page, you’ll need to ‘Recreate‘ that database. Paste the name of the database from your notepad into the ‘Create Database‘ field. If you do not copy and paste the name of your previous database correctly, the reset will not work. Step 7) Click the ‘Create Database‘ button. This database should now appear under the ‘Current Databases‘ section.

Step 8) You will now need to add back the admin user to be able to access that database. You will need to use the exact same username and password as you used previously otherwise the file won’t recognize the new database.

Step 9) You have now added the database back and created your admin user. With this method the themes, uploads and plugins you had will not be deleted. If you wish to delete them to start fresh with a new feel WordPress site, you’ll need to head to the ‘wp-content‘ directory in the WordPress root folder. From there you can delete the files under: Plugins, Theme and Uploads. It is recommended to leave one theme. Step 10) This is the final step in the reset process. You’ll need to copy your website’s primary URL and add it to the following in the browser /wp-admin/install.php. For example: https://plugin-demo.com/wp-admin/install.php. It will ask you to fill in your login details here. This is the last crucial step to resetting your WordPress website.
The post How to Reset a WordPress Install appeared first on Tips and Tricks HQ.
How to Reset a WordPress Install shared from Tipsandtricks-HQ
How to Reset a WordPress Install shared from Aileen Batts Blog
0 notes
Text
How to Reset a WordPress Install

Are You Looking for a Way to Reset Your WordPress Website? Perhaps You Wish to Start from Scratch? While There Isn’t an In-Built WordPress ‘Reset’ Button, Admin are able to Reset their Website Either Manually or Through the Use of a Plugin.
In this tutorial we’ll take a look at how a WordPress install can be reset to it’s original settings. Resetting a WordPress website means all data will be lost so it’s important to back up your site if there is any information worth saving. Effectively, resetting a WP installs means that all data bases and files are returned to their original state or commonly referred to as their factory settings.
Resetting a WordPress install can be completed by following the instructions below, or watching our video tutorials. Using the WP Reset plugin is an efficient way of resetting for those without developer knowledge, while using cPanel is generally the preferred way by WordPress enthusiasts.
Why do WordPress Users Choose to Reset their Website?
Resetting a WordPress website means returning all the files and databases to their original state. While this is ideal for those wishing to start fresh, it also means that all content that was previously on the website will no longer be accessible.
You may have created a number of test posts or pages and now wish to start with a clean slate for a live website. Completing a full website reset can be an efficient way of ‘cleaning up’ to start building your live site after testing is complete.
While not every WordPress user will want to reset their website, for those landing on this page, they have most likely found themselves in one of the situations below.
There are a number of reasons why someone would want to reset their WordPress website:
The website is to be used for a different project
The site was used for staging or demonstrating
Wish to use the same domain for a new business adventure
The owner wishes to restore the site from a previous backup
The owner is seeing many errors on a recently new website and feels the best way to overcome these errors is a complete reset
The WordPress website cannot be accessed due to a failure and admin has previously saved a backup
What is Entailed in a Website Reset?
Depending on how you reset your WordPress will dictate if it will be a complete reset meaning all settings and files are lost or a partial reset. For example, using the ‘WP Reset‘ plugin, you can dictate whether or not your plugins are reactivated after a reset or not.
If you wish to use any data that was previously stored on your site (in the database tables) now is the time to complete a backup of your website.
How to Reset a WordPress Install
The instructions below can be completed to reset a WordPress website. Please note that by completing a reset you will not be able to retrieve information that may have been previously saved on your site. It is important prior to resetting your WordPress website that you back up any information you wish to use in the future.
Method 1) Resetting My WordPress Install with a Plugin
Video Tutorial: Using a Plugin to Reset My WordPress
youtube
Written Tutorial: Using a Plugin to Reset My WordPress
This is the best way to reset WordPress for those who aren’t that WordPress savvy. Using a plugin to reset your WordPress can be hassle free and means you will never need to leave your WordPress dashboard. While this way is effective, it means that you will still need to have access to your WordPress site.
Step 1) From your WordPress dashboard, click on the Plugins menu and then on ‘add new‘. Search for the following plugin: WP Reset. Step 2) ‘Install‘ and ‘Activate‘ the WP Reset Plugin (Please note: This is not a TTHQ plugin).

Step 3) Now click on the ‘Tools‘ menu in your WordPress Dashboard. Step 4)Under ‘Tools‘ click on the sub-menu; WP Reset. Step 5) Read the text to ensure you wish to reset your WordPress. If you are happy to go ahead and reset, type the word ‘Reset‘ in the field towards the bottom. Also specify any ‘Post-reset Actions‘ that you wish to occur. Step 6) Click the ‘Reset WordPress‘ button. Step 7) Click the ‘Reset WordPress‘ button again to confirm a full reset.
You have now completed a reset of your WordPress website.

Further WordPress Database Reset Plugins
While our procedure above outlines how to use the WP Reset Plugin to achieve a WordPress Reset, there are a number of other plugins that can also do the trick. If you find WP Reset is not working on your website, checkout some of the following WordPress.Org Reset Plugins:
Advanced WordPress Reset
Reset WP
WordPress Reset
Method 2) Resetting WordPress Install without the Use of a Plugin
To reset your WordPress install without the use of a plugin you will need to have access to your website’s cPanel (or similar). The details needed to access your WordPress database can be obtained from your hosting provider.
This method is said to be the harder method of the two, although by following the instructions below even someone without developer knowledge should be able to reset their WordPress account.
Using cPanel to Reset a WordPress Website
Step 1) Log in to your ‘cPanel‘ account for the WordPress install that you wish to reset. Step 2) Once you have logged into cPanel, click on the ‘MySQL Databases‘ button located under the ‘Databases‘ section.

Step 3) Find the name of the database in question and ensure you copy and paste the name of it into a notepad. You’ll need this later. Step 4) From the actions column, click the ‘Delete‘ button for the database you wish to reset. This will delete that WordPress database so ensure if you wished to save any of that data, you did that prior to clicking delete.

Step 5) Now you will not be able to access your WordPress website until the following steps are completed. Step 6) At the top of that same page, you’ll need to ‘Recreate‘ that database. Paste the name of the database from your notepad into the ‘Create Database‘ field. If you do not copy and paste the name of your previous database correctly, the reset will not work. Step 7) Click the ‘Create Database‘ button. This database should now appear under the ‘Current Databases‘ section.

Step 8) You will now need to add back the admin user to be able to access that database. You will need to use the exact same username and password as you used previously otherwise the file won’t recognize the new database.

Step 9) You have now added the database back and created your admin user. With this method the themes, uploads and plugins you had will not be deleted. If you wish to delete them to start fresh with a new feel WordPress site, you’ll need to head to the ‘wp-content‘ directory in the WordPress root folder. From there you can delete the files under: Plugins, Theme and Uploads. It is recommended to leave one theme. Step 10) This is the final step in the reset process. You’ll need to copy your website’s primary URL and add it to the following in the browser /wp-admin/install.php. For example: https://plugin-demo.com/wp-admin/install.php. It will ask you to fill in your login details here. This is the last crucial step to resetting your WordPress website.
The post How to Reset a WordPress Install appeared first on Tips and Tricks HQ.
How to Reset a WordPress Install shared from Tipsandtricks-HQ
0 notes