#Craft Tutorial
Explore tagged Tumblr posts
Visit Tumblr Blog
Explore Tumblr blogs with no restrictions, modern design and the best experience.
Last Seen Tumblr Blogs


Fun Fact
12.7% of mobile users access Tumblr.
Text
DIY lace bobbins from dollar store supplies 🥳
#fiber art#artists on tumblr#bobbin lace#lace making#craft tutorial#diy#arts n crafts#tutorial#crafts
839 notes
·
View notes
Text


Heres a tutorial on how i make thease badges! Have fun yall🌟💖
#badges#diy#diy patches#diy projects#diy craft#diy punk#diy ideas#handmade#dbd craft#crafts#art and craft#craftblr#hand crafted#paper craft#easy crafts#tutorial#craft tutorial#fallout 4 fanart#fallout fanart#fallout#fallout art#fall out#fallout chems#fallout merch#dbd#dbd ghostface#ghostface fanart#ghostface#dbd fanart#dbd art
107 notes
·
View notes
Text
Character / F/o pin tutorial
Someone asked me how I made the pins when I originally posted that I was making pins earlier, so I decided to made an in depth tutorial.
First things first, supplies!

You will need:
Paper (and a printer, unless you want to draw it out yourself)
Scissors
Glue (I use a gluestick because it's what I have on hand, but if you use something like school glue you might have to be careful not to saturate the paper with it)
Pins (the ones in the picture are some I've already painted, which will be explained in the prep step)
Paint (color doesn't actually matter much, but know that theres a chance it will alter the tint of the pins)
Some kind of sealant (I use acrylic sealer because that's what I have on hand, but things like mod podge and clear nail polish work too) bonus points if it's glossy ✨️
Step one: Prep!

Print out/draw the designs you want on the pins. Here, I have my sweet dork of a f/o, Deidara.
This is also the stage where you'll paint your pins, because if they have designs on them already (like mine did) it can show through during the sealant step. That's what happened to me on my first attempt (I ended up having to redo them all, which worked out because now I'm making this tutorial <3) I used black paint, which gave them a darker undertone after spraying the sealer on them.
Step two: Cutting and Gluing!

When cutting, it's a good idea to leave some excess and trim it off later (if the pin is too big for the design, you can fill in the white edges with a local color to bridge the gap)
Now for gluing, slather some glue on the back of the picture and line it up with the pin to the best of your ability.

Now you can trim the edges, but still keep a bit of excess so you can fold it over the edge of the pin. I do this by smoothing outward from the center of the picture, and then around the edge.

Now you're nearly done! Give your character / f/o a smooch for getting this far 😘
Step three: Sealing!
For this final step, you just need to take your sealant and apply it to the top of the pins. You can also use this time to make sure that the extra edge (that was folded down) is glued down securely. I skipped this part because these pins are going into my ita bag, but I recommend you do this if they’re going to be in a less protected spot.

I did not heed the instructions on my sealer and accidentally sprayed way too much at once. My poor boy 😭 (it's not too terrible at least, and should be better when it's dry)

And that's all, folks! Have fun with your new knowledge and stay creative!
Bonus:
My ita bag!!

(the big pins don't even fit lmao)
#Arts and crafts#Craft tutorial#Pin tutorial#Homemade merch#ita bag#f/o pins#button pins#pins#homemade#selfshipping#f/o community#self ship#f/o#self ship community#self shipping#fictional other#self ship positivity#selfship community#Deidara#Selfship crafts#Selfship art
56 notes
·
View notes
Text
instagram
insta reel by easyastryyt on how to fold cardstock into squares you can attach to each other and make 3d pixel art models in real life
#insta reel#stardew valley#minecraft#papercraft#paper art#art diy#art idea#art tutorial#craft tutorial#Instagram
23 notes
·
View notes
Text
~How to Make Custom Pins~
What you need:
Can (eg. can of Coke)
Scissors
Paint brush
Hot glue/ hot glue gun
Craft glue
Clear nail polish/ varnish
Safety pin
(Optional) sand paper
(Optional) hair dryer
(Optional) blu-tack
Steps:
1. Clean and cut out the bottom part of a can. It it optional, but you can sand the cut out.

2. Cut out your picture (leave excess room around the egdes)

3. Use the craft glue to cover the back of the picture cut out

4. Wrap the picture around the back, and dab the edges down with craft glue

5. Cover the front with craft glue, and prop it up off the ground with something (I used nail polish). Let the pin air dry or dry with a hair dryer.

6. When the glue dries, you can optionally use a bit of blu-tack to stick the pin to the item you're using to prop the pin up. Then, use varnish or clear nail polish and add a clear coat to your pin. Let air dry or dry with a hair dryer.

7. Use hot glue to secure the edges of your picture down

8. Hot glue a safety pin to the back of your pin

9. Let the hot glue fully dry, and then you're done!
#art#diy#craft#diy pins#craft tutorial#diy tutorial#arts and crafts#diy craft#fandom#dbh#detroit become human#fun#things to do when bored
14 notes
·
View notes
Text
a craft I made for the new years:) the point of the wishing star is to fill it with your resolutions and keep it as a constant reminder to yourself, I love mine!


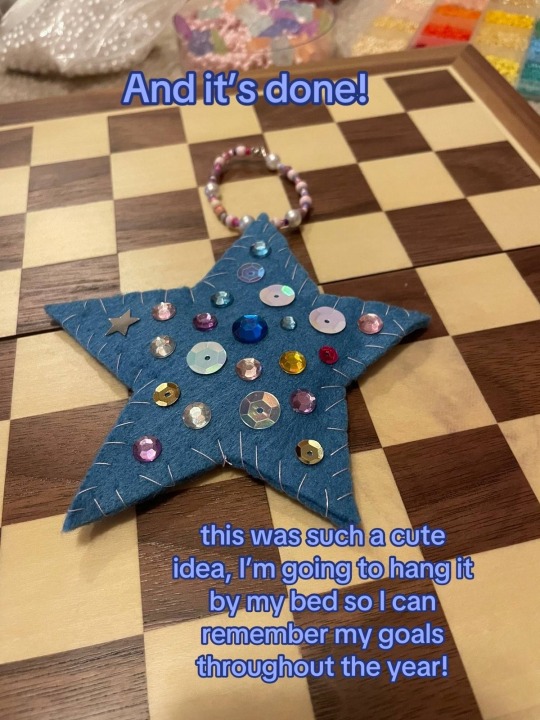

#crafts#diy craft#art and craft#felt crafts#craft ideas#diy#craft tutorial#art resolutions#self care#hand crafted#Spotify
27 notes
·
View notes
Text
Single Band Quadfish
Supplies:
Monster Tail loom • rubber bands (any # of colors) • hook • C clip

Step One:
Place one band around 4 pegs to create a square shape.

Step Two:
Pull one corner of the square away from the loom. Loop the band over and around the peg as shown below.
Repeat this on every peg.

Step Three:
Push the band down until you have room to stack 2 more bands onto the pegs.

Step Four:
Hook the bottom band-- the one you looped around each corner peg-- and loop it up and over the peg. Repeat this on all four pegs.

Once the entire band is looped, push your work down the pegs and add another band to the top.
Step Five:
Repeat step four with the new bottom band. Continue to loop and add new bands.

After a while, your project will look like this

Rad as fuck 😍

Oh! She's crowning!
Step Six:
Once the bracelet is long enough, pop a large C-clip on the end.

Enjoy your bracelet!
Final Thoughts...
This bracelet is great for beginners since you don't really have to pay attention to the looping order. The pattern is kind of like an elevated version of the fishtail (hence 'quadfish'). It was super easy to mend mistakes - this was my first time using the Monster Tail loom, and I absolutely dominated that shit. I'm also obsessed with the colors I used (mermaid vibez).
9 notes
·
View notes
Text


12 notes
·
View notes
Text
idk who needs to hear this but here's my button-making tip of the day
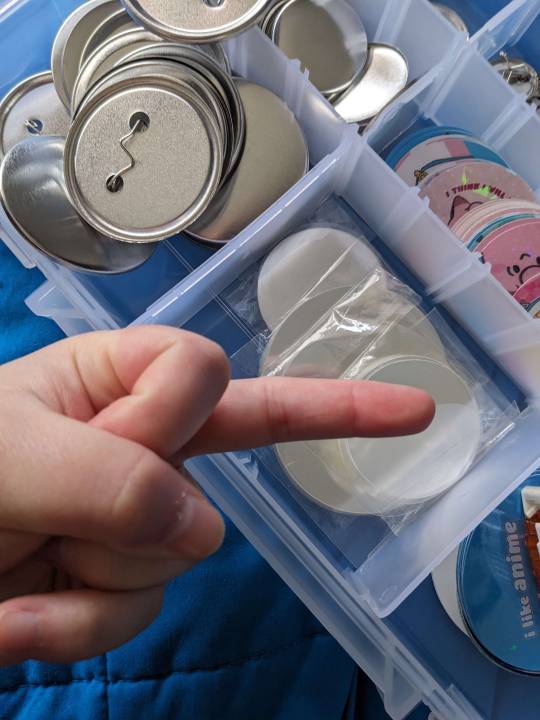
mylars: STINKY. bastards. evil. duplicitous. they build up static and never let it go, they slide all over the place, you think you only have one but it's still secretly 2 stuck together, they get misaligned no matter how carefully you place them and then crimp wrong and then your button is fucked up. they were my #1 cause of button failure in the year-ish i've been using a button press. garbageboy stinkman belongs in the toilet.

the answer: SINGLE SIDED LAMINATE, BABEY!!! you can hand-lay it over a printed sheet. it comes in clear, it comes in many kinds of sparkle and dazzle and so on. i use my die cutter to achieve these lovely circles but obviously, you could use scissors too. it's waterproof, it's attractive, it crimps the way it's supposed to without having to deal with the slidey sandwich static problems, i've had far fewer button failures with this method. i highly recommend this in combination with Epson's "presentation paper," which is really lightweight and durable.
#crafts#artists on tumblr#crafters of tumblr#button making#pinback button#buttons#pins#craft tutorial
21 notes
·
View notes
Text
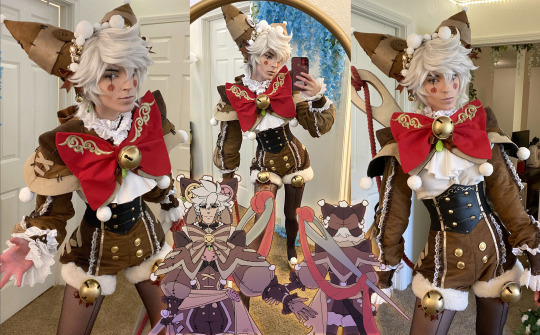
eeeeeeey whadda know I got Pupet's tutorial/buildlog out today!
its a 31-page pdf with lots of pictures about how I made this costume plus a lot of my design and concept process. Its free to download (but of course tips are appreciated) so please check it out if you get the chance!
#my cosplay#cosplay#cosplay tutorial#fiber crafts#fiber arts#craft tutorial#this is mostly me just roasting myself for a second here#with teaching pay cycles theres always 2 months where we have to go without pay#i knew it was coming and tried to plan ahead by scheming to put out 3-4 cosplay tutorials for popular characters this summer#with the hopes that the side hustle revenue would help me out#but as luck would have it i got sick and hit a massive creative burnout and only produced one (1) tutorial for an OC haha#to my credit this type of thing is exactly why i dont take commissions bc my creative output is insanely finicky and hard to predict
102 notes
·
View notes
Text

These guys are inexpensive, simple, and make lovely gifts so here’s a tutorial on how to make them!
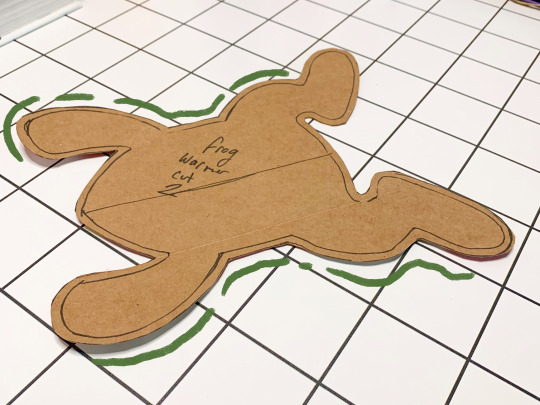
1. Make a pattern piece - any relatively simple shape will do, I modeled mine after beanie baby frogs. Just draw the shape onto a piece of cardboard and cut it out!

2. Cut two pattern pieces from 100% cotton - old tshirts, hoodies or jeans are perfect. I like to make the top and bottom different colors :)
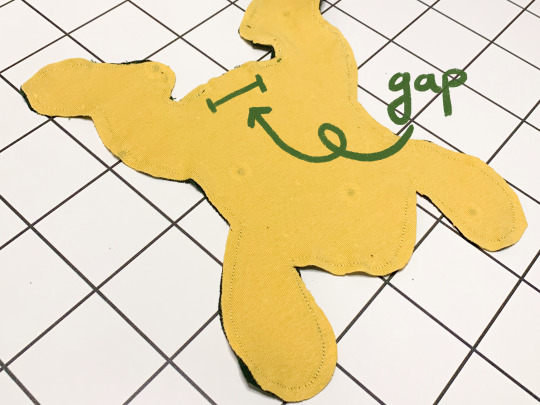
3. With the good sides of the fabric together, use a sewing machine or needle and thread to stitch along the outer edge of your critter. Make sure to leave a small gap so you can turn it right side out - it’s easiest if this is along a flat edge.

4. Turn your critter right side out and add eyes if desired - I use safety eyes, but you can also paint, draw, or embroider them on, along with any other decorations you’d like!
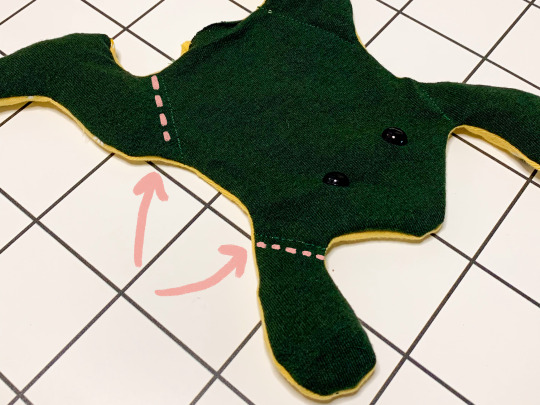
5. Add your filling - I use feed corn, but dry rice or beans will work too. For the frogs, I massage the corn into the legs and then use a line of stitching to keep all the filling from migrating into the center of the body.

6. Add the rest of your filling and hand-stitch the gap closed with needle and thread.

7. Done! Microwave your critter for 30 seconds at a time until perfectly cozy.
#diy projects#diy craft#diy#diy gift ideas#arts n crafts#fiber crafts#craft tutorial#plush maker#handmade plush#handmade
51 notes
·
View notes
Photo

(via Make Glitter Stickers! - The Graphics Fairy)
8 notes
·
View notes
Text
Crossbody Fanny Pack – Free Pattern & Video Tutorial Included!
In this post, you will learn how to sew your very own crossbody fanny pack with free PDF pattern. Welcome to my cozy corner of creativity, where I, a passionate sewing enthusiast, am thrilled to guide you through crafting your very own Crossbody Fanny Pack. This isn’t just any sewing project; it’s a chance to infuse your personality into a versatile accessory that’s as unique as you…

View On WordPress
#Craft Tutorial#Crossbody Bag#diy fashion#Fanny Pack#free pattern#handmade#sewing#sewing for beginners
12 notes
·
View notes
Text
youtube
I shared this on a separate blog but I may as well post it here, I made a YouTube video!!! It's a tutorial on how to make a stuffed animal out of old gloves, I focus heavily on making it beginner friendly as well as cheap !! I wanna make more videos in the future- figuring out what sorts however, if you wanna see more crafts lemme know! I focus on thrifting and reusing materials in my day to day crafting world and I'd love to share some tips with anyone :) anyways please watch my video if you like it lemme know <3

#cottagecore#aesthetic#cozycore#grandpacore#grandmacore#craft#crafting#sustainable crafts#craft tutorial#diy craft#stuffed animals#homemade stuffed animals#Youtube
4 notes
·
View notes
Text

I've been making a bunch of DIY button pins recently. They've turned out pretty good, so I'll probably post a tutorial soon (:
#diy#diy craft#craft#pins#button pins#tutorial#diy tutorial#craft tutorial#dbh#detroit become human#detroit become human connor#connor dbh
4 notes
·
View notes
Text

youtube
My youtube video where I teach you how to do a quick, cheap and easy craft!!! You can use materials probably already in your home or thrifted!! I downloaded so many sound affects for this and put a lot of love into it <3
#my post#stuffed animals#my art#art#my art <3#stuffed animal#craft#crafting#craft tutorial#tutorial#youtube video#indie#Youtube
3 notes
·
View notes