#EmbroideryProjects
Explore tagged Tumblr posts
Visit Tumblr Blog
Explore Tumblr blogs with no restrictions, modern design and the best experience.
Last Seen Tumblr Blogs


Fun Fact
Tumblr has a low social media market share in South America.
Text
Calligraphy Embroidery Projects: Threaded Words of Art

Calligraphy Embroidery Projects: Discover the Art of Threaded Words!
Calligraphy embroidery projects is a unique blend of thread art and calligraphy, allowing you to enhance your creative skills while adding personalized words to your projects. Whether you're a hand embroiderer, quilter, textile artist, or crafter, adding lettering and text can bring a special touch to gifts, household objects, and more. In this series of tutorials, you'll learn various embroidery stitches and techniques for stitching beautiful hand embroidered words. Key Takeaways: - Calligraphy embroidery combines thread art and calligraphy for personalized projects. - Adding lettering and text can enhance the creative appeal of your embroidery projects. - These tutorials provide step-by-step guidance on various embroidery stitches and techniques. - Learn how to stitch beautiful hand embroidered words to create unique gifts and decor items. - Mastering calligraphy embroidery opens up new creative possibilities for your artistic endeavors.
Hand Embroidery: Lettering and Text 1 - Setting up the Lettering Sampler

When it comes to DIY calligraphy embroidery, setting up a lettering sampler is the first step towards creating stunning and personalized projects. While this tutorial primarily focuses on design transfer, it provides valuable tips and tricks that will enhance your overall embroidery experience. Whether you're a beginner or an experienced embroiderer, this tutorial will help you lay a strong foundation for your calligraphy embroidery journey. Creating a lettering sampler allows you to experiment with different fonts, sizes, and styles of text. By having a visual reference throughout your projects, you can ensure consistency and precision in your stitching. This sampler will serve as a guide as you progress through the series of tutorials, helping you develop your skills and gain confidence in your calligraphy embroidery abilities. Begin by choosing a simple phrase or quote that resonates with you. It's important to select a text that has a mix of straight lines and curves, as this will allow you to explore various embroidery stitches and techniques. Transfer the design onto your fabric using your preferred method, such as using a water-soluble pen or tracing paper and transfer pencil. Ensure that the design is centered and well-placed, providing enough space for your chosen stitches. Lettering Sampler Design Font Size Stitch Script 1 inch Backstitch Serif 0.5 inch Whipped Backstitch Sans-serif 0.75 inch Split Stitch The table above showcases an example of a lettering sampler design. Feel free to customize the font, size, and stitch based on your preferences and the specific techniques you want to explore. Remember, this sampler is all about creativity and personalization, so don't be afraid to experiment and make it your own. Once your lettering sampler is set up, you're ready to dive into the world of calligraphy embroidery. In the upcoming tutorials, we'll explore various stitches and techniques for stitching beautiful hand-embroidered words. Get your needles, thread, and fabric ready, and let's embark on this exciting journey together.
Hand Embroidery: Lettering and Text 2 – Backstitch and Thread Traveling

In this tutorial, we will delve into the art of calligraphy embroidery, focusing on the backstitch technique and thread traveling. Backstitch is a versatile stitch that allows you to create clean and precise lines, making it perfect for lettering and text in embroidery projects. By understanding the technique of thread traveling, you can achieve professional results with seamless transitions between different sections of your design. Before we dive into the tutorial, it's important to note that practice is key when it comes to mastering calligraphy embroidery. Don't be discouraged if your first attempts don't turn out perfectly – with time and practice, your skills will improve. Backstitch: A Foundation for Lettering Backstitch is commonly used in hand embroidery because of its clean and neat appearance. It's a simple stitch that involves stitching backward to create a solid line. When it comes to lettering and text, the backstitch provides a strong foundation for creating beautiful and legible embroidered words. "Backstitch is one of the fundamental stitches in embroidery. Its versatility makes it an excellent choice for creating lettering and text with clean lines." - Embroidery Expert Thread traveling is an important technique to master when working on lettering and text. It involves moving the thread from one section of the design to another without leaving visible gaps or loose threads. This creates a seamless look and professional finish to your embroidery. Backstitch Technique: Thread Traveling Technique: 1. Bring the needle up from the back of the fabric at point A. 1. After completing a section of stitches, run the thread under several backstitches on the backside of the fabric. 2. Insert the needle back into the fabric at point B, a short distance away. 2. Bring the needle up at the starting point of the next section of stitches. 3. Bring the needle up at point C, directly behind point B. 3. Continue stitching the next section while maintaining tension on the thread. 4. Repeat steps 2 and 3 to complete the backstitch line. 4. Repeat the thread traveling technique as needed to move to different sections of the design. By practicing backstitch and thread traveling, you'll be able to create stunning calligraphy embroidery patterns with beautifully stitched lettering and text. Let your creativity flow as you combine these techniques with other stitch variations to personalize your projects. In the next tutorial, we'll explore dotting I's in calligraphy embroidery, adding another layer of detail to your stitched words.
Hand Embroidery: Lettering and Text 3 – Dotting I's

In this tutorial, we will focus on one essential technique for perfecting your calligraphy embroidery - dotting I's. The dot above the letter "i" is a tiny detail that can make a significant impact on the overall look of your embroidered letters. By mastering the method of dotting without carrying threads, you can achieve clean and precise dots that enhance the elegance of your calligraphy. To dot the letter "i" without carrying threads, follow these steps: - Bring the needle up at the bottom of the stem of the "i". - Create a small stitch, looping the thread under the needle to form a tiny loop. - Bring the needle back down at the base of the stitch, securing the loop in place. - Tighten the loop by pulling the thread gently, forming a neat dot on top of the "i". Practice this technique on scrap fabric before applying it to your actual embroidery project. With time and practice, you will achieve consistent and professional-looking dots on all your embroidered letters. Materials Needed Additional Tips Embroidery hoop Use a thin needle to make small, precise dots. Embroidery floss in desired colors Experiment with different thread thicknesses for various dot effects. Embroidery needle Practice dotting on scrap fabric before attempting it on your actual project. "Dotting the 'i' in calligraphy embroidery adds a touch of elegance and professionalism to your lettering." - Embroidery Enthusiast Other Tips for Perfecting Your Dotting Technique Here are a few additional tips to help you achieve precise and clean dots on your embroidered letters: - Keep your stitches small and tight for a more polished look. - Experiment with different dot sizes to create variations in your lettering. - Practice dotting on different fabrics to understand how the technique differs with each material. - Use contrasting colors for your dots to make them stand out. - Consider using metallic thread or beads for an extra touch of sparkle on your dots. By mastering the art of dotting I's in calligraphy embroidery, you'll add a professional and refined touch to your lettering. With practice, you'll be able to achieve consistent and beautiful dots that elevate your embroidery projects to the next level.
Hand Embroidery: Lettering and Text 4 – Stem Stitch and Crossings

Stem stitch is a versatile stitch that can add elegance and charm to your calligraphy embroidery designs. In this tutorial, you'll learn how to use stem stitch to create cursive text and navigate the challenge of crossing over previously stitched lines. With the right technique, you can achieve smooth and flowing lettering in your embroidery projects. When working with stem stitch, it's important to consider the direction of your stitches to maintain the characteristic look of this stitch. By following the natural curves of your letters, you'll create beautiful cursive text that mimics the flow of handwriting. Additionally, this tutorial will provide guidance on how to navigate crossings, ensuring that your lines intersect cleanly and seamlessly. Mastering the art of stem stitch and crossings Embarking on the stem stitch journey requires practice and patience. By mastering the skills to create smooth and flowing lettering, you'll be able to add a personal touch to a wide range of calligraphy embroidery designs. Whether you're creating monograms, quotes, or decorative text, stem stitch and its variations can bring your words to life. Combine stem stitch with other stitches, explore different thread types, and experiment with color choices to unlock endless possibilities for your calligraphy embroidery projects. With each stitch, your skills will grow, and you'll find inspiration in the beauty of handwritten text brought to life through the art of embroidery. Summary: - Stem stitch is a versatile stitch for creating cursive text in calligraphy embroidery. - Consider the direction of your stitches to maintain the characteristic look of stem stitch. - Navigate crossings by carefully intersecting previously stitched lines. - Mastering stem stitch and crossings opens up endless creative possibilities. Table: Stem Stitch Techniques and Tips Technique/Tips Description Following the natural curves Stitch along the curves of your letters to achieve a fluid, cursive look. Traveling in the right direction Ensure your stem stitch travels in the same direction as the previous stitches for a cohesive appearance. Clean crossings Cross over previously stitched lines carefully to create seamless intersections. Combine with other stitches Experiment with combining stem stitch with other embroidery stitches to enhance your lettering designs.
Hand Embroidery: Lettering and Text 5 – Whipped Backstitch for Small Text
https://www.youtube.com/watch?v=-z_FFXiXGNs In this tutorial, we will explore the technique of using whipped backstitch for small text in calligraphy embroidery. Whipped backstitch is a versatile stitch that can add depth and texture to your lettering. It is especially useful when working with intricate designs or smaller fonts. By mastering this technique, you will be able to create beautiful and precise lettering in your embroidery projects. To start, prepare your fabric and thread the needle with your chosen embroidery floss. Begin by stitching a backstitch line following the shape of the letter. Make sure to leave enough space between each stitch to accommodate the whipped backstitch. Once you have completed the backstitch line, take a contrasting thread and thread it through your needle. Starting at the beginning of the backstitch line, bring the needle up through the fabric just next to the first stitch. Then, insert the needle under the first stitch and pull it through. Continue this process along the length of the backstitch line until you reach the end. Whipped backstitch adds an extra layer of detail and dimension to your small text, making it stand out on your embroidery projects. With practice and experimentation, you can create stunning lettering that will impress and inspire. Example of Whipped Backstitch for Small Text: Text Thread Color Stitch Length Love Red 1/4 inch Hope Blue 1/2 inch Joy Yellow 1/4 inch
Hand Embroidery: Lettering and Text 6 – Combination Stitches
Combining stitches is an exciting way to add depth and dimension to your calligraphy embroidery designs. In this tutorial, we will explore the combination of buttonhole stitch and stem stitch, two versatile stitches that can create stunning effects when used together. The buttonhole stitch, also known as blanket stitch, is commonly used to secure fabric edges and create decorative borders. When combined with the stem stitch, which is perfect for creating flowing lines and curves, you can achieve unique lettering designs that stand out. To start, choose a letter or word for your embroidery project. Begin by outlining the letter with buttonhole stitch, creating a solid base for the stem stitch. Then, use the stem stitch to fill in the shape of the letter, following the contours and curves. The combination of the two stitches will give your lettering a beautiful textured appearance. Benefits of Combination Stitches in Calligraphy Embroidery Combining stitches in calligraphy embroidery offers several benefits and possibilities for creative expression. Some advantages include: - Texture: The combination of buttonhole stitch and stem stitch adds visual and tactile texture to your lettering, making it more interesting to look at and touch. - Contrast: The contrasting nature of the two stitches creates a dynamic effect, highlighting the different elements of your design and making them stand out. - Versatility: By exploring different combinations of stitches, you can create a wide range of lettering effects, from bold and graphic to delicate and intricate. - Personalization: Combining stitches allows you to personalize your calligraphy embroidery, adding your own unique touch to each project. Experiment with different combinations of stitches and explore the possibilities they offer. Let your creativity guide you as you create stunning lettering designs that inspire and captivate.
Hand Embroidery: Lettering and Text 7 – Padded Satin Stitch and Chain Stitch
When it comes to adding standout lettering to your calligraphy embroidery projects, the combination of padded satin stitch and chain stitch offers a stunning effect. Padded satin stitch creates a raised, smooth surface for the initial letter, while chain stitch provides a beautiful texture for the rest of the lettering. Let's explore these techniques and see how they can elevate your embroidery. To start, choose a contrasting thread color for the padded satin stitch, as it will be the focal point of the letter. The padding is created by stitching parallel lines of satin stitch underneath the main color. This gives the letter depth and dimension, making it stand out from the rest of the embroidery. Once the padding is complete, switch to the main color thread and stitch a smooth satin stitch over the padding, covering it completely. For the remaining lettering, chain stitch is an excellent choice. This stitch adds a beautiful texture and can be worked in a variety of thicknesses to achieve different effects. Whether you prefer a delicate chain or a chunkier one, the chain stitch provides a sense of movement and fluidity to your lettering. Experiment with different thread types and colors to create unique designs and enhance the overall visual appeal of your embroidery. Simply Wool Embroidery Wool Review Thread Type Features Simply Wool Embroidery Wool Soft and fluffy texture, perfect for padded satin stitch “The combination of padded satin stitch and chain stitch in calligraphy embroidery adds depth, dimension, and texture to your lettering, making it truly stand out.” With the technique of padded satin stitch and chain stitch, you have the power to create eye-catching lettering in your calligraphy embroidery projects. By incorporating different thread types, such as Simply Wool embroidery wool, you can further enhance the visual appeal of your embroidery. Let your creativity shine as you experiment with colors, stitches, and designs, and watch your projects come to life with beautiful and unique lettering.
Hand Embroidery: Lettering and Text 8 – Split Stitch for Embroidered Writing
If you're looking to add a touch of elegance and precision to your embroidered writing, the split stitch is a fantastic technique to master. Particularly when using non-stranded threads like floche or perle cotton, the split stitch allows you to create beautifully detailed and precise lettering that stands out in your calligraphy embroidery projects. The split stitch is formed by splitting the previous stitch with the needle, creating a continuous line of embroidery. This technique adds depth and texture to your embroidered writing, enhancing its visual appeal. By carefully selecting the appropriate thread and controlling the tension of your stitches, you can achieve stunning results that will inspire and captivate. Thread Selection When working with the split stitch, thread selection is crucial to ensure the desired effect. Non-stranded threads like floche or perle cotton work exceptionally well for this technique, as they allow for easy splitting and create a fuller appearance. These threads also provide a smooth and even surface, making it easier to achieve precise and consistent stitches. Technique Tips - Start with a single strand of thread and thread your needle. - Bring the needle up from the back of the fabric at the starting point of your letter. - Divide the previous stitch in half with your needle, creating a small space. - Insert the needle back into the fabric through the split, creating a new stitch. - Continue the process, splitting each previous stitch as you progress along the letter. - Remember to maintain consistent stitch lengths for a uniform appearance. With practice and attention to detail, the split stitch technique will become an invaluable tool in your calligraphy embroidery journey. Take inspiration from the delicate and precise nature of this stitch, and let it guide you as you bring words to life through the art of embroidery.
Hand Embroidery: Lettering and Text 9 – Combination of Herringbone Stitch and Split Stitch
In this tutorial, we will explore the stunning results that can be achieved by combining herringbone stitch and split stitch in calligraphy embroidery. By combining these two stitches, you can create unique and textured lettering that will add depth and dimension to your projects. Let's dive in and learn how to incorporate this beautiful stitch combination into your embroidery. To begin, let's take a look at the herringbone stitch. This stitch is known for its distinctive V-shaped pattern, which can resemble the bones of a fish. It is commonly used to add texture and interest to embroidery projects. By combining herringbone stitch with split stitch, you can create a beautiful contrast of bold lines and delicate details in your lettering. The split stitch, on the other hand, is perfect for creating fine lines and intricate details. Read the full article
0 notes
Text
#TearawayEmbroideryPaper#AssociateNonwoven#EmbroideryEssentials#CraftingSupplies#NeedleworkTools#EmbroiderySupport#CraftingMadeEasy#EmbroideryStabilizer#SewingTools#CraftingInnovation#EmbroideryProjects#FabricCrafting#SewingEssentials
0 notes
Text

Nouveau 🩷
DM si vous êtes intéressé 💫
65 notes
·
View notes
Text
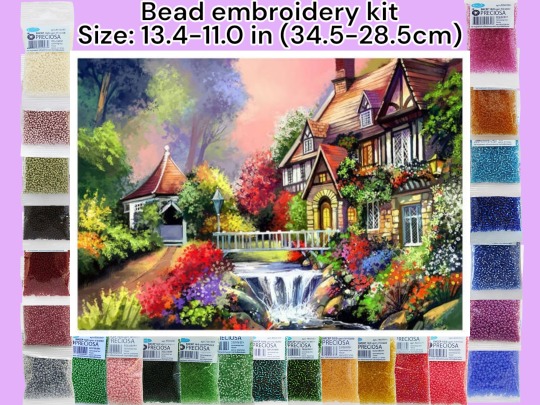
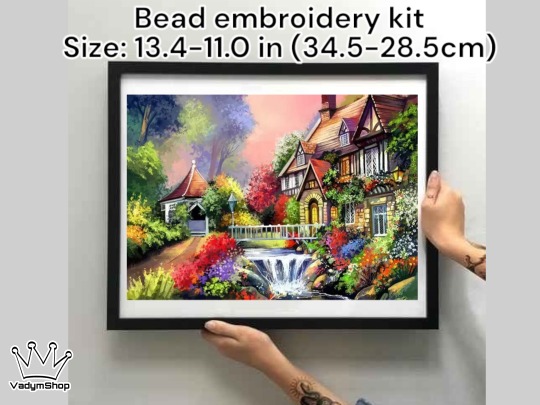


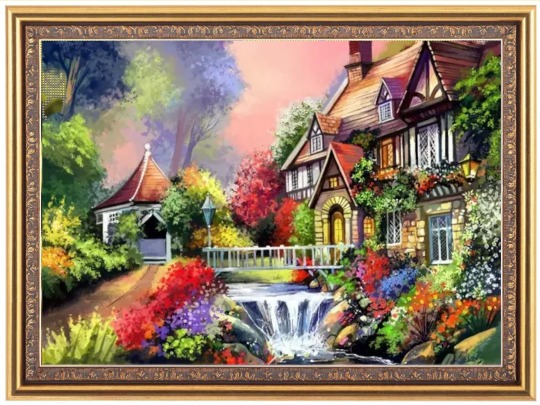

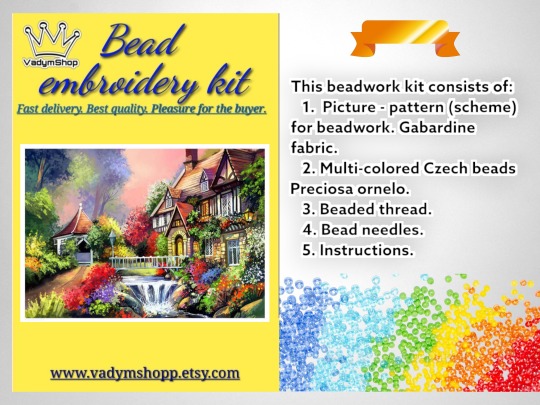
DIY Bead embroidery kit "House by the river". Size: 13.4-11.0 in (34.5-28.5cm). Beading kit. Home Decor.
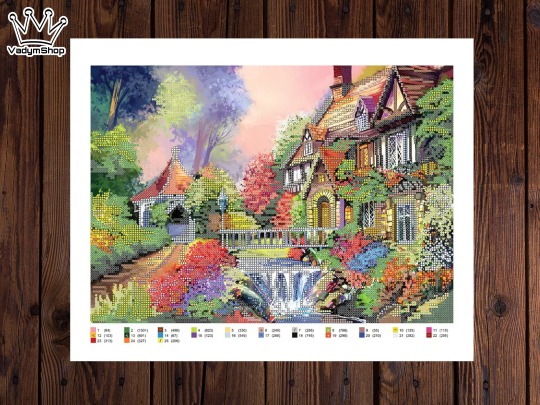
DIY Bead embroidery kit "House by the river". See more in my shop... Size: 13.4-11.0 in (34.5-28.5cm) Bead colors 25. Home decor. Beading kit.
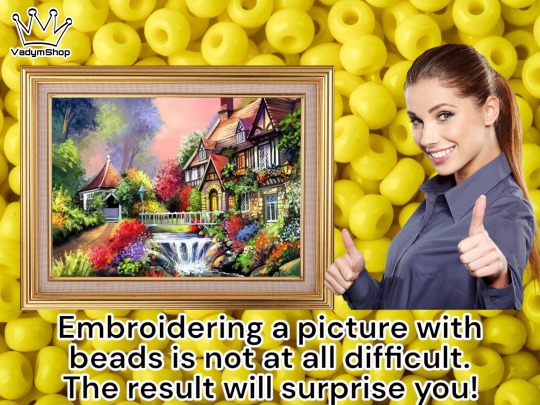
Dream of escaping to a tranquil riverside retreat every time you indulge in the art of bead embroidery with our exquisite 'House by the River' kit. This thoughtfully designed kit brings together the beauty of nature and the joy of beadwork, allowing you to create a stunning tapestry that captures the calmness and serenity of a riverside house. The kit includes a professionally printed pattern, a variety of colorful beads, embroidery thread, and step-by-step instructions. Let your creativity flow as you meticulously place each bead, transforming a blank canvas into a breathtaking piece of art. Hang it in your home or give it as a thoughtful gift, and let the beauty of this riverside oasis inspire peace and tranquility in your everyday life.
The beading kit consists of:
1. Picture - pattern (scheme) for beadwork. Gabardine fabric.
2. Beads Preciosa ornelo 25 colours.
3. Beaded thread.
4. Bead needles.
5. Instructions.
You have questions? Contact me.
VadymShop is fast delivery, super quality, satisfied customer.
See more in my shop...
#homedecor#handmadegift#embroiderydesigns#diykit#artsandcrafts#housedecor#beadingpatterns#diygift#beadpatterns#needleworkkit#embroideryproject#beadart#beadingpicture#embroidery#handmade#beadedembroidery#beadwork#beading#bead embroidery kits#bead embroidery#beadedneedlework#beadembroiderykit#beadworkkit
0 notes
Text
0 notes
Text

Hungry dog
3K notes
·
View notes
Photo

Melanie made this sweet pin cushion for me. She used my “Girlie” embroidery pattern and shrunk it down to 4” and used two strands of floss. Isn’t it sweet? There are so many different ways to use our embroidery patterns! #pincushion #handembroidery #stitching #hchquiltpatterns #hoopitupembroidery #dmc #inthehoop #projects #stitchers #embroideryprojects https://www.instagram.com/p/CAeku4sHNyh/?igshid=1q014ig6trvie
#pincushion#handembroidery#stitching#hchquiltpatterns#hoopitupembroidery#dmc#inthehoop#projects#stitchers#embroideryprojects
0 notes
Text


Details 🌞 🌛 This is an embroidery process for my dark handmade journal. The original art was taken from a medieval alchemy treatise named ROSARIUM PHILOSOPHORUM. This is a collection of 20 prints published in 1550. My store | Instagram
#handcrafted#bookbinding#embroidery#hand embroidery#hand stitching#stitch#stitching#embroideryprocess#embroideryproject#handmade journal#handmade notebook#alchemical#middle ages#witchblr#magick history#witchy#book of shadows#grimoire#alchemy books
254 notes
·
View notes
Text
Part 1:
Overall tips and tricks for silk shading, or needle patting:
Try to wash your hands before stitching. The oils from your hands can collect on the floss and fabric, which isn’t great for them. It will degrade the fabric and floss over time. But washing your piece when you’ve finished will help remove anything that may have unintentionally transferred. I can send you info on exactly how to launder your piece when you’ve finished if you’d like as well. It also helps to block or damp stretch the piece when you’ve finished stitching. This will ensure a perfectly flat embroidery with no puckering or warps.
Equipment
A medium plus weight linen is ideal for shading. I sometimes will back my linen with another fabric like muslin or calico to help stabilize the fabric, and help keep the stitches secure and support them. If using a linen or even a cotton, make sure to pre-launder your fabric first to shrink it. You can also use a high count good quality quilters cotton. Silk dupioni works even better. Silk is my favorite and preferred by professional thread painters, but it’s finicky to work with.
Make sure when you cut your fabric, it’s squared on grain. If it’s not cut and mounted on grain, it can lead to terrible puckering and warps. Measure out your fabric, to the dimensions you’ll need to properly finish it for mounting. Mark a mark with a water soluble pen at that measurement. Cut a 1 inch slit along the measurement line. Find and then separate a single strand within the fabric, along the slit you just made. Pull that thread out of the fabric. By removing a single thread from the fabric, you’ll be left with a straight line from where that thread was in the fabric. Using your scissors, cut along that line, using it as a guide. Repeat for all four sides. This will create a perfectly squared piece of fabric in which all the edges are on thread. When mounting the fabric on a frame or in a hoop, keep it squared, on thread. Meaning keep the warp and weft threads straight. They’ll either go vertical perfectly, or horizontal perfectly. Don’t pull one area of the fabric so hard it warp the threads of the fabric. It should be pulled drum tight, but kept so that the fabric remains on thread.
Transfer your pattern using prick and pounce, if you can. An alternative is to use a water soluble transfer paper. This works on any fabric, and on every color. Yellow transfer paper works especially well for fabrics that are dark. Another option is to trace the design using a light box or sunny window. Make sure you’re using a good water soluble pen. Note that this only work for fabric that is thin enough for the light to pass through, and typically you want a thicker fabric for stitching. ****Be wary of heat erase pens!!! The ink my look like it disappears, but it’s always inside and on the fabric and can show back up at any time. They can also leave ghost marks that are permanent and can ruin the piece. Regular carbon paper and iron on transfer methods are also permanent so must be stitch over perfectly and transferee perfectly. Which is not easy to do. It’s best to use transfer methods that are non-damaging to the fabric, like water soluble products.
I recommend using a slate frame to mount your fabric. But stretcher bars work just as well and are cheaper and easier to set up. Use stainless steel tacks to secure the fabric onto the stretcher bars. Other tacks can rust and stain the fabric. A hoop can work in a pinch. I prefer quilter’s embroidery hoops if I’m using one. They’re sturdier and hold the fabric more securely. If you use a hoop, make sure it’s good quality and can either be tightened with a screwdriver or has a wingnut. You can always bind your hoop with bias tape or hoop tape if you feel the fabric is slipping too much or if you’re worried about hoop burn. Just make sure it’s much larger than your actual embroidery design. You should have plenty of space around the pattern. Remember to always keep the fabric drum tight. I can tell you exactly how to mount it up in the hoop or on stretcher bars if you need that info. If using a hoop, remember to take it out of the hoop if not actively stitching to prevent hoop marks and burns.
It helps to lay down acid-free tissue paper over your fabric to protect the it and stitches while working. You can move it around as needed to access the areas you’re working on.
Use good quality, new embroidery needles. I love Tulip brand size 10. John James are fine to work with. Note that old or cheap needles form burs which wear the floss down more quickly making it appear fuzzy and worn.
Start with stranded cotton. DMC or Anchor brand floss are a good place to start. If you’re looking to step it up a bit, look into Cosmo floss, Madeira or Valdani. They’re amazing. Spun silk like Au Ver a Soie d’Alger is superior to stranded cotton. It’s heavenly to work with. I actually use filament silk floss a lot as well, like from DeVere Yarns (size 6). It’s finer and allows for greater detail. It can be hard to work with though and is a bit more expensive. A good alternative is regular sewing threads, like Gutermann. Sewing thread will work to get the same results for detail work.
Cutting and working with your floss
Don’t cut all 6 threads off your skein at once. Separate out only one thread, strip that thread from your skein, then cut it off. Cut the piece of floss 16-18inches long. Any more will wear your floss down, making it fuzzy and it will loose its shine. You can gently wrap the threads still on your skein around it to keep them from getting knotted up. I use DMC’s stitchbow storage system to hold my skeins. It’s very convenient and keeps them organized. I just wrap the un-cut threads back onto the bow after I’ve cut off my one thread.
Make sure you’re paying attention to the grain of your floss. I cut one thread at a time from the skein. Make sure you’re pulling the floss from the proper end of the skein. I then thread my needle with the non-cut end of the floss. This ensures I’m stitching with the grain of the floss. Embroidery thread has a grain, kind of like wood has a grain. Therefore, If you rub along embroidery thread in the wrong direction, you’ll be working against the grain, and subsequently, you will achieve inferior results with your stitching, because you’re pulling the fibers against the grain. To ensure that you’re not stitching against the grain. Always thread your needle from the same end of the floss, which should be pulled from the right end of the skein. To make sure you do this, you pull your floss from the right end of the skein and cut only one strand (of the six) at a time, threading the “front” of the strand into the needle (the end opposite the cut you just made), that way, every time you thread your needle from floss from a pull skein, you’re always threading it so that the thread travels in the same direction through the fabric, and that direction is with the grain and not against it. Stitching “with the grain” of the thread will result in smoother stitching, in fewer knots as you work with your thread, and embroidery thread that doesn’t wear down as quickly.
Part 2 next…
#embroidery#hand embroidery#needlework#needlepainting#silkshading#embroideryproject#embroidery craft#embroidery pattern#embroidery tips
9 notes
·
View notes
Text

Another new scissor added to my existing collection of embroidery scissors. Introducing new ‘Arabseque’ embroidery scissors made by BOHIN in France. 💕It has a fine pointed blade and are perfect for snipping threads! ✂️
#scissors#embroiderysupplies#craftsupplies#craft kits#craft tools#bohinj#handembroidery#embroiderykit#embroidery#etsyuk#embroideryart#embroiderypattern#handmade#etsy#diycrafts#beginnerembroidery#embroideryproject
13 notes
·
View notes
Photo
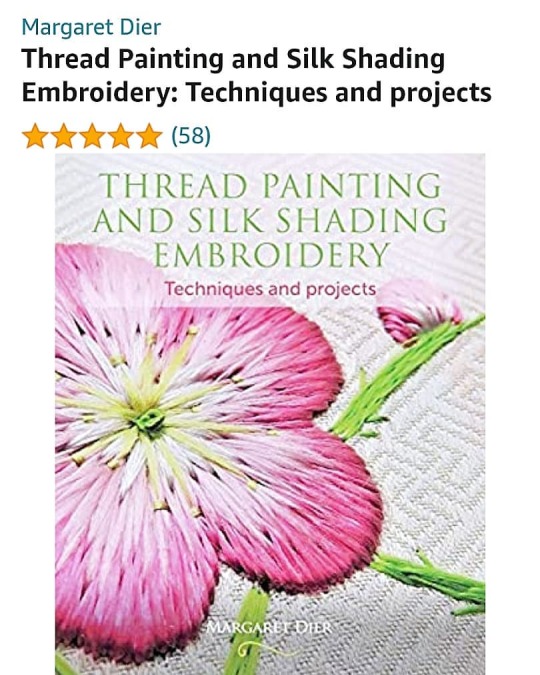
My book has now been on sale for two years and is in it's second print run already. I have been overwhelmed by the support that all of you have given me, by buying it, reviewing it, giving me a brilliant rating on Amazon and getting in touch with me to say how much it's helped you. THANK YOU everyone. Available at @royalneedlework for worldwide delivery and " All good bookshops" 😁😁. . . . #threadpainting #silkshading #needlepainting #needlework #embroiderytutor #rsntutor #embroiderybook #needleoworktutor #needleworkbook #embroiderytuition #embroiderydesign #newbook #insrtuctionbook #embroideryproject https://www.instagram.com/p/CIDyfBgnXsX/?igshid=1mapucujbtjmd
#threadpainting#silkshading#needlepainting#needlework#embroiderytutor#rsntutor#embroiderybook#needleoworktutor#needleworkbook#embroiderytuition#embroiderydesign#newbook#insrtuctionbook#embroideryproject
43 notes
·
View notes
Text

The wait is finally over, the Kix patch is completed!
#star wars#the clone wars#clone wars#star wars the clone wars#tcw#clone trooper#clones#embroidery#handembroidery#501st#501st battalion#patches#clone trooper kix#clone medic kix#kix#passtime#handmade#handmadepatch#embroideryproject#embroiderypatches#clone troopers#shadowwing projects
23 notes
·
View notes
Text

Tearaway Embroidery Paper by Associate Nonwoven is an essential tool for every embroidery enthusiast. This unique product offers exceptional stability and support during the embroidery process. When you're working on intricate designs, Tearaway Embroidery Paper by Associate Nonwoven ensures your fabric remains taut and your stitches stay precise.
#TearawayEmbroideryPaper#AssociateNonwoven#EmbroideryEssentials#CraftingSupplies#NeedleworkTools#EmbroiderySupport#CraftingMadeEasy#EmbroideryStabilizer#SewingTools#CraftingInnovation#EmbroideryProjects#FabricCrafting#SewingEssentials
0 notes
Text

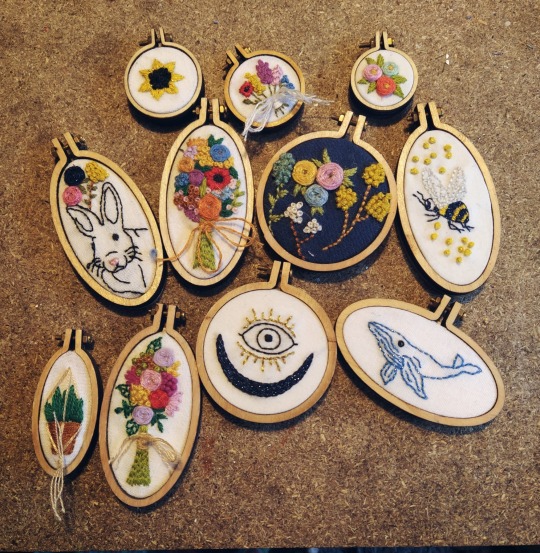
Une partie de toute mes broderies.
Évidemment, si vous êtes intéressé elles sont toutes à vendre. Venez en DM je ne mange pas.✨
24 notes
·
View notes
Photo

"Cætera desunt" ♡ ♤ ♡ #albertdemath #irréalisme #projetdebroderie #embroideryprojects #curiosité #curiosity #sketching #heart #nature #coeur #latin #locutionlatine #printemps #spring #vie #life #reflexion #réflexion https://www.instagram.com/p/BsKiaI5lD43/?utm_source=ig_tumblr_share&igshid=1917abdcjak2c
#albertdemath#irréalisme#projetdebroderie#embroideryprojects#curiosité#curiosity#sketching#heart#nature#coeur#latin#locutionlatine#printemps#spring#vie#life#reflexion#réflexion
1 note
·
View note
Text
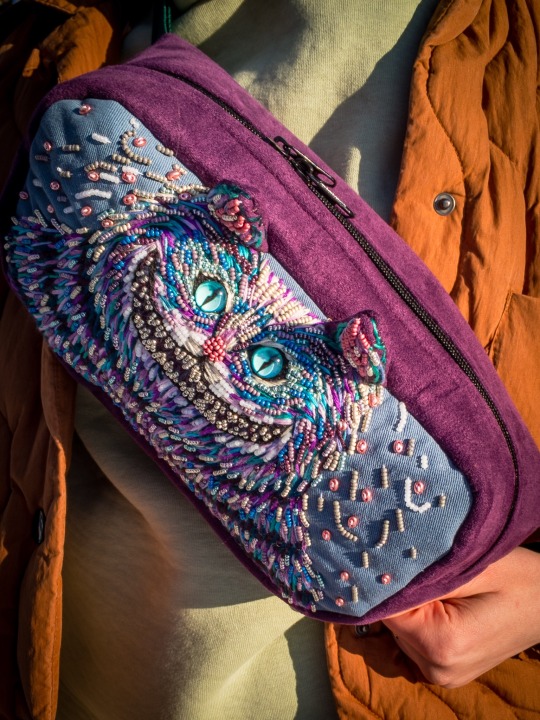
Cheshire Cat
#cheshire#alice in wonderland#embroidery#embroideryart#embroiderydesign#embroideryproject#illustration
24 notes
·
View notes