#Emulsion Transfers
Text

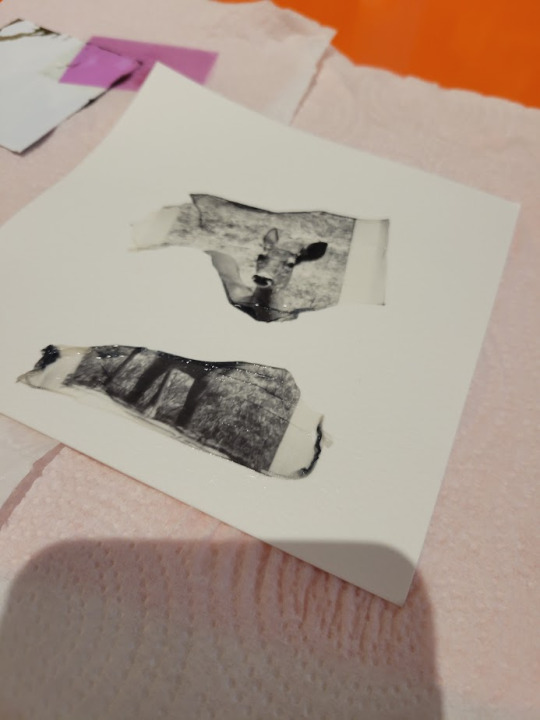
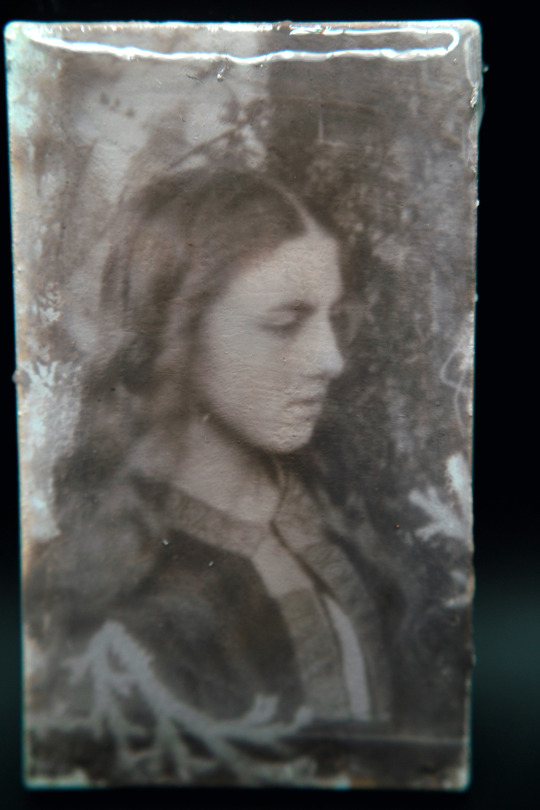
Green in Judgement, pt.21
Emulsion Lift on Arches Cover
6”x6.5”
2023
Summer Sketches
#arron foster#artists on tumblr#kent ohio#ohioartist#art#alternative photography#contemporary art#analog photography#polaroid#polaroid transfer#emulsion lift#landscape photography#alternativeprocessphotography
10 notes
·
View notes
Text
#silicone emulsion manufacturers in Delhi#silicone glue heat transfer in Delhi#Silicone Heat Transfer in Delhi
0 notes
Text

Elaine Spatz-Rabinowitz. Tilted Horizon, 2022.
oil emulsion on transferred photo emulsion on coal hydrocal plaster
7 notes
·
View notes
Note
I very much appreciate your insightful answers to my photography questions. I hadn’t fully considered the entire process of making a picture as an act of “Gesamtkunstwerk”.
For me, I’ve come to enjoy how film prolongs photographic activity, and offers artists time to critically reflect on their work.
I’ve been worried about the cogency behind my use of the gelatin silver process when many photographers who began their artistic career with analog have switched to digital for a variety of reasons, the ability to recreate the aesthetic of film via computer software among them.
Here's my question to you now: Does the process make you happy?
As an aside, the expression of photographic process as itself being considered the artform is hardly new.
You have the classic second exposure, where instead of taking a photo and advancing a picture, you take a second photo on the same frame with a higher contrast

There are emulsions available that can render literally any surface photosensitive, and have been used for some really impressive prints.
The act of using large format polaroid for image transfers have been used for quite a long time. Old polaroids used to be usable in any film camera, with a packet of chemicals behind the emulsion able to be burst and spread to develop the photo in front of you. One could peel off the developing layer before the emulsion has set and can transfer it to any porous surface (like textured papers), leaving behind an imprint of the developer sheet itself.
One can also immerse a freshly developed polaroid photo in boiling water and lift the emulsion from the photo paper entirely and transfer it to paper as well.

some info if you'd like to learn more about emulsion art
looking past that, there are other ways the mediums behind film photography have been used for the years for art.
Early on, you have the rayograph, in which you take the film out of the equation entirely, place objects directly on the photo paper and shine light on it.

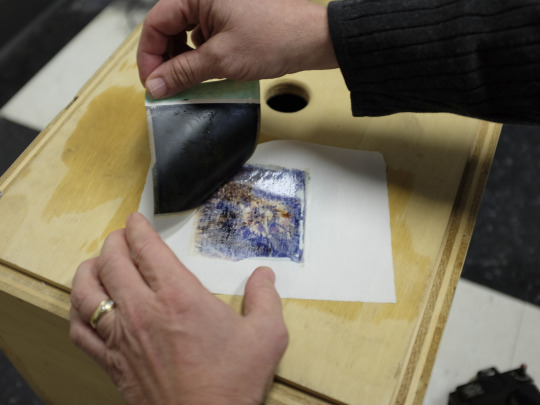
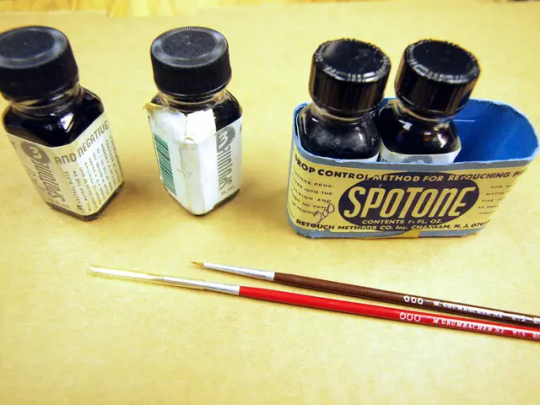
Then you have the art of touching up photos using spotone, a compound that you can dab directly onto a photo to eliminate dust and scratches. Using it however can be extended into wild forms of expression, quite literally painting changes into the photo paper itself
Going even further back you also have color toning, in which one uses dilutes translucent oil paints to paint directly atop a photograph to colorize an image. This is actually what inspired overlay layer styles in photoshop

Even setting that aside, inside the darkroom the way you handle the film can produce dramatic and jarring results that can be breathtaking
Mastering each of these parts of film is really where the true art of film photography reveals itself. The unknown middle ground where magic happens behind the darkroom door.
I can't even remember the name of it but there's an entire art movement surrounding the act of shining light on prints that are still sitting in the developer. If timed well, it can give the print's subject a metallic sheen where the midtones melt into black where it should be white.
Anyways. I'd say thats where the magic of film photography still exists. One can do things in the darkroom that software even today can only kind of form a facsimile of using brushes and layer styles and exposure settings. So I'd say yes, absolutely, hold onto the medium, don't be afraid to experiment and get messy, and develop your own unique style. Here there be dragons hiding within the emulsion, waiting to blur the boundary between a photograph and artistic expression.
Good luck.
4 notes
·
View notes
Text
Orange Pound Cake
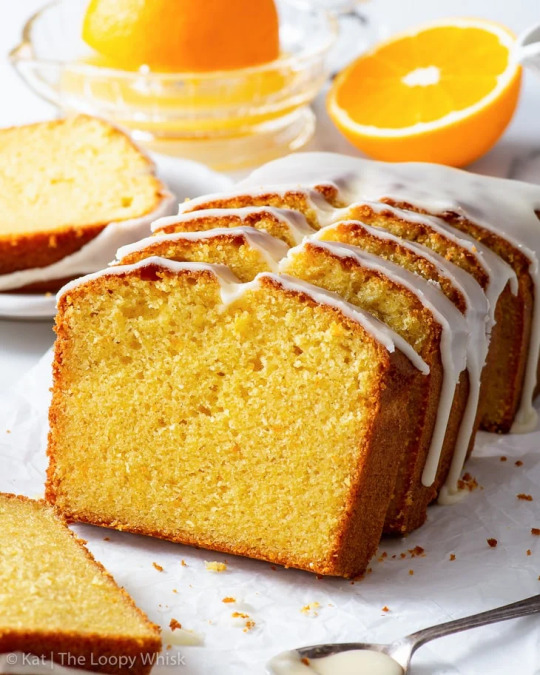
This recipe is an edited recipe. Original recipe by The Loopy Whisk. Find it here.
Yields: 1 pound cake
Rating: ⭐️⭐️⭐️⭐️⭐️ (42)
Time: 45 mins for prep, 1 hr for baking
This incredible orange pound cake will blow you away with its intense orange flavour and moist, soft, melt-in-the-mouth texture. It uses both plenty of orange zest and ¾ cup of orange juice – so there’s really no doubt that orange is the star of the show here. It’s also super easy to make.
Ingredients:
200g (1 cup) granulated sugar
Zest of 3 oranges
170g (1 ½ sticks) unsalted butter, softened
4 eggs
1 tsp vanilla extract
240g (2 cups) all-purpose flour
65g (⅔ cup) almond flour
3 tsp baking powder
¼ tsp salt
180g (¾ cup) orange juice, freshly squeezed
Instructions:
Adjust the oven rack to the middle position, preheat the oven to 350ºF (180ºC) and line a 2lb/900g loaf tin with parchment/baking paper.
Tip: I used a loaf tin with the following dimensions: 8 ½ inches/21 cm long, 4 ½ inches/11 cm wide and 3 inches/7 cm high.
Add the sugar and orange zest to a bowl and use your fingertips to rub the zest into the sugar. This helps to release more essential oils from the zest.
For the following steps, I recommend using either a stand mixer fitted with the paddle attachment or a hand mixer fitted with the double beaters. You could also do it by hand, using a large balloon whisk, but you might not get the butter and sugar as fluffy as you would using a mixer.
Cream the butter and sugar (with the added orange zest) together until pale and fluffy.
Add the eggs, one at a time, mixing well after each addition, until well combined.
Tip: It's very important that your eggs are at room temperature and that you add them one at a time. This way, you'll maintain the emulsion of the butter as much as possible. If you forgot to take your eggs out of the fridge, place them in warm water for 5-10 minutes before using them.
Add the vanilla and mix until combined.
In a separate bowl, sift together the all-purpose flour, almond flour, baking powder, and salt.
Beginning and ending with the dry ingredients, alternately add the dry ingredients (in three batches) and the orange juice (in two batches) to the butter-sugar mixture, whisking well after each addition, until you get a fairly smooth cake batter with no flour clumps.
Tip: This alternating way of adding dry and wet ingredients helps to maintain the emulsion of the butter in the cake batter as much as possible. When alternating dry and wet ingredients, make sure to end with the dry.
Even with this method of adding the ingredients, your final batter might still look slightly split or curdled due to the large amount of acidic orange juice that you've added. Don't worry if that happens – you will still get a wonderfully soft, melt-in-the-mouth cake crumb in the end.
Transfer the cake batter into the prepared loaf tin, smooth out the top, and bake in the pre-heated oven at 350ºF (180ºC) for about 1 hour - 1 hour 5 minutes or until risen, golden brown on top and an inserted toothpick comes out clean. The loaf should have a large crack running along the center.
Tip: If the cake starts browning too quickly or too much, cover it with aluminum foil (shiny side up) and continue baking until done.
Allow to cool in the loaf tin for about 10 minutes, then transfer the cake out of the tin and onto a wire cooling to cool completely.
3 notes
·
View notes
Text
I worked a couple more days after my post last week. The first day, I started off the day by adding more books to the book inventory system I made. Through the process, I have learned a lot more about ISBNs than I ever expected to. I have also learned that not every book's information is complete, or even correct, in Google's books database, so we will definitely have some work ahead making sure everything is correct. However, it's provided an excellent start and saved us having to enter a ton of data manually.
Then, I used the scanner I set up last week to scan a zine my partner Cam made. I still need to work on cleaning up the scans to reprint it, but it's been great to work with professional-grade equipment rather than a basic home scanner. The level of quality I was able to get is honestly kind of absurd.
Later that night, we had our monthly collage night, but we also did a Polaroid transfer demo. The person demonstrating the process used a Polaroid of Cam and I that I printed from my phone using the Polaroid Lab.
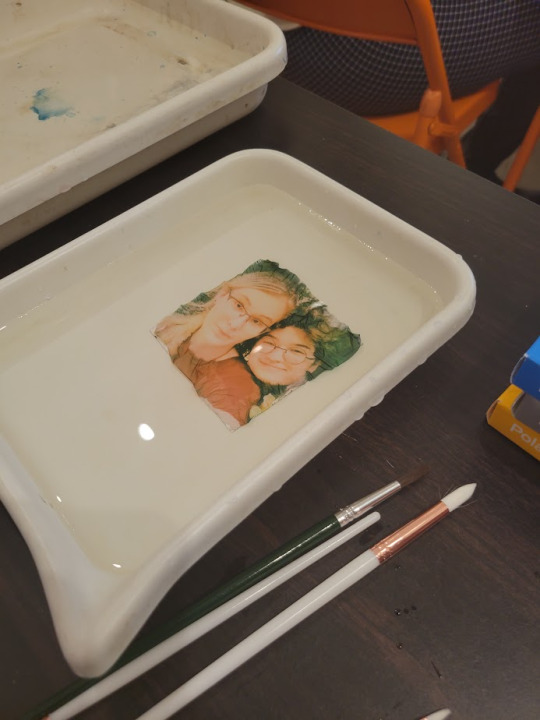
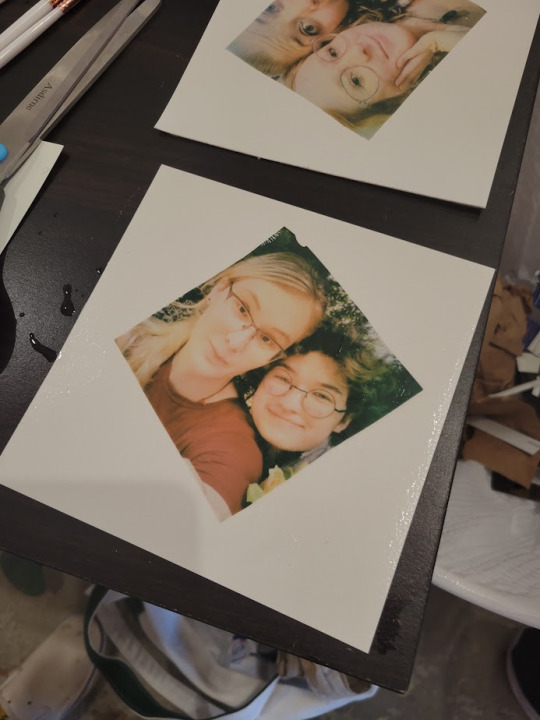
Basically, you remove the protective plastic top, soak the Polaroid in hot water until the emulsion detaches from the back, then transfer that into cool water and carefully spread it out over a sheet of paper. I was shocked by how simple the process was in concept...

... and less shocked by how difficult it was in practice. Above is my one attempt, and below is Cam's two attempts. The emulsion layer is easy to damage and hard to get to stay in place. The most frustrating part is when one side would be in place but would then get messed up trying to smooth out the rest of the image. Black and white is even more frustrating, because it is harder to peel off the protective layer and the backing tends to flake instead of come off in one piece. I'm definitely going to try this process again and see what I can make with it, though! The event ended up running later than we planned because everyone was so engaged with what they were working on.
The next day was pretty slow, and I had to leave early for an appointment. However, I did learn to add products to our online Squarespace store. I added some books I had unpacked and inventoried the previous day, grabbing images and descriptions from the publisher and making sure to categorize them properly on our site.
Today so far has been more book inventorying, but we are approaching the end of that process! Once that's done, we will be able to import the data to our payment system to speed up checkout and make sure inventory levels of books are properly tracked.
I've only got a couple more days this week before I'm out of town next week to visit Cam's family. I'm hoping to finish the inventory before I leave.
2 notes
·
View notes
Text

Hot Cross Buns
"One a penny, two a penny, hot cross-buns"
Hot cross buns are a centuries' old tradition from England. There are many different recipes, but all forms feature a fruit laden roll with a cross on top. The most authentic versions have the cross baked into the bun. It should not be frosting. The buns described here are my version of Paul Hollywood's recipe.
The dough is very simple. The ingredients are all dumped into the stand mixer equipped with the dough hook. You start with 500 grams of flour, two tablespoons of sugar, a tablespoon of yeast and a teaspoon of salt. One egg is whisked with 100 grams of milk and 140 grams of water. This mixture is then added to the dry ingredients with the mixer running. Once things are well combined two tablespoons of softened butter are added. The dough is kneaded for about eight minutes then transferred to a cover bowl for a one hour rise.
While the dough is rising the filling is prepared. One apple is pealed and diced. (I used a honey crisp.) A half cup of golden raisins are added along with third of a cup of candied orange peel and the zest of two oranges.
After the hour rise the dough is smashed down and the filling is kneaded into the dough. This is pretty messy and takes a bit of work. It gets easier as you go as the juice from the apples lightens up the dough. Once you are finished the dough goes back into the bowl for another hour rise.
Finally you get to make the buns. You should have enough dough for a dozen good sized buns. Use your trusty triple beam to portion the dough into twelve 90 gram portions. Roll each portion into a ball. Try to poke any protruding fruit chunks into the ball. Place the balls in a 3 x 4 pattern on a parchment covered baking sheet leaving about an inch gap between them. Cover everything loosely with plastic wrap and give the buns a hour and a half rise.
The next step before the oven is adding the cross. Take 150 grams of flour and add enough water (perhaps 130 grams) to make a soft paste. Transfer this to a pastry bag and pipe a cross onto the top of each bun. Bake the rolls for 18 minutes in a 400 degree oven.
While the buns are in the oven prepare a simple 1:1 glaze of 100 grams each of sugar and water. I flavored the glaze with a teaspoon of orange emulsion, but you could use orange of lemon zest instead.
Once the buns are out of the oven immediately use your paint brush and give them at least two coats of the glaze. Transfer the buns to a wire rack for cooling.
The buns are best eaten warm. Either immediately, which is truly divine, or later after a zap in the microwave. They are a lot of work, but they are worth it!
2 notes
·
View notes
Photo

Collage, cyanotype, image transfer, liquid emulsion, paint, Polaroid, silver print, altered books and a hat. This grouping interrupts a line of my larger photographs and mixed media pieces here at the South Shore Art Center in Cohasset MA. I am exhibiting with fellow artists @jiranekmosaics and @andreawilliams.365. Join us tonight (march 2) for our opening reception at @ssartcenter 6-8pm. There will be wine and snacks by @thefreshfeast so come by and enjoy! (at South Shore Art Center) https://www.instagram.com/p/CpSd3y3OrMv/?igshid=NGJjMDIxMWI=
2 notes
·
View notes
Text

Photo and emulsion transfer by Steve Double
4 notes
·
View notes
Photo
என் பெயர் Ryo
VanDyke Brown print made on an old photographic enlarger directly from an analog film (35mm negative film) without using a conventional contact printer and digital negative processing
Kate Dore (1862)
----
Printed on a plaster plate (matchbox size) / exposed for 3 min (after development, the surface was coated with UV resin)
Sensitizer: VanDyke Brown print solution / The photosensitizer was made into a viscous emulsion (allows the sensitizer to be uniformly dispersed) by adding professional white medium and applied to the plaster plate with a brush.
----
Fixing agent: Citric acid solution & sodium thiosulfate solution
Toning: none
Enlarger: Lucky Attache-35 (EL-Nikkor 1:2.8 f=50mm)
Film carrier: 35mm carrier
Negative film: 35mm (135) film (Fuji Acros 100) transferred from a digital image (taken from an antique collotype postcard) with a film recorder (Polaroid Digital Palette HR 6000)
Light source: High power (50w) UV LED unit (SMD=surface mounted LED modules)
New group was created. If you like, please join.
[www.flickr.com/groups/cyanotype_wenlarger]
6 notes
·
View notes
Text

Green in Judgement, pt.25
Emulsion Lift on Arches Cover
6”x6.5”
2023
Summer sketches
#arron foster#artists on tumblr#kent ohio#ohioartist#art#alternative photography#contemporary art#analog photography#polaroid#polaroid transfer#landscape photography#alternativeprocessphotography#analog#emulsion lift
3 notes
·
View notes
Text

Are you looking for products relating to one such as mould silicone heat transfer? Do you require silicone related products in the country
#Silicone Heat Transfer#Mould Silicone Heat Transfer#Silicone Glue Heat Transfer#Silicone Emulsion Manufacturers in India
0 notes
Text


Riso printing research - Sheahan showed me a few books for ideas and to help me understand the process more!
The price is printing is cheap, especially when printing bulk. I’ve decided to go for a5 prints
The image is transferred to a silk screen (much like emulsion printing) and the speed and density alters the colour and the transparency
The range of greyscale is important, to avoid pop art heavy contrast look
Only goes to a3, can fold in half for larger scale works
Ink needs at least a days drying time
Print out images of each layer
Go for an off white and matte paper
Recommendations for inspiration:
- Text box (website)
-Jonty Valentine (a floral gesture)
- Stuart Geddes
- Luke Woods (red on red)
2 notes
·
View notes
Text

Polaroid emulsion transfer
#lensblr#photographers on tumblr#original photographers#analog photography#film#photography#film photographers#photooftheday#polaroid#portrait photography
1 note
·
View note
Text
Unveiling the Vibrant World of Screen Printing in London
Nestled within the bustling streets of London lies a vibrant and dynamic world of screen printing, where creativity knows no bounds and innovation thrives. From small independent studios to larger workshops, the art of screen printing has found its home in the heart of this cosmopolitan city, attracting artists, designers, and enthusiasts alike. In this blog post, we'll delve into the rich tapestry of screen printing in London, exploring its history, techniques, and the diverse community that breathes life into this timeless craft.
A Rich History
Screen printing, also known as silkscreen or serigraphy, traces its origins back to ancient China, where stencils were used to transfer designs onto fabric. Over the centuries, the technique evolved and spread to other parts of the world, eventually becoming popularised in the West during the 20th century. In London, screen printing found its niche within the burgeoning arts scene of the 1960s and 70s, with iconic artists such as Andy Warhol embracing the medium as a means of artistic expression.
Techniques and Processes
At its core, screen printing involves transferring ink through a mesh screen onto a substrate, such as paper, fabric, or even wood. The process begins with the creation of a stencil, either by hand or digitally, which is then attached to a Silkscreen Printers near me coated with photosensitive emulsion. When exposed to light, the emulsion hardens, creating a negative of the desired design. Ink is then applied to the screen and forced through the mesh using a squeegee, resulting in a crisp and vibrant print.
Exploring Creativity
What sets screen printing apart is its versatility and adaptability to various artistic styles and concepts. From bold graphic prints to intricate illustrations, the possibilities are endless. In London, artists and designers harness the power of screen printing to breathe life into their visions, whether it's a limited edition art print, a striking gig poster, or a bespoke piece of apparel. The process itself encourages experimentation, with artists often pushing the boundaries of traditional techniques to create truly unique and innovative works.
Community and Collaboration
Central to the thriving screen printing scene in London is the sense of community and collaboration that permeates throughout. Studios and workshops serve as creative hubs where artists come together to share ideas, techniques, and resources. From beginners looking to learn the basics to seasoned professionals seeking inspiration, there's a sense of camaraderie and support that fuels the passion for the craft. Collaborative projects and exhibitions further foster connections within the community, showcasing the diverse talent that calls London home.
Looking to the Future
As technology continues to evolve, so too does the world of screen printing. Advancements in digital printing have opened up new possibilities, allowing artists to seamlessly integrate traditional and modern techniques. However, the allure of screen printing lies not only in its technical aspects but also in its tactile and hands-on nature. In an age of mass production and digital replication, there's something inherently special about the imperfections and character that come with a hand-printed piece.
In conclusion, the world of Screen Printing in London is a vibrant tapestry of creativity, innovation, and community. From its rich history to its modern-day resurgence, this timeless craft continues to captivate and inspire artists and enthusiasts alike. As we look to the future, one thing remains certain – the art of screen printing will continue to thrive, providing a canvas for imagination and expression in the heart of the city.

1 note
·
View note
Text
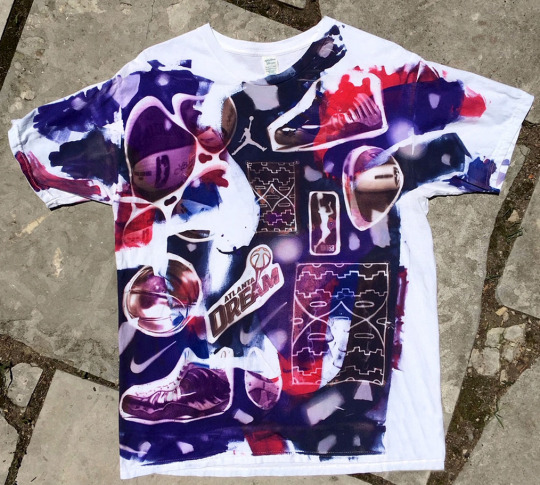
Mastering the Art of T-Shirt Screen Printing
Screen printing, also known as silk screening, is a versatile and popular technique for customising t-shirts. This method allows for the creation of vibrant, durable designs that can withstand multiple washes. Whether you're a hobbyist or an aspiring entrepreneur, mastering the art of t-shirt screen printing can open up a world of creative possibilities. This guide will walk you through the essentials of screen printing, from the materials you need to the step-by-step process.
The Basics of Screen Printing
At its core, screen printing involves creating a stencil (known as a screen) and using it to apply layers of ink on the printing surface, in this case, a t-shirt. The process can be broken down into several key stages:
Design Creation: The first step in Nottingham Print Shop is creating your design. This can be done using graphic design software like Adobe Illustrator or even hand-drawn if you're aiming for a more organic look. The design is then transferred to a transparent film, which will be used to create the stencil.
Screen Preparation: A screen is essentially a fine mesh stretched over a frame. The mesh is coated with a light-sensitive emulsion, which hardens when exposed to light. Once the emulsion is dry, the transparent film with your design is placed on the screen and exposed to UV light. The areas of the screen blocked by the design remain soft and are washed away, leaving a stencil of your design on the screen.
Setting Up the Screen: After the screen has been prepared and dried, it is placed on a screen printing press. The t-shirt is then laid flat on the printing surface beneath the screen.
Printing: Ink is applied to the screen and spread evenly across the stencil using a squeegee. The ink passes through the open areas of the stencil and onto the t-shirt, creating the design. For multi-coloured designs, this process is repeated with different screens for each colour.
Curing: Once the design is printed, the t-shirt needs to be cured to set the ink. This is usually done using a heat press or a conveyor dryer. Proper curing ensures that the design is durable and can withstand washing and wearing.
Materials Needed
To get started with t-shirt screen printing, you'll need the following materials:
Screens and Frames: These come in various sizes and mesh counts, which affect the level of detail and the thickness of the ink layer.
Emulsion and Sensitiser: Used to coat the screen and create the stencil.
Inks: Specially formulated for screen printing, available in a wide range of colours and finishes.
Squeegees: Used to spread the ink across the screen.
Exposure Unit: To expose the screen to UV light and harden the emulsion.
Heat Press or Conveyor Dryer: For curing the printed designs.
Tips for Successful Screen Printing
Practice Good Screen Care: Properly cleaning and maintaining your screens will extend their lifespan and improve print quality. Make sure to thoroughly wash out all ink and emulsion after each use.
Choose the Right Mesh Count: The mesh count of your screen affects the detail of your print. Higher mesh counts are better for fine details, while lower mesh counts are suitable for bold, heavy ink applications.
Test Prints: Always do test prints on scrap fabric before printing on your final t-shirts. This allows you to check the alignment, ink consistency, and overall design.
Work in a Clean Environment: Dust and debris can ruin your prints. Ensure your workspace is clean and free from contaminants.
Invest in Quality Inks: High-quality inks not only provide better print results but also enhance the durability of your designs.
Conclusion
Mastering the art of T Shirt Screen Printing requires practice, patience, and a keen eye for detail. By understanding the basics and investing in the right materials, you can create stunning, custom t-shirts that stand out. Whether you're printing for fun or setting up a business, the skills you develop in screen printing will be invaluable. Happy printing!
Read Also: Guide to UK T-Shirt Printing Services

0 notes
Last Seen Blogs

e-atombuzzin
found yourself back here eh?

legilimancia-blog
* /⠀𝕝𝕖𝕘𝕖𝕣𝕖𝕞𝕖𝕟𝕤

really-burnt-toast
BURNT

sphanrit-blog
wandering

whybe123
Hey Tracer, why do you walk like that