#FFXIV beginner guide
Explore tagged Tumblr posts
Visit Tumblr Blog
Explore Tumblr blogs with no restrictions, modern design and the best experience.
Last Seen Tumblr Blogs


Fun Fact
In 2020, Tumblr had 29.4 million users in the US.
Text
A Newbie Guide to Healing
HALO~
I make this guide in the hopes that it will make new players less scared of healing, or at the very least, more mentally prepared for it. Also because the in game tutorial makes me do this (ಠ ∩ಠ)
SO! Suggestions encouraged, just remember this is meant to be a general beginners guide, so I won't be including anything specific to a single dungeon/raid/trial.
Everything under the cut!
Healing is understandably the job the player base finds the most intimidating. The Tank is sturdy, and the DPS nimble, but they depend on you to keep them alive, as none of them can compete with the sheer healing and resurrection powers you have! And that can be a lot of pressure, but we can break this down so its slightly less pressure!
Healing in its most basic form is all about multitasking and prioritizing your moves. Think of it like playing Invaders, you have to make sure you are taking out the closest threats before you can worry about the next - get rid of the first row, then the next row, and so on. In this case the threat is your party members health bars depleting XD
How to Heal
Know Your Skills
Let's start with getting familiar with your skills! The Healer classes all have pretty unique styles to each other, so I advise you READ YOUR TOOL TIPS. For the most part you will have two types of healing spells:
Regular Heal-this heals the player/party for a certain amount of points. Some will heal a little bit, some heal a good amount, and a couple will heal for a lot/all the targets HP. These come in both single target and Area of Effect [AOE] form.
Regenerating Heal-also known as regen. These are spells that initially heal a small amount of points, and then heal a small amount over time, for a few seconds or so. These also come in single target and AOE forms.
The Healer classes also all have unique class specific Heal spells that will have certain effects, or play with class specific mechanics. That is for you to learn as you get more familiar with the classes, as most of them are beyond Lv50 and at that point we're no longer in newbie territory. SO, from this point on I will refer to a "regular heal" as simply a Heal, and a "regenerating heal" as a Regen.
All Healers also have a Role skill called Esuna, a status or debuff clearing heal. These are also called DOTs or Damage Over Time. Keep in mind this will not heal any status, only the ones with a progress bar over them will be cured. You also will not be able to choose which status is healed if your target has multiple. Esuna is a single target skill.
Two of the Healer jobs [SCH & SGE] also have shielding or barrier granting skills. These skills do not heal the party, but instead negate damage for a certain amount of points. This will appear as a yellow section of a player's HP bar capping before their health points. If they have full health it will roll over to an extra line. Any damage taken will first have to go through the barrier before it can get through to the health points. These also can be single target or AoE.
Finally, every Healer has the ability to revive a fallen player, usually referred to as a "res". This will be elaborated on later, but know that you all get this skill very early, and that this has a pretty long cast time normally.
Learning to Cast
Yes I said cast time! All Healing jobs are also casting types! Meaning that for a majority of your skills are spells, and most of them require you to stand still until the cast finishes for it to work! This requires you to position yourself out of danger, but still close enough to heal.
Most of the time a good place to be is a short distance off to the side of the Tank. That way you have a good view of everyone, while being out of harm's way. This applies to both groups of enemies and Bosses.
Single target spells will have a longer range than the AoE ones, and most AoE heals/regens/barriers treat you as the center of the circle. So if you're planning to do a party-wide skill, you need to position yourself so others are in your range!
There is also a helpful tactic called slide-casting, that can assist you if you find yourself in harm's way. There is perhaps a half-second before your spell is done casting, that you can move, but the spell will still finish! It will take some practice to get a feel for it.
You and Your Tank
As the Healer you are responsible for your parties health, but most of all you are also the Tanks partner. They are going to depend on you to keep them alive as they do their best to soak up all the damage to keep the party out of harm's way.
This means you must keep up with the Tank for every pull. If they are running, you are running. If they pull the group around a corner, you have to run around that corner to target them for healing. If they fall, you bring them back up!
But also, if they are taking on too much for you to handle or going too fast, tell them! Very few Tanks will warn or ask if big pulls are ok, because it tends to be assumed. If you're nervous, let them know you are new/new to healing a particular encounter. Most Tanks will ease up and at that point you can tell them if you're comfortable taking on more. They might lead the charge, but you're the one keeping them standing!
The Tank in turn is supposed to be keeping everyone safe, especially you. They do this by generating the most enmity. Enmity is the in game stat that tells the enemies who to attack first, also known as Aggro in most other games. All enemies are drawn to who is creating the most enmity and who is doing the most damage. All Tanks have a Stance that will help them generate enmity, if they have it on, it will look like a little buff by their name called either Iron Will, Defiance, Royal Guard, or Grit. If your Tank is pulling and you don't see this by their name, tell them!
This is important because you as the Healer are also capable of generating enmity, because big heals also tend to grab the enemies attention. Especially regen.
The Pull
OK, let's try to put all that together!
1. The Buddy System
If you are a SGE, immediately put Kardia on your Tank. If you are a SCH, summon your Carbuncle/Fairy if they're not out!
The Tank is the front liner so they will run in first so that they can grab the enemies attention. Always stay behind the Tank, not just because you need to be there to heal them, but because you don't want the enemies to spot you first! You are mighty of mending but squishy of body!
Generally you have two options on your approach: if you are some distance away from an enemy group you can safely throw a regen/barrier on to the Tank without drawing enemy attention. OR you can wait until the Tank have picked up the Boss/all the enemies before starting up any skills.
2. Stay Alive
This is going to sound counterintuitive to your Role, but remember: you are the only Healer! The party might be able to take a few mobs and be okay until you return, but if you die in the boss fight, the rest of the party is often soon to follow.
Make sure you are out of harm's way and your own health is fine, before you start throwing out heals to the others! You can't heal anyone if you are face-planting the earth.
3. Keep the Others Alive
Once you're in a good spot and your own HP bar is okay, it's time to watch everyone else's! When you're the Healer you're going to spend most of the time watching these bars, so it might be helpful to change the size in the HUD to make them bigger. This will make it easier to select the player you want for individual heals.
SCH, your Fairy will also move independently of your commands to heal and shield other players. This is normal, and your game is not tweaking out. It also will not interfere with any of your spells, so don't worry about it!
Generally the Tank will be your priority and the one taking all damage if things are going well. Depending on the amount they are taking, you can heal them every so often, give them a big heal, or if it looks like they are doing fine, a regen may suffice!
Something to watch here also: make sure your Tank is using their mitigations! These are skills the Tanks have to lessen the amount of damage they take, and the skills will have many different names, but all of them will appear as a buff by their name and say they reduce damage. This is important because you are not expected to, and in some cases straight up cannot, heal through all the damage the Tank will take. This is a balancing act between you and the Tank and you both have to contribute for it to work! If you notice the Tank is not using mitigations, politely ask if they are/know about them.
4. Attack Whenever Possible
Remember, you also have attacks! FF14 wants all the players to be actively damaging foes. In fact they generally want the healer to be 30% of the DPS! If your party looks good and the Tank is not in immediate danger, be attacking as much as you can!
SGE this is why you pick the Tank to put Kardion on, for every attack you make it gives the Tank a bit of healing!
Again you are a caster class so most of your attacks will also require you to stand still! When you are fighting groups of enemies, stick to AoE attacks, when you are fighting single targets, use single target spells.
When you are using AoE attacks, some of them will also treat you as the center of the circle, forcing you to get close to your enemies. DO NOT stand next to the Tank. The Tank is only directing damage, they cannot actually shield you with their body. Attacks will go through them and hit you. This is called Cleave. A fair strategy is to follow the lead of the DPS who is experienced, as they also prefer not to die lol
Your DOTs or Damage over Time skills are instant cast! Which can come in handy, as sometimes you won't have time for much else. These are best saved for Bosses, but if you have time to throw them on a random enemy, don't hesitate! For bosses you want to try and reapply DOTs as often as possible.
AST, your Tarot Cards and Divination are specifically for buffing the attack power of yourself and other players, so keep whipping those out!
And remember, the slide-casting trick works on attack spells too!
5. Pick Up the Fallen
Despite your best efforts, someone has died. Don't panic! Even if it's the Tank, don't panic. Now is the time we learn how to play god!
All Healers have the ability to res: Raise for WHM, Resurrection for SCH, Ascend for AST, and Egeiro for SGE. Despite the different names these spell all function exactly the same and they have the same casting time. Which is long.
So when you need to raise someone in a pinch, you want to use the Role skill Swiftcast first! This skill makes it so the next spell you cast is instantaneous. Your priority if everyone else is dead will always be Tank first. If there is a need to raise more, you can use the res move again, but you will have to do it for the full cast time, until you are able to use Swiftcast again. So it's best to wait for a moment where everything is back under control, and you are out of harm's way so you won't be interrupted.
Keep in mind also, when you res someone, they will revive in the last place you were standing when you cast that spell, not where their body is. Also, players first have to accept the res in order to be revived, meaning there may be a delay between when you cast it, and when they actually get up.
6. Tank Busters
Every so often a Boss will think "well shit, if I just take care of this one mother fucker, the rest will fall like leaves!" and try to take out your Tank in one attack. This is the Tank Buster and you need to keep your eye on the Tank when this is happening!
You can tell when this is happening when the Tank suddenly has both a circular marker around their body, and an arrow over their head pointed directly down at them. This is usually coupled with a progress bar indicating a strong move is charging up.
Generally these moves cannot be stopped, your Tank will take damage. So do your best to make sure your Tank's health is at max before the attack hits, and once the damage is done, assess the amount needed to be healed after. Sometimes it's going to be a lot, sometimes they might just need a regen.
Making Good Choices!
As the Healer, you will in the end have to prioritize some Roles over others depending on your situation. There isn't any favoritism involved in these lists, it's purely from a "how do I get us back on track the fastest" standpoint. If it helps, think of it like you're a battlefield medic, they have to make choices based on the conditions!
For Light Parties
This will be most Dungeons and the early Trials. For the majority of in game content this will be the set up you will work with: 1 Tank, 1 Healer, and 2 DPS.
Heal Priority- 1. Yourself 2. The Tank 3. DPS
Res Priority- 1. The Tank 2. The DPS
For Full Parties
These will be Normal Raids and most trials after ARR. 2 Tanks, 2 Healers, and 4 DPS.
Heal Priority- 1. Yourself 2. The Main Tank 3. Off Tank/DPS
Res Priority- 1. One of the Tanks 2. Other Healer 3. DPS- Summoner [can help res at Lv12] or Red Mage [can help res at Lv64] 4. Other Tank/All other DPS
For Alliance Raids
These are Alliance Raid only. You will be part of an 8 player team, and there will be two other 8 player teams on the field. When you pick Healer in Alliance Raid, keep in mind that your skills will typically only affect those in your immediate party. For instance if you use an AoE skill. You can help players from the other parties, but only if you specifically select them, and only with single target skills. Your Party-1 Tank, 2 Healers, and 5 DPS. The Alliance- 3 Tanks, 6 Healers, and 15 DPS.
Heal Priority- 1. Yourself 2. The Main Tank [may not be your Tank!] 3. Your Tank [if not the main tank] and DPS
Resurrection Priority- 1. One Tank 2. Your other Healer 3. Healers from other parties 4. Any Summoner [can help res at Lv12] or Red Mage [can help res at Lv64] 5. Other Tanks/Your other DPS 6. DPS from other parties
General Tips and Etiquette
You will never need Repose. At this time, this skill is useful maybe in a few story instances, and if you're out in the field alone. But in any general dungeon/trial/raid run it has no use.
You can use the Role skill Surecast to ensure your next spell will not be interrupted by attacks, and it will also prevent most knock-back effects!
If you are having trouble managing MP consumption, you can use the Role skill Lucid Dreaming to steadily regain MP for a short amount of time. Likewise you can also use it after just having been revived to get your MP back quickly so you can use your stronger spells faster! Because your MP will be extremely low when you regain control.
Speaking of that, WHM and AST, once you guys get level up high enough to learn Cure II and Benefic II, stop using the first versions of these skills. Yes, there is a neat little bonus action combo that they do, but I'm telling you that is inconsequential. It is simply more time and cost effective to use the stronger Heal move, then to keep pumping out a tiny heal for a chance at something bigger. If you're having trouble just use Lucid Dreaming, or Presence of Mind/Lightspeed to help you out, it will be quicker I promise!
Don't forget about Esuna! Yes you could just heal through the DOT on your Tank, but that takes more time and MP than just cleansing them! Especially if the DOT is going to last more than 5 seconds. However, if the target has more than 2 status effects on them and they have short timers, it may be more cost effective to cleanse one and then heal. If ALL the DOTs have long timers, heal between cleanses.
On that note, let's talk about Doom [the in game debuff]. Cleansing Doom is not optional, as it can kill a player that has full HP instantly. Doom is not so much a DOT as a countdown to player death. On top of that, the way you must cure Doom is not always the same. Most of the time you can cleanse Doom by healing a player up to full HP before the timer runs out. Sometimes it has a bar over it, which means you can use Esuna to clear it. And then there's the ones that are completely out of your control, because it's a boss specific mechanic that required the afflicted player to do something [there's only one of these in main game content]. So yes when it comes to Doom, pay attention and do your best :')
For the Healers the use of the Limit Break is not common, but when it's time, it is crucial. For main game content with a 4 player party you will never need it, but in the Trials and Raiding content this is a potential tool to save your team if you need it. Because for the Healers the Level 3 Limit Break [LB3] results in a full party 100% heal and res. Meaning if you are the last man standing in the raid you have the power to turn the whole thing around! Keep in mind: You will still have a cast time for this move, and this move has a limited range. Make sure you are safe when casting, and be close to the party members you intend to res.
If a player has died and you didn't have time to res them before all the enemies/boss are dead, whatever the reason may be, it is better for them to teleport and run back. This might seem rude, but it's because when you res someone, they don't come back at full strength! They have a minute long debuff called Weakness that lowers their attack by 25%. If you've already ressed them in that time frame, doing it a second time will make it Brink of Death and then their attack is lowered by 50%. Some players don't know this and will just lay there. Politely explain it to them. If they stay there, then they can stay there :)
Rescue is a Role skill that you need to be the most careful with in its use. Yes, a timely rescue from the jaws of death is great and you love to see it! But this is also a move that can easily be used to cause grief in the wrong hands. Unless the player in question is actively in danger and they are aware of it, they are more often than not going to be a little bit terse with being literally pulled away from whatever they were trying to accomplish. Especially if they were in the right place and they just got pulled into death. You must be 100% sure when you use this move, that you are moving someone out of danger when you do it.
DO NOT pull for the Tank. Remember you and the Tank are a team! That means you both have to be comfortable with a big pull. Because you might be an awesome healer, but if they're still not familiar with all their mitigations, or even not familiar with the encounter, then they might die anyways. If you're feeling good about it, you can simply tell the Tank that they can grab more enemies. If they're not, then please continue to move at the pace they set. If the Tank wants to make a big pull they will either ask, or most just do it and see if you're able to keep up with their stride.
On that note, DO NOT use Rescue to make the Tank move forward faster. Do not use it to pull the Tank into mobs. The only thing this will accomplish is make the Tank mad at you. Again, this is a partnership, be considerate of the Tank!
NOW GO! PROTEC YOUR FRANDS FROM DANGAR ;3
#Final Fantasy XIV#Final Fantasy 14#FFXIV#FF14#FF14 Guide#FF14 Healer#FF14 Healing#FF14 Beginners Guide
15 notes
·
View notes
Text
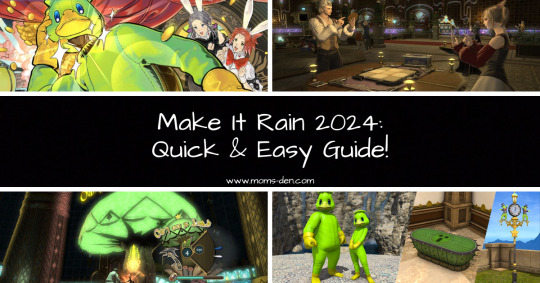
FFXIV Make IT RAIN CAMPAIGN 2024: QUICK & EASY GUIDE!
If you haven’t been visiting the Gold Saucer lately and you’d like to get some of those MGP sink loot, now is the time to come back, as the Make It Rain Campaign is live starting today. It’ll go on until Friday, May 31 at 7:59AM PDT, so you’ve got quite some time to take advantage of it! If you’d like to know how to start the event, what you can do during it and how to get the most MGP this year,…
View On WordPress
#ff14#ff14 beginners guide#FFXIV#ffxiv beginners guide#final fantasy 14#final fantasy xiv#Gaming#gold saucer#ivona nikolic#make it rain#make it rain 2024#mgp#mmorpg#moms den
2 notes
·
View notes
Text
Hi all! I managed to jinx myself by saying there wasn't a lot to add to the Compendium this week... and then I found a tonne of resources. I can't say I'm complaining about looking like a fool, though! 🪸
A lot of these resources were shamelessly sourced by xiv.sleepyshiba's masterlist! While I tend to endeavour to provide general / creative resources, their master list does contain a lot of discords / guides you can check out around raiding, combat guides, PVP etc. I might have missed. Send them a coffee if you want, for their kit is pretty comprehensive!
I have tried to include sources I can see have been actively maintained but I can't promise all are 100% accurate or up to date. If in doubt, send me a DM.
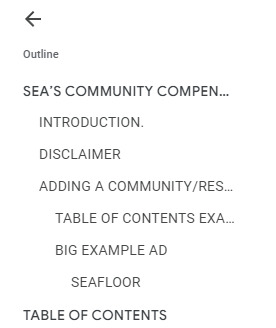
Additionally, due to the fact I am slowly increasing my collection, the Compendium has expanded its sections from four to five! We now have a dedicated lore section for anyone who wants to learn more about the game. 📖 I'm hoping this will encourage people to write and submit their lore compilations knowing that people will see them.
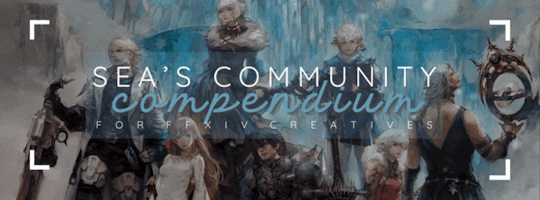
However, without further adieu, as of 05/11, the following resources have been added (in no particular order) to Sea's Community Compendium for XIV Creatives!
LARGE SCALE
Eorzea Collection — A one-stop shop for everything gear and glamour related! Browse through gear sets, fashion accessories or individual pieces of gear; view player-made glamorous for any job, race, etc; view chocobo sets and more!
A Master Beginners Guide to FFXIV — A comprehensive document of useful information for anyone looking to get into FFXIV. While accurate only up to Shadowbringers, it includes basic how-to's and general information relevant for people brand new to the game.
FFXIV Venues — A repository of various player-submitted venues open to the public and times of their events!
Aether Roleplay Hub — A discord focusing on roleplay and the roleplayers of the Aether data centre.
Tales From — Every expansion, the Final Fantasy XIV Dev Team releases a series of short stories about the various peoples’, tribes, factions and key characters called Tales From the ___.
Mirapri — Functionally similar to Eorzea Collection, this site accepts player-submitted glamorous for ideas and inspiration. Appears to be predominately used by the Japanese player base.
Akhmorning — A collection of XIV resources containing things one might find the miscellaneous section such as A Comfy Guide for Sprouts and Raiding Fundamentals; Bozja guides including Southern Front, Castrum Lacus Litore, Delubrum Reginae and more; PVP guides including, but not limited to Introduction to Frontlines and Beginners Guide to Feast; and Job guides.
Heavenswhere — Having trouble finding just where your treasure map is located? This tool will help you narrow down the search!
Fashion Reporter — Official Discord server of Kaiyoko and the Fashion Reporter discord bot. Also contains links to access the Fashion Report each week and the How to Make MGP guide.
FFXIV Clock — A tool to track the spawn timers of timed gathering nodes.
LORE
Ishgardian Forms of Address — A document that explores the honorifics, and forms of address used in the in-game setting of Ishgard and by Ishgardian characters using using in-game dialogue, quest text, levequest text and information from the second printing of the English-language lore book, Encyclopedia Eorzea. Maintained by @hasty-touch!
Final Fantasy XIV Lore: Ishgard — also written by @hasty-touch, this document contains lore relating to Ishgard and Coerthas.
Ascian Reference Pile — An up-to-date reference on FFXIV's Convocation of Fourteen, in appearance and lore. Maintained by Igeyorhm on Twitter.
Eorzea Time — The measurement and expression of time in Eorzea, like the real world, is governed by a fundamental set of rules. To understand them, users on Gamer Escape have put together a handy guide for people to follow.
FFXIV Meals Catalogue & Compendium — Have you ever wanted to know all foods currently contained in XIV? This document has a record of all consumable meal items obtained up to 5.4 and the ingredients used to make them. Maintained by vashiane on Twitter.
MISC
Detailed XIV World Map — Have you ever wondered where locations sit in relation to the entirety of Etheirys (and beyond)? This detailed world map provides accurate locals and information for you!
XIV SleepyShiba — Maintained by Udra Virias, this website is a repository of all their resources including, but not limited to; The Detailed XIV World Map, 6x. Paladin Resources, hotbar builders and BiS/gear trackers for raiding, and their own XIV Resources Masterlist!
FFXIV — Hairstyles — Having trouble remembering what Modern Aesthetic style is which? Struggling to find that one hairstyle you saw in game but you don’t know where it’s from? This guide has you covered!
Obscura's consolidation of Helpful links for Roleplay — A collection of tips, tricks and guides to assist people looking into getting into FFXIV RP — or just roleplay in general! Contained within are resources around character creation, relationships, roleplay tips, how to write villains and more.
FFXIV Reference Sheets by Ren — Maintained by @renofmanyalts, these reference sheets currently contain a sortable Roegadyn dictionary and height chart for all the race/clan combinations currently in game.
FFXIV Armoury Collection — exactly what it says on the tin — a collection of every single gear set currently available in FFXIV sorted by things such as patches, class, jobs and raids.
How to Craft like a Machine — This document covers the crafting formulae and other related aspects of crafting in Final Fantasy XIV.
MakePlace — A stand alone tool to preview, edit and share housing layouts.
FFXIV Chocobo Racing — a blog that’s designed to be a comprehensive guide to the Chocobo Racing minigame.
Lord of Verminion — A comprehensive website for everything to do with the Gold Saucer minigame Lord of Verminion.
The Easy Win Lord of Verminion Guide — An easy way to maximise your MGP using the Lord of Verminion.
FFXIV Housing Grade by Plot — A rubric to assist people in understanding the pricing of FFXIV houses.
Housing NPC Images — Not sure what housing NPC looks like? This guide may be able to help you!
FFXIV Fishing Guides — A Final Fantasy XIV Fisher creating guides on how to fish all the fish of The Source and The First, in quick, goldfish sized videos. Making FFXIV fishing easier to do and understand.
Pigeon's Guide to XIV Screenshots — A guide created by @ahollowgrave detailing their screenshot process for FFXIV.
REMOVALS
The following communities have been removed from the Compendium as their sites/tumblrs no longer exist. If new links exist, please get in touch with me and I will re-add them.
The Glitter Hall
Story Hall
CHANGELOG
The Compendium has been updated for compatibility with Google Doc's built-in document outline! This should hopefully assist with accessibility issues. ✨ You can find it by clicking the button below on the left-hand side of the document. No one had made a comment about this, I'm just pedantic.

I have also added definition around the Lore category as well as some general sentence structure and definition in other sections.
Have I missed something? Probably, this update was huge. I'm going to take a break DFKGJHSDF.
Want to submit? You can either fill out the google form here, send me an ask with the relevant information contained on the Compendium, or join my Discord at SEAFLOOR (21+ only)!
#final fantasy xiv#ffxiv#ffxiv community#。・゚゚・ — sea's community compendium#。・゚゚・ — sea speaks#holy shit i'm going to take a break now#DFKGJHSDF#i'm sure i've missed something but do i want to stare at this any longer#no#i've been at it for hours
81 notes
·
View notes
Text
How to make Tattoos/Skin Textures for Final Fantasy 14
Hi there! I made a video about this a long time ago, essentially it is still the same work flow even though the Textools UI has changed a little bit with the Dawntrail update. Please mind that the video is a little old, recorded with a free software and I personally have zero editing skills. From experience and from what other creators told me it helped them a lot so I would like to bring it to more people and share my wisdom. This is a "beginners guide" for now, I can and will expand on it if necessary. You're always welcome to ask me questions. Join my discord or send me a dm! Let's start with what we need to make a tattoo/skin texture:
- Textools - Final Fantasy 14 with subscribtion - Substance Painter - Any Photo editor (Photopea is a free Photoshop online clone) - Not required but it could help: my videos
Step 1
Open your fbx in Substance Painter by clicking "Open" then "New" or Ctrl + N, with the following settings: PBR Metallic Roughness (Starter Assets) Resolution 2048 You can find the Bibo+, Gen3 and TBSE .fbx file here!
Step 2
Import your assets by dragging and dropping them into the Asset Library, then set them to "Texture" and import into your preferred Asset Library Category.
Step 3
Drawing: You can draw directly onto the 3D model and on the UV/2D planes. For that create a paint layer, select your brush, set your color in "base color". Assets: You can drag and drop your assets onto the 3D model, then select "Base color". This will project the asset in 3D. You can change the projection properties on the right under your layer selection or by right clicking in either of the windows. You can also create a "Paint Layer" and drag and drop the asset into the "Base color" slot. This will replace the fill color with the asset. Please make sure to make linework have a transparent background before using your assets.
Step 4
Whenever you're done arranging your tattoos/textures, it is time to export. Export with the following settings: - Output template: Document channels + Normal + AO (With Alpha) - Size: 2048 is more than enough for skin textures in FF14!! 4096 is almost overkill but will result in better quality, if you're a Mare user, please don't blast others with a 4k tattoo/skin texture unless it's really necessary - Padding: Dilation + Transparent
Step 5
Export the Skin Diffuse Material from Textools by selecting Character then choose your Characters race and gender. Midlanders share their skin material with Miqote and Elezen.
Step 6
Open a photo editor of your choice, open the skin Diffuse png and your Substance Painter Export. Adjust the layers if needeed so your tattoo/skin texture is above the skin texture. Export as png.
Step 7
Replace the Skin Diffuse png with the one you've just created, save to FFXIV to apply your changes to the game files and then launch the game to check the results!
If you have any questions please don't hesitate to DM me here or on discord @arimaemae
#ffxiv tattoos#tutorial#guide#skin texture#tattoo guide#ffxiv tutorial#ffxiv#ffxiv oc#final fantasy xiv#ff14#final fantasy 14#texture
14 notes
·
View notes
Note
hello wow nerd reporting in. very excited that you're starting in WoD, it's my favorite old expansion. hunters are probably the most beginner-friendly class out there so good job there too. to make your life easier i would suggest getting CurseForge to download some addons. Adibags makes your inventory way more manageable, and Leatrix Plus offers a lot of quality of life things like auto-selling junk and some UI support. TomTom is useful for following guides since it's the coordinate system everyone expects you to use. Can I Mog It is nice for keeping track of armor appearances. those should get you started i would suggest a new toon for every xpac you want to level through, yeah. while you're diversifying, i would suggest getting one of each of the four armor classes so you have someone to collect appearances. your hunter already wears mail and your cool dranei pally wears plate, so that leaves a mage/priest/warlock to wear cloth and a druid/rogue/demon hunter to wear leather. wow is a dressup game <3 if you haven't figured out professions already and want to do so, an important thing to note is that you can Only have two professions per toon, where i think in FFXIV one character can do all of them. there are professions that are meant to pair well together. if you want to make your own armor for your hunter, i'd suggest Skinning/Leatherworking. skinning's also a high-value profession if you care any about gold but you don't have to worry about it. the professions that pair well together are Tailoring/Enchanting, Herbalism/Alchemy-Inscription, Mining/Blacksmithing-Jewelcrafting-Engineering. engineering gets you access to a bunch of cool toys. enchanting is nice because your materials come from melting down armor which means you get things from just regular questing. i actually prefer to double up on the gathering professions (skinning herbalism mining) but to each their own. i hope this helps and i'm sorry for busting down the wall to your inbox like koolaid man. i hope you have tons of fun!! last thing if you make a druid (which i highly recommend, they're blizzard's favorite child and get tons of cool features) i recommend making a worgen druid if only because worgen have by far the coolest starting zone. hope this helps bye
:(
40 notes
·
View notes
Note
hello, I just followed for your orctober stuff and scrolled through some of your blog and wanted to ask, what is guild wars 2?
OOOH BOY HERE I GO! ahem.
Guild Wars 2 is a high fantasy MMO, similar to maybe Final Fantasy Online. Guid Wars as a series is about as old as World of Warcraft, but has a much smaller fanbase; mostly because the company behind it, ArenaNet, seems to be allergic to advertisements (it's gotten better since the last two expansions).
These days, the core game is free, with only the expansions costing money. Well, some expansions, as they just throw in older expacs for free now. Even if you start with a free account, you can technically buy an upgrade by just... using ingame currency, which is a WILD concept to me.
Most notable features of the game are probably the character customization, free dyeing of armor, and a few thousand unique armor and weapon skins. Players often joke that the true endgame of GW2 is fashion (and they are RIGHT goddamnit). All five playable races are so ridiculously detailed in lore and design, it's incredible. Sylvari for example are not plain elves, they are full on plant constructs that grow from fruits on the mother tree. Asura are not just gnomes/goblins, they are a highly educated society of geniuses that would openly strive for world domination if it werent for their inherent bureaucratic tendencies.
The mounts in GW2 are among the best you will find anywhere, so much that World of Warcraft just copied some for their Dragonflight expansion.
Guild Wars 2 has a medium sized active player base, smaller than WoW or FFXIV, but they are an amazing community. We have veteran players, including me, who routinely patrol the starter maps to offer advice and maybe some healing to newbies (supported by the ingame mentor system). You might receive random mail from players gifting some cake. There's festivals, community parties, role playing, fashion contests, races and minigames.
If you are a seasoned MMO player, GW2 offers raids and the smaller strike system, which is being constantly expanded. Extreme MMO experts might find the game a bit flat, but that's only superficial. For beginners, I'd say the story is beatifully written. You can explore the open world, meeting players along the way (every map holds around 50-80 player at a time). You can choose any class and complete any content, including endgame. Any class, any race, (almost) any playstyle is viable, and nothing about your build is permanent, you can adjust your whole build on the fly.
Aside from the obvious MMO parts, GW2 also has structured PvP (5 vs 5 players) and the so called World vs World, which is a large scale week-long epic battle of three teams of around 50 players on each side (which btw is not as draining on the CPU as you'd think)
If you plan on giving it a try, I'd be more than happy to give you a more detailed overview of the game. This little chaotic hellhole of an MMO is very dear to my heart <3
This is by the way for ANYONE reading this: If any of you want to try the game, hit me up. DM me here on tumblr, or on discord (@ achromant). Even if you already play the game and are still new or just lost - ask me anything you want. I have close to 18k ingame hours.
#gw2#guild wars 2#ask achro#also i LOVE meeting new people ingame!#we even got furries#and elves#and gnomes#and ogres#and undead sassy lich overlords#and that one psycho pumpkin king dude#pumpkin dude and lich dude are husbands according to the fandom#also we got zombies#and plant zombies and crystal zombies and ice zombies#and dragons who are responsible for most of the zombie population to be honest#you can fight the personification of death#or kill a god
62 notes
·
View notes
Text
Hey there! I have written for OCs in various MMOs over the years, and never really gotten into fandom - only participating from afar - until now. Love and Deepspace has engaged me on an intellectual level... and on some other levels too... let's be honest. But when I'm not digging into Chinese culture or astrophysics, thanks to LaDS, I'm playing things like WoW or FFXIV. (Or other otome, like Ikemen Villains.) I'm an anime enjoyer, as well, if not as well seasoned in the genre as some. I'm not full on friends in LaDS yet, so I figured I'd toss my hunter number out, as well - 82002062245

Expect memes, fanfic, images, art, and thoughtful lore conjecture - as well as posts explaining/exploring the Chinese cultural references being made, when I come across such materials! As I collect useful lore information along the way, I'll try and compile the most relevant things I find on this post, so expect it to be a WIP for a long while! (Suggestions for useful guides/lore are welcome, as well.) Hidden Achievement Guides:
Official LaDS FB Group post (with a few, not all of them - but a useful explanation on how to get the 5% health wins)
A Reddit list (This is probably the most comprehensive list I've seen)
Nicknames That Trigger Voicelines (Reddit)
Masterlist of Moments posts triggered in Photo-booth (Reddit) - Certain specific combinations of clothing/background/pose will trigger a Moments post from your LI - here's ALL the known ones at present! (More posts = more affection!)
Lore Resources:
Angel's Corner - Angel runs a Youtube channel all about exploring LaDS lore, and the ways in which Chinese culture is interwoven into the story. I'll link the major videos from her channel that I recommend in particular, below - but I recommend going through various myths with her as she explores the lore, as well!
EVER holds all the strings in Love and Deepspace | let’s yap about it
Love and Deepspace & Mr Love Queen’s Choice: SAME UNIVERSE?! Let's yap about the connections - HIGHLY RECOMMEND, if you're a big lore nerd!!
MC Lore Deepdive (a lore spiral & yap sesh) - Highly recommended you watch the previously linked video above, first, then watch the one below.
Sylus’s Master Plan & MC’s Origin EXPLAINED | Death & Rebirth Breakdown - Recommended to watch the above video first.
Other LaDS Resources:
LaDS (Re)Translation Project - CN > EN Fan Translation Project Love and Deepspace. ( Having read their Sylus - Beyond Cloudfall - re-translation? I highly recommend this project for those who want more context! Many nuances are changed... sometimes seemingly for no reason.)
Cloudfall Myth's Chinese Cultural Context - This is tied to the Sylus re-translation project for Cloudfall; the cultural context sheds a LOT of light on everything in this myth - even that bit about whether or not they were dreaming!
Stellactrum Theorizing - A Reddit discussion breaking down everyone's colors, and debating their meanings. Nothing official, but it's excellent food for thought.
Abyssal Chaos:
Final Farewell (All LIs) - Reddit Compilation of how to obtain all Final Farewell Endings.
Finding Tobias (All LIs) - Reddit Compilation of how to obtain all Finding Tobias Endings
Combat Related Resources:
Which Protocore and Build to Prioritize? Here’s What To Do (YT)
Combat Guide, Weapon & Companion Combos, Tips & Tricks (YT)
Beginner's Guide to Combat (YT)
Ultimate Rewards Guide Without Spending $$ (30+ WAYS)
#love and deepspace#lads#lnds#love and deepspace guide#lads guide#lads guides#lads resources#lads lore#love and deepspace guides#otome#l&ds
6 notes
·
View notes
Note
*virtual hugs* I finally have internet so I can play ffxiv the free trial at least 😅 it's currently downloading on my playstation 4.. any advice for a new player/sprout?
Hi there! Hope you are doing well! ^-^
A/N: This might be a bit lengthy so I do apologize! I also don't want to frighten you, but I do want to say what I remember. And honestly I wish I had some of this advice when I was a sprout 5 or 6 years ago. I probably forgot a bunch of things, so if you want additional tips, you can always look it up online.
First and foremost, welcome to rhe world of FFXIV!
Go into the game with an open mind
Don't rush through the game, take your time and experience the story, characters and the world. There is much for you to explore!
Go at your own pace. This is your journey in Eorzea
If you want to get into the story and understand what's going on, I reccomend not skipping cutscenes
If you don't wish to be spoiled, avoid any sort of spoilers like the plague
It's okay to not know mechanics in the game, you are still learning and you will learn them eventually
Attune to the athrytes (Big crystal thingies in different areas as well as tiny crystals in the main cities)
If it's your first time, do your main story quests (It's a ! icon with fire around it) it will level you to make through the story!
Your class/job quests should take priority before MSQ (Main Story Quests) whenever they are available to you. They give you skills and armor
Speaking of job/class, if you don't think one works for you, switch until you find the one that you like the most
Hunting logs are great to do for experience, even if it may seem a bit tedius. If you can't find what you're looking for, there are help guides online for them
When you get to it, do the Hall of Novice beginner stuff - It will help you learn the start of your class and it will give you an armor set for your first dungeon!
Glamour is a big thing with ffxiv, but if you're just starting out, don't stress about it. You have lots of time later to pretty-ify your character later. Save up your gil (in game money)
But if you do want to wear pretty things right away, there's a quest you can get in Vesper Bay that you can do at level 15 "If I Had a Glamour" and "Color Your World" that will unlock glamours for you. Once you have an outfit you want to make a glamour, you can go to an inn and go to your glamour chest and make it so!
But most importantly, have fun! And it's okay to step away from the game from time to time. Eorzea will always be waiting for you when you return.
8 notes
·
View notes
Note
You can add another +1 for roping a ffxiv player into fallen london, I haven't played too much of it since I get lost on what to do pretty easily, but I do often reblog quotes/art now because of you

fallen london has A Lot going on at first. i actually stopped playing it shortly after i first started because i managed to get into an area i couldn't figure out how to get out of (polythreme). by this point i know how most stuff works (except the bone market) and this is largely due to my bestest friend in the world, the fallen london wiki, which has some great guides on it.
so if you want to get less lost I'd recommend checking out:
beginners guide - basic info on mechanics
making your name guide - the myk stories are what take you through the early parts of the game, help you level, and unlock other areas. just doing the stories labeled making your name is all that's needed but if you get lost and can't remember where you're at the guide can help you figure it out
masterlist of guides - the wiki is extremely excellent and there is a guide for just about everything (also you can look up any storylet on it)
the other thing that can really help is using plans, which is the little icon that looks like a bookmark that you'll see on story options. so if you don't or can't do something right away because you're missing resources or underleveled you can just bookmark it and it goes to your plans tab so you can remember it and easily check what it cost (i forget everything instantly so i rely heavily on this)
#you know how in the eden raids the wol is traumatized about the landslides from titan#that was me about polythreme for ages#i understand how it works now but I've given up on the bone market#the wiki went down for like an hour last night and i sat in a corner and rocked back and forth until it came back#that's a lie i was actually in matoyas relict but in my heart i was crying about it#mp#asks
9 notes
·
View notes
Text
FFXIV: Best Beginner Jobs
Best Jobs for Beginners in Final Fantasy XIV Final Fantasy XIV boasts a plethora of captivating jobs, but selecting the perfect starting point can be daunting for newcomers. This guide highlights some of the most beginner-friendly options, ensuring a smooth and enjoyable experience. Enhance your Final Fantasy XIV adventure by purchasing FFXIV Gils on iGV! Whether you’re upgrading gear,…
0 notes
Text
A Newbie Guide to Tanking
HALO~
I make this guide in the hopes that it helps out new players to Final Fantasy XIV, as the in game tutorial is um, bad. (-。-;
I also included a general etiquette guide, because when it comes to working with other players, a lot of these things you don't pick up unless someone tells it to you.
Suggestions welcome! However, remember that this is meant to be a general beginners guide, so I'm not likely going to add in anything that's specific to a single /dungeon/raid/boss and such.
Everything under the cut!
Basic Tanking and How it Works
Part 1: How to Pull
As the Tank it's your job to make everything in the room hate you the most! That way they punch your extremely durable face instead of everyone else's more squishy ones!
You do this by creating what the game calls "Enmity", aka the stat of creating enemy aggression, or "Aggro". There are three steps in which the Tank must do this.
PUT YOUR STANCE ON Your stance is the thing that makes the bad guys turn their heads and go "Oh! You're a mother fucker!". You will generate enmity just by having it on. This is called a different thing depending on your job: Defiance [WAR], Iron Will [PLD], Royal Guard [GNB], and Grit [DRK]. You click it once to put the stance on, click it again to turn the stance off [there are a few instances you may need it to be off, they will be explained later]. It's important to put this on because if it's not, no matter how much you attack, other players WILL take aggro and get hurt.
USE AN ENMITY GENERATING SKILL Unlike some other MMOs your mere presence does not make the enemies incensed enough to fully ignore your party members, you must encourage them to hate you and only you! You can do this in a couple ways. There is the Provoke skill, which has the longest range. All Tanks also have a ranged skill which works similarly to Provoke but slightly closer distance and slightly less enmity, Tomahawk [WAR], Shield Lob [PLD], Lightning Shot [GNB], and Unmend [DRK]. [While they are fun and look cool, none of the skills that rush the enemies actually generate enmity] Using one of these once is enough to piss off a group or a boss.
ALWAYS BE ATTACKING Enemies in this game are drawn to the player doing that are doing two things at once: generating the most enmity & doing the most damage. This is important to remember! Because even if you have your stance on and you use an enmity skill, if you are not also attacking with all your might, the enemies will think you are all talk and start attacking your DPS/Healers instead! If you are fighting a group of enemies [and that is more often the case] make sure you are using attacks that are going to hit multiple enemies at once. These are called Area of Effect or AOE skills.
NOW THAT YOU HAVE DONE ALL THAT-look at the names of the enemies. There should be a little red square next to them, indicating that they are focused on and attacking you. If they are not, don't panic! A few things could have happened:
You might have just missed one
Your Healer used a Regen skill as you were engaging, and enemies just hate that.
Your DPS is doing some bonkers damage to start pulling enmity, good for them!
Regardless of the why, you can either use an enmity generating skill, or just hit them really hard a few times, and they'll be pissed off enough to turn around and hit you instead!
[and for reference, green circle means they are not focused on you at all, and yellow triangle means that your face is beginning to look punch-able!]
Part 2: Managing your Damage
OK, now everyone in the room wants you dead more than they want your DPS/Healers dead. Excellent! Now you move to Step two: STAY ON YOUR FEET. You are made to take all the blows from the enemy and laugh at them! It's time for MITIGATIONS.
All Tanks have several mitigation skills [or "mits"] that they can use to either reduce the damage they take from enemies, reduce the amount of damage their enemies are doing, or temporarily negate damage altogether [only one of these per Tank Job].
Ideally you want to be spacing these skills out, rather than using them all at once. These skills have a longer recharge time [or Cool Down] than your attacking skills, so if you use a bunch, you will more than likely end up halfway through the fight with nothing to shield you but the Healers skills and the speed of your DPS. ALSO, mitigations have a soft cap, that is to say, the game will only allow you to negate so much damage at one time. So at most you can use 2 of these skills at once while still effectively negating damage, anything past that goes to waste.
Now there are too many mitigation skills to go through all of them individually [most are unique to their Tank Job], I encourage you to read all your skill descriptions and get familiar with them. But I will touch on a couple Role ones and the full damage negation ones.
Reprisal: Great for groups and bosses, it will reduce the damage enemies do to your party
Arm's Length: This is not advertised as a mitigation from it's description, but it is in fact quite helpful for large pulls. Because every enemy that hits you [physically] will have their actions slowed by 20%, which means less time hitting you, and more time for the Healer to do their work.
The full damage negation mitigations are great! But a couple of them can be risky to use, and require your healer to be paying attention. They also have very long Cool Downs, so they're meant to be used sparingly.
[PLD] Hallowed Ground: You're impervious for 10 seconds, have fun.
[WAR] Holmgang: You will still take damage, but cannot be taken down past 1 HP for 10 seconds, and also root the targeted enemy in place.
[GNB] Superbolide: This will negate all damage for 10 seconds, BUT it will also take you down to 1 HP.
[DRK] Living Dead: You will still take damage, but your enemies cannot take you down past 1 HP for 10 seconds. HOWEVER, if while using this mit you would have been killed by your enemies, your Healer now has to heal an amount of points equal to your HP points in a limited amount of time, or you die. So say your HP is 5000, and you use Living Dead, and you would have "died" while using it, the Healer now has you heal you for at least 5000 points [within 10 seconds], or you die .
Some tanks like to use simple macros that announce when they are using the Superbolide and Living Dead mits in particular, to give their Healers a heads up. This is up to player preference.
Every so often a boss will decide they've had enough of you kicking them in the shins and will try to get you in one blow. This is called a Tank Buster and will be indicated by a red targeting marker on you [red circles around your character and a red arrow pointing down on them] coupled with a progress bar. Stay calm! So long as you have a mitigation to use when you see it coming, everything will be fine. The Healer will know to be watching your health. Some will of course hit harder than others though, so if you're worried or low on health use 2 mits to be safe!
Part 3: Stunning Enemies & Interrupting Attacks
Now you've got the enemy right where you want them and you're weathering their blows- but oh no! They're preparing to attack the party anyways! It's a huge AOE too. What do you do? You give them the finger and then kick them in the balls! [partly true, most of the time.]
Most enemies in the game have both an auto-attack, and attacks that can be stopped in some fashion by specific skills. There are two different ways to stop an attack, you can use a skill that will Stun the enemy [Tanks and Melee DPS], OR you can Interrupt it [Tanks and Ranged DPS]. Stun and Interrupt are not interchangeable in their use.
So! How can you tell which attacks can be stopped by players? They are the attacks that have a progress bar, showing the enemy has to charge them up before they are actually used. The normal progress bar indicates an attack that can be stopped by Stunning the enemy. For Tanks this is the Low Blow skill [also the Shield Bash skill for PLD]. The flashing progress bar indicates that the attack can be Interrupted. For Tanks this is the Interject skill.
Keep in mind that both these types of skills will also have longer cool downs, so you cannot spam them. This means sometimes you might have to be strategic about when you use them, as some attacks will be more dangerous or troublesome than others. HOWEVER, not all enemies can be stunned, and enemies that can be stunned will become impervious to it after a few uses. You cannot stun bosses period.
You And Your Healer
You may be the biggest baddest person in the room now, but you are not a one man show, and you certainly cannot stay alive without your Healer! Your mitigations can only do just that-mitigate, in the end you have to rely on the Healer to help keep you standing.
You and the Healer are partners in this system. You have to make sure that if you are going, they are following close behind. If you decide to pull a ton of enemies around the corner, your Healer now has to run around that corner first before their spells can effect you.
Most Healers are going to assume you will run and grab all the enemies you can, but if you're finding that you and your Healer are struggling to keep the party alive, you need to tone down your pulls! If the Healer tells you that they are new, or straight up asks you not to full-pull, be considerate of that! Remember, while they have their eyes on you often, they are charged with keeping the whole party alive too! Literally in their case lol
General Tank Etiquette
Dungeons & General Tips
As the Tank it is your job to protect the party and make sure you are the only one taking damage. This also means you set the pace, and lead the group into every battle. This is because it is much easier to pull enemies to you if you are the first thing they see, and are the first to attack. Most players will follow your lead and wait to attack after you have done so. Mostly. So! It's good to remember that your comfort level is important. Go at the pace you feel works for you, let people know you are new if you are worried. Most other players are understanding of this! Many are willing to explain mechanics even!
Additionally since you are the leader, most players will expect you to run in first and generally to keep running until you've decided you've gathered all the enemies you feel like pulling. But! Don't leave your party in the dust. You need you DPS to kill all the things you pulled and your Healer to keep your ass alive X'D
Remember to check that your stance is on before you run in! Most times when you enter a dungeon or a raid its turned off at the start, even if you had it on when you were in the field.
Also, while not a hard rule it's generally advised not to do big pulls in early dungeons anyways [like, Lv 40 or under]. This is mostly to do with the amount of enemies in some areas versus your mitigation options and your Healers healing options. Often at this stage there is simply not enough of these to go around between you and your Healer, and a big pull can sometimes result in a party wipe.
Whether engaging a group of enemies or a boss, common courtesy is to run through the enemy and tank them from the other side [or if you're out in the field, attack from the opposite side of the other players]. This rotates the enemy so that they face you and not the rest of the party, making it so no one else is caught in the majority of enemy attacks. [You do not prevent damage from happening to others by standing in front of them, so attacks can go through you and hit other players, this is called Cleave]
Generally speaking it is also best to keep enemies in one place and facing the same direction as best you can. This makes it easier for the DPS to do their job [especially if they are using casting skills] and easier for the Healer to keep track of you.
Many of the melee DPS have a thing usually referred to as Positionals, meaning they do more damage if they strike enemies from the flank or from the rear. When possible it is good to position bosses so that they can do this, and reposition bosses out of harmful terrain for the melee DPS to strike without harm to themselves.
Speaking of that, do not stand in bad things or perfectly dodge-able attacks! You might be the Tank, but you don't need to tax your Healer while you're at it. They have to worry about other people too! One last note on movement and control of enemies: generally speaking it is also best to grab all the enemies you feel comfortable with and then stay put until all of them are dead, rather than pull a group and kill some and moving to the next one. It might seem like you are saving time by advancing slowly, but in actuality you are making everything harder for everyone else. This is because this forces all the other players to stop and start their actions constantly, which is bad. Why? Because now your melee DPS are having to chase after enemies they are trying to kill [meaning they are only hitting them half the time], and your DPS casters/Healers basically cannot do anything until the party stops again [because they have to stand still for 95% of their actions]. In the end it it more effective to stay until all the enemies are dead!
When it comes to the Limit Break [or LB], you as the Tank will almost never need to touch this button. The Limit Break is usually something the DPS will use to make a big attack on the boss, or in the case of a boss/raid not going well, the Healers can use a Limit Break Three/LB3 [when you have three full Limit Break bars] to revive the entire party. Thus far in the core game encounters, there are only a couple specific cases that utilize the Tank LB 3, and that will not occur until the ShadowBringers Expansion.
Provoke is not part of your attack rotation! If you have used an Enmity skill once in the fight, especially if you opened with it, you will not have to use it again to keep the enemy on you. While using Provoke consistently is not a big deal if you are the sole Tank, it is a bad habit to get into, as it will become a problem in situations where there are multiple Tanks.
Raids
In a Raid, be it a 8-player one [Normal Raid] or a 24-player one [Alliance Raid], you are not the only Tank on the field, making things slightly confusing and sometimes chaotic lol
When you are all facing mobs of enemies, all Tanks should have their stance on to ensure none of the Healers or DPS get hurt. Sometimes the mobs are spaced far apart when you find them, and its easier when Tanks work together to bring them in. Sometimes you may notice your Enmity being pulled, it is [hopefully] the other Tanks.
When you are facing bosses, generally the first Tank to put on their stance and engage the boss is now the Main Tank:
If that is you, cool! Have fun tanking boss!
If that is not you, DO NOT turn your stance on and try to provoke the boss away from the other Tank. That is rude. Keep your Stance off so you don't draw Enmity, you are now the Off-Tank and play the part of a beefy DPS.
If you are an Off-Tank, DO NOT stand next to the Main Tank to attack the boss. This makes you vulnerable to being Cleaved from boss attacks and unnecessarily overtaxes your Healers. Off-Tanks need to be attacking from the flank or the rear with the other DPS.
Main Tank is the Main Tank until they die.
Off-Tanks, if inclined, can help bring any extra enemies that appear on the field to the Main Tank so they do not have to move the boss around. This is helpful to the group because they can now attack all enemies together at the same time, rather than in small pockets. In this case it's okay to Stance On to get the enemies and then Stance Off so the Main Tank can take them.
IF the Main Tank dies for whatever reason, [one of] the Off-Tank[s] must put their Stance on and take control of the boss, they are now the Main Tank.
Some raids will also require Tanks to switch control of the boss off to each other, require Off-Tanks to manage their own mechanics or assist the Main Tank in some way, or even make all Tanks have to position themselves away from the group to take three-pronged Tank Busters that can cleave others! Raids are very diverse so it's a matter of learning the fights. There are many online guides for dungeons and raids you can use for this!
NOW GO! PROTECCA YOUR FRIENDS AND ATTACKA YOUR FOES!! >:3
#final fantasy xiv#final fantasy 14#ffxiv#ff14#ff14 guide#ff14 tank#ff14 tanking#ff14 beginners guide
9 notes
·
View notes
Text
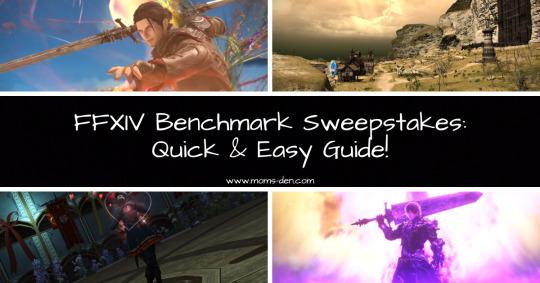
FFXIV Dawntrail Benchmark and Sweepstakes - Quick & Easy Guide!
FFXIV has been too quiet for too long, but we’re finally getting some super exciting updates, the most important one this week being the Benchmark server. Along with that, the FFXIV Twitter is hosting the Benchmark Sweepstakes, and in this guide, I’ll walk you through what you need to do in order to participate! This giveaway is live until April 22nd, so you may want to check it out now to not…
View On WordPress
#benchmark#dawntrail#ff14#ff14 beginners guide#FFXIV#ffxiv beginners guide#final fantasy 14#final fantasy xiv#Gaming#ivona nikolic#JRPG#mmorpg#moms den#sweepstakes#twitter
2 notes
·
View notes
Text

Happy weekend, all! 🦇 I'll probably do one more spooky update next week to round it out and then we'll be back to normal Compendium updates! I miss the spooky season already. 🎃
This is also a final plug for SEAFLOOR Saints Wake Gpose Challenge for anyone who might be interested! All works are reblogged to SEAFLOOR as well as queued on my blog. 🍬
If you know of anything I have missed, please reach out to me via my Discord or the Google Form.
Without further adeb, the following communities have been added to Sea's Community Compendium for XIV Creatives. 👻
COMMUNITY FOCUSED / EVENT SPACES
The Kwehnnedy Center—The Kwehnnedy Center for the Performing Arts gives performers a venue to showcase themselves and audiences access to some of the finest shows Eorzea has to offer.
MISC
Beginner's Guide to Gposing with Anamnesis/Ktisis—An entry-level walkthrough of how to download posing programs, load actors, edit character appearances, and manipulate poses in gpose. Written by @lilbittymonster.
CHANGELOG
Etheirys has been removed from the Large Scale Communities at the request of its owner due to imminent shutdown.
FFXIV Roleplay (Tumblr) has been removed at the request of its owner due to imminent shutdown.
If you'd like a FFXIV-based forum/communityto join, I would suggest Final Fantasy XIV Roleplay at this time!
The Google Form contained the outdated categories for Compendium sorting. This has been updated.
Have you thought about joining our Tumblr Community? You can find it here!

Want to submit? You can either fill out the google form here or send me an ask with the relevant information!
Is my space suitable for the Compendium? Most of the time, yes! Below the read more is some more information/stipulations. This is all publicly available on the document. 🐈⬛
Below are the following things I do not accept on the Compendium:
Personal/Single-Character LFC ads. (Though these get posted to the SEAFLOOR Tumblr Community when I find them!)
Content intended for or can be used for bullying, harassment and OOC gossip. E.g. ‘Secrets’ blogs, receipts, callout posts, etc. This does not include IC tabloid blogs or other ventures used to generate roleplay.
Communities that do not have an RP/writing element (large-scale exempt).
Anything I find personally distasteful or goes against the spirit of this project.
Common-sense rule applies.
I want to put my community on the Compendium but we have an application process. Is this okay?
Yes! Just note somewhere in your application that's a requirement. The only thing that is mandatory for the Compendium is that you must be open to new members or have a public-facing/accessible facet. There's no point advertising a community if no one can join it in some way!
I want to put my Community on the compendium but I only have x number of members —
Also totally okay! People don't start with large communities. Activity is a must but, whether your server has two or two thousand members, if you're looking for new people to join, I'd love to help you find people.
I want to put my community/resource on the Compendium but I worry its too niche?
Okay, and? If your Eorzean Fishing Alliance has four members but you roleplay every second weekend, I still want to know about it. The same goes for resources; if it's relevant to the game, it'll be useful to someone.
How active does a community need to be?
If you find a community has not been active in about two/three months, send me a message and I'll take a look at it. Communities have ebbs and flows, especially event spaces that may take hiatuses depending on member interest/life events. I'm not strict in my implementation provided a space isn't dead. If a link or anything is broken, contact me asap!
I have [insert a question not stated here]?
No drama! Send me an ask or use the #Compendium channel in my Discord!
#final fantasy xiv#ffxiv#ffxiv community#final fantasy xiv roleplay#ffxiv roleplay#。・゚゚・ — sea speaks#。・゚゚・ — sea's community compendium
26 notes
·
View notes
Video
youtube
What To Know About FFXIV Grand Company | Final Fantasy XIV Beginner's Guide
0 notes
Text
genuinely wanna know if I'm alone in this cause everyone assumes it to be a sprout/beginner only issue but I'm always thinking I'm gonna mess up a duty in ffxiv so I try and say ahead that I might mess up even though I've looked up a guide, generally it's because I get overwhelmed and confused even though most mechs are very similar it's just that I can't keep up with it if that makes sense. idk if it makes me dumb or incompetent but it's making me avoid doing content I'd otherwise love to do and I genuinely wonder if I'm the only non beginner player who is like this
#it's gotten better now but when i was actually a beginner i had a meltdown over crystal tower so um
1 note
·
View note
Text
My adventures in FFXIV: finally reached the end of ARR edition
So...a fair few years back I, a huge Final Fantasy fan but not so much a fan of MMORPGs, heard that the critically acclaimed MMORPG FFXIV was available on a free trial (up to level blah blah and including expansions etc insert rest of meme here). And I figured I would give it a shot.
I downloaded it to my PS4, made my character, stumbled my way through chosing a class, got lost a billion times, and then finally made it out of the city and to my first enemies...
Where, with my lack of understanding of the controls and mechanics, thought I'd accidentally attacked another player instead of the monster and insta closed the game in shame and dishonour.
(Back then I didn't know you COULDN'T attack another player outside of PVP and the player probably just teleported away with great timing)
I didn't touch the game for another year or two.
That year or two later I was exposed to XIV again through FFXIII fans. And it was also around the time that SquareEnix started to release and advertise a beginners guide to FFXIV and it was being mentioned by many people that XIV could now be played solo*.
*not quite fully but we'll get to that
So, with these factors combined, I watched the SE vids and dusted off my PS4 and booted the game back up.
A few hours later and I was invested.
This time around I wasn't stumbling around completely blind (don't get me wrong...there are SEVERAL mechanics I would later have to Google and watch YouTube vids for because the in game experience wasn't intuituive) and I had some aims to get to. Plus I now had fans of the game, that I knew, telling me 'it gets better after ARR' so I had a reason to get through the story to 'make it to the good stuff'.
So...about that.
I proceeded to spend the last two years 'getting through the story'.
And that is for two reasons.
1. I unlocked every role and initially started to equally level them all up, not realising this was not a great idea. I eventually WHM mained at around lvl 34 but I continued an obsessive need to level up all the DOL/DOH roles.
I actually ran out of material accessibility before slowing down.
2. Solo*
I very, very quickly realised that doing anything with parties made me extremely anxious. I'm not extremely confident in my gameplay and whilst I'm happy to fail and repeat in my own gameplay, I don't want to negatively affect anyone else.
But, in the latter half of ARR, I started stumbling across content I couldn't complete without a party. I avoided those side content aspects for a while and procrastinated a little with more gathering and crafting.
But then I reached the Crystal Tower. And, suddenly, it wasn't just side content I could avoid.
In order to continue the MSQ I HAD to join a party.
And here is where I give a shout out to youtube tutorials (in particular The Scrub) for giving me a guides that I could study like I was about to take an exam. Because being able to go into coop content with some idea of what to expect did ease my concerns a little.
And here is where I give a massive shout out to the XIV player base. Because I wasn't perfect. And I did make some mistakes (although I'm also pretty sure on some duties the tank was making mistakes...) but the players were helpful and kind about it. Especially when I put out a 'sry new and on ps5' message (because by this point I had transferred my file to my PS5 and brought the game for inventory space...see my crafting and gathering obsession). I think I saw one 'ugh doing with this newbs is rough' message in an 8 man raid where it went wrong for a lot of people but even that wasn't too mean.
But the bad thing about the 'it gets really good after ARR' thing was that after the Praetorium I was expecting it to be close to the end of the expansion. And that the things after it were just trying up loose ends and simple side quest stuff. So I tried rushing through it a bit but then realised that...it kept going. And it was also full of plot. New characters, more world building etc. So I slowed down again because it had been a year since the Praetorium and, sure, I'd taken some long breaks to play other games, but I wasn't getting to the end.
Now...I had seen exactly one thing from FFXIV before playing the game at all. I have been exposed to some more spoilers since then, but the scene I had seen before playing was a complete scene that was understandable without context. Nanamo's part at the end of ARR.
So I knew it was coming and I was starting to piece together the context leading up to it before I reached it. And the longer it took to show up the more I thought 'wow...this really is the expansion that never ends'.
Until yesterday. When 'several cutscenes will play in a sequence' popped up and I knew.
It was time.
The Venn Diagram of side characters I really liked and characters who FFXIV killed off is pretty much a circle.
Still mourning Noraxia and don't get me started on Moenbryda, the character so hot even my aroace ass went 'oh'.
But it finally happened. I reached credits on ARR.
It's taken me 2 (or technically like 5) years but I made it!
The story for ARR wasn't bad, but there were sections where I just wanted to get to the next bit. It took me a while to really get into the swing of things and understand the world and it's characters. At the beginning I didn't really like any of the city leaders because there was a lot of 'let's kill all the beast tribes' talk and the beast tribes seemed sentient, so it seemed pretty genocidal. But then the sentience and right of the various races to live and coexist became a plot point and I think that was when I finally started to settle into the world building.
It probably took until post praetorium for me to really get into the Scions squad. This was not helped by Minfilia's VA who almost made me hate the character because yikes. I don't want to blame the actress, because I do believe that voice direction has a lot to answer for with dubbing. But it was so bad. I am very glad I have now reached the stage where a new cast and studio took over.
Now my new task (other than, obviously, playing HW) is to work through the tribal quests. I really like the tribes and was very happy to unlock the quests. But I didn't work through them and I forgot that you are limited in daily activity. And that they share a quest quota.
I also think there might be some materials locked behind the quests???
I also would like some money for a house. Ha. Haha. Hahaha.
I have like 560k. Houses are like 3mil at least.
But I'm missing out on so much crafting by not having a house to fill with furniture.
0 notes